Dry-mix pointing works by brushing a sand-and-cement blend (or a pre-mixed polymeric jointing sand) into the gaps between pavers, then misting it with water to activate the binder and lock everything in place. Done right, it fills eroded or missing joints, stops weeds, and tightens up a patio that's started to look ragged. Done wrong, the first heavy rain washes it straight out. The difference almost always comes down to preparation and watering, not the product itself.
How to Point a Patio With Dry Mix: Step-by-Step Guide

Talia Lang
26 Jun 2026
When dry-mix pointing is actually the right fix
Dry-mix pointing is the right call when your joints are eroded, crumbling, missing entirely, or overrun with weeds, but the pavers themselves are still flat, level, and stable. If you can press down on a paver and it doesn't rock, and water drains away from the patio rather than pooling on it, you're a good candidate for a dry-mix repair.
Where it doesn't work is when the underlying problem is the base, not the joints. If pavers are sinking, lifting, or rocking underfoot, that's a base or drainage issue, typically settlement or subsidence in the sub-base or bedding layer.
No amount of re-pointing will fix that. You'd be filling joints on a surface that's still moving, and they'll crack or wash out again within months. If that's your situation, the honest answer is that you need to lift the affected pavers, fix the base, and re-lay them before even thinking about pointing.
If the base itself is weak or unstable, you'll need to compact and level it before laying the pavers, since pointing alone cannot correct settlement compact and level the base. That's a bigger job, and depending on the scale, it may be worth calling a professional.
The sweet spot for dry-mix pointing: joints that are more than half empty, patios where weeds keep coming back through old sand, or a re-point job where the previous material has simply worn away over time. If your joints are just slightly low but otherwise intact, a light top-up may be all you need, and that's covered in the repointing guide in this series. If your joints are only slightly low, a light top-up can be all you need, and the same general technique applies when you're wondering how to repoint a patio dry mix rather than fully redoing everything.
Choosing the right dry mix and tools
There are two main materials used for dry-mix pointing, and they behave quite differently.
| Material | Best for | Weed resistance | Rain resistance | Notes |
|---|---|---|---|---|
| Polymeric jointing sand | Pavers, block paving, flagstone | High | High (once cured) | Pre-mixed, easiest to use, needs dry conditions to apply |
| Sand and cement (3:1 or 4:1 dry mix) | Natural stone, concrete slabs, larger joints | Moderate | Moderate | Cheaper, more flexible on joint size, can stain some stones |
Polymeric jointing sand is the go-to for most modern block-paved patios and driveways. It contains a polymer binder that, when activated with water, hardens into a firm but slightly flexible joint that resists washout, insects, and weed seeds far better than plain sand. For natural stone or irregular flagstone with wider joints (anything over about 10mm), a sand-and-cement dry mix at a 3:1 or 4:1 ratio gives you more body and tends to fill more reliably.
One thing worth knowing upfront: if you're re-jointing over existing sand with polymeric sand, Sakrete recommends removing all the existing sand down to the bottom of the paver first, not just scraping the surface. This matters because the new polymer binder needs to bond through a consistent material. If it sits on top of loose old sand, the joint fails from the bottom up.
For tools, you don't need much. A stiff-bristle brush or a large push broom handles spreading. A leaf blower or soft brush is useful for clearing excess material off paver faces. A hose with a fine mist setting is essential for watering, a jet will blow the material straight out. If you're working with a sand-and-cement mix on wider joints, a rubber mallet and a length of timber for tamping helps compact the mix before watering. A pointing tool or squeegee is handy for working mix into stubborn narrow joints, though it's not always necessary for a dry-mix application.
Preparing the joints, this is where most DIY jobs fail
There's no shortcut here. The preparation is the job. If you rush this part, the pointing will fail regardless of which product you use.
- Clear the patio surface of loose debris, leaves, and dirt. A stiff brush or leaf blower works well. The surface needs to be dry before you start — don't attempt dry-mix pointing on a damp patio.
- Remove all existing loose or eroded joint material. Use a joint scraper, an old screwdriver, or a purpose-made grout rake to dig out the joints. For polymeric sand re-jointing, go all the way to the bottom. For a sand-and-cement top-up on partially intact joints, clear at least the top 20-25mm so the new material has depth to bind into.
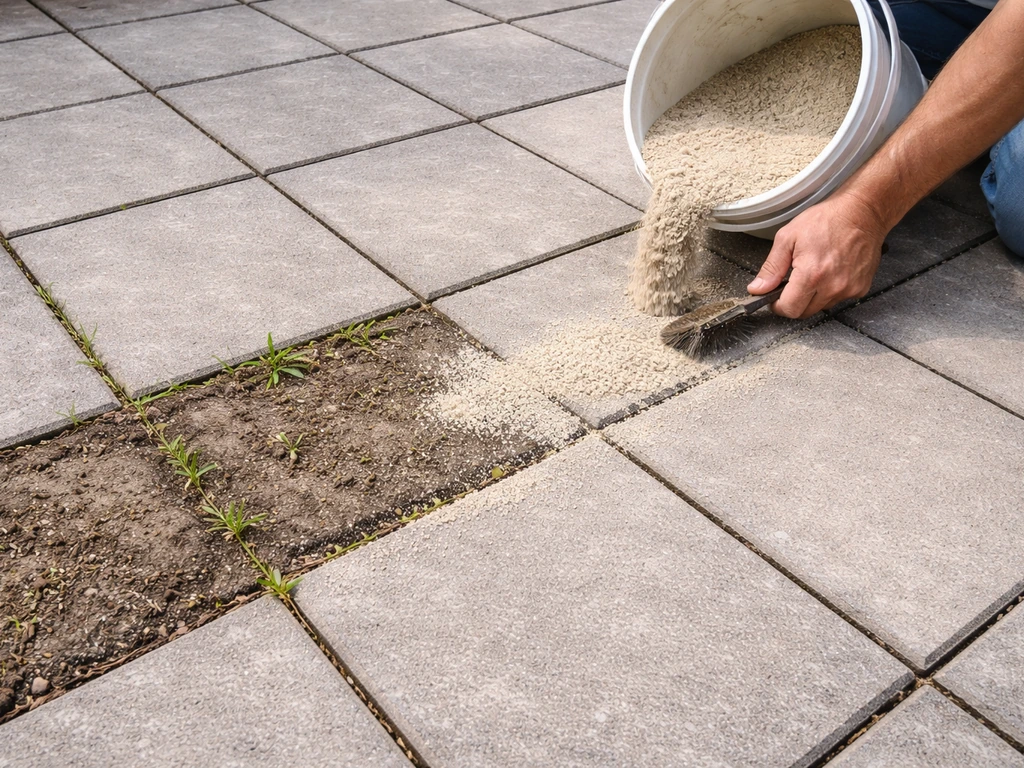
- Kill and remove all weeds. Pull them out by the root — don't just scrape them off at the surface. Any root left in the joint will regrow through the new mix within a season. You can use a weed killer a few days beforehand and let it fully die back before clearing.
- Blow or brush out all dust and debris from the joints. Compressed air is great if you have it. Any loose material left in the joint acts as a barrier and stops the new mix bonding properly.
- Check the joint depth. Aim for at least 20-30mm of depth for the new mix to fill. Shallower than that and the joint won't have enough body to stay intact. If your pavers are bedded very shallow, adjust your expectations accordingly.
- Let the surface and joints dry completely. This is especially important with polymeric sand — any residual moisture in the joint before you apply the dry mix can cause it to start activating prematurely and clump rather than flow into the gaps.
How to apply, fill, level, and finish the dry mix
The application process is the same in principle whether you're using polymeric sand or a sand-and-cement mix, though the handling is slightly different.
Applying polymeric jointing sand
- Pour the dry polymeric sand onto the patio in manageable sections — don't tip the whole bag at once.
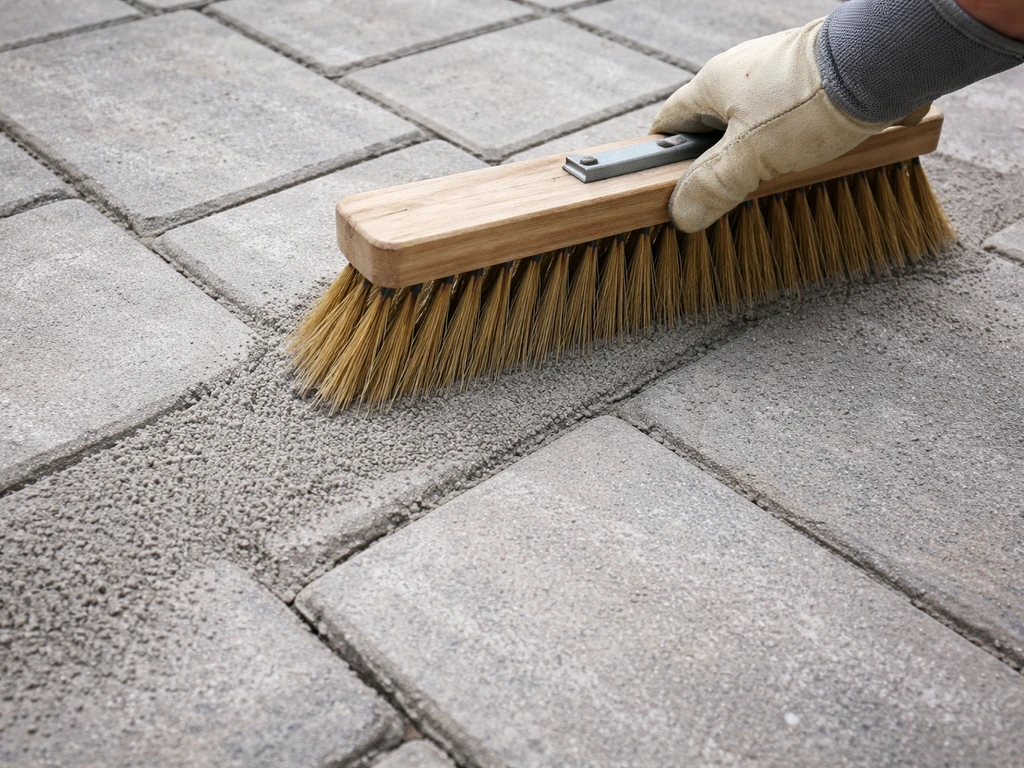
- Use a stiff push broom to sweep the sand across the surface in multiple directions, working it into the joints. Use circular and diagonal sweeping motions to make sure the sand gets into the corners of each joint.
- Compact the sand into the joints by running a plate compactor over the patio if you have one, or tamping with a rubber mallet over a piece of timber. This settles the sand and reveals any joints that need a second pass.
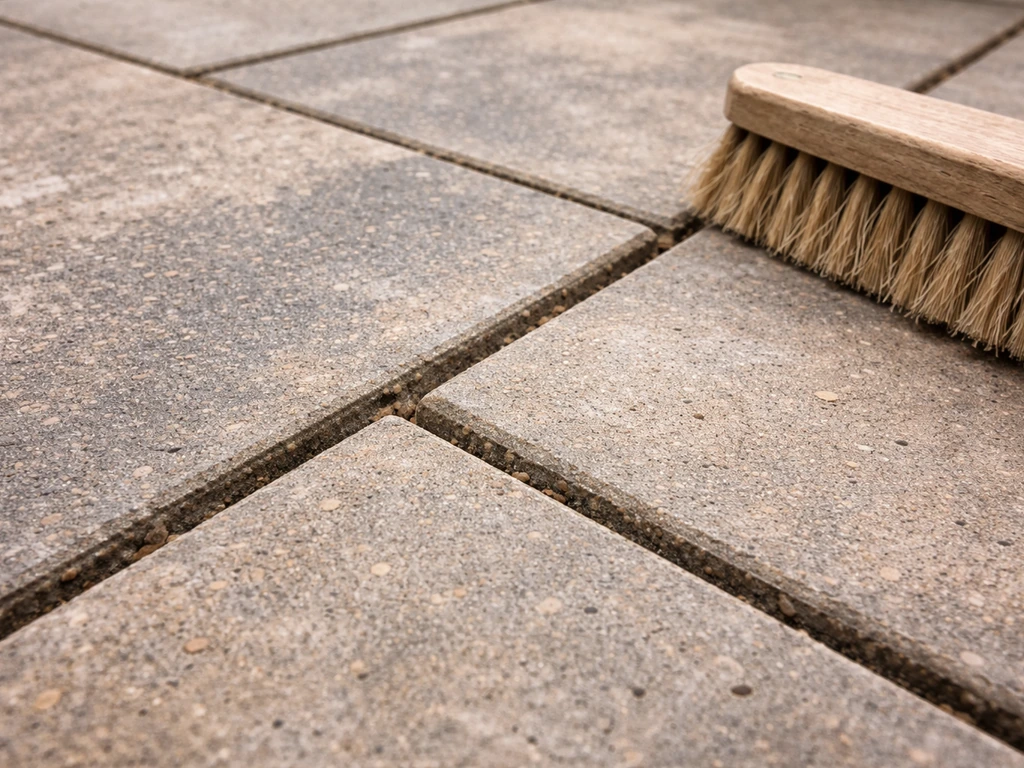
- Add more sand and sweep again until every joint is filled to within 3-5mm of the paver surface. You want the joint slightly recessed, not flush or proud — a slightly recessed joint drains better and looks neater.
- Once filled, sweep or blow off all excess sand from the paver faces. This is important: any polymeric sand left on the surface when you water will haze onto the pavers and can be difficult to remove.
Applying a sand-and-cement dry mix
- Mix your dry sand and cement to a 3: 1 or 4:1 ratio (sand to cement) in a bucket or wheelbarrow. Don't add water — it should be completely dry.
- Pour small amounts onto the patio and work it into the joints using a stiff brush or a squeegee. Use a pointing tool or trowel to push the mix down into deeper or wider joints.
- Compact the mix into the joints with a piece of timber and a rubber mallet. Work along each joint to make sure there are no voids or air pockets deeper in the joint.
- Top up and compact again until the joint is filled to within 3-5mm of the paver top.
- Brush all excess mix off the paver faces before watering. With cement in the mix, anything left on the surface when wet will stain — especially on natural stone.
Watering and curing, getting this right makes or breaks it
This is the step most people get wrong. Too much water too fast and you flush the mix out of the joints or disturb the surface layer. Too little and the binder never properly activates.
Use a hose fitted with a fine mist or rose setting. Never use a jet. Start at one end of the patio and work your way across in slow, overlapping passes. The goal is to thoroughly wet the joints without pooling water on the surface. Watch the joints as you go, you should see the water absorb in and the mix darken as it wets through. If water is running across the surface and sitting, you're applying it too fast.
For polymeric sand, most manufacturers recommend two or three light passes with the mist setting, waiting about 15 minutes between each pass to let the water absorb down through the full depth of the joint. The total wetting time per joint is typically 3-5 minutes of light misting. After the final pass, avoid walking on the patio for at least 24 hours, and keep it dry for the same period.
For a sand-and-cement dry mix, the approach is similar but you can afford to be slightly more generous with water, since the mix is denser and needs more moisture to activate the cement. Mist thoroughly until the joints are visibly wet all the way through, then leave it alone. Don't try to smooth the joint surface while it's wet, you'll just pull material out.
Curing times to expect: polymeric sand will be firm to walk on within 24 hours in dry weather at around 15-20°C, but allow 48-72 hours before it's fully locked. Sand-and-cement pointing takes longer, allow at least 48 hours before foot traffic and up to a week for full strength. Neither should be used in temperatures below 5°C or if rain is forecast within 24 hours of application. Both products are moisture-activated, but rain in the first 24 hours is too aggressive and will erode the surface layer before it's had time to bind.
How to stop the joints failing again
If you've had to re-point a patio more than once, the problem is probably not the material, it's something about the setup that keeps breaking the joints down. Here's what to check.
- Drainage: The most common cause of repeated joint failure is water sitting on or under the patio. If the patio doesn't have a fall (a slight slope away from the house, typically 1:60 or 1:80), water pools and slowly washes joints out from below. Check which way your patio drains. If it's flat or drains toward the house, that's a problem that pointing alone won't fix.
- Joint width and depth: Very narrow joints (under 5mm) don't hold much material and tend to crack and empty quickly. Very wide joints (over 20-25mm) need a bulkier mix and often a backer material at depth. If your joint geometry is wrong for the material you're using, consider whether a different product or approach is needed.
- Weed control: Weeds don't just grow in joints — they actively destroy them by expanding roots that push the mix apart. Even polymeric sand, which is specifically designed to reduce weed growth, isn't completely weed-proof. Brushing a patio regularly and catching weed seedlings early is far easier than re-pointing every couple of years.
- Paver stability: If any pavers are still slightly mobile after re-pointing, they'll crack the new joints every time someone walks on them. Make sure any rocking pavers are re-bedded properly before pointing.
- Regular maintenance: A light top-up of joint sand every two to three years is much less work than a full re-point every five to six. Get into the habit of checking joint levels after a hard winter.
Troubleshooting: when things don't go to plan
Joints washed out after first rain

This almost always means either the mix wasn't given enough time to cure before rain hit, or the watering step was skipped or done too lightly and the binder never properly activated. If the joint dried out before it was watered (common on hot days), the mix will just sit there as loose dry material with no binding strength. Re-clear the joint and start again, this time watering properly and protecting the patio from rain for at least 24-48 hours.
Joints that stay low after curing
The mix has probably settled and compacted more than expected, which is normal, especially on the first application over a deep joint. Let it cure fully, then do a second application to top up to the right level. This is why the compacting step during application matters, tamping the mix down before watering gives you a more accurate read on how much you actually need.
White haze or staining on paver surfaces
With polymeric sand, haze is usually caused by fine particles left on the paver face when you watered. The binder activates and sticks the particles to the surface. Catch it within the first 24-48 hours and you can often remove it with a damp cloth and a stiff brush. If it's dried hard, a diluted patio cleaner or a specialist efflorescence remover will shift it, but test on a small area first, especially on natural stone. To avoid it next time: sweep or blow every last trace of material off the paver faces before misting.
Mix not binding or staying powdery
If the joint looks and feels powdery after curing, it wasn't watered enough or the mix was applied in very hot, dry conditions where it dried out before the water could penetrate to the full depth. In hot weather, lightly mist the whole patio before applying dry mix to drop the surface temperature, and work in the early morning or evening. For stubborn cases, a second round of misting a couple of hours after the first can help drive moisture deeper.
Pavers moving or shifting after pointing
Pointing doesn't hold pavers in place, it fills the space between them. If pavers are moving after you've pointed, the bedding layer isn't doing its job. This is the base settlement issue mentioned at the start, and it needs to be fixed from below. Lift the affected pavers, check the bedding layer (usually a sand or mortar bed), re-level it, re-lay the pavers, and then re-point. If the movement is widespread across the patio, it's worth getting a professional eye on the sub-base before you spend more time on the surface.
Weeds returning through new joints
If weeds are back within a season, the roots weren't fully removed before pointing, or seeds are germinating on top of the joints before the surface has hardened fully. Polymeric sand resists this better than plain sand-and-cement mixes over time, but no joint material is completely weed-proof indefinitely. A patio membrane under the bedding layer, combined with good drainage and regular maintenance, is the only long-term answer.
FAQ
Can I point over existing sand if it looks clean and solid?
You can, but for polymeric sand the safest approach is to remove loose old sand down to the bottom of the paver, not just scrape the surface. If you leave a dusty or loose layer, the new binder often fails from the bottom up. After removal, sweep thoroughly and only then refill joints with fresh mix.
What should I do if rain is likely within a few hours of applying dry mix?
Plan to avoid exposure in the first 24 hours. If rain is unavoidable, cover the patio immediately after misting using a breathable cover that prevents direct runoff, not plastic that traps puddles against the surface. The key goal is to prevent water from washing through the joints before the binder can lock.
How do I know I used the right amount of water during misting?
Watch the joints, they should darken as moisture penetrates and then stop looking dry as you move across. If you see water flowing across paver faces or puddling, you are over-wetting. If joints stay light and powdery after misting, you are under-wetting, especially if the patio is hot or windy.
Is it okay to walk on the patio as soon as the joints look set?
Avoid it until the manufacturer’s minimum cure window is met. Even if joints feel firm, polymeric sand typically needs up to 48-72 hours for full locking in normal conditions, and sand-and-cement needs at least 48 hours before foot traffic and up to a week for full strength.
Do I need to remove weeds and roots before pointing, or is the joint material enough?
Remove weeds thoroughly before filling joints. Pointing can reduce new growth, but it does not eliminate buried roots or established seed banks. If weeds return quickly, consider adding a membrane under the bedding layer and improving drainage, because the problem is usually coming from below or from seeds already present.
Can I use polymeric sand and sand-and-cement mix together in the same joints?
It’s best not to mix product types in the same joint, since their binders and activation behavior differ. If you use polymeric sand, clear out old inconsistent material first so the polymer can bind properly. Mixing can create weak spots where washout happens.
Why do joints look fine at first, then wash out after heavy rain?
This usually happens when curing time was cut short or watering was incorrect, either too little to activate the binder or too much too quickly so the mix was displaced. Re-clear the joints completely, then reapply with correct misting and keep the patio dry long enough for the joints to lock.
My patio has sunken pavers. Should I point anyway and hope it holds?
If pavers rock, sink, or lift, pointing will not fix the underlying base or bedding failure. Pointing only fills joints, it does not stabilize movement. Lift the affected pavers, correct and compact the base/bedding layer, re-lay the pavers, and then point.
What’s the best way to clean haze on paver faces after using polymeric sand?
Remove it early, within the first 24-48 hours, using a damp cloth and a stiff brush while it is still workable. If it has dried hard, you may need a diluted patio cleaner or a specialist remover, but test on a small hidden area first, especially on natural stone or textured finishes.
How do I top up joints that are only slightly low?
If joints are just slightly low and the bedding is stable, you can often top up using the same product and method. Before adding new mix, brush and clear any loose material and debris so the fresh mix bonds through a consistent depth, then mist to full penetration.
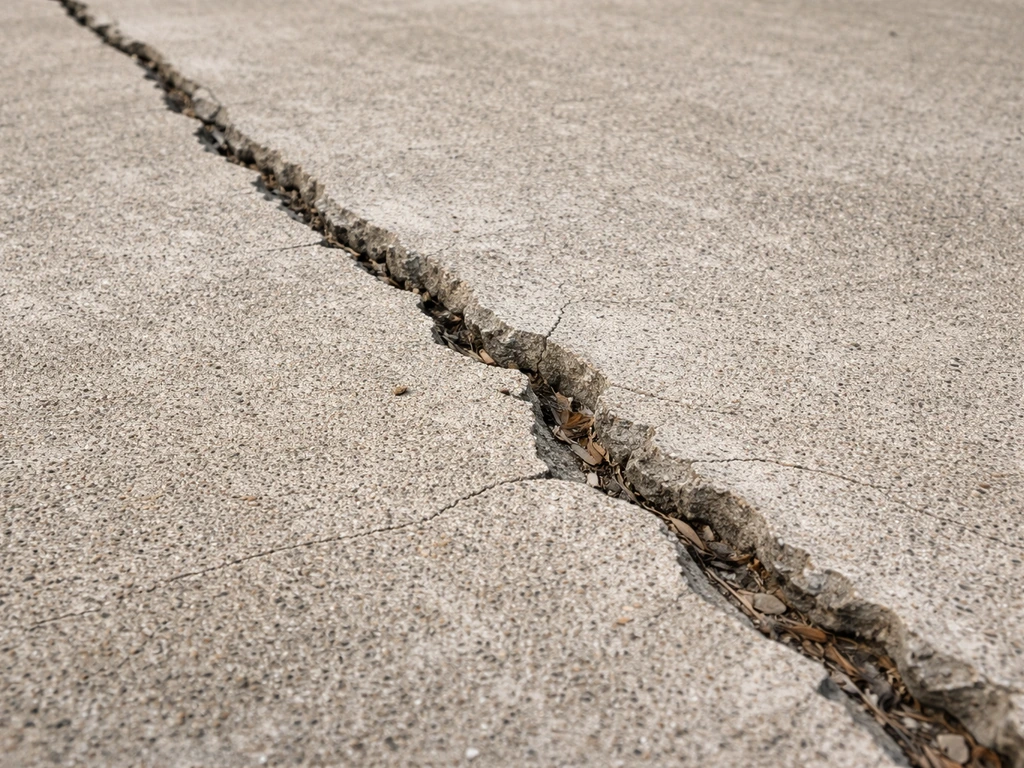
Next Article
How to Fix Cement Patio Cracks: Diagnose and Repair
Diagnose concrete patio crack types and repair with the right sealant or patch, from prep to curing and prevention.