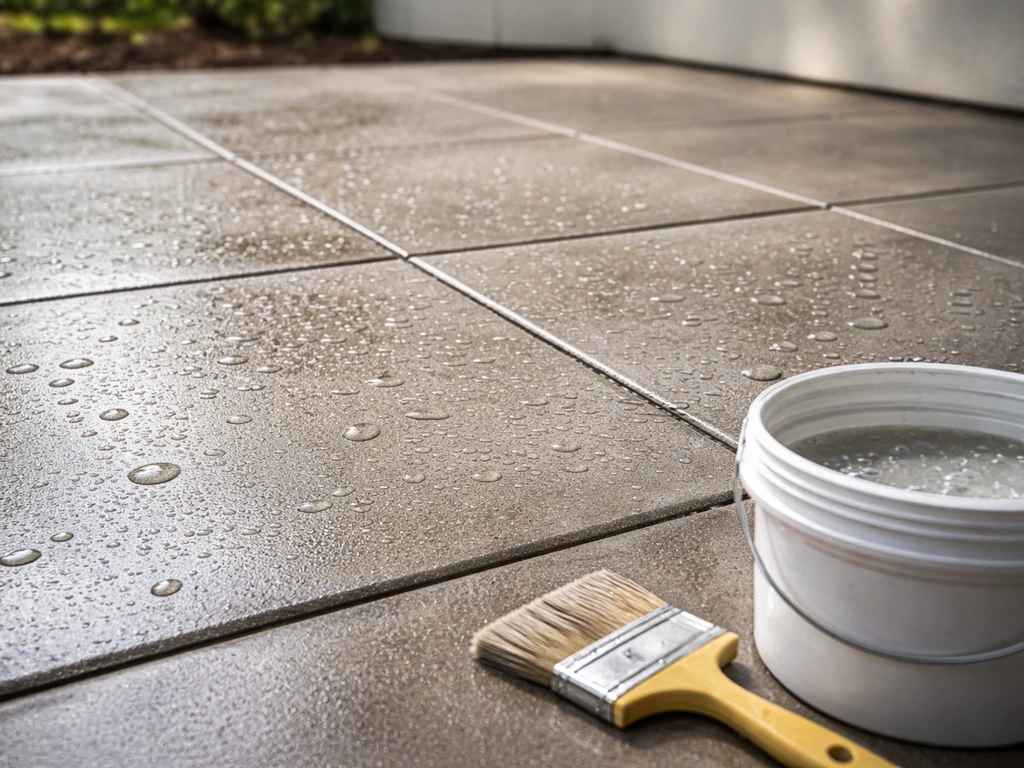
To seal a patio, you clean the surface thoroughly, let it dry completely, repair any cracks or damage, then apply one or two thin coats of the right sealer for your surface type using a roller, brush, or low-pressure sprayer. The exact sealer and method depend on whether your patio is concrete, pavers, stone, slate, or tiles, but the prep process is almost always the same and it's what determines whether the sealant actually lasts. For patio tiles specifically, the same fundamentals apply, but you need to choose a penetrating or film-forming sealer that matches the tile and grout, and follow the right prep and dry-time steps how to seal patio tiles. If you want to improve protection against water and freeze-thaw damage, learning how to seal patio slabs properly is the next step.
How Do You Seal a Patio: DIY Steps, Sealants, and Prep

Why you should seal a patio
Water is the main enemy of any outdoor patio surface. When rainwater or snowmelt soaks into concrete or stone, it sits inside the material. In colder climates, that trapped water freezes, expands, and causes spalling, pitting, and cracking over time. Sealing reduces how much water gets in, which directly cuts down on freeze-thaw damage and extends the life of the surface.
Beyond cold weather, sealing protects against staining from oil, grease, rust, and general grime. An unsealed patio absorbs all of that. A sealed one gives you time to wipe it up. Sealing also slows the growth of mold and mildew, reduces efflorescence (that chalky white salt residue that appears on pavers and concrete), and helps the surface resist de-icing salts if you're treating your patio in winter.
The honest caveat: sealing is maintenance, not a permanent fix. Most sealers last anywhere from 2 to 10 years depending on the product type, traffic, and your climate. Penetrating silane/siloxane sealers tend to last 7 to 10 years. Film-forming acrylic or wet-look sealers typically need reapplication every 2 to 3 years. Plan for it now and you won't be caught off guard later.
Choosing the right patio sealant for your surface
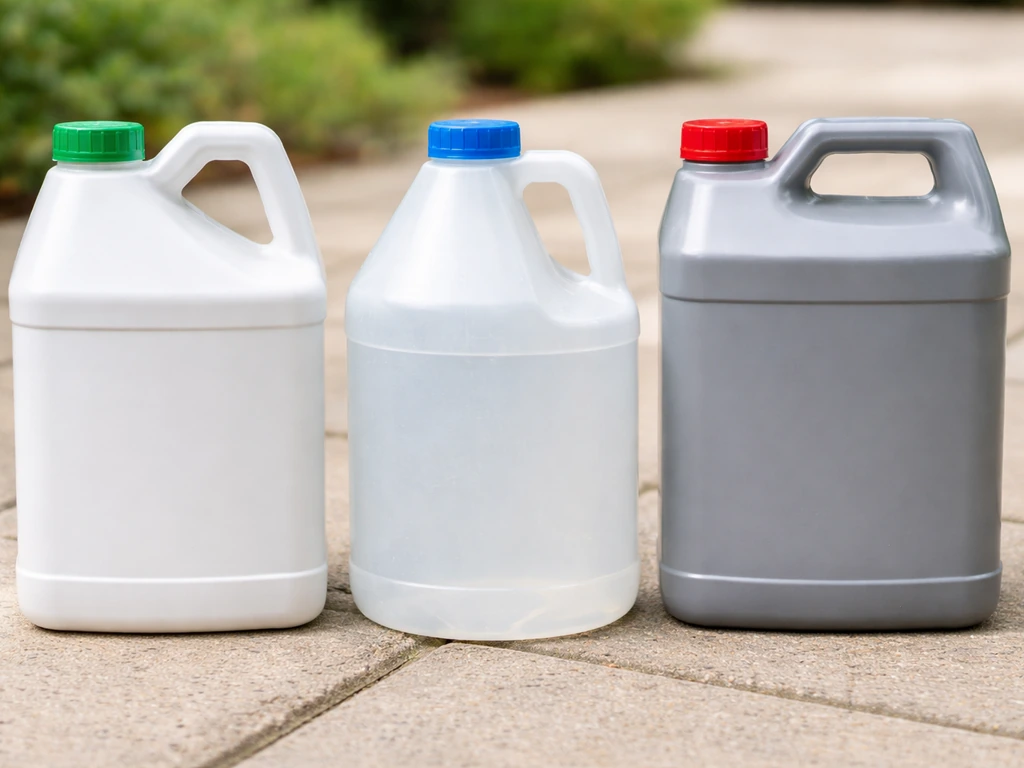
This is where most people go wrong. The wrong sealer on the wrong surface either fails quickly, causes cosmetic damage, or traps moisture instead of protecting against it. There are two broad categories you need to know about: penetrating sealers and film-forming (topical) sealers.
Penetrating sealers (silane, siloxane, silane-siloxane blends)
These soak into the surface and react chemically with the material. They don't create a visible film on top. Because they're breathable, moisture vapor can still escape from below, which is critical for patios that sit on ground that holds moisture. Silane/siloxane products are the go-to for natural stone, pavers, slate, and textured or exposed-aggregate concrete where you want protection without changing the look. To get the best results on a stone patio table, choose a penetrating sealer made for natural stone and prep the surface so the product can soak in evenly. Products like Sikagard-705 OWR, SikaCem-102 First Seal, and Geocel 700 are all in this category. These are especially worth using in freeze-thaw climates because they dramatically reduce water absorption while still letting the slab breathe.
Film-forming sealers (acrylic, wet-look, high-gloss)
These sit on top of the surface and create a protective coating. They can add a wet look, a high gloss, or a matte finish depending on what you pick. QUIKRETE Concrete and Masonry High Gloss Sealer and products like BEHR's wet-look sealer fall here. These are popular for smooth concrete patios and decorative poured surfaces where you want that shiny finish. The trade-off is that film-formers are more vulnerable to peeling, especially if applied over moisture or incompatible old sealers. They also typically need reapplication more often than penetrating sealers. One important note from Techniseal's technical data: their Wet Look paver protector specifically should not be used on natural stone, stamped concrete, or poured concrete. Always check the product label for surface restrictions before you buy.
Quick surface-to-sealer reference
| Surface type | Recommended sealer type | Typical finish |
|---|---|---|
| Concrete (plain/broom finish) | Penetrating silane-siloxane or film-forming acrylic | Natural or low gloss |
| Decorative/stamped concrete | Film-forming acrylic cure and seal (e.g., EverClear VOX) | Gloss or satin |
| Concrete block/brick pavers | Penetrating silane-siloxane or paver-specific sealer | Natural, wet, or satin look |
| Natural stone (flagstone, slate, bluestone) | Penetrating silane-siloxane only | Natural look |
| Patio tiles (porcelain, ceramic) | Penetrating sealer for grout lines; tile itself often non-porous | Natural |
| Wet-cast or poured concrete pavers | Check manufacturer spec; many wet-look products not compatible | Varies |
If your patio was previously sealed, you need to figure out what's already on it before adding more. Film-forming sealers generally require complete removal before re-coating with a different product type. Penetrating sealers leave nothing on the surface to strip. A quick test: drip a little water on the surface. If it beads up, there's an existing sealer. If it soaks in immediately, the surface is either unsealed or the old sealer has worn out.
Prep and cleaning before sealing
This is the most important part of the whole job. A sealer applied over a dirty, damp, or damaged surface will fail fast, look terrible, or trap moisture underneath and cause more damage than if you'd done nothing. Don't rush this.
Step 1: Diagnose what you're dealing with
Before you clean anything, walk the patio and note what you see. Cracks need to be repaired before sealing, not after. Peeling or flaking sealer needs to be stripped. Efflorescence (white chalky deposits) needs to be cleaned with a dedicated efflorescence remover like Techniseal Paver Prep. Sunken pavers or drainage problems that let water pool on the surface need to be addressed separately because sealing a drainage problem just hides it.
Step 2: Remove old sealer if needed
If there's a failed film-forming sealer that's peeling, bubbling, or flaking, it has to come off. Chemical strippers are the most common removal method. Be careful with methylene-chloride-based strippers as these can cause serious skin irritation and long-term health damage if used without proper protective gear. Follow manufacturer recommendations, wear chemical-resistant gloves and eye protection, and work in a ventilated area. Mechanical methods (grinding, pressure washing with a surface cleaner attachment, or light sandblasting) are an option too, though they're more aggressive. The goal is to get back to a clean, bare surface. Only film-forming topical sealers typically require full removal before recoating. If the existing penetrating sealer has simply worn out, you can usually clean the surface and reapply.
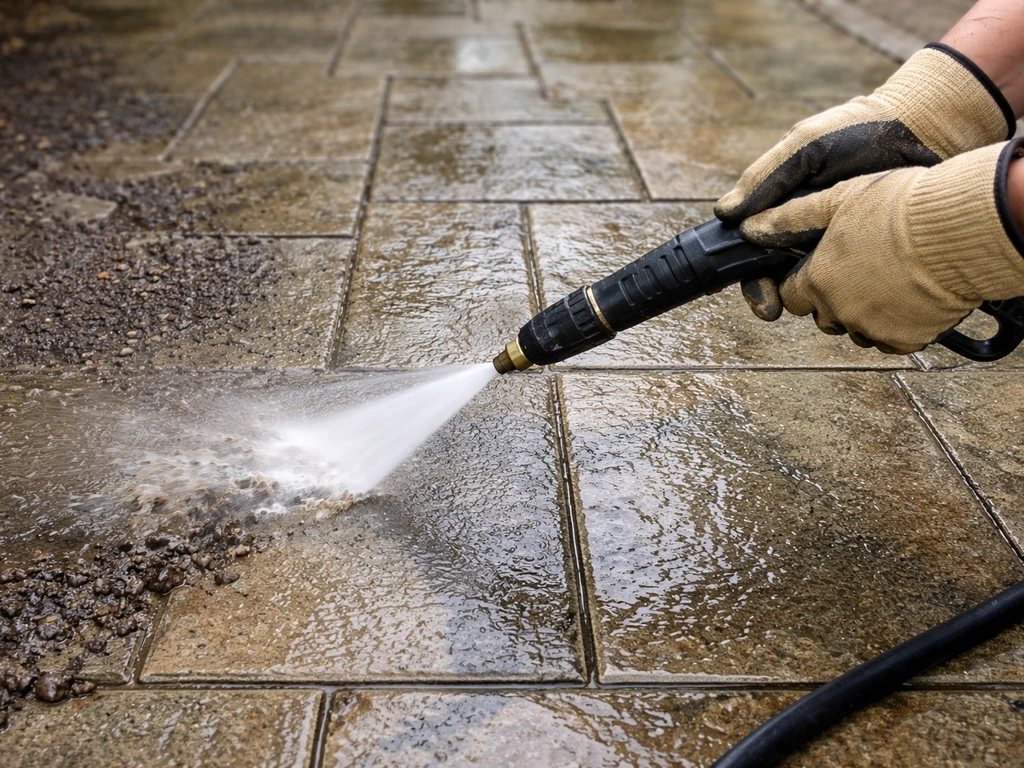
Step 3: Clean the surface properly
Remove all dirt, oil, grease, laitance (the weak top layer that can form on new concrete), mold, and any form-release agents. Pressure washing handles general grime well. For oil stains, use a degreaser first. For efflorescence on pavers or stone, use a dedicated efflorescence cleaner and follow the dilution and dwell time on the label. If you've just had polymeric sand installed in paver joints, wait at least 30 days before cleaning and sealing. For very smooth concrete surfaces where a penetrating sealer needs to soak in, light acid etching or waterblasting may be needed to open up the surface enough for the product to penetrate properly.
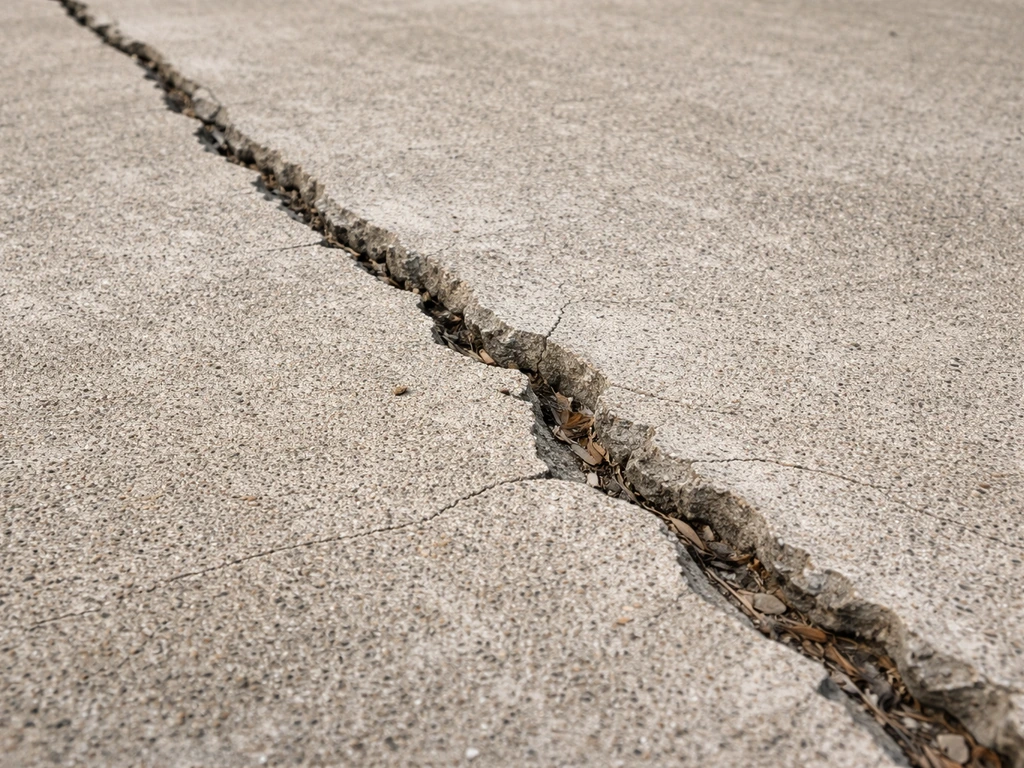
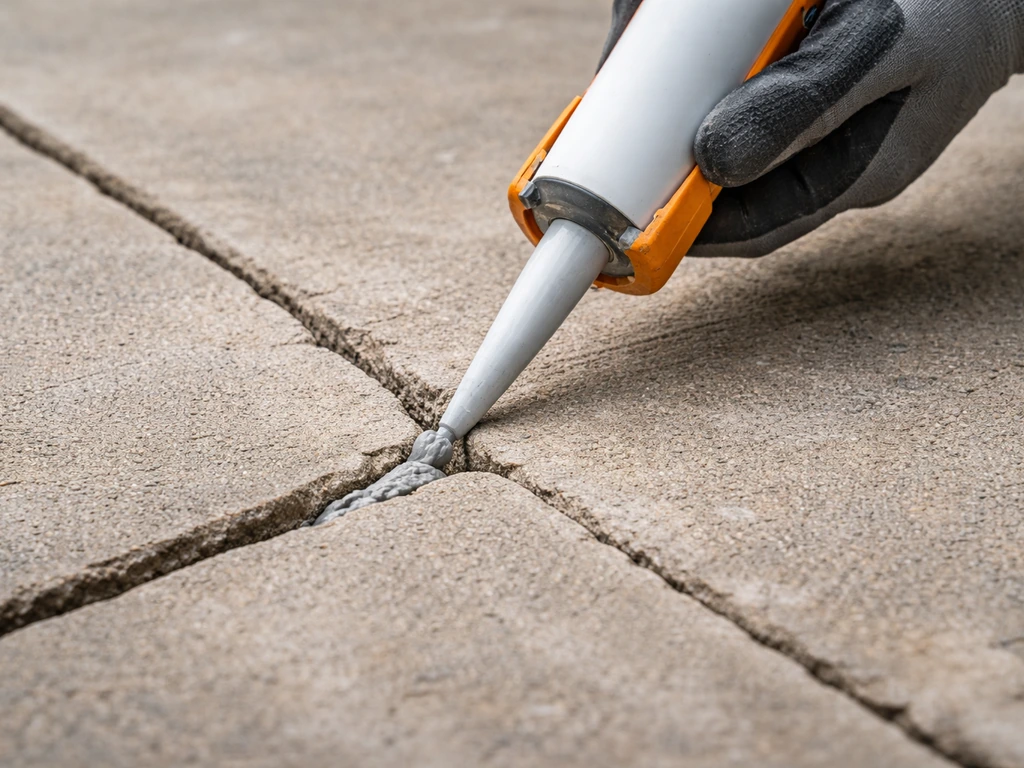
Step 4: Repair cracks and damage
Seal over a crack and you'll see that crack again within a season or two. Fill cracks in concrete with a compatible concrete crack filler or polyurethane caulk before sealing. For spalled areas, use a concrete patching compound. Let all repairs cure fully before applying sealer. Rushing this step is one of the most common reasons DIY sealing jobs fail early. If you are also dealing with pointing, make sure the mortar cures fully first, since sealing too early can trap moisture and cause failures.
Step 5: Let everything dry completely
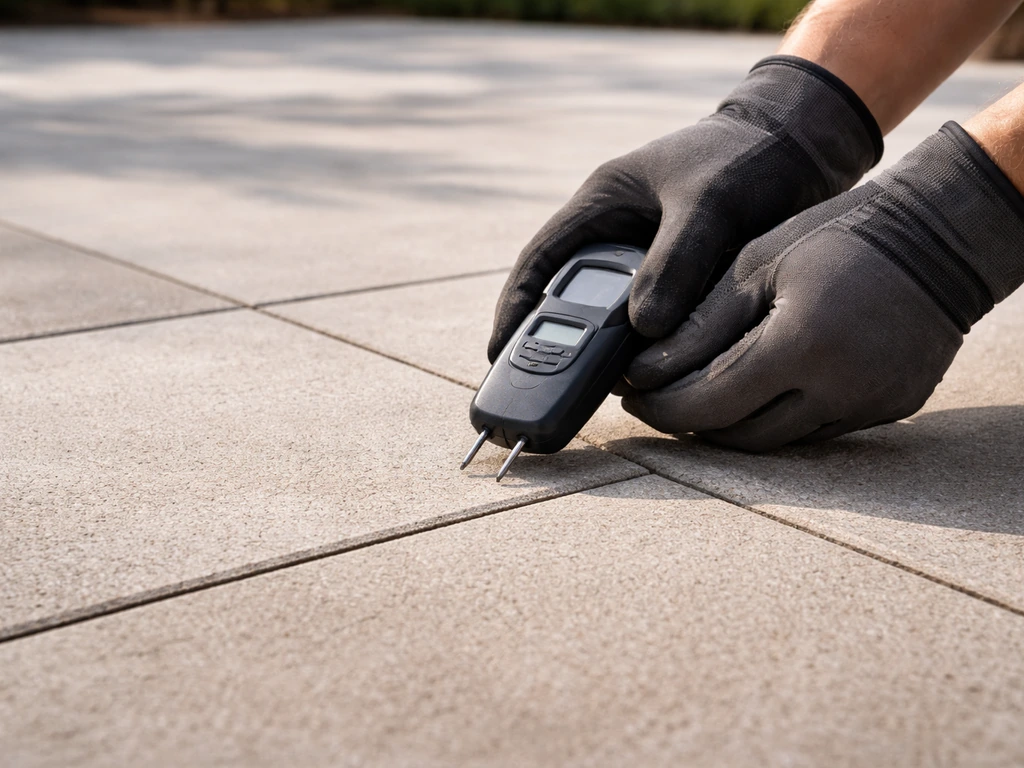
This cannot be overstated. Applying sealer over a damp surface is one of the top causes of milky white discoloration, bubbling, and peeling. The surface needs to be not just surface-dry but genuinely dry through the top layer. After washing, give the patio at least 24 to 48 hours of dry weather before sealing. Techniseal's technical guidance specifically states the surface must be porous, clean, dry, and warm to the touch before you apply. If it feels cool and damp to the touch, wait longer.
How to seal a patio step-by-step
- Check the forecast. You need at least 24 to 48 hours of dry weather with temperatures between roughly 50°F (10°C) and 90°F (32°C). Avoid sealing in direct midday sun on a hot day as the sealer can dry too quickly and streak. Avoid sealing if rain is expected within 24 hours.
- Mask off adjacent surfaces. Use painter's tape to protect house siding, steps, door thresholds, and any landscaping borders you don't want sealer on. If you're using a sprayer, mask more aggressively.
- Mix or shake your sealer. Most products need a thorough stir or shake before use to ensure even consistency. Don't skip this even if the container looks uniform.
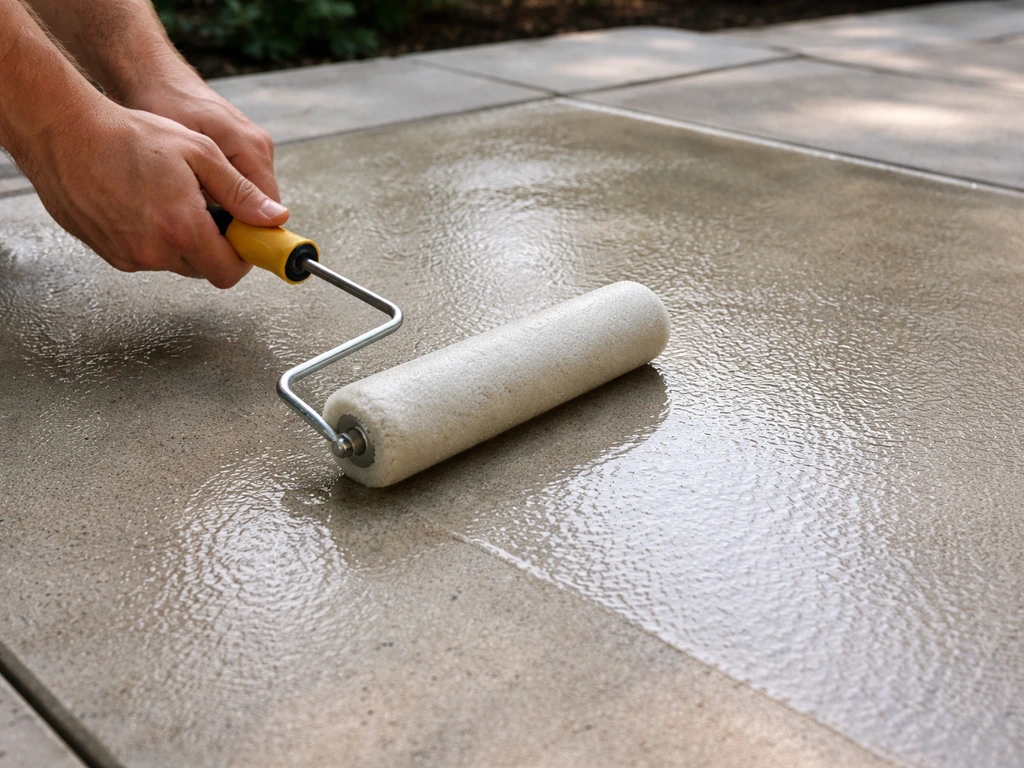
- Apply the first coat. Work in manageable sections, starting at the far end and working toward your exit point. Use a roller, brush, or low-pressure sprayer depending on your surface (see the tools section below). Apply thin and even. For penetrating sealers, make sure the product is absorbing rather than sitting on top. For film-forming sealers, aim for consistent, streak-free coverage without puddles.
- Avoid puddling and running product. This is critical. Thick pooled sealer dries slower, can leave a milky residue, and won't bond properly. If you see product running or pooling, spread it out or back-roll it immediately.
- Let the first coat dry to the touch before applying a second coat. Depending on the product and conditions, this is typically 1 to 4 hours. At standard conditions (around 72°F / 22°C and 50% humidity), many film-forming sealers are ready to recoat in 1 to 2 hours. Penetrating sealers may need longer, sometimes 5 or more hours before any overcoating.
- Apply the second coat in the opposite direction to the first. Cross-hatching your application ensures more even coverage and reduces the chance of streaks or missed spots.
- Allow full cure before use. Light foot traffic is usually possible after 24 hours. Full cure for most products is 48 to 72 hours. Avoid placing furniture or driving on the sealed surface until fully cured.
Best way to seal a patio (tips, thickness, and coats)
Two thin coats always outperform one thick coat. This is true for both penetrating and film-forming products. A thick single coat traps solvent and moisture, leading to cloudiness, peeling, and uneven finish. Thin coats bond properly, cure evenly, and last significantly longer.
Apply penetrating sealers until the surface is saturated but not puddling. If the surface stops absorbing and sealer starts sitting on top, stop applying. Wipe up or back-roll any excess immediately. Sika's guidance for their silane-siloxane products specifically warns to apply in a single pass direction and to be careful not to leave running product on the surface.
For film-forming sealers, coverage rates matter. Check your product's TDS (technical data sheet) for square footage per gallon at the recommended film thickness. Under-applying gives weak protection. Over-applying causes the problems mentioned above. Most products cover around 200 to 400 square feet per gallon for the first coat, with more coverage on the second coat since the surface is less absorbent.
Temperature and humidity are the other big variables. Dry times and cure times increase significantly at lower temperatures and higher humidity. What dries in 1 hour at 72°F and 50% relative humidity might take 3 to 4 hours at 55°F or 80% humidity. Plan accordingly and don't rush recoating.
- Seal in the morning or late afternoon, not in direct midday sun
- Keep the surface shaded if possible during application and initial dry time
- Don't apply if rain is expected within 24 hours
- Don't apply if nighttime temperatures will drop below freezing before the sealer has cured
- Always test a small inconspicuous area first, especially on colored or decorative concrete and natural stone
- For pavers, check joint sand condition before sealing; loose or missing sand should be swept and compacted first
- Work wet-edge to wet-edge on large surfaces to avoid lap marks
What to use to seal a patio (tools and materials)
The right tools make a real difference in finish quality and how long the job takes. Here's what you'll actually need.
Sealers and cleaners
- Sealer matched to your surface type (penetrating silane-siloxane for stone and pavers; acrylic or film-forming for decorative concrete)
- Concrete or paver cleaner / degreaser for prep
- Efflorescence remover (such as Techniseal Paver Prep) if you have white salt deposits
- Concrete crack filler or patching compound for any damage repair
- Chemical sealer stripper if removing an old film-forming coating
Application tools
- 9-inch or 18-inch nap roller with an extension pole for flat surfaces (3/8-inch nap for smooth concrete; 1/2-inch nap for textured or paver surfaces)
- Natural bristle brush or masonry brush for edges, joints, and detail work
- Low-pressure pump sprayer as an alternative to a roller on large areas (keep pressure low to avoid overspray and uneven coverage)
- Paint tray and liners
- Painter's tape for masking edges, siding, and borders
- Plastic sheeting to protect landscaping if using a sprayer
Safety gear
- Chemical-resistant gloves (especially for stripper products and solvent-based sealers)
- Safety glasses or goggles
- Respirator rated for organic vapors if using solvent-based products
- Old clothes you don't mind ruining
Roller vs. sprayer vs. brush: which to use
A roller is the most practical tool for most DIY patio sealing jobs. If you want a step-by-step walkthrough of the process, see how to apply patio sealer with a roller as a related option alongside this roller-versus-sprayer guidance. It gives you good control over application thickness, works well on flat concrete and pavers, and is easy to clean up. A low-pressure pump sprayer is faster for large areas but requires more masking and you need to back-roll immediately after spraying to prevent uneven application. A brush is best reserved for edges, tight spots between pavers, and getting sealer into textured or grouted surfaces. For slate patios or irregular stone, a brush may be your primary tool with a roller handling the open areas.
When sealing won't fix the problem
Sealer is not a structural fix and it's not a drainage solution. There are situations where applying sealant is either a waste of money or will actually make things worse. Know these before you start.
Active drainage problems
If water pools on your patio after rain, sealing won't help. Film-forming sealers will actually make ponding worse by stopping any absorption that currently helps slow it. The underlying issue is slope or drainage, and that needs to be fixed first. Sunken pavers, settled slabs, and low spots that hold water are structural and grading problems, not sealing problems.
Structural cracks and widespread spalling
A hairline crack you can fill with a quality concrete filler is one thing. Wide cracks, cracks that are actively moving or growing, or large areas of spalling and surface breakdown indicate deeper structural issues. Sealing over significant damage hides the problem temporarily but doesn't stop it from progressing. If more than 25 to 30 percent of the surface has visible damage, you're looking at resurfacing or replacement rather than sealing.
Failed sealer that keeps coming back
If you've sealed the patio twice and it keeps peeling, clouding, or failing within a season, the problem is likely either incompatible products layered over each other, moisture migrating up from below, or a substrate issue (like a concrete slab with poor drainage below it). Stripping back to bare concrete and investigating the moisture source before resealing is the right move, not just applying another coat.
When to call a professional
If your patio has significant settlement, multiple large cracks, persistent drainage issues, or you're not sure what's causing repeated sealer failure, it's worth getting a professional assessment before spending money on materials that won't solve the actual problem. A concrete contractor or paving specialist can diagnose subsurface issues, recommend resurfacing if needed, or advise on proper drainage correction. Sealing is a great maintenance step, but it works best when the underlying patio is in fundamentally sound condition to begin with.
If you're working on a specific surface type and want more detailed guidance, the approach for sealing slate, applying sealer with a roller, or working through particular product instructions like Everbuild patio sealer each have their own nuances worth checking into once you've got the core process down. Always follow the everbuild patio sealer instructions for the correct prep, application method, and drying times so the finish lasts. If you’re specifically wondering how to seal slate patio surfaces, focus on choosing a penetrating silane or siloxane sealer that won’t change the stone’s look and follow the product’s label instructions for prep and dry time.
FAQ
How do I test whether my patio is already sealed without damaging it?
Use a small water test in an inconspicuous spot. Drip water on the surface and watch for 5 to 10 minutes. If it beads and stays beaded, it is likely sealed (film-forming or a fresh penetrating layer). If it soaks in right away, it is either unsealed or the old sealer has worn out, meaning you can usually prep and reapply without needing full chemical stripping.
Can I seal a patio the same day I pressure wash it?
Usually no. Even if the surface looks dry, water can remain damp in pores and capillaries. Wait for a full dry-through period, the article suggests 24 to 48 hours of warm, dry weather after washing. Also touch the surface, if it feels cool or damp to the touch, extend the wait.
What should I do if my sealer leaves a milky haze or cloudiness after it dries?
Milky discoloration is commonly a sign of trapped moisture or applying before the patio was dry through the top layer. Stop and let the area dry fully, then reassess. If it is a film-forming product, the fix often requires removal and reapplication with correct drying time. If it is a penetrating sealer, additional coats over damp substrate can worsen the appearance, so identify and correct the underlying moisture condition first.
How long should I wait before walking on a freshly sealed patio?
Dry times on labels can differ by product type, temperature, and humidity, but plan conservatively. Avoid foot traffic until the surface is no longer tacky and has cured per the technical data sheet. For film-formers, tackiness and uneven cure can be more noticeable, so give extra time before moving furniture back onto the finish.
Should I seal pavers if there is efflorescence or white salt already present?
Do not seal over active efflorescence. Clean it first using a dedicated efflorescence remover and follow the dilution and dwell time on the label. If the white deposits keep returning quickly, you likely have a moisture or water-migration issue that sealing will not solve.
Do I need to reapply sealer sooner if I have heavy vehicle traffic or a lot of direct sun?
Yes, those conditions shorten service life. High traffic increases wear, and intense UV and heat can accelerate breakdown of film-forming coatings, especially wet-look types. Penetrating silane or siloxane products often last longer in many climates, but you should still monitor water repellency and recoat when water no longer beads or the surface starts to darken from water absorption.
What is the difference between penetrating sealers and film-forming sealers when choosing for my patio?
Penetrating sealers soak into the material and reduce water absorption while letting vapor escape, which helps prevent trapped moisture issues. Film-forming sealers sit on top and create a coating that can provide a wet look, gloss, or matte finish, but they can peel or fail faster if the wrong substrate, moisture, or an incompatible old sealer is present.
How do I know if I should strip a previous film-forming sealer before re-coating?
If your existing product is peeling, flaking, bubbling, or looks cloudy, treat it as a failed topical coating that typically needs removal. Also use product-type compatibility logic: film-formers generally require full removal before applying a different film-forming system, while penetrating sealers usually do not leave a surface film to strip. When in doubt, confirm with the product label and perform a small test area.
Can sealing make ponding worse on a patio?
Yes. If water pools because the patio lacks proper slope or drainage, sealing can reduce absorption that was temporarily helping slow runoff. The article notes that film-formers can make ponding worse by stopping absorption. Fix the grading or drainage first, then seal for long-term protection.
Should I seal over cracks in concrete or paver joints?
Small cracks that you can stabilize should be repaired before sealing, because sealing over active cracking can make it reappear quickly. Use a compatible concrete crack filler or polyurethane caulk for appropriate crack types, and patch spalled areas with the right patching compound. Let repairs cure fully, rushing this step is a major reason DIY sealing fails early.
How do I handle polymeric sand in paver joints before sealing?
Wait at least 30 days after polymeric sand installation before cleaning and sealing. Sealing too early can interfere with the final set and can reduce joint performance, leading to joint failure or inconsistent sealing results across paver gaps.
What temperature and humidity conditions should I avoid for sealing?
Avoid sealing when it is too cool or too humid because dry and cure times can increase significantly. The article highlights that dry time at 72°F and moderate humidity can triple at cooler, damper conditions. Check the product’s technical data sheet, then schedule the job for warm, dry conditions with a clear weather window for the recommended recoat and cure times.
Is it okay to apply one thick coat to save time?
Usually no. The article states that two thinner coats outperform one thick coat for both penetrating and film-forming products. Thick applications can trap solvent or moisture, which increases cloudiness, uneven cure, and peeling risk. Follow the stated coverage rate and apply in consistent passes.
What tools give the most even results, and how do I prevent streaks?
A roller is often best for even thickness on flat areas. For sprayers, back-roll immediately to even out application, and be meticulous with masking around edges to prevent overspray. With penetrating silane or siloxane products, apply in a single pass direction and avoid leaving running product, since that can cause patchy absorption and streaking.
When should I stop and call a professional instead of sealing again?
If the patio shows persistent drainage problems, significant settlement, multiple large or growing cracks, or repeated sealer failure shortly after sealing, professional diagnosis is worth it. The article notes that multiple quick failures can point to moisture migrating from below or incompatible layered products. A contractor can identify grading or subsurface issues, then advise whether resurfacing is the real fix before you spend again on sealer.
How to Fix Cement Patio Cracks: Diagnose and Repair
Diagnose concrete patio crack types and repair with the right sealant or patch, from prep to curing and prevention.