Most cement patio cracks are fixable yourself, but the right repair depends entirely on what kind of crack you're dealing with. A hairline surface crack gets a pourable sealant. A wide, deep crack needs a backer rod and elastomeric filler. A crack where one side sits higher than the other, or where the slab is actually sinking, is a different problem altogether and may be beyond DIY territory. Get the diagnosis right first, and the rest of the job becomes straightforward.
How to Fix Cement Patio Cracks: Diagnose and Repair

Talia Lang
29 Apr 2026
Diagnose the crack before you buy anything
Concrete cracks fall into two broad categories: dormant and active. A dormant crack has stopped moving. It formed at some point, maybe from shrinkage when the slab was poured or from a single freeze-thaw event, and it hasn't changed since. These are the easiest to fix and the most DIY-friendly. An active crack is still moving. The width changes over time, which means whatever you put in it will eventually break apart. Filling an active crack with rigid cementitious patching compound is a short-term fix at best.
A quick way to check whether a crack is active: brush a thin layer of plaster of Paris or even just white paint across it, bridging both sides, and come back in a few weeks. If the bridge material cracks or separates, the underlying crack is still moving. If it stays intact, the crack is dormant and you can repair it with confidence.
Next, assess the crack's size and depth. Width matters because it determines which product to use. A crack comparator card (a cheap tool available online) lets you match the crack width against labeled lines to get an accurate measurement. As a rough field guide: hairline cracks are under 1/16 inch wide; mid-range cracks run from 1/16 to 1/2 inch wide; anything wider or with vertical displacement (one side higher than the other) is heading into structural territory.
Depth matters just as much. Tap the concrete on either side of the crack with a screwdriver handle or a coin. A solid thud means the concrete is sound. A hollow sound indicates delamination, meaning a layer of concrete has separated from the slab beneath it. That delaminated material needs to be removed before any patch will hold. If you find large hollow sections, that's a sign of deeper slab deterioration and you should be realistic about what a surface repair can accomplish.
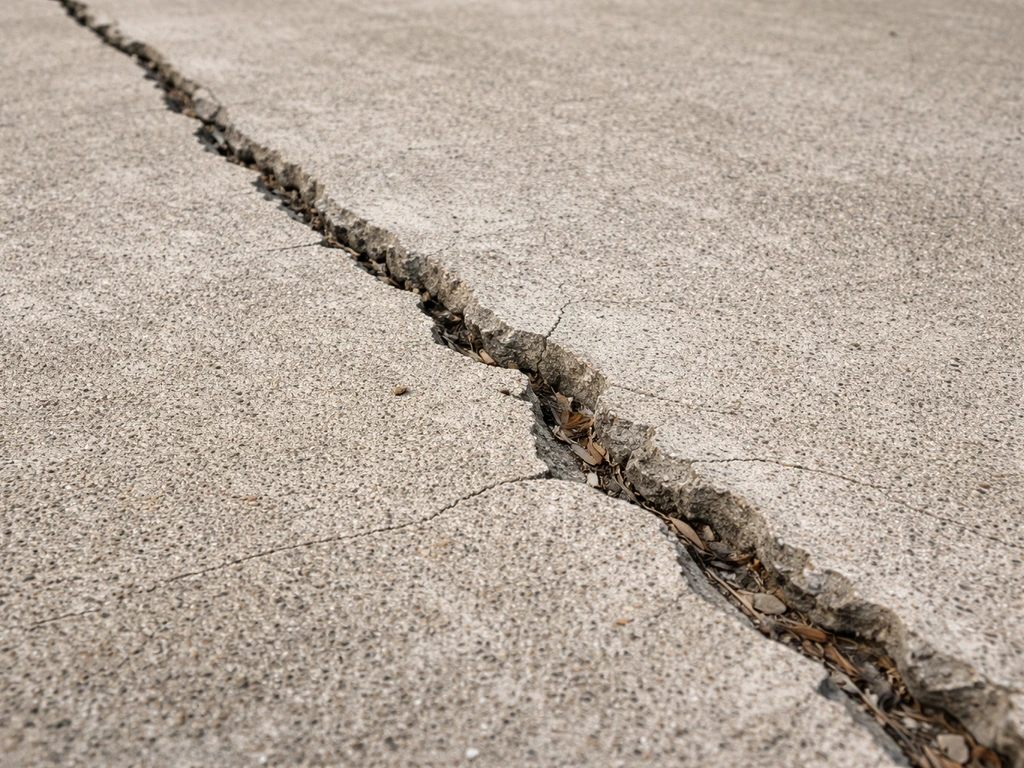
Also look at what's happening at the crack itself. A crack that's wider at the top and narrow at the bottom is typically a shrinkage crack, which is common and usually dormant. A crack with one side lifted higher than the other suggests heaving from tree roots underneath or frost heave. Cracks with crumbling, flaking edges indicate freeze-thaw spalling, where water worked into the concrete, froze, expanded, and broke the surface from the inside out. Each of these has a different cause and slightly different repair approach.
| Crack type | Typical width/depth | Likely cause | Best repair approach |
|---|---|---|---|
| Hairline / shrinkage | Under 1/16" | Normal curing shrinkage | Pourable or self-leveling sealant |
| Mid-range dormant | 1/16" to 1/2" | Settle, freeze-thaw, age | Backer rod + elastomeric sealant or patching compound |
| Wide / deep crack | Over 1/2", depth varies | Subgrade movement, heavy load | Backer rod + polymer-modified mortar or structural filler |
| Active / moving crack | Any width, changes over time | Ongoing soil movement, roots, drainage | Elastomeric sealant only; address root cause |
| Heaved / displaced crack | Any width, uneven sides | Frost heave, tree roots, poor base | Professional assessment often needed |
| Spalling / crumbling edges | Surface area loss | Freeze-thaw, poor air entrainment | Remove loose material, surface patch or resurfacer |
What you need before you start
Getting the right materials together before you start saves a lot of frustration. Here's what covers the full range of common cement patio crack repairs:
- Wire brush or angle grinder with a crack chaser blade (for cleaning and widening cracks to get solid edges)
- Shop vacuum or compressed air (for removing all dust and debris from the crack)
- Stiff-bristle brush and concrete-safe degreaser or detergent (for surface cleaning)
- Crack comparator card (optional but useful for measuring crack width accurately)
- Backer rod: foam rope sold in hardware stores; use a diameter about 1/4 inch larger than the crack width for a snug fit
- Pourable/self-leveling concrete crack sealant for hairline to 1/2-inch cracks (Sikacryl Pourable Crack Repair Sealant is a reliable option for cracks up to 1/2 inch wide and 1/4 inch deep)
- Elastomeric polyurethane sealant for wider joints or active cracks (Sikaflex+ Concrete Fix works well; keep depth between 1/4 and 1/2 inch using backer rod)
- Polymer-modified structural repair mortar for large or deep damage (QUIKRETE Polymer Modified Structural Repair is well-regarded and tested for freeze-thaw resistance per ASTM C666)
- Concrete bonding adhesive or primer (required when applying cementitious patch material to existing concrete)
- Trowel, margin trowel, or putty knife
- Safety glasses and gloves
- Plastic sheeting or damp burlap for curing cementitious patches
One thing to pay attention to: temperature. Most sealants and repair products have minimum application temperature requirements. Sikaflex+ and similar polyurethane sealants need surfaces above 40-45°F. TruFlex rubberized crack sealant specifically requires temperatures above 50°F during application and for at least 24 hours afterward. Cementitious repair mortars have similar cold-weather risks: if the material freezes before it reaches adequate strength, it will fail. Don't repair cracks when temperatures are near freezing or frost is expected within a day.
How to fill and seal small cracks
This process covers hairline cracks and cracks up to about 1/4 inch wide and 1/4 inch deep. These are the most common cracks on older patios, and with proper prep, a good <a data-article-id="6C7537B9-00D8-4D51-831B-E7BB8D2EC3B1">sealant fill</a> will last years.
- Clean the crack thoroughly. Use a wire brush to scrub out all loose material, dirt, and debris from inside the crack. Follow up with a shop vacuum or compressed air. Any dust left inside will prevent the sealant from bonding properly.
- Degrease if needed. If there's oil, grease, or efflorescence (white mineral deposits) near or in the crack, scrub with a concrete-safe detergent solution. Rinse completely and let the area dry fully before applying anything. Polyurethane-based sealants in particular will not bond well to damp or contaminated surfaces.
- Widen hairline cracks slightly. This sounds counterintuitive, but a crack thinner than 1/8 inch is actually hard to fill properly because the sealant can't get deep enough for a good bond. Run an angle grinder with a crack chaser blade, or even a sturdy cold chisel, along the crack to open it to at least 1/8 inch wide with slightly undercut sides (wider at the bottom than the top). Vacuum again after.
- Check depth. If the crack is deeper than 1/4 inch, push in a length of backer rod foam rope to within 1/4 inch of the surface. This controls how deep the sealant goes and ensures the right thickness for flexibility.
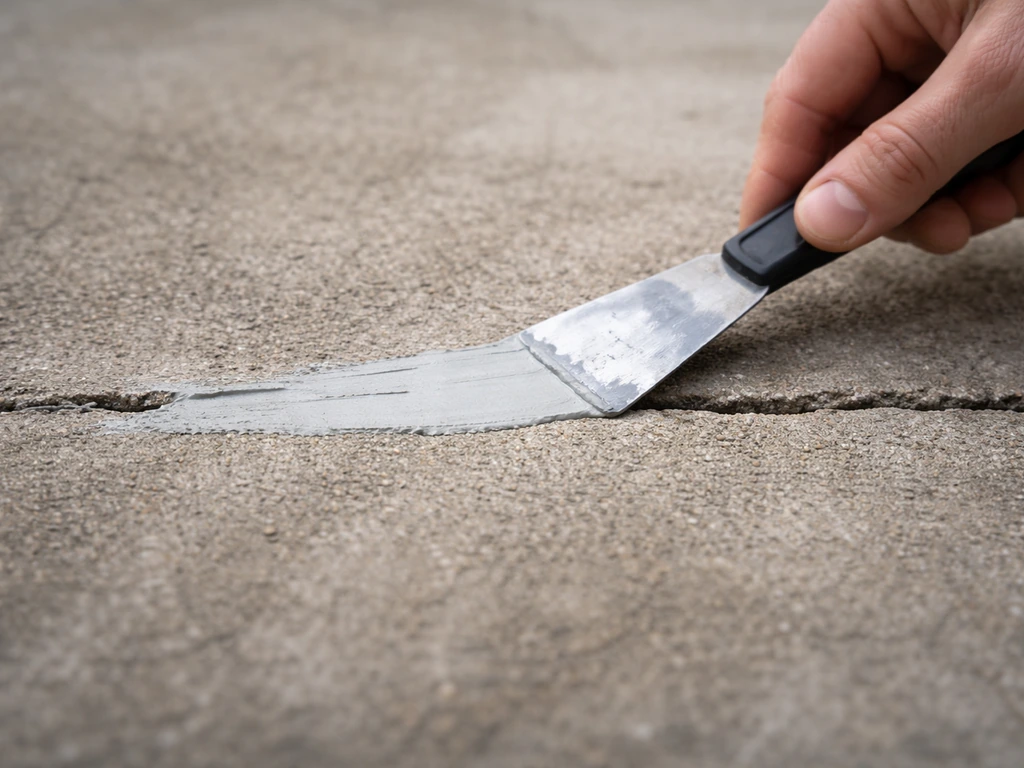
- Apply the pourable sealant. For small cracks, a self-leveling sealant like Sikacryl Pourable Crack Repair works well: just cut the nozzle tip small and pour or squeeze it slowly into the crack. It flows in and self-levels. Don't overfill: aim to slightly overfill, then smooth with a putty knife once it starts to skin over.
- Allow to cure before walking on it. Follow the product's curing time, typically 24-48 hours before foot traffic, longer before replacing patio furniture.
How to repair large cracks and deeper damage
Cracks wider than 1/4 inch, cracks that go deep into the slab, or areas with crumbling edges need a more substantial repair. For these, you're either using a deep elastomeric sealant with backer rod or a polymer-modified repair mortar, depending on whether the crack is active or dormant.
For wide dormant cracks (1/4 inch to 1/2 inch wide)
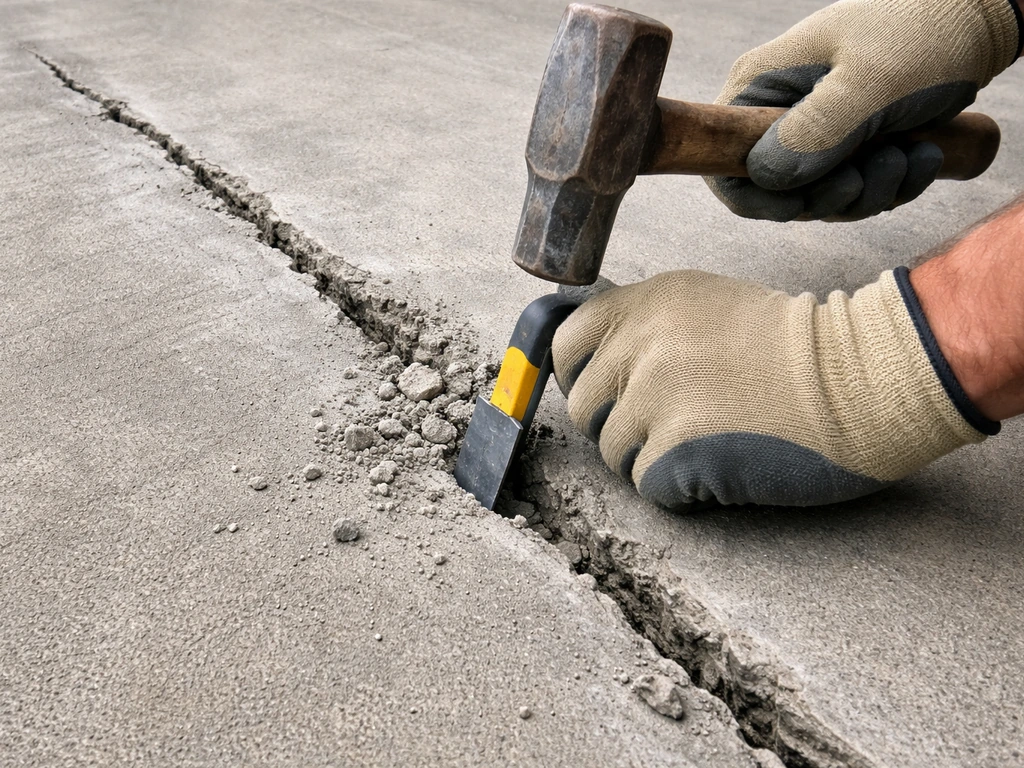
- Prep the crack edges. Chip out any loose, crumbling, or delaminating material along the crack edges with a cold chisel and hammer. Tap the surrounding concrete with a screwdriver handle: hollow sounds mean more removal is needed. You want sound, solid concrete on both sides before you fill anything.
- Vacuum and clean thoroughly. Same process as before: wire brush, vacuum, degrease, rinse, and let it dry completely.
- Install backer rod. For cracks deeper than 1/4 inch, press a foam backer rod into the crack with a blunt tool. It should sit 1/4 to 1/2 inch below the surface. For a Sikaflex-type elastomeric sealant, the joint design should aim for a 2:1 width-to-depth ratio, with a minimum depth of 1/4 inch and a maximum of 1/2 inch. Use a backer rod diameter about 1/4 inch wider than the crack for a secure fit.
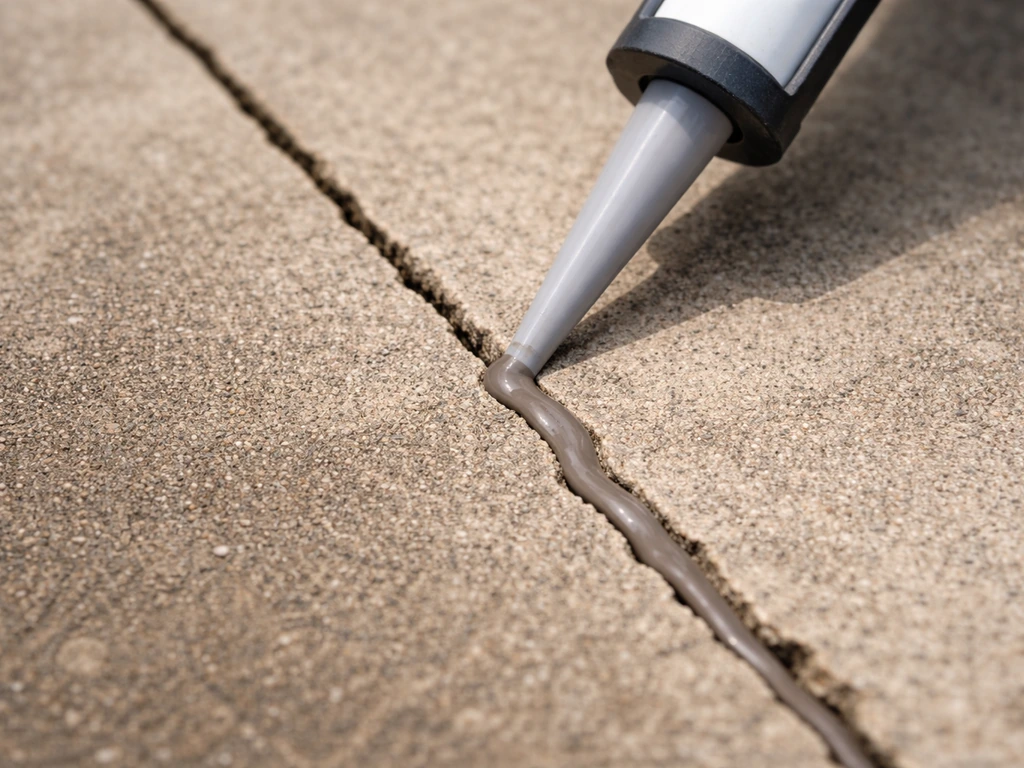
- Apply the sealant. Load a tube of Sikaflex+ Concrete Fix or equivalent into a caulk gun and fill the crack in a steady, slow pass. For deep cracks filled with sand (an alternative to backer rod for very deep fills), fill sand to within 3/4 inch of the surface first, then apply sealant over the sand base.
- Tool the surface. Once applied, use a wet finger or a rounded tool to press the sealant firmly against both crack edges and create a slightly concave surface. This prevents pooling water from sitting on the repair.
- Cure time. Polyurethane sealants typically skin over within a few hours but take 24-72 hours for full cure. Keep foot traffic off during that time.
For deep, wide, or heavily damaged areas
- Remove all unsound material. Use a cold chisel and hammer or an angle grinder to cut back to solid concrete. The repair area should have clean, square-cut or slightly undercut edges (not feathered thin edges, which will flake off).
- Vacuum and prepare. Remove all dust, rinse with water, and allow the area to become saturated surface dry (damp but not puddling). Some polymer-modified mortars require this; others prefer a dry surface and a bonding agent. Read your specific product's instructions.
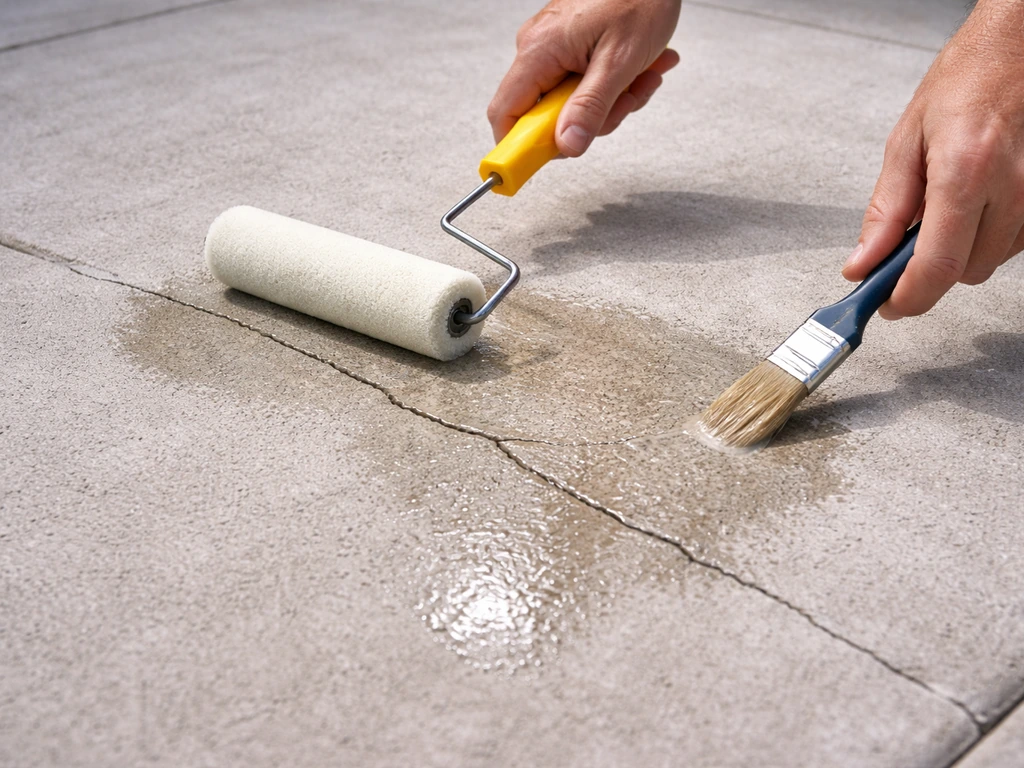
- Apply bonding adhesive. Brush or roll a concrete bonding adhesive into the repair area and let it become tacky before applying the mortar. This step is what makes patches actually stick.
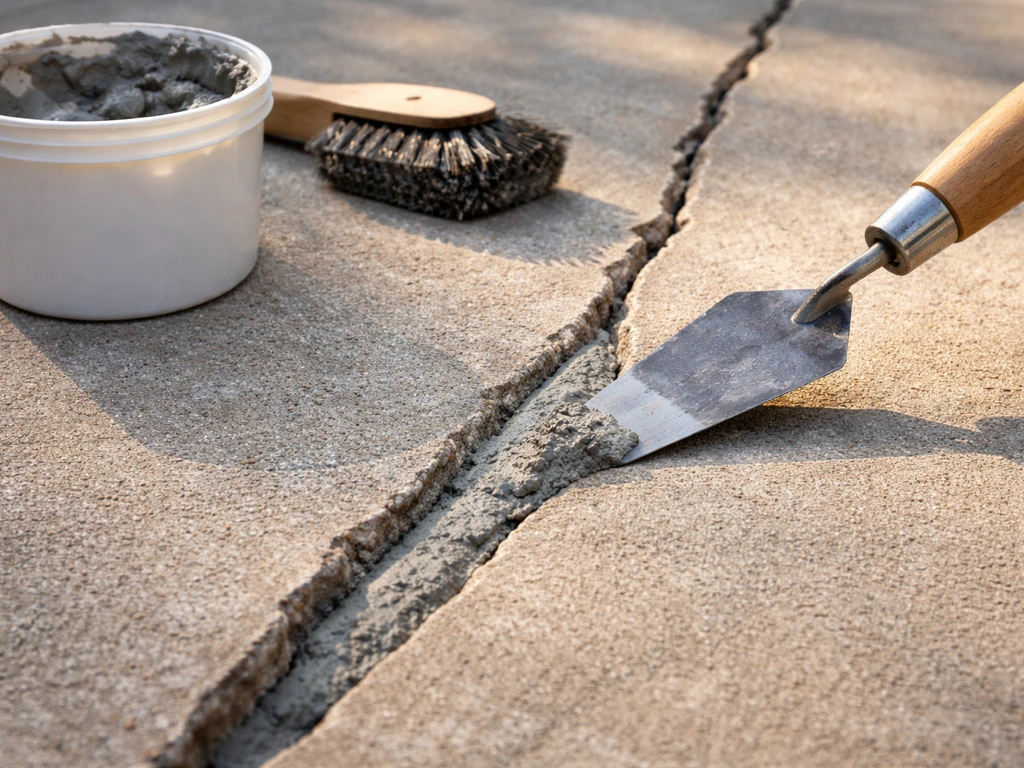
- Mix and apply the repair mortar. Mix QUIKRETE Polymer Modified Structural Repair or equivalent according to package directions. Work it into the crack firmly with a margin trowel, making sure it fills all voids without air pockets. Build up to the surrounding surface level.
- Finish the surface. Smooth with a trowel to match the surrounding texture. For a brushed finish, drag a stiff brush across the wet mortar. For an exposed aggregate look, gently expose aggregate with a brush after initial set.
- Cure carefully. Cover the repair with plastic sheeting or damp burlap to slow the cure and prevent cracking from drying too fast. Keep it moist for at least 24-48 hours. In warm or windy weather, curing too fast causes new surface cracks.
Patching the surface vs fixing the slab
It helps to think about repairs at two distinct levels: surface patching and slab-level repair. They're different jobs with different expectations.
Surface-level patching
If the slab is structurally intact but the surface has cracking, spalling, or shallow pop-outs, surface patching is the right approach. This covers the kinds of repairs described above: sealants and polymer-modified mortars applied at or near the surface. A concrete resurfacer can also be used to skim-coat an entire patio that has widespread shallow cracking or surface deterioration, giving you a fresh, even surface without tearing out the old slab. These products typically go on at 1/4 inch or less and require the same thorough prep: clean, sound, profiled concrete for adhesion.
Slab-level repair
When the slab has shifted, sunk, or heaved, surface patching won't solve the problem. It will just fail again. Slab settlement is usually caused by water drainage problems, wet-dry soil cycles, frost heave, or inadequate base preparation when the patio was originally installed. Tree roots near the patio can destabilize soil and physically push slabs upward. These underlying causes need to be addressed first. Depending on the severity, options include mudjacking (pumping a slurry beneath the slab to lift it back into place), polyurethane foam lifting, or full slab replacement. If your crack has vertical displacement and the slab is visibly uneven, get a concrete contractor to assess the subgrade situation before you spend money on surface repairs that won't last.
If you're dealing with cracked or damaged materials other than poured concrete, the repair process is different. Flagstone, natural stone, and brick patios have their own repair logic that doesn't translate directly to poured slab work. These same prep and fill steps are also the framework for how to fill cracks in brick patio when you are dealing with mortar joint or brick movement issues. For a flagstone patio crack, the fix often comes down to re-leveling loose stones and resetting cracked mortar joints so the surface stays stable Flagstone, natural stone, and brick patios.
When to DIY and when to call someone
DIY is the right call for dormant cracks of any width as long as the slab is level and the surrounding concrete is sound. If your crack passes the painted bridge test and doesn't show displacement, you can repair it yourself with confidence using the steps above. Realistically, most hairline and mid-range cracks on patios fall into this category. For crack-specific steps, including the right sealants and prep for each crack type, follow the guide on how to fill cracks in patio. For a complete, step-by-step approach to repairing stone patio cracks, follow the guide on how to repair cracks in stone patio.
Call a professional if any of the following are true:
- The crack is active and keeps widening after you repair it
- One side of the crack is higher than the other, indicating slab movement
- The slab feels soft or unstable underfoot, or hollow-sounding over a large area
- You see new cracks forming near the old ones after repair
- The slab is visibly sinking or there's a drainage problem causing water to pool under or near the patio
- Tree roots are lifting part of the slab from below
These situations involve subgrade or structural issues that a surface repair simply can't fix. Patching over an active underlying problem is a waste of money. A concrete contractor can assess whether mudjacking, slab replacement, or regrading is the appropriate fix.
How to prevent cracks from coming back
Fixing a crack and then ignoring the conditions that caused it is a short path to doing the same repair again in a year or two. Here's what actually helps long-term:
- Seal the repaired area and the surrounding patio surface with a quality penetrating concrete sealer. This keeps water out of the pores and dramatically reduces freeze-thaw damage by limiting how much moisture can freeze and expand inside the concrete.
- Fix drainage problems. If water pools on or around your patio, it will keep working into cracks and the subgrade. Check that the patio slopes slightly away from the house (typically 1/8 inch per foot) and that downspouts aren't discharging onto or near the slab.
- Address nearby trees. Roots from trees planted too close to a patio will eventually find their way under the slab. If a tree is within 10-15 feet, keep an eye on new crack patterns and consider root barriers if the tree is young.
- Reseal on a regular schedule. Concrete sealers wear out, typically every 2-5 years depending on the product and traffic. Reapplying on schedule is much cheaper than repairing spalling from repeated freeze-thaw cycles.
- Avoid deicing salt in winter. Road salt and common ice melters are hard on concrete surfaces and accelerate freeze-thaw spalling. Use sand for traction or look for concrete-safe alternatives.
The combination of a proper repair, a good sealer, and fixing whatever drainage or root issue caused the crack in the first place gives you a genuinely durable result. Most homeowners who do all three steps don't see the same crack come back.
FAQ
Can I fix a cement patio crack if it is painted or has an existing sealant on it?
Yes, but only if the crack is dormant and the slab is level. Any product that stays bonded to concrete should be applied to a clean, profiled surface (often cleaned and ground/etched so the repair can mechanically grab). If the crack is active or the slab is uneven, patching or sealing over the paint will fail quickly.
Do I need to seal the patio after filling the crack, and with what?
For repairs meant to last, you should focus on sealing both the crack and the surrounding surface, but not necessarily with the same material. After curing, apply a compatible concrete sealer over the repaired area and a buffer zone so water cannot reach the edges again. If you use a polyurethane crack sealant, choose a patio sealer that tolerates it and won’t soften it.
When do I need backer rod, and how do I avoid overfilling a deep crack?
Use the backer rod only for deeper, wider gaps where the sealant needs a fill depth, and install it to sit below the final surface height so sealant can form a proper hourglass-shaped bond. If you overfill or skip the backer rod in a deep crack, the sealant can tear because it lacks the correct thickness for movement.
What should I do if the crack area sounds hollow when I tap it?
Don’t patch over loose or delaminated concrete. First, remove any hollow-sounding sections, clean the cavity, and profile the edges so the repair can bond. A good rule is if tapping reveals hollow areas beyond the visible crack, surface repair will be cosmetic unless you remove the unsound concrete.
How do I fix it if the crack keeps reopening after freeze-thaw cycles?
If the crack keeps reopening seasonally, it is active. Rigid cementitious patch compounds usually crack again, even if they look fine initially. For active behavior, prioritize an elastomeric crack system designed for movement, and address the movement cause (drainage, frost exposure, heaving from soil).
What’s the best way to protect the repaired crack from rain or foot traffic while it cures?
Immediately clean off any residue before curing and keep people off the repair until it has reached full cure. Also protect the joint from rain or irrigation runoff during the cure window, because washing water can prevent proper bonding and create weak, chalky surface repairs.
At what point should I stop DIY patching and call a concrete contractor for cracking issues?
If you see vertical displacement (one side higher) or repeated settlement patterns, that suggests a slab movement or base problem. At that point, surface products will tend to fail again. The practical decision is to get a concrete contractor assessment before spending on multiple patch attempts.
Can I use household caulk or generic filler to repair a patio crack?
Yes, but only with the right prep and an outdoor-rated product. If the crack width changes, caulk-like products that are not elastomeric or not rated for exterior concrete movement will separate. Match the product to crack width and expected movement, then ensure the surface is dry and properly primed if the manufacturer requires it.
What if the crack is deeper than the product’s max thickness?
Cementitious patching and crack fillers typically have a limited usable thickness. If the crack is deeper than what a surface patch can accommodate, build it in layers using the correct system or use backer rod plus elastomeric filler. Over-thick single-layer applications can cure unevenly and shrink away from the sides.
Is the plaster-of-Paris bridge test enough to confirm a crack is truly dormant?
The “dormant” plaster-of-Paris bridge test is a guide, not a guarantee. Climate and load changes can activate dormant cracks later, especially in freeze-thaw regions. If you are near tree roots, have poor drainage, or see widening after heavy rains, assume there is potential movement and choose a more movement-tolerant repair.
Why did my crack come back, and what should I check for drainage problems?
A simple step is to check drainage first. If water consistently pools near the crack, it can keep the subbase wet-dry cycling and re-create cracks. Fix grading or downspout drainage before or at the same time as the repair, otherwise the new filler becomes just another temporary barrier.
Next Article
How to Fill Cracks in a Patio: DIY Repair Steps
DIY steps to diagnose and repair patio cracks with the right filler or joint sand, plus curing, sealing, and pro red fla