Most flagstone cracks come down to one of three things: the joint filler has failed, the stone itself has cracked, or a stone has shifted because something moved underneath it. The fix depends entirely on which one you're dealing with, because packing polymeric sand into a crack caused by a sunken base will just crack again in a season. Diagnose first, then repair. This guide walks you through the whole process, from figuring out what actually went wrong to cleaning, filling, and keeping it from coming back.
How to Fix Cracks in a Flagstone Patio Step by Step

Talia Lang
29 Apr 2026
Why flagstone patios crack in the first place
Before you buy anything or mix anything, spend ten minutes figuring out what you're actually looking at. The right repair for joint failure looks nothing like the right repair for a cracked stone or a sunken slab, and mistaking one for another wastes your time and money.
Joint filler failure
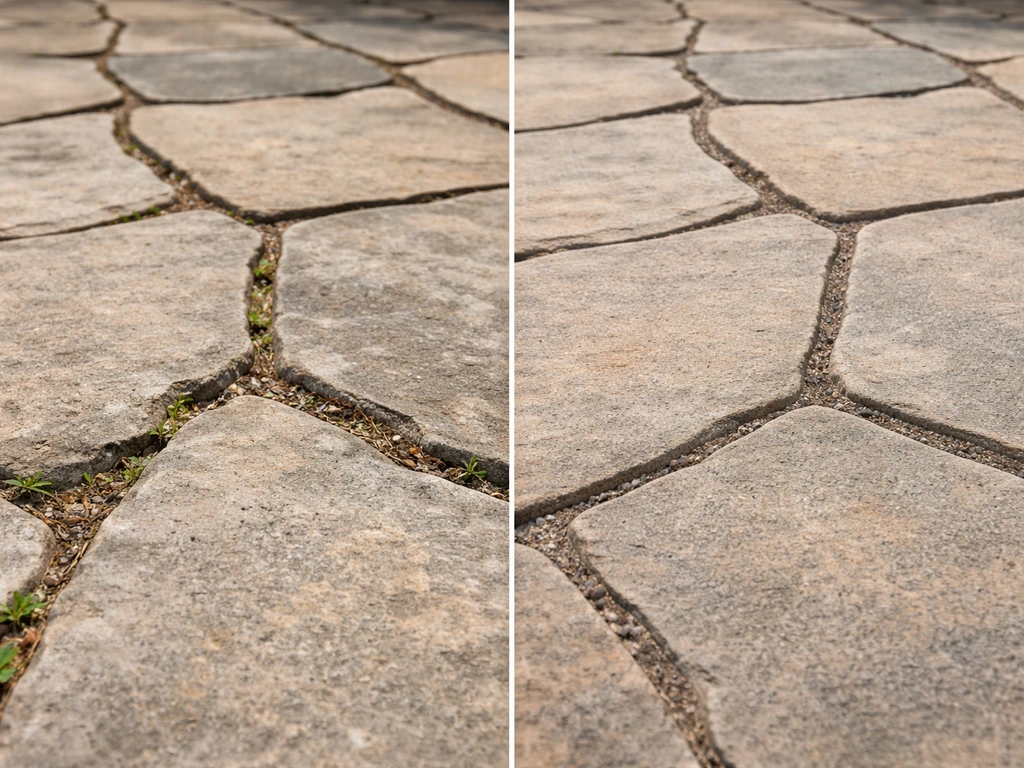
This is the most common thing people notice: the sand, mortar, or filler between stones has crumbled, washed away, or grown weeds through it. The joint itself is gone or barely there. If the stones feel solid and level when you step on them but the gaps look hollow or crumbly, you're dealing with joint failure. It's repairable, but here's the honest part: missing joint filler is often a symptom of a drainage problem underneath. Water gets in through the open joint, saturates the base, and in cold climates the freeze-thaw cycle does the rest. Fix only the joint without fixing the water pathway, and you'll be back to square one in a year or two.
Cracked stone
A crack running through the stone itself, not just along the joint, usually means one of two things. Either a heavy load or impact broke it, or the stone is being pushed from below by a heaving base. Freeze-thaw movement is the classic culprit: water infiltrates through joints and cracks, freezes, expands, and over repeated cycles it lifts and cracks whatever is above it. Look for cracked corners, diagonal cracks across a stone's face, or a crack pattern that follows a line across multiple stones. That pattern usually points to a base problem, not just a surface one.
Sunken, rocking, or shifted stones
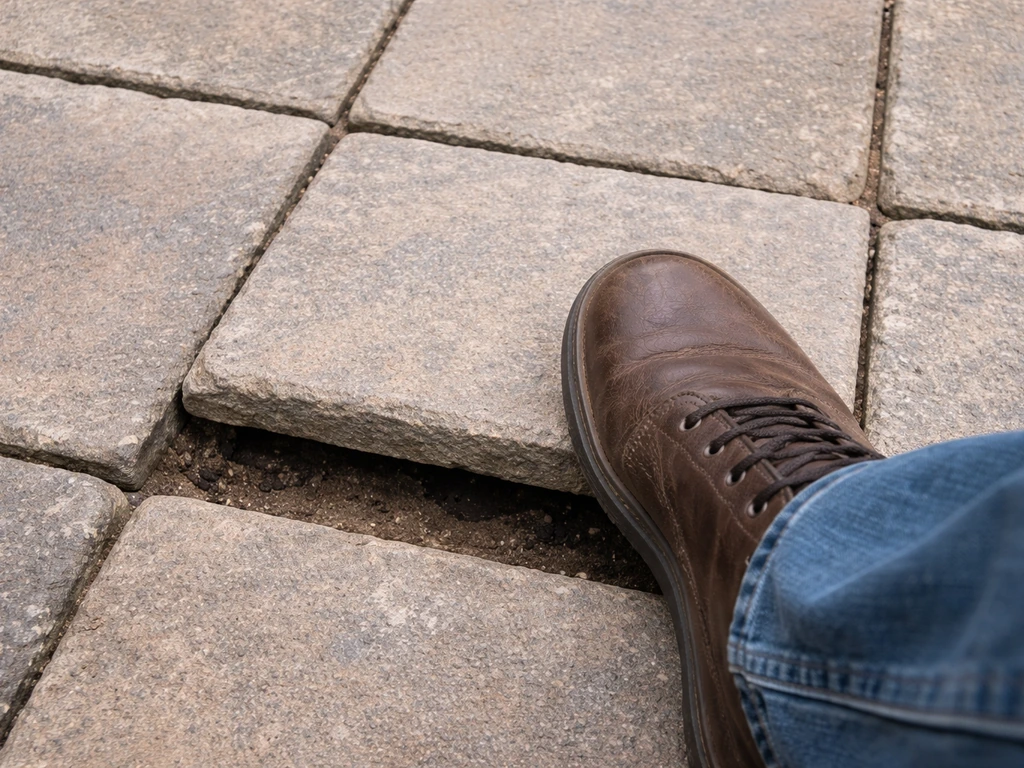
Walk across your patio and listen. A rocking or hollow sound under your foot means the stone isn't making full contact with its base. This is almost always a settlement issue: the base material beneath that stone has washed out, compacted unevenly, or eroded because water keeps flowing through it. One saturated area that repeatedly freezes and thaws will loosen the base progressively with each cycle. A sunken or rocking stone isn't just a surface repair job, it needs to be lifted and re-bedded. Skipping that step and just filling the joints is a temporary cosmetic fix.
A quick diagnostic checklist
- Press each stone: does it rock or feel hollow?
- Look at the joint depth: is the filler missing, crumbly, or weed-filled?
- Check if any stones sit noticeably lower than their neighbors
- Look for cracks that run through the stone face, not just along the edge
- After a rain, see if water pools near any of the damaged areas
- In cold climates, note whether damage gets worse every spring
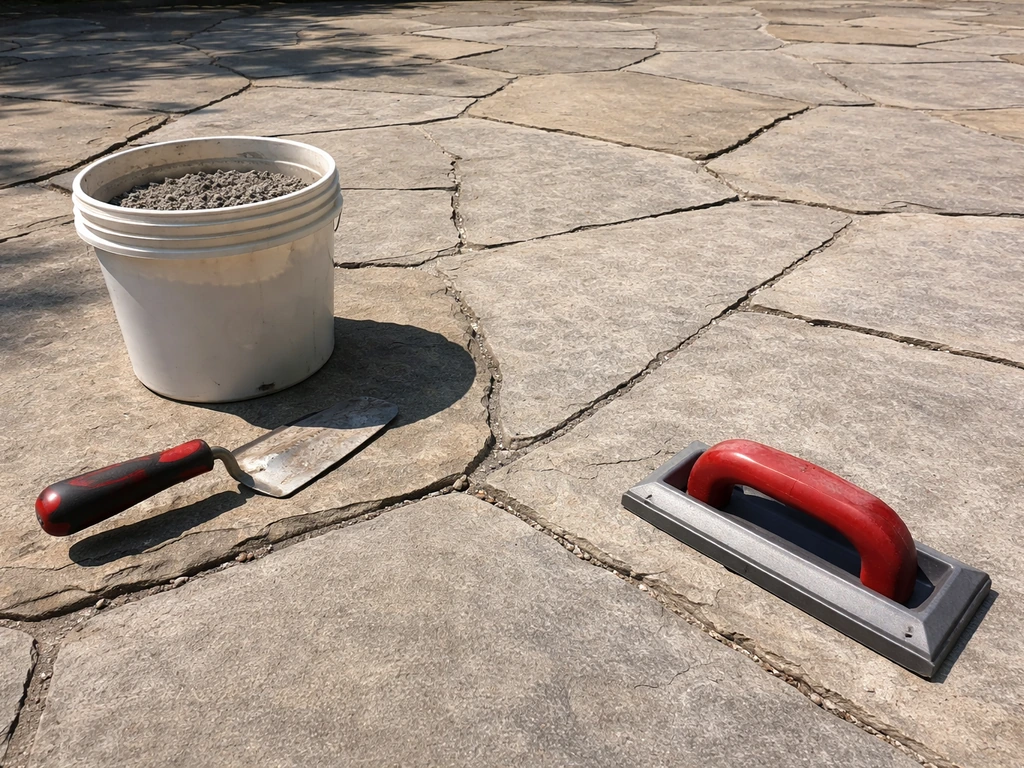
Tools and materials you'll need
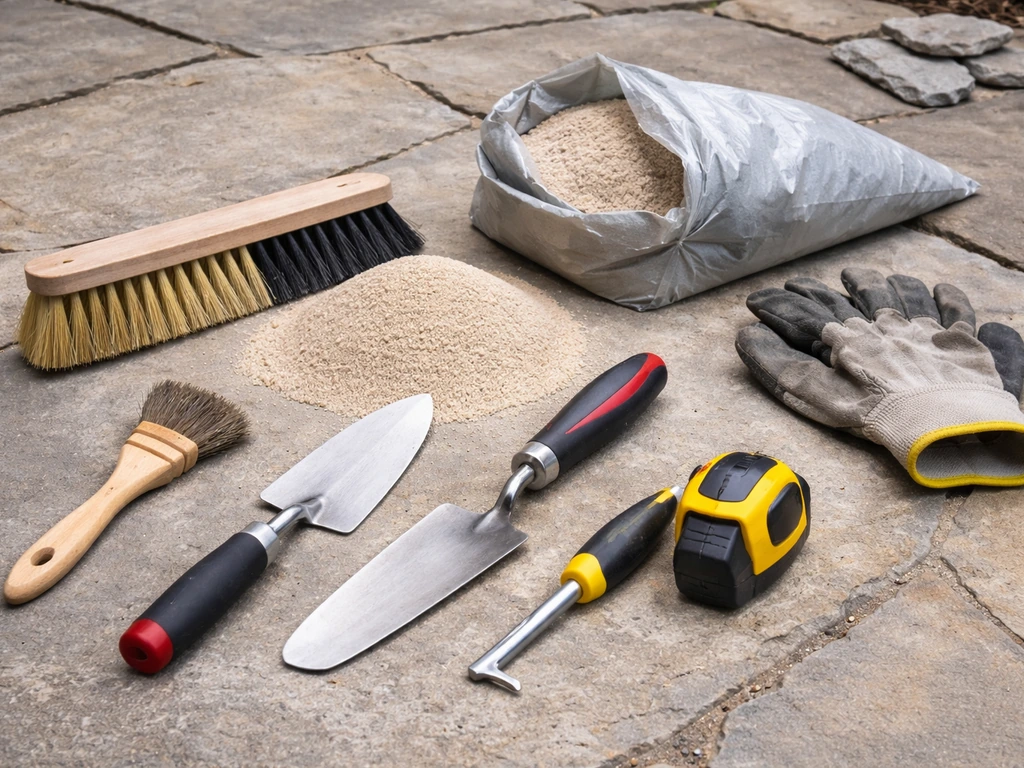
The right filler depends on the joint type and width. Flagstone joints vary a lot, from narrow 1/4-inch gaps to wide rustic joints 1.5 inches across, and that matters. Here's a breakdown of what to have on hand before you start.
For polymeric sand joints (most common for dry-laid flagstone)
- Polymeric jointing sand sized for your joint width (check the product's max joint width spec: Sakrete PermaSand handles up to 1.5 inches, Polybind Sand is rated to 1 inch)
- Leaf blower or plate compactor with rubber pad
- Stiff bristle broom or brush
- Garden hose with gentle spray nozzle
- Kneeling pad and hand trowel for packing deep voids
For mortar joints (mortared flagstone or structural cracks)
- Type N mortar mix (Sakrete or QUIKRETE Type N) for standard repointing work, 1/4 to 1/2 inch depth range
- Type S mortar if you need higher compressive strength (rated around 1800 PSI at 28 days) for load-bearing or structurally stressed areas
- QUIKRETE Mortar Repair (water-resistant acrylic formula) for smaller patch work or hairline repairs
- Margin trowel and pointing trowel
- Cold chisel and hammer or oscillating tool for removing old mortar
- Shop vac or stiff brush for joint cleaning
- Spray bottle for dampening joints before applying mortar
General tools for all repairs
- Wire brush or stiff utility brush
- Weed puller or flat screwdriver for removing roots
- Bucket and mixing paddle (or drill with paddle attachment)
- Rubber mallet
- Safety glasses and gloves
- Plastic sheeting for protecting fresh work from rain
Choosing the right filler: a quick comparison
| Filler Type | Best For | Joint Width | Flexibility | Skill Level |
|---|---|---|---|---|
| Polymeric sand | Dry-laid flagstone, sand-set patios, wide irregular joints | Up to 1.5 in | High (moves with stone) | Beginner-friendly |
| Type N mortar | Mortared joints, repointing, standard depth repairs | 1/4 to 1/2 in | Low-moderate | Moderate |
| Type S mortar | High-traffic areas, structurally stressed joints | 1/4 to 1/2 in | Low (rigid) | Moderate |
| Acrylic mortar repair (QUIKRETE Mortar Repair) | Hairline cracks, small patch fills, cosmetic repairs | Very narrow to 1/4 in | Moderate | Beginner-friendly |
| FastSet repair mortar | Structural masonry cracks where quick return to service is needed | Varies | Low | Moderate |
One important note on mortar: for flagstone in freeze-thaw climates, rigid mortars can work against you. If the base moves even slightly with seasonal temperature changes, a very hard rigid mortar will crack again at the joint. That's why some experienced installers prefer a slightly softer Type N over Type S for repointing flagstone in cold regions, and why polymeric sand is often the smarter choice for dry-laid installations. The goal is a filler that's compatible with the movement your patio already experiences.
Step 1: Cleaning and prepping the crack or joint
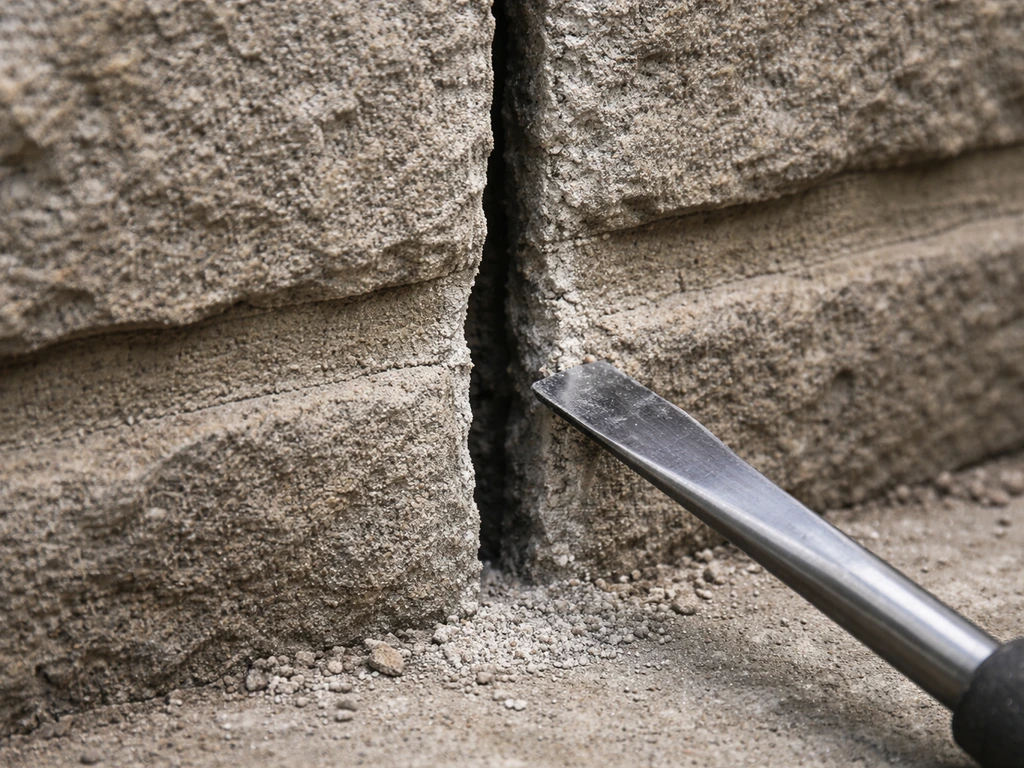
This is the step people rush, and it's usually why repairs fail. New filler applied over loose debris, old crumbling mortar, or damp surfaces just doesn't bond and hold. Take your time here. After you have clean, dry access to the crack, you can fill it in the right way to make your brick patio last fill cracks in a brick patio.
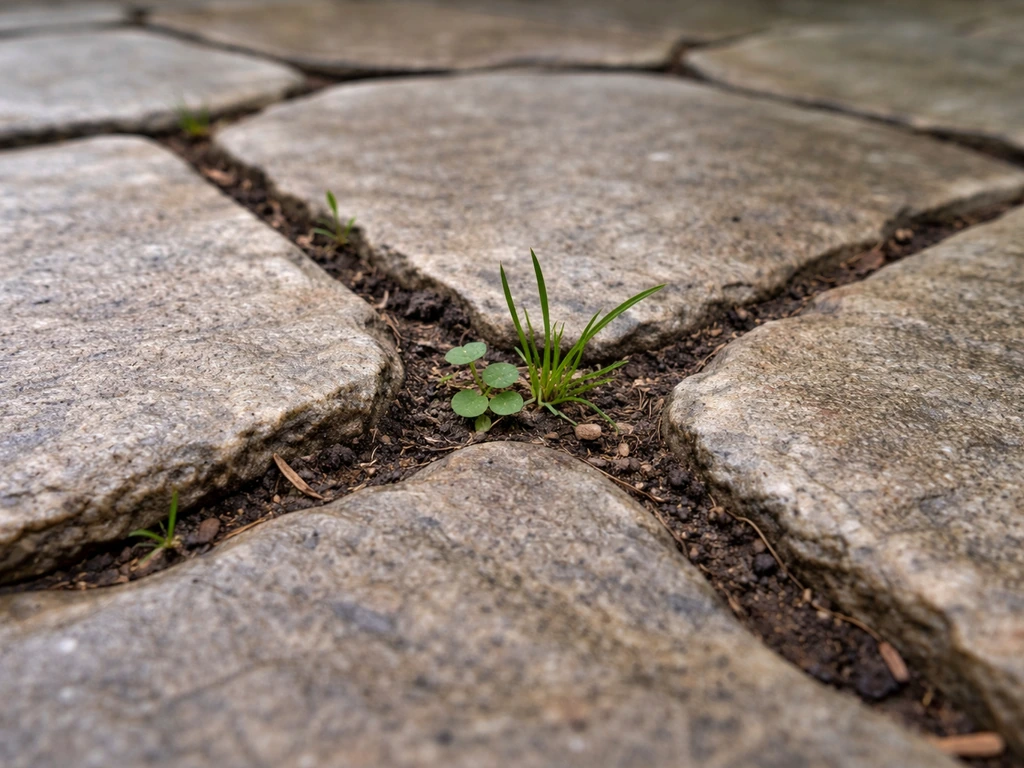
- Remove all vegetation. Use a flat screwdriver, weed puller, or narrow chisel to get the roots out completely. If you leave root fragments, they'll regrow and crack your new joint within a season.
- Clear out loose material. For mortar joints, use a cold chisel and hammer or oscillating tool to chip out all the crumbling, loose, or deteriorated mortar to a depth of at least 3/4 inch (roughly the joint width, and enough to give new mortar something to grip). The goal is to get back to sound, solid mortar on both sides and a clean bottom. For polymeric sand joints, use a stiff brush or a narrow tool to scrape out any loose sand or debris until you hit something solid.
- Vacuum or blow out the joint. A shop vac works well here. You want the joint dust-free and clean on all sides before adding anything new. This step matters more than most people think.
- Assess moisture. Feel inside the joint. If it's wet or damp, wait. For polymeric sand, Techniseal specifically recommends waiting at least 24 hours after significant rainfall before installation. For mortar, the joint should be damp but not wet when you apply: a dry joint can pull moisture out of the mortar too fast and weaken the cure.
- Check surrounding stone condition. While you're down there, press on the adjacent stones. If any rock, deal with them before filling joints. Filling the joint between a rocking stone and a stable one will only crack again as soon as that stone shifts.
A word on cleaning solutions: skip muriatic acid on natural flagstone. Acid-based cleaners can etch the stone surface and cause damage you can't undo. For stubborn biological growth or staining, use a stone-safe cleaner or diluted dish soap, rinse thoroughly, and let the surface dry completely before you start.
Step 2: Filling and repairing the cracks
Here's where the repair type splits into two different workflows. Follow the one that matches your situation. If you need step-by-step help on the process, follow this guide for how to repair cracks in a stone patio.
Repointing mortar joints
- Lightly dampen the joint. Mist the cleaned joint with a spray bottle so it's damp but not dripping. This helps prevent the surrounding stone and old mortar from pulling water out of your new mix too quickly.
- Mix your mortar. Follow the manufacturer's water ratio exactly. For QUIKRETE or Sakrete Type N, you're typically looking at a peanut-butter-thick consistency, not soupy. Mix only as much as you can use in about 30 minutes.
- Pack the joint in layers. Use a pointing trowel to press mortar firmly into the joint. For deep joints (over 3/4 inch), work in two layers: pack the first layer about halfway, let it firm up for 20-30 minutes, then add the second layer. Trying to fill a deep joint in one pass tends to cause the mortar to sag or crack as it cures.
- Tool the joint surface. Once the mortar is thumb-print firm (it should dent slightly when you press it but not stick to your thumb), use a jointing tool or the edge of your trowel to compact and shape the joint surface slightly concave or flush. This helps shed water.
- Clean the stone face promptly. Wipe fresh mortar smears off the flagstone with a damp sponge while the mortar is still workable. Dried mortar on natural stone is much harder to remove.
- Cure slowly. Keep the repair out of direct sun and wind for the first 24 hours if possible. If rain is forecast, cover the repair with plastic sheeting. Type N mortar reaches most of its working strength within 28 days.
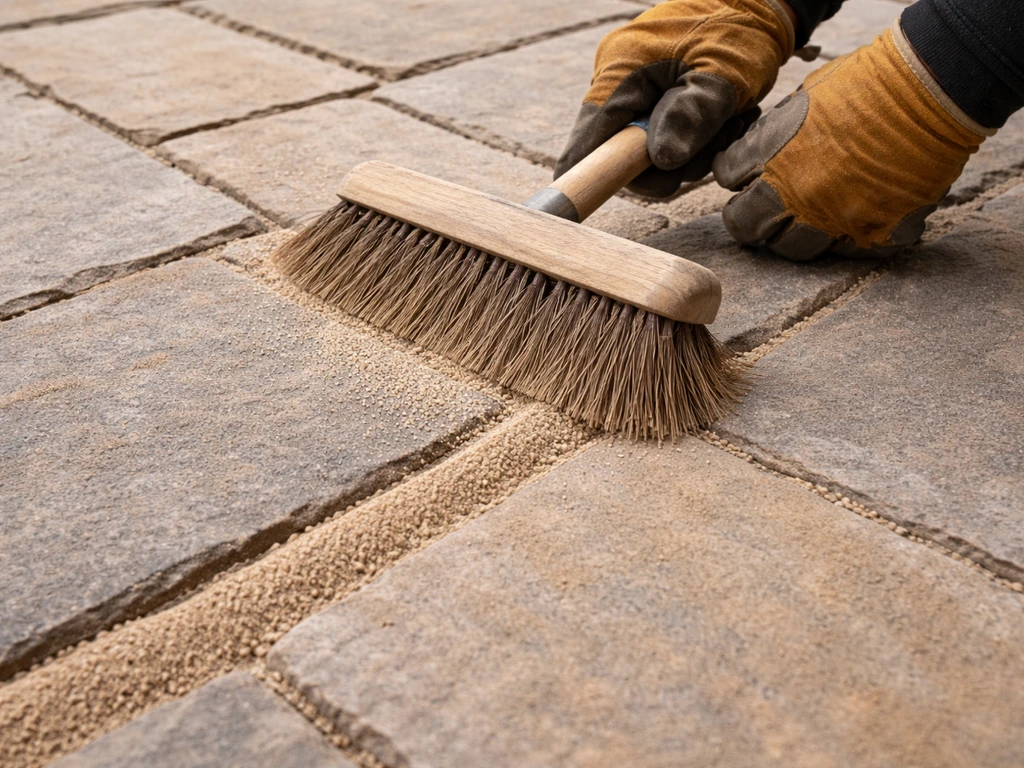
Installing polymeric sand in flagstone joints
- Make sure everything is dry. Polymeric sand must go onto dry stone surfaces. Sweeping damp sand over wet flagstone causes white haze, which is the polymer bonding to the stone face instead of staying in the joint. If there's any surface moisture, wait for it to evaporate completely.
- Pour and sweep the sand into the joints. Work in sections, pouring sand across the patio and sweeping it into the joints with a stiff broom. Don't over-fill: the sand should sit about 1/8 inch below the stone surface, not flush.
- Compact the sand. Use a leaf blower on low setting or a plate compactor with rubber pad to settle the sand down into the joints. Then sweep in another pass of sand to refill any gaps. Repeat until the joints are consistently filled to just below the surface.
- Blow off excess. Use a leaf blower to clear all loose sand off the stone faces. This step is critical: any residual sand on the surface will bond there when you add water, creating haze. Take your time here.
- Water it in. Use a gentle misting spray (not a hard jet) to wet the sand. Work in sections, letting water soak in rather than run across the surface. Most products require two or three wetting passes. The goal is to fully saturate the joint without washing sand out or flooding the surface. Follow the specific product instructions on wetting passes.
- Protect the cure. Keep rain, heavy dew, and foot traffic off the patio for at least 24 hours, and extend that to 48 hours in cooler temperatures or for wider joints. A heavy rain hitting polymeric sand in the first few hours of curing can wash the polymer out of the joint entirely. If weather looks uncertain, cover with plastic sheeting.
Repairing a cracked stone (not just the joint)
If the flagstone itself is cracked, you have two realistic options: cosmetic repair with an acrylic mortar repair product like QUIKRETE Mortar Repair, or replacement. For a crack that's purely cosmetic and less than about 1/4 inch wide, clean the crack thoroughly, apply the repair product with a trowel, tool it flush, and let it cure. It won't be invisible, but it'll stop water entry. For cracks wider than that, or for stones that have broken into pieces, replacement is almost always the better call. A badly cracked stone that's been patched tends to crack further along the same line within a season or two.
Finishing up: leveling, cleanup, and whether to seal
Final surface check
Once the repair has cured, walk the patio and check that no mortar or hardened sand is sitting proud of the stone surface. High spots can direct water in unintended directions or create trip hazards. A stiff brush or fine grit sandpaper can knock back small bumps. For mortar work, check that the joint surface is concave or flush and not humped up, since a raised mortar joint acts like a dam and traps water against the stone edge.
To seal or not to seal
This question comes up constantly and the honest answer is: it depends on your stone and your climate. For flagstone in a freeze-thaw climate, a breathable penetrating sealer is genuinely useful. Products like silane or siloxane-based sealers (look for terms like 'breathable,' 'vapor permeable,' or 'non-film forming') repel water from the surface while still allowing moisture vapor to escape from below. That's important because a film-forming sealer can trap moisture under the stone and actually accelerate freeze-thaw damage. Penetrating sealers such as silane/siloxane formulations reduce water infiltration through the surface while keeping the stone able to breathe.
If you seal, apply the sealer only after the repair has fully cured (at least 28 days for mortar repairs, at least 48 to 72 hours for polymeric sand). Test in a small, inconspicuous area first to check for discoloration, since natural stone can darken unexpectedly. Apply in dry conditions, follow the manufacturer's spread rate to avoid puddling, and let it penetrate rather than sitting on the surface.
If your patio is in a mild climate and uses polymeric sand joints, sealing is optional. The polymeric sand itself resists water reasonably well once cured. If you skip sealing entirely, just plan to inspect the joints every spring and fall and top up any areas that have eroded.
Why cracks keep coming back (and how to stop it)
If you've repaired this patio before and the cracks came back in the same spots, the repair itself wasn't the problem. Something underneath is driving the failure. Here's how to think through the usual suspects. If you're dealing with cement patio cracks, the same idea applies: diagnose the cause first, then match the filler or repair method to the movement and moisture behind the damage how to fix cement patio cracks.
Drainage is the most common underlying cause
Water pooling near or under the patio, a downspout discharging close to the patio edge, or a lawn that slopes water toward the hardscape are all ways to repeatedly saturate the base. Once the base is wet, freeze-thaw cycles do the damage. The repair triangle for a flagstone patio that keeps failing is almost always: water, weak or saturated base, and movement. Fix the water pathway first. That might mean regrading the adjacent lawn to slope away from the patio, extending a downspout, or installing a simple French drain along the problem edge.
Base compaction problems
If a specific area of the patio keeps sinking or cracking, it usually means the base material under those stones wasn't compacted properly when the patio was built, or it's been eroded by water movement. This is a deeper fix: the stones in that area need to come up, the base needs to be addressed (adding compacted crushed stone, correcting drainage), and the stones need to be re-set. It's more work than a surface repair, but it's the only fix that actually holds.
Using too rigid a mortar
If your mortar joints keep cracking and the stones themselves are solid, there's a chance the mortar mix is too hard for the amount of movement your patio sees. A very high-strength mortar in a setting that experiences seasonal movement will crack along the joint every cycle. Switching to Type N (softer, slightly more flexible) or to polymeric sand for a dry-set installation can make a real difference over time.
Over-watering polymeric sand
If polymeric sand joints keep eroding or you're seeing white haze on the stone face, the most common culprit is the application process: either the sand was swept onto damp stones, excess sand wasn't fully blown off before watering, or the wetting step was too aggressive and washed polymer out of the joints. Techniseal RG+ Polymeric Jointing Sand warns that it should not be applied to wet or damp surfaces because the binder can activate and stick to the paver surface, contributing to haze instead of properly hardening in the joints blank" rel="noopener noreferrer">white haze on the stone face. Polymeric sand installation guidance also notes that avoiding “white haze” and surface residue comes down to keeping the pavers dry and following the correct wetting and cleanup steps, such as blowing off haze-causing material after activation. Do the next repair on a clear, dry day, take the blower step seriously, and use a gentle misting nozzle rather than a garden hose on full pressure.
When to call a pro or replace the stone entirely
Not every flagstone repair is a realistic DIY job. Here's when to step back and get professional help or accept that replacement is the right answer.
- Multiple stones are sunken, rocking, or cracked and the pattern suggests a widespread base failure, not just isolated settling. Pulling up and re-setting more than a handful of stones is a significant job that benefits from proper base work and compaction equipment.
- Water is clearly draining under the patio from a structural source you can't easily redirect. A professional can assess whether a drainage system needs to be installed as part of the repair.
- Stones are cracked into three or more pieces, or large chips are missing from the stone face. At that point, patching rarely looks acceptable and the structural integrity is compromised. Matching replacement flagstone is often harder than it sounds, since stone lots vary, but it's still the better long-term option.
- The patio was built on a mortared concrete slab and the slab itself is cracked or heaved. Flagstone cracking driven by an underlying slab issue is a different repair category entirely, closer to repairing a concrete patio than a stone patio. That involves assessing the slab and potentially grinding, filling, and re-tiling, which is a separate workflow.
- Every repair you've made in the same spot has failed within one or two seasons. That's the clearest signal that the problem is structural or drainage-based and surface repairs won't hold it.
If you're working on a mortared flagstone patio with widespread joint failure, it's also worth knowing that the workflow has real overlap with repointing cracked stone patios more generally. The principles for cleaning, depth of removal, and mortar selection apply across most natural stone surfaces, whether you're dealing with flagstone, fieldstone, or similar materials. The flagstone-specific considerations are mainly around matching the mortar flexibility to the irregular joint widths and the seasonal movement your specific climate introduces.
The bottom line: a joint repair you can do yourself in an afternoon, a full re-setting and drainage correction can take a weekend or require a professional, and a failed base under a large portion of the patio is almost always a hire-it-out situation. Be honest about which one you're looking at before you buy materials.
FAQ
How can I tell whether I have joint filler failure versus a lifted or sunken flagstone before I start digging or filling?
Do a two-minute test: press down with your foot near the crack and compare how the stone feels to adjacent ones, then use a thin screwdriver to probe the joint. If the stone itself feels rock-solid but the joint crumbles away, it’s usually filler failure. If the stone rocks, clicks, or the joint stays intact while the stone moves, you likely need re-bedding, not just refilling.
When should I remove the old filler, and how deep do I need to go to make the repair actually hold?
You generally need to remove everything that is loose, sandy, or damp enough to wipe away with fingers, and you should keep clearing until you hit firm, clean material on the sides of the joint. Avoid “patching over” crumbling edges, because the new filler will bond to the debris instead of the stable joint walls.
Is it ever safe to mix different fillers or “top off” a partially failed joint?
It’s risky. If the original joint material type is unknown, topped-off repairs can create a weak layer or trap moisture in a spot that moves. If you see multiple materials or you can’t confirm it was polymeric sand or a compatible mortar, remove to stable material first, then install one system consistently.
How much crack width qualifies for cosmetic repair on flagstone, and what if my crack falls around the 1/4-inch line?
As a rule of thumb, cosmetic mortar repair products are best when the crack is under about 1/4 inch and the stone edges are still stable. If your crack is near that threshold but the stone face shows movement signs (rocking, hollow sound, or diagonal patterns across several stones), lean toward lifting and re-setting rather than trying to bridge a moving gap.
What’s the best way to keep polymeric sand from washing out during the joint repair?
Use a light, controlled wetting method. Sweep filler in fully, remove excess from the surface once it’s in place, then wet with a fine mist that’s just enough to activate, not enough to flood. If you see washed material staining the stone face or forming tracks, stop and let it settle before attempting any additional fill.
Should I water the patio immediately after applying polymeric sand, or can I wait?
Don’t guess based on time alone. Follow the activation instructions in the product label, and base timing on conditions like temperature and dryness. In very hot or windy weather, the sand may need a more careful misting schedule, but the goal stays the same, activate gently without over-saturating.
Can I use a pressure washer to clean the joints before repairing cracks?
Usually no. High pressure can dislodge joint material and subtly enlarge joints or undercut bedding. Use a stiff brush, vacuum, and careful hand tools, and only use water with a gentle approach if the repair plan allows it, then ensure the stone is fully dry before filling.
Why do my cracks come back in the same lines even after I re-fill the joints?
That pattern usually points to the base or drainage path under that area. Common causes are weak or eroded base, repeated saturation from pooling, or seasonal heaving that keeps moving the same stones. If the stones rock or you keep seeing hollow sounds, the “fix” needs re-setting and base correction.
What should I do if my repair area has a raised mound of mortar or hard sand after curing?
Knock it down so water cannot collect against the stone edge and to avoid trip hazards. Use a stiff brush and fine grit abrasion for small bumps, and for mortar humps remove only what’s protruding. After adjustments, re-check that the joint is still filled and not left with a channel that lets water in.
Is sealing still useful if I repaired only a few cracks, not the whole patio?
It can be, especially in freeze-thaw climates, but apply sealer based on the whole patio’s exposure, not just the repaired spot. A local patch that’s sealed while surrounding stones aren’t can darken differently, and sealing won’t prevent cracking if the underlying base is still saturating or moving.
How do I choose between re-pointing with a softer mortar versus using polymeric sand when joints keep cracking?
If your patio is dry-laid (stones not bonded with mortar to the base), polymeric sand often matches the movement better. If your patio is mortared and is experiencing seasonal movement, switching to a more flexible approach, such as Type N rather than a rigid mix, can reduce repeat joint cracking. The key decision is how the patio was originally constructed and how much movement the base sees.
When is replacement the better choice instead of repeatedly patching cracked flagstones?
Replacement is usually the better call when stones are broken into multiple pieces, when the crack is wider and reappears quickly after repairs, or when a large section shows coordinated cracking patterns that suggest widespread base failure. If more than a small localized area needs lifting and re-bedding, labor often shifts toward replacement or a broader reset.
Next Article
How to Repair a Stone Patio: Step by Step DIY Guide
Step-by-step DIY guide to repair a stone patio: fix loose stones, uneven areas, weeds, damaged units, base, joints, and