Most patio cracks can be filled in a single afternoon with a $10–$20 tube of concrete crack sealant or a bag of polymeric jointing sand, depending on what your patio is made of. The key is matching the right product to the crack type and doing the prep work properly, because a repair that fails in one season almost always traces back to skipped prep or the wrong filler, not bad luck.
How to Fill Cracks in a Patio: DIY Repair Steps

Talia Lang
29 Apr 2026
Why patio cracks happen (and when they're actually serious)
The most common cause of cracking in concrete patios is shrinkage. As fresh concrete cures and dries, it contracts slightly, and if that movement is restrained by the ground, a footing, or an adjacent structure, it cracks. The Portland Cement Association has documented this as the single most frequent cause of concrete cracking, and it's why you'll often see a hairline crack appear in a brand-new slab within the first year. These shrinkage cracks are cosmetic annoyances, not structural emergencies.
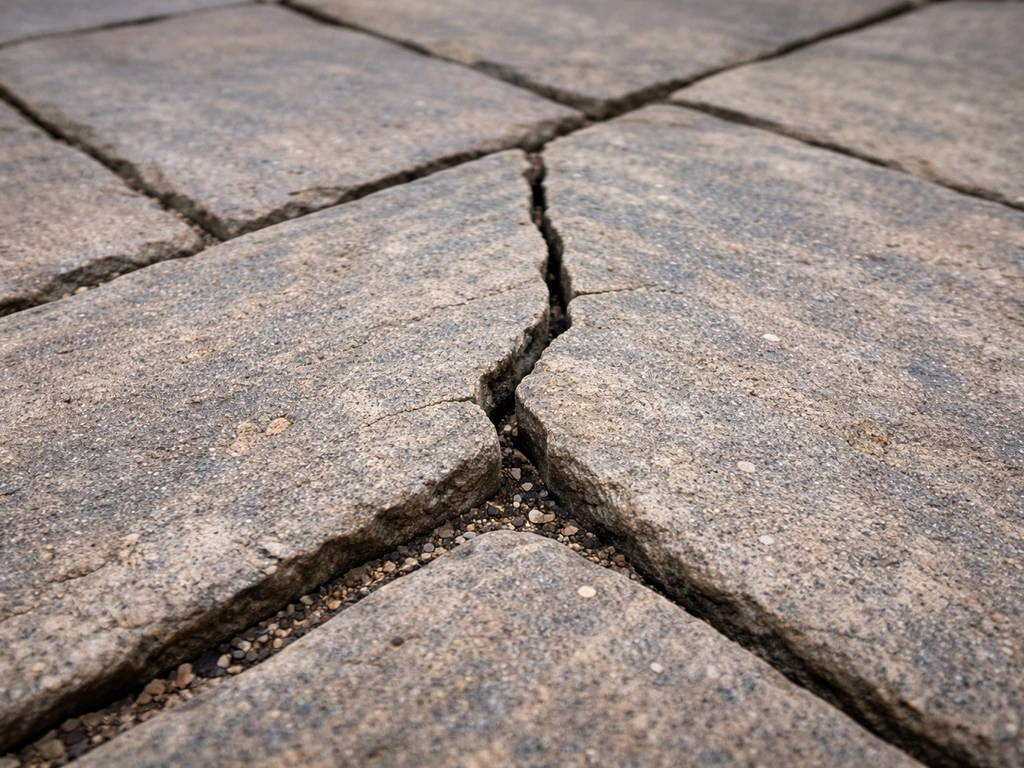
After that, thermal movement is a big contributor. Concrete and pavers expand in summer heat and contract in winter cold. Over years of cycling through those temperature swings, joints open up and surface cracks grow. If you're in a freeze-thaw climate, the problem compounds: water seeps into a crack, freezes, expands, and physically wedges the crack wider. Left alone, what was a hairline crack in October can be a 3/4-inch gap by March.
The cracks you need to worry about are those caused by soil movement underneath the slab. Settlement (soil compressing or washing away) and heaving (frost, tree roots, or drainage problems lifting the ground) both cause the slab to move unevenly. These cracks are different in character: one side of the crack sits higher than the other. That vertical displacement is the tell-tale sign that you're dealing with ground movement, not simple shrinkage.
A crack that runs all the way through the full depth of the slab is also worth taking seriously, even if it looks level. Full-depth cracks allow moisture to reach the base layer underneath, which can accelerate further damage, especially through freeze-thaw cycles. FHWA describes a full-depth repair framework for concrete pavement distress that extends through the slab depth, which is why surface crack filling can be insufficient Surface cracks grow. Seal them promptly to stop water intrusion, and keep an eye on whether they grow.
Figuring out what you're dealing with before you buy anything
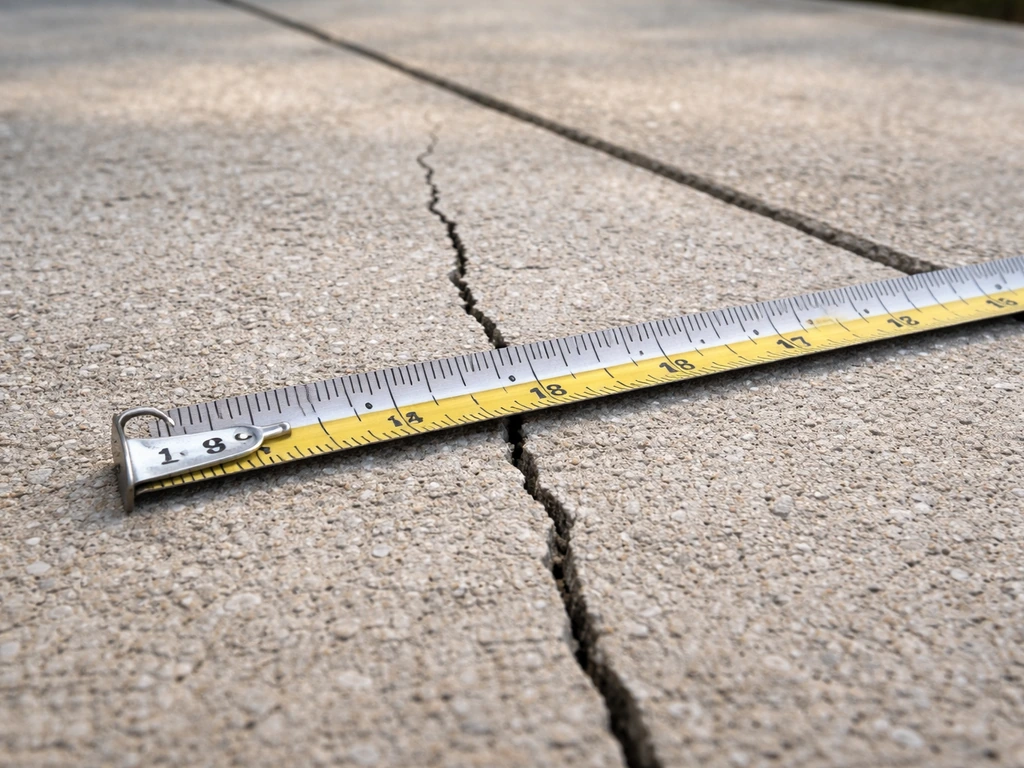
Spend five minutes assessing the crack before you reach for a product. The repair approach changes significantly depending on what you find.
Hairline cracks (under 1/8 inch wide)
These are the most common and the least urgent. If both sides of the crack are level with each other and the crack hasn't changed size since you first noticed it, you're looking at a cosmetic issue. A liquid concrete crack sealer handles these easily. The goal is keeping water out so the crack doesn't grow.
Medium cracks (1/8 inch to 1/2 inch wide)
Still DIY-able, but you'll need a thicker product, a caulk-style concrete crack filler or a vinyl concrete patching compound rather than a thin liquid sealer. Check whether both sides are the same height. If they are, you're probably dealing with thermal movement or old shrinkage. If one side is higher, stop and read the professional help section below.
Wide gaps, heaving, or displacement (over 1/2 inch, or any vertical offset)
Anything wider than half an inch, or any crack where one side of the concrete is noticeably higher than the other, is a red flag. So is a crack that keeps coming back after you've already filled it. These are signs of active movement in the base, and filling the surface crack without fixing the underlying cause is a temporary patch at best.
| Crack Type | Width | Sides Level? | Likely Cause | DIY Fix? |
|---|---|---|---|---|
| Hairline | Under 1/8" | Yes | Shrinkage or thermal | Yes — liquid crack sealer |
| Medium | 1/8" to 1/2" | Yes | Thermal movement, age | Yes — crack filler/caulk or patching compound |
| Wide | Over 1/2" | Yes | Settlement or old movement | Maybe — assess carefully before filling |
| Heaving/displaced | Any width | No (offset) | Frost heave, roots, soil failure | No — get a pro involved |
| Recurring | Any width | Any | Active base movement | No — surface fill won't hold |
Choosing the right materials
There's no single universal crack filler, and using the wrong one is one of the most common DIY mistakes. Here's a practical breakdown of what's on the shelf and when each one makes sense.
For concrete and cement patios

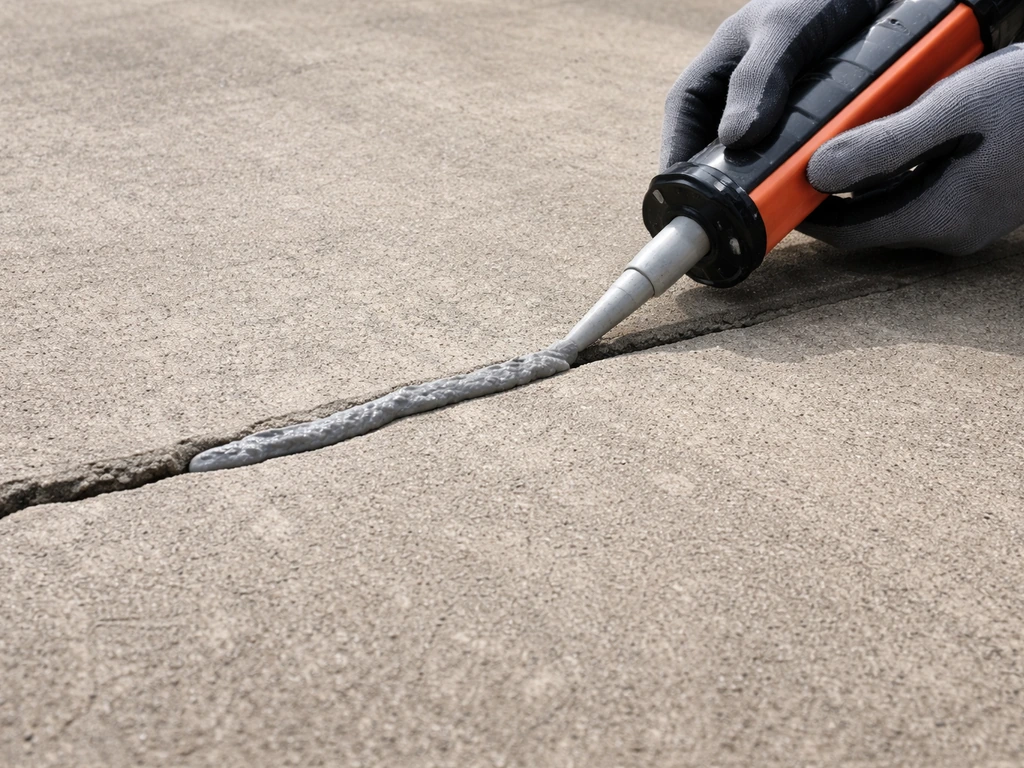
- Liquid concrete crack sealer (like QUIKRETE Gray Concrete Crack Seal): Best for hairline cracks under 1/8 inch. Pours in and self-levels. Easy to apply, dries relatively fast.
- Polyurethane self-leveling sealant (like QUIKRETE Self-Leveling Polyurethane Sealant): Good for medium-width cracks in a flat surface. Flexible after curing, which helps it survive thermal movement. Tack-free in about 60 minutes at room temperature.
- Latex or vinyl concrete crack filler (like Sakrete Crack Filler or QUIKRETE Concrete Repair): Works well on cracks up to 1/2 inch wide and 3/8 inch deep. Comes in a caulk tube and bonds well to clean concrete.
- Cementitious patching compound (like Sakrete Concrete Repair or Mapei Planitop products): For wider or deeper repairs where you're actually rebuilding material. Apply only when temps are between 45°F and 95°F (7°C to 35°C).
- Two-part rapid-cure crack repair (like QUIKRETE FastSet Concrete Crack Repair): Faster return to service, good when you can't wait a full day.
For paver patios
- Polymeric jointing sand (like Techniseal HP NextGel or RG+): The standard solution for re-filling joints between pavers that have opened up, eroded, or lost their sand. Activates with water and hardens to resist washing out and weed intrusion.
- Regular kiln-dried jointing sand: Works for temporary or budget refills, but washes out much more easily and doesn't bind like polymeric sand does.
- Paver repair adhesive: For a paver that's cracked itself (not just the joint between pavers), an adhesive can glue pieces back together before re-setting.
One thing worth noting: if your patio is flagstone or natural stone rather than cast concrete or manufactured pavers, the repair approach overlaps with both categories above but has some specific considerations around matching mortar color and working with irregular joint widths. For a flagstone patio, focus on cleaning out loose debris, choosing the right patch or mortar mix, and matching the joint widths so the repair holds up as weather cycles how to fix cracks in flagstone patio. Similarly, brick patios with joint failures have their own nuances around mortar-based repointing. For detailed steps on how to fill cracks in brick patio, make sure you prep the joints, choose the right mortar or filler, and let the repair cure properly.
Step-by-step: filling cracks in a concrete patio
Surface prep is the single most important part of this job. I know that sounds like something every DIY guide says, but with crack repair it's genuinely true, a repair that bonds to dirty or dusty concrete will fail within a season. Spend more time on prep than on the actual filling. If you follow the steps below, you can learn how to fix cement patio cracks and keep the repair from failing the next time weather hits filling cracks in a concrete patio.
- Clean out the crack. Use a wire brush, a narrow chisel, or even a flat-head screwdriver to scrape out any loose concrete, debris, moss, or dirt. You want to get down to solid material on both sides of the crack. A shop vacuum is ideal for pulling out the loosened debris.
- Widen and shape the crack if needed. For cracks between 1/8 and 1/2 inch wide, use a cold chisel and hammer (or an angle grinder with a crack-chasing blade) to open the crack into a V-shape or a uniform channel. This gives the filler more surface area to grip. Aim for consistent width throughout — a jagged crack filled unevenly will crack again at the thin spots.
- Remove all dust. This step is non-negotiable. Dust and fine particles act as a bond breaker between the filler and the concrete. Blow out the crack with compressed air, then vacuum again. If you have a pressure washer, a 3,500 psi pass over the whole repair area works well. Let the concrete dry fully before applying any filler.
- Apply a concrete bonding agent if using a cementitious patch. For small liquid sealers or polyurethane caulk, skip this step. But if you're troweling in a patching compound, a bonding agent brushed into the crack first dramatically improves adhesion.
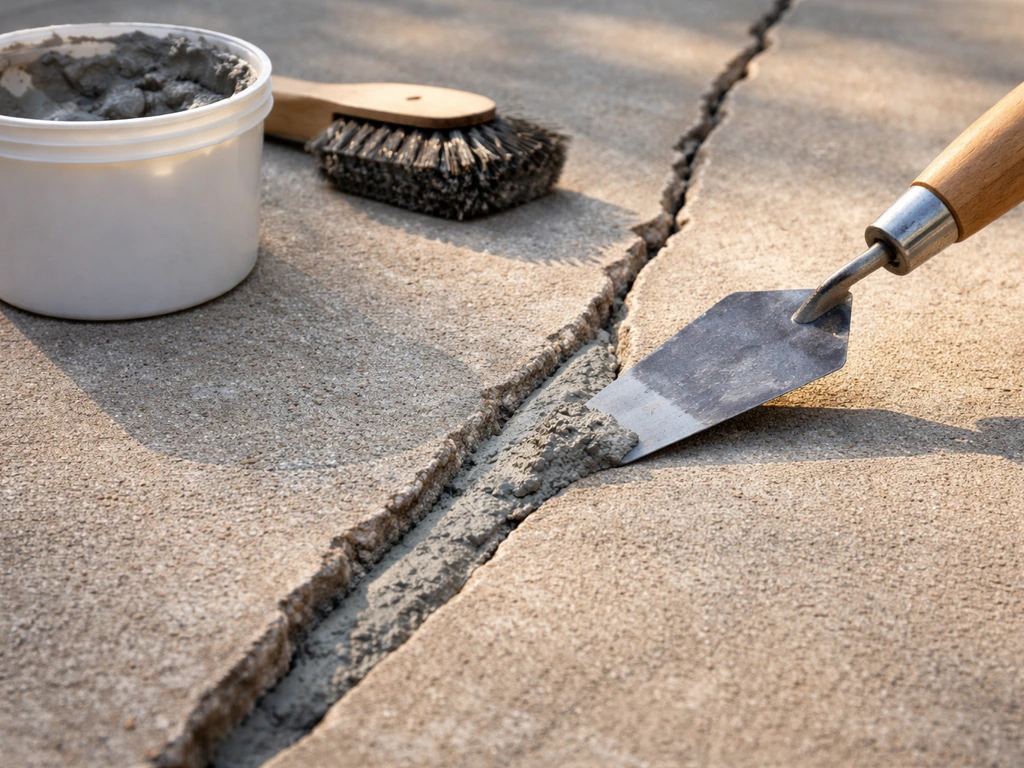
- Fill the crack. For liquid sealers, pour slowly and let it self-level. For caulk-tube products, work steadily from one end to the other, slightly overfilling so you can tool it flush. For cementitious compounds, pack the material in firmly and work it in layers for deep repairs — don't try to fill a deep crack in one shot, as it can shrink and crack again.
- Tool and level the surface. Before the product skins over, use a putty knife or margin trowel to scrape the filler flush with the surrounding concrete. Feather the edges so there's no raised ridge that could trip someone or catch water.
- Let it cure fully before any traffic. Polyurethane sealants are typically tack-free in about 60 minutes but need longer for full cure. Cementitious products need at least 24 hours, and ideally longer, before you walk on them. Keep the area dry during cure.
Temperature matters more than most people think. Don't apply cement-based repair products below 45°F (7°C) or above about 95°F (35°C). Cold slows and can prevent proper curing; heat causes the product to dry too fast and can lead to shrinkage cracking in the patch itself.
Step-by-step: re-filling joints in a paver patio
When joints between pavers open up, wash out, or crack, the fix is re-filling with jointing sand rather than a concrete-style filler. The process is straightforward but the timing and moisture conditions matter a lot, especially if you're using polymeric sand. Techniseal recommends waiting at least 24 hours after significant rainfall before installing polymeric jointing sand blank" rel="noopener noreferrer">timing and moisture conditions matter a lot.
- Check the existing joint depth. Polymeric sand needs at least 1.5 inches (4 cm) of joint depth to work properly. If your joints are shallower than that because the base is too high, the product won't perform as designed. Scrape out any old sand, weeds, or debris first.
- Wait for dry conditions. Don't apply polymeric sand if rain is coming within 24 hours, or if the pavers themselves are still damp from recent rain. Techniseal specifically recommends waiting at least 24 hours after significant rainfall before installing polymeric sand. Moisture already in the joint can prevent the sand from curing correctly.
- Pour the polymeric sand over the paver surface. Work it into the joints using a stiff push broom, sweeping diagonally across the joints. Pour more sand and sweep again until the joints are filled to about 1/8 inch below the top edge of the paver.
- Blow or sweep off the excess. Use a leaf blower on low setting (or a stiff broom) to clear polymeric sand off the surface of the pavers. Any sand left on top can create a haze when activated. This step takes more time than you'd expect — be thorough.
- Compact the sand lightly if needed. For larger areas or where joints are wide, a plate compactor run over the pavers (with a protective mat under it) helps settle the sand. For small repairs, tamping by hand works.
- Activate with water. Use a garden hose with a gentle spray setting (not a jet) to wet the joints. The goal is to saturate the sand to a depth of about 1.5 inches (4 cm) — you'll see the sand darken as it absorbs moisture. Avoid puddling or washing the sand out. Multiple light passes work better than one heavy soak.
- Keep off the patio until fully cured. Block foot and vehicle traffic for at least 48–72 hours to let the joints dry completely. The surface will feel firm before it's fully cured — full strength takes about 30 days, during which the joints are still building their final hardness. Keep temperatures above 32°F (0°C) throughout that curing period.
One thing to watch: if the bedding layer under your pavers doesn't drain well, moisture can get trapped under the polymeric sand and prevent it from drying properly. If you notice joints that stay soft or develop a powdery haze after activation, poor drainage is often the culprit. That's a bigger fix than just adding more sand.
Curing, sealing, and keeping the repair intact
Once the repair is cured, sealing is optional for concrete but genuinely worth doing if you're in a freeze-thaw climate or if the patio takes a lot of weather exposure. A concrete sealer penetrates the surface and reduces how much water the slab absorbs, less water in the pores means less freeze-thaw damage and slower crack development over time. Apply a penetrating silane or siloxane sealer (not a film-forming acrylic) after the repair has cured fully, usually 28 days for a cementitious patch.
For pavers with polymeric sand joints, sealing the surface after the sand has cured (allow the full 30-day cure) adds another layer of protection and helps the joints stay intact longer. Use a paver-specific sealer, not a concrete sealer. Some paver sealers also act as a joint stabilizer that further hardens the sand.
For ongoing maintenance, inspect the patio every spring and fall. Catch small cracks early, a hairline crack sealed in spring costs you $10 and 20 minutes. That same crack, ignored through two winters of freeze-thaw cycling, can become a 3/8-inch gap that needs a full patching compound repair. Keep drains and scuppers clear so water doesn't pool on the surface or against the edge of the slab, and trim back any tree roots that are pushing up near the patio.
When to stop DIYing and call a professional
I'd rather tell you this straight: some patio problems genuinely cannot be fixed with a bag of polymeric sand or a tube of crack filler, and trying to surface-fill them is money and effort wasted. Here's when to put the caulk gun down.
- The crack keeps coming back. If you've filled the same crack twice and it returns, something underneath is still moving. Filling the surface again won't change that.
- One side of the crack is higher than the other. Vertical displacement means heaving or settlement — a ground-level problem, not a surface one. The cause needs to be identified and corrected before any repair will last.
- Multiple cracks are appearing in the same area. A pattern of cracking across a section of patio usually indicates base failure, drainage problems, or serious soil movement underneath.
- There's standing water near or under the slab. Poor drainage is one of the most destructive forces acting on a patio. Water that pools against or under the slab softens the base, promotes freeze-thaw damage, and will keep generating new cracks. A concrete repair contractor or landscape drainage specialist needs to redirect that water before any surface work is done.
- The slab has sunk significantly on one side. A slab that's dropped more than about half an inch can sometimes be raised with slabjacking (mudjacking or polyurethane foam injection), but that's a professional job. Filling the crack on a sunken slab without addressing the void underneath just delays the inevitable.
- The patio is attached to your house foundation. Cracks near the foundation or where the patio meets the house warrant more scrutiny. Movement there can indicate foundation settlement, which is well outside DIY territory.
Getting a structural assessment costs less than redoing a failed repair twice. If anything on that list matches what you're seeing, the honest move is to have a concrete contractor or a structural engineer take a look before you spend time and money on a fix that won't hold.
FAQ
Can I fill a patio crack even if the crack is hairline and looks “cosmetic”?
Yes, but only for true surface shrinkage or hairline cracks where both sides stay at the same height and the crack is not actively widening. If the crack is vertical displacement (one side higher), or if the crack keeps reopening after filling, you need a thicker patch or a different approach, and you should stop DIY surface-filling.
Should I seal a crack after filling it, and when should I do it?
For freeze-thaw areas, a penetrating silane or siloxane sealer can reduce water absorption, but apply it only after the repair has fully cured (often about 28 days for cementitious patches). If you seal too early, moisture can get trapped in the patch and undermine bonding, especially in cold weather.
What if my patio is made of pavers, can I use the same concrete crack filler?
Don’t use cement-based crack fillers in paver joints. Paver joints typically need re-filling with jointing sand, and polymeric sand requires the right moisture level during activation. If you put the wrong product in the joint, it can harden incorrectly and the joint can fail again quickly.
How do I know polymeric sand failed because of drainage, not because I applied it wrong?
Polymeric sand can look fine right after installation but fail if the bedding layer traps water. If joints stay soft, remain dark and damp, or develop a powdery haze after you activate them, suspect drainage or an underlying base issue, and address that before adding more sand.
What temperature and weather conditions are safest for filling patio cracks?
Temperature swings matter. Avoid applying cementitious repair products below 45°F (7°C) or above roughly 95°F (35°C), because cold can prevent proper curing and heat can dry the patch too fast and encourage shrinkage cracking. If the weather is borderline, wait for a stable window.
Do I need to let the patio fully dry before I fill the cracks?
Yes, but you should keep it minimal and only before the filler. You need the crack clean and dust-free, then fill while the surfaces are dry enough for bonding. If you hose the crack and then fill immediately, excess moisture can stop adhesion and lead to early debonding.
At what crack width or repeat-failure should I stop DIY crack filling?
A crack that is wider than about 1/2 inch, or one that repeatedly comes back after you repair it, is a sign of ongoing movement. In that case, surface filling is usually a temporary cosmetic fix, and you should investigate settlement, heaving, or a drainage problem beneath the slab.
What should I do if one side of the crack is higher than the other?
If one side of the crack is noticeably higher than the other, that vertical displacement points to movement from settlement or heaving. In those situations, filling the top only can trap water and mask the problem, so plan on contractor assessment rather than just choosing a new product.
After repairing paver joints, should I seal the whole patio or just the repaired lines?
It’s different from concrete crack sealing. For paver joints, match the approach to joint width and use a paver-specific sealer if you choose to seal, because concrete sealers may not be compatible with polymeric sand joints. Also, sealing too soon after polymeric sand can interfere with the final joint stabilization.
Can tree roots cause patio cracks that keep coming back even after I fill them?
If your patio has trees nearby, roots can keep lifting one side of the slab and reopen cracks. Trim roots back only if allowed locally and safely, and if you see active heaving or recurring cracks near the same spot, address the source rather than repeatedly refilling the surface.
Next Article
How to Repair Cracks in a Stone Patio: DIY Steps
Diagnose crack type and follow DIY steps to clean, fill, and re-joint a stone patio so repairs cure and last.