Apply patio sealer on a dry, clean surface when temperatures are between 50 and 90°F, using a roller, brush, or pump sprayer depending on your product and surface type. If you want the right protection, knowing how to seal patio slabs properly is the key to preventing moisture problems and peeling can you seal patio slabs. Work in thin, even coats, keep a wet edge so you don't get lap marks, and give each coat 3 to 4 hours before adding another. This same approach applies when you’re sealing patio tiles, from cleaning and drying to choosing a compatible product and applying it in thin, even coats. Most patios need two coats. Stay off it for light foot traffic after 4 to 6 hours, but give it a full 24 to 72 hours before putting furniture back or letting heavy use happen. That's the short version. Everything below covers the decisions and prep work that actually determine whether your sealer holds up or peels off within a season.
How to Apply Patio Sealer: Step-by-Step DIY Guide

When to seal a patio (and when to hold off)
Sealing makes sense when your patio surface is structurally sound, properly drained, and showing signs it needs protection: fading colour, staining easily, absorbing water slowly instead of beading it off, or looking weathered and porous. A good sealer protects against freeze-thaw damage, oil and food stains, and UV colour fade, and it can give your patio a refreshed appearance with minimal effort.
But there are situations where sealing is the wrong move entirely. If your patio has an active moisture problem underneath (rising damp, poor drainage, or a damp shaded area that never fully dries out), sealing over it traps that moisture and causes the sealer to go milky, bubble, or peel within weeks. If you can see white powdery deposits on the surface, that's efflorescence: a sign that salts are migrating outward with moisture. Sealing over efflorescence doesn't fix the moisture source, and the problem will reappear beneath your new coating. Clean it off first, and ideally wait until the surface has stabilised and the efflorescence has stopped returning before you seal.
New installations also need time. If you've just had pavers or concrete laid, wait 30 to 90 days before sealing. This gives trapped moisture time to escape, lets polymeric sand cure properly in paver joints, and gives efflorescence a chance to show up and be dealt with while you can still fix it. Sealing too early is one of the most common reasons patio sealers fail early.
If your patio already has a sealer on it that's peeling, flaking, or going patchy, do not just apply a new coat on top. You'll need to strip or mechanically remove the failing coating first, otherwise your new sealer has nothing solid to bond to. Same logic applies to old wax or paint residue. And if your concrete has significant structural cracking or your pavers are sinking and shifting, sort those problems out before you seal or you'll just be sealing in the damage.
Prep work: clean, repair, dry, and mask
Prep is where most DIY sealing jobs succeed or fail. A sealer is only as good as what it's bonding to, and if that surface is dirty, damp, or damaged, the sealer will show it.
Cleaning the surface
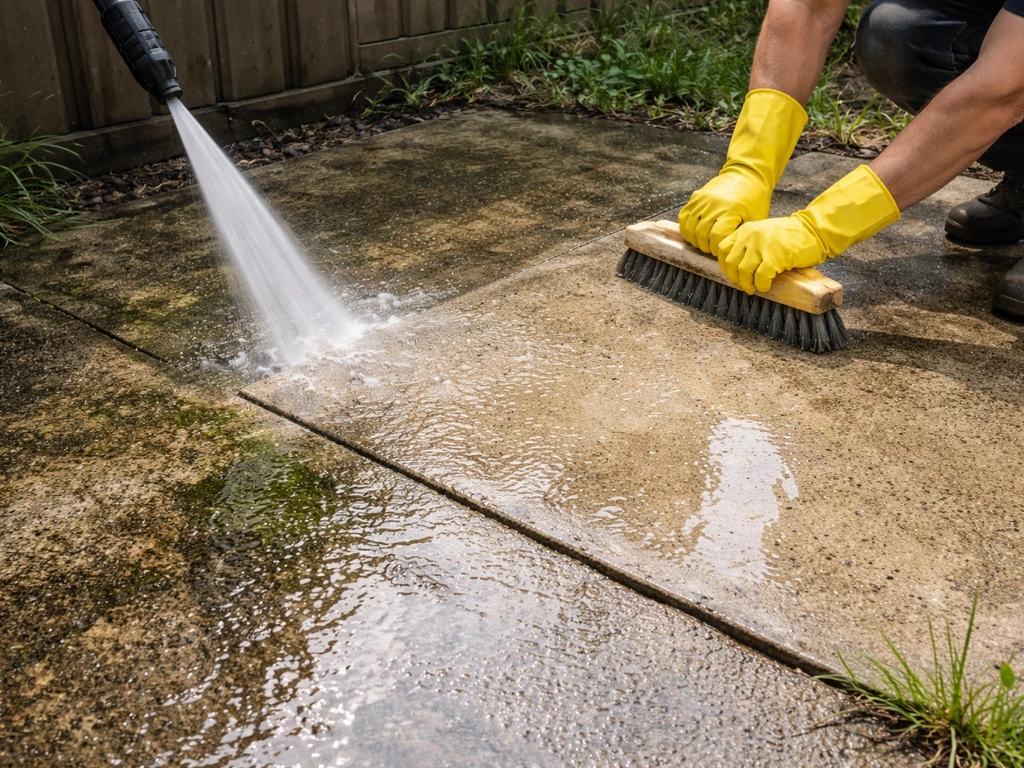
Start with a thorough clean. For most patios, a pressure washer set between 1,500 and 2,500 PSI will shift algae, dirt, and loose material without damaging the surface. Use a fan tip rather than a pencil jet, and keep it moving. For oil stains, use a degreaser first and let it dwell before rinsing. If you're dealing with efflorescence, an acid-based cleaner or masonry etcher will dissolve it. Just make sure you rinse the surface extremely thoroughly afterward because any chemical residue left on the surface will interfere with sealer adhesion. This is a step people rush, and it causes problems later.
Repairs
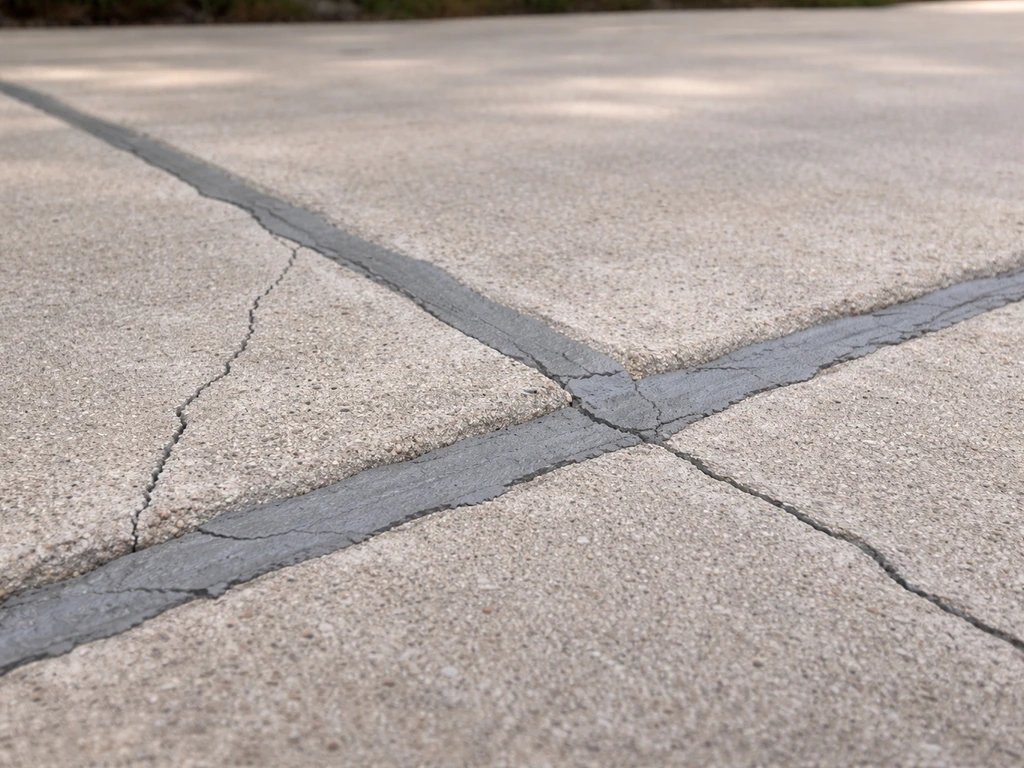
Once clean, inspect for cracks, crumbling joints, sunken pavers, or spalled concrete. Fill cracks in concrete with a suitable crack filler and let it cure fully before sealing. Repoint any eroded mortar joints in stone or brick patios. Re-bed any sunken or rocking pavers. Don't skip this step thinking the sealer will hide the damage. It won't, and sealing over cracked or unstable areas just locks in the problem.
Drying time
After washing, your surface must be bone dry before you apply sealer. Rust-Oleum's own guidance on their penetrating concrete sealer says to wait at least 24 hours after washing before application, and that's a minimum in good drying conditions. In shaded, humid, or cooler weather, wait longer. If you're not sure whether the surface is dry enough, do a simple plastic sheet moisture test: tape a 4 ft x 4 ft piece of clear polyethylene film flat to the surface and leave it sealed for at least 16 hours (this is the ASTM D4263 test). If you see condensation or dark damp patches under the plastic afterward, the surface isn't dry enough to seal. Wait another day and test again.
Masking and surroundings
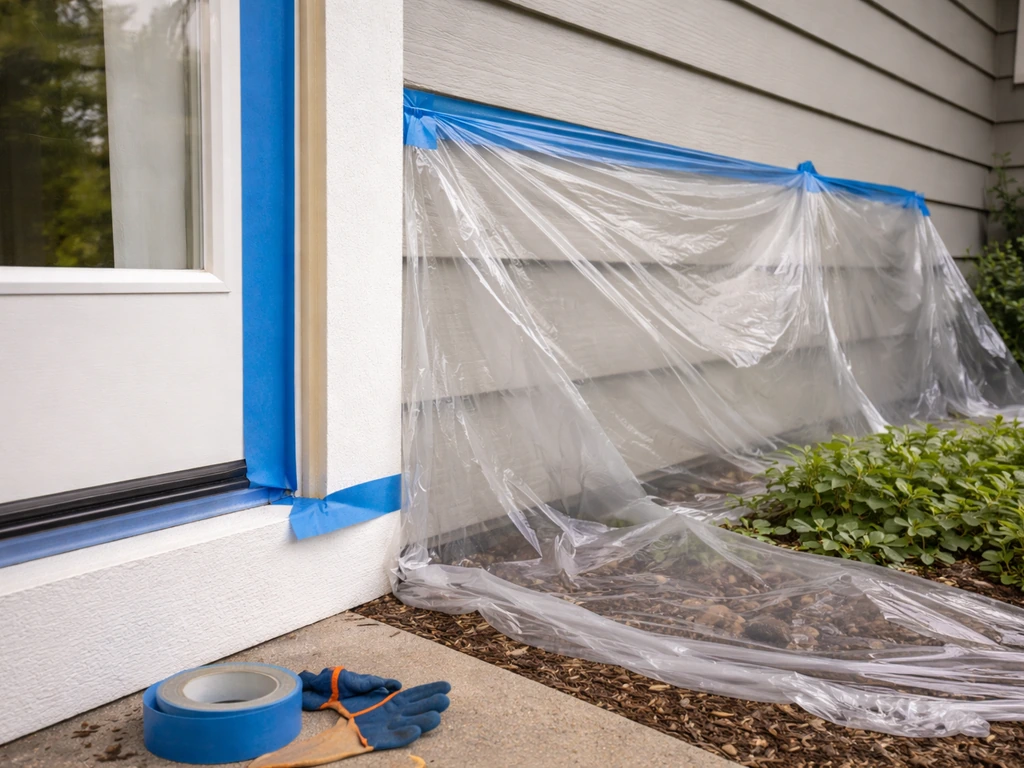
Mask off anything you don't want sealer on: house walls, door frames, timber edging, and any adjacent garden beds or grass. Some sealers, especially solvent-based film-forming products, will stain or damage surfaces they're not meant for. Use painter's tape and plastic sheeting. It takes ten minutes and saves a lot of grief.
Choosing the right sealer for your patio
The sealer you pick depends on your surface material and what you want it to do. Getting this decision wrong means either a product that doesn't bond, a finish you hate, or protection that doesn't suit the conditions. Here's how to think about it.
Penetrating sealers vs film-forming sealers

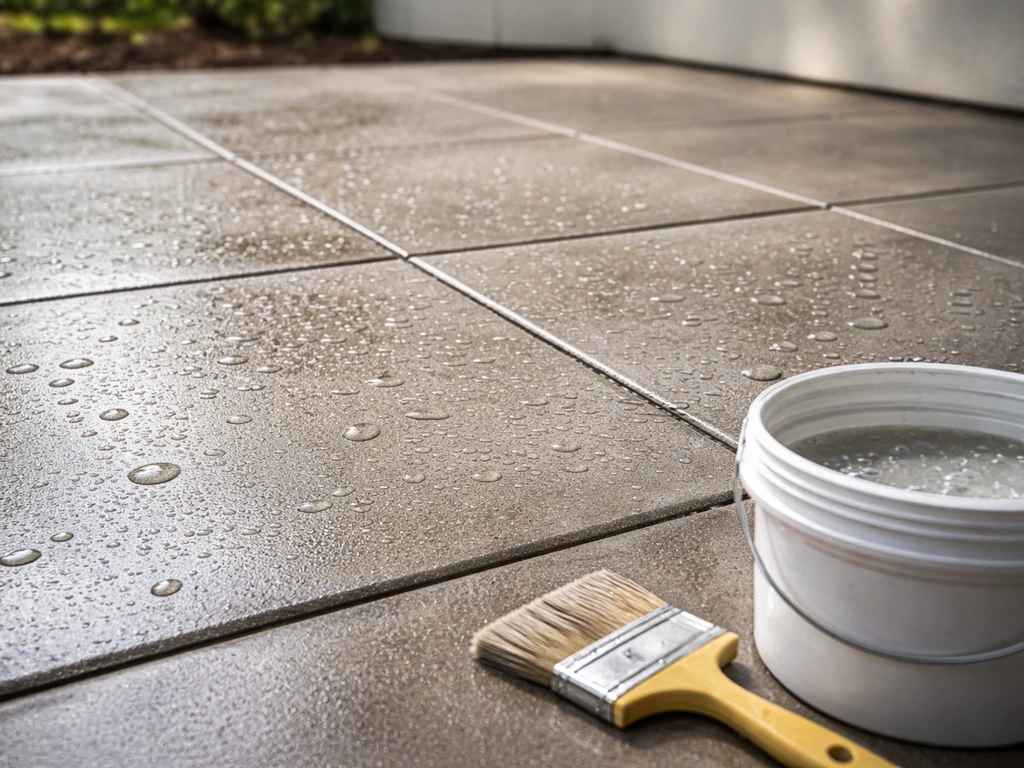
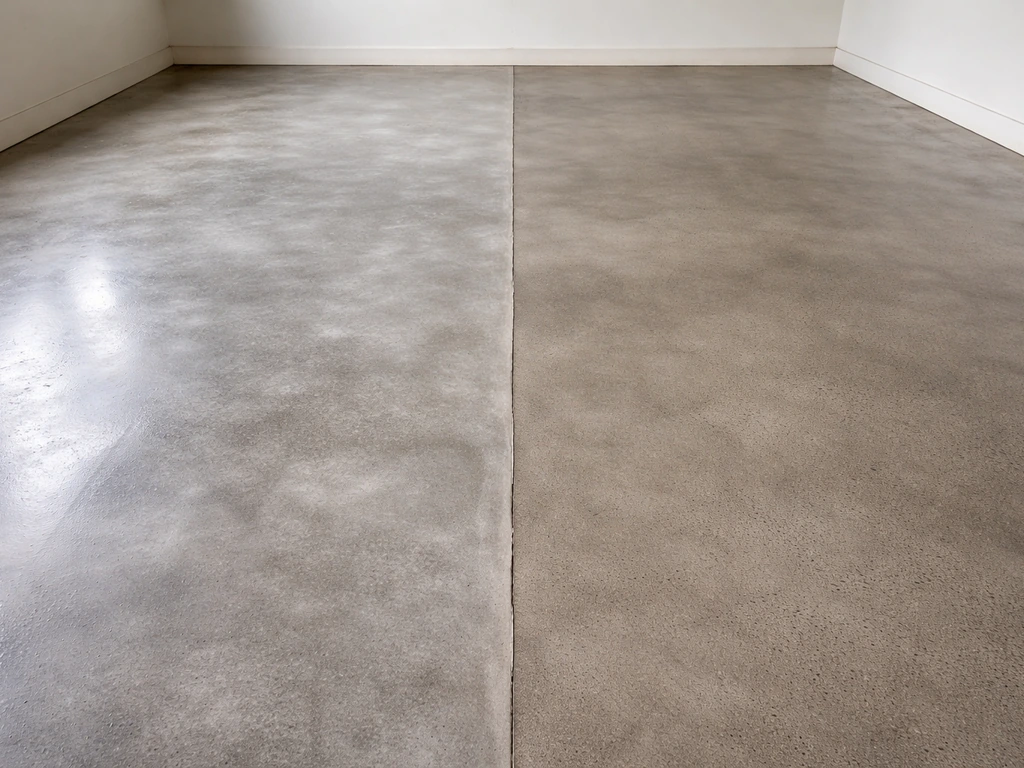
Penetrating sealers soak into the pores of the surface and chemically bond from within. They don't change the look of the surface much, if at all, and they won't peel or flake because there's no film on top to fail. They're ideal for natural stone, brick, and unsealed concrete where you want invisible protection. If you want your patio to look exactly as it does now but be better protected against staining and water damage, a penetrating sealer is the right call. Apply these with a pump sprayer to get an even, continuous wetting film across the surface.
Film-forming sealers sit on top of the surface and create a protective coating. They come in matte, satin, and gloss finishes, with gloss giving that popular wet-look enhancement. The trade-off is that glossy finishes can become slippery when wet, which is a real safety issue on an outdoor walking surface. If you go for a film-forming sealer, choose one rated for exterior use and check whether it has anti-slip additives, or plan to add them yourself. Film-forming sealers are more susceptible to peeling over time, especially if the surface wasn't fully dry or properly cleaned before application.
Sealer by surface type
| Surface Type | Recommended Sealer Type | Finish Options | Notes |
|---|---|---|---|
| Concrete patio | Penetrating or acrylic film-forming | Matte to high gloss | Acrylic gives wet look; penetrating for natural finish |
| Concrete pavers | Penetrating or polyurethane film-forming | Matte, satin, or gloss | Wait 30–90 days after new installation before sealing |
| Brick | Penetrating silane/siloxane | Natural/invisible | Film-formers can trap moisture in older brick |
| Natural stone (slate, sandstone, limestone) | Penetrating impregnator | Natural or slight enhancement | Avoid solvent-based film-formers on porous stone |
| Block paving | Paver-specific film-forming (e.g. Block-Guard type) | Natural to gloss | Also stabilises jointing sand when applied correctly |
If your patio surface has already been sealed before, check compatibility before applying a new product. A water-based sealer over an old solvent-based one often won't bond properly. When in doubt, do a small test patch in an inconspicuous corner and let it dry fully before committing to the whole area. If you're sealing slate or patio tiles specifically, the surface porosity and slip risk need particular attention, as those materials behave differently from concrete or block paving.
How to apply patio sealer step by step
Once your surface is clean, repaired, dry, and masked off, you're ready to go. Following these steps is the core of how do you seal a patio how to apply patio sealer. Check the weather forecast before you start: you need blank" rel="noopener noreferrer">temperatures between 50 and 90°F during application and for at least 24 hours afterward so the sealer cures properly. Don't apply if rain is forecast within the next few hours, and avoid direct midday sun on hot surfaces, which can cause the sealer to dry too fast and leave lap marks or bubbles.
Tools you'll need
- 9-inch roller with a medium or long pile sleeve (3/8 to 3/4 inch nap works for most patio surfaces; use longer pile for rougher surfaces)
- Pump garden sprayer or dedicated sealer sprayer for penetrating products
- Paintbrush or edging brush for corners, edges, and around obstacles
- Roller tray or pour directly for block-guard type products (some apply from a watering can first)
- Painter's tape and plastic sheeting for masking
- Old clothes and nitrile gloves (sealer is a pain to get off skin)
Application: step by step
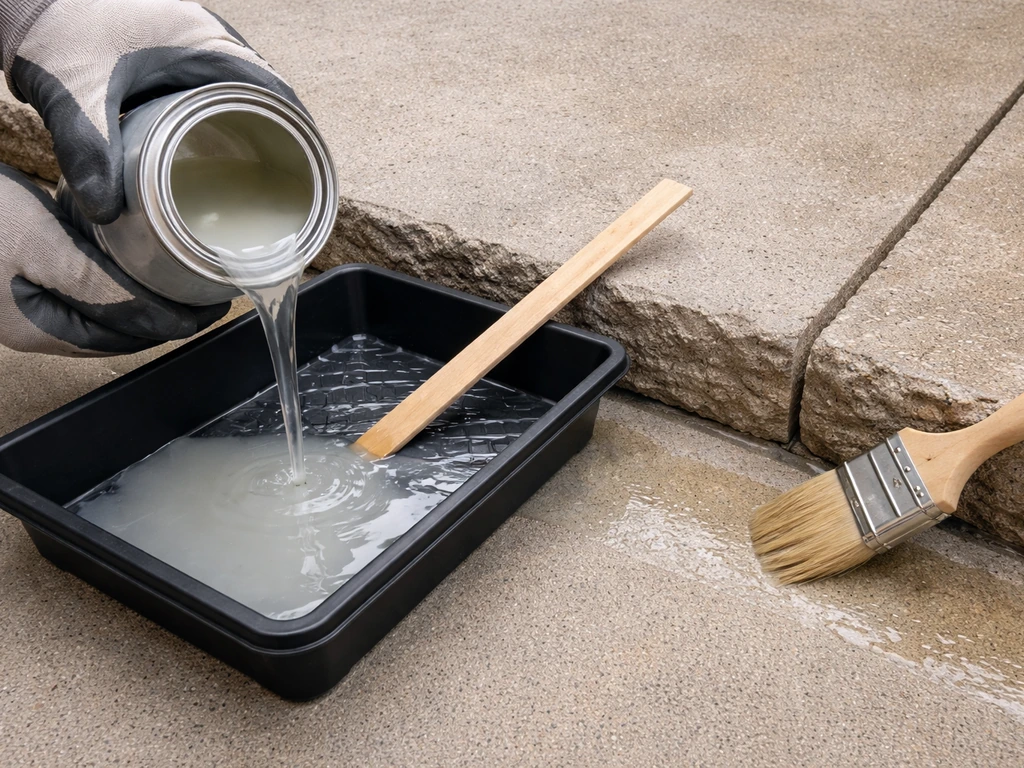
- Stir or shake the sealer well before opening. Some products separate in the container, especially if they've been sitting a while.
- Cut in around the edges first with a brush, working about 4 to 6 inches in from walls, steps, and borders. This gives you a clean edge the roller won't reach.
- For penetrating sealers applied by sprayer: hold the nozzle 12 to 18 inches from the surface and work in overlapping passes to create a continuous wet film. Don't let it puddle; if excess pools on the surface, spread it with a brush or roller within a few minutes before it dries.
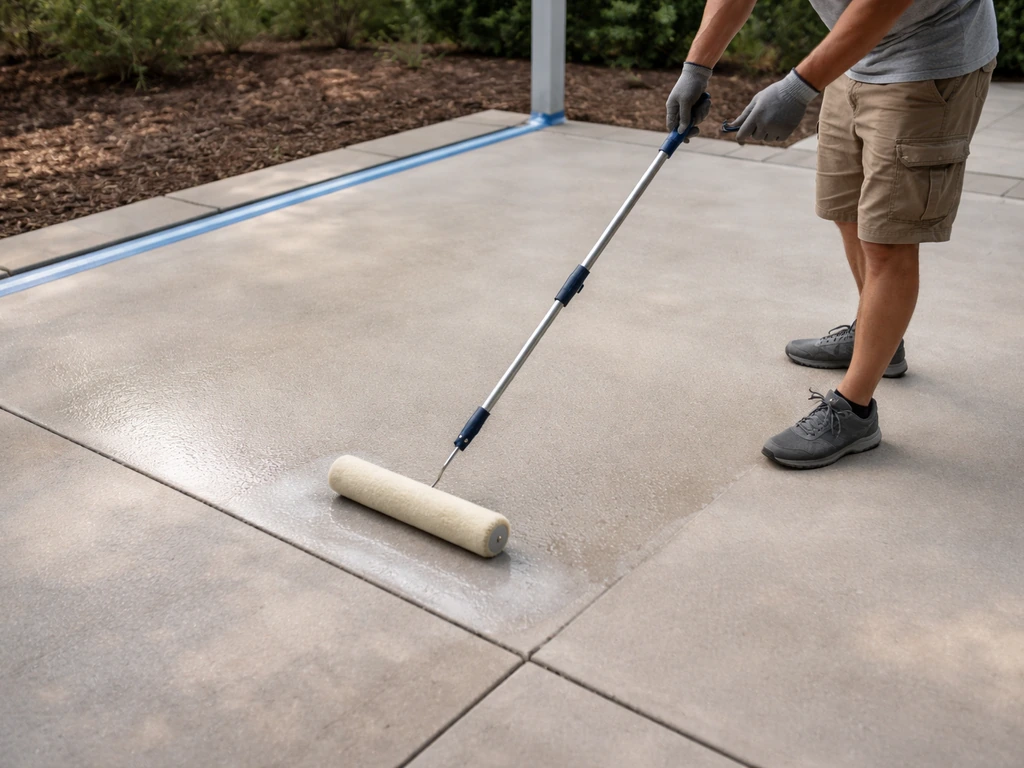
- For film-forming sealers applied by roller: load the roller moderately (don't overload it) and apply in smooth, even passes. Work in manageable sections, roughly 3 to 4 feet wide, moving in one direction. Keep your strokes parallel and consistent.
- Maintain a wet edge throughout. This means working quickly enough that the edge of your last stroke is still wet when you connect your next pass to it. If you let sections dry before connecting them, you'll get visible lap lines. Work with a helper if your patio is large.
- Apply thin coats. A thin coat applied properly beats a thick coat every time. Thick coats trap air and solvent vapour and are the primary cause of bubbling and haziness.
- Allow the first coat to dry for 3 to 4 hours (or per your product's instructions) before applying the second coat. Most products, including block paving sealers like Everbuild 409 Block-Guard, require a minimum of 2 coats. Don't skip the second coat thinking one thick one will do the same job.
- Apply the second coat in the opposite direction to the first. If you rolled left-to-right on the first coat, roll front-to-back on the second. This helps eliminate any thin spots from the first pass.
- Keep people, pets, and furniture off the surface for at least 4 to 6 hours for light foot traffic. Full cure takes longer.
Coverage rates to expect
Coverage varies significantly by product and surface texture. A smooth concrete surface will use less sealer than rough block paving or textured stone. As a rough guide, Everbuild 405 Path and Patio Seal covers around 8 square metres per litre per coat on typical surfaces, while a block paving sealer like Everbuild 409 Block-Guard covers 5 to 7 square metres per litre per coat. Everbuild 409 Block-Guard also specifies application temperatures above 5°C and below 35°C, with 3 to 4 hours between coats, and a minimum of two coats. If you’re following Everbuild patio sealer instructions, check the stated coverage rate and apply a full, even coat for best results. Buy slightly more than you think you need so you're not caught short mid-job. Running out halfway through and having to stop and go buy more is how you end up with a visible join line in your finish.
Common mistakes and how to fix them
Even when people follow the steps, things can still go wrong. Here's what the most common failure modes look like and what caused them.
Milky or hazy finish
This is almost always a moisture problem. Either the surface wasn't fully dry before sealing, or the sealer was applied in humid conditions and moisture got trapped under the film. It can also happen if rain fell on the sealer before it cured. On a penetrating sealer, milkiness is less common but can still appear if the product was applied too thickly. If the haziness is minor and the sealer is still curing, wait a full 72 hours and see if it clears. If it doesn't, you may need to strip and reapply.
Bubbles in the sealer
Bubbles form when solvent or moisture vapour tries to escape through a coat that's drying too fast on the surface. This happens when the coat is too thick, the surface is too hot (direct sun), or the application is too fast. Apply in thinner coats, work in the shade or cooler part of the day, and don't apply in temperatures above 90°F. If you already have bubbles, let the sealer fully cure and then lightly sand the bubbled areas and apply a thin corrective coat.
Streaks, roller marks, and lap lines
These happen when you lose your wet edge or apply inconsistent pressure with the roller. Using too dry a roller, working too slowly, or trying to cover too large an area alone are the usual culprits. If you can still see the roller marks while the sealer is wet, re-roll the area immediately in the perpendicular direction to blend them out. If the sealer has already dried, you'll need to wait until it's fully cured, lightly abrade the surface, and apply a fresh thin coat over the affected area.
Peeling or flaking
Peeling means the sealer didn't bond. The most common causes are: surface wasn't clean enough, surface was damp, an incompatible product was applied over an existing coating, or the sealer was applied too thickly and didn't bond uniformly. If peeling starts within the first season, you'll need to remove the failing sealer mechanically or chemically and start over. There's no shortcut here, and applying more sealer on top of peeling sealer just gives you more peeling sealer.
Uneven darkening or patchy finish
Patchiness on a colour-enhancing or film-forming sealer usually means the surface had inconsistent porosity (some areas absorbed more than others), or the sealer was applied unevenly. A second thin, even coat often fixes this. If certain areas look much darker than the rest, those sections may have had the sealer pool on them. On penetrating sealers, uneven absorption is normal on varied stone surfaces and usually evens out over a few weeks as the product redistributes through the pores.
Slippery when wet
Glossy film-forming sealers reduce traction, and some people only discover this after it rains. If your patio has turned into a slip hazard, you can apply an anti-slip additive (fine silica or aluminium oxide granules) mixed into a fresh coat of sealer, or use a matte topcoat designed for exterior use. Going forward, match the finish level to the location: high-gloss looks great on a sheltered patio, but a satin or matte finish is safer anywhere exposed to rain.
Tacky or sticky surface that won't dry
A sealer that stays tacky usually means it was applied too thickly, applied in cold or humid conditions that slowed curing, or the product is incompatible with something on the surface (like residual chemical cleaner that wasn't fully rinsed). Give it more time and warmth first. If it's still tacky after 48 to 72 hours, the coat is unlikely to cure properly on its own and will need to be removed.
Curing, maintenance, and when to re-seal
Curing times
Drying and curing are different things. The surface may feel dry to the touch in 4 to 6 hours and be ready for light foot traffic, but the sealer isn't fully cured for 24 to 72 hours depending on the product, temperature, and humidity. During that full cure window, avoid dragging furniture across the surface, getting it wet (if you can help it), or letting anything sit on it that might mark it. When the sealer has finished curing, you can move and use your stone patio table without leaving scratches or marks that can’t be repaired later. Keep traffic to a minimum. The curing window is when the sealer is most vulnerable to damage and impression marks.
Cleaning a sealed patio
Once cured, a sealed patio is much easier to clean than an unsealed one. For routine maintenance, a garden hose rinse or gentle pressure wash is usually enough. Avoid strong chemical cleaners, bleach, or acidic products directly on a film-forming sealer because they can degrade the coating over time. For oily or stubborn marks, a pH-neutral cleaner and a soft brush is the safest approach. Don't use a high-pressure jet at close range on a film-forming sealer because you can strip it or cause delamination.
When to re-seal
There's no fixed schedule that applies to every patio, but as a general guide, most film-forming sealers on concrete or pavers need reapplying every 2 to 3 years, and penetrating sealers can last 3 to 5 years or more depending on traffic and exposure. The practical signs that it's time to re-seal: water no longer beads on the surface and instead soaks in, the surface stains more easily, the colour looks faded or the finish looks worn, or you can see areas where the sealer has clearly worn through. Do a water bead test: pour a small amount of water on the surface and watch what happens. If it soaks in within 30 seconds rather than beading up, your sealer has lost its effectiveness and it's time to clean and re-apply.
Before you re-seal, do the same prep you did the first time: clean thoroughly, deal with any efflorescence or repairs, and confirm the surface is properly dry. If the existing sealer is still largely intact and in good condition, a compatible top-up coat may be all you need. If it's peeling or failing, strip it first. Cutting corners on prep the second time around causes the same problems as cutting corners the first time.
FAQ
Can I apply patio sealer if it is going to be cooler or warmer than the recommended temperature range?
No. If your patio is colder than about 50°F or the surface is still cooling after heat, the sealer can cure unevenly and trap moisture, leading to hazing or early peeling. Use the temperature window during application and keep conditions stable for at least 24 hours (longer in shade or humid weather).
When can I walk on the patio and move furniture after applying sealer?
For safety and durability, wait. Many sealers are walkable after several hours, but dragging furniture, setting heavy planters, or getting the surface wet during the 24 to 72 hour cure window can cause permanent marks. Plan to keep foot traffic light and fully place items only after the full cure time.
If my patio was sealed before, can I apply a different sealer on top without stripping?
Check the label, then do a small compatibility patch first. Water-based vs solvent-based products often do not bond well to the wrong chemistry, which can cause peeling. Apply the new product in a hidden spot, let it fully dry, then look for lifting, smudging, or a tacky film that never hardens.
What should I do if my patio shows white powder or I suspect rising damp?
Do not. If the surface has active moisture issues, sealing can trap moisture and cause milky haze, bubbling, or repeat peeling. White powdery deposits (efflorescence) also indicate migrating salts, so you should clean and wait until movement stops before sealing.
Is it okay to apply patio sealer over light dirt, algae staining, or existing surface buildup?
No, not as a first step. If you seal over algae and loose material, the coating will bond poorly and you may get patchiness or early failure. Use a thorough clean first, then confirm the surface is fully dry before any sealer coat.
How can I confirm the patio is truly dry enough after pressure washing?
It depends on the product, but in most cases you should not wet the surface after cleaning and before sealing. If you must rinse, allow full drying and verify with the plastic sheet moisture test (condensation or dark damp areas mean you need more time).
What is the best way to fix roller marks or lap lines while the sealer is drying?
If you notice roller lines or lap marks while the sealer is still wet, re-roll that area promptly with a consistent wet edge, typically blending perpendicular to the existing lines. If it has dried, you will usually need to wait for full cure, lightly abrade, then apply a thin corrective coat.
Why did my sealer bubble, and can I correct it after it cures?
Yes, but only if you have the right preparation. Bubbles usually mean the coat is drying too fast, or moisture or solvent vapor cannot escape due to thick application or hot conditions. If bubbles are fresh, switch to thinner coats and cooler conditions. If already cured, lightly sand and apply a thin corrective coat instead of building thickness.
My sealer is peeling. Should I scrape and reapply, or just apply another top coat?
If peeling starts, the safest approach is to remove the failing coating, then reseal with a compatible product on clean, dry, properly prepared substrate. Adding another layer over peeling generally creates more peeling because the new layer bonds to failure, not to the surface.
How often should I re-seal my patio, and what signs mean it is time to reapply?
Most sealers should not be treated like a permanent, maintenance-free film. Film-forming coatings often need reapplication sooner, while penetrating types generally last longer, depending on traffic and weathering. Use practical signs, like water no longer beading and the finish looking worn, to decide when to re-seal.
My patio is slippery after sealing, what options do I have to improve traction?
It is usually avoidable with the right finish choice. Glossy film-forming sealers can become slippery when wet. If you are sealed already and traction is an issue, you can add an anti-slip additive or switch to a matte or satin exterior finish for future coats.
How Do You Seal a Patio: DIY Steps, Sealants, and Prep
Learn how to seal a patio: choose the right sealant, prep, repair cracks, apply coats, and avoid moisture traps.