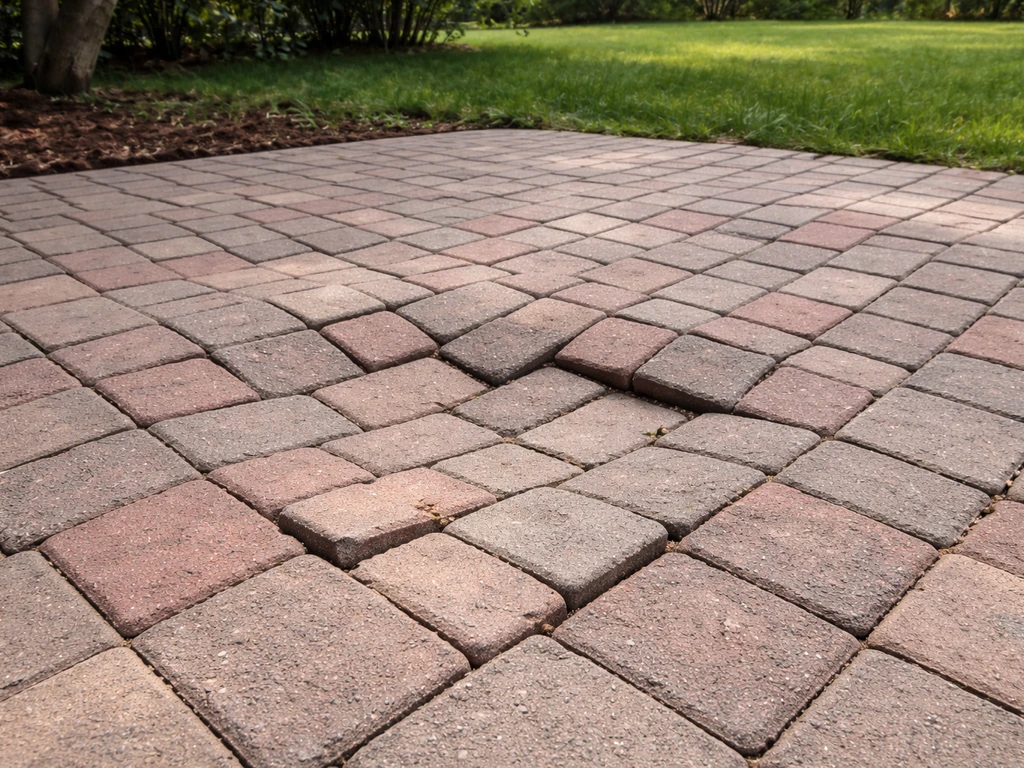
A sunken patio that pools water after rain is almost always fixable without a contractor, but only if you correctly identify whether the core problem is drainage, a failed base, settled soil, tree roots, or a crumbling concrete slab. Fix the wrong thing first and you'll be back out there in two years doing it again. This guide walks you through diagnosing the actual cause, choosing the right drainage solution, repairing your specific patio material, and doing it all in the right order so the fix actually holds. For step-by-step instructions on how to level a sunken patio, see our detailed leveling guide. For a step-by-step DIY plan to fix sunken patio, consult the detailed internal guide titled fix sunken patio (bf29acc0-b1bb-4508-b142-6ee0b227f931).
How to Drain a Sunken Patio: DIY Drainage & Leveling Guide

What we mean by a sunken patio and what this guide covers
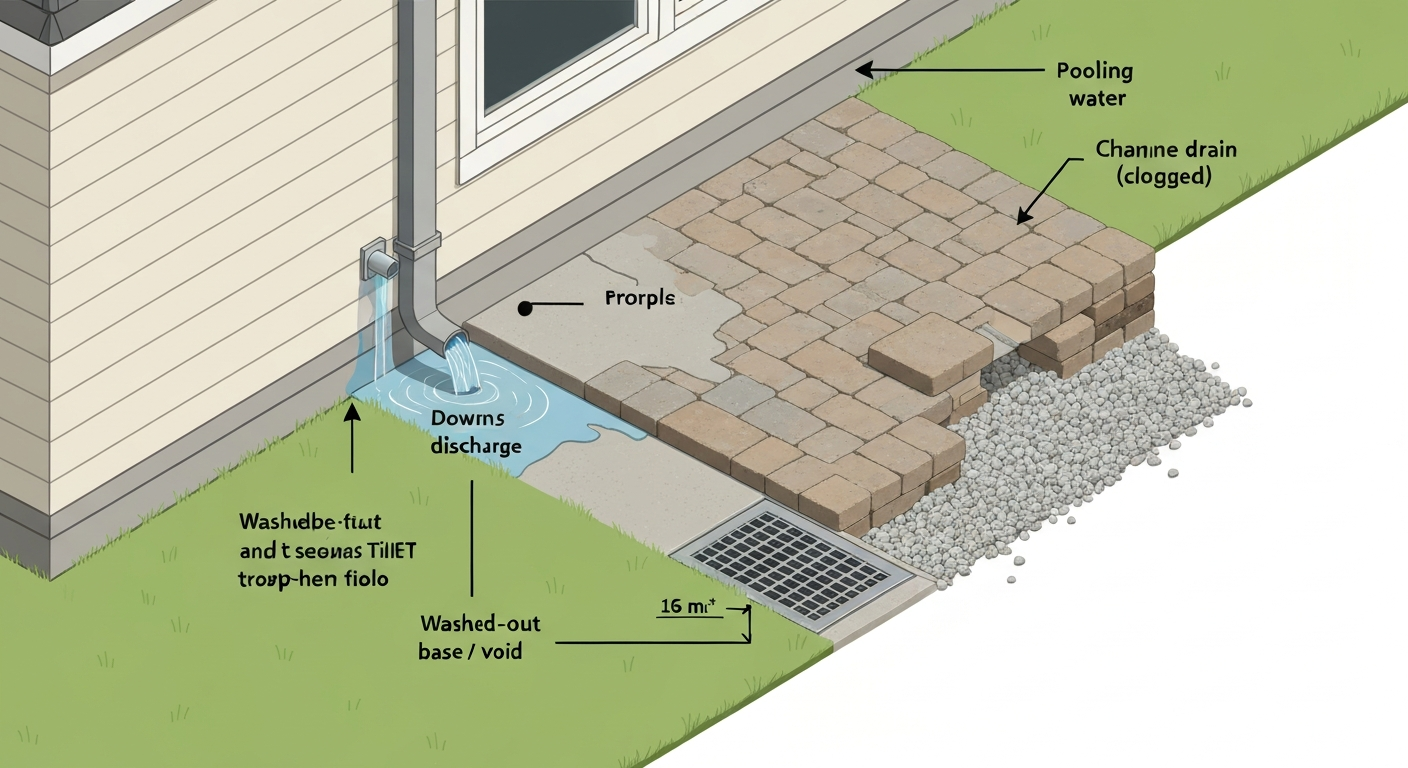
A sunken patio is any outdoor hardscape surface that has dropped below its original elevation, lost its designed slope, or developed low spots where water sits instead of running off. That might look like a brick patio where a section has dipped an inch, a concrete slab that's cracked and tilted toward the house, or a paver field that's gradually settled in the middle over several winters. The symptom is pooling water, but the cause is usually something happening underneath: a weak base, washed-out soil, compressed clay, frost heave, or roots creating voids. Getting the drainage right and leveling the surface are related jobs, but the sequence matters enormously.
Diagnose before you dig: what's actually causing the problem
Before you buy a bag of sand or rent a trenching tool, spend 30 minutes running through this checklist. Most sunken patios fail for one of five reasons, and each one has a different fix. Treating a base failure like a drainage problem, or vice versa, wastes time and money.
Diagnostic checklist
- Check the slope with a 4-foot level and tape measure. Set the level on the patio surface pointing away from the house. If the bubble shows the surface tilts toward the house, or reads flat, you have a grading problem. The IRC (R401.3) requires impervious surfaces within 10 feet of a foundation to slope away at a minimum of roughly 2%, which is about 1/4 inch per foot. A patio that was originally built flat or has settled inward violates this and will funnel water toward your foundation.
- Find the concentrated runoff sources. Walk around the perimeter in the rain or run a hose on the roof. Watch where downspouts discharge. If a downspout dumps directly onto or next to the patio, that single source of concentrated water can erode the base over time, no matter how well-built the patio was.
- Probe or expose the base. For pavers, pry up one or two units in the sunken area. You're checking: how deep is the gravel base (ICPI recommends 4–6 inches compacted for a residential patio, 6–8 inches on weak subgrades), is the bedding sand intact or washed away, and does the subgrade feel solid or spongy? For concrete, drill a 1-inch test hole or probe around the slab edges to detect voids underneath.
- Look for voids, roots, or animal activity. Visible gaps under a slab edge, sections that sound hollow when you tap them, or lifted sections near a tree all point to root intrusion or soil washout beneath the surface rather than a simple grade issue.
- Run a hose test. Run water onto the sunken area at moderate pressure for 5 minutes. Watch whether it pools on the surface (slope and drainage issue), disappears quickly into the base (base erosion or voids), or runs toward the house foundation (grade failure). Note exactly where the water goes — that path tells you where the outlet or correction needs to be.
| Cause | What you'll see | Primary fix needed |
|---|---|---|
| Poor surface drainage (grade) | Water pools on surface, tilts toward house, no slope visible | Regrade, extend downspouts, add surface channels |
| Base failure (compaction) | Spongy feel underfoot, settled area without cracking, thin or washed-out gravel base | Lift pavers or slab, rebuild base to correct depth and compaction |
| Soil settlement | Gradual, even sinking over large area, not near trees or downspouts | Mudjacking, foam lifting, or full base rebuild |
| Tree roots or voids | Heaved or hollow sections near trees, slab segments tilted in opposite directions | Root barrier, void fill, and reset or replace affected sections |
| Slab failure (concrete) | Cracking pattern across the slab, multiple broken pieces, hollow sound when tapped | Mudjacking, foam lifting, or partial/full slab replacement |
What to fix first: drainage, base, or slab
Here is the most important sequencing rule: always fix drainage before or alongside structural repairs, never after. If you lift and relay pavers over a base that still collects water from an undirected downspout or a flat grade, you'll be doing it again in a few years. That said, there's a sensible priority order based on severity.
- Start with the concentrated runoff sources. If a downspout empties onto the patio, extend it first. This is a 1–2 hour job and costs almost nothing, but it removes the single biggest cause of base erosion before you do any other work.
- Address the surface grade. If the patio tilts toward the house or is functionally flat, nothing else you do will fully work. Regrading or adding channels to create the required 1–2% slope away from the structure comes before base work on pavers, and before slab lifting on concrete.
- Fix the base or slab. Once water has a controlled path off the surface and away from the house, you can confidently lift pavers, rebuild the base, or have a slab lifted. Doing base work on a surface that still floods is rebuilding on a wet, unstable subgrade.
- Install subsurface drainage (French drains, dry wells) last, or in parallel with base repair when the soil itself is the water retention problem. If you have heavy clay soil that doesn't drain even after you fix the slope, you need to pull water out from below, not just redirect it on the surface.
DIY drainage solutions, from simplest to most involved
Regrading the surface
If your patio is pavers or loose-set materials, you can regrade by lifting sections and adjusting the bedding and base. For concrete, regrading means lifting the slab (covered below) or adding an overlay, which is a separate decision. The target is a minimum 1% slope (1/8 inch per foot) for good drainage, with 2% preferred. Within 10 feet of the house foundation, IRC R401.3 calls for impervious surfaces to slope at roughly 2% away from the building, and the first 10 feet from the foundation need to drop at least 6 inches total.
- Drive two stakes 10 feet apart, one at the house edge of the patio, one at the outer edge. Run a string line level between them.
- Measure down from the string at each stake. The outer stake should be at least 2 inches lower than the inner stake for a 2% slope over 10 feet. For every foot of patio, you want at least 1/8 to 1/4 inch of drop.
- For pavers: lift the affected section, adjust the base or bedding depth as needed to hit your target elevations, compact, and relay.
- Avoid the common mistake of just adding sand on top to build up a low spot. Sand without a properly compacted base underneath will settle again within a season.
Extending downspouts
Downspout water concentrated at the edge of a patio is one of the fastest ways to erode a base. The simplest fix is a rigid downspout extension that moves discharge at least 6 feet from the foundation, with 10 feet preferred. The better long-term fix is to bury a solid 4-inch PVC pipe from the downspout to a pop-up emitter or daylight outlet, sloped at 1–2%. Use solid (non-perforated) pipe for the conveyance run near the foundation, perforated pipe near a house is a way to introduce water into the soil right where you don't want it.
- Disconnect the downspout at the elbow closest to grade.
- Attach a solid 4-inch PVC or corrugated solid pipe to the elbow with a downspout adapter.
- Trench from the downspout to your outlet point, sloping at least 1% (roughly 1/8 inch per foot of run).
- Bury the pipe at least 6–8 inches deep to protect it from foot traffic and freeze-thaw.
- Terminate with a pop-up emitter that opens under flow and closes otherwise (keeps out animals and backflow).
- Common mistake: using flexible corrugated pipe for the whole run. It's tempting because it's cheap and easy, but corrugated pipe collects sediment, collapses over time under compaction, and is much harder to clean or snake than smooth PVC.
Simple surface channels and slot drains
When you can't achieve adequate slope across the whole patio surface (for example, a patio that's up against the house on one side and a step on the other, with no room to create fall), a trench or channel drain across the low end is an effective solution. Residential modular channel drains from brands like NDS and ACO come in 3–12 inch widths with grated tops that blend into the patio surface. The channel body collects water flowing across the surface and routes it to a 3–4 inch outlet pipe.
- Plan the channel location at the lowest point of the patio, or at the edge nearest the yard where water can be directed away from the house.
- Excavate a trench to the product's required depth plus 2–4 inches for the bedding. Follow the manufacturer's exact trench dimensions — most residential channel drains require a trench roughly 6–8 inches wide and deep enough to set the channel at the correct surface elevation.
- Pour 2–3 inches of concrete or compact crushed stone bedding per the manufacturer's specification. Channel drains that are set in compacted gravel instead of concrete will shift over time.
- Set the channel units level side-to-side, but slope the outlet end slightly lower (manufacturer specs typically call for at least 0.5–1% grade along the channel run).
- Connect the outlet to 3–4 inch solid PVC and run to an approved discharge point.
- Haunch the sides of the channel with concrete or compacted dense aggregate per the manual before backfilling and resetting the patio surface around it.
- Common mistake: setting the channel grate flush with the pavers but not accounting for the patio slope, so water still bypasses the drain and runs toward the house. The channel needs to be at or just below the patio surface at its lowest point.
French drains
A French drain is a gravel-filled trench containing a perforated pipe that intercepts groundwater or surface water and carries it away. Around a patio, French drains are most useful when the subgrade soil (often clay) holds water and keeps the base wet even after you've fixed the surface grade. They're also effective as a perimeter drain around the patio to intercept water before it reaches the base.
- Mark the trench line. For a patio perimeter drain, run it along the uphill side or the side nearest the house, where water enters the area. Plan your outlet: the pipe needs to daylight somewhere lower, connect to a storm system, or feed a dry well.
- Dig the trench. For a patio-perimeter French drain, typical residential depth is 12–24 inches. Width is commonly 6–12 inches. You need enough depth to set the pipe below the base material you're trying to drain.
- Slope the trench bottom at a minimum of 1% toward the outlet. That's about 1/8 inch per linear foot. Less than 1% and sediment settles out and the pipe slowly clogs.
- Line the trench with nonwoven geotextile filter fabric, wide enough to fold up the sides and overlap at the top by at least 12 inches. This fabric keeps soil fines from migrating into the gravel and clogging the system. It's the single most important long-term quality step in a French drain install.
- Pour 2–3 inches of washed, coarse gravel (3/4 inch clean crushed stone or river gravel — no fines) into the trench bottom.
- Lay 4-inch perforated PVC pipe on the gravel bed. Hard perforated PVC is preferred over flexible corrugated pipe for long runs because it holds its shape, drains faster, and can be cleaned with a sewer snake. Place the pipe with perforations facing down (holes at the 4 and 8 o'clock positions) so water enters from below rather than collecting debris from above.
- Backfill around and over the pipe with the same clean coarse gravel to within 2–3 inches of the surface.
- Fold the filter fabric over the top of the gravel and overlap the edges. Cap with a layer of pea gravel or topsoil depending on what surrounds the patio.
- Common mistake: using fine or mixed gravel with dirt and fines. This defeats the purpose of the filter fabric and clogs the pipe within a few years. Use clean washed stone only.
Dry wells and catch basins
A catch basin is a grated inlet box, typically 6–12 inches square, set into a low point in the patio surface. It collects surface water and pipes it away underground. It's the right solution when you have a specific low spot that collects water and you have a pipe route available. A dry well is a perforated container (or a gravel-filled pit) buried in the yard that accepts water from a pipe and allows it to slowly infiltrate into the surrounding soil. Dry wells work well when you don't have a daylight outlet for a downspout or French drain but you do have permeable soil beyond the clay zone.
For sizing, follow your local stormwater manual. Many jurisdictions publish prescriptive charts that relate roof or patio catchment area to dry well diameter and depth. A common minimum setback from the foundation is 5–10 feet depending on jurisdiction, and from property lines typically 5 feet, always check local rules before digging. See BMP Fact Sheets - San Francisco Public Utilities Commission (drywell & infiltration BMPs) for local guidance on setbacks, rock surrounds, and manufacturer catchment-area recommendations. Manufactured mini-dry wells handle small catchment areas (a single downspout, for example), while larger precast concrete ring drywells are used for bigger drainage areas. Pipe from a catch basin or downspout to a dry well should slope at a minimum 1% grade, using solid (non-perforated) pipe for the conveyance run.
- Setback from foundation: minimum 5 feet, 10 feet preferred
- Pipe slope from catch basin or downspout to dry well: at least 1% (1/8 inch per foot)
- Surround dry well with clean 3/4-inch washed gravel and wrap in filter fabric
- Include a cleanout access at the top for maintenance
- Do not use a dry well in heavy clay soil that doesn't percolate — the well will fill and not empty, creating a saturated zone near the patio
Connecting drainage work to your patio repairs
Drainage fixes and patio repairs need to be designed together, not treated as separate projects. The key principles are: your new drain outlet elevation must be lower than the patio surface at every point along the flow path; when you relay pavers or lift a slab, the finished surface elevation must maintain or improve the slope toward the drainage outlet; and edge restraints must be re-secured after any base work so that paving units can't drift laterally and create new low spots over time.
If you're installing a channel drain and relaying pavers in the same project, install and bed the channel drain first, then set your paver elevations to slope toward it. Don't set pavers to their old elevations and then try to fit a drain in afterward, you'll either set the drain too high and it won't catch runoff, or you'll create a trip hazard at the drain edge. Similarly, if you're running a French drain around the patio perimeter and relaying the edge section of the patio, coordinate the trench work with the base rebuild so you're not re-excavating the same area twice.
Fixing a paver or brick patio: lift, rebuild, relay
Pavers and brick patios are the most DIY-friendly to repair because they're designed to be lifted and reset. Unlike concrete, you don't need specialized equipment to access and fix the base, just patience and a methodical approach. If you have a brick patio that's sinking in sections, the repair almost always involves pulling up the affected units and rebuilding from the base up. If your brick patio is sinking, see a step-by-step guide for lifting, rebuilding, and stabilizing it my brick patio is sinking. For step-by-step instructions on how to fix sinking patio stones, see the related guide ff482c10-b242-43de-bef5-daa319bab700. blank" rel="noopener noreferrer">ICPI Tech Spec 2 / ICPI guide specifications for construction and repair (paver repair guidance) recommends lifting affected pavers, removing contaminated bedding/base to sound material, compacting base in lifts to target depth, reestablishing a ≈1" bedding sand layer, resetting pavers, sweeping joint sand (or polymeric sand), and compacting the surface.
- Remove the pavers or bricks from the sunken area. Use a flat pry bar or a purpose-made paver puller. Stack them nearby on a flat surface so you can identify any broken units that need replacing.
- Excavate and inspect the base. Remove all the bedding sand and enough base material until you reach undisturbed, firm subgrade. Measure the depth of your existing base. ICPI standard for a residential pedestrian patio is 4–6 inches of compacted aggregate base on stable soil, or 6–8 inches on weak or clay subgrades.
- If you find voids, washed-out material, or roots, address those now. Fill voids with compactable aggregate. Cut and remove roots that are actively causing displacement if possible (consult an arborist for large root systems near valued trees).
- Add new base material in compacted lifts of no more than 4 inches loose depth. Use 3/4-inch compactable crusher run or road base aggregate. Compact each lift with a plate compactor to at least 98% of standard Proctor density — in practical terms, compact until the surface stops visibly moving and feels solid underfoot. Rent a plate compactor rather than hand-tamping; hand-tamping doesn't achieve adequate compaction.
- Set a 1-inch nominal layer of coarse bedding sand (ICPI specifies concrete sand or No. 8 stone as the bedding layer). Screed it flat to your target elevation using two parallel screed rails set at the correct slope.
- Reset pavers or brick. For cuts at the edges, use a masonry saw or angle grinder with a diamond blade.
- Re-secure edge restraints. Plastic snap-together edge restraints secured with 12-inch spikes are standard for pavers. Without a properly secured edge restraint, the outer courses will gradually migrate outward, causing the field to lose support and sink again.
- Fill joints with polymeric sand. Sweep it in, compact the surface with the plate compactor (use a rubber pad or paver pad to protect the surface), sweep in a second application, and wet it down to activate the polymer binder. Polymeric sand resists washout far better than regular jointing sand, which is one reason patios installed with plain sand lose joint material and begin to sink.
- Common mistakes: using plain construction sand as bedding (it washes out), skipping the edge restraint re-install, not compacting base lifts adequately, and setting final pavers at the old (wrong) elevation rather than the corrected slope.
Fixing a concrete patio: lifting and leveling options
Concrete patios are a different challenge because you can't easily access or rebuild the base without removing the slab. There are three main approaches depending on how bad the situation is.
Mudjacking (slab lifting with cement slurry)
Mudjacking is a process where a contractor drills 1.5–2 inch holes through the slab, pumps a slurry of cement, soil, and water beneath it, and uses the hydraulic pressure to lift the slab back to grade. It's a well-established method for raising sunken concrete, typically costs $3–$8 per square foot, and is usually a contractor job, the equipment (a grout pump and mixing equipment) isn't practical to rent for a single residential project. Mudjacking is a good option when: the slab is structurally sound (not cracked into many pieces), the void or settlement is under a relatively large section, and you want to restore the original slope without replacing the concrete.
The drainage connection: after mudjacking, verify the slab slope with a level before the slurry sets. Communicate your required slope (at least 1% away from the house, 2% preferred) to the contractor before work begins, because this is your one chance to set the grade correctly. After lifting, any channel drains or pipe connections that cross the slab edge will need to be re-checked for elevation alignment.
Polyurethane foam slab lifting
Foam lifting works on the same principle as mudjacking but injects two-part expanding polyurethane foam through smaller holes (about 5/8 inch diameter). The foam expands, fills voids, and lifts the slab. Advantages over mudjacking: lighter weight (so less new load on the subgrade), faster cure time (you can walk on it in 15–30 minutes), and smaller injection holes. Typical cost is $5–$25 per square foot, higher than mudjacking. Same drainage considerations apply: communicate your required slope to the contractor.
Partial or full slab removal and replacement
When a slab is cracked into multiple pieces, has failed reinforcement, or the subgrade problems are severe enough that lifting won't hold, removal and replacement is the right call. This is the most disruptive and expensive option ($6–$12 per square foot for removal and $8–$15 per square foot for replacement poured concrete, depending on thickness and reinforcement), but it's also the one opportunity to fix the base and grade completely. If you're doing a full replacement, this is when you install any French drains or perimeter drainage under the new slab, properly compact and grade the subbase, and add appropriate drainage slope before the new pour.
Partial sections can be removed if the damage is isolated. Use a circular saw with a diamond blade to cut clean control joints, then break out the damaged section with a jackhammer or sledgehammer and cold chisel. Partial replacement patches are functional but will always be somewhat visible unless you resurface the whole slab afterward.
Materials, tools, costs, and how hard each job actually is
| Method | Key materials | Key tools | Rental needed? | DIY cost range | Time (typical) | Skill level |
|---|---|---|---|---|---|---|
| Regrading (pavers) | Crusher run base aggregate, bedding sand, polymeric sand, edge restraint spikes | Plate compactor, screed rails, pry bar, level, rubber mallet | Plate compactor ($60–$90/day) | $150–$400 materials | Half day to full day | Intermediate |
| Downspout extension (buried) | 4" solid PVC pipe, fittings, downspout adapter, pop-up emitter | Spade or trenching shovel, PVC cutter, level | Trenching spade or power trencher for long runs ($80–$150/day) | $50–$200 materials | 2–4 hours | Beginner |
| Surface/channel drain | Modular channel drain kit, 3–4" solid PVC outlet pipe, concrete or dense aggregate for bedding | Cold chisel or angle grinder (to cut pavers), concrete mix, level | Angle grinder with diamond blade if cutting pavers | $80–$300 for drain kit, $50–$100 pipe and fittings | Half day to full day | Intermediate |
| French drain | 4" perforated PVC (rigid preferred), nonwoven geotextile fabric, 3/4" washed clean stone | Trenching shovel or power trencher, level, utility knife | Power trencher for runs over 20 ft ($150–$250/day) | $200–$600 for 20–40 ft run | Half day to full day | Intermediate |
| Dry well or catch basin | Manufactured dry well or precast ring, catch basin box, solid 4" PVC conveyance pipe, washed gravel, filter fabric | Shovel, level, pipe cutter | None usually needed for small installs | $150–$500 depending on size | 4–8 hours | Intermediate |
| Paver lift and relay | Crusher run base aggregate, bedding sand (concrete sand), polymeric sand, replacement pavers if needed, edge restraint | Plate compactor, pry bar/paver puller, masonry saw or angle grinder, level, screed rails | Plate compactor ($60–$90/day), masonry saw for cuts | $200–$800 depending on area | Full day to weekend | Intermediate to advanced |
| Mudjacking or foam lifting | Contractor-supplied slurry or polyurethane foam | Contractor equipment only | N/A — hire out | $400–$3,000+ depending on slab size | 2–6 hours (contractor) | Professional job |
| Slab removal and replacement | Ready-mix or bag concrete, rebar or wire mesh, base aggregate, plastic sheeting | Jackhammer, concrete saw, plate compactor, float, screed | Jackhammer ($80–$150/day), concrete saw ($100–$200/day) | $1,500–$5,000+ depending on size | 2–4 days | Advanced to professional |
Troubleshooting common problems after the fix
The drain is clogging repeatedly
If a channel drain or catch basin clogs with silt and debris within a season or two, the most likely cause is that fine soil is washing in from adjacent planting beds or an unsealed gravel area nearby. Add a filter fabric collar around the drain box or clean-chip gravel around the channel edges to slow sediment migration. For a French drain that's losing capacity, the problem is almost always that filter fabric was omitted or failed, a clogged French drain usually needs to be excavated and reinstalled with proper fabric and clean stone.
Recurring sinkage in the same spot
If the same section of pavers or slab keeps dropping, you haven't resolved the underlying cause. Recurring sinkage after a proper base rebuild is almost always a subgrade issue: soft clay that compresses under load and moisture, an organic layer (old mulch, decomposed wood) below the base, or a void created by an underground issue like a deteriorating pipe, animal burrowing, or a tree root that's since been removed. Probe the subgrade deeply, if you find organic material more than a few inches down, you may need to overexcavate and import compactable fill before rebuilding.
Clay soil that won't drain
Heavy clay soils are genuinely difficult. Clay holds water for days after rain and prevents subsurface drainage from working effectively. If you have dense clay subgrade, a French drain on its own won't help unless it can reach a lower elevation where water can actually move. Options: ensure the French drain outlets to a point meaningfully lower in elevation (not just a dry well in the same clay), or use a sand-based drainage layer under the paver base to create a reservoir that drains laterally. On very heavy clay sites, a geotextile separator layer between the subgrade and the base aggregate is especially important to prevent clay from pumping up into the base material over time.
Frost heave lifting pavers each winter
Frost heave happens when water in the base or subgrade freezes and expands, pushing up pavers unevenly. The cure is improving drainage so that water doesn't saturate the base before winter. Make sure your base aggregate is clean, angular, and non-frost-susceptible, angular crushed stone drains and compacts better than round river gravel and is less prone to heave. If you live in a freeze-thaw climate and have recurring heave, a French drain or good surface drainage that keeps the base dry through fall is the most effective prevention.
Ongoing maintenance to avoid a repeat
- Clean gutters and downspouts twice a year. A blocked gutter overflows at the fascia, sending sheets of water directly onto the patio edge and base.
- Inspect channel drains and catch basins each spring and fall. Remove debris, check that the grate is sitting correctly and the outlet pipe isn't blocked.
- Sweep and reapply polymeric sand in paver joints every 2–3 years or when you notice gaps. Open joints allow water to penetrate the base and accelerate erosion.
- Check the slope of the patio surface annually with a 4-foot level. Minor adjustments to a paver section are easy; catching grade loss early prevents the need for a full rebuild.
- Monitor the area around downspout terminations after heavy rain. If you see erosion or washout at a pop-up emitter or drain outlet, add a splash pad of large stones to dissipate the energy.
When to stop and call a professional
Most paver and small concrete patch jobs are within a competent DIYer's reach. But there are situations where the scope, risk, or required equipment makes a professional the right call. Be honest with yourself about these.
- Large concrete slab failure: if your concrete patio is cracked across multiple planes, has significant differential settlement across its width, or shows signs of failing reinforcement (rust staining, delamination), the practical fix is removal and replacement, which involves concrete saws, jackhammers, and ready-mix trucks — a professional job.
- Grade and drainage problems near the foundation: if regrading the patio creates a slope toward the house due to the existing site contours, you may have a lot grading problem that goes beyond the patio. A civil engineer or landscape grading contractor is the right resource here — you don't want to experiment with water management within 10 feet of a foundation.
- Suspected conflicts with utilities, septic, or irrigation: always call 811 before any trenching. If you have a septic system in the yard, do not install dry wells or French drains without knowing their location and setback requirements.
- Persistent settlement despite correct base work: if a paved area keeps sinking after you've rebuilt the base correctly, there's likely something significant happening in the subgrade — a deteriorating utility, significant organic layer, or high water table issue — that needs professional diagnosis.
- Mudjacking or foam lifting: both require pump equipment and material expertise that aren't practical for one-time DIY use. Get two or three quotes from licensed concrete lifting contractors and verify they'll guarantee the slope correction.
FAQ
What quick diagnostic checklist should I use to find why my patio is holding water or sinking?
Step-by-step checklist: 1) Measure slope: use a 4–10 ft level or string line to check fall away from house across the first 10 ft — code guidance expects about 6" fall in 10 ft (≈0.5"/ft or ~5%) near foundations; for pedestrian patios 1–2% (0.12–0.24"/ft) is usually acceptable for sheet drainage. 2) Look for concentrated runoff: inspect gutters/downspouts, splash blocks, and roof leaders for nearby discharge. 3) Probe base: pry up a few pavers or core/drill a small hole in mortar/concrete to inspect bedding/base depth and material and check for voids or washout. 4) Check for biological/physical causes: look for tree roots under the patio or signs of sinkholes/voids. 5) Water test: run a hose for 10–20 minutes and observe where water pools or flows — this reveals surface vs subsurface flow. 6) Check for cracking/deflection: wide cracks, sagging slabs, or separated joints often indicate slab failure rather than just drainage. Use these steps to classify the core problems: poor surface grading, insufficient/failed base, subgrade settlement, tree roots/voids, or failing concrete slab.
What prioritized DIY drainage fixes should I try first, and what are the target slopes and key specs?
Prioritized sequence (DIY-first): 1) Fix downspouts: clean gutters, add/extend downspout extensions or bury 4" solid pipe to a pop-up or daylight outlet. Target: discharge at least 6–10 ft from foundation; maintain ≥1% gravity slope (ideally 1–2%). 2) Regrade surface: add material to create positive slope away from structure. Target slope: at least 1–2% for patios; within first 10 ft of foundation target 6" drop/10 ft if possible. 3) Add shallow surface channel(s): install narrow channel drains or shallow swales to intercept sheet flow where water concentrates. 4) Install trench/channel drain (slot drain): use modular channel units sized to expected flow; connect outlet to 3–4" solid pipe. 5) Install French drain: 4" perforated pipe, trench 12–24" deep depending on needed capture depth, slope pipe ≥1% to outlet, place pipe on 2–3" gravel bedding, wrap with nonwoven geotextile or use filter-sock, backfill with clean crushed stone. 6) Dry well or catch basin: when no daylight outlet exists, size/locate per local stormwater rules and maintain setbacks (typically min 5–10 ft from foundations). Key specs summary: downspout conveyance = 4" solid pipe; French-drain pipe = 4" perforated with holes down; trench width ~6–12"; gravel surround = clean 3/4" minus or #57 stone to within a few inches of surface; geotextile: nonwoven filter fabric; slope = ≥1% preferred, 2% where possible. Common mistakes to avoid: connecting to a perforated pipe without a proper outlet, insufficient slope, skipping fabric (causes siltation), undersized pipe or trench, and discharging too close to foundation.
How do I install a DIY French drain step-by-step with exact trench depth, pipe, gravel and fabric specs?
Installation steps: 1) Plan route to daylight or dry well/outlet and mark grade line. 2) Trench size: typical residential perimeter/yard trench 6–12" wide and 12–24" deep (deeper if capture from deeper base is needed or to meet outlet elevation). 3) Slope: aim for ≥1% (1" fall per 8 ft) to preserve gravity flow; more slope if needed. 4) Line trench with nonwoven geotextile fabric, extending fabric 12"+ up trench sides. 5) Place 2–3" layer of coarse gravel (#3 or #57 stone) as bedding. 6) Lay 4" perforated pipe with holes facing down and cover with gravel so pipe is fully surrounded (minimum 3–4" of gravel over pipe). 7) Fold fabric over gravel (or use pipe with filter-sock) to limit fine migration. 8) Backfill remaining trench with gravel to within a few inches of final grade; top with soil or cover material per site needs. Materials/specs: 4" perforated PVC or corrugated HDPE, nonwoven geotextile, #57 or similar coarse drain stone, optional filter-sock. Maintenance note: include an accessible cleanout or pop-up outlet where connected; avoid running perforated pipe within 5–10 ft of foundations without adequate design. Common errors: too shallow trench, poor slope, no fabric, using fine stone, or failing to provide outlet/cleanout.
When should I use a channel (slot) drain vs a French drain vs a dry well?
Use cases: - Channel/slot drain: best where surface water concentrates (along patio edge, at door thresholds) and you need immediate surface capture; requires a formed trench sized for product and a solid outlet connection. - French drain: best for subsurface collection along a perimeter or to intercept water migrating under pavers or slab at shallow depths; good when you can route to an outlet or dry well. - Dry well: good when no daylight outlet exists and permitted locally; it is an infiltration solution for collected water (e.g., roof or small patio catchments). Choose based on where water is coming from (surface vs subsurface), outlet availability, and local setbacks/permit rules. Combining methods is common — e.g., channel drain into a buried solid pipe that leads to a dry well or daylight outlet, or French drain that intercepts subgrade flow and funnels to a catch basin.
How do I repair and level pavers or brick patios while integrating drainage fixes?
Paver/brick repair steps: 1) Identify affected area and lift pavers to expose bedding and base. 2) Excavate contaminated bedding/aggregate until reaching stable subgrade. 3) If base is too thin, add compacted crushed stone in lifts to reach recommended compacted base depth: typical pedestrian patios 4–6" compacted; increase to 6–8" or more on poor soils. Compact each lift to high density (ICPI recommends high compaction — 98% of Proctor where practical). 4) Re-establish a nominal 1" bedding sand layer (ICPI tolerance ~1"), set pavers, reinstall edge restraints. 5) Compact pavers with a plate compactor and sweep joint sand (or polymeric sand if allowed by local conditions). Integration with drainage: install French drain or trench drain below or just outside affected paver zone before resetting pavers; ensure edge channels tie to the drainage pipe, and maintain required slope away from structures. Common mistakes: inadequate compaction, insufficient base thickness, no edge restraint, skipping geotextile on very silty/clayey sites.
What are the concrete slab repair options for sunken slabs and how do drainage improvements fit in?
Concrete slab options: 1) Mudjacking (slab jacking) — pump a sand/cement slurry under slab to lift; best for small to moderate sinks, lower cost but may reoccur if subgrade continues to erode. 2) Polyurethane foam lifting — inject expanding closed-cell polyurethane foam to lift slab; lighter, less invasive, cures quickly, and often longer-lasting than mudjacking. 3) Partial/full replacement — cut out and replace severely cracked or widely collapsed slabs; required when slab is structurally failed. Integration: before lifting or replacing, resolve the drainage cause — regrade surface, fix downspouts, or install perimeter French drain/channel drain to prevent future undermining. If slab is lifted, ensure soil stabilisation (add compacted aggregate or nondispersive fill) and redirect water away from slab edges. Criteria: choose mudjacking/polyurethane for limited localized settlement; choose replacement for extensive cracking, large unsupported spans, or when slab sits on unstable subgrade that cannot be reasonably stabilized by injection.
My Brick Patio Is Sinking: DIY Diagnosis and Repair Steps
Diagnose why your brick patio is sinking and follow step-by-step DIY repair to relevel or reset pavers safely.