If your patio slopes toward the house, water is pooling against your foundation every time it rains, and that needs to be fixed now, not later. The correct outward slope for a patio is between [1/8 and 1/4 inch of drop per running foot away from the house. ](https://www. homedepot.
How to Fix a Patio That Slopes Toward the House

Talia Lang
5 May 2026
com/catalog/pdfImages/0b/0b509e40-76a3-4cd7-82d9-0419e8a8d8d6. pdf) For a 10-foot patio, that means the outer edge should sit 1. 25 to 2. 5 inches lower than the edge against the wall.
Most slope problems come down to one of three causes: the base was never graded correctly to begin with, the soil underneath settled or washed out over time, or the surrounding grade has built up against the house and tilted the whole surface inward. The good news is that all three are fixable with the right approach.
Why your patio slopes toward the house
Understanding the actual cause before you start swinging a sledgehammer will save you a lot of wasted effort. Patios end up draining backward for several reasons, and the fix depends entirely on which one you're dealing with.
- Improper original installation: The base was never sloped correctly, or the forms were set flat and the patio has drained inward from day one.
- Base settlement: The compacted gravel or crushed stone base beneath the surface has shifted, settled unevenly, or eroded. This is extremely common when compaction was skipped or rushed during installation.
- Soil washout: Water running along the foundation has slowly pulled soil and base material away from under the patio, causing the inner edge to drop.
- Grade buildup: Mulch, soil, or landscaping added around the foundation over the years has raised the surrounding grade, effectively tilting the patio toward the house.
- Downspout dumping: A downspout terminating at or near the patio edge is saturating the base material, causing it to soften and shift inward.
- Frost heave: In cold climates, freeze-thaw cycles lift and resettle the base unevenly, often tipping pavers or slabs back toward the house over several winters.
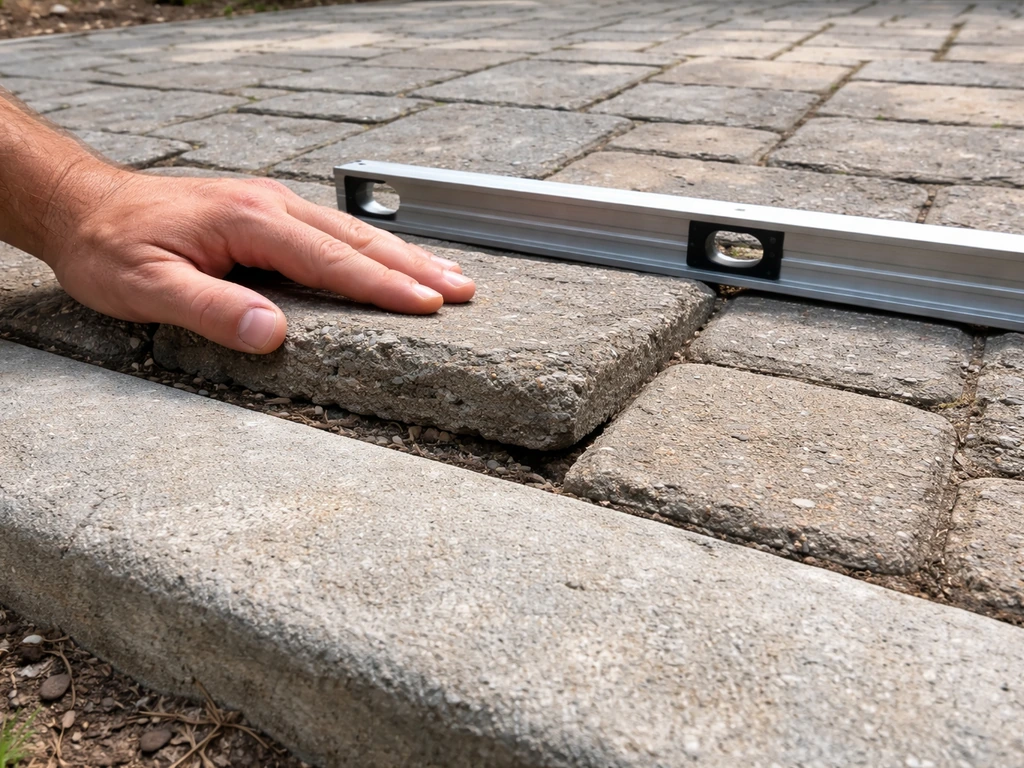
To confirm the slope direction, you don't need any special tools. Set a 4-foot level on the patio surface pointing away from the house. If the bubble shows the house side is lower, you have a reverse slope. For a more precise measurement, use a string line and a line level from the house wall out to the patio edge, then measure the drop (or lack of it) at each foot. You're looking for at least 1/8 to 1/4 inch of drop per foot away from the wall.
Safety checks and what to inspect before you start
Before you plan any repair, take 30 minutes to do a proper inspection. A patio draining toward the house is a foundation issue as much as a patio issue, and you need to know whether the damage has already started.
Check for signs of water intrusion
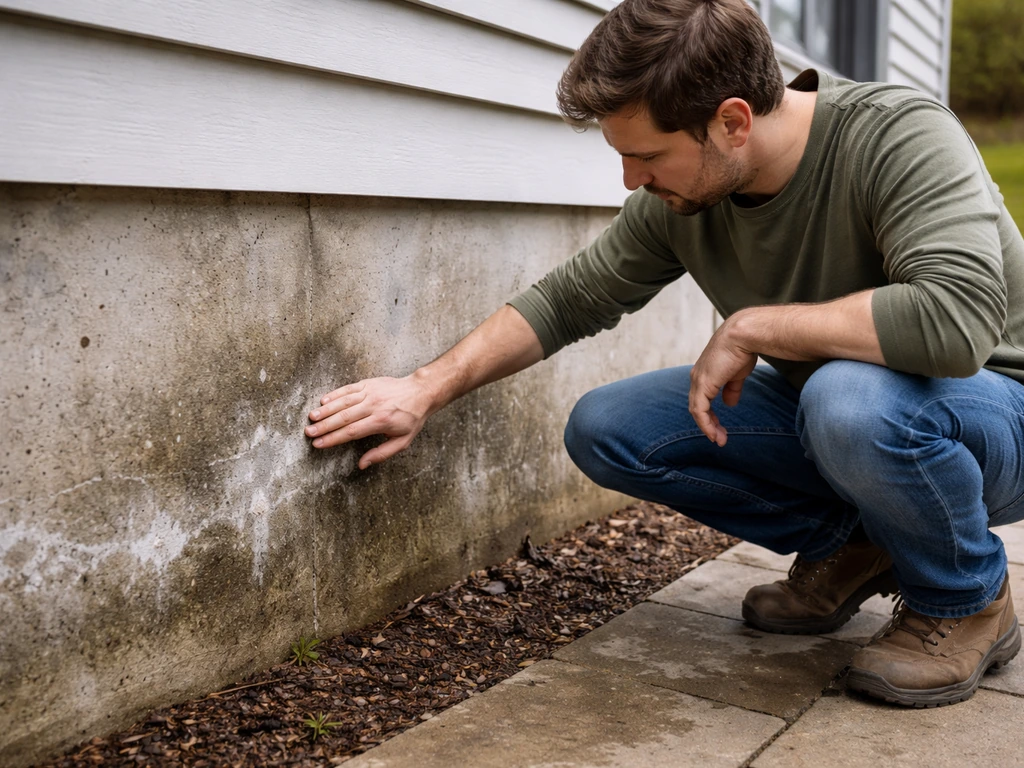
- Go into the basement or crawl space and look for moisture stains, efflorescence (white chalky deposits on the wall), or active dampness on the foundation wall nearest the patio. Efflorescence is caused by water carrying soluble salts through the masonry and depositing them on the surface as it dries. If you wet the stain and it disappears, then reappears as it dries, that's classic efflorescence, and it means water has been getting into or through the wall.
- Look at the slab or pavers where they meet the house. Cracking at the joint, separated caulk, or heaving at the wall edge are all signs the patio movement has been going on for a while.
- Check for undermined edges: probe along the perimeter with a screwdriver. If it sinks easily into soft soil under the edge of the patio, the base has washed out.
- Look at your downspouts. If any terminate right at the patio or within a few feet of it, they're almost certainly contributing to the problem.
Check the drainage path
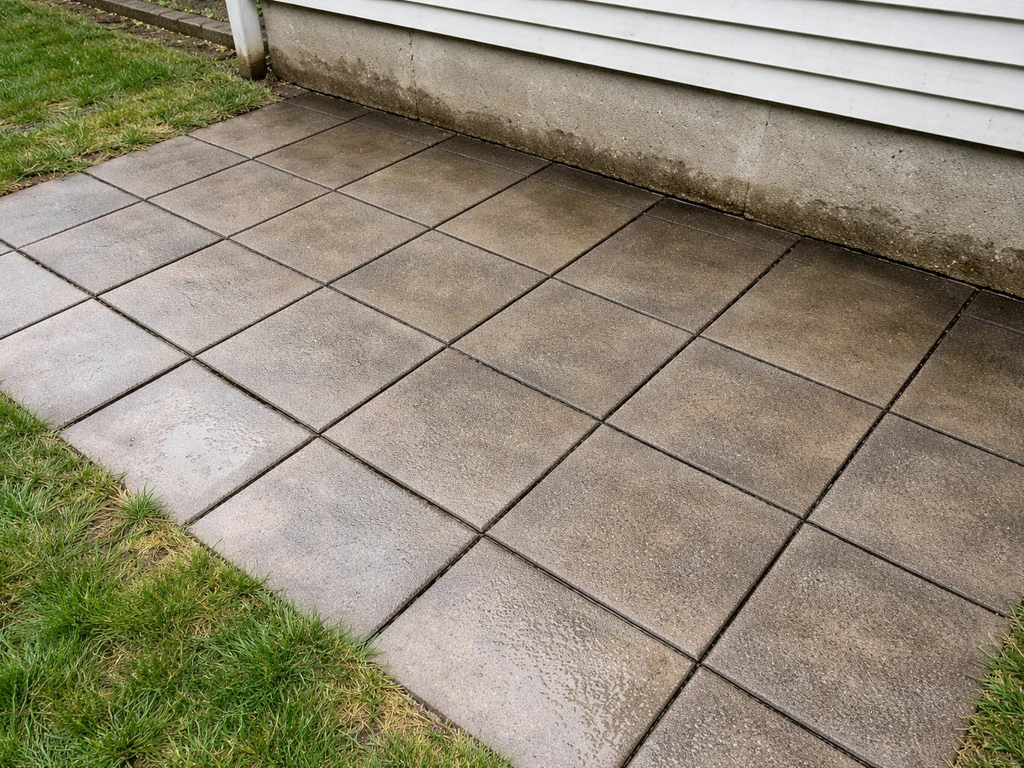
Walk the yard after a rainstorm and trace where the water goes. Does it pool at the house wall? Does it flow along the foundation? This tells you whether you have only a patio slope problem or a broader grading issue affecting the whole yard. If water is flowing toward the house from the lawn as well as the patio, fixing just the patio won't solve the problem.
When to call a professional instead of DIYing
If you find active water in the basement, horizontal cracks in the foundation wall, or significant structural cracking in the slab, stop and get a foundation specialist or structural engineer to assess before you do any patio repair. Moving or regrading the patio could change the water pressure dynamics around the foundation, and you want professional eyes on it first. Similarly, if the entire yard grade slopes toward the house, that's a major grading and drainage project that goes beyond patio repair.
Choosing the right fix: regrade, rebuild, or reroute drainage

There's no one-size-fits-all repair here. The right approach depends on your patio material, how severe the slope is, and what caused it. Here's how to decide. Here's how to decide how to fix patio drainage problems.
| Scenario | Patio Type | Best Fix |
|---|---|---|
| Slope is 1/4 inch or less in the wrong direction, base is solid | Pavers or brick | Reset and regrade surface layer only |
| Slope is significant, base has washed out or settled | Pavers or brick | Remove pavers, rebuild and recompact base, relay surface |
| Poured concrete, slope is slightly off, no cracking | Concrete slab | Surface drainage addition (catch basin, channel drain) or mudjacking |
| Poured concrete, cracked, settled, or badly sloped | Concrete slab | Partial or full slab removal and repour with correct slope |
| Slope is caused by grade buildup around house | Any | Regrade surrounding soil, extend downspouts, add surface drain |
| Downspout or surface water is the main driver | Any | Reroute downspouts and add French drain or catch basin |
Pavers and bricks give you the most flexibility because they can be removed, the base corrected, and the surface relaid without starting completely from scratch. Poured concrete is much harder to regrade once it's set. For concrete, your realistic options are mudjacking (pumping a slurry under the slab to lift it), adding a surface drain to intercept the pooling water, or removing and repouring. Each option has a different cost and skill level.
Adding a surface drain is often the most practical DIY solution for a concrete patio with a mild reverse slope. If your concrete patio is still sinking, a properly designed drainage upgrade can help keep it from slanting again Adding a surface drain. For a patio drainage problem, capture the water at the low point and route it to a proper discharge.
Step-by-step: regrading the base and restoring proper slope
This section covers the full base correction process, which applies whether you're working with pavers or a concrete form. If you're only resetting a few pavers over a still-solid base, skip ahead to the paver reset section.
What you'll need

- Pry bar and rubber mallet (for paver removal)
- Plate compactor (rent one, don't skip this)
- Compactible gravel or crushed stone (also called road base or Class II base)
- Coarse concrete sand (for paver bedding)
- Screed board and string lines with line level
- Tape measure
- Rake and hand tamper
- Polymeric sand (for paver joints after relay)
Step 1: Set your slope targets
Before you move a single stone, calculate your target drop. Tiling a patio math problem starts by figuring out that target drop so every row and edge line up with the slope you need calculate your target drop. The standard is 1/4 inch of drop per foot of patio, measured from the house wall outward. So if your patio is 12 feet deep, the outer edge needs to be 3 inches lower than the inner edge against the house. Drive stakes at each corner and run string lines to establish this slope. Check with a line level as you go. This string line becomes your guide for the entire base regrading process.
Step 2: Remove the surface
For pavers and bricks, use a pry bar to lift the edge pieces first, then pull them up row by row. Stack them nearby in the order they came out if you have a pattern to preserve. Mark any cracked or damaged pieces so you can replace them. For a poured slab you're removing, rent a jackhammer or rotary hammer with a chisel bit, break it into manageable sections, and haul the rubble. This is heavy, exhausting work, and renting a small dumpster is worth it.
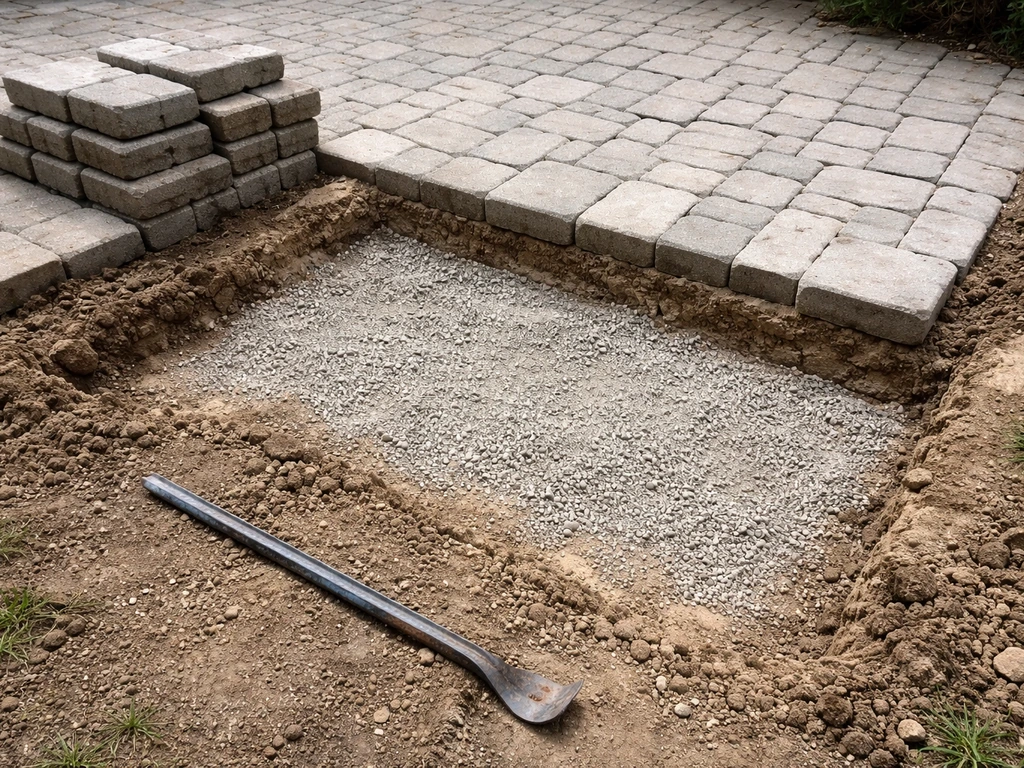
Step 3: Excavate and correct the base grade
Once the surface is off, you can see and feel the existing base. Excavate or add material to get the base gravel layer sitting at the right slope. You want a compacted gravel base of 4 to 6 inches deep (6 inches in freeze-thaw climates). Add fresh compactible gravel and rake it to follow your string line slope. Don't try to do this in one thick lift: add gravel in 2-inch layers, compacting each layer with the plate compactor before adding the next. This is the step most DIYers skip and the single biggest reason patio bases fail.
Step 4: Add the bedding layer
For pavers, add roughly 1 inch of coarse concrete sand on top of the compacted gravel base. Screed it flat (following your slope) using a screed board pulled along pipes or rails set to your slope angle. Do not compact the sand after screeding. The pavers will settle it when you set them and compact them afterward. For a concrete pour, skip the sand and proceed directly to form setting.
Step 5: Compact and confirm
After relaying pavers, run the plate compactor over the entire surface to seat them into the bedding sand. Check your slope again with the level and string line before adding joint sand. It's much easier to nudge a paver now than after the joints are filled.
Fixing pavers, bricks, and concrete: reset, remove, or patch
Resetting a section of pavers
If the base is still solid and only a portion of the patio has shifted, you can do a targeted reset without full excavation. Remove the affected pavers, scrape out the sand bed, add or remove sand to achieve the correct slope at that section, and relay the pavers. This works well when just 10 to 20 square feet has tilted. If the problem extends across most of the patio, a full base correction is the right call.
Polymeric sand: do it right or do it twice
Once pavers are relaid and compacted, sweep polymeric sand into the joints. Fill to about 1/8 inch below the paver surface, not flush. The pavers must be completely dry before you apply it, and no rain should be forecast for 48 to 72 hours after activation. Activate it with a fine water mist, let it set, and avoid foot traffic for at least 24 hours. Skip either of those conditions and you'll end up with a hazy residue or joints that wash out in the first storm.
Fixing concrete: your options are limited but real
Poured concrete can't be regraded the way pavers can. If the slab has a mild reverse slope, the most practical DIY fix is installing a channel drain or catch basin at the low point (near the house) to intercept water before it reaches the foundation. This doesn't fix the slope, but it redirects the water away.
Mudjacking (also called slabjacking) is a professional service where grout is pumped under the slab to lift it, and it can restore slope without demolition. If the slab is cracked, badly settled, or you want a permanent fix, removal and repour is the most reliable path. When repouring, set your outer forms 2 inches lower than the inner forms for an 8-foot slab (1/4 inch per foot times 8 feet equals 2 inches), following your string line grade.
Water management upgrades that actually work
Fixing the patio slope is step one. Making sure the water that does reach the patio has somewhere to go is step two. These two things together are what actually protect your foundation long-term.
Extend your downspouts
This is the cheapest, highest-impact thing you can do. Downspouts should discharge water at least 6 to 10 feet from the foundation, with 10 feet being the target when you have the yard space. Flexible downspout extenders cost a few dollars at any hardware store. If you need a more permanent solution, bury a solid PVC pipe from the downspout base and run it to a pop-up emitter in the lawn. This is a half-day project that eliminates one of the biggest sources of soil saturation next to the house.
Install a French drain along the patio edge
A French drain is a gravel-filled trench with a perforated pipe that collects subsurface water and channels it away. For a patio draining toward the house, a French drain installed along the inner edge of the patio (between the patio and the house wall) intercepts water before it reaches the foundation.
Dig a trench 12 inches wide and 12 to 18 inches deep, line it with filter fabric, add a few inches of gravel, lay a 4-inch perforated pipe with holes facing down, cover with more gravel, fold the fabric over the top, and cover with soil or gravel. The pipe needs to slope at least 0.
5% (about 1/4 inch every 2 feet) toward a discharge point: a daylight outlet in the yard, a dry well, or a storm drain connection where local code permits. The filter fabric is not optional. It keeps soil from migrating into the gravel and clogging the pipe, which is the most common reason French drains fail.
Add a catch basin or channel drain
A catch basin is a buried box with a grated top that collects surface water at a low point and sends it through a pipe to an outlet. A channel drain (also called a trench drain) is a linear grate version of the same idea. Either one can be set at the low end of the patio, near the house, to capture water before it reaches the foundation. Both connect to solid PVC pipe that runs to a discharge point. These are especially useful for concrete patios where you can't easily regrade the surface.
How to stop this from happening again
The best patio repair is the one you only have to do once. These habits and maintenance steps will keep water moving away from your house for years.
Annual slope check
Every spring, set a level on the patio and confirm it still slopes outward. Catch a paver that's tipped or a small settled section early and you're looking at a 30-minute fix. Miss it for three or four years and you're back to a full base rebuild. If you live somewhere with hard winters, this check is especially important because frost heave is gradual and sneaky.
Keep the grade around the house in check
Mulch and topsoil added to planting beds along the foundation build up over time and can eventually raise the grade above the patio level, channeling water onto and across it. Keep the soil and mulch level at least 6 inches below any wood framing and maintain a clear slope away from the house in the first 10 feet of ground adjacent to the foundation.
Seal the surface, but understand what sealant does and doesn't do
A good concrete or masonry sealer (silane-siloxane formulations are well-regarded for this) will reduce water absorption into the surface and help prevent efflorescence. What it will not do is fix a drainage problem. If water is pooling on your patio because of a slope issue, sealing the surface just means water sits on top of the sealed surface instead of soaking in. It doesn't redirect anything. Seal after you've fixed the slope and base, not instead of fixing them.
Keep joints and edges maintained
For paver patios, check joint sand annually and top it up where it has eroded. Bare joints let water channel directly into the base, softening it and starting the settlement cycle all over again. For concrete patios, inspect the caulk or expansion joint material where the slab meets the house. When that joint opens up, water gets behind and under the slab. Recaulk it with a flexible polyurethane or polymer-modified sealant every few years.
Clean drains and downspouts before every wet season
If you've installed a catch basin or French drain, clear the grates of debris and run a hose through the outlet pipe once a year to confirm it's flowing freely. A clogged drain does nothing. If you've extended your downspouts with buried pipe, check that the pop-up emitter in the lawn opens and closes freely and hasn't been covered by sod or soil.
A patio that drains away from the house correctly is one of the most underrated things protecting your foundation. If your patio is uneven and water is pooling instead of draining outward, start by correcting the slope before you seal or patch anything A patio that drains away from the house correctly. The repair work is real labor, especially if you need to pull up and rebuild a base, but the alternative is water against your foundation wall every time it rains. Do it once, do it right, and keep up with the annual checks so you don't have to do it again.
FAQ
Can I fix a patio that slopes toward the house without lifting all the pavers or breaking the concrete?
Yes, but only in limited cases. If the reverse slope is due to minor settling in a small section and the base is still stable, you can do a targeted reset (remove the affected pavers, adjust bedding sand, then relay and re-slope that patch). If water consistently pools at the wall or the patio is visibly dropping across most of its width, the base needs full correction, otherwise the problem usually returns.
How do I know the slope problem is truly causing the pooling, not just a cosmetic uneven surface?
Not always. A level that shows the patio surface slopes outward can still drain badly if the surface has low spots, clogged joints, or an incorrect base thickness. After a rain, trace the flow with a garden hose or by observing runoff to confirm where water actually goes before you start demolition or regrading.
What’s the biggest mistake when installing polymeric sand on a re-sloped paver patio?
For pavers, polymeric sand needs dry pavers and no rain after activation (typically 48 to 72 hours). If you apply polymeric sand while rain is likely or right after washing, joints can haze, wash out, or fail to lock. For best results, plan around weather, and only mist-activate when temperatures are suitable and the surface is fully dry.
Should I seal the patio right away to stop water pooling toward the house?
Do not seal to “solve” reverse drainage. Sealer mainly reduces absorption, it does not create outward flow or correct the grade. Seal can also trap water on an incorrectly sloped surface, increasing the time water stays near the foundation. Fix slope and base first, then seal if you want extra protection.
When is it unsafe to DIY the patio slope repair?
If you see basement seepage, horizontal foundation cracks, or significant structural cracking in the slab, pause and get a foundation or structural professional to assess. Regrading can change how water pressure and runoff patterns behave around the foundation, so you want to confirm the cause is limited to patio grading, not active structural movement.
Can I add a drain without fully correcting the patio grade?
Yes, if you have a perched low point at the patio edge, you can add a drain to intercept water while you plan larger work. However, a drain is usually a supplemental solution, not a substitute for restoring the correct outward slope, especially if the slab or base is still settling. Use the drain at the low point near the wall to capture what the patio carries.
Where should water from a patio drain be routed so it actually helps?
Plan for the discharge path. A French drain or catch basin only works if the outlet is lower than the collected water, and local code may restrict tying into storm systems. Good discharge options are a daylight outlet in the yard, a dry well, or a permitted storm drain connection.
Why do French drains under patio areas sometimes stop working?
French drains fail most often because the gravel trench becomes clogged with fine soil, which then blocks water flow. The filter fabric and correct trench slope matter, if the pipe is not sloped toward the outlet, water can stagnate and the system won’t intercept effectively.
What’s the most common base-related mistake that causes patio slope repairs to fail?
Generally, avoid stacking too much bedding sand or trying to correct slope with sand alone. The base needs correct compacted gravel thickness and proper layering, otherwise pavers and concrete can re-settle. A practical rule is to rebuild using compacted base layers, then fine-tune the surface with the appropriate bedding layer thickness.
How often should I re-check the patio slope and drainage after I’ve repaired it?
After repair, re-check slope after the first rain, and then again in spring (and once before winter if you get freeze-thaw). Catching a tipped paver or minor settlement early can keep you from needing a full rebuild later. For pavers, also top off joint sand annually so joints don’t turn into water pathways.
Can downspouts and yard runoff be the real reason the patio keeps sloping inward?
Yes, if the downspout outlet is closer than about 6 to 10 feet from the foundation, soil saturation often increases and can undermine patio bases over time. Use extenders to push discharge farther out, or route downspout runoff with a buried PVC line to a pop-up emitter (or other approved discharge) to reduce wet soil near the foundation.
Next Article
My Patio Is Uneven: DIY Diagnosis and Repair Steps
Diagnose why your patio is uneven, run quick tests, then follow DIY fixes for pavers or concrete with lasting drainage r