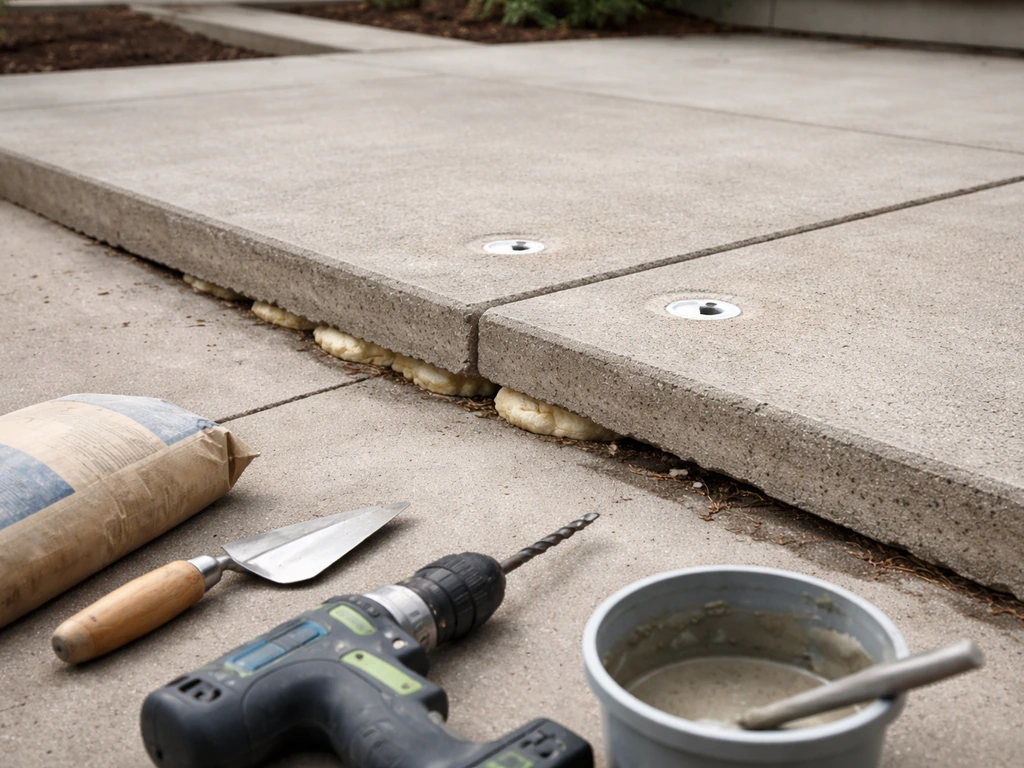
A rocking patio slab almost always means one thing: the ground underneath it has shifted, eroded, or was never properly supported in the first place. The slab itself is usually fine. The fix depends on how badly it has moved, what caused it, and whether you are dealing with one slab or several. In most cases a DIY homeowner can lift, re-bed, and relay a single slab in an afternoon. Multiple slabs or serious subgrade failure push you toward either re-leveling on a compacted granular base or calling a slabjacking professional.
How to Fix a Rocking Patio Slab: DIY Steps, Costs & Tips

Talia Lang
12 Jul 2026
At-a-glance: which fix do you actually need?
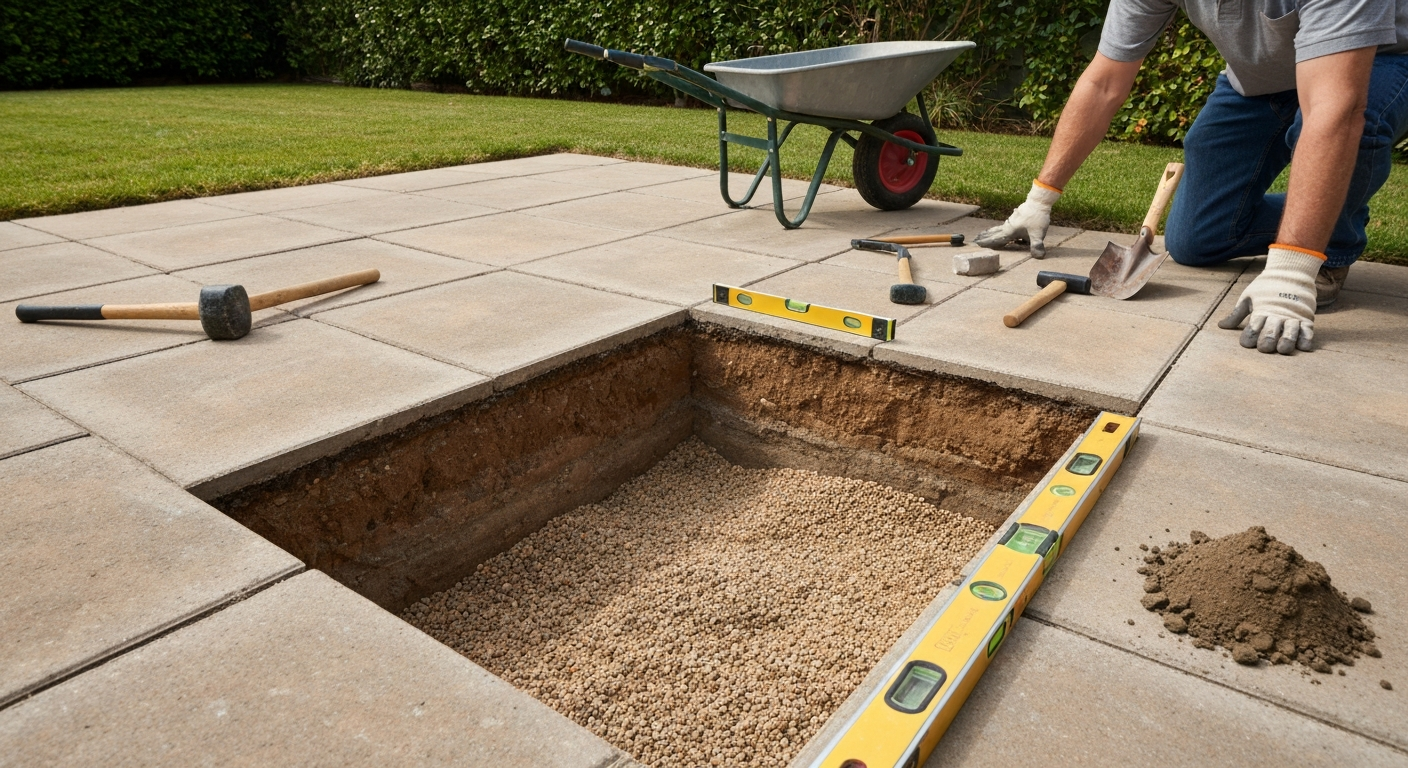
Before you buy anything or hire anyone, match your situation to one of these paths. Most rocking slabs fall into the first two categories.
| Situation | Best fix | DIY or pro? |
|---|---|---|
| One or two intact slabs rocking on sand bed | Lift and re-bed with full sand or mortar bed | DIY |
| Several slabs across a wide area all uneven | Re-level on compacted granular subbase | DIY (more work) |
| Intact slab with void underneath, no cracking | Slabjacking (polyurethane foam) | Pro recommended |
| Slab is loose but flush — won't bond to base | Bond with mortar or paving adhesive | DIY |
| Slab broken into multiple pieces, rebar corroded | Full replacement | DIY or pro depending on size |
| Frost heave or root uplift still active | Fix root/drainage cause first, then re-bed | DIY prep, pro assess if ongoing |
If you are unsure which row describes you, the next two sections will help you diagnose it accurately before you commit to a repair.
How to tell if your slab is actually rocking (and what it isn't)
A rocking slab pivots when you walk across it, usually corner to corner. That movement tells you the slab is unsupported underneath rather than cracked through. To confirm, walk or press firmly on each corner and the center of the slab. If one corner or edge deflects noticeably underfoot while the opposite side rises, you have a classic rocking problem caused by a void or uneven bedding.
Next, do a tap test. Use a rubber mallet or the handle of a hammer and tap the slab in a rough grid pattern about 30 cm (12 in) apart. A well-supported slab gives a solid, dull thud. A slab over a void sounds hollow or drum-like. Mark the hollow-sounding spots with chalk so you can map where the void is concentrated before you start digging. This matters because a void in the center calls for a different repair than a void at one edge only.
Then measure the actual tilt. Lay a long straightedge or a taut string line across the slab and any neighboring slabs. Use a spirit level to check for slope. Gaps greater than about 6 mm (1/4 inch) at the slab edge or greater than 12 mm (1/2 inch) across a 1 to 2 meter span indicate significant differential movement. A gap you can measure with a tape or feeler gauge that is wider than about 10 mm (3/8 inch) at the joint means the slab has moved enough to need lifting, not just re-pointing.
What it is not: a slab that is level but has a surface crack is a different problem from a rocking one. A slab that has sunk uniformly (all edges lower than the surrounding surface) is a settling or drainage issue rather than a rocking issue, though the underlying causes overlap. And a slab that is simply loose but not tilted may only need bonding, not lifting. If your slabs won't bond to the base, see why are my patio slabs not sticking for common causes and fixes. These distinctions matter because the repairs are different. For step-by-step guidance on how to stick down a loose patio slab using adhesives or bonding mortar, see our dedicated guide.
Why slabs start rocking: the common causes
Understanding the cause is not an academic exercise. If you fix the slab without fixing the cause, it will rock again within a season or two. Here are the five causes I see most often. For a simple diagnostic checklist and repair options, see why are my patio slabs lifting.
Poor or spot bedding
This is the most common cause on domestic patios. Spot bedding means the slab was only supported at its corners or edges with dabs of mortar, leaving the center unsupported. It feels solid at first but eventually the corners crack, the center sags, or the whole slab starts to teeter. A full bed of compacted sand or mortar is the correct approach and spot bedding is a shortcut that always catches up with you.
Settling and void formation
Sandy or poorly compacted subgrade gradually washes or migrates out from under the slab over years, leaving a void. Water accelerates this: every time it rains, fine particles get carried away. Once a void forms, the slab has no support at that point and begins to rock. This is the scenario where slabjacking is a genuine option because the slab itself is intact and the void just needs filling.
Frost heave
In colder climates, water in the soil freezes and expands, lifting whatever is above it. Frost heave needs three things to happen: temperatures cold enough to penetrate the ground to the depth of your slab base, soil water present, and frost-susceptible soil (fine silts and some clays are the worst offenders, well-graded gravel is much more resistant). The result is differential heave, where one part of a slab gets pushed up more than another because moisture is unevenly distributed. The slab rocks, and then in spring it may settle back but not always to exactly where it was. If frost heave is your problem, a granular base that drains freely is the long-term fix.
Root uplift
Tree and large shrub roots grow under slabs and physically push them up from below. Unlike frost heave, root uplift is progressive and one-directional: the slab keeps going up over time as the root thickens. You can relay the slab all you like but if the root is still there and still growing, you will be back in the same spot. Roots need to be cut back or redirected before relaying, and in some cases a root barrier is warranted.
Poor drainage
Water sitting under or around a patio long-term softens and displaces the subgrade. Soils with high clay content shrink when dry and swell when wet, so a slab on a clay-heavy subgrade with poor drainage will move every time there is a wet-dry cycle. High-shrink/swell clays, organic fill, and loose compressible fill are the most problematic soil types. Good drainage is not optional on a patio, it is the foundation of any repair lasting more than a few years.
Everything you need before you start: tools and materials checklist
The exact list varies by method, but here is what you need to cover all the DIY repair approaches. Pick what applies to your job.
For diagnosis (every job)
- Rubber mallet or hammer handle for the tap test
- Chalk or lumber crayon to mark hollow areas
- Spirit level (at least 600 mm / 24 in)
- Long straightedge or string line (1.8–3 m / 6–10 ft)
- Tape measure and feeler gauge or thin coin for measuring gaps
For lift-and-re-bed (single or a few slabs)
- Bolster chisel and club hammer (to break out old mortar joints)
- Pry bar or slab lifters (two-person job for heavy slabs)
- Wheelbarrow and shovel
- Sharp/washed grit sand or pre-mixed sand-and-cement mortar (1: 3 mix ratio)
- Screed board or timber straightedge for leveling the bed
- Rubber mallet for tapping the slab into place
- Spirit level and long straightedge (again, during laying)
- Jointing sand or mortar for finishing the joints
- Gloves, knee pads, safety glasses
For re-leveling on compacted granular subbase (multiple slabs or full area)
- All tools from the lift-and-re-bed list above
- Dense-graded aggregate (crusher run / MOT Type 1 or equivalent) for the subbase
- Bedding sand (sharp sand, approximately 25 mm / 1 in deep after screeding)
- Walk-behind plate compactor (rent one — do not skip this)
- Screed pipes or rails for consistent sand depth
- Edging restraints if the perimeter is not already fixed
For bonding a loose but flush slab
- Stiff brush and leaf blower or vacuum for cleaning under the slab
- Exterior paving adhesive or SBR-bonded mortar slurry
- Trowel
- Temporary weight (sandbags or paving offcuts) to hold the slab while adhesive cures
Safety and site prep before you touch anything
Paving slabs are heavy. A standard 600 x 600 mm (24 x 24 in) concrete slab is typically 40–50 kg (88–110 lb). Natural stone can be heavier. Lift with a partner, keep your back straight, and use proper slab-lifting tools rather than bare hands and a pry bar jammed under the edge. Dropping a slab on your foot is a serious injury. This is not a one-person job for anything bigger than a small paving block.
- Check for buried services before any digging: gas, water, and electrical lines can run under patios; use a cable and pipe detector (available to rent) if you are unsure
- Wear safety glasses when using a bolster chisel — mortar chips travel fast
- Wear sturdy boots with toe protection throughout
- Keep children and pets off the work area; an upturned slab leaning against a wall can topple
- If working in summer, wet the subgrade lightly before laying to reduce dust inhalation from dry fine aggregate
- If your patio has a fall (slope for drainage), identify the direction before you start and maintain it in the repaired area — typically 1:80 (about 12 mm per metre) away from the house
- Stack removed slabs flat, not upright, on a stable surface away from foot traffic
Your repair options: a clear comparison
There are five realistic repair paths for a rocking patio slab. None of them is universally right. Here is an honest breakdown of each.
| Method | Best for | Approximate DIY cost | Time to complete | Pros | Cons |
|---|---|---|---|---|---|
| Lift and re-bed | 1–4 intact slabs, accessible area | £20–£60 / $25–$75 in materials | 2–4 hours per slab | Durable, addresses root cause, uses standard skills | Labour-intensive, slabs may be heavy |
| Re-level on compacted granular subbase | Multiple slabs, widespread unevenness, poor original base | £150–£400+ in materials, hire compactor | 1–2 days for a typical patio | Most durable long-term fix, correct method for poor subbase | Most work, plate compactor needed |
| Slabjacking (polyurethane foam) | Intact slab over a void, no access needed from above | £300–£800+ per area (pro job) | 1–3 hours per area | Minimal disruption, fast cure, non-destructive | Not DIY, void must be diagnosed correctly, cost |
| Bonding / mortar injection | Slab that is flat but loose or vibrating slightly | Under £20 / $25 in materials | 1–2 hours | Quick, low cost | Only works if slab is already level; won't fix a rocking problem |
| Full replacement | Broken, multiple-piece slabs, corroded reinforcement, widespread subgrade failure | £50–£150+ per slab plus disposal | Half to full day per slab | Permanently resolves structural failure | Highest cost and effort, matching new slabs to old can be difficult |
My honest recommendation: for a single rocking slab that is still in one piece, lift-and-re-bed is almost always the right choice and well within reach of a competent DIYer. If you are dealing with several slabs and suspect the whole base was poorly constructed, go straight to the granular subbase re-level rather than re-bedding individual slabs one by one, you will just be back doing the same job in two years.
Lift and re-bed: step-by-step
This is the go-to repair for one to four intact slabs that rock, tilt, or have one edge lifted. You are lifting the slab out, removing the failed bedding, preparing the subgrade properly, laying a consistent new bed, and replacing the slab. When done with a full bed rather than spot dabs of mortar, this repair lasts.
When to use this method
Choose lift-and-re-bed when: the slab is intact (not broken into pieces), the rocking affects only a few slabs, and the surrounding slabs are still level. If you find that several slabs nearby are also uneven when you do your tap test and straightedge check, widen your scope to the full re-level method described in the next section.
Step 1: Clear the joint
Use a bolster chisel and club hammer to carefully remove the mortar or jointing sand from all four edges of the slab. Work around the perimeter rather than levering immediately, trying to pry a slab that is still tight in mortar joints risks chipping the edges of neighboring slabs. Take your time here. If joints are sand-filled they come out easily; mortar joints need more effort.
Step 2: Lift the slab
Slide a flat pry bar into the cleared joint and lever the slab up enough to get a grip. Use slab-lifting clamps if you have them (absolutely worth renting or buying for slabs heavier than 30 kg). With a partner, lift the slab straight up or slide it sideways onto a piece of hardboard or old carpet so it does not chip on the patio edge. Lean it upright against a wall if space is tight, but make sure it is stable. For a detailed, step-by-step guide on how to raise a patio slab, see our full instructions.
Step 3: Remove the old bedding
Shovel out all the old bedding material. Do not just top it up or fill the hollow patch. Contaminated or loose sand, dried mortar crumbs, and fine silt all need to come out. If the bottom of the excavation is soft or muddy, dig down another 50–75 mm (2–3 in) and fill with compacted granular aggregate (crusher run or similar) before you place bedding. Compact this with a hand tamper if a plate compactor is too large for one slab opening.
Step 4: Prepare the bed
For a sand bed, pour in sharp/washed grit sand to give you a loose depth of about 30–40 mm (roughly 1.5 in). Use a screed board to level it to a consistent depth, accounting for your desired finished height. The sand will compress by around 5–10 mm when the slab is placed. For a mortar bed (better where you want a firm, bonded finish), use a 1:3 Portland cement to sharp sand mix at a stiff, damp consistency. PavingExpert, Lift and relay / bedding guidance recommends removing the slab and all contaminated or loose bedding, compacting the subgrade and/or adding a well‑graded granular base where needed, then laying a consistent bedding layer (typical uncompacted sand ~25–30 mm prior to laying; mortar bedding 1:3 cement:sand at about 25–40 mm) before relaying PavingExpert — Lift and relay / bedding guidance. Spread it to about 25–40 mm depth and create a full bed with no voids, paying attention to the corners. Do not spot-bed.
Step 5: Lay the slab and check level
Lower the slab carefully onto the bed. Use a rubber mallet to tap it down, checking with your spirit level and long straightedge as you go. Compare the height to the adjacent slabs frequently. Tap high spots down; if a spot is low, lift and add a small amount of bed material. Do not rock or slide the slab once it is on a mortar bed, this causes delamination.
Step 6: Joint the slab
Leave the slab to cure for at least 24 hours if mortar-bedded before jointing or walking on it. Fill joints with either kiln-dried jointing sand (swept in and tamped), semi-dry mortar, or a polymeric jointing compound. Do not allow water to stand on fresh joints. Mortar joints should be tooled slightly below the slab surface to prevent water retention.
Tips for success
- Always use a full bed, not spot dabs — this is the single most common reason re-bedded slabs fail again quickly
- Match the fall (drainage slope) of the surrounding slabs — usually 1: 80 away from the house
- If you find root material in the subgrade, cut it back and consider a physical root barrier before relaying
- In frost-prone areas, ensure the base drains freely so water does not sit under the slab and cause future heave
Re-leveling on a compacted granular subbase: step-by-step
This method is the right approach when multiple slabs are rocking, settling, or uneven across a wider area, particularly if the original base was poorly constructed or inadequate. Instead of fixing individual slabs, you are effectively rebuilding the patio from the base up. It is more work, but it produces results that genuinely last.
When to use this method
Use this method when: more than four or five slabs are affected, your tap test reveals widespread hollow areas across the patio, the original subbase was clearly inadequate (thin, uncompacted, or absent), or you have already re-bedded individual slabs and they have settled again within a year or two.
Step 1: Lift and stack all affected slabs
Mark each slab with chalk or tape so you know its original position (useful for matching patterns or avoiding cutting issues later). Lift and stack them flat on the grass or driveway, not upright. Stack them in order if they are part of a pattern. Keep a note of any slabs that are cracked or damaged at this point, you may need replacements.
Step 2: Excavate to the right depth
Remove all the old bedding and loose material. Your total depth from finished surface should be: slab thickness + 25 mm bedding sand + 100 mm compacted aggregate base. For a typical 50 mm concrete slab, that is 175 mm total. Check your local frost depth if you are in a frost-prone climate, in cold areas you may need a deeper base that extends below the frost line to prevent heave recurring. Excavate the area cleanly and remove any organic material, soft spots, or root debris from the subgrade.
Step 3: Compact the subgrade
Before adding any aggregate, compact the exposed subgrade with your plate compactor. If you find soft or wet patches that do not firm up with compaction, those spots need to be dug out and replaced with compacted aggregate. Do not try to cover over soft subgrade with aggregate, it will just keep moving.
Step 4: Place and compact the aggregate base
Use a dense-graded aggregate (crusher run, Type 1 sub-base, or equivalent). Place it in layers no thicker than 100–150 mm (4–6 in) loose depth and compact each layer with the plate compactor before adding more. The target is a firm, stable base with no give underfoot. For a pedestrian patio you are aiming for around 95% compaction of the maximum dry density. FHWA NHI, compaction guidance and Proctor testing (Chapter on compaction) recommends compaction targets of ≥95% of the Standard Proctor maximum dry density (ASTM D698) for subgrade and 95–98% for aggregate bases, with compaction performed in thin lifts using a plate compactor and verified by spot tests for critical work FHWA NHI—compaction guidance and Proctor testing (Chapter on compaction). In practice, this means multiple passes with the compactor until the surface stops visibly moving. The total compacted depth should be at least 100 mm (4 in) for a pedestrian patio.
Step 5: Screed the bedding sand
Lay screed pipes or rails at the edges of the work area set to the correct height (25 mm / 1 in above the aggregate base). Spread sharp sand between the rails and pull a screed board across to create a perfectly level sand surface. Do not walk on the screeded sand, it will leave footprints that throw off your levels. Screed only as much as you can lay slabs on in a single session.
Step 6: Lay the slabs
Start from a fixed edge or corner. Place each slab on the screeded sand, tap down with a rubber mallet, and check level and alignment with your straightedge after every second or third slab. Maintain consistent joint gaps with spacers if needed. Step on previously laid slabs rather than on the screeded sand. Keep checking that the overall surface falls away from the house at your target gradient.
Step 7: Final compaction and jointing
Once all slabs are laid, run the plate compactor over the surface (use a rubber pad or carpet offcut under the plate to protect the slab surface). This final pass seats the slabs firmly into the sand and removes any minor unevenness. Then fill joints with kiln-dried jointing sand, polymeric sand, or mortar depending on the look you want. Brush in two or three applications, tamping between each, until joints are fully filled to just below the slab surface.
Best practices and common mistakes
- Do not skip the plate compactor — hand tamping is not sufficient for the subbase layer on a multi-slab job
- Compact the subgrade before placing aggregate; a firm subgrade is the foundation for everything above
- Lay aggregate in two thin lifts rather than one thick one for more consistent compaction
- Keep the bedding sand dry during laying — wet sand does not screed accurately and causes uneven settlement
- If any slabs are slightly different thicknesses (common with reclaimed or natural stone), sort and group them before laying to avoid impossible level changes
- Maintain the drainage fall throughout the relaid area — the most common cause of future problems is water being directed toward the house foundation after a repair
Prevention: stopping the same problem from coming back
Every repair is only as good as the steps you take to prevent a repeat. The three most important things you can do once the patio is relaid are: sort the drainage, maintain the joints, and address any root issues before they take hold again.
Drainage first: make sure water runs freely off the patio surface and away from the slab edges. A properly graded surface (1:80 slope away from the building) prevents water from pooling and undermining the subgrade. If water regularly sits on or around the patio after rain, look at adding a channel drain at the lower edge or improving the garden grading around the perimeter.
Joints second: open or eroded joints are how water and fine particles get under slabs. Inspect joints every spring and autumn and top up any that have lost material. Polymeric jointing sand resists washing out better than plain kiln-dried sand and is worth the small extra cost on a freshly re-leveled patio.
Roots third: if a nearby tree or large shrub was part of the problem, consider cutting back encroaching roots and installing a physical root barrier (a plastic or geotextile barrier placed vertically in the soil at the patio edge) to deflect future growth downward rather than under the slabs. This is far less disruptive than re-lifting slabs again in five years.
In frost-prone climates, the granular base approach is not optional, it is how you prevent heave recurring. A permeable, well-draining subbase that does not hold water means there is no water available to form ice lenses under the slab. Frost heave cannot happen without water in the subgrade, so drainage and a free-draining granular base are directly linked to frost resistance.
FAQ
How do I tell if a patio slab is 'rocking' or has a different problem?
Do a simple tap and walk test. Tap the slab in a grid with a hammer or rubber mallet and listen: a hollow/drummy sound or noticeable deflection under your foot means there’s a void or poor support beneath. Use a 6–10 ft straightedge or string line and a spirit level to measure flatness—gaps greater than about 1/4 in at an edge or more than 1/2 in over a 3–6 ft span indicate significant movement. Visible edge gaps over ~3/8 in (10–12 mm) or slabs that rock under hand pressure usually need lifting/re-bedding or slabjacking; hairline gaps or non‑rocking settlement may be fixable by bonding or re‑pointing.
What are the common causes of a rocking or lifting patio slab?
Typical causes are: (1) voids from erosion or poor compaction beneath the slab; (2) poor or missing bedding (loose sand or spot bedding); (3) frost heave in cold climates (ice lensing under frost‑susceptible soils); (4) root uplift from nearby trees or shrubs; and (5) chronic poor drainage that weakens subgrade. The cause determines which repair will last.
When should I choose lifting & re‑bedding (lift, replace bedding, relay) vs. slabjacking vs. full replacement?
Choose lift‑and‑re‑bed when the slab is intact, but sitting on poor/contaminated bedding or loose subgrade and you can remove and relay it (good for individual flags or slabs). Choose slabjacking (polyurethane or cement grout injection) when the slab is intact, too heavy to lift safely, or on small voids beneath and you want a fast, low‑disruption solution. Choose full replacement when slabs are broken into multiple pieces, severely cracked, rebar is badly corroded, or subgrade failure is widespread and recurring.
How to lift and re‑bed a single concrete or paving slab (step‑by‑step)?
1) Mark and clear the work area; remove jointing mortar/sealant around the slab edges. 2) Pry up the slab with pry bars and a block or use mechanical lifters for heavy slabs. 3) Remove contaminated or loose bedding and inspect/trim subgrade. 4) Compact the subgrade; add a compacted granular base (about 100 mm / 4 in compacted for patios) if needed, compacting in 2–3 lifts with a plate compactor. 5) Place a uniform bedding layer: screeded sharp sand ~25–30 mm for flexible bedding or a 25–40 mm mortar bed (1:3 cement:sand) for rigid bedding. 6) Bed the slab into position, check level with a straightedge and spirit level, tap gently to seat. 7) Repoint joints with jointing sand or mortar and clean off. 8) Allow mortar to cure (follow manufacturer times) and re‑establish edge restraints. Test before use.
How to re‑level a slab by rebuilding the compacted granular subbase (step‑by‑step)?
1) Remove the slab(s) to expose subgrade. 2) Excavate soft or organic material and trim to sound soil. 3) Install compacted granular base aggregate (common: ~100 mm compacted) in 50–75 mm lifts, compact each lift with a plate compactor until no further densification. 4) Add and screed a 25–30 mm bedding sand layer (or mortar if specified). 5) Relay slabs, checking levels and joint spacing. 6) Repoint and reinstall edge restraints. This approach is best when poor compaction or lack of base is the root cause.
What is slabjacking and how do polyurethane and cement grout methods differ (step‑by‑step)?
Slabjacking fills voids and lifts slabs by injecting material through small drilled holes. 1) Drill a series of small holes (~5–12 mm) through the slab at planned locations. 2) Inject the chosen material in a controlled sequence while monitoring lift and level. Polyurethane: two‑component high‑density foam expands, fills voids, lifts quickly and cures in minutes to an hour—low moisture sensitivity and minimal weight. Cement grout: pumped low‑pressure grout is heavier, slower to set, and can provide stronger support where foam isn’t suitable. 3) Stop when the slab reaches desired level; wipe or grind holes and reseal. 4) Allow required cure time (polyurethane often trafficable within hours; grout may take 24–48+ hours). Use a pro for larger areas or uncertain subgrades.
Next Article
How to Raise a Patio Slab Step by Step DIY Guide
Step-by-step how to raise patio slabs: diagnose sinking causes, lift with mudjacking or grout, then finish and prevent r