You can fix sunken patio pavers yourself in most cases. The process comes down to pulling up the affected pavers, removing and rebuilding the failed base or bedding layer underneath, regrading for proper drainage slope, compacting everything solid, and resetting the pavers with fresh joint sand. If you skip any of those steps, especially the base rebuild and compaction, the pavers will sink again within a season or two. This guide walks you through each step, helps you figure out what actually caused your pavers to sink, and tells you when the problem is big enough to need a professional.
How to Fix Sunken Patio Pavers Step-by-Step

Talia Lang
3 May 2026
Quick Safety Check and How to Gauge the Scope
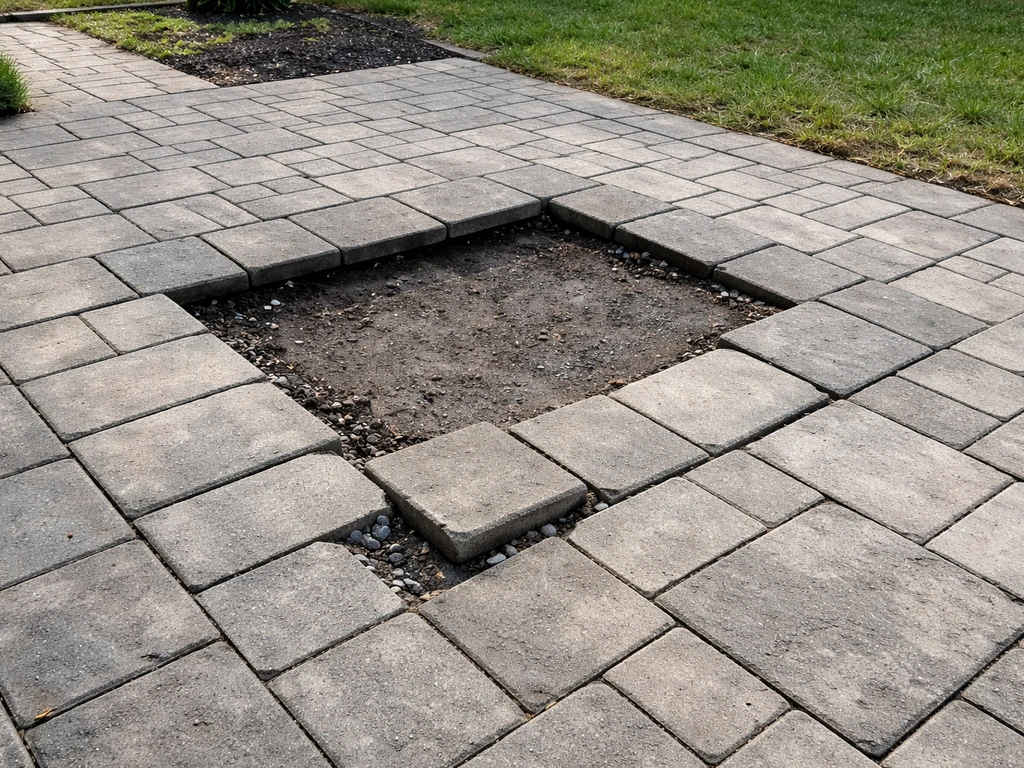
Before you grab a pry bar, take ten minutes to walk the entire patio and look at the big picture. A single sunken paver in the middle of an otherwise flat surface is a very different problem from a section that has dropped two or three inches along one edge. One is a spot fix; the other might point to serious drainage failure or soil movement underneath.
Start with a quick safety sweep. Check for trip hazards where pavers have tilted or created lips higher than about half an inch. If you have kids or elderly family members using the patio, mark those spots with tape or cones while you work. Then look for signs that water is pooling on the surface after rain. Standing water almost always means the slope has changed, and slope problems usually mean the base needs to be rebuilt, not just shimmed.
Next, probe the perimeter. Press down on pavers near the edges. If they rock or feel springy, your edge restraints may have failed or shifted. Look for gaps opening up between pavers, which tells you lateral movement has started and joint sand has been washing out. Finally, check whether the sinking is isolated to one spot or follows a pattern, like along a downspout, a garden bed, or the edge nearest a slope. That pattern is your best clue to the cause.
- 1 to 3 sunken pavers with no pattern: likely a bedding sand washout or a single soft spot in the base
- A sunken section along one edge or corner: suspect edge restraint failure or lateral erosion
- A wide, gradual dip across the whole patio: base compaction failure or subgrade settlement
- Sinking near a downspout, garden bed, or slope: water is almost certainly the cause
- Sunken pavers that also have cracks or breakage: possible heavier vehicle loading or tree roots
Why Patio Pavers Sink: Common Causes and How to Diagnose Yours
Pavers don't sink randomly. There's always a reason, and identifying it correctly determines whether you need a simple reset or a full base rebuild. The most common culprits are bedding sand washout, base failure, improper compaction during the original installation, poor drainage, and edge restraint problems. Sometimes it's a combination.
Bedding Sand Washout
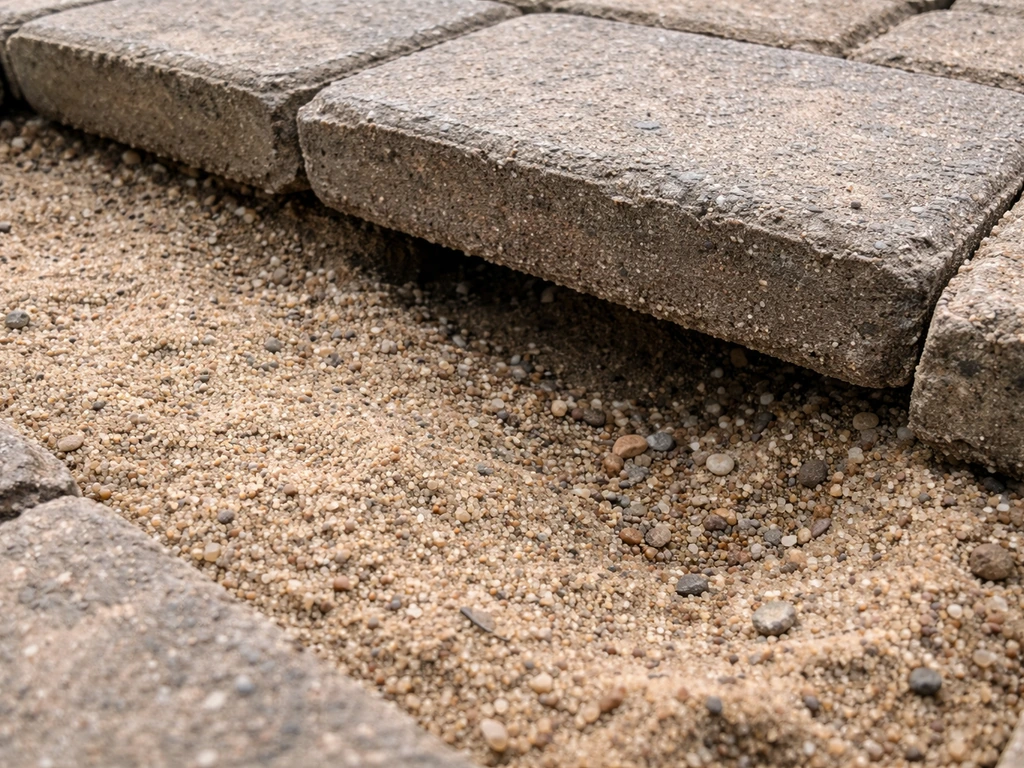
The bedding layer is the 1-inch layer of coarse sand that sits directly under your pavers. It's not structural, but it needs to stay put. When water runs through the joints repeatedly, it carries that sand out from under the pavers, leaving voids. The pavers then drop into those voids. This is one of the most common causes of isolated sinking and is usually fixable without a full base rebuild, as long as the compacted gravel base underneath is still solid.
Base Compaction Failure
The gravel base under the bedding sand (typically 4 to 6 inches deep for a residential patio) needs to be compacted in lifts during installation. If that was skipped or done poorly, the base slowly compresses under foot traffic and weather cycles, and the whole surface drops. This usually shows up as a wide, gradual depression rather than one or two isolated sunken spots. You'll need to remove the pavers and the existing base material and rebuild it properly.
Drainage and Water Damage
Water is the number one long-term enemy of paver installations. If the patio wasn't built with at least a 1/8 inch per foot slope away from the house, water pools on the surface and works its way through the joints, eroding the bedding and eventually the base. Freeze-thaw cycles in colder climates make this worse: water gets into the base, freezes, expands, and heaves or displaces material. If drainage is your root cause, just resetting the pavers won't fix anything. You'll need to regrade the base for the correct slope as part of the repair.
Edge Restraint Failure
Edge restraints are the plastic, aluminum, or concrete borders that hold pavers in place laterally. When they fail, whether from improper installation, frost heave, or being placed incorrectly on top of the bedding sand rather than on the compacted base, the entire field of pavers can spread outward. As the pavers shift apart, joint sand falls out, and the whole system starts to unravel. Edge restraints should never be installed on top of the bedding sand layer, and soil backfill alone is not a valid substitute for a proper restraint. If your edges are the problem, that needs to be addressed as part of your repair, not after.
Subgrade Soil Settlement
Sometimes the issue isn't the gravel base or the sand, it's the native soil underneath everything. If the patio was built over fill soil that wasn't properly compacted, over an area with buried organic material (old tree stumps, construction debris), or near underground utility lines that have settled, the subgrade can drop and take everything above it with it. This type of sinking often comes with more dramatic drops, uneven cracking in adjacent concrete, and recurring problems even after repair. It's the scenario where calling a pro makes the most sense.
Tools and Materials You'll Need
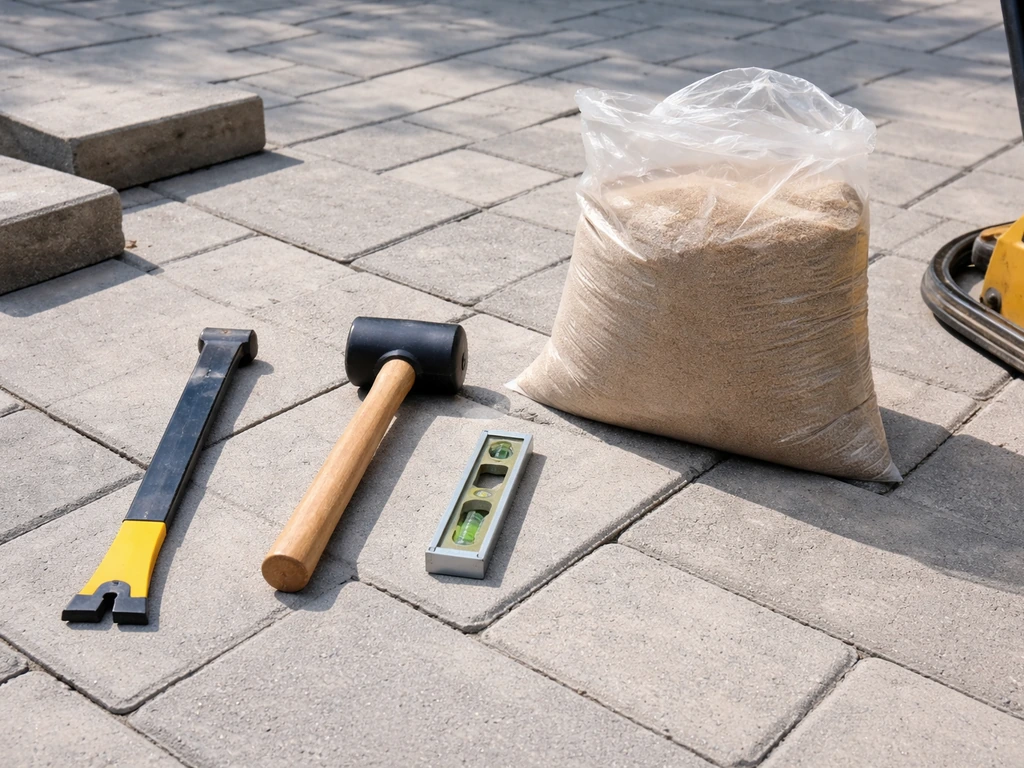
Gather everything before you start. Running to the hardware store mid-repair is frustrating and means leaving your patio open to weather. Here's what a proper paver repair job requires:
| Item | What It's For | Notes |
|---|---|---|
| Flat pry bar or paver puller | Lifting pavers without breaking them | A dedicated paver puller makes this much easier |
| Plate compactor (rental) | Compacting the gravel base | Essential for any repair larger than a few pavers; hand tamper only works for very small patches |
| Hand tamper | Compacting in tight spots | Good for edges where the plate compactor can't reach |
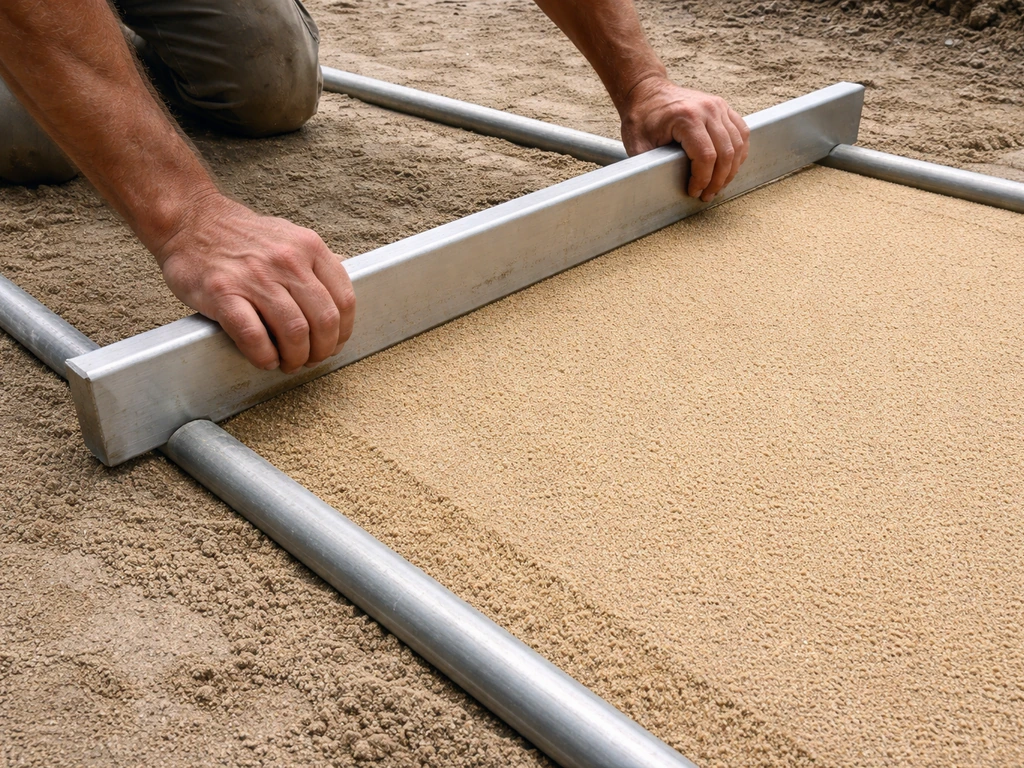
| Screed rails | Setting the 1-inch bedding sand depth consistently | Can be metal pipes of the right diameter |
| Long straightedge or level | Checking slope and flatness | A 4 to 6 foot level works well |
| Coarse concrete sand (bedding sand) | The 1-inch bedding layer under pavers | Do not use fine play sand |
| Crushed gravel (compactable) | Rebuilding the base | Typically 3/4-inch clean crushed stone or dense-graded aggregate |
| Polymeric jointing sand | Filling joints and locking pavers in place | Hardens when wet; prevents weed growth and erosion |
| Plate compactor rubber pad | Protecting pavers during final compaction | Prevents surface scratching |
| Edge restraints and spikes | Locking the perimeter | Plastic or aluminum; use manufacturer-specified spikes |
| Broom and leaf blower | Sweeping in jointing sand | Leaf blower needed for polymeric sand cleanup |
| Safety glasses, gloves, knee pads | Personal protection | You'll be on your knees a lot |
Step-by-Step: How to Lift, Rebuild, and Reset Sunken Pavers
This process works for anything from a small sunken section to a larger area. The steps are the same; the scale just changes how long it takes and whether you need to rent a plate compactor (answer: yes, for anything more than three or four pavers).
Step 1: Remove the Pavers
Start at one edge of the sunken area rather than the middle. Insert your flat pry bar into a joint, lever the first paver up, and set it aside on a flat surface, keeping them in order if the pattern needs to match. Work outward from that first paver, lifting row by row. If you need to reset a large section, work from the center outward or row by row across the area. Stack the pavers in a way that keeps your workspace clear. Number or photograph the pattern before you start if it's complex.
Step 2: Assess and Remove the Failed Bedding and Base
Once the pavers are out, scrape out the old bedding sand completely. Then dig down and check the condition of your gravel base. Push a screwdriver or rod into it. If it goes in easily, the base is not compacted properly and needs to be rebuilt. If there's a drainage problem or the slope is wrong, This Old House is right on this: the best fix is to remove the existing base material back to the correct grade and rebuild it from scratch. Trying to just add material on top of a bad base is a short-term patch that will sink again.
For a residential patio, you want a minimum of 4 inches of compacted gravel base for pedestrian use. If you're digging down and finding soft, wet, or displaced soil where the gravel base should be, remove it all. If you find tree roots or buried debris, remove those too before rebuilding.
Step 3: Check and Fix the Slope
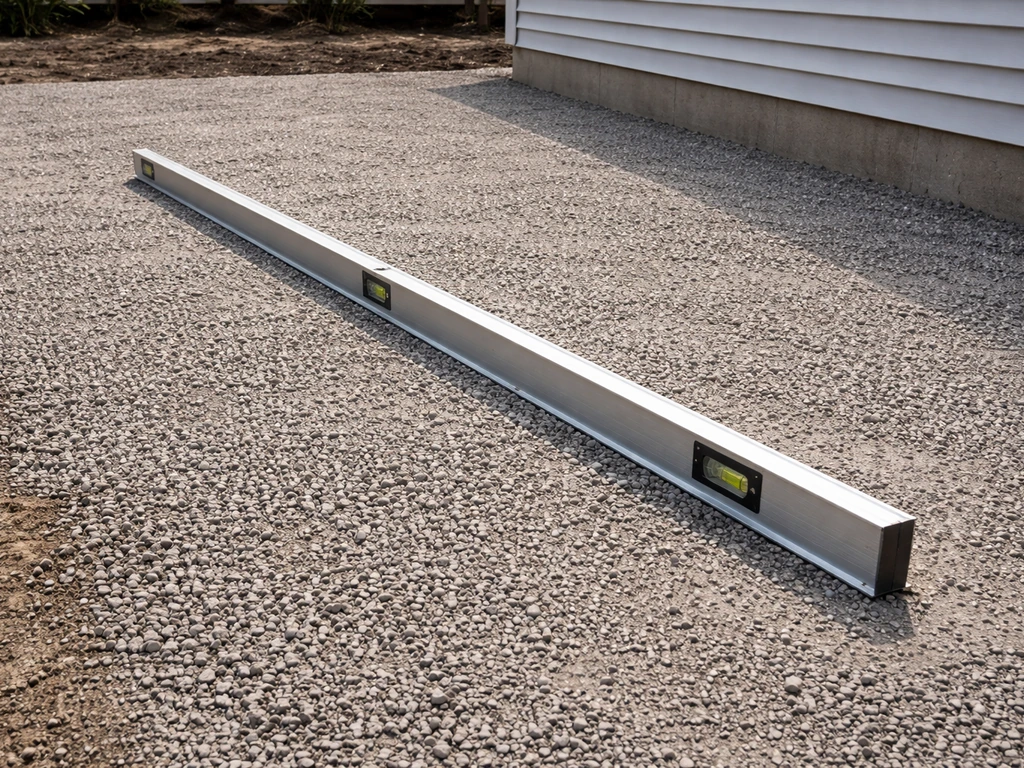
This is the step most DIYers skip, and it's the main reason patios sink again. Lay your long level across the subgrade and check which direction it drains. The finished surface needs to slope away from your house at a minimum of 1/8 inch per foot. Mark the correct grade with stakes and string lines before you add any base material back. If you're adding gravel to build the grade back up, add it in 2 to 3 inch lifts and compact each lift before adding the next one.
Step 4: Rebuild and Compact the Gravel Base
Add your compactable gravel in layers no more than 3 inches deep at a time. Run the plate compactor over each lift before adding the next one. Keep going until you've built the base up to within about 1.5 to 2 inches of your finished paver surface (1 inch for the bedding sand, plus the paver thickness). This is the most physical part of the job and the most important. A poorly compacted base is the root cause of most sinking problems. Don't rush it.
Step 5: Check Your Edge Restraints
Before you lay the bedding sand, look at your perimeter edge restraints. They should be sitting on top of the compacted gravel base, not on the bedding sand layer. If they've shifted, heaved, or corroded, replace them now. Spike them at the spacing the manufacturer recommends, usually every 12 inches for straight runs and closer on curves. If your patio borders a fixed structure like a foundation wall, steps, or a concrete retaining wall, you don't need a separate edge restraint on that side. But every open or exposed edge needs one.
Compaction, Leveling, Joint Sand, and Getting the Finish Right
Screeding the Bedding Sand
With your base compacted and graded, lay your bedding sand. The target depth is 1 inch (25 mm), no more, no less. Use two screed rails (metal conduit pipes of the right diameter work great) laid parallel across the base as guides. Pour the sand between them, then drag a straight board across the rails to create a perfectly flat, consistent 1-inch layer. Remove the rails and fill those channels with sand by hand. Do not walk on the screeded sand before laying pavers.
Setting the Pavers
Lay the pavers back into position starting from a fixed edge or corner. Press each one straight down into the bedding sand, don't slide them. Sliding disturbs the screeded surface and creates inconsistent depth. Work in rows and check every few rows with your level to make sure you're staying flat and maintaining your slope. If a paver sits too high, pull it up, remove a small amount of sand, and reset it. If it sits too low, add a small amount of sand and reset.
Final Compaction
Once the pavers are all set, run the plate compactor over the entire surface to bed them into the sand. Always use a rubber pad attachment on the plate compactor to avoid scratching or cracking the paver surfaces. Make at least two passes in perpendicular directions. This step also reveals any pavers that are still high or low, which you can then pull and adjust.
Sweeping in Joint Sand
Polymeric jointing sand is the best choice for most paver repairs. It hardens when activated with water, which locks the pavers together, resists erosion, and discourages weed growth. That said, it's not suitable for heavily textured stone surfaces where it can be difficult to remove residue, and it requires dry joints to cure properly. Conventional dry sand is simpler to install but won't hold up as long.
To install polymeric sand: make sure the paver surfaces and joints are completely dry. Pour the sand over the pavers and sweep it into the joints with a broom. The target depth is about 1/8 inch below the beveled bottom edge of the paver (or about 1/8 inch below the top surface for non-beveled pavers). After filling, use a leaf blower on low setting to blow off all residue from the paver surfaces before you activate the sand. This is critical: any polymeric sand left on the surface when you wet it will cure there as a haze or stain that's difficult to remove.
Once the surface is clean, mist the entire area gently with water to activate the polymer. Follow the specific product instructions for timing and amount of water, but the general rule is two slow passes with a gentle spray, waiting a few minutes between them. Avoid puddles. Don't install polymeric sand if rain is expected within 24 hours, if temperatures are at or near freezing, or if the surface is damp. Give it at least 24 hours before allowing foot traffic.
How to Keep Your Pavers from Sinking Again
Fixing sunken pavers is straightforward once you know what to do. Keeping them from sinking again is about addressing the conditions that caused the sinking in the first place. Most recurring paver problems come from water, edge movement, or a base that was never right. Here's how to address all three.
Drainage: The Most Important Factor
Get the slope right and keep water moving off and away from the patio surface. That means at least 1/8 inch of drop per foot away from the house. Check your downspouts: if they're dumping water at the edge of the patio, extend them or add a splash block so the water exits well away from the patio footprint. In areas where water consistently drains toward the patio from the yard, a perforated drainpipe in a gravel trench along the affected edge can intercept it before it reaches the base. Dealing with drainage at the source is what separates a repair that lasts from one that fails again in two years.
Maintain the Joint Sand
Check your joints every spring. If you see gaps opening up, sweep fresh jointing sand in before the voids get large enough for water to work through in volume. Catching this early is a five-minute job. Ignoring it leads to the bedding washout that started this whole problem in the first place.
Keep Edge Restraints in Good Shape
Walk the perimeter every year and look for edge restraints that have shifted, heaved out of the ground, or broken. Tap any loose spikes back down and replace damaged sections. Edge restraints don't last forever, especially plastic ones in climates with hard freeze-thaw cycles. Catching a failing edge restraint early prevents the lateral migration of pavers that leads to joint sand loss and eventual settlement.
Watch for Signs of Trouble Early
Surface drainage changes (water pooling in a new spot), pavers that rock when you step on them, or joint gaps opening up between specific pavers are all early warning signs. Address them when they're small. A paver that's dropped 1/4 inch is a quick reset. A section that's dropped 2 inches after the base has washed out is a weekend project.
When to Stop DIY and Call a Pro
Most sunken paver repairs are genuinely DIY-able if you're comfortable with physical labor, renting a plate compactor, and working methodically. But there are situations where doing it yourself could mean fixing the same problem repeatedly, or worse, missing something that causes damage to your house or property.
- The sinking is dramatic (more than 3 to 4 inches of drop) or covers most of the patio surface, which suggests subgrade soil failure rather than a base or bedding issue
- The sinking is recurring: you've repaired it before and it came back within a year or two, pointing to a drainage or subgrade problem that needs engineering rather than just a rebuild
- You find consistently wet or saturated soil underneath the base when you dig, especially if it doesn't drain after a dry spell
- The patio is very large and the slope needs to be completely regraded, which requires more equipment and expertise than a typical DIY repair
- You suspect underground utility lines, buried debris, or tree roots are involved in the settlement
- The sinking is causing damage to adjacent structures like a retaining wall, steps, or the house foundation
If any of those describe your situation, it's worth getting a landscape contractor or hardscape specialist out to assess the drainage and subgrade before you spend a weekend and several hundred dollars on materials that won't hold. A pro can also bring the right equipment, like a transit level for precise grading or a compactor with specific pressure ratings, that make the base rebuild more reliable on a larger scale.
If your situation involves sinking concrete slabs rather than individual pavers, or a full sinking patio that goes beyond a paver reset, the scope and approach shift quite a bit. The core drainage and compaction principles are the same, but the repair methods are different. For concrete, the approach can differ from paver resets, so it helps to understand how to fix sunken patio slabs specifically sinking concrete slabs. Know what you're dealing with before you commit to a repair approach.
Done right, a paver repair holds for many years. If you need help with a stubborn case of sinking pavers, focus on identifying the cause first so the repair actually holds paver repair. The key is not cutting corners on the base rebuild and compaction, getting the slope right for drainage, and keeping up with basic maintenance after. That combination is what separates a patio that lasts from one you'll be fixing again next spring.
FAQ
Can I fix sunken patio pavers by simply adding more joint sand on top?
You should not just add sand or shim pavers if the area is sinking after rain, if multiple pavers are gradually dropping, or if pavers rock. Those are signs the bedding has washed out, the base is not compacted, the slope has changed, or edge restraint has shifted, which requires lifting pavers and rebuilding the layer that failed.
What should I do if my patio uses polymeric sand but the pavers still sink?
If you already have polymeric sand and you get haze, residue, or weeds return, the usual fix is to remove and replace the jointing material after you do the base and compaction work. Polymerics typically must have clean, dry joints to cure properly, and remediating only the joints without correcting drainage or base issues usually leads to the same sinking.
How do I know whether my base is thick enough or actually needs rebuilding?
The typical minimum base thickness mentioned is 4 inches of compacted gravel for pedestrian patios, but the real test is what you find when you probe. If the gravel compresses easily or is wet/soft, treat it as a failed base, remove it back to stable material, and rebuild with proper lifts and compaction rather than trying to top off.
Should I remove only the sunken pavers, or expand the area I dig out?
For a small isolated drop, you can often lift only the affected pavers if the surrounding area stays stable when probed and the slope is still correct. If the sinking spans a strip, follows an edge, or the patio surface shows a wider depression, expand the excavation area so you can regrade and compact the whole section that’s behaving as one base unit.
Why do my patio pavers keep spreading outward after repairs?
Set edge restraints on the compacted gravel base, not on the bedding sand. If you find an edge restraint installed on bedding, it can fail early and allow lateral spreading, which then causes joint sand loss and re-sinking. Replace or reinstall the restraints after the base is rebuilt and graded.
How can I avoid polymeric jointing sand failing or turning into a sticky haze?
A common cause is installing or activating jointing sand when the joints are damp or when rain is expected soon after. Polymerics should not be installed if the surface is damp or if freezing temperatures are likely, and you should allow at least a day before foot traffic so the cure is complete.
Do I need to address gutters and downspouts before fixing sunken pavers?
Before you rebuild, check where water goes right after a rain. If downspouts discharge near the patio, extend them or add splash blocks so the water exits farther away. If yard runoff consistently travels toward the patio edge, intercepting it with a gravel trench and drainpipe can be more effective than repeatedly resetting pavers.
How do I decide whether the problem is the bedding sand versus the compacted gravel base?
If a paver rocks when you step on it, or if multiple pavers settle unevenly within a small radius, it often means the base or bedding beneath that region is compromised. A simple reset may work only when the bedding was disturbed but the compacted gravel base is solid and the slope still meets the drainage requirement.
What’s the easiest way to keep the correct drainage slope during a paver repair?
Set your final surface grade using stakes and string lines before adding base back, then compact in lifts and recheck levels as you go. This prevents ending up with a patio that looks flat but drains incorrectly, which leads to repeating washout even if the pavers are reset correctly.
How should I reset pavers in the right pattern without ending up with uneven lines?
Yes, keep working directions in mind. If you rebuild a large area, choose a start point that maintains alignment with existing edges, corners, or a fixed reference, then build out row by row while periodically rechecking level and slope. For complex patterns, photograph or number pavers so you can reset them in the correct sequence.
Next Article
How to Fix Cement Patio Cracks: Diagnose and Repair
Diagnose concrete patio crack types and repair with the right sealant or patch, from prep to curing and prevention.