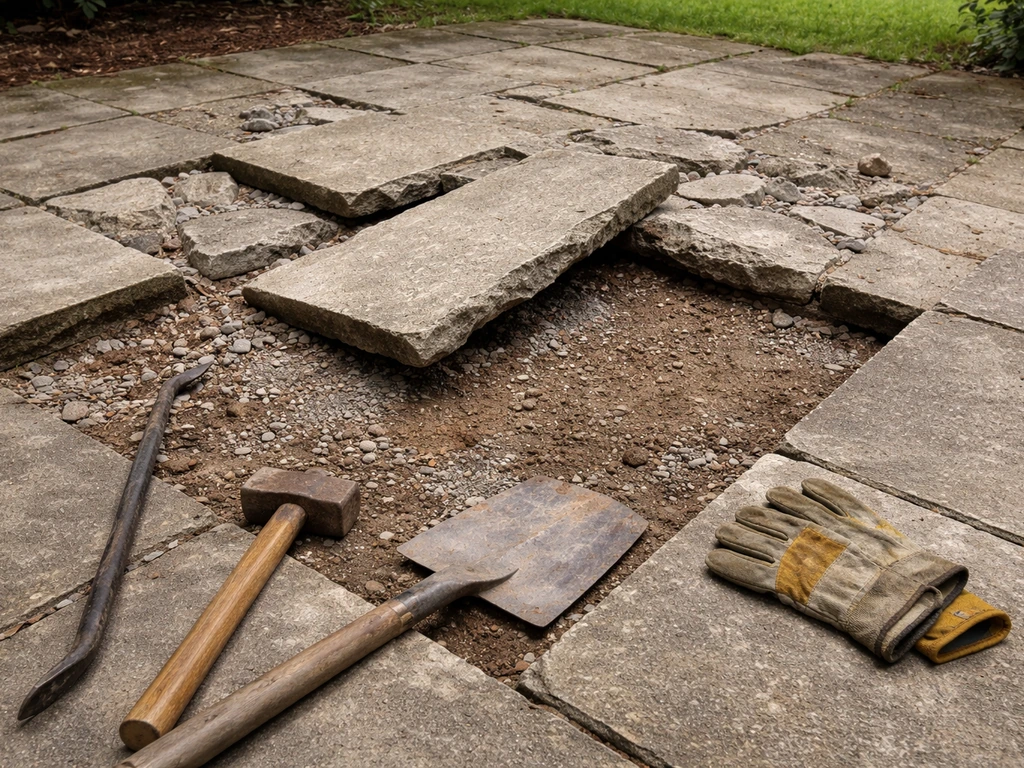
You can lift most patio slabs without breaking them if you work slowly, use the right tools, and understand what's holding each slab down. The two things that crack slabs during removal are rushing the pry and not supporting the slab once it's free. Get those two things right and a standard 600×600 mm concrete flag is perfectly manageable for one or two people. What follows is everything you need to know before you touch a single slab.
How to Lift Patio Slabs Without Breaking Them: DIY Guide

Talia Lang
12 Jul 2026
When it actually makes sense to lift slabs yourself
Most homeowners lift patio slabs for one of three reasons: a slab has sunk or tilted and is a trip hazard, water is pooling where it shouldn't be, or they need access to a drain or pipe running underneath. In all three cases, lifting and re-bedding is a genuine DIY repair if the slabs themselves are still intact and the sub-base hasn't completely failed. I've lifted dozens of slabs over the years for exactly these reasons and put them back down better than they were before.
Where it gets more complicated is when the whole patio surface has moved, when the slabs are cracked already, or when the underlying drainage or base has seriously deteriorated. In those situations you're not really lifting slabs, you're doing a partial rebuild, and that's a different job with different expectations. This article focuses on the controlled lift: getting a slab up cleanly, intact, so it can be inspected, reset, or temporarily removed for access.
Lift or replace? A quick decision checklist
Before you pick up a pry bar, spend five minutes walking the patio and answering these questions honestly. Lifting a slab that should actually be replaced wastes time and risks injury.
| What you're looking at | Likely action | Why |
|---|---|---|
| One or two slabs sunken or tilted, rest of patio solid | Lift and re-bed | Localised settlement, sub-base fixable |
| Slab surface intact but hollow sound when tapped | Lift and re-bed | Bedding has failed, slab is fine |
| Hairline cracks on the surface only | Lift carefully, assess underside | May still be usable; handle with extra care |
| Through-cracks or slab broken into pieces | Replace, don't lift | Slab will shatter during removal |
| Spalling, flaking, or rust staining | Professional assessment first | Possible reinforcement corrosion — not a simple re-bed job |
| Multiple slabs affected across the whole patio | Partial or full rebuild | Sub-base has likely failed across the board |
| Need temporary access to a pipe or drain | Lift, do work, relay | Access lift — slab condition is secondary to access need |
| Slab set in poured concrete (not bedding) | See mortar/concrete section below | Different technique required; higher breakage risk |
The FHWA's pavement distress classification and ACI slab guidance both flag widespread map cracking, through-cracks, spalling with exposed aggregate or steel, and progressive sub-base undermining as indicators that repair has moved beyond simple re-bedding. The ACI Guide to Concrete Floor and Slab Construction (ACI 302.1R), American Concrete Institute (guidance on distress & repair) notes that spalling, rust staining, delamination, or visible reinforcement near the surface are indicators of reinforcement corrosion and often require engineering assessment ACI Guide to Concrete Floor and Slab Construction (ACI 302.1R) — American Concrete Institute (guidance on distress & repair). If you see those signs across more than a third of your patio, get a structural assessment before you lift anything.
Know what you're dealing with: assessing your slabs
The single most useful thing you can do before lifting is figure out what type of slab you have, how heavy it is, and how it's been bedded. This tells you what tools you need, how many people, and what technique to use.
Slab type and weight
blank" rel="noopener noreferrer">Concrete slabs (the most common type in UK and North American patios) weigh roughly 2,300 to 2,400 kg per cubic metre. To estimate the weight of a single slab, multiply length × width × thickness (all in metres) to get the volume in m³, then multiply by 2,400. A standard 600×600×38 mm concrete flag works out to about 0.0137 m³, which gives you around 33 kg. That's manageable for one person with the right tools. Go up to a 900×600×50 mm slab and you're at roughly 65 kg, firmly a two-person lift.
Natural stone is heavier and more variable. Sandstone runs 2,100 to 2,600 kg/m³, limestone and granite both sit at 2,600 to 2,800 kg/m³. A 600×600×40 mm granite slab can weigh 38 to 40 kg compared to about 35 kg for the equivalent concrete flag. The difference matters less than the brittleness: natural stone slabs (especially sandstone and slate) are more prone to cracking under uneven load or point stress, so they need more careful handling.
Measure your slabs before you start. Use a tape measure for length and width and check thickness at a joint edge. If you can't see the edge, probe the joint with a screwdriver to get an approximate depth. This takes two minutes and tells you exactly what you're lifting.
Bedding type: what's holding the slab down
How a slab was originally laid determines how hard it will be to lift and what resistance you'll feel when you pry. There are four main bedding types you'll encounter in residential patios.
| Bedding type | How to identify it | Lifting difficulty | Key technique note |
|---|---|---|---|
| Dry sand or sharp sand (no cement) | Slab rocks or is already loose; sand visible in joints | Easy | Slab will lift almost freely once joint is cleared |
| Semi-dry mortar (spot-bedded or full bed) | Slab is firm but joints show old mortar; hollow tap in places | Moderate | Mortar pads may grip; work pry bar around all four edges |
| Full mortar bed (3:1 sand:cement) | Slab is very firm; scraping joint reveals hard grey mortar | Harder | May need a rotary hammer to break mortar bond at edges first |
| Poured/structural concrete | No visible joint mortar — slab appears cast into surrounding concrete; no movement at all | Very difficult | Cutting disc or breaker usually needed; high breakage risk |
The practical standard for full mortar bedding in the UK is a 3:1 sharp sand to cement mix laid at 25 to 40 mm thick, as described in BS 7533 and in trade guidance from sources like PavingExpert. If your slab was professionally laid on a proper mortar bed, expect it to put up a fight. If it was laid on dry sand or a semi-dry mix that has since degraded, it may practically lift itself.
Safety first: clear thresholds for calling a professional
I'll be straightforward here: most single-slab lifts are genuinely manageable for a fit adult with basic tools. But there are specific situations where you should stop, step back, and call someone with the right equipment or structural knowledge.
- Any slab over 80 kg that cannot be mechanically assisted — manual lifting above this weight significantly increases injury risk to your back, shoulders, and hands
- Slabs showing rust staining, spalling, or surface delamination — this can indicate corroded reinforcement steel; lifting without a structural assessment risks collapse
- Any indication of underground services (gas, electric, water, telecoms) beneath the area — always call 811 (US) or use the Dial Before You Dig service (UK/Australia) before breaking ground
- Slabs adjacent to a wall, step, or structural footing where the slab may be load-bearing or tied into the structure
- Slabs near retaining walls where lifting could destabilise the wall or adjacent ground
- Any situation where the sub-base below appears waterlogged, unstable, or undermined — working above a void or saturated sub-base risks sudden slab movement
- Commercial or public access areas — these fall outside the scope of standard DIY and may require licensed contractors and formal risk assessments
If you're unsure about underground services, do not assume. Even an old residential patio can have conduits or pipes that weren't mapped. The cost of a cable avoidance tool rental or a quick call to your utility provider is trivial compared to the consequences of hitting a live cable.
Tools, lifting aids, and PPE you actually need
Personal protective equipment
Don't skip this. Concrete and stone slab edges are sharp, and a slab shifting unexpectedly can remove fingertips or crush a foot. At minimum, wear: heavy-duty work gloves (leather palm, not thin latex), steel-toecap boots, safety glasses, and knee pads if you'll be working at ground level for any length of time. If you're using a rotary hammer or angle grinder to cut mortar joints, add ear defenders and a dust mask rated for silica dust (FFP3 or P100 minimum). Hilti and Bosch both specify this PPE in their rotary hammer operating manuals, and it's not overcautious, silica dust is a serious respiratory hazard.
Core lifting tools
- Flat pry bar (600–900 mm): the workhorse for breaking mortar bonds and getting initial lift
- Bolster chisel (50–75 mm wide) and club hammer: for clearing joint mortar before prying
- Rotary hammer with wide chisel bit: for thick mortar beds or stubborn bonds (Bosch GBH or Hilti equivalent); use SDS mode, not rotation-only
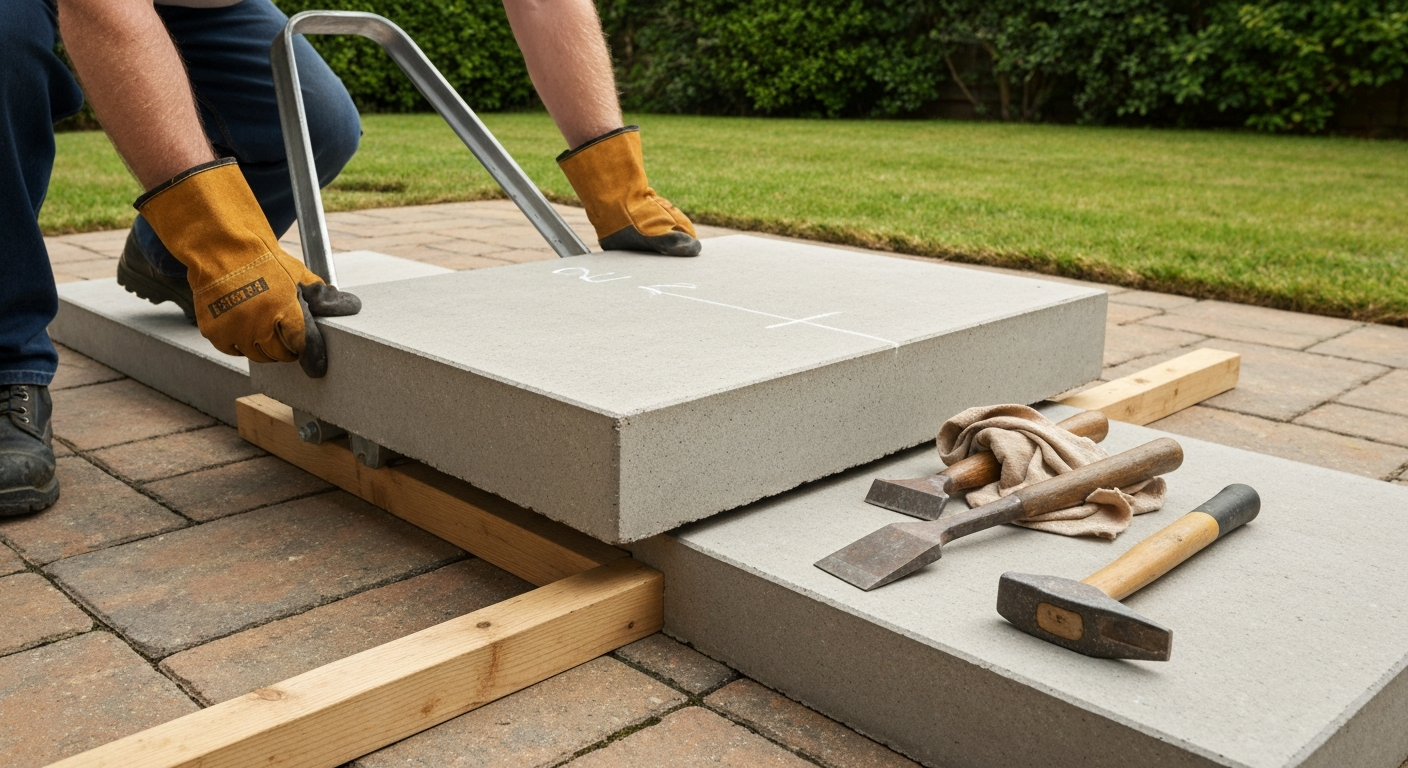
- Slab lifter / paving lifter: a mechanical lever-and-clip device that clamps the slab edge and uses your body weight as leverage — makes single-handed lifting of 30–50 kg slabs very manageable
- Vacuum lifter (cordless): tools like the GRABO Pro or FLEX VLP 18 use suction to grip the slab surface; the GRABO Pro is rated up to approximately 170–180 kg on suitable surfaces, making it useful for larger flags — check your specific model's datasheet and note that porous or heavily textured slabs reduce suction performance significantly
- Hydraulic bottle jack (2-tonne minimum): useful for slabs that are partially buried or very firmly bedded; place a timber bearer across the slab surface and jack under it
- Airbag lifter: an inflatable bladder slipped into the joint that gently lifts the slab using air pressure — effective for tight joints without pry-bar damage to edges
- Lifting straps or slab tongs: for carrying lifted slabs to a safe stacking area without grip failing
- Timber bearers (50×100 mm minimum): for supporting lifted slabs and for cribbing
- Pallet or flat wheeled trolley: for moving heavy slabs short distances without dragging
You don't need all of these for a simple loose-slab lift. A flat pry bar, a bolster chisel, a slab lifter, and your PPE will handle most standard residential patio flags. The vacuum lifter and hydraulic jack become relevant for larger or heavier slabs, or when you're lifting multiple slabs and want to protect your back.
Preparing the site before you lift anything
Good preparation takes maybe 30 minutes and prevents the majority of accidents and broken slabs. Don't skip it because you're keen to get started.
- Clear the work area: remove all furniture, pots, and obstacles from the patio and create a clear path to where you'll stack the lifted slabs. You need at least 1.5 m of clear working space around each slab you plan to lift.
- Mark the slabs you're lifting: use chalk or a wax crayon to number each slab and mark its orientation (an arrow showing which way it faces). If you're re-laying the same slabs, this saves enormous time and prevents mismatched gaps.
- Check for underground services: call 811 (US), use Dial Before You Dig (UK/AU), or rent a cable avoidance tool (CAT scanner). This applies even if you think you know what's under there. Pipes and cables are not always where plans suggest.
- Probe the joints: use a screwdriver or bolster chisel to test the joint fill. If it's polymeric sand, it needs to be removed mechanically. If it's cement pointing, it needs to be cut or chiselled before you attempt to pry the slab up.
- Protect adjacent slabs and edges: lay rubber matting or thick cardboard next to the slab being worked on. Pry bars slip; a slipping bar across an adjacent slab can chip or crack it.
- Prepare your stacking area: decide where lifted slabs will go before you lift the first one. Flat ground, ideally on timber bearers or pallets, close enough to be practical but clear of the work area. Stacking slabs on uneven ground or leaning them against a wall is how slabs fall and break — or worse, fall on someone.
Temporary support and edge protection while you work
Once a slab is partially lifted, it becomes unstable. A 35 kg slab balanced on a pry bar can topple and crack in under a second. Before you get a slab more than 50 mm off the ground, you need something to keep it there safely while you reposition your hands and your tools.
Cribbing is the simplest and most reliable method: use timber offcuts or 50×100 mm bearers placed at the slab edge to act as a temporary rest. As you lever the slab up, slide a timber piece under the raised edge. Then move to the opposite edge, lever that up, and slide another piece under. Work around all four sides in small increments rather than trying to lever one side fully up in one go, this distributes the lifting load and massively reduces the chance of the slab cracking under point stress.
For edge protection, the concern is both the slab you're lifting and its neighbours. Wrap the pry bar contact point with a rag or rubber offcut to prevent it scoring the edge of the slab. Fit timber packers between adjacent slabs if there's any risk of your tools knocking into them. This is especially important with natural stone, which chips and spalls much more readily than concrete at the edges.
If you're using a hydraulic jack, place a 50×100 mm timber bearer flat across the slab surface to spread the load, never jack directly against a single point on the underside of a slab or you'll crack it. Prop the jack clear of the joint so you're loading the slab centrally, not at a weak point near the edge.
Lifting a single loose slab: step-by-step
This is the most common scenario: one or two slabs that have settled, are hollow-sounding, or need to come up for access. The slab is intact, the bedding has failed or is sand-only, and you want it up cleanly.
- Clear and open the joints: use a bolster chisel and club hammer to remove all joint fill from the four edges of the slab. Work the chisel at a low angle along the joint, not straight down, so you're cutting along the mortar line rather than into the slab face. For polymeric sand, a stiff wire brush or oscillating multi-tool works better than a chisel. Clear at least 20–30 mm deep on all four sides.
- Test for movement: press down on each corner of the slab with your foot. A properly loose slab will rock slightly. If it doesn't move at all, the bedding bond is still intact and you'll need to work the joints more aggressively before levering.
- Find your entry point: look for the side of the slab with the widest joint or the most joint degradation. This is where your pry bar goes in first. If all joints are tight, start at a corner where two joints meet — you get more leverage and the force is applied at the weakest point of the mortar.
- Set your pry bar: slide the flat end of the pry bar into the joint at a low angle (roughly 20–30 degrees from horizontal). Place a timber offcut under the bar as a fulcrum — this protects the adjacent slab surface and gives you far better leverage than levering against the slab itself.
- Apply steady, even pressure: lever down on the bar handle slowly and smoothly. Do not jerk or hammer the bar. The goal is to break the suction and mortar bond progressively. You'll often hear a soft 'pop' as the bond releases. If the slab doesn't move, stop, reset the bar 200 mm along the same edge, and try again.
- Slide a timber crib under the raised edge: as soon as the slab lifts 20–30 mm on one side, slide a 50×50 mm timber offcut under that edge to hold the gap. This is critical — don't rely on the pry bar to hold the slab up while you move to the next edge.
- Work around all four edges: move to the opposite edge and repeat. Then do the two remaining sides. Each time you lever, slide a crib under. You're gradually walking the slab up evenly rather than hinging it up from one side, which is how slabs crack.
- Grip and lift: once the slab is 40–50 mm clear of the bed on all sides, you can get a proper grip. If the slab is under 30 kg and you have a good grip angle, two people can lift it vertically by the edges. For heavier slabs, bring in the slab tongs or vacuum lifter at this point. With the GRABO or similar vacuum tool, press the pad flat on the centre of the slab, activate the pump, wait for the green indicator, then lift. Keep the slab level — tilting puts asymmetric stress on it.
- Carry and stack: carry the slab vertically (on its edge) between two people for distances more than about a metre. Flat horizontal carrying of heavy slabs over distance is hard on backs and risks dropping. At the stacking area, lower the slab flat onto the timber bearers you prepared earlier. Never lean a slab against a wall or fence without a second person supporting it — a falling slab is a serious injury risk.
What to do once the slab is up
With the slab off, inspect it front and back in good light. Run your hand over the underside and look for through-cracks, significant flaking, or areas where the concrete has honeycombed (lots of small voids). A slab with surface marks or old mortar residue on the back is completely reusable. A slab with a crack that runs through its full thickness is not, it will re-crack when re-laid under load.
Clean the exposed bedding area thoroughly before re-laying. Remove all loose mortar, old sand, and debris. If the sub-base looks fine (compact, level, no voids, no standing water), you can re-bed directly. If you find a void, soft spot, or waterlogged area, that's the actual cause of the settlement and it needs to be fixed at sub-base level before the slab goes back. Fill voids with compacted Type 1 granular material (MOT Type 1 in the UK) in 50 mm layers, tamping each layer before adding the next. ICPI guidance recommends achieving a minimum 100 to 150 mm compacted sub-base for residential pedestrian patios.
For re-bedding on mortar, a 3:1 sharp sand to cement mix at 25 to 40 mm depth is the standard full-bed approach for concrete and natural stone flags. Lay it semi-dry (it should hold a shape when squeezed in your fist but not slump), screed it level, and bed the slab with firm, even pressure. Check level in both directions and tap down with a rubber mallet, never a metal hammer directly on the slab. Leave a consistent joint gap and re-point once the bed has cured (typically 24 hours minimum in normal temperatures).
Handling and transporting slabs without breaking them
Most slab breakage doesn't happen during the lift itself, it happens during carrying and stacking. The rules are simple. Always carry a slab on edge (vertically) with one person at each end for anything over 20 kg. Keep the slab perpendicular to the ground, not angled. An angled slab has one edge taking all the weight and it will fail at that point under load. For large-format slabs (900 mm and above), three people or a slab barrow is safer than two people trying to carry it flat.
When stacking, lay slabs flat, not leaning. Place 50×100 mm timber bearers between each slab to prevent chipping and to make it easier to pick the next one up. Stack no more than four or five slabs high on bearers, a stack of ten concrete slabs is over 300 kg and inherently unstable. On soft ground, a stack can tilt and topple without warning.
Disposal and recycling options for old slabs
Intact slabs have real value and you should try to rehome them before skipping them. Concrete flags in good condition sell or give away quickly on Facebook Marketplace, Freecycle, or local buy-nothing groups. Natural stone slabs (sandstone, slate, limestone) have even higher second-hand value, especially in areas where new stone flags are expensive. Post photos that show the slab condition honestly and give accurate measurements.
Broken or damaged slabs are harder to move on but still have uses: broken concrete can be used as hardcore fill, and some skip hire companies specifically accept concrete and stone for crushing and recycling into road base aggregate. In the UK, most licensed waste transfer stations accept inert concrete and stone separately from general skip waste, often at a lower rate. In the US, C&D (construction and demolition) recycling facilities accept concrete rubble. Call ahead to confirm acceptance and any weight limits before loading your vehicle.
Related jobs you might need next
Lifting slabs cleanly is often just the first step in a bigger project. If the slabs you've lifted are past re-use, the next step is full removal, getting them off-site and clearing the area down to sub-base. For a step-by-step guide on full removal, see how to remove old patio slabs. That process has its own considerations around volume, weight, and skip sizing. If your patio includes sections of poured aggregate concrete rather than individual flags, removal is a different job entirely involving a breaker or disc saw, since aggregate panels don't lift as individual units. For step-by-step guidance on safely removing poured aggregate patio panels, see our guide on how to remove aggregate patio. And if you're planning to replace the whole patio rather than repair it, you'll likely need to address the underlying ground first, including removing any existing sod or vegetation layer before laying a new sub-base.
Some slabs that seem worth saving turn out to be too deteriorated, too thick with old mortar, or the wrong size for a re-laid surface. If that's the case, breaking them up into manageable pieces for disposal is faster than trying to cart full slabs away, but it needs its own technique to do safely without the fragments becoming shrapnel. If you need to break slabs into pieces for disposal, see our guide on how to break up patio slabs for safe, efficient techniques.
Realistic expectations before you start
A single loose slab in good condition, laid on degraded sand bed, can be up and restacked in under 20 minutes with the right tools. A mortar-bedded slab in a tight patio with intact pointing might take an hour of joint-clearing before it moves at all. That's not failure, that's just the job. The difference between a slab that comes up intact and one that cracks is almost always patience at the joint-clearing and prying stages. Once the mortar bond is properly broken and the slab is cribbered up evenly, the actual lift is easy.
Don't try to rush a slab that isn't ready to move. If it's resisting hard on all four sides after thorough joint clearing, the slab may be set into poured concrete rather than a mortar bed, and that changes the job significantly. At that point you're looking at cutting rather than prying, which carries a much higher breakage risk and is a job where the line between DIY and professional help gets a lot thinner.
FAQ
What core information and authoritative sources should I consult to write a safe, accurate DIY article on lifting patio slabs without breaking them?
Use engineering data for material densities (concrete and natural stone) to estimate slab weights; national/industry installation standards (e.g., BS 7533, ICPI tech specs, ASTM references) for recommended bedding and base construction; trade guidance for bedding/mortar mixes and jointing (PavingExpert, manufacturer tech notes); equipment manufacturer/operator manuals for lifting tools (vacuum lifters, slab lifters, jacks, airbags, hydraulic units) and power tools (rotary hammers, breakers) for rated capacities and PPE; pavement distress and structural guidance (FHWA, ACI) to define when replacement or structural assessment is required; and local waste‑disposal/recycling guidance for disposal options. Cite the specific standard, manufacturer manual or technical guide used for each recommendation.
How do I estimate the weight of a patio slab before attempting to lift it?
Calculate slab volume (length × width × thickness) in cubic metres, then multiply by material density. Use ~2,300–2,400 kg/m³ for normal concrete and appropriate ranges for natural stone (sandstone ~2,100–2,600 kg/m³; granite/limestone ~2,600–2,800 kg/m³). Example: a 600 × 600 × 40 mm concrete slab = 0.0144 m³ × 2,400 kg/m³ ≈ 34–35 kg.
When is it reasonable for a homeowner to attempt lifting slabs themselves versus calling a professional?
Attempt DIY lifting if slabs are intact or only lightly seated in sand/loose bedding, slab weight is within your lifting capability or within rated capacity of hired/lent equipment, there is no visible structural reinforcement corrosion or severe cracking, and you can follow safe handling and re‑bedding steps. Call a professional if slabs are heavily mortared or poured into a concrete slab, there is widespread cracking/spalling or exposed corroded reinforcement, slabs are very large/heavy beyond equipment limits, lifting will involve working near utilities or steps, or if you lack necessary tools/PPE or confidence. When in doubt about structural distress (spalling, through‑cracks, exposed reinforcement) get an engineer or contractor opinion.
How do I assess the slab type, how it is bedded, and how that affects lifting technique?
Inspect slab edges and joints: loose joints and crumbly sand suggest sand bedding; firm mortar fillets or a continuous mortar bed indicate mortar‑set units; if adjacent slabs are monolithically cracked or you can’t separate edges, it may be a poured concrete slab. Tap test (hollow sound) and lifting a corner with a bar can reveal bedding. Note slab thickness and any visible reinforcement. Sand‑bedded slabs are the easiest to lift; mortar‑bedded or poured slabs require chiselling out mortar or breaking beds and caution about underlying concrete continuity.
What tools and PPE are recommended for DIY slab lifting?
Basic hand tools: pry bars (flat and lug), wide chisel/spud bar, cold chisels, lump hammer, rubber mallet, brick trowel, stiff brush. Lifting aids: slab lifter/strap, handheld vacuum lifter (check model rating), two‑man lifting straps, suction pads, and pry‑type clamp lifters. Heavy/assisted options: hydraulic bottle jack with protection plates, low‑height trolley jack, small hydraulic slab jack, pneumatic/hydraulic lifting bags (trained use), or hired mechanical vacuum lifter. Groundwork: vibrating plate compactor, rake, spirit level, straightedge. Power tools: rotary hammer with chisel bits for mortar removal (follow manual). PPE: safety boots (steel toe), gloves, eye protection, ear protection for power tools, dust mask/respirator when cutting/chiselling, kneepads, hi‑vis if site is shared. Always follow specific tool manuals for safe operation.
What are safe, scenario‑based techniques for lifting a single loose or sand‑bedded slab?
Clear joints of vegetation and debris. Use a wide pry bar under an edge or corner, leverage slowly on ground using a timber pad to protect edge. For heavier slabs use two people with a slab strap or a rated suction pad/vacuum lifter—confirm the lifter’s rated capacity and surface suitability (porous slabs may reduce suction). Lift vertically, keep slab level, and walk it short distances on edge or carry on a trolley. Support slab on timber blocks when placing down to avoid impact. Re‑bed on compacted bedding sand or coarse mortar as appropriate.
Next Article
How to Remove Old Patio Slabs: Step-by-Step DIY Guide
Step-by-step DIY on how to remove old patio slabs, from safety and tools to stuck sections, sub-base prep, and disposal.