To re-sand patio paver joints, you need to clear out the old, loose sand completely, clean the joints down to a solid surface, then sweep new jointing sand (polymeric sand is the best choice for most patios) into the gaps, compact it in passes, and activate it with water at the right nozzle setting. For slate patios, the same resanding workflow applies, but you'll want to pay extra attention to joint cleanliness and how you handle any uneven or shifting stones restore slate patio. Done right, this stops wobbling, cuts off weed growth, and keeps your patio locked together for several years before you need to repeat it.
How to Re-Sand Patio Pavers for Stable, Weed-Free Joints

Talia Lang
1 May 2026
When your paver joints actually need re-sanding
The most obvious sign is visible gaps between pavers, especially after heavy rain. A downpour can strip joint sand right out of the gaps, and once it's gone, everything starts moving. You'll also notice individual pavers that rock or wobble when you step on them, or joints packed with weeds that come back no matter how many times you pull them. Weeds don't just grow in joints for fun: they're exploiting loose, shallow sand that's been slowly washing away season after season.
Sand loss happens for a few reasons. The most common is simple washout: the original sand was too fine, the joints were never properly filled to begin with, or there's no edge restraint keeping things contained. Sometimes the base or bedding layer underneath has settled unevenly, which shifts the pavers and breaks up the joint sand over time. If you're seeing widespread wobbling and not just a few loose spots, it's worth checking whether a base or drainage issue is driving the problem before you resand, otherwise you'll be doing this again in a year. If the patio has significant sinking or areas that hold water, that's a bigger structural fix.
For most patios, though, joint sand just wears out with time and weather. Resanding every few years is normal maintenance, not a sign something went terribly wrong.
Tools and materials to gather before you start

Getting this together before you begin saves a lot of frustration. Here's what the job actually requires.
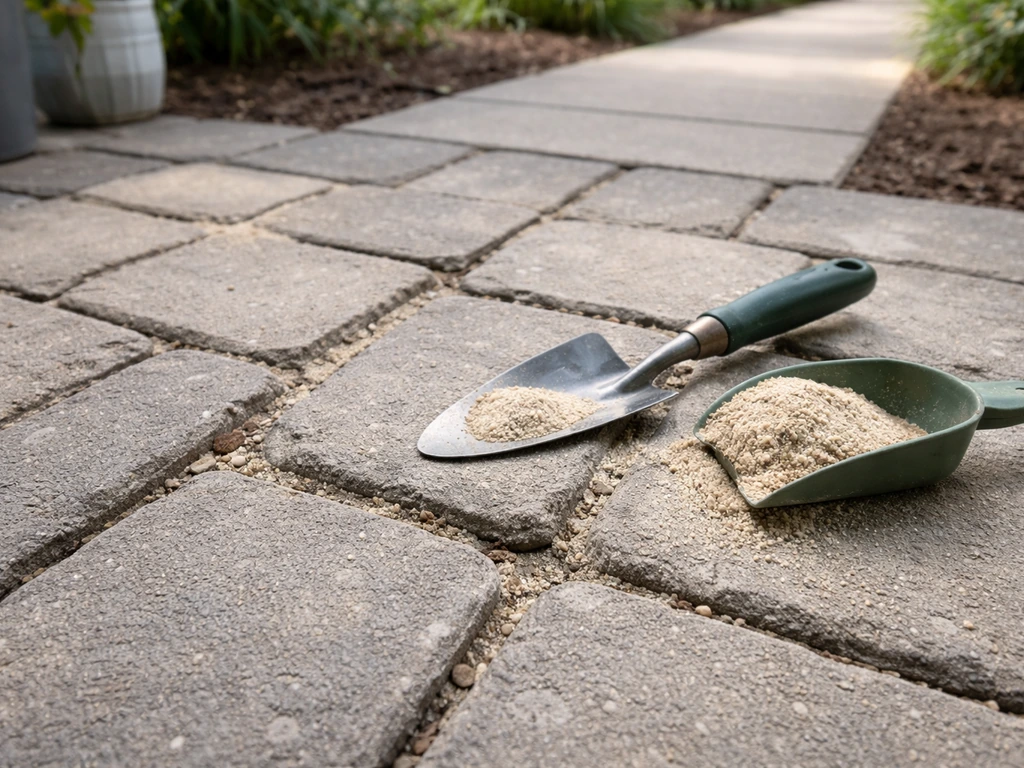
- Polymeric sand: this is the go-to for most paver patios. It contains binders that activate with water and harden into the joint, resisting washout and weed growth far better than plain kiln-dried sand. Check your paver manufacturer's guidance for compatibility, but polymeric sand works with the vast majority of concrete and natural stone pavers. You need a minimum joint depth of about 1.5 inches (4 cm) and a minimum joint width of 1/8 inch (3 mm) for it to work properly.
- Push broom with stiff bristles: you'll use this to sweep sand into joints. A wide broom (24 inches) covers more ground and speeds things up considerably.
- Garden hose with an adjustable nozzle: you need a shower or mist setting, not a jet. High pressure will blast the sand right back out of the joints. This matters more than most people realize.
- Leaf blower: useful for clearing excess sand off the paver surface before wetting, and for dealing with puddling water after activation without disturbing the fresh joints.
- Pressure washer (for the removal phase): helpful for clearing out old joint sand. More on this below.
- Vibratory plate compactor: if your patio is large (over 100 square feet), renting one is worth it. It drives sand deeper into joints than hand tamping. Rent one from a local equipment rental shop for around $60-90 for a half day.
- Hand tamper: for smaller patios or tight areas around the edges, a hand tamper works fine.
- Stiff-bristle hand brush or old putty knife: for clearing joints in corners and tight spots.
- Buckets or a tarp: for collecting excavated sand and debris.
- Rubber mallet: useful if you need to re-seat any pavers that have lifted.
One thing worth mentioning: if your patio has a sealer on it already, check whether it's still intact before you start. Resanding over a degraded sealer can trap moisture and cause problems. If the sealer is peeling or flaking, plan to address that as a separate step after resanding.
Step 1: Remove the old sand and clean the joints properly
This is the step most DIYers skip or rush, and it's why the job fails. You cannot just sweep new polymeric sand on top of old, degraded sand and expect it to hold. The new product needs to bond to a clean, solid surface, and that means getting the old jointing material out.
Start by using a pressure washer to flush the joints. Hold the wand at about a 45-degree angle and work along the joint lines, not straight down into the joint. You're trying to blast out loose, degraded sand rather than excavate the bedding layer underneath. If your original sand was polymeric and has hardened well in spots, you may need to make a few passes or use a narrower tip. Work in sections and let the water carry the debris off the patio surface.
After pressure washing, use your stiff hand brush or a screwdriver to check the joint depth in a few places. You want to confirm you're down to the bedding layer and that the joints are actually empty and clean, not just surface-flushed. If chunks of old hardened polymeric sand are still stuck in the joints, work them out with the hand brush or putty knife. Don't leave partial material in there hoping the new sand will stick to it.
Once the joints are cleared, blank" rel="noopener noreferrer">let the patio dry. If it's a warm day, a couple of hours is usually enough. You want the joints dry before you start sweeping in new sand, because damp joints will cause polymeric sand to start activating prematurely and clump instead of flowing into the gaps.
While you're waiting, check the pavers themselves. Re-seat any that are rocking using a rubber mallet. If a paver has sunk significantly, you'll need to pull it, add a bit of bedding sand (the standard depth is about 1 inch), and reset it before resanding. Don't try to compensate for a sunken paver with extra joint sand.
Step 2: Fill the joints with polymeric sand
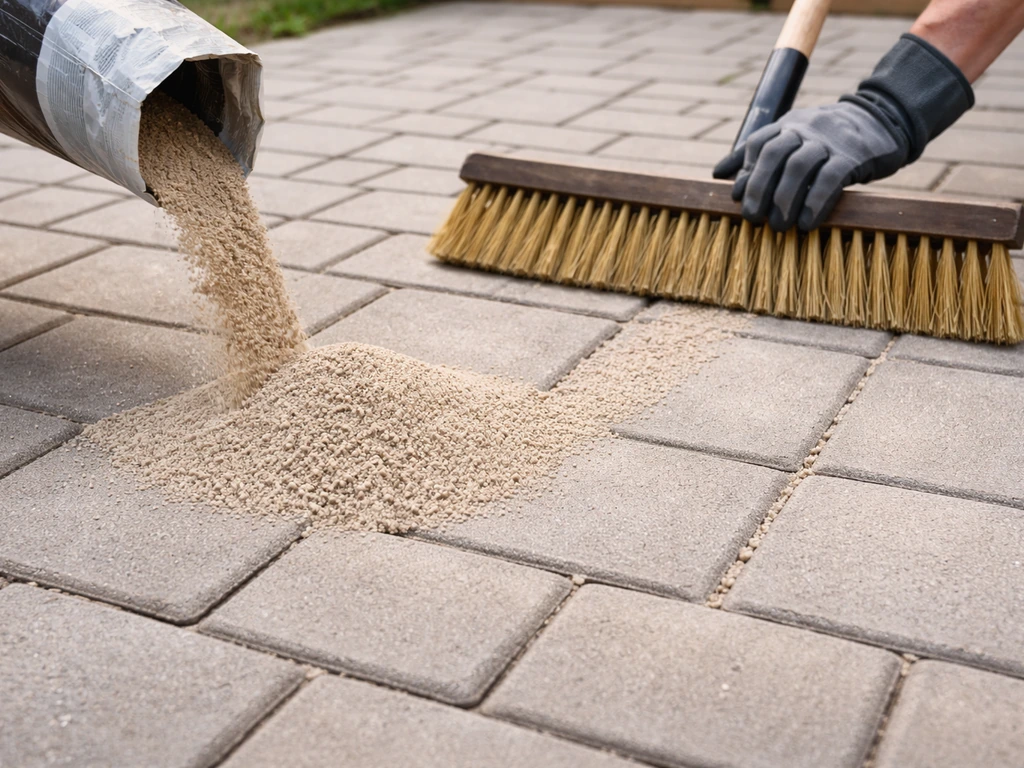
Pour polymeric sand directly onto the dry paver surface in manageable sections, not all at once. Start at one end of the patio and work your way across. Use your push broom to sweep the sand diagonally across the joints, not parallel to them. Sweeping at an angle to the joint lines pushes sand down into the gaps much more effectively than sweeping along them. Work the broom in multiple directions over each area.
The goal at this stage is to get the joints visually full, meaning sand is piled slightly above the joint surface. Don't worry about the excess on top of the pavers yet, and don't try to pre-level everything perfectly. You want more sand in the joints than you think you need because compaction will drive it down.
One thing to watch: if excess sand is piling up faster than you can sweep it in, remove the excess with a bucket rather than leaving big mounds sitting on the surface. Leaving too much material piled on the pavers interferes with even consolidation later.
Step 3: Compact the sand and repeat until joints are properly full
Once you've swept sand into a section, it's time to compact. Run the plate compactor slowly over the paver surface. The vibration drives sand down into the joints and seats it properly. On a smaller patio, use the hand tamper and work in a grid pattern, overlapping each pass.
After the first compaction pass, sweep more sand into the joints. You'll notice they've dropped significantly and need refilling. This is completely normal. Sweep sand in again, work the broom diagonally, compact again. Most patios need two to three rounds of this before the joints stay full after compaction.
Keep going until the sand level sits about 3 mm (1/8 inch) below the top of the paver surface, or just below the chamfer (the small beveled edge on most concrete pavers). Never fill joints flush with or above the paver surface. Overfilling causes problems with drainage and prevents the sand from doing its job structurally. That 1/8-inch gap is the target, and it's worth checking in a few spots with a straightedge or just eyeballing it carefully.
Once the joints are holding at the right level after compaction, use the leaf blower to clear excess sand off the paver surface. Work methodically so you're blowing surface debris off the patio, not back into joints you've already filled. At this point the paver surface should look clean and the joints should look consistently filled.
Step 4: Activate the polymeric sand with water
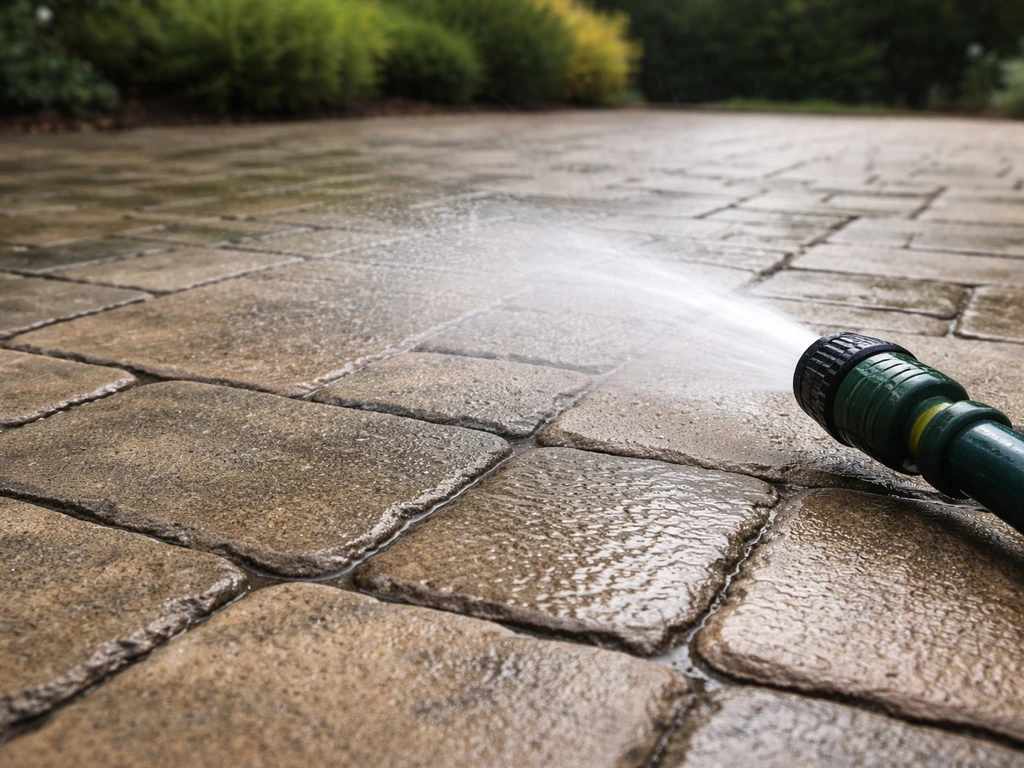
This is the step that makes polymeric sand work. Set your hose nozzle to a shower or mist setting and wet the entire patio surface evenly. You're trying to saturate the joints without blasting the sand out of them. Move the hose slowly and evenly. High pressure here will undo everything you just did, so resist the temptation to use a jet setting to speed things up.
Wet the surface until you see water pooling slightly in the joints. If water is puddling heavily on the paver surface (this happens more on textured pavers), use the leaf blower on its lowest setting to push the surface water into the joints without disturbing the sand. Let the patio soak for a few minutes, then do a second light wetting pass to make sure the full depth of each joint is saturated.
After wetting, leave the patio alone. The polymeric binders need to cure, and most manufacturers specify at least 24 hours without rain or foot traffic for the sand to set properly. Check the forecast before you start this job: a clear 24-hour window is the minimum you want. If rain is coming in less than 24 hours, wait for a better day.
Finishing up: sealing, drainage, and making it last
Should you seal after resanding?
Sealing is optional, not mandatory. A good paver sealer can help lock in the joint sand, enhance the look of the pavers, and reduce future weed growth and staining. But not every patio benefits from sealer, and applying it to the wrong surface or at the wrong time causes more problems than it solves. If you do want to seal, wait at least 48-72 hours after the polymeric sand has cured, make sure the surface is completely dry, and use a penetrating sealer rated for your paver type. Don't apply sealer to pavers that are already sealed with something incompatible. When in doubt, skip it for now and revisit it as a separate project.
Check your drainage and edges while you're at it
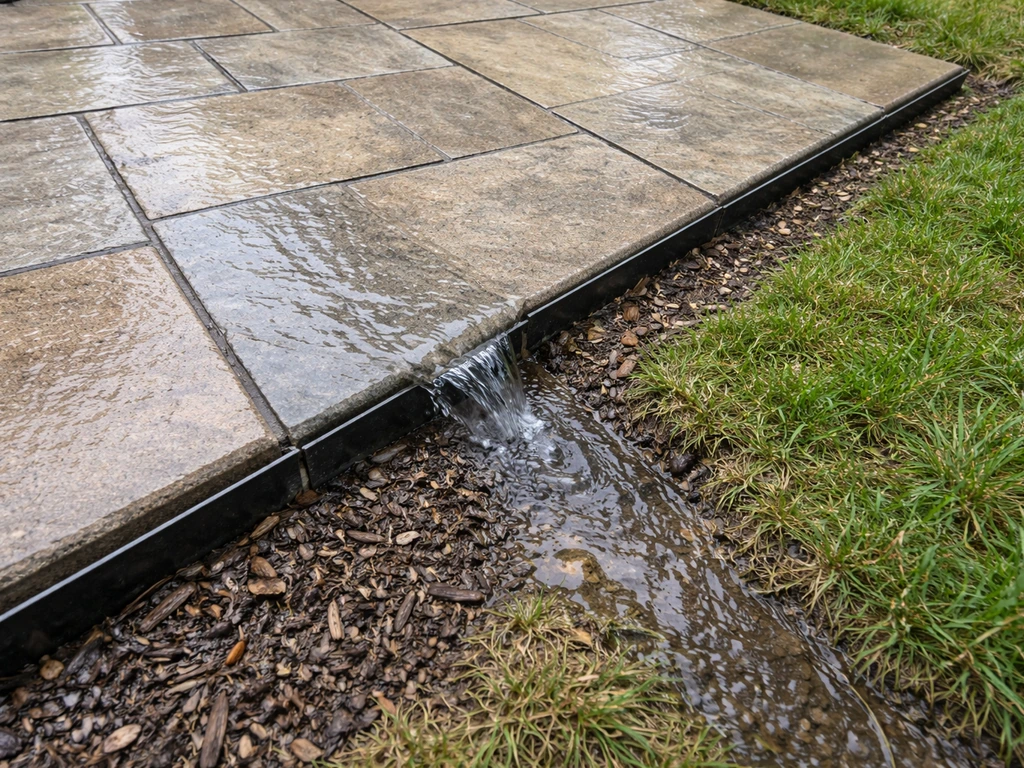
Before you call the job done, take a look at two things that drive repeat sand loss. First, check that water drains off the patio surface rather than pooling in the center. If the patio doesn't have a slight slope away from the house (about 1/8 inch per foot is the standard), standing water after rain will keep washing out your joint sand no matter how well you've filled it.
Second, check your edge restraints. Plastic or metal edging along the perimeter of the patio keeps the outer row of pavers from spreading, which is what allows all the interior joints to stay tight. If the edging is missing, broken, or has worked loose, the patio will slowly splay outward and you'll be chasing this problem forever. Repair or replace it now while everything else is fresh. If your patio is made with pea gravel, you also need the right base and edging to stabilize the surface before you start filling and maintaining any joint material stabilize pea gravel patio.
Realistic expectations going forward
Polymeric sand in a well-maintained patio with good drainage and intact edging can last five to seven years before needing attention. In harsher climates with freeze-thaw cycles, heavy rainfall, or significant tree canopy (roots and shade both cause problems), plan to inspect the joints every year and do a light top-up pass every two to three years. Catching minor joint loss early is a lot easier than doing a full resanding job again.
If you're dealing with broader patio issues beyond just the joints, like cracked or sunken areas, failed base layers, or widespread surface deterioration, re-sanding alone won't fix those. If you have to tackle more than worn joint sand, use a patio refurbishment approach that addresses those bigger damage areas too, not just the joints. If you’re wondering how to restore a patio with cracked or sunken areas, you may need to address the underlying base and surface problems, not just re-sand the joints patio restoration. Those situations call for a more involved restoration approach, which is a different scope of work than what this guide covers.
Quick reference: the resanding process at a glance
| Step | What you're doing | Key detail to get right |
|---|---|---|
| 1. Remove old sand | Pressure wash joints to clear degraded material | Get joints fully empty, not just surface-flushed |
| 2. Dry and prep | Let patio dry; re-seat any wobbly pavers | Joints must be dry before new sand goes in |
| 3. Sweep in sand | Push broom diagonally across joints in sections | Overfill slightly; you'll compact it down |
| 4. Compact | Plate compactor or hand tamper across the surface | Multiple passes; refill after each compaction |
| 5. Final level check | Confirm sand sits 1/8" below paver surface | Never fill flush or above the paver top |
| 6. Clear surface | Leaf blower removes excess sand from paver tops | Do this before wetting |
| 7. Activate with water | Shower/mist nozzle, two even passes | No jet setting; 24-hour cure window needed |
| 8. Cure | Keep off patio; no rain for 24 hours | Plan around the weather forecast |
FAQ
Can I re-sand patio pavers if the joints are partly filled and some sand is still hard?
Yes, but only if you remove the loose and degraded material. Check joint depth in several spots, scrape out any hardened polymeric chunks that remain inside, then pressure wash again and fully dry before adding fresh sand so the new product can bond to clean, solid sides.
How do I know whether I should use polymeric sand or regular joint sand?
Use polymeric sand when your joints need bonding that resists washout and weed growth. If your patio sees lots of standing water, heavy salts, or you cannot control rainfall after installation, polymeric sand can be temperamental, and you may need a drainage or slope correction first.
What’s the right amount to fill the joints, and how strict is the 1/8 inch gap?
Aim for joints to be about 3 mm (1/8 inch) below the paver surface after compaction, similar to being just under the chamfer on concrete pavers. If you fill flush or above, you can trap water at the top of the joint and reduce the joint sand’s ability to lock the pavers together.
Should I use a jointing sand that matches the old sand color, especially on pavers that look uneven?
Color matching is cosmetic, but consistency matters for performance. Match the jointing sand type (polymeric vs non-polymeric) and grain size recommended for your paver system. Even if the color differs slightly, the key is that joints are cleaned to solid material and compacted to the target depth.
Can I speed up activation by using higher water pressure or a jet setting?
Avoid it. Jet pressure can scour fresh sand out of the joints and undo compaction. Use a mist or shower setting, wet evenly across the patio, and only use the lowest blower setting if you need to move surface water without disturbing the sand.
What if rain comes after I’ve activated the polymeric sand, but within the 24-hour window?
If rain hits before the minimum cure time, the joints may not fully bind and you can see sand washout or weed return sooner. The practical move is to wait it out, then inspect after the storm; if joints are washed out, you may need to repeat the cleaning and re-sanding steps rather than just topping up.
Do I need to remove and reinstall any sunken pavers before resanding?
If a paver is noticeably rocking or sunk beyond minor adjustment, yes. Pull it, add bedding sand to the standard depth (commonly about 1 inch), re-seat it, and compact. Don’t try to fix height issues by overfilling joints, because the joint sand cannot compensate for a displaced stone.
Why do weeds come back even after resanding, and what is the fastest check to prevent it?
Most weed return comes from sand that is too shallow, not compacted, or repeatedly washed out due to poor drainage or failed edge restraint. After resanding, confirm the patio has proper slope away from the house and that perimeter edging is intact so water and sand are not migrating outward.
Can I re-sand over a previously sealed patio?
Only with caution. If the pavers or joints are sealed, degraded sealer can block bonding and trap moisture, which leads to failure. If sealer is peeling or flaking, plan to address that separately, and ensure the surface is fully dry before adding polymeric sand.
Is it okay to use a leaf blower immediately after sweeping excess sand off?
Yes for clearing the surface, but use care not to blow directly into joints at close range. Clear debris from paver surfaces methodically, then proceed with activation once the patio is dry, because moving debris back into joints unevenly can create weak spots.
How often should I inspect and top up joints if my patio is stable?
For a properly drained, well-edged patio, many installations last several years. Even so, do an annual joint check, and consider a light top-up every two to three years in harsher climates or high-rain areas to prevent small washouts from turning into repeat full resanding.
What are signs that resanding alone will not solve the problem?
If you see widespread rocking across many pavers, significant sinking, cracking in the paver area, or recurring pooling after rain, it usually points to bedding or base movement and drainage issues. In those cases, resanding is a temporary fix, and you should address the underlying base and water path before you refill joints.
Next Article
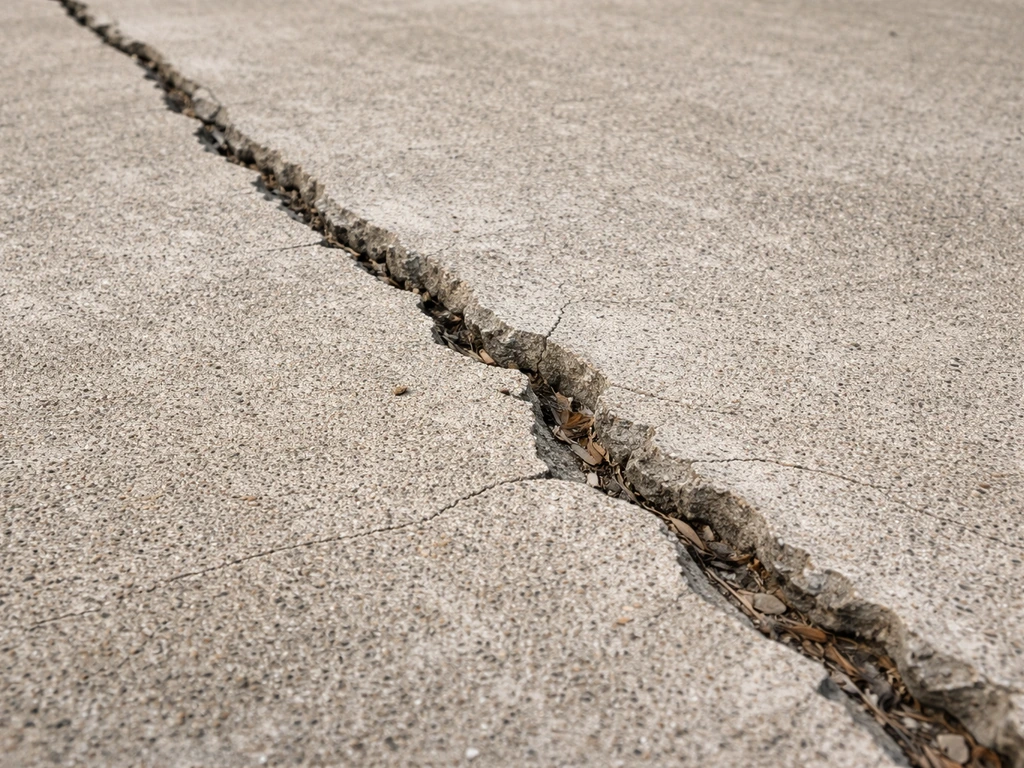
How to Fix Cement Patio Cracks: Diagnose and Repair
Diagnose concrete patio crack types and repair with the right sealant or patch, from prep to curing and prevention.