Regrouting patio pavers means removing the old, failing joint material, cleaning the gaps out thoroughly, and refilling them with the right product, whether that's polymeric sand, regular jointing sand, or a mortar-based grout depending on your paver type. If you are using mortar-based grout for a patio, the mixing ratio matters, so follow the manufacturer’s instructions closely for the right consistency and strength how to make grout for patio. Done right, it stops weeds, stabilizes movement, and can add years to a patio's life. Done wrong (wrong product, skipped prep, or wet pavers on installation day), you'll be doing it again in a season.
How to Regrout Patio Pavers: Step-by-Step DIY Guide

Talia Lang
3 May 2026
Signs you actually need to regrout (and when it won't help)
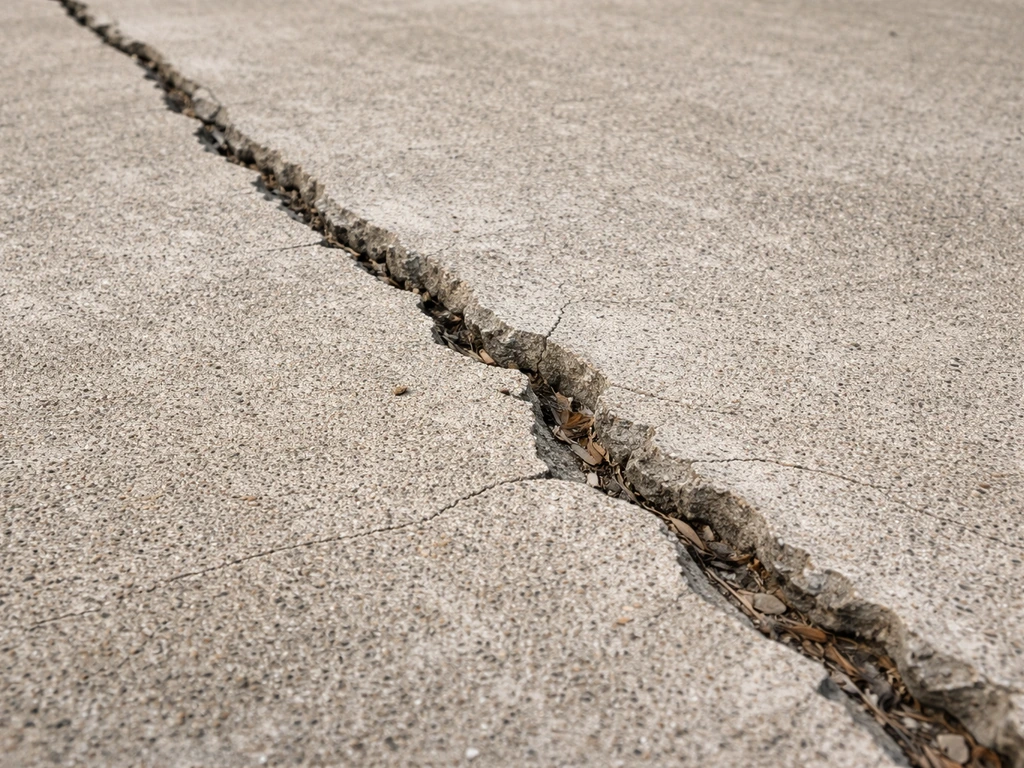
The clearest signs that regrouting is overdue: joints that are visibly eroded or sunken below the paver edge, persistent weeds and grass pushing up through the gaps, joint sand that washes out after every hard rain, and pavers that rock or shift slightly when you step on them. If you see any of these, regrouting is almost certainly the right call.
That said, regrouting only fixes the joints. It won't fix what's underneath. If you have pavers that have sunk significantly in one area, or a section of the patio that's clearly heaved due to frost or tree roots, filling the joints is cosmetic at that point. The same goes for a drainage problem where water is pooling and saturating the base.
If the base is failing or moving, no joint material is going to stay put. You need to address the underlying issue first, then regrout. If you're unsure whether it's a base problem or just surface wear, press down firmly on each paver with your foot before you start. Significant rocking or a hollow feel usually points to base failure, not just joint erosion.
- Weeds and grass growing through joints: regrout is the fix
- Eroded, sunken, or missing joint fill: regrout is the fix
- Joint sand washing out after rain: regrout with polymeric sand
- Pavers rocking noticeably: check the base first before regrouting
- One section notably lower or higher than the rest: likely a base or drainage issue
- Cracked or crumbling mortar joints on a stone patio: may need mortar repair, not just sand
If your patio uses mortared joints (common on natural stone like slate, flagstone, or bluestone) rather than sand-filled joints, the process is a bit different. This guide focuses primarily on sand-based pavers and polymeric sand, but the prep and cleaning steps apply broadly. If you're working with stone slabs and mortar, those repairs follow a related but distinct process. If you need the same kind of guidance for how to regrout patio slabs, follow the slab-specific prep and mortar notes so the joints bond correctly. Stone patio grout repairs are a bit different from sand-jointed pavers, so use the right mortar-based or mortared-joint approach for your specific stone how to repair stone patio grout.
What you'll need: tools and materials
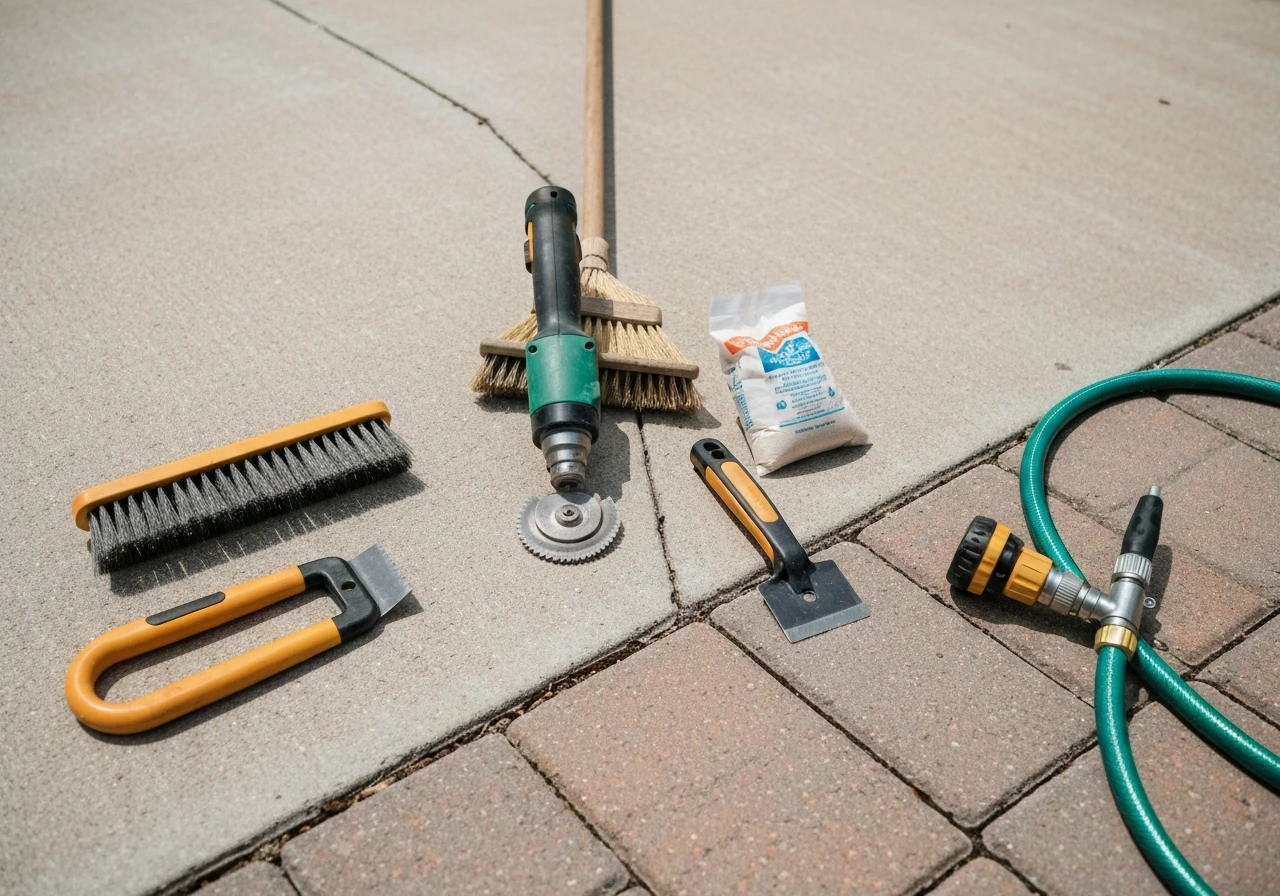
You don't need a lot of specialized equipment, but having the right tools makes the job go much faster and cleaner. Here's what to gather before you start.
- Stiff wire brush or oscillating tool with a grout removal blade (for cleaning out old joint material)
- Flathead screwdriver or putty knife (for scraping loose material from tight joints)
- Leaf blower or shop vac (critical for clearing dust and debris from joints before filling)
- Push broom (for sweeping polymeric sand into joints)
- Plate compactor or hand tamper (for settling the sand)
- Garden hose with an adjustable spray nozzle (mist/shower setting only)
- Stiff bristle broom (for final cleanup of sand off paver surfaces)
- Kneepads and gloves
- Polymeric jointing sand or appropriate grout product (see section below on choosing)
For most standard interlocking paver patios, a 50 lb bag of polymeric sand covers roughly 25 to 50 square feet depending on joint width and depth. Measure your patio and estimate generously. Running short mid-project and needing to stop is frustrating, especially once you've already activated part of the surface with water.
Choosing the right joint material for your patio
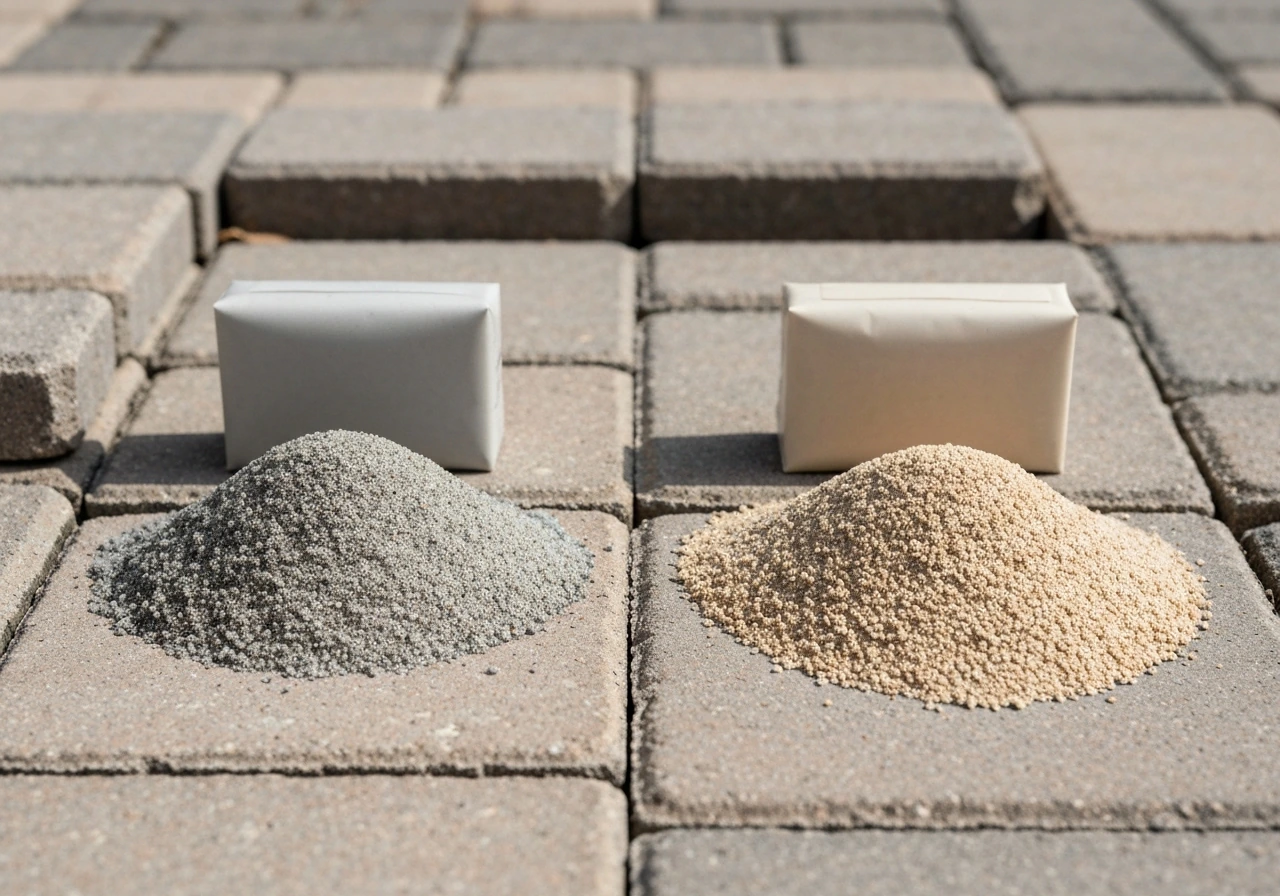
This is where a lot of DIY regrouting projects go wrong. Not every joint material works for every patio. Here's a plain breakdown.
| Material | Best For | Weed Resistance | Wash-Out Risk | Notes |
|---|---|---|---|---|
| Polymeric sand | Interlocking pavers, concrete pavers, brick, natural stone with sand joints | High | Low once cured | Most popular for DIY regrouting; requires dry pavers and correct activation |
| Regular jointing sand | Temporary fill or situations where flexibility is needed | None | High | Washes out easily; not recommended as a long-term fix |
| Polymeric mortar/grout | Natural stone, flagstone, irregular joints | High | Very low | Better for wide or irregular gaps; harder to install than sand |
| Portland cement mortar | Mortared stone patios, bluestone, slate | High | Very low | Needs mixing; cures rigid; cracks over time in freeze-thaw climates |
For the vast majority of interlocking concrete paver patios, polymeric sand is the right answer. Products like QUIKRETE HardScapes Polymeric Jointing Sand are designed specifically for joints up to 2 inches wide between pavers, brick, natural stone, and concrete slabs. You sweep it in, compact it, then activate it with water. Once it cures, it's firm, weed-resistant, and holds up to rain far better than regular sand. If you're working on brick or a regrout job for brick pavers specifically, the process is nearly identical.
One important sizing note: most polymeric sands require a minimum joint width of about 1/4 inch (roughly 6 mm) and a minimum joint depth of around 1.5 inches to work correctly. Techniseal specifies at least 4 cm (about 1.5 in) of depth for their product family. If your joints are shallower than that after cleanup, the sand won't bond properly and will fail faster. Check the technical data sheet for whatever product you buy, because minimums vary by brand.
Step-by-step: how to regrout patio pavers
Step 1: Pick the right day
This matters more than most guides admit. Polymeric sand requires dry pavers on installation day. Hanover's installation guidelines are explicit: do not apply polymeric sand to damp pavers. If it rained recently, wait at least 24 to 48 hours for the surface to dry out completely. You also need above-freezing temperatures for at least 48 hours after application. Techniseal specifies temperatures should stay above 0°C during the entire curing period. Ideal conditions are a dry, partly cloudy day above 50°F with no rain forecast for at least 24 hours.
Step 2: Remove the old joint material
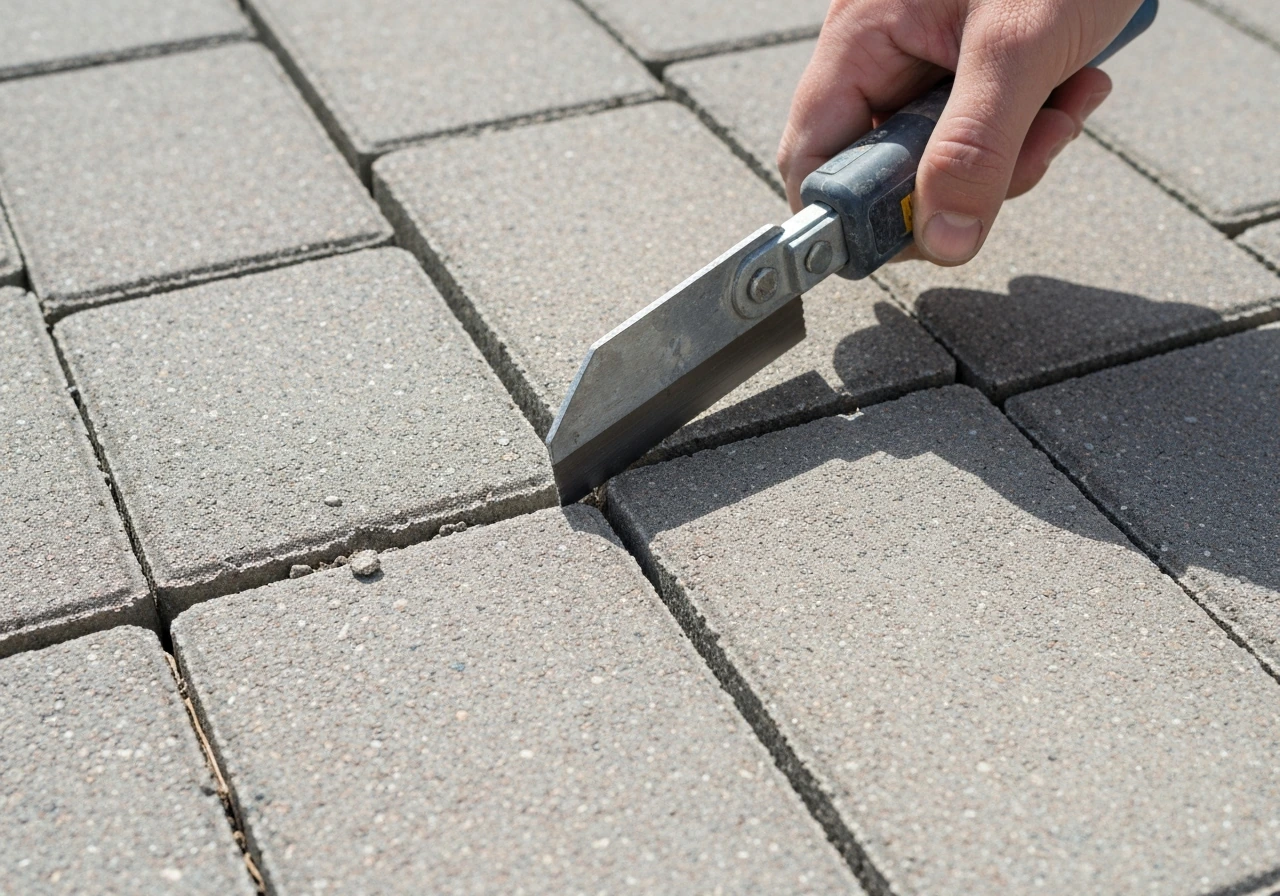
You can't just fill over old, failing grout or sand. If you need to replace worn-out grout rather than just regrout the joints, remove the old material completely and refill with the correct grout product for your patio type replace patio grout. It needs to come out. For loose or eroded joints, a stiff wire brush often does the job on its own.
For hardened old polymeric sand that's cracking but still partially bonded, an oscillating tool with a grout removal attachment speeds things up considerably. Work along each joint at a consistent depth. You're aiming to clear material down at least 1. 5 inches, or to the bedding layer if the joint is shallower than that.
Don't be aggressive enough to disturb the pavers themselves or dislodge the edge restraints.
Step 3: Clean the joints thoroughly
After scraping, there's going to be a lot of dust and fine debris sitting in those joints. This step is non-negotiable. Grab a leaf blower and work it along every joint to blow out the loose debris. Sakrete also recommends using a leaf blower on the lowest setting to remove excess dust before watering and activating polymeric sand [Grab a leaf blower and work it along every joint to blow out the loose debris.
](https://www. sakrete. com/blog/post/applying-polymeric-sand-to-an-existing-patio-or-walkway/). A shop vac works even better for tight or narrow joints.
Any material left in the bottom of the joint will prevent the new sand from bonding properly. Once the joints look clean and clear, let the whole surface sit for another hour if there's any doubt about moisture.
Step 4: Fill the joints with polymeric sand
Pour the polymeric sand out across a section of the patio and use a push broom to sweep it across the surface and into the joints. Work in multiple passes and directions. The goal is to pack the joints as full as possible without leaving large amounts of loose sand on the paver faces. This is where a plate compactor earns its keep. If you can rent one (most equipment rental places have them for around $60 to $90 per day), run it over the entire patio surface. The vibration settles the sand down into the joints much more effectively than hand tamping. After compacting, sweep in another pass of sand and compact again if the joints look low.
Step 5: Clear the surface before wetting
Before you activate the sand with water, you need to remove all the excess sand from the paver faces. Use a stiff broom to sweep it off carefully. Any polymeric sand left sitting on top of the pavers when you apply water will haze over the surface and bond to it, which is a pain to remove after the fact. Take your time here. A leaf blower on low can also help clear fine residual dust off the surface.
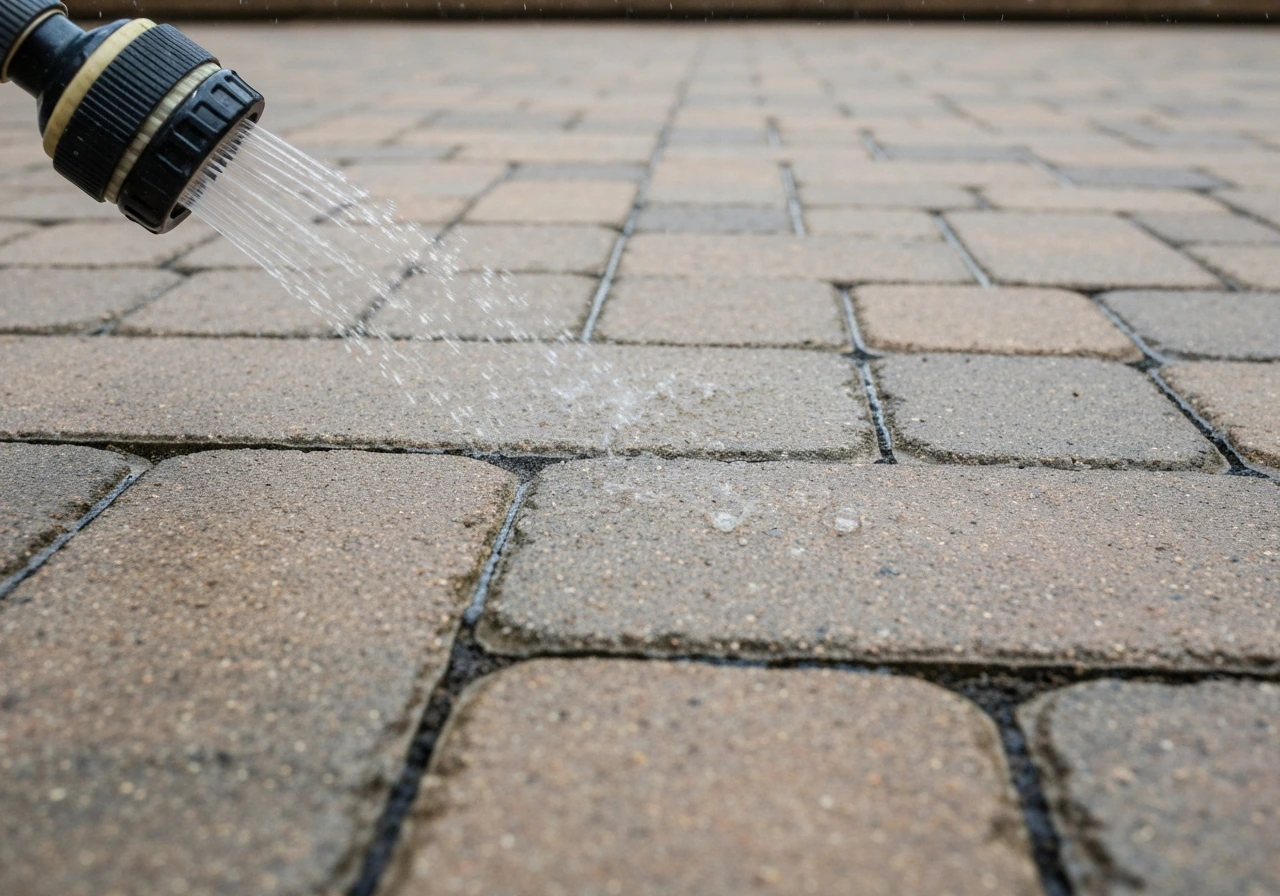
Step 6: Activate with water (carefully)
Set your hose nozzle to a gentle mist or shower setting. Never use a direct stream or jet setting on polymeric sand. Bell Industries explicitly warns against using a fine mist, which might sound contradictory, but what they mean is avoid a setting so fine it barely penetrates and causes fogging. You want a soft, steady shower that soaks into the joints without blasting them.
[Sakrete's guidance for their PermaSand product also specifies a mist or shower nozzle setting to avoid displacing the product. ](https://www. sakrete. com/wp-content/uploads/2021/12/PermaSand-TDS.
pdf) Work in sections, keeping the water moving slowly and evenly. You'll see the surface change color as the polymeric binders activate. Let the water soak all the way through the joints, but don't allow standing puddles on the surface.
Curing, cleanup, and locking the joints
Once the sand is activated, leave it alone. Most polymeric sands need 24 to 48 hours to firm up properly. Keep foot traffic off the patio for at least 24 hours, and definitely don't allow vehicle traffic until the full cure time has passed. Flexlock's product guidance is clear that joints should not be in contact with foot traffic or tire load until the sand is fully set. Rushing this is one of the most common ways DIY regrouting fails prematurely.
Rain timing is worth watching carefully. Hanover's guidelines give a window of about one hour after wetting where rain can be a problem. Most brands want no rain for at least 24 hours after activation. If rain is coming, check the forecast before you start and plan accordingly.
After curing, inspect all the joints. There's often minor settling that creates low spots, especially on larger patios. If any joints look underfilled, you can do a small dry sand top-up, sweep it in, and activate that section again without disturbing the rest. Once everything looks even and firm, do a final sweep of the entire surface to remove any residual fine dust.
Water management and preventing joint failure from happening again
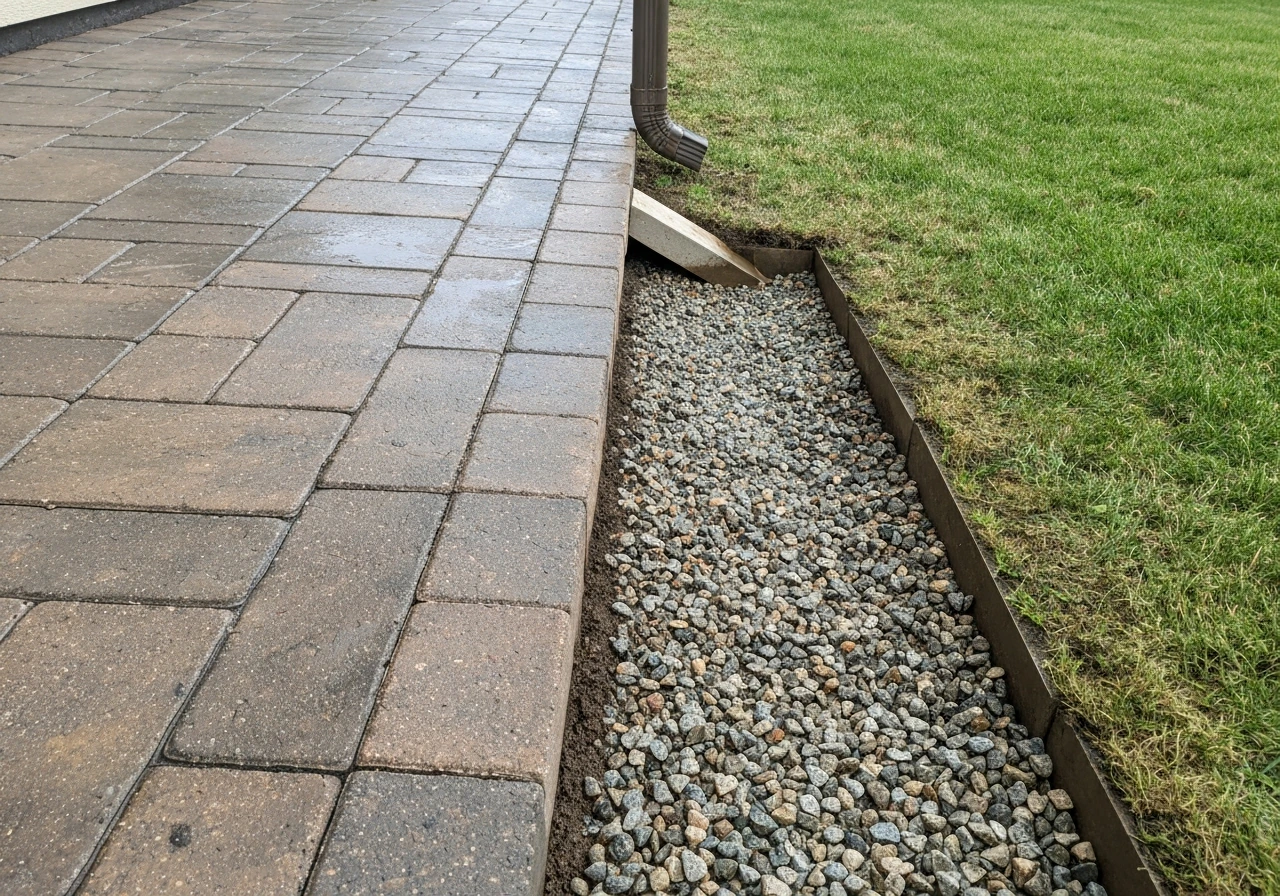
Here's something most guides skip: if your joints failed in the first place because of drainage issues, regrouting alone won't solve the recurring problem. Water has to go somewhere. If your patio doesn't have adequate slope (the general rule is a 1/4 inch drop per foot of run away from the house), water will pool on the surface or work its way into the joints rather than running off. That constant saturation is what breaks down joint material over time, regardless of what product you use.
After regrouting, take a look at where water goes during a rain. You shouldn't see it pooling in the middle of the patio or running toward the foundation. If you do, the pitch needs correction, and that means resetting pavers, not just filling joints again next spring.
Sealing is worth considering as a next step, though it's not required. A penetrating paver sealer can help lock the polymeric sand and add a layer of protection against staining and moisture intrusion. Wait a minimum of 30 days after regrouting before applying any sealer, and make sure the joints are fully cured first. Not every patio needs sealing, but for patios in high-traffic areas or climates with heavy freeze-thaw cycling, it's a reasonable investment.
Also check your edge restraints. Plastic or metal edging around the perimeter of the patio keeps pavers from spreading, which is what allows joints to widen over time. If the edging is loose, missing, or buried under soil buildup, that's worth correcting before you regrout, otherwise the pavers will slowly migrate outward again and open the joints back up.
When regrouting isn't enough: call a pro
Regrouting patio pavers is genuinely one of the more DIY-friendly patio repairs out there. But there are situations where pushing forward yourself is going to waste your time and money.
- Multiple pavers have sunk or heaved by more than half an inch: the base needs to be excavated and rebuilt
- There's a consistent drainage problem where water pools on or near the patio: regrading or a drainage system is the real fix
- The entire patio edge is spreading or the edge restraints have completely failed: the patio likely needs to be partially or fully reset
- Mortared joints on natural stone (flagstone, slate, bluestone) are failing in large sections: mortar work on irregular stone can be tricky and an improperly repaired mortar joint cracks faster than the original
- You find soft, unstable base material when you clean out the joints: that means the compacted base layer has eroded or was never adequate
If only a small section of the patio has base issues but the rest is solid, it's reasonable to reset those pavers yourself, relay the bedding, and then regrout the whole surface. But if more than 20 to 25 percent of the patio has structural problems, the economics usually point toward a full professional reset rather than piecemeal repair.
For most homeowners, a standard sand-jointed paver patio in decent shape can be regrouted in a single weekend day: a morning of removal and cleaning, an afternoon of filling, and then 24 to 48 hours of hands-off curing. The actual labor cost is low. The main investment is the polymeric sand itself, the plate compactor rental, and your patience with the cure time. Get those three things right, and the joints should hold for five to ten years before needing attention again.
FAQ
Can I regrout patio pavers if it rained recently?
If you do, the bond can fail because the binder activates incorrectly and joints can wash out early. Let the patio dry fully after rain, then re-check by pressing a finger into the joint area, it should feel dry and not cool or damp. If you cannot confirm dryness, wait longer than the minimum window before you apply polymeric sand.
Is it okay to add new polymeric sand over old cracked sand?
No. Remove material from the joint down to at least the product minimum depth, then clean out dust before refilling. If you simply top off over loose or partially bonded sand, the new layer may not penetrate or lock, and the joint will re-erode quickly.
How do I know if my patio joints are deep or wide enough for polymeric sand?
Start with the joint width and depth you have after cleaning, then match the product to those minimums. A quick test is to vacuum out one joint, measure it with a ruler, and verify it meets the sand’s technical data sheet. If joints are too shallow, you may need deeper cleanup or a different jointing material strategy.
What should I do if some joints look underfilled after curing?
Yes, but only as a targeted fix. After cure, if you see low spots or gaps, you can add a small amount of dry jointing sand to those specific areas, sweep it in, then lightly reactivate that section. Avoid soaking the whole patio again, which can disturb fully cured joints.
What if water runs across the pavers instead of soaking into the joints?
If the hose hits the paver faces, it can leave haze and create a weak interface. Use a gentle shower or mist setting, keep water moving, and stop if you see runoff or puddling on the surface. Puddles usually mean you are applying too fast or the joints are not ready to accept water.
Why do my pavers look hazy after activating the polymeric sand, and how can I prevent it?
Don’t. Excess sand on the paver surface can haze over when activated, and it becomes hard to remove without damaging the finish. Sweep thoroughly before wetting, then do a second light sweep after the final blower/vac pass to remove residual dust.
How long should I wait before walking on or parking on a freshly regrouted patio?
It depends on the product and weather, but as a rule, avoid foot traffic for at least 24 hours and avoid vehicles until full cure is reached. If you can still see color change or wetness in joints, the sand is not fully set, wait longer. Early traffic is a top cause of premature joint failure.
Can I use the same watering technique as other patio projects, or do I need a different method for polymeric sand?
Take a small test section approach. Wet one section in a controlled way and watch for the surface color change, then see if water penetrates without blowing sand out. If you get fogging, displacement, or erosion around joints, adjust the nozzle setting and your water flow before doing the rest.
How can I tell if I need to reset pavers instead of just regrouting?
Repairing joints will not fix recurring failure caused by base movement or poor drainage. If you see pooling after rain, inadequate slope, or pavers rocking, plan for addressing the base and drainage (for example resetting affected areas) before regrouting across the whole patio.
When is it safe to seal polymeric-sand joints?
Many sealers are not recommended right away because they can interfere with curing and bonding. Wait at least the stated cure period for the joint material (the article suggests 30 days), and only use a penetrating sealer that is compatible with polymeric joints to reduce staining and moisture intrusion.
Should I fix edge restraints before regrouting, or can I do it afterward?
Replace or secure edge restraints before regrouting if they are loose or missing. If pavers are able to spread, joint widths increase and sand will fail again even if you used the correct product. After fixing edging, remove and clean joints as needed before redoing them.
When does DIY regrouting stop being worth it and professional help becomes smarter?
If more than about a fifth of the patio shows structural issues, a full reset is usually more cost-effective than repeated spot repairs. Also consider a professional reset if pavers sink/heave repeatedly after weather changes, because that often indicates underlying base or drainage problems.
Next Article
How to Fix Cement Patio Cracks: Diagnose and Repair
Diagnose concrete patio crack types and repair with the right sealant or patch, from prep to curing and prevention.