You can replace a glass patio table top with tile, and the result is often more durable and better-looking than what you started with. The core process is: measure the frame opening, remove the glass safely, build a solid substrate with backer board and waterproofing, set tile with an exterior-rated mortar, grout with a weather-resistant product, and seal it. Done right, this tabletop will outlast the original glass by years.
How to Replace a Glass Patio Table Top With Tile

Talia Lang
12 May 2026
Done wrong, usually because the substrate or waterproofing was skipped or rushed, you'll end up with cracked tile, failed grout, and water rotting the frame from the inside. This guide walks you through every step so you don't end up there. If you also want to know how to retile a patio table from start to finish, follow the same step-by-step order in the rest of this guide.
Step 1: Assess the Frame and Measure for Tile Fit
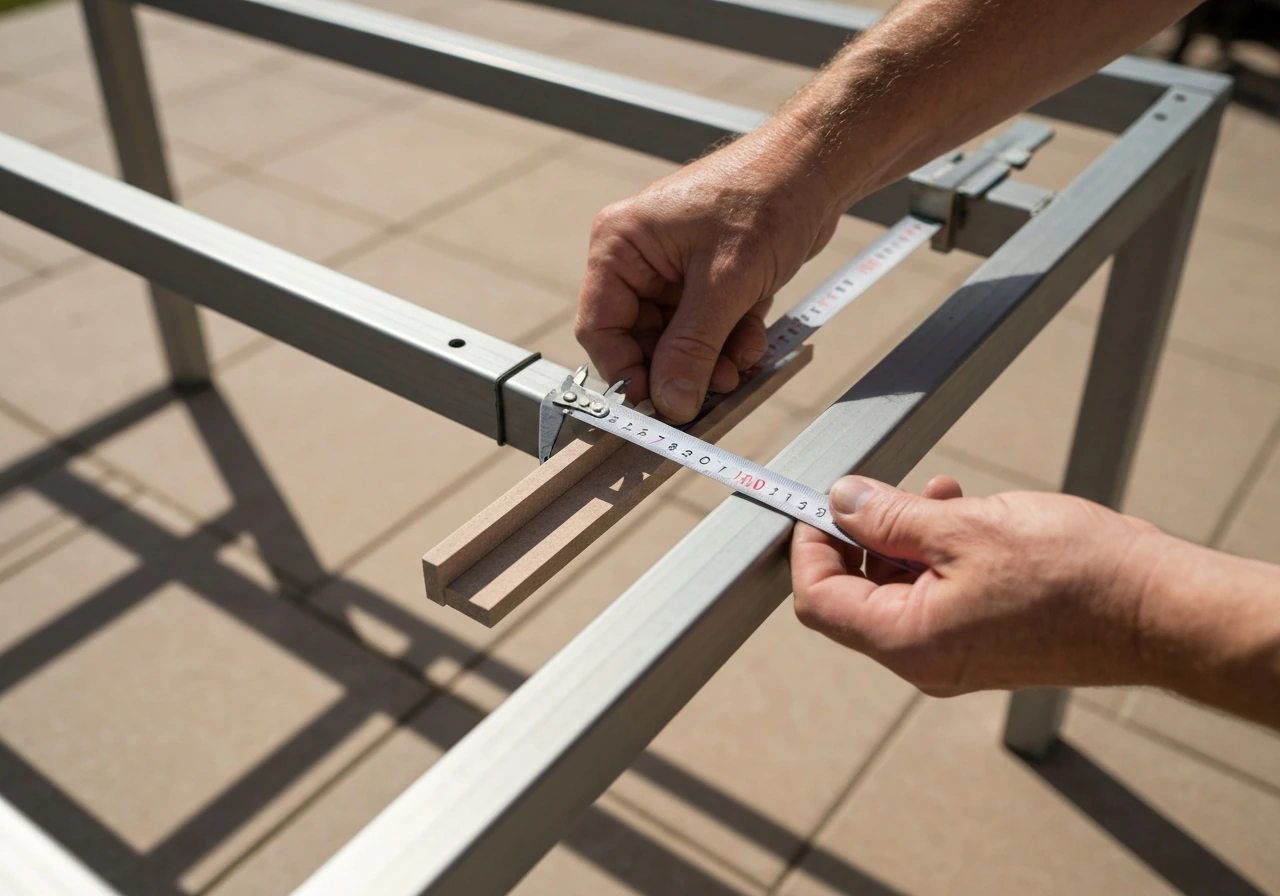
Before you buy anything, spend 20 minutes really looking at the table frame. You need to know two things: whether the frame can structurally support a tiled top, and what dimensions you're working with.
Most patio table frames fall into one of two designs. Either the glass sits inside a lip or channel around the perimeter (recessed), or it rests on top of a flat support ledge with a small rim. For a tile conversion, the recessed design is easier to work with because the edges of your substrate will be contained by the frame. For the flat-ledge design, you'll need to plan for edge treatments to keep the tile from lifting or chipping at the perimeter.
Check the frame for rust, cracks, bent sections, and loose welds. If it's a metal frame, press on the corners and sides. If anything flexes significantly, tile will crack over it within a season. Tile is unforgiving of movement. A wobbly or compromised frame is a reason to pause and either repair the frame first or walk away from the project. If you're unsure about structural integrity, especially on older wrought iron or cast aluminum tables, it's worth having a welder take a look before you invest in materials.
For measurements, take them at several points, not just once. Measure the clear inner opening (the usable space inside the frame) in at least three places across the length and three across the width. Use the smallest of those measurements for planning your substrate size. This is the same principle used when measuring for replacement glass: the smallest dimension ensures your panel actually fits.
Also measure the depth of the channel or ledge so you know how much room you have for the substrate stack (backer board plus tile thickness). A standard ceramic or porcelain tile at around 3/8 inch thick plus a 1/2-inch backer board adds up to roughly 7/8 inch. If you want a flush finish with the frame rim, that depth needs to be available.
If not, you'll need to account for the top sitting slightly proud of the frame, which is fine as long as the edges are treated properly.
For a round or oval table, measure the diameter at multiple points. If the frame has curved or radius corners, trace those curves onto cardboard to make a template. Linear measurements alone won't get you a properly fitting substrate on a curved frame.
Step 2: Choose the Right Tile for an Outdoor Table
Not every tile is appropriate for a horizontal outdoor surface that sees rain, UV, freeze/thaw cycles, and coffee cups. Here's what actually matters when choosing tile for this project.
Tile type and thickness
Porcelain tile is the right call for most outdoor tabletop conversions. It has low water absorption (typically less than 0.5%), high density, and handles freeze/thaw stress better than most ceramics. Look for tiles rated for outdoor use, often labeled frost-resistant or suitable for exterior applications. For a tabletop specifically, standard porcelain at around 3/8 inch (roughly 1 cm) thickness works well. The 2 cm thick porcelain pavers that are popular for patio floors are usually overkill for a table and will add significant weight, which matters for a table you may want to move around.
For tile size, smaller format tiles (4x4 up to 12x12 inches) are easier to work with on a table surface and reduce the number of cuts at the perimeter. Large-format tiles look great but require a flatter substrate and more precise leveling. Mosaic tiles (typically 2x2 or smaller on a mesh backing) are popular for table conversions because they conform to slightly irregular surfaces more easily, but the high grout-joint volume means more sealing maintenance over time.
Tile system comparison
| Tile Type | Best For | Watch Out For | Maintenance Level |
|---|---|---|---|
| Standard porcelain (3/8") | Most tabletop conversions, good all-around | Requires precise cuts at edges and curves | Low — seal grout annually |
| Mosaic porcelain (mesh-backed) | Curved frames, irregular shapes | More grout joints = more sealing needed | Medium — reseal grout 1-2x/year |
| 2 cm porcelain paver | Large, heavy-duty tables with strong frames | Heavy, harder to cut, overkill for most tables | Low — seal grout annually |
| Glazed ceramic | Budget option, mild climates only | Susceptible to freeze/thaw cracking, lower density | Medium — inspect annually for chips |
| Natural stone (slate, travertine) | Aesthetic preference | Porous, requires aggressive sealing, stains easily outdoors | High — seal 2-3x/year |
The recommendation for most people doing this project today: go with a frost-resistant porcelain in a 6x6 or 12x12 format. It's widely available, easy to cut with a wet saw, and gives you a surface that's genuinely low-maintenance outdoors.
Step 3: Remove the Glass Top Safely

This is the step where injuries happen if you rush. Patio table glass is typically tempered, which means if it breaks, it shatters into hundreds of small pieces rather than sharp shards. That's safer than plate glass, but it still creates a mess and can cut you. Wear heavy work gloves (not thin latex) and safety glasses for the whole removal process.
- Clear the table completely and move it to a stable work area, ideally on grass or a soft surface in case the glass slips.
- Look for any rubber bumpers, silicone beads, or retaining clips holding the glass in place. Many patio tables use small rubber tabs or a bead of clear silicone around the perimeter. Gently pry these off or cut the silicone with a utility knife before lifting.
- If the glass is sealed in with silicone, score around the full perimeter with a utility knife and then use a thin plastic putty knife (not metal) to break the bond. Work slowly and don't pry hard in one spot.
- With a helper, lift the glass straight up from both sides simultaneously. Don't tilt it. Tempered glass under bending stress can shatter without warning.
- Set the glass flat on a surface, not leaning against a wall or fence. Transport it carefully to wherever you're disposing of it or giving it away.
If the glass is cracked or has any visible damage, treat it as already broken. Put a thick moving blanket or canvas tarp over it before touching it, and wear long sleeves. Cracked tempered glass can release suddenly when you lift or flex the panel. If the glass is severely compromised, call a glass disposal service rather than trying to remove it yourself. This is one of those moments where paying someone else is worth it.
Once the glass is out, clean the frame channel or ledge thoroughly. Remove old silicone residue, rust flakes, paint chips, and dirt. A wire brush and some acetone on a rag will handle most residue. If there's significant rust on a metal frame, treat it with a rust converter product before proceeding. Any rust you leave behind will continue spreading under your new substrate.
Step 4: Build a Solid Substrate with Backer Board and Waterproofing
This is the most important part of the whole project. The substrate is what holds the tile in place and keeps water from destroying the frame. Skipping or rushing this step is why most DIY tile table projects fail within a year or two.
Choosing your backer board
For an outdoor horizontal surface, you want a substrate that won't swell, rot, or delaminate when wet. Standard cement backer board (like HardieBacker or USG Durock) is the most common choice and works well. Cut it to fit the frame opening using your smallest measured dimension. Use a carbide scoring tool or a diamond blade to cut it cleanly. For a round or curved frame, transfer your cardboard template to the backer board and cut accordingly. The board should fit snugly in the frame with no more than about 1/8 inch gap at any edge.
Schluter DITRA (a polyethylene mat membrane) is an alternative substrate approach worth knowing about. It's thinner than cement board, provides crack isolation, and has excellent drainage properties. However, it requires unmodified thin-set mortar for bonding tile to it, which is a specific product requirement you need to follow. Schluter’s official uncoupling membrane document specifies the mortar requirements for Schluter systems, including system language for thin-set selection and use requires unmodified thin-set mortar. For a simple tabletop conversion, cement backer board is more beginner-friendly and easier to source at any home improvement store.
Fasten the backer board to the frame using stainless steel screws or, if the frame isn't easily drilled, a heavy-duty construction adhesive rated for exterior use. Do not use drywall screws outdoors. They rust fast. If your table frame has metal crossbars or a wire mesh center, fasten through those. If the frame is open in the center with only a perimeter lip, you may need to add support: small aluminum angle brackets or a welded cross brace are common solutions. The backer board should not flex or bounce when you push on it. If it does, add more support before moving on.
Waterproofing the substrate
This step is non-negotiable for an outdoor horizontal surface. Water that gets through the grout joints will sit on top of your backer board, seep into the frame, and cause rust, freeze/thaw cracking, and eventual tile debonding. A liquid waterproofing membrane applied over the backer board before tile is the right approach here.
MAPEI's Mapelastic AquaDefense is a popular choice: it's a premixed liquid-rubber membrane that you roll or brush onto the backer board surface. The manufacturer recommends letting it dry for 24 hours before tiling. Before you coat the full surface, tape and treat the seams between backer board pieces and the corners where the board meets the frame using fabric mesh tape embedded in the membrane. These seams and corners are where water intrusion almost always starts.
LATICRETE's HYDRO BAN is another solid option and works the same way, with specific accessories for corners and changes of plane. Apply at least two coats of whichever membrane you choose, letting each coat dry fully. You want a continuous, pinhole-free membrane across the entire top surface and up the edges where the board contacts the frame.
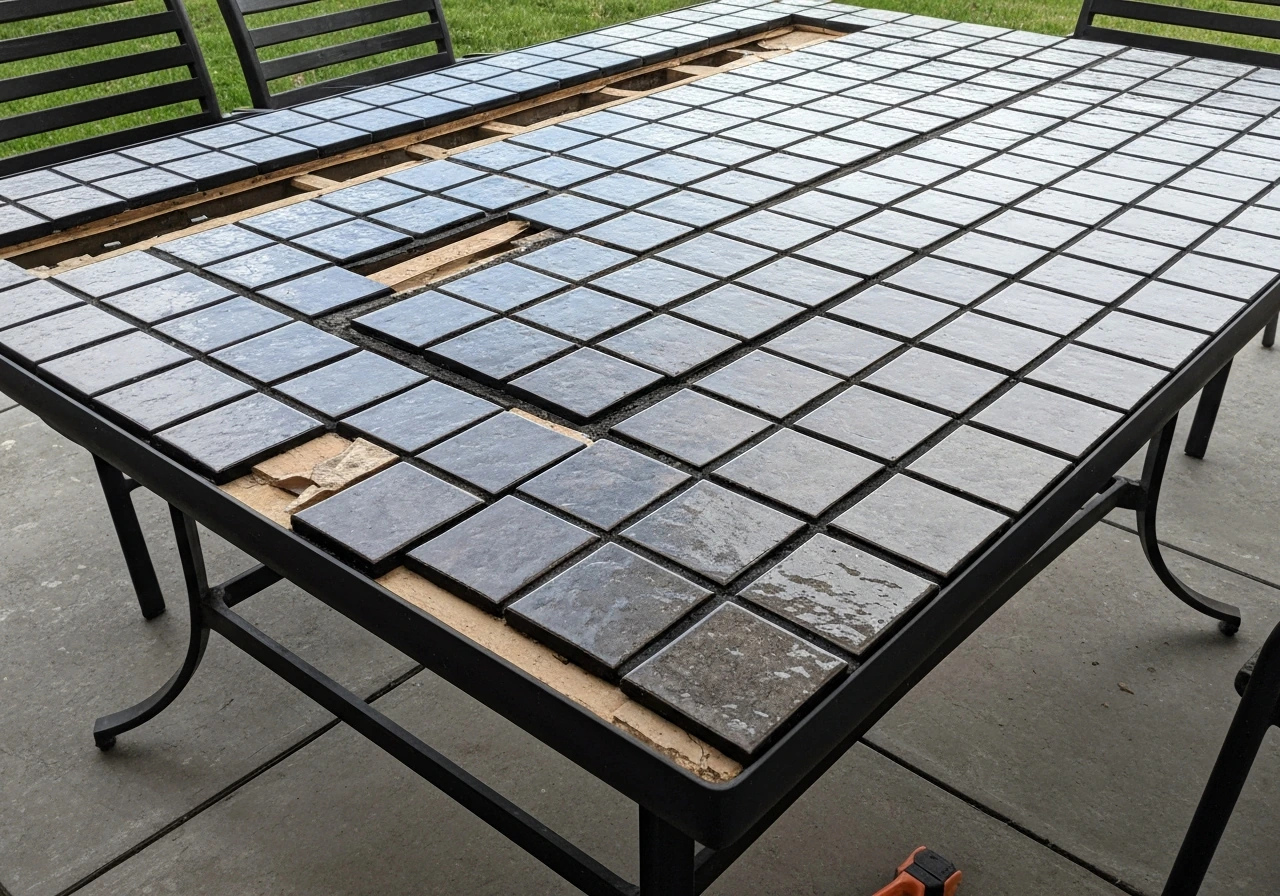
Step 5: Set the Tile Correctly for Outdoor Conditions
Layout and dry fit
Before mixing any mortar, do a full dry layout. Set your tiles out on the waterproofed surface without adhesive to confirm your spacing, pattern, and cut lines. For a centered layout, find the midpoint of the table in both directions and start from the center out toward the edges. This ensures your cut tiles at the perimeter are roughly equal in size on opposite sides, which looks intentional rather than awkward. Mark your layout lines in pencil or chalk.
For cuts at the edges and around any frame features, use a wet saw. Angle grinders with diamond blades work in a pinch but produce rougher cuts. Budget at least 10 to 15 percent extra tile for cuts and breakage.
Mortar selection and application
Use a polymer-modified thin-set mortar rated for exterior use. Products meeting ANSI A118. 4 or A118. 15 are the right performance class for this application.
For outdoor horizontal tile, ANSI A108. 5 requires at least 95% mortar contact coverage, meaning you can't have voids under the tile. Schluter’s fast-setting mortar coverage guidance when used with Schluter membranes also references ANSI A108. 5 for exterior mortar contact expectations, including over 95% coverage for exterior/shower applications [ANSI A108.
5 mortar contact coverage expectations](https://app. schluter. com/schluter-us/en_US/Setting-Materials/Schluter-FAST-SET%C2%AE/p/SETF50W). The way to hit that target is the back-butter method: apply thin-set to both the substrate and the back of each tile, then press the tile into place with a slight twisting motion and check coverage by lifting a tile periodically to verify.
If you see gaps or ridges, adjust your technique.
Use the notched trowel size recommended by the mortar manufacturer for your tile format. For most 6x6 or 12x12 tiles, a 3/16 to 1/4 inch V-notch or square-notch trowel is typical. Comb the mortar in one direction, then press the tile in perpendicular to those ridges to help collapse the ridges and fill voids.
Spacing, leveling, and edges
Use tile spacers to maintain consistent grout joints. For an outdoor table, a 1/8 inch joint is a reasonable minimum. Slightly wider joints (3/16 inch) give the grout more room and are more tolerant of minor movement. Check each tile with a small level as you go, and use a straightedge across multiple tiles frequently. Lippage (one tile sitting higher than the adjacent tile) is not just an aesthetic problem outdoors: it becomes a point where impact stress concentrates and tile chips.
At the table edges, you have a few options. Metal Schluter-RONDEC or JOLLY edge trim profiles are the cleanest solution: they cap the tile edge, protect it from chipping, and create a finished look. Alternatively, use bullnose tiles at the perimeter if your tile comes in that format. Avoid leaving raw cut tile edges exposed at the perimeter where they'll take impact and absorb water. Whatever edge solution you use, bed it in mortar the same way you set the field tile.
One thing many DIYers overlook: movement joints. Tile cannot be grouted solid all the way to the frame on an outdoor surface. Leave a small soft joint (1/8 to 1/4 inch gap, filled later with a flexible exterior silicone sealant, not grout) at the perimeter where the tile meets the frame. This gap allows for thermal expansion and prevents the tile from cracking or popping up when the table heats up on a summer afternoon. TCNA's EJ171 guideline establishes this as standard practice for exterior tile.
Step 6: Grout and Seal for Weather Resistance
Wait at least 24 hours after setting tile before grouting, or follow your mortar manufacturer's cure time. Don't rush this: grouting over uncured mortar can telegraph movement into your joints.
Choosing your grout
For an outdoor tabletop, epoxy grout is genuinely worth considering. It has water absorption below 0.5%, it doesn't need to be sealed, and it holds up to freeze/thaw cycling and outdoor staining much better than standard cement grout. The tradeoff is that it's harder to work with: it has a shorter working time, cleans up with special solvents, and costs more. LATICRETE SPECTRALOCK is a well-regarded epoxy grout option that is also confirmed to never need sealing.
If you prefer cement-based grout, use a polymer-modified or sanded cement grout rated for outdoor use. Products like LATICRETE PERMACOLOR include freeze/thaw resistance in their formulation. With cement grout, you'll need to seal it after cure. Wait at least 72 hours at 70°F (21°C) before sealing, per standard guidance. Don't seal it earlier: trapped moisture under a sealer can cause dusting or flaking as the grout cures.
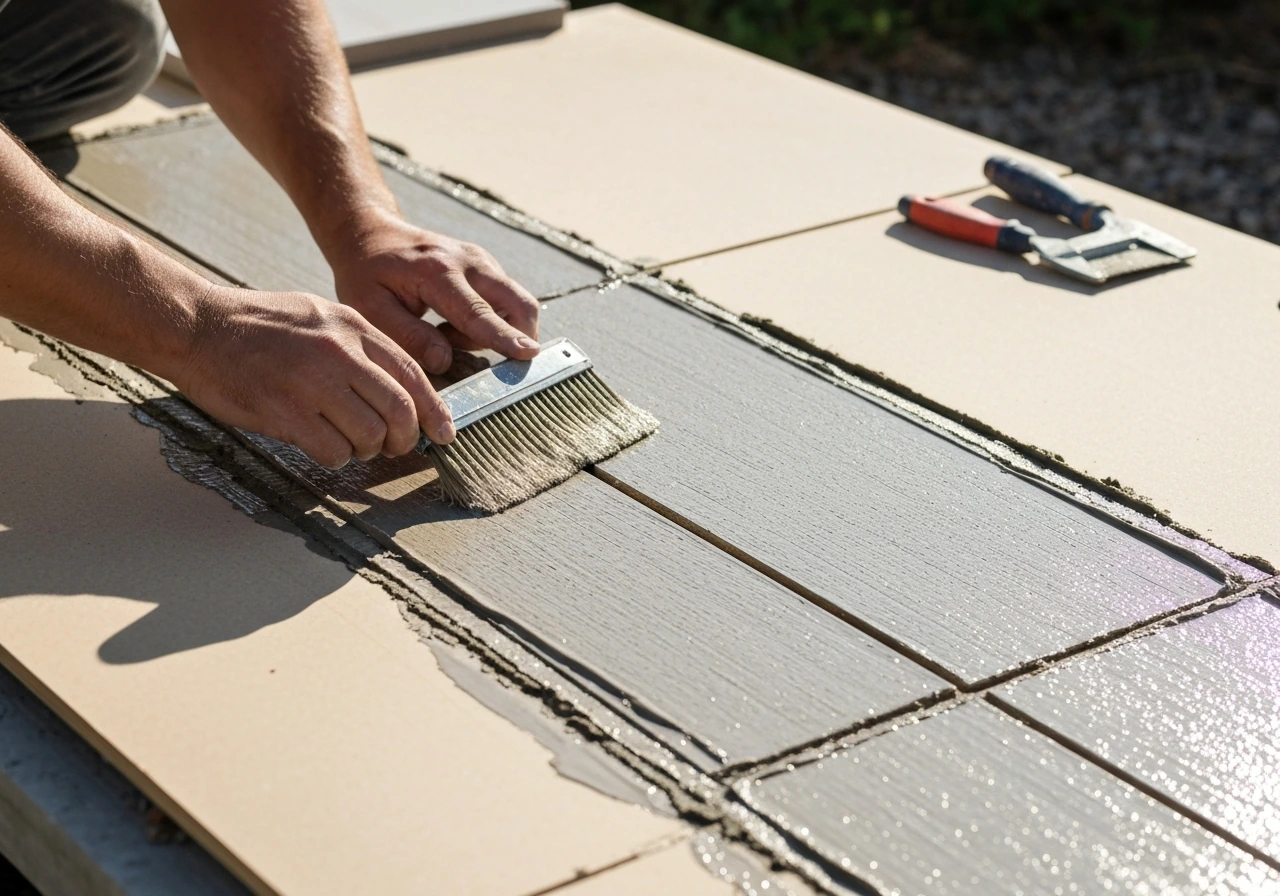
Applying grout and sealant
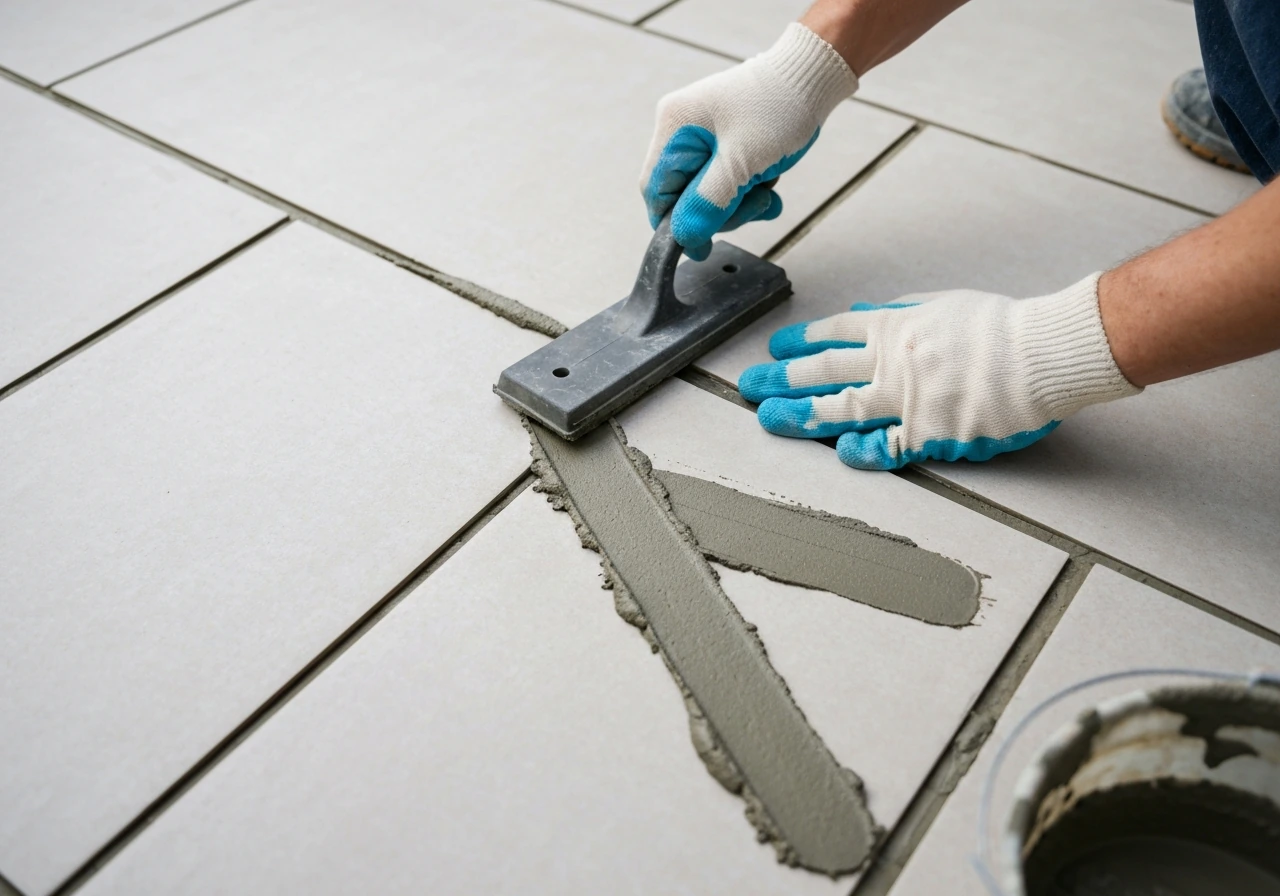
Mix grout to a smooth, peanut butter consistency. Apply it diagonally across the tile joints using a rubber float, pressing firmly to pack the joints fully. Remove excess grout from the tile surface with the edge of the float, then clean up with a damp sponge in circular motions before the grout hazes over. Polish the haze off with a dry cloth once the grout firms up. After the grout is fully cured, fill the perimeter soft joint with an exterior-grade, mold-resistant silicone sealant in a color that matches your grout. Smooth it with a wet finger or a sealant tool.
For cement grout, apply a penetrating sealer (not a topcoat sealer) after the 72-hour cure. A penetrating sealer soaks into the grout and repels water without leaving a film that can peel. Reapply annually, or whenever water no longer beads on the grout surface. For epoxy grout, skip the sealer entirely.
Step 7: Reinstall, Test, and Maintain the Finished Tabletop
Before moving the table back into use, do a quick inspection. Press on the tile surface at multiple points: you should hear no hollow sounds and feel no flex. Hollow-sounding tiles indicate a voids in the mortar bed, which means that tile will eventually crack under impact. If you find hollow tiles now, chip them out, add mortar, and reset them. It's much easier to fix this before the grout cures than to deal with a failed tile six months later.
Check that water drains off the surface. A flat tabletop will pool water at the center if there's any slight dish in the substrate. Pooling water accelerates grout breakdown and gets into any pinhole in the membrane. If the table frame allows for a slight slope (even 1/8 inch per foot), that helps enormously. If the surface is flat and water pools, keep a habit of wiping or tipping the table after rain.
For ongoing maintenance: clean the tile with a mild, pH-neutral cleaner. Avoid anything acidic (vinegar-based cleaners, citrus) on cement grout, since acid eats grout over time. Inspect the perimeter silicone joint every season and reapply if it shows any cracking or separation. Reseal cement grout annually. If you used epoxy grout, your maintenance is essentially just cleaning. Cover or store the table during extended winter freezes if you can: it's not required, but it will extend the life of the grout joints significantly.
This project is entirely doable as a DIY job over a weekend, but it's worth being honest that the glass removal and substrate waterproofing steps are where most problems start. If the glass is cracked, the frame is structurally questionable, or you don't have a way to add center support to an open frame, those are the moments to call in a pro or at least get a second opinion before proceeding. If you’re replacing a patio post, make sure you set the new post on proper footings and use the right fasteners for the material and soil conditions replace patio post. Done carefully, though, a tiled patio table top is one of the more satisfying outdoor upgrades you can make: it's durable, it looks custom, and it doesn't shatter when your kid throws a tennis ball at it.
If you're working on the table as part of a larger patio refresh, the same waterproofing and mortar principles used here apply directly to retiling a full patio surface. If you are tackling a full patio instead of just a tabletop, the same waterproofing and mortar principles are at the heart of a proper porcelain tile patio installation how to porcelain tile patio. The substrate and membrane approach scales up straightforwardly from a tabletop to a full deck or patio floor, so the skills you build on this project carry over.
FAQ
Can I tile over a table frame that flexes a little?
Yes, but only if you can confirm the frame supports the additional weight and provides a stable, non-flexing surface. If your table is light metal, corroded, or the center sags when you press it, tile will crack or debond even with good waterproofing. Before you start, do a push test on every corner and across the center, and if it moves noticeably, reinforce first or have a welder evaluate it.
What’s the best way to cut porcelain tile for a patio table edge?
Use a wet saw with a continuous-feed diamond blade, and keep the blade wet to reduce chipping and overheating. If you switch to an angle grinder, expect rougher edges that may not sit cleanly on the waterproofed substrate, which can create weak spots at the perimeter. Dry cutting also increases dust, so plan for respiratory protection.
Should I grout the tile all the way to the frame?
Aim for a slight gap between the tile and the frame, then seal that perimeter gap later. The article’s soft joint requirement (filled with exterior silicone, not grout) is what prevents cracking from heat expansion. If you grout the perimeter rigidly, temperature changes will stress the tile, and grout or tile will likely fail first along that line.
How do I prevent lippage and uneven tile on a patio table top?
After the final waterproofing coat dries, do a dry layout and check fit, then verify the table is level and the substrate plane is even. If you need to correct a “dish,” the fix is before tile goes down, through shimming or adding support under the backer board, not by relying on thick mortar. Uneven support typically shows up as lippage or hollow spots later.
When should I seal cement grout, and what type of sealer should I buy?
If you’re choosing cement grout, wait at least the full cure time before sealing, because sealing early can trap moisture and cause dusting or flaking as grout continues to hydrate. Also use a penetrating sealer, not a topical film, so water repels without leaving a coating that can peel under outdoor conditions.
Is epoxy grout better than cement grout for outdoor tabletops, and is it easier?
Epoxy grout is often more forgiving on outdoor tabletops because it resists staining and does not require sealing. The practical downside is cleanup difficulty and shorter working time, so have everything staged before mixing. If you tend to take breaks while grouting, cement grout may be easier to manage.
Can I mix different brands of thin-set mortar and waterproofing?
You should be using either an appropriate exterior-rated mortar and waterproofing plan for that system, or an isolation membrane that explicitly calls for an unmodified thin-set mortar. If you use the wrong thin-set with a membrane mat, bond can fail even if the tile looks fine initially. When in doubt, match products to the membrane instructions rather than the tile alone.
What happens if I skip waterproofing or rush the membrane cure time?
Yes, but be careful: a small sealed gap may still let water get behind the tile if the waterproofing membrane and seam treatment were incomplete. The key is that the membrane must be continuous and fully cured before tile, especially at seams and where the board meets the frame. Any missed spots become pathways for rust and freeze-thaw damage.
How can I tell if a tile is set on a void, and can I fix it later?
If you find any hollow-sounding tiles after setting, fix them immediately before grout fully hardens. Chip out the loose tile, scrape away failed mortar, and reset using the back-butter method, then let cure again before grouting. Waiting usually means the hollow spot can turn into a cracked tile under normal use.
What should I do if water pools on the tabletop after tiling?
A table top that pools water will shorten grout life even with good materials. If the frame allows it, build in a gentle slope, roughly 1/8 inch per foot, toward drains or edges. If you cannot slope the structure, make sure the surface is not dished when you install the backer board, and commit to wiping after rain.
What fasteners should I use to secure cement backer board to a patio table frame?
Use stainless steel screws rated for exterior use, or exterior-rated construction adhesive if drilling is not practical. Avoid drywall screws outdoors because corrosion can loosen the board over time, which then leads to cracked tile. Also, ensure the backer board is supported so it cannot bounce when pressed.
How do I handle backer board and tile layout on a round or oval table?
If the table has curved or radius sections, you will need a template method so the backer board and tiles actually fit the curve. Measure at multiple points, transfer a cardboard template to the board, and cut to match the curve before waterproofing. Trying to force straight cuts on a curved frame is a common cause of gaps that water can penetrate.
What maintenance schedule should I expect after installing a tiled patio tabletop?
Plan for maintenance based on grout type. Cement grout generally needs annual resealing and periodic inspection of the perimeter silicone joint, look for cracks or separation and reapply as needed. Epoxy grout mainly requires cleaning and occasional recheck of the perimeter seal.
Next Article
How to Fix Cement Patio Cracks: Diagnose and Repair
Diagnose concrete patio crack types and repair with the right sealant or patch, from prep to curing and prevention.