Replacing a patio post is a mid-level DIY project that most handy homeowners can handle over a weekend, but it has to be done in the right order: shore up the load first, then remove the old post, then set the new one properly anchored and protected against moisture. Skip any of those steps and you either end up with a sagging roof cover or a new post that rots in three years for the same reason the old one did.
How to Replace Patio Post: Step-by-Step Guide for DIYers

Talia Lang
14 Jul 2026
When and why a patio post needs to be replaced
Most patio cover posts fail at the base. Water pools around the bottom, the wood-to-concrete connection traps moisture, and rot works its way up from the inside before it's obvious on the surface. By the time you notice soft wood, a spongy feel, or the post has shifted, the structural section loss is usually already significant. You can also see failure from insect damage (termites, carpenter ants), physical impact, or just the wrong material used in the first place. Posts supporting a patio cover, pergola, or roof overhang are structural. They carry real load. That's why a temporary patch is rarely the right call once decay is established.
Signs a post needs replacing, not patching
The classic test is the screwdriver probe: push the tip firmly into the base of the post. If it sinks in more than a quarter inch with light pressure, the wood fibers have broken down and you're dealing with active decay, not surface discoloration. The general rule of thumb used by inspectors is that more than 25 to 30 percent cross-section loss means the post should come out. Here's what to look for more broadly.
- Soft, crumbly, or stringy wood at the base when probed with a screwdriver or awl
- Visible hollows, dark staining, or mushroom-like fungal growth along the grain
- The post feels spongy or slightly springy when you push on it sideways
- Visible gap or rock at the base where the post meets the footing or slab
- The roof cover or beam above has visibly shifted, settled, or pulled away
- Multiple posts show similar distress (a drainage or grading problem is the likely cause)
- Adjacent framing, the beam, or the ledger board at the house also shows rot
Repair is only reasonable when the damage is purely cosmetic (surface checks, minor splitting, weathering) and the probe test shows solid wood underneath. If the damage is localized to a small surface area, a good-quality wood hardener followed by epoxy filler can stabilize it. But if the base is compromised or the rot goes more than an inch into the section, replacement is the only responsible choice. Don't patch a structural post that has lost meaningful load capacity.
Safety first: shoring, PPE, and jobsite hazards
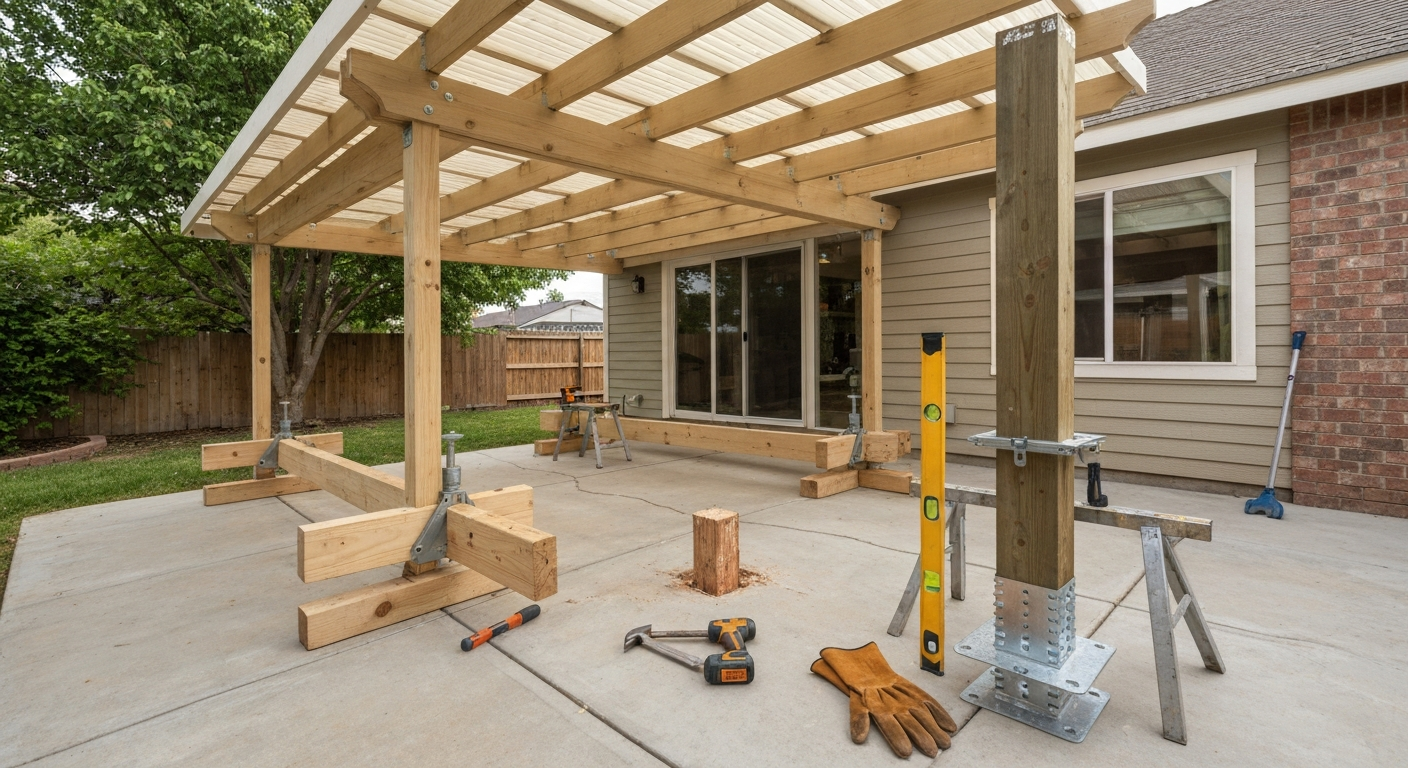
A patio cover post is holding something up. Before you touch it, you have to transfer that load somewhere else. This is non-negotiable. OSHA guidance makes clear that work affecting structural elements requires a competent-person assessment and appropriate temporary support to maintain the load path. For a typical patio cover, the practical approach is to set a temporary beam (a doubled 2x10 or an LVL offcut works well) spanning from a solid adjacent support to the next post on either side of the one you're removing, then shore that temporary beam up with adjustable screw-jack posts (also called Acrow props or telescoping jack posts) sitting on solid cribbing, not on soft soil or pavers that can shift. Get the temporary supports bearing firmly before you cut or loosen anything.
Personal protective equipment for this job: safety glasses at minimum (concrete dust and rusty fasteners both end up at eye level), leather gloves when handling pressure-treated lumber and connectors, hearing protection if you're running a reciprocating saw, and a dust mask (N95 minimum) when grinding or drilling into concrete. If the old post has paint that predates 1978, test for lead before sanding or cutting.
- Confirm the temporary shoring is carrying the load before removing any fasteners from the old post
- Don't work under an unsupported beam or roof section at any point
- Keep foot traffic and helpers out from under the work zone
- Check for electrical wiring or plumbing run through or near the post cavity before cutting
- If the structure above shows signs of unexpected movement or cracking as you work, stop and reassess
Permits, codes, and inspections: check before you dig
Here's the honest truth about permits: if the post is load-bearing (which it almost certainly is if it supports any kind of roof or cover), most building departments treat replacement as a structural alteration and require a permit, even for a like-for-like swap. Cities like Portland pull permit records for attached patio roof alterations regularly, and this is increasingly common across jurisdictions. The cost of skipping a permit is real: insurance complications, problems at resale, and potential liability if the repair fails. Call your local building department before you start. Describe what you're doing in plain terms and ask whether a permit is required.
On the code side, the 2021 IRC (Section R403.1.4) requires exterior footings to extend below the local frost line or be protected by an approved frost-protection method. IRC (2021) Section R403.1.4 requires exterior footings to extend below the local frost line (as specified in Table R301.2(1)) or be protected by an approved frost‑protection method; exterior footings must be at least 12 in. below undisturbed ground where applicable The 2021 International Residential Code (IRC) — Chapter 4: Foundations (R403.1) specifies that exterior footings must extend below the local frost line or be protected by an approved frost‑protection method.. The specific required depth comes from your local jurisdiction's version of Table R301.2(1), not a single national number. In a warm climate like southern California, that might be 12 inches. In Minnesota it can exceed 42 inches. If you're pouring a new footing, you need the local frost depth figure from your building department. Existing footings that are already code-compliant and undamaged don't need to be replaced, but you still need to confirm the anchor capacity for your post size and load.
Tools and materials checklist
This list covers the full project. You may not need every item depending on whether you're working with an existing slab anchor, pouring a new footing, or using a surface-mounted post base.
- Reciprocating saw or circular saw (post removal and cutting new post to length)
- Adjustable screw-jack posts (minimum 2) and timber cribbing for temporary shoring
- Temporary beam: doubled 2x10 or LVL scrap, long enough to span two bays
- Hammer drill with SDS bits (concrete drilling for new anchors)
- Wrench set and impact driver with appropriate bits
- Post level or digital level
- Tape measure, pencil, speed square
- Concrete hole-cleaning kit: wire brush, blow-out bulb or compressed air (for epoxy anchors)
- Rotary hammer chisel bit or cold chisel and maul (for breaking out old anchor stubs)
- Concrete mix (fast-setting bag mix for sonotube footings) and mixing bucket or mixer
- Sonotube form (if pouring new pier footing): sized to local requirements, typically 10 to 12 inches diameter
- Post anchor/base hardware: Simpson PB, PBST, or EPB series (or equivalent rated product) in correct size
- Anchor bolts or screw anchors: Simpson Titen HD or equivalent for slab attachment, or J-bolts cast in new concrete
- Hot-dip galvanized or stainless fasteners (match to preservative treatment type; see corrosion section below)
- Replacement post: pressure-treated, steel, composite, or concrete — see material section
- Flashing or post base cap (aluminum or stainless) if not included in post base design
- End-cut wood preservative (copper naphthenate) for any field cuts on pressure-treated lumber
- Exterior wood sealant, stain, or paint for finishing
- Safety glasses, N95 dust mask, leather work gloves, hearing protection
Choosing the right replacement post material
There are four practical material choices. Each has real advantages and real limitations in an exterior structural application. Here's a side-by-side comparison to help you decide, followed by a few important notes.
| Material | Pros | Cons | Code/Connector Notes |
|---|---|---|---|
| Pressure-treated wood (PT) | Widely available, easiest to cut and fasten, paintable/stainable, lowest upfront cost | Can still rot at base if moisture is trapped; requires ground-contact rating (UC4A/4B) for in-ground or concrete contact; exposed end cuts must be treated | Most common choice; use ACQ, CA, or MCA-rated PT; requires hot-dip galvanized or stainless connectors due to accelerated corrosion from treatment chemicals |
| Steel (hollow section or pipe) | Very strong for the size, no rot, dimensionally stable, long service life | Susceptible to rust if coating is damaged, harder to cut and drill in the field, requires welding or specialized connectors for some connections | Must be painted or galvanized for exterior exposure; check connector compatibility; some jurisdictions require engineered connections for steel posts in wood-framed systems |
| Composite (fiberglass wrap or solid composite) | Rot-proof, insect-proof, holds paint well, low maintenance | Higher cost than PT wood, limited sizes/profiles, some products are non-structural and decorative only — verify load rating before purchasing | Confirm the product carries a structural load rating and published design values; wrap-only products are decorative and not a post replacement |
| Concrete (cast-in-place or precast) | Extremely durable, rot-proof, no moisture issues at base, good compressive strength | Very heavy, difficult to handle without equipment, hard to connect to beam above without embedded hardware, overkill for most residential patio covers | Requires embedded anchor or hardware at top for beam connection; design and rebar typically need engineering review for structural posts |
For most residential patio covers and pergolas, ground-contact pressure-treated wood (rated UC4A minimum, UC4B for severe environments) is the practical recommendation: it's available everywhere, easy to work with, and will outlast a lot of structures if installed correctly with a proper post base that keeps the wood off the concrete. The single biggest mistake I see is using PT lumber without an elevated post base, letting the wood sit in a puddle of concrete or in direct soil contact. Even treated wood eventually loses the battle under those conditions. Use a post base. It's a $20 to $40 part that extends service life by decades.
One important note on fasteners and connectors: ACQ and other modern preservative treatments are significantly more corrosive to standard galvanized hardware than older CCA treatments were. Simpson Strong-Tie and other connector manufacturers are explicit about this: you need hot-dip galvanized (ZMAX or equivalent) or Type 304/316 stainless connectors and fasteners with treated lumber. If the treatment type is unclear or the environment is coastal, go stainless. Using standard bright or electro-galvanized hardware will cause premature connector failure.
Footing and anchor methods: which one fits your situation
The right footing method depends on what's already there, what your local frost depth requires, and what the soil conditions are. Here's an honest summary of the main options.
- Existing slab anchors (reuse or retrofit): if the existing slab is sound and the anchor bolts or post base hardware are not corroded or damaged, you can attach a new post base to the existing anchors or drill new anchors into the slab. Best for slabs in good condition with adequate thickness (typically 3.5 inches minimum, confirm with manufacturer's ICC-ES report for your anchor product). See Option A below for full details.
- Surface-mounted post base on new concrete footing or existing slab (no existing anchors): you pour a new footing or use a slab-mount base with post-installed mechanical or epoxy anchors. This is the most common approach for new footings in frost areas, using a sonotube form poured to frost depth.
- Embedded post base in new footing: you cast J-bolts or a standoff base directly into a new concrete footing while it's wet. Clean, strong, and permanent. Works well for new pours where you can control the layout.
- In-ground direct burial (not recommended for wood): burying a wood post directly is the original failure mode in most cases. If local code or site conditions require in-ground posts (some pergola designs), use a full steel post or specify in-ground rated composite with proper drainage — not wood.
If your soil is weak, waterlogged, expansive, or you're on a sloped lot with signs of movement, a simple sonotube pier may not be enough. Soft or saturated bearing soil can cause a pier to settle or tip over time regardless of how well the post is attached. In those cases, get a geotechnical opinion or consult a structural engineer before pouring. This is one of those situations where a few hundred dollars of professional input saves you from repeating the job.
Option A: Using existing slab anchors or retrofitting post bases to an existing slab
Assessing the existing slab and anchors
Before committing to reusing existing anchor hardware, spend ten minutes on a real assessment. You're looking at three things: the slab condition, the anchor condition, and the anchor capacity for your new post.
- Check slab thickness and condition: probe around the old post base for cracking, spalling, or hollow-sounding areas (tap with a hammer). Delaminated or cracked concrete near anchor locations is a problem. Manufacturer ICC-ES reports for post-installed anchors specify minimum concrete thickness (typically 3.5 to 6 inches depending on anchor type and size) and minimum edge distances — confirm your slab meets these.
- Inspect the existing anchor bolts or post base: look for visible corrosion, bending, or concrete damage around the bolt. Wiggle the bolt — any movement means it's no longer reliable. Surface rust is often cosmetic; deep section loss or a bolt that moves is not reusable.
- Check the existing post base hardware: if the old base is a rated product (Simpson or equivalent) and is not visibly corroded or deformed, and the concrete around it is sound, you may be able to reuse it with a new post. If it's deteriorated or was a non-rated cast-iron ornamental base, replace the hardware.
- Match the new post size to the base: post bases are sized to specific post widths (3.5 inch for a 4x4, 5.5 inch for a 6x6). Confirm the base size is correct for your replacement post. Using an undersized base is a code and safety issue.
Drilling and setting new post-installed anchors (retrofit method)
If the existing anchors are no good, you'll be drilling new holes and setting post-installed anchors. The two practical choices for slab applications are mechanical screw anchors (such as the Simpson Titen HD) and adhesive/epoxy anchors (such as Hilti HIT-RE 500 or similar). Mechanical screw anchors are simpler and can be loaded sooner; epoxy anchors are better where you have limited edge distances, cracked concrete, or need higher tension capacity.
- Mark the anchor hole locations from the post base template. Confirm minimum edge distance from the slab edge per the anchor manufacturer's ICC-ES report (typically 1.75 to 3 inches minimum, varies by anchor).
- Drill with a hammer drill using the exact bit diameter specified in the manufacturer's instructions — not approximate. For Titen HD anchors, the drill bit diameter matches the anchor diameter exactly. For epoxy anchors, the bit is typically 1/16 inch larger than the rod diameter.
- For epoxy anchors, clean the hole thoroughly before injecting adhesive: blow out debris with compressed air, then brush with a wire brush, then blow again. Hilti and Simpson both specify a minimum of two blow-brush-blow cycles. Skipping this step is the most common cause of epoxy anchor failure.
- For epoxy anchors (e.g., Hilti HIT-RE 500): inject the adhesive per the manufacturer's instructions (typically working from the bottom of the hole outward to avoid air pockets), insert the threaded rod slowly with a twisting motion, and do not disturb the anchor until the specified cure time has passed. Cure time is temperature-dependent: at 20°C (68°F), allow approximately 7 hours for initial cure before light loading, and longer to reach design strength — check the current product data sheet for your temperature conditions. In cold weather, cure time increases substantially.
- For mechanical screw anchors (Titen HD): insert and drive with an impact driver or torque wrench to the maximum installation torque listed in the product literature. Do not exceed the listed torque — it does not improve the connection and can crack the concrete or damage the anchor.
- Set the post base over the anchor bolts per the manufacturer's instructions and tighten the nuts with a wrench. Do not over-torque — snug plus a quarter turn is generally correct for cast-in J-bolts and mechanical anchors.
Installing the new post with flashing and moisture protection
Once the post base is anchored, the new post installation is straightforward, but don't skip the moisture protection details. This is where the previous post probably failed.
- Cut the replacement post to the required length, measuring from the top of the post base standoff to the underside of the beam. For pressure-treated posts, treat every field cut (especially end cuts) immediately with an approved end-cut preservative (copper naphthenate-based products are widely available). Let it soak in before installation.
- If the post base does not include an integral standoff that keeps the wood 1 inch or more above the concrete surface, add a drip cap or post base cap flashing. This small aluminum or stainless piece sheds water away from the wood-to-metal interface and is worth the extra few minutes.
- Set the post into the base and plumb it in both directions using a post level before driving any fasteners. Have a helper or use temporary bracing to hold it while you check. Don't drive fasteners and then try to adjust.
- Drive the specified fasteners (hot-dip galvanized joist hanger nails or structural screws, per the post base manufacturer's specifications — not standard nails or drywall screws) through all the designated holes in the post base. Partial fastening reduces the rated capacity of the connector.
- At the top connection, reconnect the post-to-beam hardware using rated post caps (Simpson PC or BC series, or equivalent). Use all specified fastener holes. If the beam-to-post connection was previously nailed through the side of the beam into the post top, this is a good time to upgrade to a proper post cap connector, which provides a more reliable and code-recognized connection.
- Once the post is fully fastened, remove the temporary shoring carefully and in reverse order: lower the jack posts slowly and observe the structure for any unexpected movement before removing the temporary beam.
Finishing, sealing, and long-term maintenance
A pressure-treated post left unfinished will weather, check (surface crack), and gray over time. Checks don't affect structural performance, but they do let moisture in. For best longevity, apply a penetrating exterior wood sealer or a solid-color exterior stain within a few weeks of installation (let the PT lumber dry down a bit first, freshly treated wood can feel damp and won't hold finish well). If you also maintain or update outdoor furniture, see our guide on how to retile a patio table for durable, weather-resistant tabletops. If you're also updating outdoor furniture, see our guide on how to replace glass patio table top with tile for a durable, weather‑resistant tabletop option. Repaint or re-seal every three to five years. If you also need guidance on refinishing or repairing tiled outdoor furniture, see how to replace tile on patio table.
In termite-prone regions, the post base's standoff feature is your primary physical defense. Beyond that, don't let mulch or soil pile up against the base of the post, keep gutters and downspouts directed away from the area, and check the post base annually for standing water or debris accumulation. A five-minute check once a year will tell you far more than a major inspection after a problem develops.
Realistic time and cost estimates
| Task | Estimated Time | Estimated Cost (Materials Only) |
|---|---|---|
| Temporary shoring setup and teardown | 1–2 hours | $0 (if you own jack posts) to $60–80 rental |
| Old post removal (cut, pull, clean up stub) | 1–2 hours | Minimal — disposal cost only |
| New anchor installation (retrofit into slab) | 1–2 hours | $15–40 for anchors and hardware |
| New post base hardware | 30 minutes | $20–50 for rated post base (Simpson or equivalent) |
| New pressure-treated post (4x4 or 6x6, 8–10 ft) | 30 minutes to cut and set | $30–70 depending on size and grade |
| New concrete footing (sonotube + bag mix) | 2–4 hours plus 7-day cure before loading | $40–80 for materials; rent mixer if needed |
| Finishing (seal, stain, paint) | 1–2 hours (plus drying time) | $20–50 for sealant or stain |
Total DIY material cost for a straightforward single-post replacement with an existing slab anchor typically runs $100 to $200 if you have basic tools already. If you're pouring a new footing, add time and roughly $50 to $80 more. Hiring a contractor for the full job typically runs $400 to $900 depending on your region and whether a permit inspection is involved.
Common mistakes and how to avoid them
- Removing the post before shoring the load: the most dangerous mistake, and it happens more often than it should. Always set temporary supports first.
- Using the wrong preservative treatment rating: UC3B (above-ground, painted) is not the same as UC4A (ground contact). Read the stamp on the lumber before you buy.
- Using standard hardware with ACQ-treated lumber: electroplated or plain galvanized fasteners corrode rapidly with modern preservative treatments. Use ZMAX or stainless hardware.
- Skipping end-cut treatment: every cut end on PT lumber opens up untreated wood fiber. Field-applied copper naphthenate is cheap and takes 30 seconds.
- Over-torquing post-installed anchors: more torque does not mean more holding power once past the listed maximum. It cracks the concrete substrate.
- Loading epoxy anchors before they've cured: the adhesive needs time to reach design strength. Loading early, especially in cold weather, dramatically reduces capacity.
- Not plumbing the post before fastening: a post that's even 1/4 inch out of plumb over 8 feet is visible and creates uneven load distribution. Check both directions before driving a single fastener.
- Using decorative composite column wraps as structural replacements: these products are widely sold and clearly labeled as non-structural, but they get misused. If it doesn't have published load values, it's not a structural post.
When to call a professional
This is a DIY-friendly project under the right conditions, but there are situations where calling a structural engineer or licensed contractor is the right call. Don't treat this as optional if any of the following apply.
- The structure above is visibly out of level, has new cracks, or shows signs of unexpected movement
- More than one post is failing, or the beam or ledger board also shows rot — the problem is systemic
- The existing footing is undersized, cracked through, or settled, and you're in a frost-affected climate
- The site has soft, waterlogged, or expansive soil that a simple pier footing may not handle
- The patio cover is attached to the main house structure and any load path change affects the house framing
- Your local jurisdiction requires a permit and an inspection that includes engineer-stamped drawings
- You're not comfortable with any step involving the temporary shoring sequence
A structural engineer consultation typically runs $200 to $500 for a site visit and a written recommendation. That's usually money well spent when the alternative is guessing about load paths under a roof cover. This guide covers a standard single-post replacement in normal conditions. Anything outside that scope deserves expert eyes.
If your patio project extends beyond the post itself, say, you're rethinking the surface underfoot while you're out there, you might find it useful to look at guides covering porcelain tile patios or retiling a patio table, since those projects often come up during the same renovation window. But the post is structural; get that right before you worry about the finish work.
FAQ
What are the clear signs that a patio post needs replacement rather than repair?
Replace (don’t just patch) a post when you find: visible soft, crumbly or spongy wood at the base; rot that removes more than roughly 25–30% of the cross‑section; insect damage that undermines structural fibers; cracking or crushing of the post under load; decay extending into the beam or supporting framing; ongoing or progressive settlement/movement despite prior fixes. Probe the base with a screwdriver: deep penetration, separation of fibers, or a hollow sound indicate replacement. If multiple posts or the beam are compromised, plan a larger structural repair.
Do I need a permit or inspection to replace a load‑bearing patio post?
Possibly—most jurisdictions treat removal/replacement of load‑bearing posts or footings as a structural alteration and require a permit and inspection. Local code also sets frost‑depth and footing requirements. Always check your local building department before starting; if the work changes the load path or footings extend below grade, a permit is commonly required.
What safety precautions and temporary shoring are required before removing a load‑bearing post?
Provide temporary support to carry the roof/cover load before removing a post. Typical safe approach: install a stout temporary beam (2× or LVL sized to span actuating supports) and use adjustable steel jack posts (Acrow/telescoping jacks) or screw‑jack props on properly stacked cribbing to bear the load. Use a competent‑person assessment (OSHA guidance) and secure the work area with fall protection if overhead work or ladders are used. Never begin cutting until the load has been transferred and verified stable.
What are the basic tools and materials I’ll need?
Tools: adjustable steel jack posts, chain/strap clamps, reciprocating saw or circular saw, posthole digger/auger, drill and masonry bit, torque wrench/driver, pry bars, sledge, level, tape measure, concrete mixer or wheelbarrow, shovel, tamper, caulk gun. Materials: replacement post (ground‑contact pressure‑treated wood, galvanized/stainless steel or composite), post base/connector sized to loads (galvanized or stainless), concrete mix (fast‑track if needed), sonotube (if using poured pier), anchor bolts or epoxy for bonded anchors, flashing/bituminous paint or rubber flashing, exterior screws/bolts per connector spec, preservative for cut ends, gap sealant/masonry caulk, gravel for pier base.
What replacement post materials are appropriate and pros/cons?
Wood (pressure‑treated ground‑contact): economical, code‑accepted, easy to cut/treat; must be kept off concrete or use a rated post base and corrosion‑resistant hardware. Metal (galvanized or stainless steel): very durable, slim profiles, resists rot; requires compatible anchors and flashing; higher cost. Composite: rot/insect resistant, low maintenance; verify structural capacity/codes. Concrete or cast post: durable but heavier, more complex to anchor and finish. Always match connector corrosion class to the material and environment (use hot‑dip galvanized or stainless with pressure‑treated wood, stainless in marine/ACQ situations).
What footing/post‑anchor methods should I consider?
Common methods: 1) Existing slab anchors — use mechanical screw anchors or bonded epoxy anchors into the slab if slab thickness, reinforcement and condition permit. 2) New concrete isolated pier/sonotube — dig to frost depth per local code, set gravel, pour concrete and use an embedded anchor or elevated post base. 3) Surface‑mounted post base on a concrete pad — use heavy post base with appropriate anchors, but elevated bases require adequate slab thickness/reinforcement. Choose method based on slab condition, frost depth, soil bearing and load. Follow manufacturer embedment, edge‑distance and cure/torque specs.
Next Article
How to Replace a Glass Patio Table Top With Tile
Step-by-step DIY on replacing a glass patio table top with outdoor tile, waterproofing, grout, sealing, and crack preven