Repointing a patio means raking out the failed joint material between your slabs or pavers and replacing it with fresh filler, whether that's a sand-cement mortar mix (typically 3:1 or 4:1 sand to cement) or a polymeric jointing sand product. Done right, it stops weeds, prevents water from undercutting your slabs, and makes the whole surface look like new. The job is absolutely DIY-friendly as long as the problem is the joints themselves and not something deeper, like a washed-out bedding layer or a moving subbase.
How to Repoint a Patio: Supplies and Step by Step Guide

Talia Lang
14 May 2026
Is repointing actually the right fix?
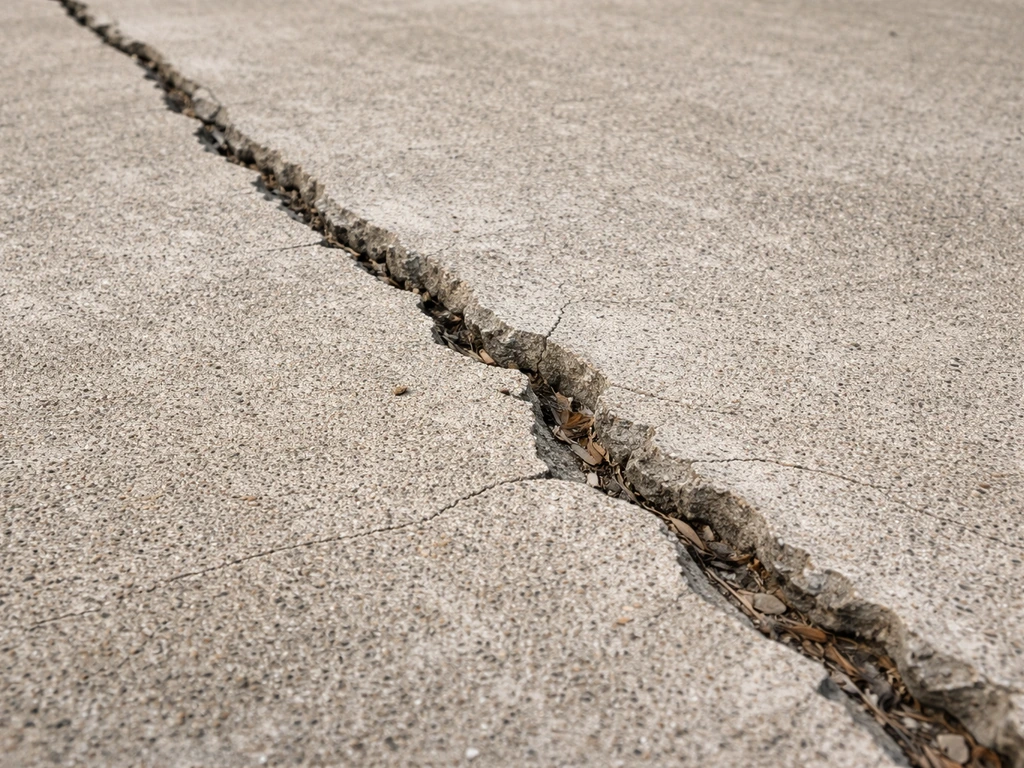
Before you buy anything, spend five minutes walking your patio slowly and pressing down on each slab or paver with your foot. This one check will save you a wasted weekend. If the slabs feel solid and just the joint material is crumbling, weedy, or washing away after rain, you're in the right place. Repointing will fix it.
If any slab rocks or flexes underfoot, that's a different problem. Rocking means the bedding underneath has washed out or the slab was never properly supported to begin with. Filling the joints on top of a rocking slab will just crack and fail again within a season, because the slab is still moving. Those slabs need to be lifted, re-bedded, and then pointed. Same goes if you can see visible voids under the edges of slabs, or if large sections of your patio feel springy.
Signs that repointing is the right and only fix you need:
- Joint material is crumbling, sandy, or missing in patches but slabs are firm
- Weeds are growing through the joints
- Joint sand washes out onto surrounding surfaces after heavy rain
- You can see ant tunnels or small holes in the joints
- The joints look sunken or hollow compared to the slab surface
- A previous polymeric sand job has cracked, gone powdery, or failed to harden properly
If you have cracked slabs themselves, drainage issues causing pooling, or ground movement under the patio, those problems need addressing first. Repointing on top of an unstable or waterlogged base is just cosmetic and it won't last.
Everything you need before you start
Getting your kit together before you begin makes a real difference. This isn't a job where you want to be running to the hardware store halfway through with open, cleaned-out joints sitting exposed to rain.
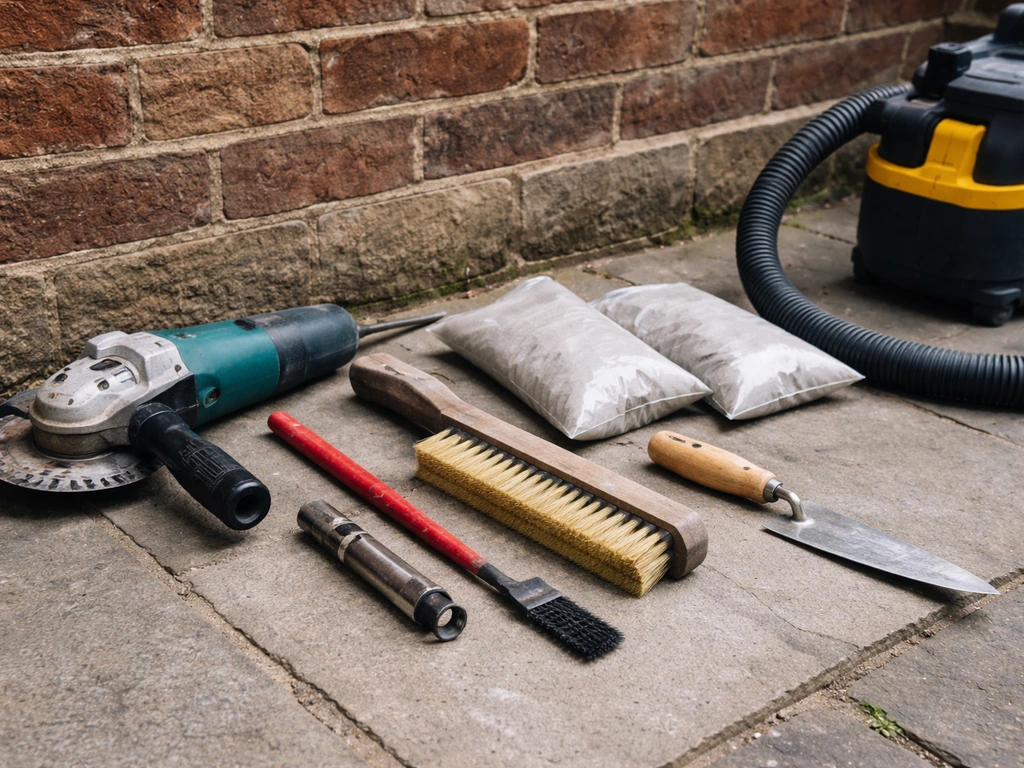
Tools
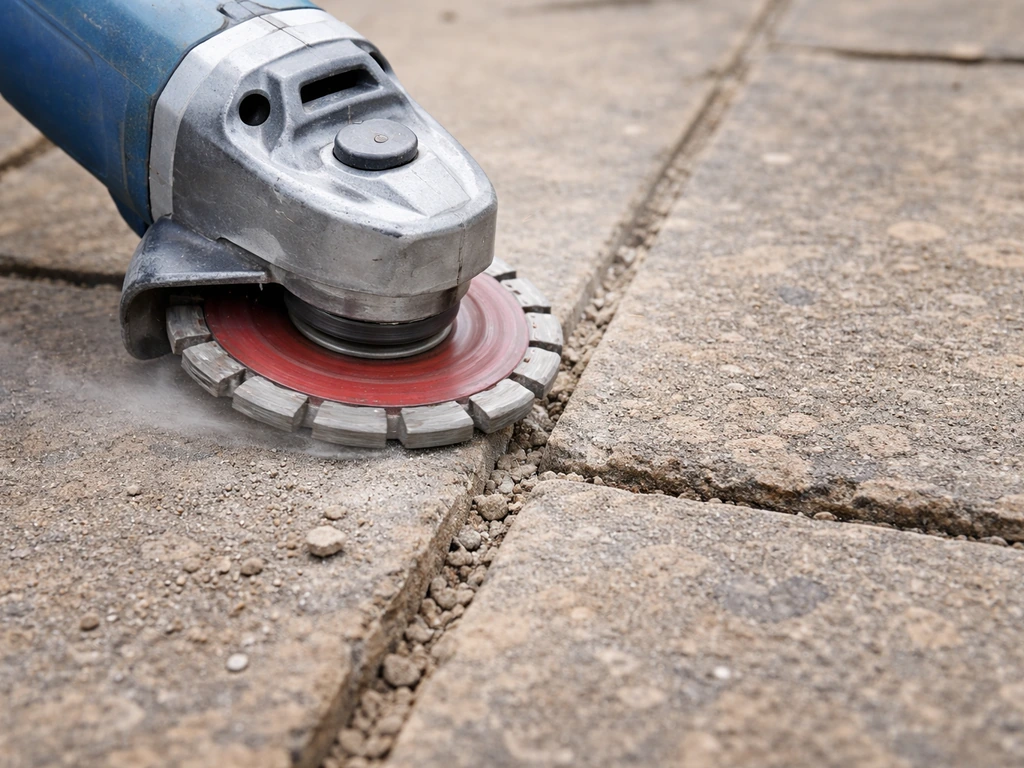
- Angle grinder with a mortar raking disc (or a dedicated joint raking tool) for removing old mortar — a cold chisel and hammer works too but takes much longer
- Stiff-bristle brush or hand brush for sweeping debris from joints
- Vacuum (a shop vac or even a standard vacuum) for pulling fine dust and debris out of the joint void
- Leaf blower (very useful if you're using polymeric sand — removes surface dust before activation)
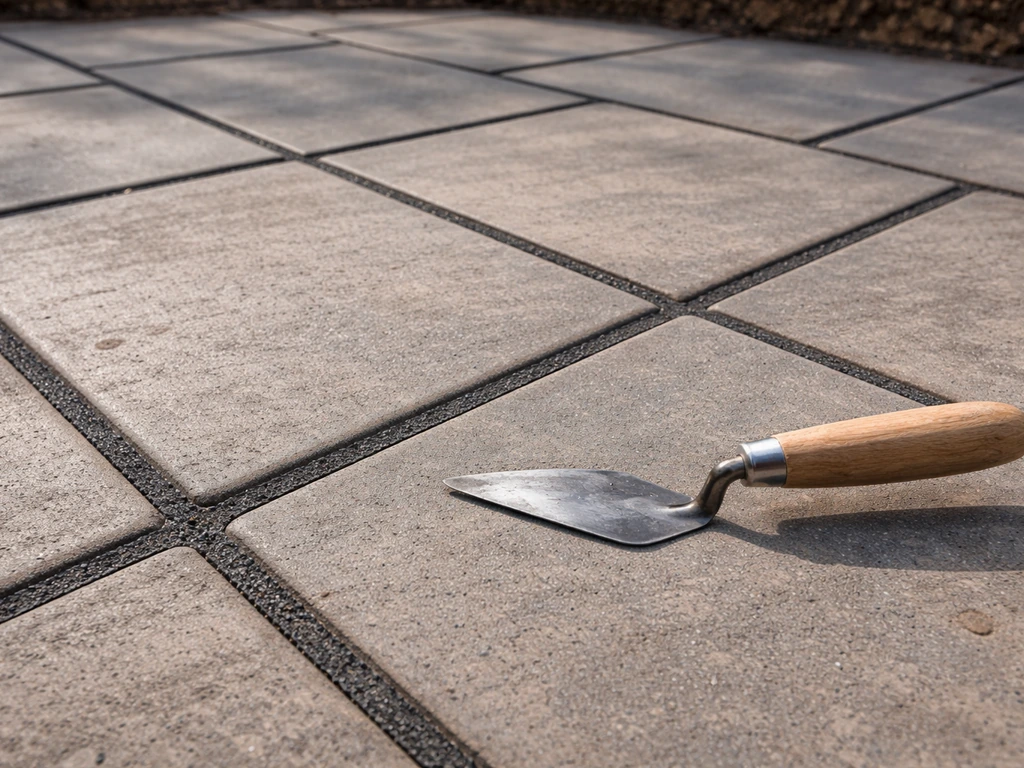
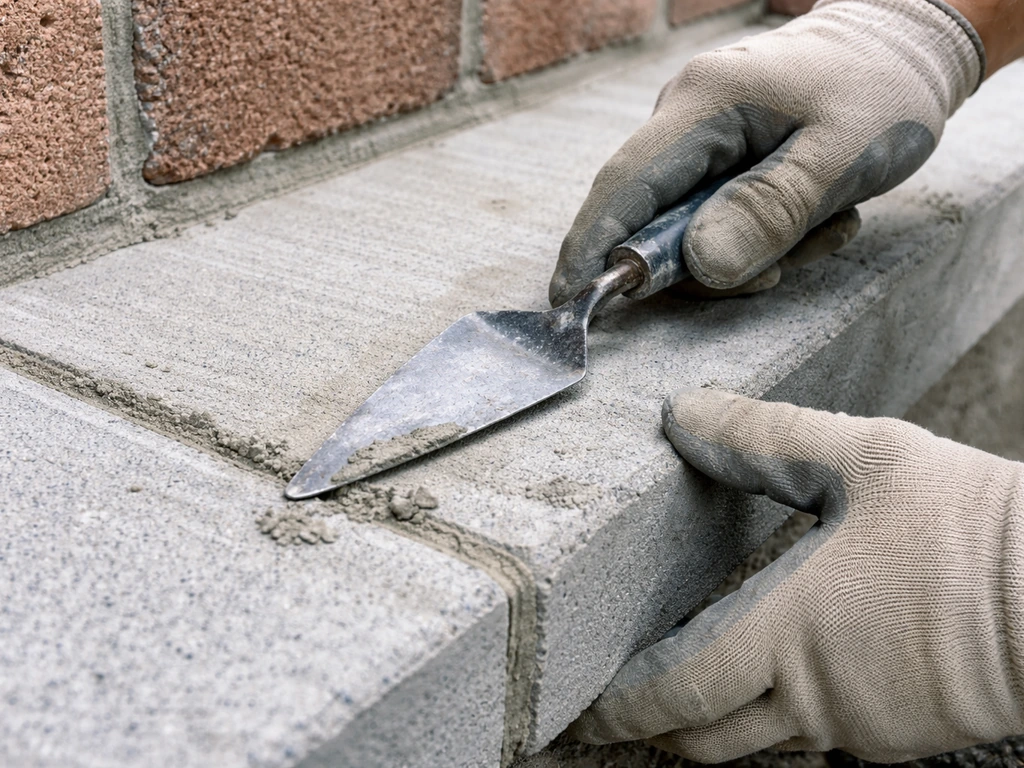
- Pointing trowel or grout float for pressing mortar or jointing compound into joints
- Rubber mallet for tamping down jointing sand
- Watering can with a rose head or garden hose with a mist/gentle spray setting for wetting polymeric sand
- Bucket and mixing paddle (or a mixing board) if you're using a sand-cement mortar
- Knee pads — you'll be on the ground for hours
- Safety glasses and dust mask for the grinding/raking stage
Materials
- Your chosen joint filler (see the next section — either sand-cement mortar, ready-mixed jointing compound, or polymeric jointing sand)
- Sharp sand and cement (if mixing mortar yourself)
- Clean water
- Patio cleaner or diluted bleach solution (for cleaning the joints and slab faces before work starts)
- Weed killer for any persistent roots in the joints (apply a few days before if possible)
- Optional: patio sealant, applied after curing is complete
Choosing the right mix or filler for your patio
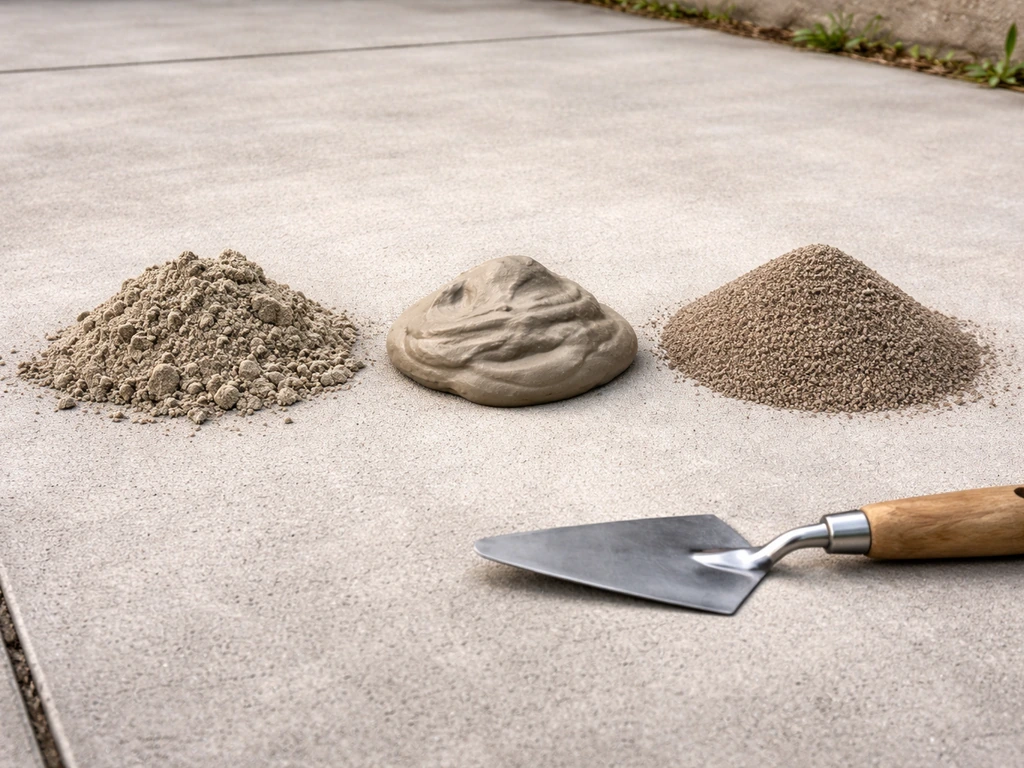
This is where most people go wrong, and it's worth spending a few minutes getting it right because the material you choose drives everything else. The main options are traditional sand-cement mortar, ready-mixed jointing compounds, and polymeric jointing sand. Each suits a different situation.
| Filler Type | Best For | Joint Width | Skill Level | Key Watch-Out |
|---|---|---|---|---|
| Sand-cement mortar (3:1 or 4:1) | Larger slabs, wide joints, robust patios | 10mm+ joints | Moderate | Needs correct water ratio; thirsty slabs absorb water before it sets |
| Ready-mixed jointing compound | Most domestic patios, convenient DIY | 6mm–20mm joints | Beginner-friendly | Check it's rated for outdoor/frost use |
| Polymeric jointing sand | Pavers, smaller joints, weed and ant resistance | 3mm–25mm joints | Moderate — wetting is critical | Over-wetting or under-wetting both cause failure |
For traditional patio slabs with joints of 10mm or wider, a sand-cement mortar is the classic and reliable choice. Mix at 3 parts sharp sand to 1 part cement for a strong joint, or 4:1 for something a little more flexible and workable. A lot of DIY guides recommend 4:1 for patio pointing because it's slightly more forgiving. If you want to go deeper on mixing mortar correctly, the sibling topic on how to mix mortar for patio covers the ratios and consistency in more detail. If you want to get the mix right before you start repointing, follow the step-by-step ratios and consistency details in that guide how to mix mortar for patio. If you also want to nail the practical patio-pointing steps, use these tips as your guide for how to mix patio magic with the right ratios and consistency how to mix mortar for patio.
For block paving or smaller pavers with narrower joints, polymeric jointing sand is the modern go-to. Products like Techniseal RG+ or Sakrete PermaSand contain a binder that activates when wet and then hardens inside the joint, creating a surface that resists weeds, ants, and washout far better than plain sand. The catch is that the wetting stage is genuinely critical and easy to get wrong in either direction. Too little water and the binder doesn't activate fully, too much and you float the polymer out of the joint and onto the slab face as a white haze. More on this in the steps below.
Ready-mixed jointing compounds (sometimes sold as patio pointing mortar in a tub) sit between these two options and are the easiest for a first-time DIYer. They're pre-mixed to the right consistency, require no measuring, and work well for most standard domestic patio situations. Just make sure the product you buy is rated for outdoor use and frost resistance.
One important note: if your existing joints used sand-cement mortar, stick with sand-cement mortar. If they used jointing sand, replacing with polymeric sand is an upgrade worth doing. Mixing material types in the same joint rarely ends well.
How to repoint your patio: the full process
Step 1: Remove the old joint material
The number one mistake people make is trying to top up failing joints rather than properly cleaning them out first. Putting fresh material on top of loose, crumbling old filler just means the whole lot fails again. You need to remove the old joint material down to a firm, clean depth.
Use an angle grinder with a mortar raking disc to run along the joints and cut out the failed material. Go carefully along the edges of your slabs to avoid chipping them. If you don't have a grinder, a cold chisel and club hammer work fine, just slower. Aim to remove material to at least 20–25mm depth, or until you hit something firm. Shallow joints (anything less than about 15mm) won't hold filler properly.
Step 2: Clean the joints thoroughly
Once you've raked out the old material, brush the joints out firmly with a stiff brush to remove loose bits, then run a vacuum along them to pull out the fine dust. This matters more than people expect, dust and debris left in the joint prevents the new material from bonding properly. A shop vac works best, but even a household vacuum on the right setting does the job.
If you have weeds growing through, pull them out by hand or treat with a weed killer a few days before you start. Make sure any roots are dead and as fully removed as you can get them, weeds grow back from tiny fragments left behind. Let the joints dry out fully before you add any new filler. If you're using polymeric sand specifically, the surface and joints must be dry when you start filling, even slight dampness can prematurely activate the binder before it's properly placed.
Step 3: Prepare your mix or filler
If you're mixing a sand-cement mortar, combine your sharp sand and cement dry first, then add water gradually until you reach a consistency that holds its shape but isn't crumbly or sloppy. Think peanut butter, stiff enough to stay in the joint but wet enough to press in and compact. The 3:1 or 4:1 ratio (sand:cement) is your starting point, but humidity and the absorbency of your slabs affect this in practice. If your slabs are very porous and 'thirsty,' they'll pull moisture out of the mortar before it sets, which weakens the joint. Pavingexpert also points out that UK-style pointing guidance treats “thirsty” units as a major failure driver because they absorb mortar water before it sets thirsty, they'll pull moisture out of the mortar before it sets, which weakens the joint. In that case, lightly dampen the slab edges with water before you apply the mortar, not soaking, just a light misting.
If you're using polymeric jointing sand, simply open the bag, no mixing needed. If you're using a ready-mixed compound, follow the product instructions, but most are truly ready to go straight from the tub.
Step 4: Fill the joints
For mortar or ready-mixed compound, use a pointing trowel to press the material firmly into each joint. Work it in so there are no air pockets. The finished joint face should sit very slightly below the surface of the slab, not flush, and definitely not proud of the surface. A joint that sits above the slab face will catch water and shed poorly, leading to early failure.
For polymeric jointing sand, pour it across the patio surface and sweep it into the joints using a soft-bristle broom. Work it back and forth until all joints are filled to within about 3–5mm of the slab surface (not flush to the top). Use a rubber mallet to tamp down pavers and help settle the sand into the joints. Sweep or blow off the excess from the slab faces using a leaf blower on low, getting this step right prevents the polymer dust from causing haze on the paver surface when you wet it.
Step 5: Finish and activate
For mortar, use a pointing trowel or a piece of dowel rod to smooth and shape each joint, pressing the mortar in firmly and giving it a slightly concave or flat profile. Clean any mortar smears off the slab face with a damp sponge before it sets, it's much harder to remove once it's hardened.
For polymeric jointing sand, the wetting step is where the product either succeeds or fails. Use a watering can with a rose head or a hose on a gentle mist setting. Apply water slowly and evenly, letting it soak into the joints. The goal is to fully saturate the sand inside the joint without flooding the surface. Sakrete's guidance is clear on this: stop adding water the moment the joints look saturated and before any milky-white film appears on the slab surface. That white film means you've over-wetted and the polymer binder is washing out of the joint and onto the face, the joints won't harden properly if this happens. Do this wetting in two or three passes, letting the water soak in between each pass.
Curing, sealing, and protecting the joints
Whatever filler you've used, the curing period is not optional. Keep foot traffic off the patio for at least 48 hours after pointing with mortar, longer if it's cold or damp weather. Cold temperatures slow cement hydration significantly, and walking on joints before they've set will crack them or leave impressions.
For polymeric jointing sand, protect the surface from rain for 24 hours after installation. Even a moderate shower within that window can wash the activated binder out of the joints before it has hardened. If rain is forecast within 24 hours, wait for a better weather window, this is one of those situations where patience actually saves you from redoing the whole job. Techniseal and Sakrete both specify this 24-hour rain-protection requirement, and it's worth taking seriously.
On the subject of sealing: patio sealant applied over the joints after repointing can add useful protection, especially for stone slabs that stain easily or pavers in a damp climate. However, if you've used polymeric jointing sand, you need to wait a full 30 days before applying any sealant. Sealing too soon traps moisture inside joints that are still curing, which undermines the whole hardening process. After 30 days, a breathable patio or paver sealant applied to clean, dry surfaces will help resist staining, limit moss and algae growth, and reduce future joint erosion. For other mix types, check the sealant manufacturer's recommended drying time for the mortar before applying.
One thing to avoid going forward: pressure washing directly at the joints. High-pressure water aimed into joints is one of the fastest ways to erode joint material, whether that's mortar or jointing sand. If you clean your patio with a pressure washer, use a fan nozzle at a lower pressure and keep the lance angled so you're cleaning the slab face rather than blasting into the gaps.
Common problems and when to stop DIYing
The new joints are cracking or falling out within weeks
If fresh mortar or jointing compound cracks soon after installation, the most likely causes are: the old joint material wasn't fully removed before filling (so the new material is just sitting on top of something loose), the mix was too dry or too wet, or there's movement in the slab underneath. Check whether the affected slabs rock at all. If they do, no amount of repointing will give you a lasting result until those slabs are re-bedded.
Polymeric sand didn't harden or washed out
Two failure modes here, both caused by water problems. If the sand feels powdery and loose after curing, it wasn't wetted enough, the binder never activated. If you see white haze on the slab faces or the joints feel chalky, the sand was over-wetted and the polymer was displaced before it could bind. In both cases, the joint material will need to be raked out and replaced. This is frustrating but it's a fixable problem. The re-do just needs better control over the wetting step.
Weeds keep coming back
If weeds return quickly after repointing, it's usually because roots or seeds weren't fully cleared from the joints before filling. A weed killer treatment a few days before raking, followed by thorough vacuuming of the joints, makes a real difference. Polymeric jointing sand is more resistant to weed regrowth than plain sand or mortar because the hardened surface gives seeds less to take hold in.
When to call a professional
Repointing is genuinely DIY-friendly when the problem is just the joints. Stop and get a professional involved if:
- Multiple slabs or pavers rock underfoot, especially across a large area — this indicates a subbase or bedding failure that needs proper assessment
- The patio is sinking or sloping noticeably where it didn't before, which suggests ground movement or drainage problems underneath
- You've repointed the same area twice and it keeps failing, with no obvious mistake in your process — repeated failure in the same spot usually means movement that only shows up at the surface
- You can see standing water pooling on or near the patio after rain, suggesting a drainage issue that repointing won't address
- The patio was recently installed and joints are already failing — that's a workmanship issue and may be covered under any agreement with the original contractor
A good paving contractor will lift the affected slabs, check the subbase, address drainage if needed, and re-bed before repointing. If you end up needing to lift and reset slabs, the same principles apply for how to repoint a patio after you remove the old joint material. It costs more upfront, but it's the only route to joints that actually last when the underlying issue is movement or water in the ground.
FAQ
How do I tell if I need to repoint or replace the bedding layer too?
Do a second test after rain or watering, press down near slab edges, and listen for movement or hollow-sounding spots. If the slab tips, sinks slightly, or the joint keeps washing out repeatedly in the same areas, it usually means bedding or drainage is compromised, and repointing alone will not hold.
Can I repoint over old joint material if it looks mostly intact?
No. Even if joints look “okay,” you still need to remove anything loose, dusty, or weedy. Replacing on top of weak filler creates a thin layer with poor bond, and cracks typically show up along the boundary within months.
What joint depth is safe if my joints are shallow after cleaning out?
If you cannot reach at least about 15 mm depth, the new filler may not lock in and can crack or blow out. In that case, stop and reassess, shallow joints often require lifting resetting pavers or addressing the installation so you can achieve proper joint capacity.
Should I dampen the patio before applying sand-cement mortar, and how much is too much?
Lightly dampening porous slab edges can help prevent the mortar from drying instantly, but do not soak the area or leave puddles. Excess moisture slows cement set, increases washout risk, and can weaken the joint surface.
For polymeric joint sand, what should the joints look like right before I stop adding water?
Stop when the joints appear fully saturated and before any milky-white film shows up on the slab faces. That film is a sign the binder is being displaced onto the surface, which can cause haze and joints that do not harden properly.
Is it okay to use polymeric sand in very cold weather or near freezing nights?
Avoid installing right before a freeze, because binder activation and curing rely on temperature staying in a workable range. If overnight temperatures are near or below freezing, postpone, otherwise joints can fail early even if the wetting step was done correctly.
How long should I wait before sweeping off excess polymeric sand?
Wait until you have filled and compacted the joints, then remove surface excess promptly using gentle airflow (leaf blower on low) once the sand has been settled. Leaving loose polymer on the slab can contribute to visible haze when you wet, wiping or re-tamping it later is harder.
What is the safest way to remove mortar or polymeric sand if I need to redo a joint?
Let any failed material cure fully first, then rake out with a joint raking tool or grinder fitted with an appropriate disc, finishing with stiff-brush cleaning and vacuuming. Reworking while material is partially set often smears residue that interferes with bonding.
Can I use a weed killer and install repointing the same day?
Usually no. Treat the weeds a few days in advance, then remove dead growth and roots, and only start pointing once the joints are clean and dry. Installing immediately after treatment can leave living or decaying roots that regrow or weaken the joint zone over time.
Do I need to seal after repointing mortar or jointing compound?
Not always, but sealing can help prevent staining and slow future erosion. If you used polymeric joint sand, you must wait about 30 days before sealing, and for mortar follow the specific sealant and mortar cure guidance rather than guessing.
Will pressure washing always ruin repointed joints?
It can, especially if the nozzle aims into gaps with high pressure. For any cleaning, keep the lance angled to clean the slab face, use a fan pattern at lower pressure, and avoid repeated passes directly over the joints.
Why do my joints crack right after repointing even if the material is correct?
Most early cracking comes from loose or incompletely removed old filler, mix consistency that is too dry or too wet, or movement in the slabs underneath. Re-check for rocking or voids, if slabs move, you need lifting and re-bedding before any repointing will last.
How soon can pets or children use the patio after repointing?
Keep foot traffic off for at least the first 48 hours when using mortar, and longer in cold or damp weather. If you have polymeric sand, also protect from rain for the first 24 hours, play areas should be blocked until curing is well underway to avoid impressions and joint disturbance.
Next Article
How to Fix Cement Patio Cracks: Diagnose and Repair
Diagnose concrete patio crack types and repair with the right sealant or patch, from prep to curing and prevention.