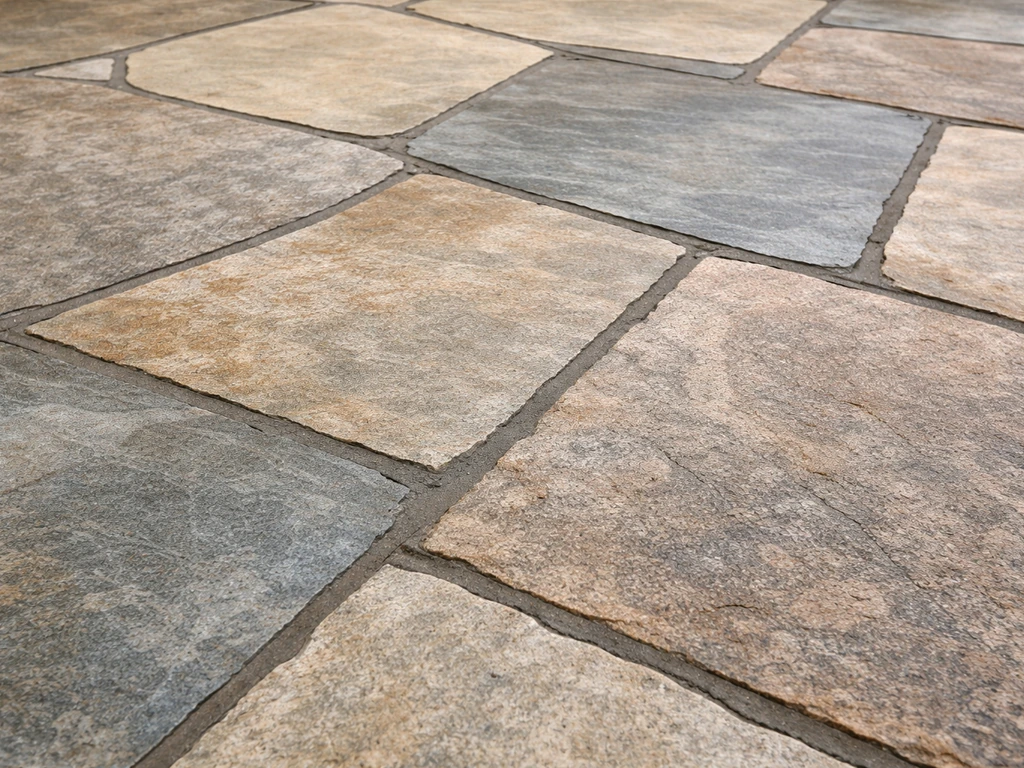
Resetting a bluestone patio means lifting the stones that have sunk, shifted, or started rocking, fixing whatever caused them to move, and re-setting them so the surface is flat, stable, and drains correctly. Most of the time this is a straightforward DIY job: pull up a few slabs, rebuild the sand or gravel bed underneath, set the stones back at the right grade, and refill the joints with polymeric sand.
How to Reset Bluestone Patio: Step-by-Step DIY Guide

Talia Lang
29 Apr 2026
The whole process for a small troubled area can take a weekend. Larger or more complicated situations, especially where the base has washed out or frost heave has been severe, take longer and sometimes need professional help, but most homeowners can handle a standard reset themselves if they work methodically.
If you’re tackling a flagstone patio, the same inspection, base rebuilding, and joint-refilling steps apply, but you may need to adapt them to your specific stone type and thickness flagstone patio repair.
What people usually mean by "resetting" a bluestone patio
The term covers a few different problems that all have the same root cause: the stones have moved from their original position. The most common scenarios are sinking slabs where one or more stones have dropped below the surrounding surface and water pools on top, rocking or wobbling stones that have lost their bedding support underneath, shifted stones where freeze-thaw cycles or soil movement have pushed slabs sideways so the joints are now uneven or gaps have opened up, and heaved stones where frost has pushed a slab upward so it sits higher than the rest. You might also be dealing with weeds growing through wide joints, which is less a structural problem and more a joint-filling problem, though it often means the joint sand has eroded and the underlying bed is exposed to water infiltration.
All of these issues are worth distinguishing from actual cracking or spalling in the stone itself. If your bluestone is physically broken, resetting alone won't fix it, you'd be re-setting damaged stone. That's a related but different repair. This guide focuses on the mechanical reset: moving stones back to where they belong and making sure they stay there. If you are also dealing with cracked or broken stone, use the dedicated guidance on how to repair bluestone patio damage rather than relying on a mechanical reset alone.
Inspect before you lift anything

Before you start prying up stones, spend 20–30 minutes doing a proper inspection. This step determines whether you're dealing with a simple sand-bed reset or something more serious that changes the scope of the job.
Check for movement patterns
Walk every stone and press on each corner. A stone that rocks when you step on it has lost contact with the bed below, common and fixable. A stone that has uniformly sunk (all four corners down, stone is level but lower than neighbors) usually means the sand bed beneath it has compressed or washed out. A stone pushed upward in winter that settles back in spring is frost heave, which can happen repeatedly unless you address drainage. If you see a row of stones all sinking in the same direction, that points to a drainage or grade problem rather than isolated settlement.
Check the drainage and grade
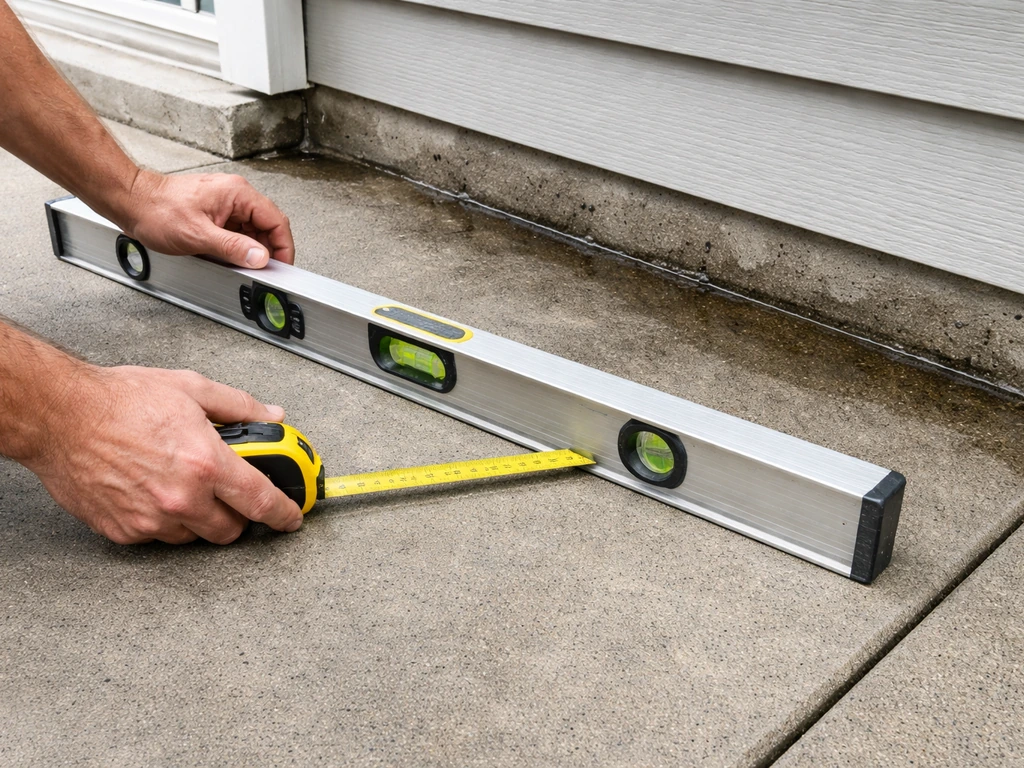
A properly built patio slopes away from the house at roughly 1/8 to 1/4 inch per foot. Use a 4-foot level and a tape measure to check your current grade. If water is pooling on the patio surface or running toward the house, you have a grade problem that resetting alone won't fix, you'll need to deliberately re-set the stones at the correct slope when you rebuild. Standing water near the edge of the patio can also saturate the base material and cause ongoing settlement.
Look at the base when you can
If any stones are already loose enough to lift by hand, peek at what's underneath. A well-built dry-laid bluestone patio typically sits on 1 inch of coarse bedding sand over 4–6 inches of compacted gravel base. If you see dark, muddy, or silty material where clean gravel should be, the base has been infiltrated by fines and is likely unstable. If the gravel base is completely absent and the sand is sitting directly on native soil, that's a building deficiency that explains chronic settling. Note what you find because it will tell you how much base work you need to do.
Tools, materials, and safety
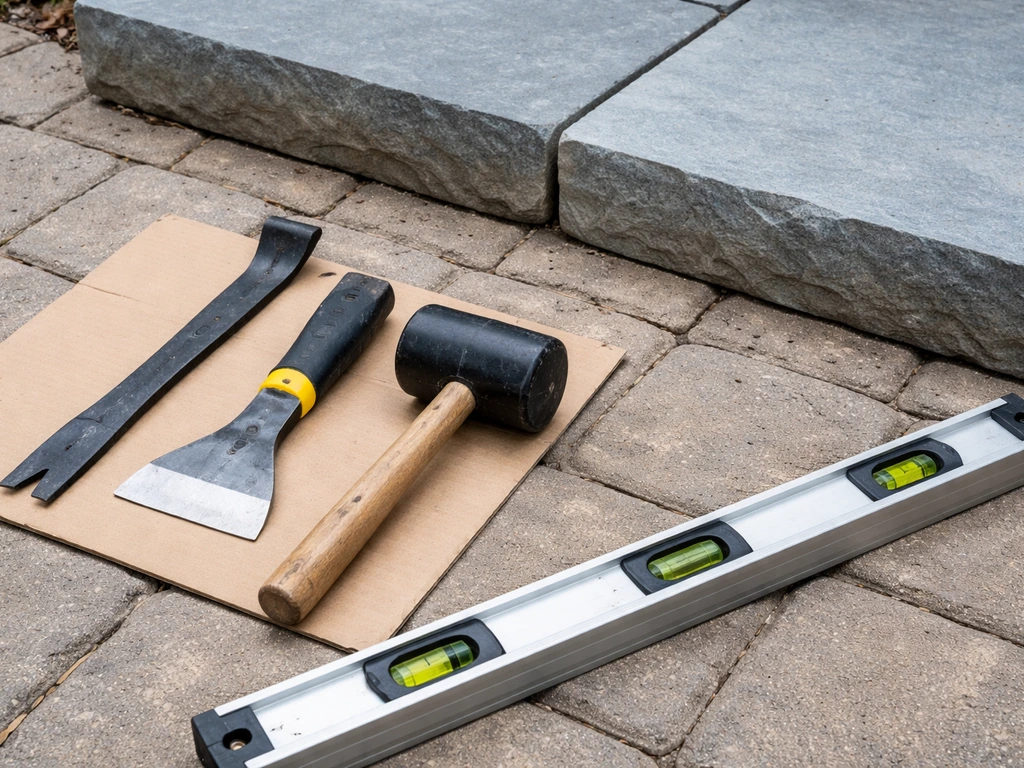
What you'll need
- Flat pry bar or wide brick chisel (for lifting stones without chipping edges)
- Rubber mallet (for tapping stones into final position)
- 4-foot level and a long straightedge or mason's string line
- Tape measure
- Stiff brush or push broom
- Garden hose with a mist/spray nozzle
- Plate compactor or hand tamper (for re-compacting base material)
- Shovel and bucket
- Coarse bedding sand (also called concrete sand or ASTM C33 sand — not fine play sand)
- Crushed gravel (3/4-inch clean gravel, if base repair is needed)
- Polymeric jointing sand (products like SAKRETE PermaSand or QUIKRETE HardScapes Polymeric Jointing Sand)
- Work gloves and eye protection
- Knee pads
Safety notes
Bluestone slabs are heavy. A standard 2-foot by 2-foot slab that's 1.5 inches thick can weigh 50–70 pounds. Larger slabs can exceed 150 pounds easily. Always lift with your knees, not your back. For anything over about 60 pounds, use two people or a stone-moving dolly. Wear gloves because bluestone edges are often sharp. Keep bystanders, especially children and pets, away from the work area while stones are being moved. If you're using a plate compactor, wear hearing protection.
Step-by-step: how to reset bluestone slabs
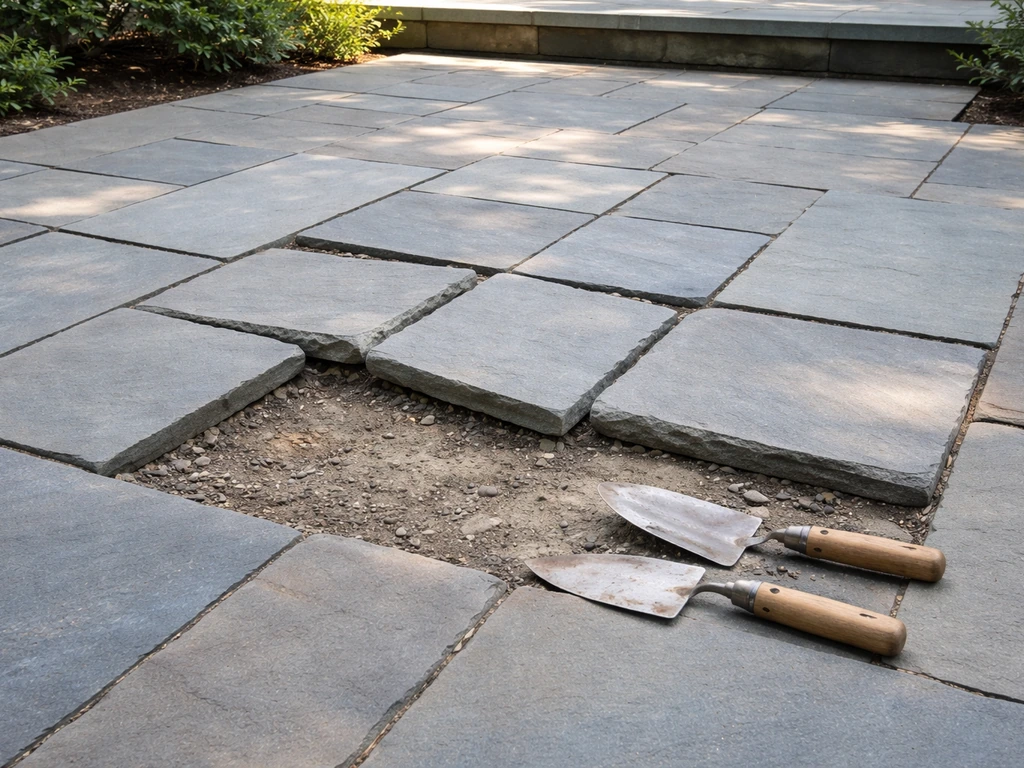
Step 1: Remove the affected stones
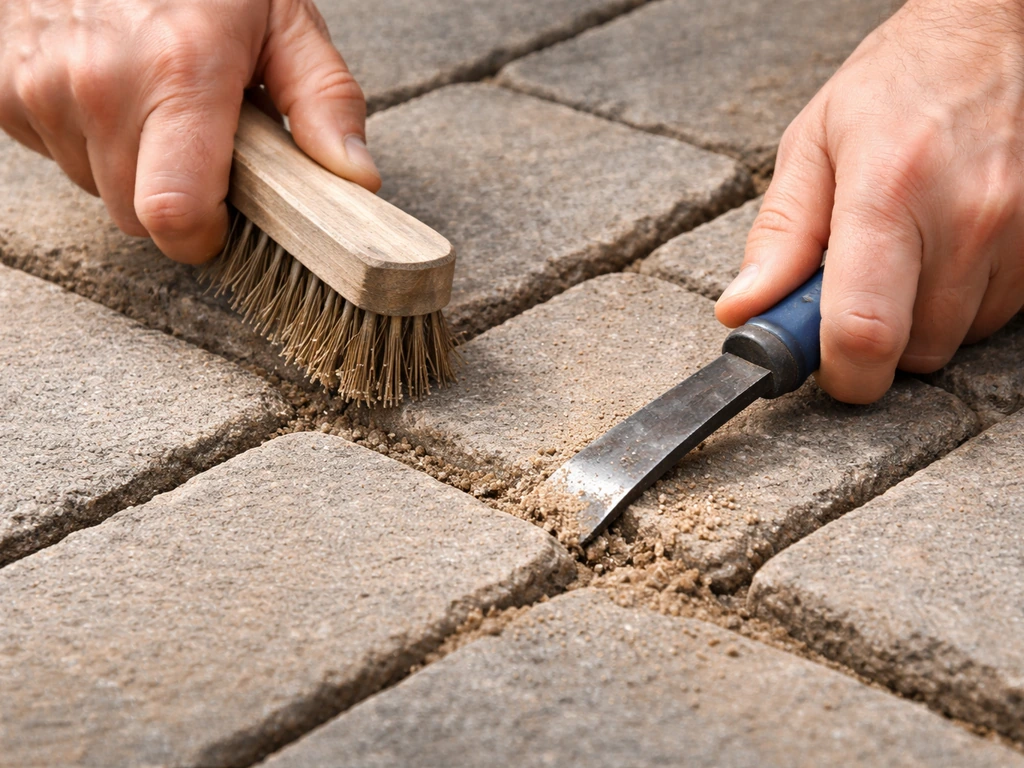
Start by clearing the joint material around the stones you need to move. Use a stiff brush or the tip of a flat pry bar to scrape out the sand or grout from the joints on all sides of the problem slab. This gives you room to work the pry bar in without levering against adjacent stones. Slide the flat pry bar into the joint at a low angle and gently lift one edge of the stone just enough to get your fingers underneath. Once you have a grip, lift the slab straight up and set it aside on a stable surface away from the work zone. Avoid dropping it on an edge, bluestone corners chip easily.
If the joints are mortared, you'll need to carefully chip out the mortar with a hammer and cold chisel before you can lift the stone. Take your time here. Rushing this step is how you crack the edge of a slab you're trying to save.
Step 2: Clean out the old bedding material
Once the stone is out, remove the old sand and any debris from the cavity. If the bedding sand is contaminated (dark, muddy, mixed with clay or organic material), remove all of it and don't reuse it. If it looks clean, you can set it aside and top it up later. Dig down far enough to inspect the gravel base underneath. If the gravel is solid, well-compacted, and undisturbed, you may only need to replace the bedding sand layer. If the gravel is loose, settled, or washed away in spots, scrape it out and plan to rebuild that layer first.
Step 3: Rebuild the base as needed
If the gravel base is compromised, add fresh 3/4-inch clean crushed gravel, roughly 4–6 inches deep, and compact it thoroughly with a hand tamper or plate compactor. This is the most important step and the one most DIYers skip or shortcut. Loose base material is why the stone moved in the first place. Once the gravel is compacted, add about 1 inch of coarse bedding sand (concrete sand, not fine sand) on top. Screed it flat using a board dragged across temporary guide rails, or just rake it roughly flat and then use the stone itself to check your height.
Step 4: Set the stone back and check level
Before you set the stone, run a mason's string line across the patio at the correct finished height and grade. This gives you a reference to work to rather than just eyeballing it. Lower the stone carefully into the opening and press it down by hand to get it close to the right height. Then use a rubber mallet to tap it down gradually, checking with your level frequently.
Work corner to corner, not just one side at a time. The goal is full, even contact between the stone and the sand bed below, no rocking, no hollow spots. If the stone sits too low, pull it back up and add a little more bedding sand. If it sits too high, remove some sand.
Do not just force it down with extra mallet blows; that compresses one spot unevenly and creates a rocking point.
Check that the stone sits flush with or at the correct grade relative to its neighbors. A 4-foot level placed across two adjacent stones will quickly show you if you're close. Also verify the slope is maintained away from the house.
Step 5: Refill the joints
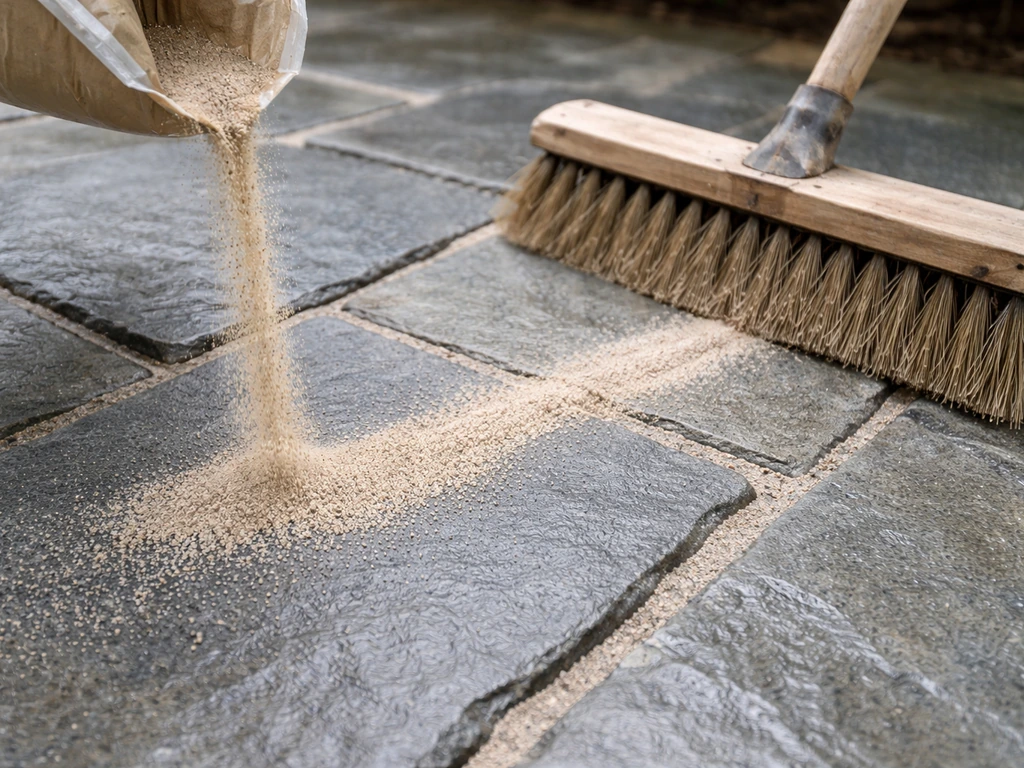
Once all stones are re-set and you're happy with the level and fit, it's time to refill the joints. For most dry-laid bluestone patios, polymeric jointing sand is the right choice. Products like SAKRETE PermaSand and QUIKRETE HardScapes Polymeric Jointing Sand are specifically designed for filling joints up to 2 inches wide between natural stone, pavers, and concrete slabs. Polymeric sand contains polymer binders that activate with water and harden the joint, which helps resist erosion, ants, and weeds far better than plain sand.
Pour the polymeric sand over the surface and sweep it into the joints with a stiff push broom. Work it in from multiple directions so the joints fill completely, especially at intersections. Once the joints are full to just below the surface of the stone, sweep off any excess from the stone faces, polymeric sand will haze on the surface if left there when you activate it. [Then activate it with water.
](https://idealconcreteblock. com/wp-content/uploads/2021/01/Contractor-Paver-How-to-06. pdf) Use a garden hose on a gentle mist setting (never a hard spray, which will wash the sand back out of the joints). Mist the surface thoroughly, let it absorb for a few minutes, then mist again.
Repeat this 3–4 times per the manufacturer's guidance. The sand will firm up as the polymers activate. Keep foot traffic off the patio for at least 24 hours.
Finishing and sealing: what to do and what to skip
After the polymeric sand has cured (usually 24–48 hours, depending on temperature and humidity), walk the patio and check for any low spots in the joints. If settling left a gap, top it up with a little more polymeric sand and re-activate. Then take a final level check across the whole reset area and verify water runs the right way.
Sealing is optional, but it can be a good idea for bluestone. A penetrating stone sealer (not a film-forming topcoat) protects against staining, slows moisture absorption, and can reduce freeze-thaw spalling on the stone surface. Look for a breathable, water-based penetrating sealer rated for natural bluestone. Apply it according to the product directions, typically with a low-pressure sprayer or roller, after the patio is clean and the joints have fully cured. Do not use a sealer that creates a shiny film on the surface: these trap moisture, peel in freeze-thaw climates, and make bluestone slippery when wet.
What to avoid: don't fill joints with regular playground sand (it erodes and encourages weeds), don't use regular cement mortar in dry-laid joints without understanding the implications (it traps moisture and can cause spalling), and don't seal the patio before the joints are fully cured or before you've confirmed water drains correctly. Sealing in a grade problem just makes it harder to fix later.
How to stop it from sinking again
The number one cause of recurring bluestone settlement is water. Water saturates the base, softens the soil underneath, and then freezes and expands in winter. In cold climates, managing water so the base does not stay saturated is central to reducing freeze-thaw driven movement and heaving of pavers or stone patios blank" rel="noopener noreferrer">water saturates the base and contributes to freeze-thaw expansion. If you fix the stones without addressing the water, you'll be resetting them again in two or three years. If you suspect your patio is still suffering from water-related issues, use this overview on how to repair stone patio as a comparison for next steps.
- Make sure the patio maintains a consistent slope of at least 1/8 inch per foot away from the house. If you couldn't achieve this during the reset, correct it now rather than later.
- Check that downspouts from gutters don't discharge onto or near the patio. Redirecting a downspout even 6 feet farther away can dramatically reduce the water load on your base.
- If the area around the patio stays wet or saturated for days after rain, consider adding a french drain or a gravel-filled trench along the edge to carry water away.
- When rebuilding the base, use clean crushed gravel (not pea gravel and not limestone screenings, which compact into a near-impermeable layer). Clean crushed stone allows water to move through and drain down rather than pooling at the sand layer.
- Compact the gravel base in layers of no more than 3–4 inches at a time. A single 6-inch layer that's only superficially compacted will settle under load.
- If frost heave is a recurring problem in your area, consider deepening the gravel base to get it below the frost line. The standard fix for chronic heave is more compacted gravel, which is more frost-stable than native soil.
When to call a pro instead of DIYing it
Most bluestone resets are honest DIY territory, but some situations genuinely call for professional help. Be realistic about what you're looking at before you commit a full weekend to a repair that might not hold.
Call a pro if the base material has completely washed out under a large section of the patio, say, more than 30–40 square feet. Rebuilding a large base properly requires heavy compaction equipment that's hard to rent and harder to use correctly without experience. You also need someone who can accurately re-establish grade across a large area. Similarly, if the soil beneath the gravel base is soft, organic, or has clearly settled significantly (you can tell because the entire patio, not just a few stones, has dropped), that's a soil compaction or geotechnical problem. You may need engineered fill or a different foundation approach.
Widespread heave across the whole patio, patterns where stones keep moving back to the same wrong position no matter how many times you reset them, or a patio next to a retaining wall that itself is moving are all signs that the problem is structural and beyond a standard reset. In these cases, resetting stones is just treating symptoms. A landscape contractor or hardscape contractor who can assess the site, evaluate the soil, and design a proper drainage solution is the right call. It's worth getting two or three estimates before deciding.
It's also worth noting that repairs involving cracked or broken stone, rather than just shifted stone, are a related but different scope of work. If you're dealing with fractures in the slabs themselves, that falls into bluestone patio repair territory, including decisions about patching, replacing individual stones, or addressing mortar joint failures, which involve some different techniques and materials than a mechanical reset. If your issue is specifically mortar joints in a stone patio, the repair steps and materials differ from a mechanical reset of moved stones mortar joint failures.
Quick reference: reset steps in order
- Walk the patio and identify every stone that's sunken, rocking, heaved, or shifted. Mark them with chalk.
- Check the slope and drainage before you start lifting anything.
- Clear joint material around the stones to be removed.
- Lift and set aside affected stones carefully.
- Remove old or contaminated bedding sand and inspect the gravel base.
- Repair or rebuild the gravel base and compact it in layers.
- Add fresh coarse bedding sand, approximately 1 inch deep, and screed it flat.
- Set each stone back using a string line as a height and grade guide.
- Tap each stone down with a rubber mallet and check level repeatedly.
- Sweep polymeric jointing sand into all joints and remove excess from stone faces.
- Activate the polymeric sand with repeated gentle misting — 3 to 4 passes.
- Keep traffic off the patio for 24 hours minimum.
- Apply a penetrating sealer after joints have fully cured, if desired.
FAQ
Can I fix a bluestone patio without lifting any stones, just by refilling the joints?
If only a few joints are eroding, you may be able to top up polymeric sand without lifting stones. First sweep out loose material, then confirm the stones are not rocking, meaning there is no bedding failure underneath. If any stone moves when pressed on opposite corners, the joint refill alone will fail quickly.
What if my patio is still pooling water after I re-set the stones?
A true mechanical reset should include the slope away from the house, about 1/8 to 1/4 inch per foot. If your patio currently directs water toward the structure, just resetting individual stones usually results in repeat settlement because the base keeps getting saturated. Plan to re-set stones at the correct grade when the base is rebuilt.
Are mortar joints acceptable for a reset, or should I keep it dry-laid?
Yes, but only if the patio is dry-laid and the joints are meant to be filled with a loose jointing material. Cement mortar in joints can trap moisture under the stone, which increases freeze-thaw damage risk and makes future resets harder because the stone becomes bonded to the joint. If you see mortar-like material in joints, remove it before resetting.
Can I use polymeric jointing sand on very wide bluestone gaps?
Use polymeric sand only in joints within the product’s stated width range (commonly up to 2 inches for many brands). If your joints are wider, you may need a different jointing system or partial lifting and re-setting to reduce joint width. Overfilling or using the wrong product can leave the joint weak or slow to activate.
Should I compact the bedding sand under the bluestone?
Don’t compact the bedding sand itself, compact only the gravel base. The bedding sand should be screeded and then lightly pressed when you set each slab, so you do not create soft spots or uneven thickness. Heavy tamping of the sand layer can cause localized ridges that lead to rocking.
Why is there a powdery or hazy residue on the bluestone after activation?
It’s normal for polymeric sand to haze on the surface, but you should wipe excess off the stone faces before activation. Use a stiff broom to remove leftover sand from the surface once joints are filled just below the stone top. If the haze turns to a stubborn film, avoid aggressive scrubbing that could pull joint material back out.
What should I do if it rains soon after I activate the polymeric sand?
If the patio gets heavy rain within the first 24 hours, it can interrupt polymer activation. After the rain, check whether joints are still loose when lightly brushed, then follow the manufacturer guidance for reactivation or reapplication. The key is to ensure the base is not actively washing fines out, since ongoing infiltration will keep re-erosion happening.
My joints washed out again soon after the repair, what does that mean?
You should not reactivate or add sand if the joints are still washing out due to drainage or a compromised base. Before redoing joints, verify slope, check downspouts and runoff paths, and confirm water is not pooling near the edge. If dark muddy bedding remains or the base is unstable, address the base first.
How do I tell when I’m dealing with stone damage instead of just a bad reset?
Spalling or cracking requires a different approach because you may be re-setting damaged stone without fixing the cause. A practical test is tapping for hollow sound and looking for chipping at edges. If the stone face is broken, replacement or a dedicated stone repair plan is usually necessary rather than relying on sand bed correction.
How can I tell if my existing bedding sand is the wrong type to reuse?
The material should be clean, coarse bedding sand, not fine sand. Fine sand behaves like a lubricant when saturated and can increase movement, especially with freeze-thaw. If your existing sand is dark, silty, or mixed with clay or organics, remove it and replace with clean coarse bedding sand.
What causes stones to keep shifting back to the same spot after I reset them?
If you consistently find stones returning to the same incorrect position, it often signals an ongoing drainage or grade issue, not a one-time bedding failure. Re-check the slope with a level across the affected area and look for a pattern that points toward one direction. In stubborn cases, it can also indicate base instability extending beyond the stones you removed.
How many people do I need to lift a typical bluestone slab safely?
Safety rule of thumb: if you cannot lift the stone comfortably with safe body mechanics, get help. Stones can exceed 150 pounds, and edges can chip, so use two people or a stone-moving dolly for heavier pieces. Keep the work area clear of children and pets, and wear gloves because bluestone edges can be sharp.
Next Article
How to Repair Flagstone Patio: Step-by-Step Guide
Diagnose and fix loose, cracked, or sunken flagstone patios with step-by-step leveling, reset, joint repair, and sealing