Most flagstone patio problems come down to one thing: the base or bedding underneath the stones has failed, shifted, or washed out. The stones themselves are rarely the real problem. Whether you're dealing with rocking flagstones, sunken sections, crumbling joints, or a few cracked pieces, the fix almost always starts below the surface. Here's how to figure out exactly what went wrong and repair it the right way so it holds up for years instead of months.
How to Repair Flagstone Patio: Step-by-Step Guide

Talia Lang
29 Apr 2026
Why flagstones fail: a quick diagnosis before you start
Before you buy anything or lift a single stone, spend 10 minutes walking your patio and paying attention to what you actually see. The failure pattern tells you a lot about the root cause, and diagnosing it correctly saves you from doing the same repair twice.
Loose or rocking stones
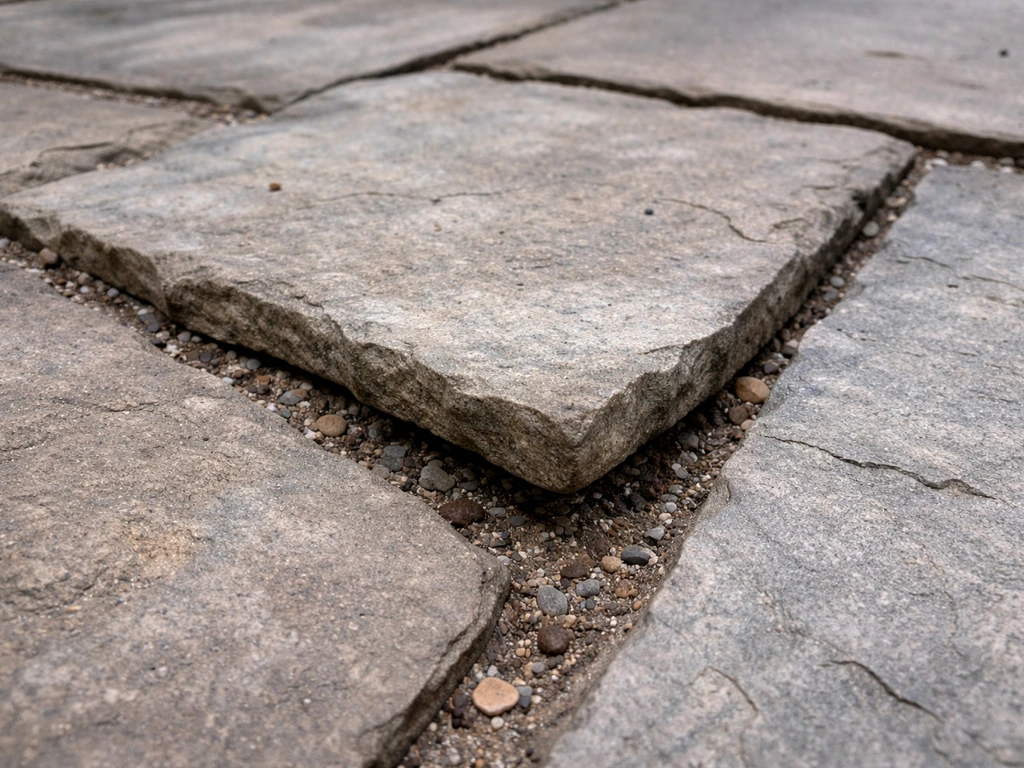
A flagstone that rocks when you step on it has lost contact with its bedding. The most common reason is that the jointing material cracked, started washing out, and the fine bedding material underneath followed. Once the joints go, water gets in, erodes the bed, and the stone loses its support points. This is not a jointing problem you can solve from the top. You need to lift the stone and fix the bed beneath it.
Sunken or uneven areas
If a section of your patio has dipped noticeably or water is pooling in low spots after rain, the issue is almost certainly underneath: either the compacted gravel base settled because it was too shallow or wasn't properly compacted at installation, the soil underneath shifted, or drainage is failing and water is saturating the base. Pooling water is a strong sign the base or slope is the problem, not the stone.
Cracked or shifting joints
Joints that are cracking, crumbling, or missing entirely let weeds take root and allow water to work its way down into the bedding layer. Over time that erodes the sand or mortar bed and makes everything else worse. Joint failure is sometimes a standalone repair, but often it's a symptom of movement happening below.
Cracked or broken stones
A flagstone that cracked cleanly in place without moving usually broke because of freeze-thaw cycling, a point load (like a heavy piece of furniture on a thin spot), or because that stone was set on a void in the bedding. A crack across multiple stones in a line often points to settling or movement in the base below.
The most important question: dry-laid or mortar-set?
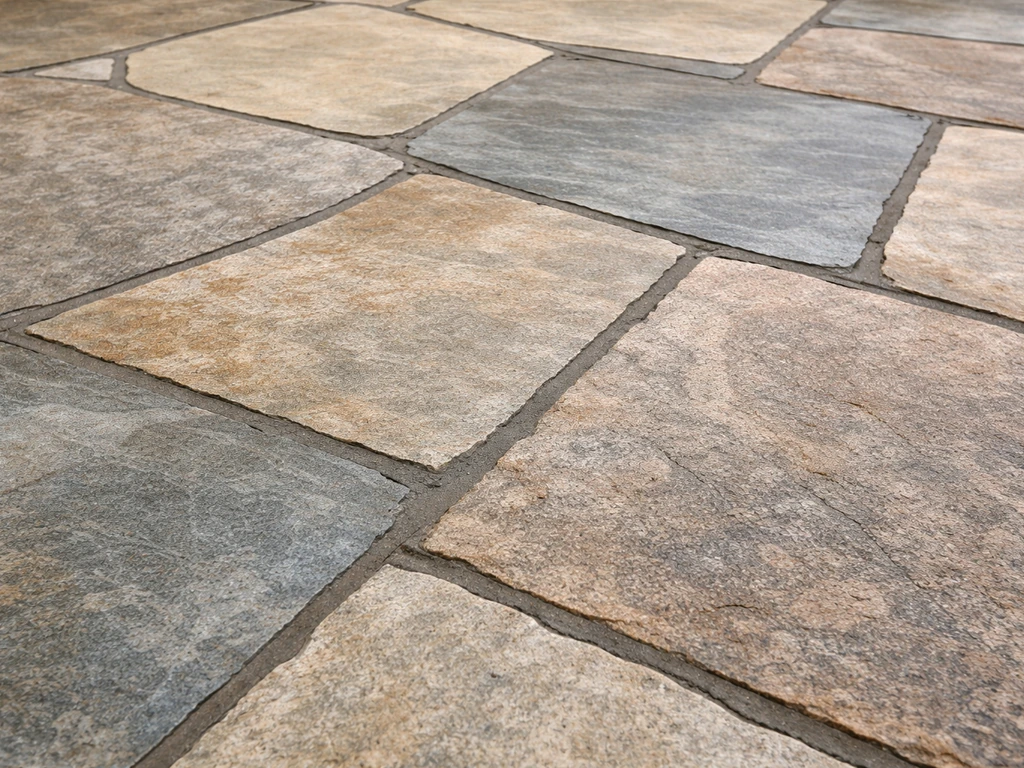
Your repair approach depends entirely on which system you have. A dry-laid patio sits on a compacted gravel base with a sand bedding layer and loose or polymeric sand joints. A mortar-set patio is bonded to a concrete slab with a mortar bed and filled with mortar joints. Look at the joint material: sand joints mean dry-laid, hard grey mortar means mortar-set. If you're not sure, probe the joint with a screwdriver. If it's flexible or comes out as particles, it's sand-based. If it's rigid and stone-hard, it's mortar. This distinction changes almost every step that follows.
Tools, materials, and safety
What you'll need
- Flat pry bar and/or a stiff-bladed bricklayer's bolster chisel for lifting stones
- Rubber mallet for resetting stones without cracking them
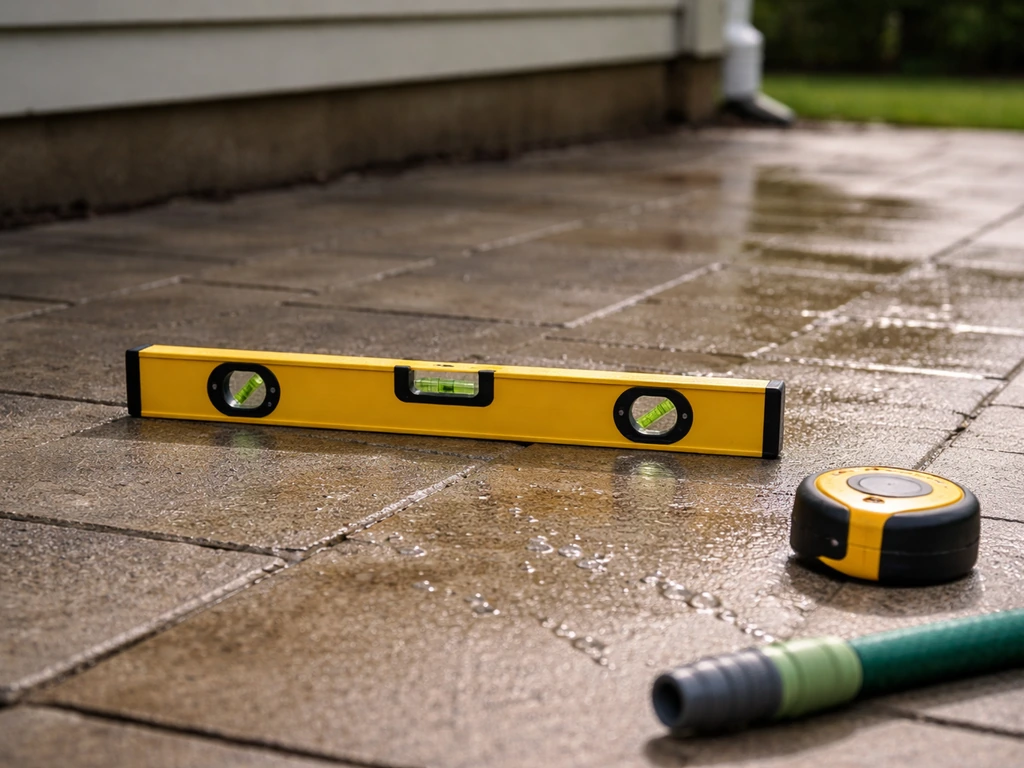
- Four-foot level or long straightedge for checking flatness
- Margin trowel and pointing trowel for bedding and joint work
- Stiff-bristle brush for cleaning joint recesses
- Plate compactor (rentable for about $60–90/day) or hand tamper for base compaction
- Garden hose with a spray nozzle
- Angle grinder with a diamond blade, or a wet-cut masonry saw for cutting replacement stones
- Safety glasses, heavy work gloves, and knee pads
- N95 or P100 respirator for any cutting or grinding work
Materials
- Compactable gravel or crushed stone (3/4-inch clean or crusher run) for base repairs
- Coarse bedding sand (concrete sand or manufactured sand) — not fine play sand
- Polymeric jointing sand for dry-laid patios, or Type S mortar mix for mortar-set work
- Replacement flagstones matched as closely as possible to existing stone type and thickness
- Penetrating stone sealer (water-based, breathable formula) if you plan to seal after repairs
Silica dust: take it seriously
Cutting or grinding flagstone generates silica dust, which causes serious and permanent lung damage with repeated exposure. Dry cutting is the highest-risk method. blank" rel="noopener noreferrer">Use a wet-cut masonry saw whenever possible: the water suppresses most of the dust at the source. HSE guidance also explains that wet cutting suppresses dust and helps reduce respirable crystalline silica risks associated with cutting stone, while dry cutting increases exposure Use a wet-cut masonry saw whenever possible. If you use an angle grinder for trimming, work outdoors, stand upwind, and wear a P100 half-mask respirator (not just a paper dust mask). Never dry-cut indoors or in an enclosed space.
Repairing loose flagstones: lifting, resetting, and stabilizing the base
This is the most common repair on a flagstone patio and also the most misunderstood. People try to squeeze sand or mortar around the edges of a rocking stone and wonder why it's rocking again a season later. You can't fix a bedding failure from the top. The stone has to come up.
Step 1: Remove the stone carefully
Work a flat pry bar into the joint at one corner and gently lever the stone up. Have a second bar or a flat piece of wood ready to slide under the raised edge so the stone doesn't drop back down. Flagstones are heavy (often 40–80 lbs or more depending on size) and awkward. Get help for larger pieces. Once it's lifted, walk it off to one side on a flat surface where it won't tip over.
Step 2: Inspect and repair the base
Look at what's exposed. If you see a compacted gravel base with a sand layer on top, you're in dry-laid territory. If you see a concrete slab with a grey mortar smear, it's mortar-set. Either way, check for soft spots, voids, or areas where the sand or mortar bed has washed away. Press on the gravel base with your hand or stomp on it. It should feel solid and unyielding. If it sinks or feels spongy, that base material needs to come out and be replaced with properly compacted crusher run or gravel. Add material in 2-inch layers and compact each layer before adding more.
Step 3: Re-establish the bedding layer
For a dry-laid repair, add fresh bedding sand screeded to a consistent 1-inch depth (25 mm is the standard spec; don't exceed 1.5 inches). Do not use bedding sand to fill a depression in the base: if the base is low, add and compact gravel first, then apply the sand layer. Trying to make up elevation with thick sand is one of the most common mistakes that causes future settling. For a mortar-set repair, mix a stiff batch of Type S mortar and apply it in a consistent layer thick enough to bring the stone to the right height, usually about 3/4 to 1 inch. Apply it in a full bed, not just dots or ribbons at the corners.
Step 4: Reset the stone and check level
Lower the stone back onto the bed and press it down firmly. Check with a level in multiple directions. The stone should sit flush with its neighbors and maintain the patio's drainage slope away from the house (typically 1/8 to 1/4 inch per foot). Tap with a rubber mallet to seat it properly. If one corner is high, lift that edge slightly and remove a small amount of bedding material beneath it. If one corner is low, add material. Get this right before moving on because once the joints are filled it's much harder to adjust.
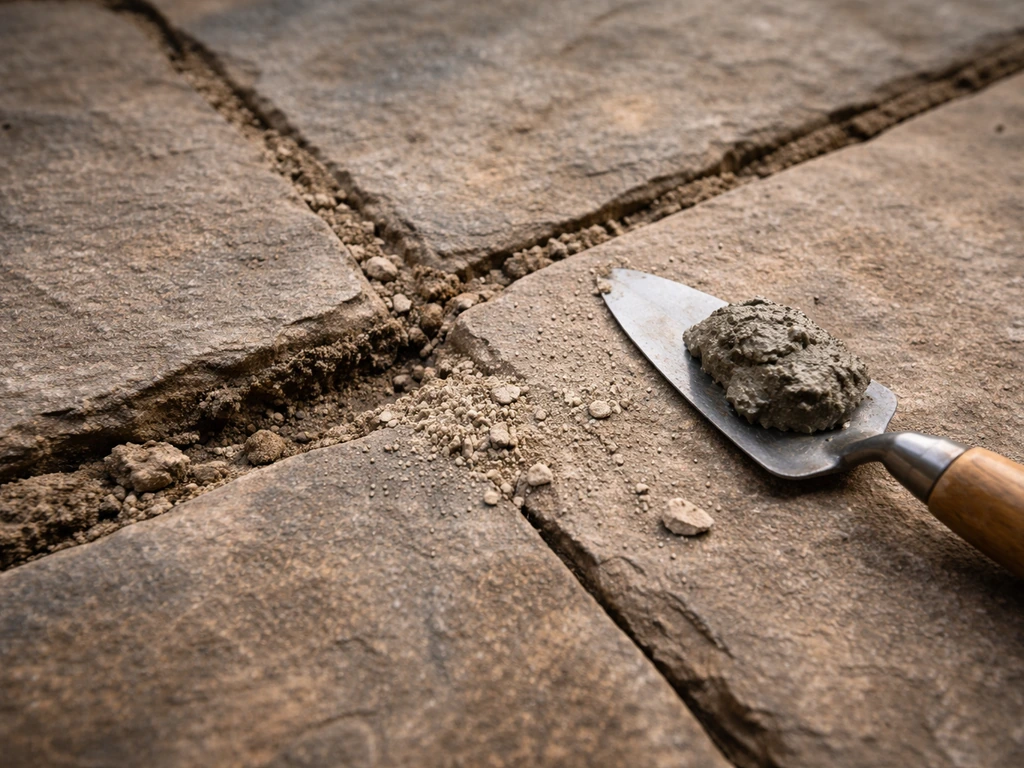
Step 5: Restore the joints
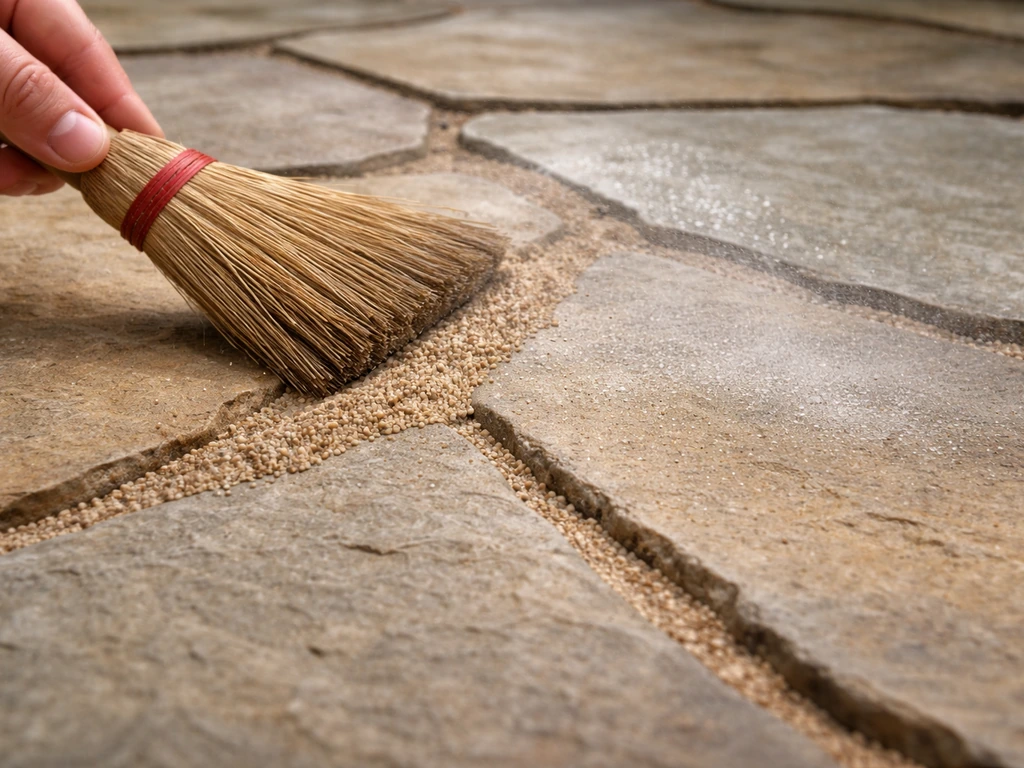
For dry-laid patios, sweep polymeric sand into the joints, mist with water per the product instructions, and allow it to cure. Polymeric sand hardens slightly when it gets wet and dries, which resists washout and weed germination far better than plain sand. For mortar-set patios, pack fresh Type S mortar into the joints and tool them to match the surrounding profile. Keep foot traffic off the repaired area for at least 24 hours, longer in cold weather.
Leveling sunken areas and fixing joint failures across a larger section
When a whole section of your patio has dropped or gone uneven, you're dealing with a base or drainage issue that's bigger than one stone. The fix is the same in principle as a single-stone repair, just scaled up.
Mapping out the affected zone
Lay a long straightedge or level across the patio in multiple directions. Any gap between the straightedge and the stone surface greater than about 3/8 inch needs to be addressed. Mark the perimeter of the affected area with chalk. Then look at where water goes when it rains. If it's running toward the house or pooling in a low area, the slope is wrong and needs to be corrected during the repair, not after.
Dealing with the drainage root cause
Before you relay anything, figure out why the base settled. Was the gravel base too thin to begin with (you want a minimum of 3 to 4 inches of compacted gravel for a residential foot-traffic patio)? Is there a drainage problem nearby, like a downspout emptying onto or near the patio? Is there a high water table or clay soil that holds moisture under the patio? If it's a drainage issue, adding a French drain or redirecting downspouts before you relay stones is worth the extra work. Otherwise you'll be doing this repair again in two or three years.
Lifting and relaying a section
Number each stone with chalk before lifting so you know where they go back. Remove the stones, clean off old bedding material from their undersides with a stiff brush and water, and set them aside. Excavate the base if needed, add fresh crushed stone, and compact in layers. Re-screed the bedding layer and relay the stones in order, checking slope continuously as you go. The patio should slope away from the house at a consistent pitch. Restore joints once all the stones are set and you're satisfied with the levels.
Repairing mortar joints on a mortar-set patio
If the stones themselves aren't moving but the mortar joints are cracked or hollow, you can repoint them without lifting everything. If you are working on a bluestone patio, the same repointing steps help you fix cracked, hollow mortar joints so the stone stays supported repairing mortar joints on a mortar-set patio. Use a cold chisel or oscillating tool to remove the old mortar to a depth of at least 2 to 2.
5 times the joint width (for a 3/4-inch joint, that means removing about 1. 5 to 2 inches of depth). This is important: leaving weak, shallow mortar underneath fresh mortar almost guarantees the new joint fails within a season.
Clean out all dust and debris with a brush and compressed air or water, dampen the joint so the existing stone and mortar don't suck moisture out of the new mix too fast, then pack in fresh Type S mortar and tool it to match the existing joint profile. This is the same kind of work described in guides for repointing mortar joints in stone patios more broadly, and the depth-of-removal rule applies regardless of stone type.
If your joints are part of a wider mortar joint issue, see how to repair mortar joints in stone patio for the full repointing workflow and troubleshooting tips.
Replacing cracked or broken flagstones
Sometimes a stone is too far gone to keep. A clean crack through the middle can sometimes be lived with on a dry-laid patio if both halves are still stable, but a stone that's spalled, shattered, or tipped at a bad angle needs to come out.
Finding a matching replacement
This is where flagstone repairs get frustrating. Natural flagstone varies in color, texture, and thickness depending on the quarry and the batch. Take a photo and, if possible, a small chip of the existing stone to a stone yard or masonry supplier. The most important dimension to match is thickness. If the replacement stone is even 1/2 inch thicker or thinner, it will sit proud or sunken relative to its neighbors, and you'll have to compensate in the bedding. Aim for a thickness match within about 1/4 inch, then fine-tune with the bedding layer.
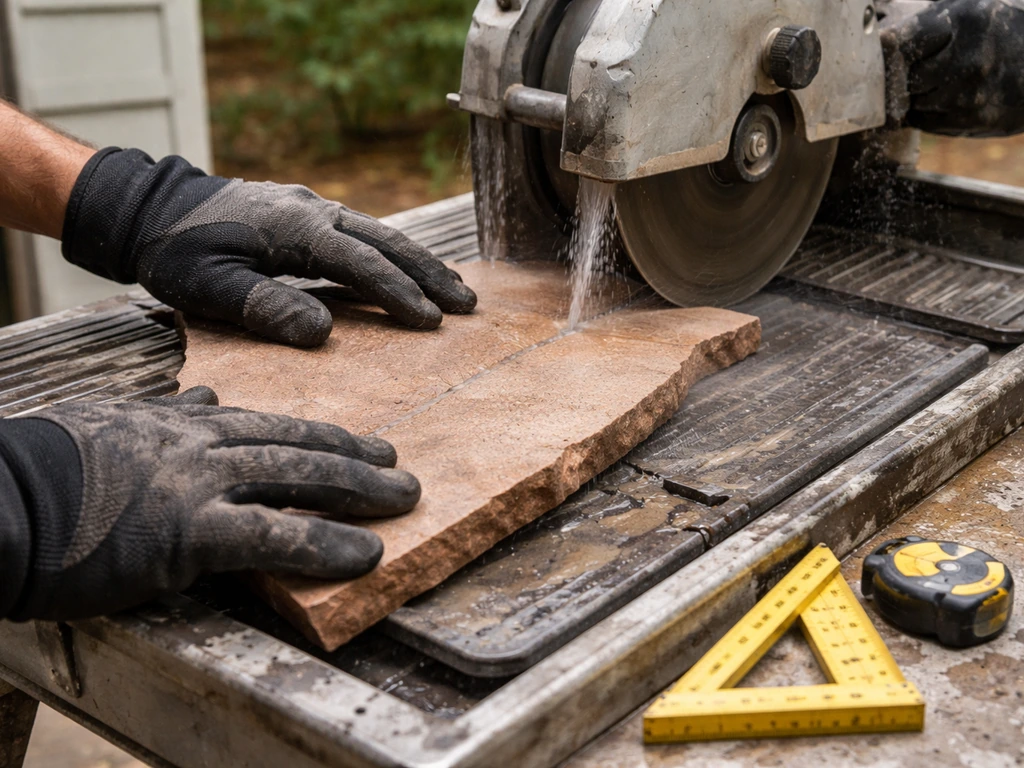
Cutting a replacement stone to fit
Make a cardboard template of the space first. Transfer the shape to the replacement stone with a pencil or chalk. For straight cuts, a wet-cut masonry saw with a diamond blade is the right tool. For irregular shapes and tight curves, score the line with an angle grinder (wet if possible) and then split carefully with a chisel.
Always wear eye protection, gloves, and a P100 respirator when cutting. Natural stone cuts variably: flagstone like bluestone or slate tends to split along natural cleavage lines, which can work in your favor. If you need a bluestone-specific approach, focus on the base, bedding depth, and the correct jointing method before resetting the stones bluestone patio. If you need a step-by-step refresher for the full reset process, see how to reset bluestone patio.
Limestone and sandstone are a bit more unpredictable.
Setting the new stone
Follow the same bedding process described earlier for resetting loose stones. Dry-fit the new stone before committing to the bed so you know it fits and is at the right height. Once it's seated and level, restore the joints around it to match the rest of the patio.
Finishing right: joints, sealing, and preventing the same problems again
Choosing a jointing approach
For dry-laid patios, polymeric sand is the best standard choice for most homeowners. It resists washout in rain, discourages weed germination, and stays flexible enough to accommodate minor seasonal movement without cracking like rigid mortar would. Follow the product instructions carefully: joints need to be dry before application, you sweep it in and compact it, then mist with water to activate the binding agents. Don't skip the activation step. For mortar-set patios, stay with mortar for the joints. Mixing mortar and polymeric sand in the same patio creates problems because they move differently.
To seal or not to seal
Sealing is optional, not mandatory, and the wrong sealer can cause more problems than it solves. If you use a film-forming sealer (one that coats the surface), you can trap moisture beneath it, leading to efflorescence (white salt deposits), spalling in freeze-thaw climates, or a slippery surface. If you want to seal, use a penetrating, breathable sealer: a water-based nano or silane/siloxane formula that soaks into the stone rather than sitting on top of it.
This type allows the stone to breathe, lets moisture out, and reduces staining without the risks of a film-forming product. Apply sealer only after all repair work is fully cured (at least 48–72 hours for mortar work, longer in cool weather) and the stone surface is completely dry.
Bedding and jointing material comparison
| Material | Best use | Pros | Cons |
|---|---|---|---|
| Coarse bedding sand | Dry-laid bedding layer | Easy to screed and adjust, inexpensive | Can wash out if drainage is poor; must not be used to fill base voids |
| Polymeric jointing sand | Dry-laid joints | Resists washout and weeds, flexible, DIY-friendly | Needs dry conditions to apply; joints must be clean and deep enough |
| Type S mortar | Mortar-set beds and joints | Strong, rigid, permanent bond | No flex; cracks if base moves; harder to repair later |
| Crusher run / compacted gravel | Base layer repair | Compacts well, drains freely, stable under load | Requires compaction equipment; heavy to move in quantity |
| Penetrating breathable sealer | Surface protection after repair | Allows stone to breathe, reduces staining, freeze-thaw safe | Less visible sheen than film-forming; needs reapplication every few years |
Preventing the same failures from happening again
- Make sure the patio slopes away from the house at 1/8 to 1/4 inch per foot of run — this is the single most important thing you can do for long-term stability
- Redirect downspouts and gutters so they don't drain onto or against the patio
- Inspect joints every spring and top up or repoint any that have washed out or cracked before water gets underneath
- Pull weeds from joints as soon as they appear — roots accelerate joint failure and can lever stones out of position
- Avoid using de-icing salts directly on flagstone, especially limestone or sandstone; they accelerate spalling and surface damage
- If you're in a freeze-thaw climate, make sure your gravel base is deep enough (3–4 inches minimum, more in frost-heavy regions) to prevent heaving
When to call a professional
Most single-stone repairs and joint work are realistic DIY projects if you're comfortable with basic manual labor and have a weekend to work with. But some situations genuinely call for a professional.
If more than 30 to 40 percent of your patio is affected, if the base is failing due to a soil or drainage issue that goes beyond the patio footprint, or if the patio is mortar-set on a cracked or heaved concrete slab, you're likely looking at a full reset or slab repair that goes beyond what most homeowners should take on alone.
Widespread drainage failure especially: if water is consistently pooling under your patio from a grading or drainage problem in the yard, no surface repair will last. Get a landscape contractor or hardscape professional to assess it first. A few hundred dollars for an honest assessment is cheaper than redoing the same repair every two years.
The good news is that most flagstone patio repairs are more manageable than they look once you've correctly identified the cause. Lift the stone, fix what's underneath, relay it properly with the right bedding thickness, restore the joints, and address drainage. Do those things in the right order and you'll get years of stable, good-looking results rather than a quick cosmetic patch that fails by next spring.
FAQ
Can I repair a rocking or sunken flagstone patio by only replacing the joint sand or mortar?
Usually no. If the stone has lost contact with the bedding, adding more joint material only fills the top gap and leaves the void under the stone. The joint may look repaired for a short time, but the stone will often rock again because water continues to undermine the bedding. The durable fix is lifting the stone and addressing the compacted base and bedding depth first, then restoring joints.
How do I tell if I have a dry-laid patio with polymeric sand joints versus mortar joints?
Look at how hard the joint edges feel after you scrape or probe. Joint sand typically powders or feels gritty and flexible, while mortar is rigid and holds a firm shape. Another practical clue is behavior with water, polymeric sand usually locks up after misting and cures more firmly than plain sand. If you are still unsure, test a single inconspicuous joint section before doing a large repointing or relaying.
What should I do if the base feels solid in one spot but spongy in another?
Treat it as a base failure, not a single-stone issue. Soft areas often indicate undermining from washout, poor compaction, or trapped saturated soil. When you lift stones, remove bedding only where you can confirm the base is fully solid, then excavate and rebuild the base through the soft boundaries. Partial repairs that leave the surrounding weak material usually re-dip nearby.
How deep should I excavate and rebuild the gravel base for a proper repair?
Plan on removing down to firm, stable material so you can rebuild with properly compacted layers. For a typical residential foot-traffic patio, aim for at least 3 to 4 inches of compacted gravel before the bedding layer. Rebuild in 2-inch lifts, compact each lift, and only then install the correct bedding thickness.
Is it okay to use sand instead of gravel to bring the patio back up to level?
No, sand is not a replacement for gravel in the base. Thick bedding sand will compress and wash out more easily, which leads to repeating settlement and rocking. If the base is low, add and compact crusher run or gravel first to correct elevation, then apply bedding sand or mortar at the proper thickness.
My patio slopes toward the house. Should I fix the slope after I relay stones?
Fix it before you reset and joint the stones. Once joints are packed, adjusting elevation becomes much harder and you risk leaving low spots that collect water. Use a long straightedge and check drainage direction as you rebuild the base and bedding, aiming for consistent slope away from the house across the repaired section.
Can I mix polymeric sand joints with mortar joints on the same patio?
It is not recommended. They behave differently with moisture and movement, which can cause joint separation or premature failure. Keep the jointing system consistent, if the patio is dry-laid use polymeric sand joints, and if it is mortar-set keep joints mortar. For mixed situations, consider matching the majority system and reworking joints around the affected area to keep performance predictable.
How long should I keep foot traffic off the repaired area?
For most relays and joint work, keep traffic off the repaired zone for at least 24 hours. In cold weather or if mortar is involved, extend the time because curing and strength gain slow down. Also avoid heavy loads early, even if joints look set, since early movement can disturb the seating and bedding contact.
Do I need to seal a repaired flagstone patio for it to last?
Sealing is optional, and the wrong product can create problems like moisture trapping and white efflorescence in freeze-thaw climates. If you seal, choose a penetrating, breathable sealer that soaks into the stone rather than a surface film. Apply only after repairs are fully cured and the surface is completely dry, since trapping moisture during cure increases risk.
How do I handle a cracked flagstone that seems stable, but the crack is through the stone?
Evaluate whether the stone can stay stable without movement. A clean crack can sometimes be acceptable on a dry-laid patio if both sides remain firmly supported and the stone does not rock or tilt. However, if the stone has spalled, shattered, or is tipped due to a void beneath it, replace it. The key decision is whether the bedding and base still provide support, not the presence of a crack alone.
What is the safest way to cut flagstone if I need to trim a replacement or fit an edge?
Use a wet-cut masonry saw when possible to reduce silica dust exposure. Avoid dry cutting, especially indoors. If you must use an angle grinder, work outdoors, stay upwind, and wear a P100 respirator (not a paper dust mask) plus eye and hand protection. Dust control is not optional because repeated exposure can cause permanent lung damage.
When should I call a professional instead of doing a DIY repair?
Consider hiring help if a large portion of the patio is affected (for example, more than about 30 to 40 percent), if the base failure is driven by yard drainage beyond the patio footprint, or if the patio is bonded to a heaved or cracked concrete slab. Widespread pooling under the patio is a sign that a grading or drainage problem needs correction, not just stone and joint patching.
Next Article
How to Repair Mortar Joints in a Stone Patio (DIY Guide)
Step-by-step DIY repointing for stone or brick patio mortar joints, tools, mortar matching, curing, and lasting preventi