Yes, you can seal a brick patio yourself, and it's one of the better weekend DIY jobs out there if the surface is in decent shape. The full process takes one to two days depending on drying time: clean thoroughly, let everything dry completely, repair any damaged joints, then roll or spray on one or two coats of the right sealer. Where people go wrong is rushing the prep, skipping the moisture check, or grabbing the wrong product. Get those three things right and the job holds up for years.
How to Seal a Brick Patio: Full DIY Reseal Guide

Talia Lang
14 May 2026
Can you seal a brick patio, and when should you wait?
Sealing makes sense when your bricks are structurally sound, the joints are intact, and drainage is working. It protects against staining, slows down efflorescence (those white salt deposits that appear on the surface), and makes the whole patio easier to clean. But sealing is a finishing step, not a fix. If you seal over problems, you lock them in.
Hold off on sealing if any of the following apply. Cracked, sunken, or loose bricks need to be re-set first. Crumbling mortar joints need repointing. If water is pooling on the surface after rain, sort the drainage before you do anything else because a sealed surface over a drainage problem just makes the moisture situation worse. If you can see heavy efflorescence, that tells you moisture is actively moving through the masonry, and sealing at that point risks trapping it and causing the sealer to bubble or peel within months.
- Seal now: bricks are solid, joints are full, surface drains well, no active moisture issues
- Fix first, then seal: cracked or sunken bricks, crumbling joints, pooling water, heavy efflorescence
- Don't seal yet: if the patio is new concrete or recently laid brick that hasn't fully cured (wait at least 28 days)
- Reassess drainage before sealing: if water sits on the surface more than a few minutes after light rain
Figure out what you're working with before you buy anything
Brick vs. pavers
Standard clay bricks and concrete pavers behave differently. Clay bricks are more porous and absorb sealer quickly. Concrete pavers are denser but still benefit from sealing. The principles here apply to both, but coverage rates and drying times can vary, so always check the product data sheet for your specific surface.
Check for existing sealer
If the patio has been sealed before, you need to know what's on there. Flick some water on the surface. If it beads up and sits, there's a film-forming sealer still active. If it soaks straight in, either no sealer exists or it's worn out. Peeling, flaking, or hazy patches are signs of a failing sealer that needs to be removed rather than coated over. Applying new sealer over a failing one is a fast track to a patchy, peeling mess.
Moisture check
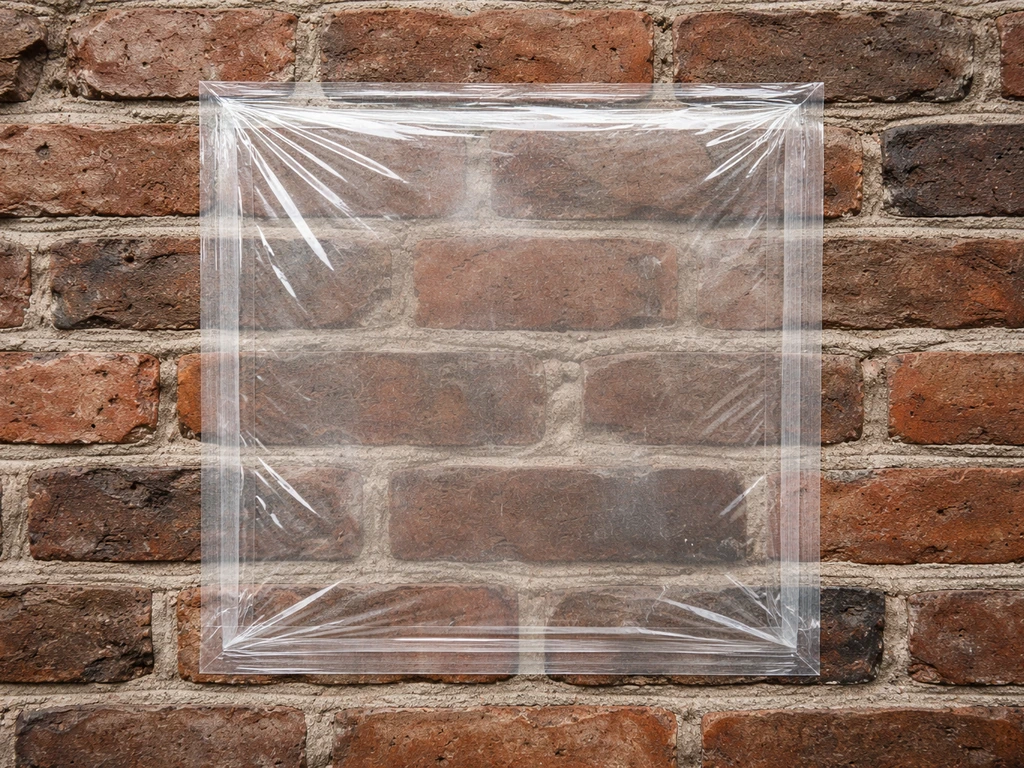
This step is worth the five minutes it takes. Cut a piece of plastic sheeting or foil about 30 cm square and tape it tightly to the brick surface, sealing all four edges. Leave it for 24 hours. If you come back and the underside is wet or condensation has formed on the brick beneath it, you have moisture moving up through the masonry from below. Sealing over active subsurface moisture is one of the main reasons sealers fail early, so identify and fix the source before proceeding.
Prep work: the part that actually determines whether this lasts
Clean the surface properly
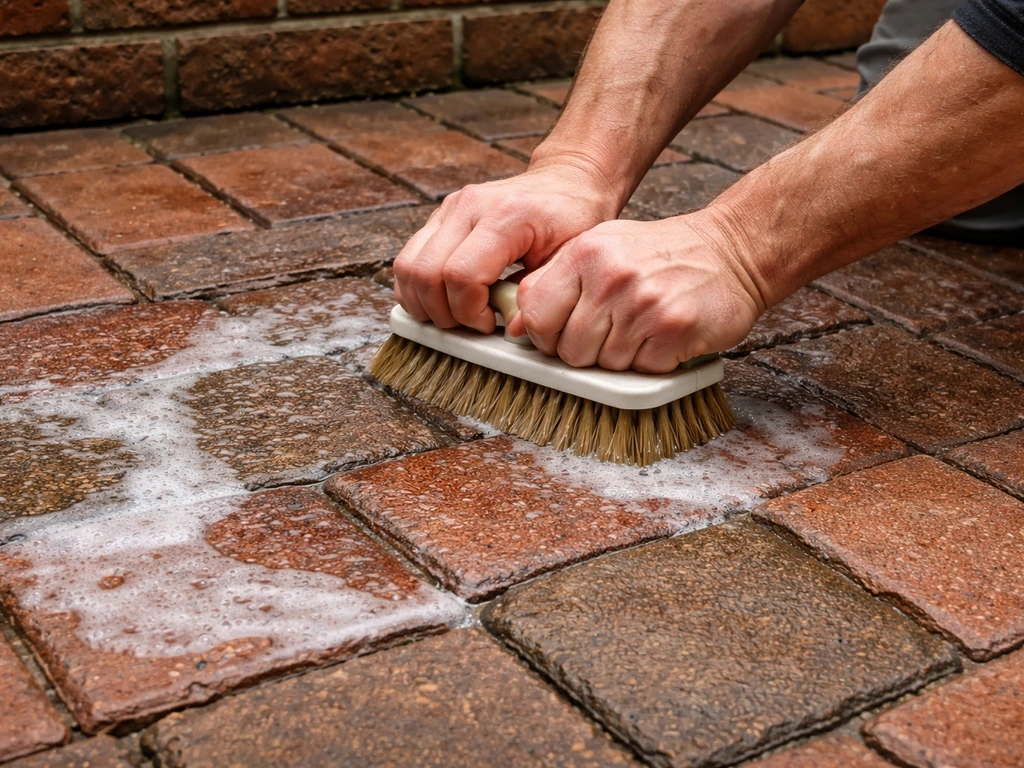
Sealer bonds to the brick, not to dirt, algae, or salts. Start with a stiff brush and a dedicated patio cleaner or a diluted masonry cleaner. For green algae and mould, a product like Everbuild Patio Wizard works well (coverage around 1 litre per 3 to 6 m² depending on how bad the growth is). For stubborn efflorescence, a dedicated efflorescence remover like Techniseal HD Paver Prep dissolves the salt deposits that a pressure washer alone won't shift. Rinse everything thoroughly and let it dry completely. Rushing this step is the single biggest cause of sealer failure.
Remove old sealer if needed
If you found peeling or flaking sealer in your assessment, it has to come off. Film-forming sealers can usually be stripped with a dedicated sealer remover or stripper (check the product is compatible with your brick type). Apply, let it dwell, then scrub and rinse. This is messy and takes time, but skipping it means your new coat will peel in the same spots within a season.
Repair joints and fill gaps
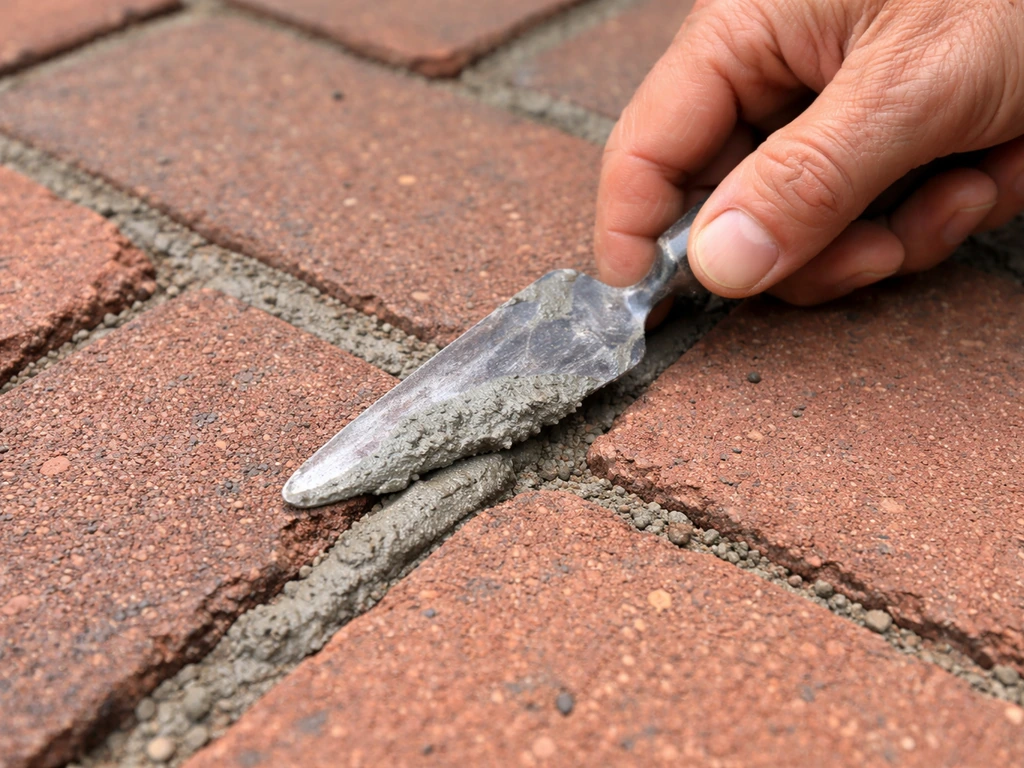
Any crumbling or missing mortar joints need to be repointed before sealing. Open joints let water in underneath and give weeds a foothold. If you have sand-set pavers with gaps, top up the jointing sand first and compact it. Once sealed, getting back into those joints is much harder. If weeds have been a recurring problem between slabs, it's worth reading up on ways to stop them before you seal, because the sealer alone won't fully prevent them from coming back through the joints. If you are dealing with weeds between patio slabs, tackle the gaps and jointing first so you do not simply seal the problem in weeds have been a recurring problem between slabs.
Drying time before you seal
The surface must be completely dry before any sealer goes on. After cleaning, give it at least 24 to 48 hours of dry weather. In cooler or humid conditions, wait longer. Even damp joints that look dry on the surface can trap moisture and cause sealer to whiten or peel. When in doubt, wait another day.
Choosing the right sealer: the decision that changes everything
There are two main sealer types and they work very differently. Penetrating sealers soak into the brick and protect from within without forming a surface film. Film-forming sealers sit on top and create a visible coating. For most brick patios in a domestic garden setting, a breathable film-forming acrylic or a penetrating silane/siloxane sealer is the right call. Here's how to think through the choice:
| Sealer Type | Best For | Finish | Breathable? | Slip Risk | Reapplication |
|---|---|---|---|---|---|
| Penetrating (silane/siloxane) | Porous brick, high moisture areas, natural look | Invisible / no change to appearance | Yes | Low (no surface film) | Every 3 to 5 years or when water stops beading |
| Film-forming acrylic (water-based) | General patio use, colour enhancement, easy cleaning | Low sheen to satin (some wet-look options) | Partially | Moderate (check slip rating) | Every 2 to 4 years |
| Solvent-based film-forming | Heavy-use areas, strong colour enhancement | High gloss or wet-look | Less breathable | Higher on smooth surfaces | Every 2 to 3 years, more prep needed |
For most DIYers with a standard brick patio, a water-based acrylic like Sika Path and Patio Sealer hits the right balance: low sheen, slip-resistant finish, easier to apply, and less harsh to work with than solvent-based options. If your bricks have a moisture problem or you want to keep the natural look, go with a penetrating silane/siloxane like Sikagard-400 Enviroseal instead. It won't change the appearance at all and lets moisture escape through the brick.
Compatibility if you're resealing
If there's existing sealer still on the surface, the new product must be compatible. Water-based acrylic over water-based acrylic is usually fine. Applying a film-forming sealer over a penetrating sealer doesn't work well because there's nothing for the film to bond to. When in doubt, call the manufacturer's technical line with the product you already have and the one you're planning to use. It's a five-minute call that can save you a full strip-and-redo job.
Slip resistance
This matters more than people think. Glossy film-forming sealers on smooth brick can become genuinely dangerous when wet. Always check the product's slip resistance rating. Products like Sika Path and Patio Sealer are specifically formulated to stay slip-resistant, which is what you want for an outdoor surface. If you want a glossier finish, look for anti-slip additives you can mix in.
How to apply the sealer: step by step
- Check the weather forecast. Apply only in dry conditions above 5°C. Most products require no rain for at least 4 to 6 hours after application. Sika Path and Patio Sealer, for example, specifies no rain within 5 hours at 20°C. Don't apply in direct hot sun either, as the sealer can dry too fast and streak.
- Do a test patch first. On a small, less visible section (roughly 1 to 1.5 m²), apply sealer and let it fully cure. This checks you're happy with the finish and gives you a feel for coverage and application before you commit to the whole area. Manufacturers like Sika specifically recommend this for penetrating sealers.
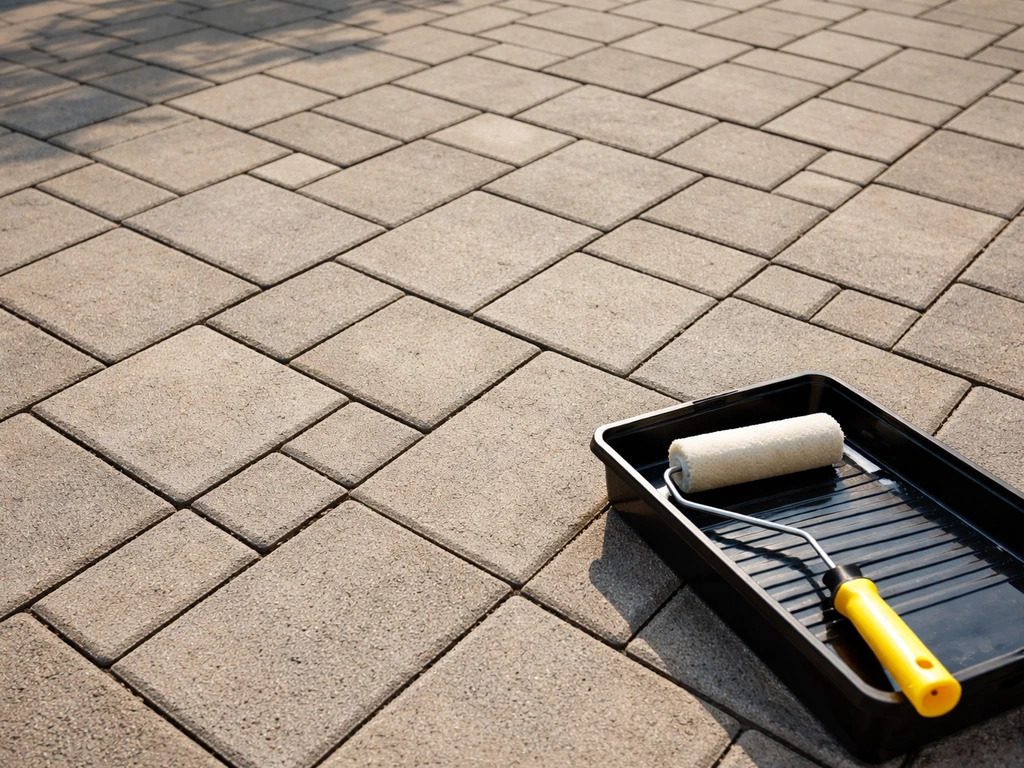
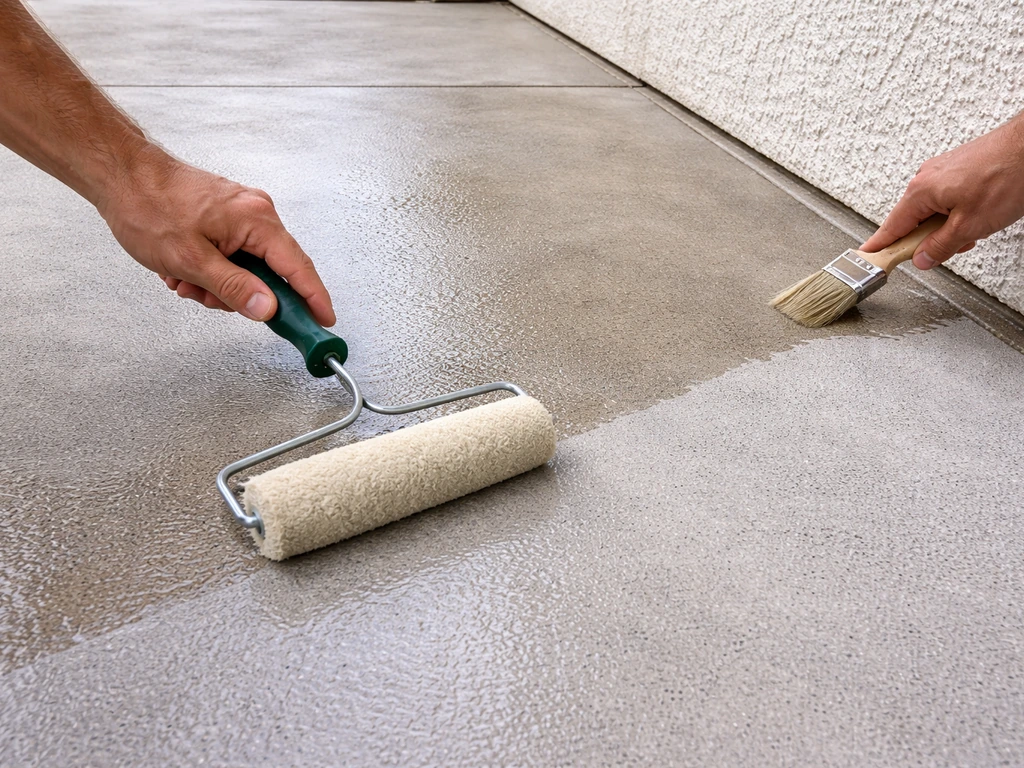
- Load your roller or sprayer. A long-pile roller (12 mm to 18 mm pile) works well for textured brick. A low-pressure garden sprayer is faster on large areas. Don't use a pump sprayer on high pressure or you'll over-apply and get puddling.
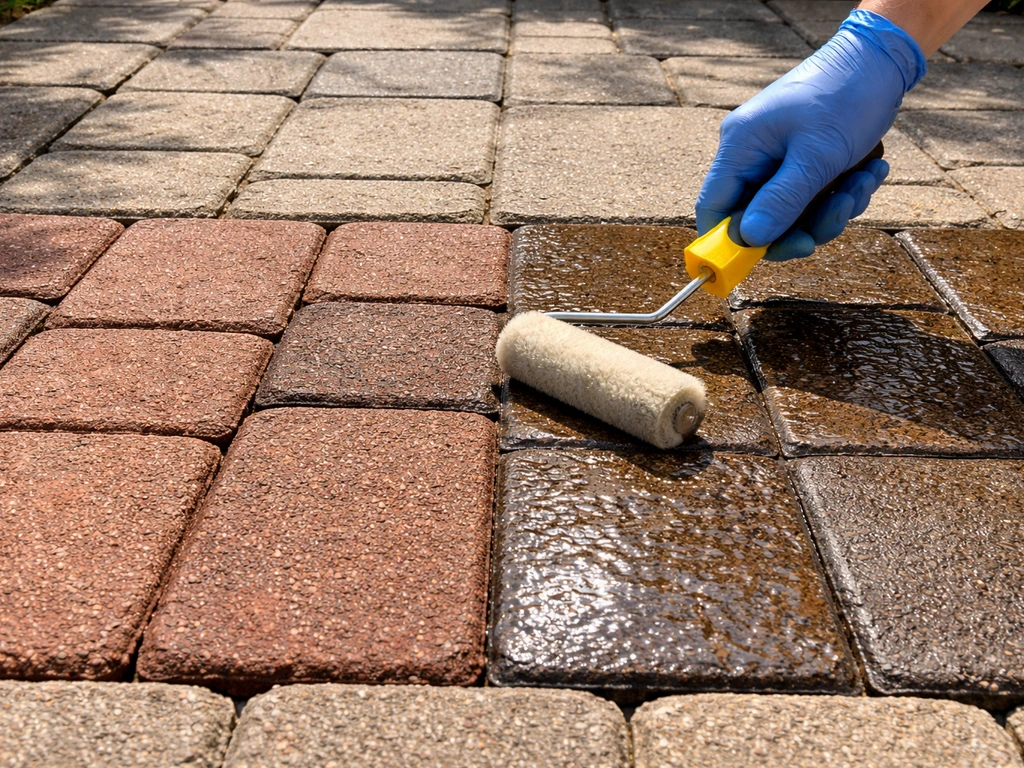
- Apply the first coat, working in sections. Work the sealer into the surface, including the joints, without letting it pond or puddle. On textured brick, ponding in recesses causes haze and uneven finish. Keep a wet edge to avoid overlap marks.
- Allow to dry between coats. With most water-based acrylics, touch-dry comes around 30 minutes at 20°C. Wait the full recommended time before the second coat, typically 2 to 4 hours. Sika Path and Patio Sealer is walk-on dry in about 1 hour at 20°C.
- Apply a second coat if needed. Most brick patios benefit from two coats. Coverage is typically around 5 to 8 m² per litre per coat depending on porosity. More porous old brick will drink more sealer on the first coat, so buy a bit extra.
- Keep traffic off until fully cured. Walk-on dry is not the same as fully cured. Most products need 24 hours before light foot traffic and up to 72 hours before furniture goes back on.
Edges, joints, and awkward spots
Cut in around the edges with a brush before you roll the main field, especially where the patio meets the house wall. If you are sealing between the house and patio, pay special attention to that transition so water cannot sneak into the gap edges with a brush.
If you're sealing right up to the house, make sure you're not bridging the gap between the patio and the wall with sealer, as this can trap moisture and create damp issues. The joint between a patio and the house is its own topic worth looking at separately before you seal near it.
If you have gaps between patio slabs, you also need to seal those joints properly so water can't work its way underneath how to seal between patio slabs.
Curing, timing, and keeping the work protected
Once the last coat is on, the sealer needs time and the right conditions to cure properly. Keep everyone off the surface for at least 24 hours. If rain arrives in that window, the sealer can wash off, streak, or go milky. Plan your application day so you have a clear 24 to 48 hours of dry weather after you finish. Most products specify that the surface must stay dry for a minimum of 4 to 6 hours after the final coat just to set, but a full 24 hours is the safer target.
For aftercare, sweeping regularly and rinsing off leaves, grit, and spills keeps the sealer working longer. Most film-forming sealers on a brick patio will last 2 to 4 years before the water beading test stops working. When rainwater stops beading and soaks straight in, that's your signal to reseal. For penetrating sealers, blank" rel="noopener noreferrer">Sika Water Sealer, for instance, suggests reapplication every few years or when the surface no longer repels water. You don't need to strip and start from scratch every time, just clean well, check for failures, and apply a fresh maintenance coat.
Troubleshooting when things go wrong
White haze or milky patches
This is the most common failure and it almost always means moisture was trapped under the sealer. Either the surface wasn't dry enough, there's subsurface moisture moving up through the brick, or the sealer used isn't breathable enough to let vapour escape. Light haziness on a breathable sealer sometimes clears as the surface dries out. A non-breathable sealer over damp brick may need to be stripped and the moisture issue fixed first. This is why the plastic-sheet moisture test before you start is not optional.
Peeling or flaking
Peeling means the sealer didn't bond properly. Usually this comes down to dirty or damp brick, incompatible sealer layered over old product, or applying in too-cold temperatures. The fix is to strip back to bare brick, sort out whatever caused the bonding failure, and start again. There's no patch fix for peeling sealer that holds long term.
Patchy or uneven finish
Patchiness usually means uneven application or applying over a surface with varying porosity (old brick absorbs sealer at different rates in different spots). A second coat applied evenly often fixes light patchiness. If the variation is severe, a third thin coat after the second has cured can even things out.
Slick spots when wet
If the sealed surface is slippery when wet, the sealer either doesn't have adequate slip resistance built in, or you've applied it too thickly and created a film that's smoother than the brick texture underneath. On a textured brick surface this is less likely, but on smoother pavers it can happen. Anti-slip aggregate additives mixed into the next coat will help, or you can switch to a product with a confirmed slip-resistant rating.
When to call a professional
Most sealing jobs are well within DIY territory, but a few situations genuinely warrant getting a professional in. If your moisture test showed significant subsurface damp and you can't identify the source, a drainage or damp specialist should look at it before anything goes on the surface. Persistent efflorescence that keeps coming back after cleaning is a sign of ongoing water movement through the base or substrate that needs to be properly addressed. Severely cracked or sunken bricks that affect large sections of the patio are a structural repair job first. And if you've already stripped and resealed twice and the sealer keeps failing in the same spots, something is wrong underneath that a sealer can't solve.
Your next steps, in plain terms
- Do the water bead test and the plastic sheet moisture test before buying anything
- Fix any cracked bricks, sunken sections, crumbling joints, or drainage problems first
- Clean the surface properly and remove all efflorescence, algae, and old failing sealer
- Wait 24 to 48 hours for the surface to fully dry after cleaning
- Choose a breathable water-based acrylic for general use, or a penetrating silane/siloxane if moisture is a concern
- Check compatibility if resealing over existing product
- Apply in dry weather above 5°C with no rain expected for at least 6 hours
- Do a small test patch first, then apply two coats with full drying time between them
- Keep traffic off for 24 to 48 hours after the final coat
- Plan to reapply every 2 to 4 years or when the water bead test fails
FAQ
Can I seal a brick patio if there are small surface cracks but the bricks feel solid?
Sometimes yes, but sealers do not repair movement. If cracks are hairline and the bricks do not rock or sink, cleaning and sealing can still work. If the cracks open and close seasonally or you see mortar loss along the line, repoint first, then re-check after a dry spell before sealing.
Do I need to pressure-wash before sealing, or is brushing enough?
Brushing alone is usually not enough. You need removal of loose dirt and salts, but avoid excessive pressure that can drive water into the joints or erode soft mortar. Use a patio cleaner and controlled rinse, then let the patio dry fully, especially around mortar lines.
How do I know if my patio is too damp to seal even if the surface looks dry?
Use the plastic sheet test and also check joint darkness. If the underside of the plastic shows moisture or the brick beneath stays cool or darker after drying, moisture is still moving. Wait for extended dry weather, and if damp returns after you stop drying, investigate from the base before sealing.
What happens if it rains soon after I apply the sealer?
If rain hits before the sealer sets, it can wash off and create streaks or a milky haze, and it can weaken bonding in shallow areas. Let it dry, then do a small water check in a hidden area. If water beading has failed or you see patchy loss, you may need an additional coat after full cure, or a strip if bonding was compromised.
Should I seal after repointing immediately, or is there a curing time for mortar?
Give new mortar time to cure and dry out. Fresh mortar holds moisture and can lead to whitening, bubbling, or early peeling. As a practical rule, wait until the repointed joints are hard, fully set, and dry to the touch for several days in dry weather, then confirm with the moisture test before sealing.
Can I apply sealer in cold weather or when temperatures are dropping at night?
Avoid sealer application when temperatures are near freezing or when dew is likely. Cold and night condensation can prevent proper film formation or cure, even if the surface feels dry. Plan so you have stable conditions for at least the first day of curing, and keep people off the surface longer if the weather is cool and humid.
Is it safe to seal over algae, moss, or staining caused by organic growth?
Not directly. You must kill and remove growth and clean out residues first so the sealer bonds to masonry, not organic matter. After using an algae or mould cleaner, rinse thoroughly and let the patio dry completely, then confirm with a water test before sealing.
How do I choose between penetrating and film-forming sealers for a brick patio with efflorescence?
Efflorescence usually means salts are being transported by moisture. If it is active or recurring after cleaning, fixing the moisture source matters more than sealer type. If you still decide to proceed, penetrating silane or siloxane is often preferred for moisture-vapour release, but only after the moisture test shows the system is dry or drying normally.
Can I apply a second coat right away after the first dries?
Typically you need the manufacturer’s recoat window, and it often depends on weather and absorption. If the first coat is not cured, the second can trap solvent or prevent proper bonding. A safe approach is to follow the label timing, and if the first coat has dried dull or feels tack-free, do a small test section to confirm uniform appearance and water beading.
Will sealing trap weeds in the joints or stop them from returning?
Sealing can reduce water penetration around some joints, but it does not reliably stop weeds from reappearing, especially where there are gaps between slabs or missing mortar. If weeds are a recurring issue, address the jointing, top up jointing sand where relevant, and improve the gaps before sealing.
How can I prevent the sealed patio from looking blotchy or uneven?
Blotchiness usually comes from uneven absorption, old patches of sealer, or uneven coverage. Ensure the patio is uniformly clean and fully dry, stir the sealer well, apply at the labeled rate, and keep a steady pace. If your first coat looks uneven after curing, an evenly applied second coat is often the simplest fix.
What should I do if water beads in some areas but soaks in others after sealing?
That pattern suggests uneven application, different porosity, or remaining old coatings in patches. Wait for full cure, then spot-clean and test small areas. If soaking areas never repel water after curing, you likely need a targeted additional coat on those spots after confirming compatibility and cleaning off any residue.
How do I check slip risk before inviting people back onto the patio?
Do a practical slip test. Once fully cured, sprinkle water and walk on the surface wearing typical footwear, then compare to untreated areas. If it feels slick, you may need an anti-slip amendment or a switch to a sealer with confirmed slip resistance rather than applying extra gloss.
If my patio was sealed before, what’s the best way to tell whether to strip or coat over?
Start with the water behavior check. If water beads strongly and stays beaded, a film-forming sealer may still be present, and coating over can work only if the products are compatible. If you see flaking or hazy loss of adhesion, plan on stripping first because new sealer will not bond to failing layers.
When is it worth calling a pro instead of DIY sealing?
Call in help if you cannot locate the source of persistent moisture, if efflorescence keeps returning after cleaning, if large sections are cracked or sunken, or if resealing fails repeatedly in the same zones after stripping. Those cases usually indicate drainage or structural issues beneath the surface that sealing cannot solve.
Next Article
How to Reseal Patio Pavers: Step-by-Step DIY Guide
DIY steps to diagnose and reseal patio pavers, fix joints, choose the right sealer, and avoid common seal failures.