Yes, you can tile over a brick patio, but only if the brick is stable, mostly level, and not shifting with the seasons. The honest version: most brick patios set on sand beds are not good candidates because they flex and move, and tile absolutely does not tolerate movement. Mortared brick patios on a concrete base are a different story, those can work well with the right prep, waterproofing membrane, and materials. Get the foundation assessment right first, because everything else depends on it.
How to Tile Over a Brick Patio: Step-by-Step Guide

Talia Lang
6 May 2026
First, figure out if your brick patio can actually support tile
Before you buy a single tile, spend 20 minutes really looking at what you have. The single biggest predictor of whether this project will succeed or fail is the condition and type of your existing brick patio. There are two completely different situations here, and they require different approaches.
The first situation is brick set in sand, which is how most residential patios are built. The bricks sit on a compacted sand or gravel base with no mortar holding them to anything. These patios flex every winter as the ground freezes and thaws, which is exactly what tile cannot handle.
If your bricks rock when you step on them, if individual bricks have sunk or heaved, or if the joints are filled with sand or polymeric sand rather than mortar, this is a sand-set patio. Tiling directly over it is asking for cracked grout and popped tiles within one or two freeze-thaw cycles.
If you still want to go this route, you'd need to either relay the whole patio on a proper concrete base first, or pour a new concrete slab on top and tile that. If your sand-set brick patio is unstable, you may need to relay it on a proper concrete base before installing tile how to relay a brick patio. That's a much bigger project than most people anticipate.
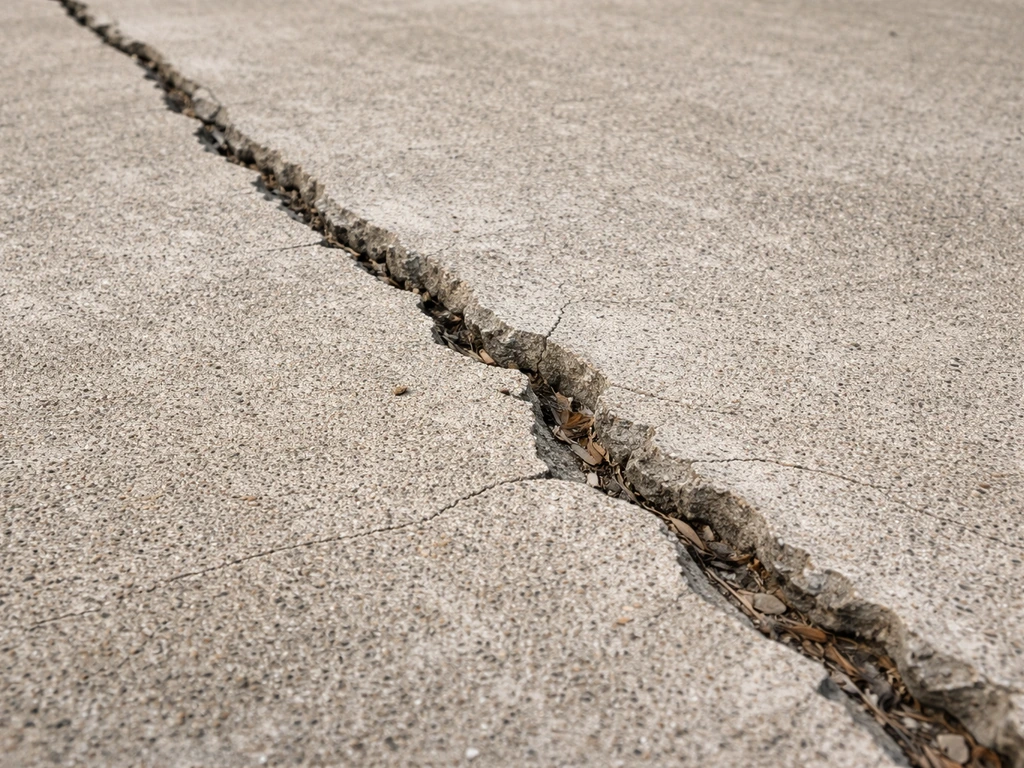
The second situation is mortared brick on a concrete slab, where the bricks are set in mortar over a poured concrete base. This is the setup that can realistically support tile. Walk the surface and press hard on individual bricks. None of them should move even slightly. Check the mortar joints: they should be intact, not crumbling or hollow-sounding when you tap them with a rubber mallet. Look for any cracking patterns across the surface, especially diagonal cracks that suggest the slab underneath has shifted. If you find significant cracking, investigate further before proceeding.
Also look carefully for moisture problems. Check the underside of any raised edge or step for efflorescence (the white powdery mineral deposits that mean water is moving through the brick). Standing water pooling in low spots is another red flag. Both issues need to be resolved before you put tile on top, not covered up. Covering a drainage problem with tile is one of the fastest ways to destroy a new installation and potentially damage your house foundation.
One more check: measure how much height you're adding. A typical tiling assembly over brick, including the membrane, thinset bed, tile, and grout, adds roughly 1 to 1.5 inches to your finished surface height. Check where that lands relative to your door threshold, any steps, and adjacent grade. If your door already sits barely above the patio, you may have a water intrusion problem the moment you add that height.
Surface prep: this is where the project lives or dies
Assuming you have a mortared brick patio that passed the stability test, prep is the most labor-intensive part of this job. Don't rush it. Poor surface prep is responsible for more failed outdoor tile jobs than anything else.
Deep cleaning
Start with a thorough pressure wash at around 2,000 to 3,000 PSI. You want to strip out any mold, algae, old sealant, grease, or loose surface material from the mortar joints. Let it dry completely, which typically means 48 to 72 hours in warm weather. Any residual moisture in the brick will compromise both your waterproofing membrane and your thinset bond. If there's significant algae or efflorescence, treat the surface with a diluted masonry cleaner after pressure washing, following the product instructions, then rinse thoroughly and let it dry again.
Addressing high and low spots
Use a long straightedge or a 6-foot level to find where the surface varies. For tiling to work, you want no more than about 1/8 inch variation over a 10-foot span. High spots need to be ground down with an angle grinder and masonry grinding wheel. Low spots can be filled with a floor-patching compound or a polymer-modified mortar mix. Pay special attention to mortar joints: if any are sunken significantly below the brick face, fill them flush. Tile bridging an unfilled joint will crack under foot traffic.
Creating a bond-friendly surface
Brick is a relatively porous surface, which can actually work in your favor for bonding, but only if it's clean and structurally sound. After cleaning and leveling, apply a masonry primer or bonding agent (sometimes called a latex bonding agent) to the entire surface. This seals the pores enough that the brick doesn't rapidly pull moisture out of your thinset before it can cure, while still leaving a mechanically grippy surface for adhesion. Skim-coating the entire surface with a thin layer of polymer-modified mortar, feathered into the joints, gives you the most consistent bonding layer and helps unify the surface texture before your waterproofing goes down.
Underlayment and waterproofing options for an outdoor patio
For an outdoor patio in a freeze-thaw climate, waterproofing is not optional. Water that gets under tile, freezes, and expands will destroy even a perfectly installed job in one winter. There are two main systems worth knowing.
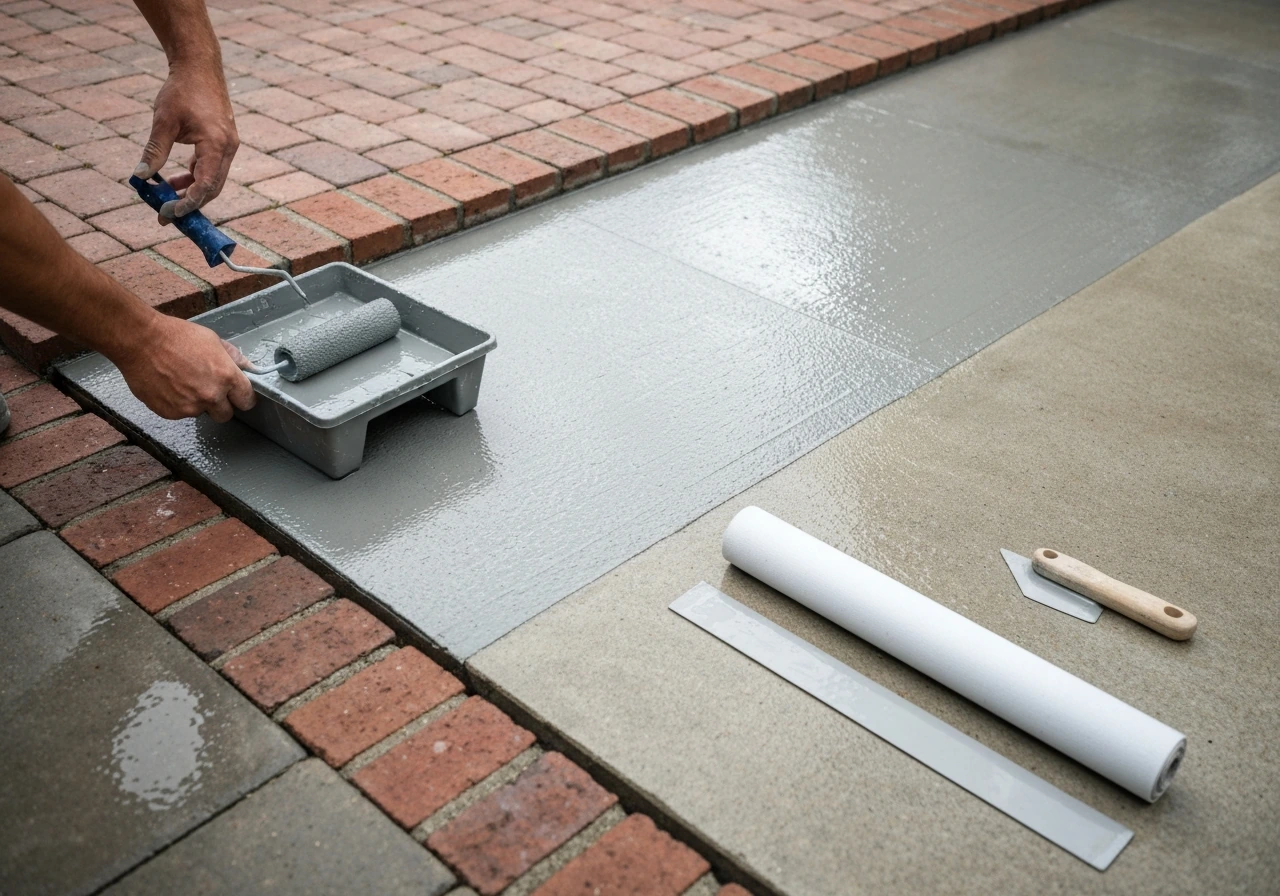
Liquid-applied waterproofing membranes
Products like LATICRETE HYDRO BAN or LATICRETE 9235 are liquid-applied rubber polymer membranes that you roll or brush directly onto the prepared brick surface. They cure to form a seamless, flexible waterproof layer. HYDRO BAN is the more popular choice for DIYers because it dries to the touch relatively quickly and you can tile over it after about 2 hours at 70°F.
The 9235 system uses a reinforcing fabric embedded in the wet membrane, which adds crack-bridging strength, that's a real benefit over brick where minor surface irregularities or hairline cracks might exist. The 9235 membrane is about 0. 02 inches (0. 5 mm) thick and, importantly, if you're using certain epoxy-based adhesives like LATAPOXY 300, you need to let it cure for a full 7 days at 70°F before setting tile.
Plan your project timeline around that if you go that route. For most DIYers using a standard polymer-modified thinset, HYDRO BAN's shorter window is more practical. Make sure you detail all the perimeter edges, inside corners, and any penetrations with extra membrane or reinforcing tape, these are the spots that fail first.
Sheet membranes and uncoupling mats
Uncoupling membranes like Schluter DITRA are another option. A Reddit thread also shares first-hand opinions on whether uncoupling membranes such as Ditra are worth it for reducing tile failure risk and improving durability uncoupling membranes like Schluter DITRA.
These polyethylene sheet membranes bond to the substrate with thinset and provide both a waterproofing layer and a slight uncoupling effect, meaning they allow tiny amounts of independent movement between the substrate and the tile assembly. For a mortared brick patio on a solid slab, this can help absorb minor seasonal movement without transmitting it to the tile.
The tradeoff is that they add slightly more height and cost, and they need to be installed on a very flat surface to avoid bridging issues. DITRA is rated for exterior use but requires attention to perimeter and seam detailing.
Cement backer board
Some guides suggest using cement backer board (like HardieBacker or Durock) over brick before tiling. While backer board is great indoors, I'd skip it as your primary system here. It's difficult to fasten solidly to brick, it adds height, and it doesn't provide true waterproofing on its own outdoors. If you use it, you still need a waterproofing membrane either under or over it. Liquid-applied membranes directly on the prepared brick surface are simpler and more reliable for this specific application.
Choosing tile and mortar that can handle freeze-thaw cycles
Material selection for an outdoor patio in a climate with freezing winters is non-negotiable. Use the wrong tile or mortar and it doesn't matter how good your prep was.
Tile selection
You want porcelain tile rated for outdoor, freeze-thaw use. Look specifically for tiles rated as frost-resistant (sometimes marked as F or Group V in absorption ratings), with a water absorption rate below 0. A tile retailer FAQ similarly notes that porcelain tiles typically have water absorption less than 0. 5%, which is why they are generally considered frost resistant [water absorption rate below 0.
5%](https://www. tilesdirect. net/ceramic-porcelain-tile-faq/). Home Depot’s ceramic tile label information notes that a frost-resistant tile is identified with a snowflake icon and that an impervious or very-low absorption category corresponds to water absorption of less than 0.
5% a snowflake icon indicates frost-resistant tile.
5%. Standard ceramic tile is too porous and will absorb water, crack, and spall in freezing temperatures. For a patio, also prioritize slip resistance: look for a Dynamic Coefficient of Friction (DCOF) rating of at least 0. 42 for wet areas, and higher is better for outdoor use.
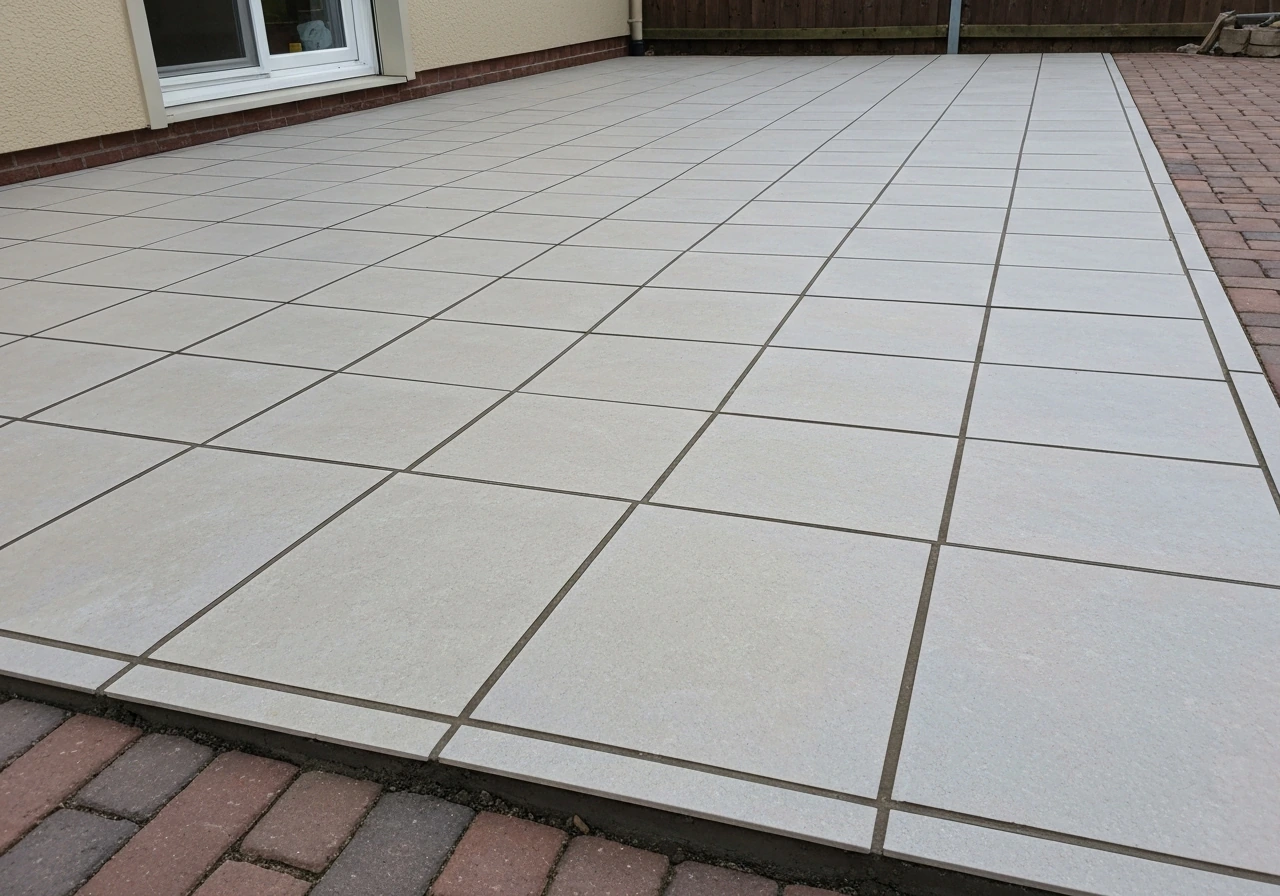
Larger format tiles (18x18 or larger) look great but require a very flat substrate and more precise installation. For a DIY project on brick, 12x12 or 16x16 porcelain is more forgiving and still looks excellent.
Thinset and mortar selection
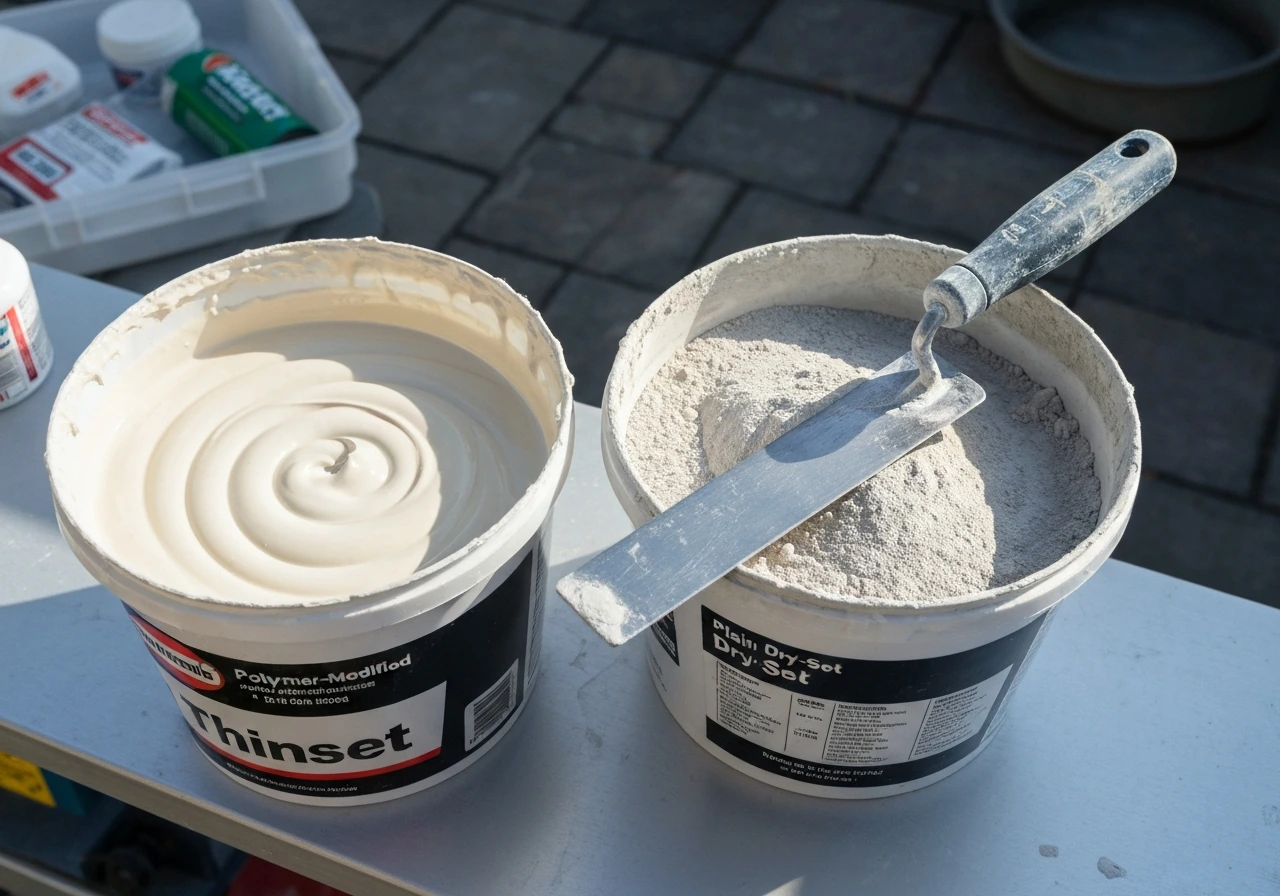
For outdoor tile over brick, do not use standard dry-set mortar. You need a polymer-modified thinset, which contains latex or acrylic polymers that add flexibility and dramatically improve adhesion to difficult substrates like brick. Look for mortars rated to ANSI A118. 4 at minimum, or better yet ANSI A118.
11 (for large and heavy tile) or ANSI A118. 15 (improved modified mortars specifically framed for high-performance freeze-thaw applications). Products like TEC PermaLastic 100 or PermaLastic 200 both meet A118. 4 and A118.
11 and are rated for exterior use, these are solid, practical choices. Use the full mortar coverage technique: back-butter the tile in addition to combing the substrate, aiming for at least 95% coverage on an outdoor installation. Air pockets under tile trap water, and water trapped under tile in a freeze-thaw climate will eventually destroy the bond.
| Material | Best Use Case | Key Rating | Notes |
|---|---|---|---|
| Porcelain tile (frost-resistant) | Primary tile choice for freeze-thaw outdoors | Water absorption < 0.5%, DCOF ≥ 0.42 | 12x12 to 18x18 most DIY-friendly |
| Polymer-modified thinset (ANSI A118.4) | Standard outdoor tile bonding | A118.4 / A118.11 | TEC PermaLastic 100 or 200 are good examples |
| Improved modified mortar (ANSI A118.15) | High-performance freeze-thaw applications | A118.15 | Best choice for demanding climates |
| LATICRETE HYDRO BAN | Liquid waterproofing membrane | Tile after 2 hrs at 70°F | Good DIY option, fast cure window |
| LATICRETE 9235 | Liquid waterproofing with fabric reinforcement | 7-day cure for epoxy adhesives | Better crack bridging, longer cure time |
| Schluter DITRA | Uncoupling + waterproofing sheet membrane | Exterior rated | Adds height; needs flat substrate |
Step-by-step: how to actually install the tile
Once your surface is prepped, primed, and waterproofed, you're ready to tile. Here's the workflow from start to finish. For a step-by-step walkthrough, see our guide on how to actually install the tile on the patio surface.
- Plan your layout on paper first. Measure the patio length and width, then find the center point. Decide whether you want grout joints to be centered on the space or if you prefer full tiles along the most visible edge. Avoid ending up with tiny slivers of tile at any edge — if your layout works out to less than half a tile at a border, shift the whole grid by half a tile in that direction.
- Snap chalk lines on the waterproofed surface to establish your working grid. Start from the center and work outward. These lines are your reference throughout the job, so take the time to make them square (use the 3-4-5 triangle method to confirm 90-degree corners).
- Do a complete dry lay before mixing any mortar. Set out a full run of tiles in both directions without adhesive to confirm your layout looks right and your cuts make sense. Mark any tiles that need cutting before you start setting.
- Mix your polymer-modified thinset to a peanut-butter consistency, firm but spreadable. Mix only what you can use in about 30 minutes — outdoor heat and sun shorten your working time significantly.
- Use a notched trowel (typically 1/4-inch x 3/8-inch V-notch or square notch for 12x12 tile) to spread thinset over about 3 to 4 square feet at a time. Comb the thinset in one direction with the notched edge, then back-butter the back of each tile with a thin skim coat before setting it. This double-buttering technique is essential outdoors.
- Set each tile with a slight twisting motion to collapse the trowel ridges and maximize contact. Use plastic tile spacers to maintain consistent grout joint width — for outdoor use, don't go narrower than 3/16 inch, and 1/4 inch is better for managing slight variations in brick surface flatness.
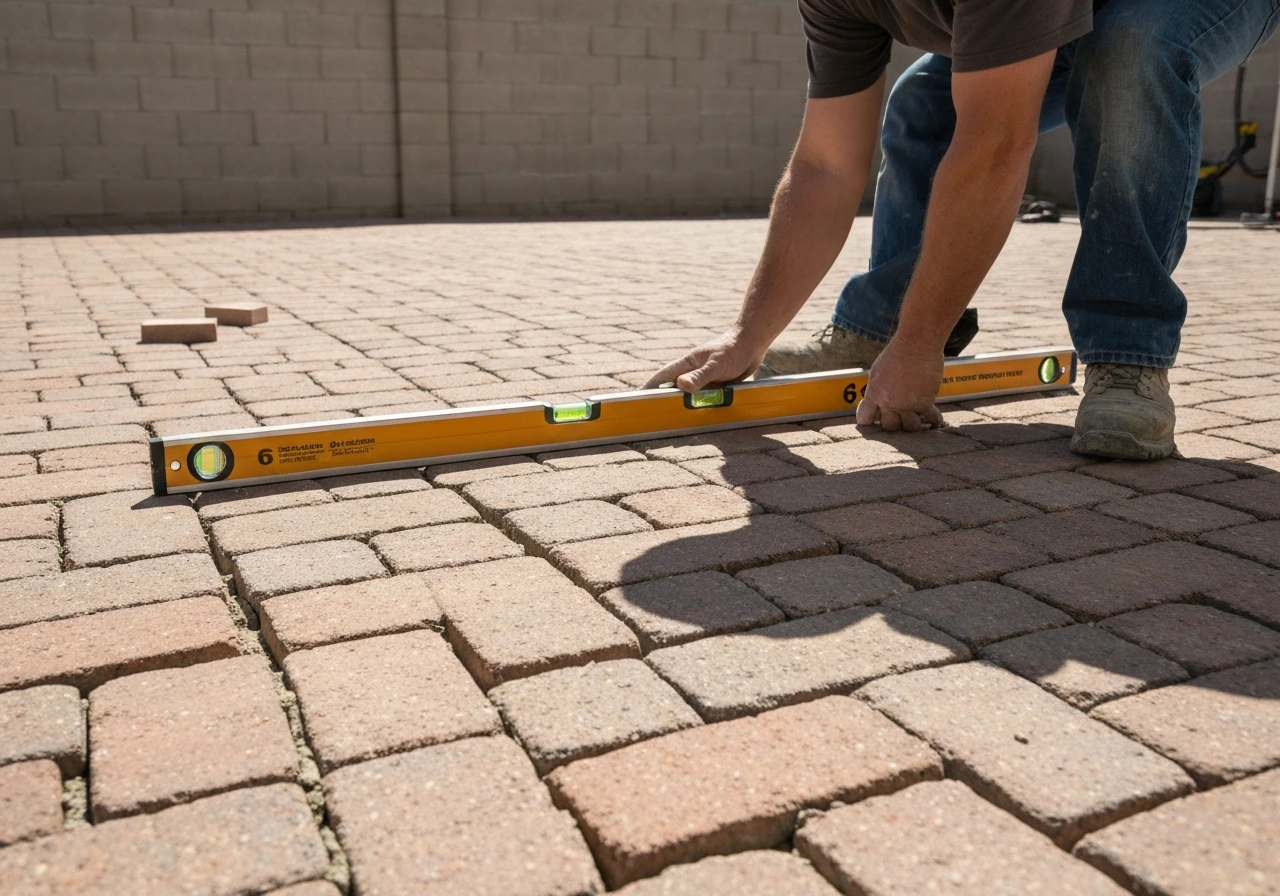
- Check your work with a level every few tiles. Tap down any high spots gently with a rubber mallet. Remove and re-set any tile that sounds hollow when tapped — hollow spots mean insufficient coverage.
- Cut perimeter tiles with a wet saw. Score-and-snap tools are not reliable for porcelain. Rent or buy a wet tile saw; it's worth it. Cut tiles slightly short of the wall or edge to allow for the expansion gap you'll fill with flexible sealant.
- Let the thinset cure before grouting. Follow the product's cure time guidance, and remember that cooler or humid conditions extend cure time significantly. At 50°F, cure times can be substantially longer than the standard times listed for 70°F test conditions. A good rule of thumb: wait 24 hours minimum at comfortable temperatures, 48 to 72 hours if it's cool.
- Once thinset is cured, remove all tile spacers before grouting.
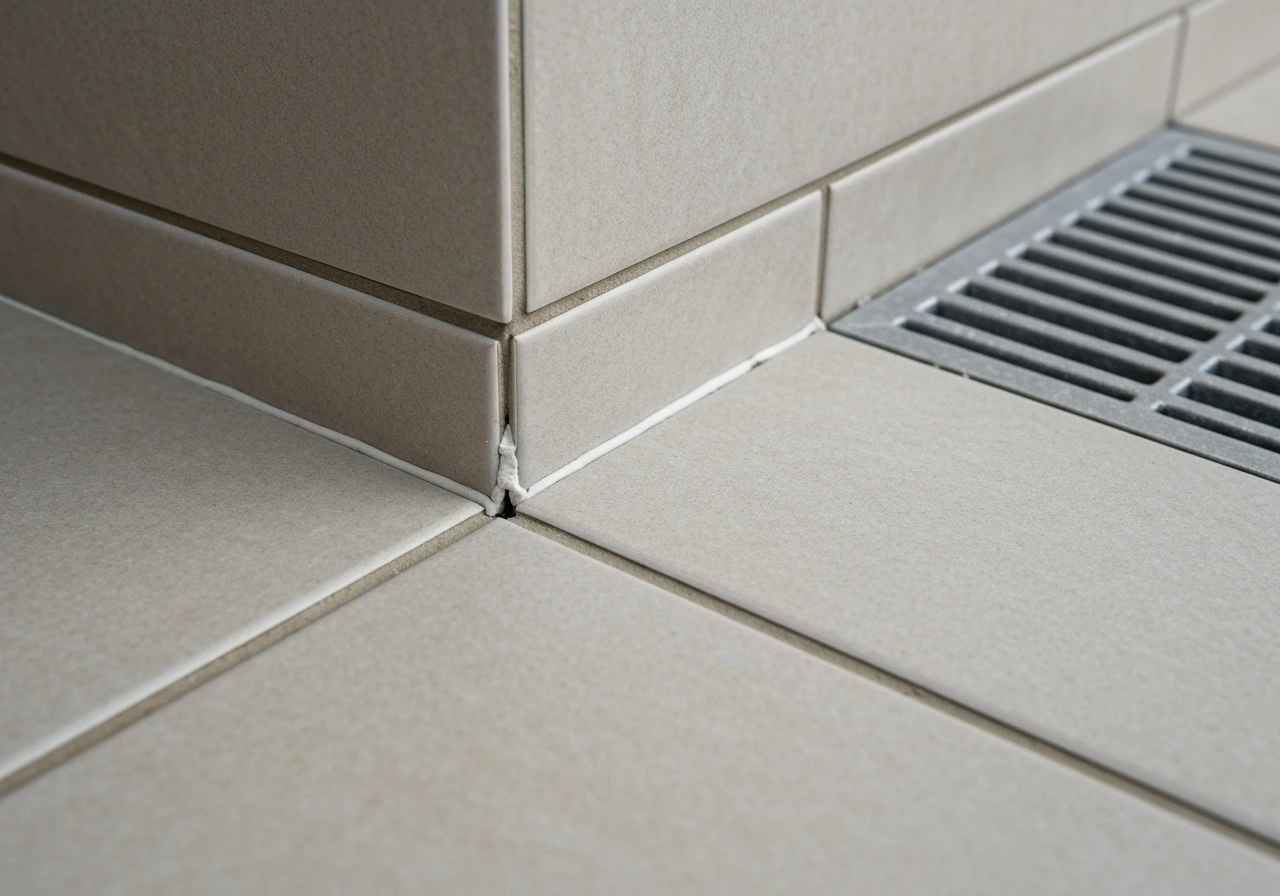
Grout, sealant, and finishing the surface
For an outdoor patio, use a sanded grout for joints wider than 1/8 inch, which covers most of what you'll have here. More importantly, use an epoxy grout or a polymer-modified grout rated for outdoor and freeze-thaw use. Standard cement grout on a patio will absorb water, stain, and eventually crack. Epoxy grout is harder to work with, it sets fast and requires careful mixing and cleanup, but it's extremely durable, stain-resistant, and non-porous. If you go the polymer-modified cement grout route, seal it thoroughly after curing.
Mix grout in small batches and work in sections. Pack grout into joints with a grout float held at a 45-degree angle, working diagonally across the tile faces to avoid dragging grout back out of the joints. Wipe the tile faces with a damp sponge in a circular motion, rinsing frequently. Don't use too much water, excess water weakens grout. Let the grout haze that forms on the tile surface firm up, then buff it off with a clean dry cloth.
After the grout has cured fully (typically 72 hours at 70°F, longer if cooler), apply a penetrating tile and grout sealer to the entire surface. On a patio, plan to reseal annually or every other year depending on traffic and weather exposure. The sealer doesn't make grout bulletproof, but it dramatically slows water infiltration and staining.
The parts most people skip: drainage, expansion gaps, and failure points
This is the section that separates tile jobs that last 20 years from ones that start failing in year two. These details are unglamorous but absolutely critical.
Drainage slope
Your finished tile surface needs to drain water away from the house. The standard slope for an exterior patio is 1/8 inch per foot minimum, ideally 1/4 inch per foot. If your existing brick patio already has adequate slope, your tiled surface should maintain it as long as your thinset bed is relatively uniform. If the existing brick is flat or sloping toward the house, you need to address this in your mortar bed, building up a slight pitch toward the yard or a drain. Don't assume the tile layer alone will fix a drainage problem.
Expansion joints
Every outdoor tile installation needs expansion joints. These are soft joints (no grout, just flexible sealant) that allow the tile assembly to expand and contract with temperature changes without cracking. Per TCNA detail EJ171, the minimums for exterior installations are: 3/8 inch wide joints at 8-foot intervals, and 1/2 inch wide joints at 12-foot intervals.
In practice, install expansion joints at every change of plane (where the patio meets a wall, step, or column), at the perimeter of the entire installation, and at intervals across large open areas. Fill these joints with a paintable polyurethane or silicone caulk that matches your grout color, don't pack them with grout.
If there are any existing control joints or cracks in the slab below, the expansion joint in the tile must align directly over them and must never be narrower than the joint below.
Common failure points and what to do about them
- Tiles cracking or popping up in winter: Almost always caused by missing or inadequate expansion joints, or by setting tile over a sand-set brick base that's moving. If this happens, the fix is to remove the affected tiles, address the underlying movement issue, install proper expansion joints, and reset. There's no patch that will hold if movement is the cause.
- Grout cracking along edges and at perimeter: Classic expansion joint failure. Remove the cracked grout, clean the joint out completely, and fill with flexible sealant. Don't re-grout these joints.
- Tiles sounding hollow after a season: The thinset bond has failed, usually due to inadequate coverage, moisture under the tile at install time, or movement. Hollow tiles need to be removed and re-set. The longer you leave them, the more adjacent tiles will eventually fail too.
- Water pooling on the surface: Either the tile was set without adequate slope, or the slope runs the wrong direction. This is a serious issue because standing water will infiltrate grout joints and accelerate freeze-thaw damage. Minor pooling spots can sometimes be addressed by removing a section and re-setting with corrected slope, but widespread slope problems may require starting over.
- Efflorescence appearing through grout joints: Water is moving through the assembly and carrying mineral salts to the surface. This points to a waterproofing failure. It's worth cleaning the surface and resealing as a first step, but if it returns quickly, the membrane may be compromised and the section needs to come up.
- Grout staining and deteriorating: Usually means the grout was never sealed or the sealer has worn off. Clean thoroughly and apply a quality penetrating sealer as maintenance.
When to stop and call a professional
Some situations genuinely call for a professional tile setter or structural contractor. If your brick patio has significant differential settlement (some areas are inches higher or lower than others), that points to a substrate or drainage problem that needs to be fixed structurally before any tile goes down. If you find active water intrusion into the house from the patio area, tile is not the fix. If the concrete slab under the mortared brick has major cracks or evidence of ongoing movement, no amount of good tiling will prevent failure. Getting a professional assessment in those cases will save you a lot of money compared to installing tile over a problem and watching it fail.
If your situation is more straightforward, a sand-set brick patio that just needs updating, you might also consider other approaches. If you are starting with a brick patio that needs replacement, the next step is planning how to replace a brick patio safely and correctly other approaches. If your goal is specifically to extend a brick patio, the same stability and drainage checks will guide whether you can add tile or need a new base other approaches.
Relaying the patio on a proper mortared base, replacing it entirely, or covering it with other materials are all options worth comparing depending on your goals and budget. The right prep work up front determines whether you get a patio that lasts or one you're repairing two winters from now.
When you plan to attach a pergola to a brick patio, you should also account for structural loading and waterproofing so your tile installation and the brick connections both stay reliable.
FAQ
Can I tile over a sand-set brick patio if the bricks are mostly flat but the joints look uneven?
If a brick patio is sand-set and bricks rock, you generally cannot solve it with patching. The durable options are to relay the brick on a properly prepared concrete base, or install a new slab and tile on top. Small joint regrouting or filling voids does not stop freeze-thaw flexing.
What should I do if the mortar joints on my mortared brick patio crumble or sound hollow?
Before tiling, verify that the mortar surface can bond. If you still see loose sand in joints, crumbling mortar, or hollow-sounding areas, you need to remove and rebuild those joints or grind back to sound material. Tile will follow the weakest layer, so unstable mortar joints are a common failure point.
If I install a waterproofing membrane, what details most often still cause leaks or failure?
Do not assume waterproofing is done just because you used a membrane. You still need a continuous system at edges, corners, and penetrations, and you must keep water from getting underneath via proper perimeter flashing details. Any gap, missing overlap, or unsealed penetration can turn the patio into a “water collection system.”
How do I handle tile over brick that includes steps or an area right next to my door threshold?
Yes, you can tile over raised steps or narrow ledges, but you must re-check the added build-up height. A small change can cause a door threshold problem or create a ledge that traps water. Use the 1 to 1.5 inch build-up rule, then confirm you still have clearance and proper slope at each transition.
Can I use an uncoupling membrane instead of a liquid-applied waterproofing membrane on brick?
If your substrate is flat enough, a liquid membrane can be used as described. If you plan to use uncoupling membranes or sheet membranes, verify the surface is very flat and that you will not create ridges at seams. Bridging over dips can cause voids under the tile assembly.
What happens if I tile before the membrane or thinset has cured fully due to cold weather?
If the temperature is below the manufacturer’s stated limits, cure times for both the membrane and thinset can stretch out, and bonding can be weaker. For membranes like the ones mentioned, the “hours to tile” window and any “days for epoxy” window only apply when the temperature and conditions are within spec. Plan around the longest required cure time.
How should I protect outdoor tile grout during the first few days after grouting?
Use an outdoor-rated grout system and protect it from early water exposure. Even with epoxy or polymer-modified grout, you should avoid washing, heavy rain exposure, or misting the surface during initial cure. If you get unexpected rain before cure, let it dry, then inspect for surface damage or haze before proceeding to sealing.
Where exactly should expansion joints be placed, and can I grout them instead of sealing them?
Expansion joints are not optional, but they also must be placed correctly. If you skip joints at changes of plane (wall-to-patio, steps, columns) or you grout across those areas, cracking often starts along those stress points. Also align the tile joint over slab control joints.
What’s the real impact of not back-buttering the tile on an outdoor patio?
Back-buttering is not just a recommendation, it’s a moisture and bond insurance step for freeze-thaw climates. If you only comb one side, you can leave voids that fill with water and freeze, which leads to debonding and tile movement. For outdoor installations, aim for very high coverage and consistent mortar ridges.
Do I still need to seal the grout if I used an epoxy grout or a polymer-modified grout?
For outdoor brick, choose grout and sealer based on how you’ll maintain it. Penetrating sealers reduce staining and slow water uptake, but they do not replace proper waterproofing and slope. Reapply on schedule, especially in high-traffic zones where grout faces wear faster.
How do I know when my brick patio problem is structural or drainage-related, and tile is not the solution?
Professional involvement is warranted when the patio shows large elevation differences, ongoing slab movement, or active water intrusion into the home. In those cases, the real fix is usually structural or drainage-related, not cosmetic tile work. Tile can conceal issues briefly but cannot stop differential settlement or failing waterproofing at the building interface.
Next Article
How to Fix Cement Patio Cracks: Diagnose and Repair
Diagnose concrete patio crack types and repair with the right sealant or patch, from prep to curing and prevention.