Most cracked patios can be fixed DIY with materials from any hardware store, but the right fix depends entirely on what kind of crack you have and why it formed. A hairline shrinkage crack in a cement slab needs a different approach than a wide crack caused by ground settlement or frost heave. Get the diagnosis right first, and the repair will last. Get it wrong, and you'll be patching the same spot again in a season.
Fix Cracked Patio: DIY Guide for Slab and Cement Cracks

Talia Lang
29 Apr 2026
How to assess why your patio is cracking
Before you buy anything, spend five minutes actually reading the crack. The shape, width, and location tell you a lot about the cause, and the cause determines whether a simple filler will hold or whether something more serious is going on underneath.
The most common causes of patio cracks are shrinkage during curing, freeze/thaw cycles, soil settlement, tree root pressure, poor drainage, and a failed base or previous repair. Here's how to tell them apart:
- Shrinkage cracks: Hairline, often random or map-cracked (a spider web pattern across the surface). These form as concrete dries and are mostly cosmetic if they're less than 1/8 inch wide and don't go all the way through.
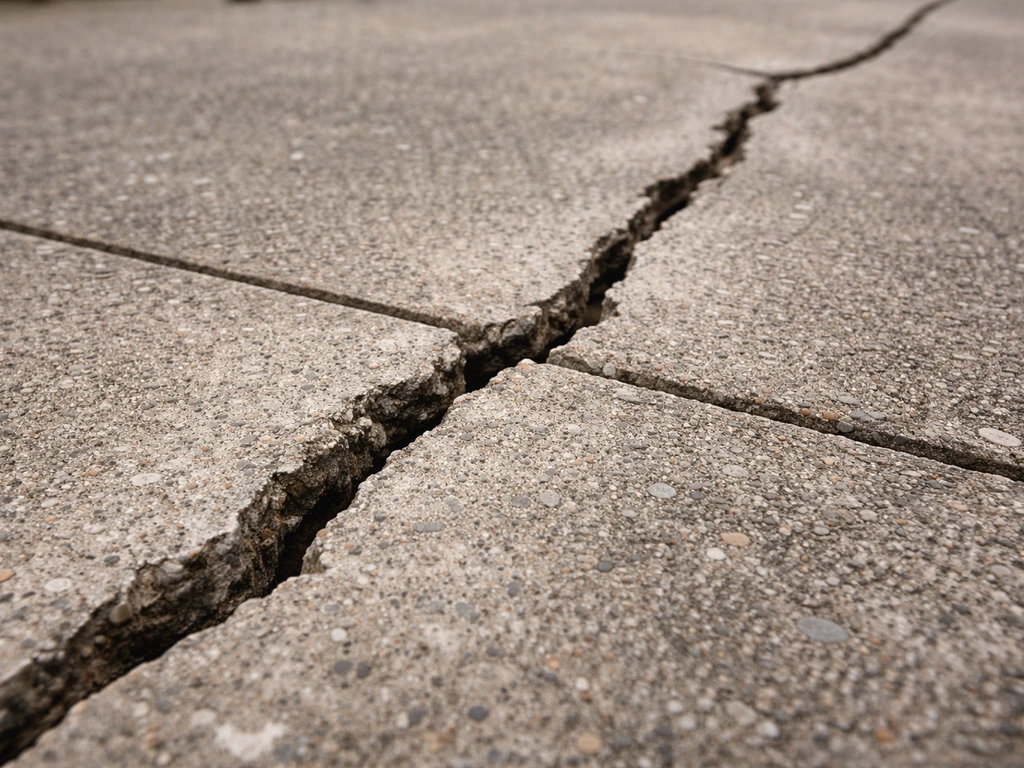
- Freeze/thaw cracks: Wider cracks, sometimes with spalling (flaking) at the edges. Common in cold climates. Usually surface-level but can deepen over multiple winters if unsealed.
- Settlement cracks: One side of the crack is higher or lower than the other (run your hand across it). This means the ground underneath has shifted. These need more than filler.
- Tree root cracks: Heaving or lifting on one side, often near a tree. The slab may be visibly tilted. Root pressure cracks tend to get worse over time.
- Drainage cracks: Water pools near or in the crack. Chronic moisture beneath the slab can erode the base and cause progressive cracking.
- Failed previous repair: The crack re-opened along an old patch line. This usually means the original cause was never addressed.
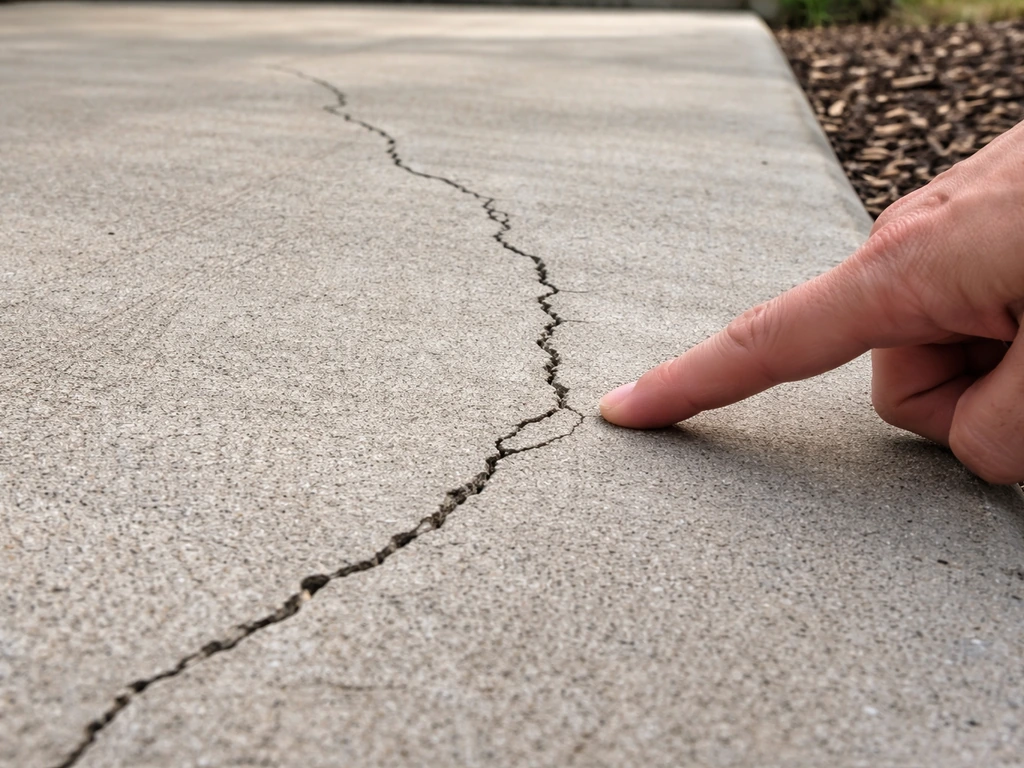
The most important thing to check: is the crack moving? Measure the width at two or three points and mark the ends with a pencil and date. Check again in 2 to 4 weeks. A crack that's stable is much easier to repair permanently than one that's still growing or shifting with temperature changes. If the two sides of the crack are at different heights (called a displacement crack), that's a red flag for settlement and may mean the slab needs more than patching.
Choosing the right fix for slab vs surface cracks
Not all patio cracks are the same depth or severity, and the repair material you use matters. Using the wrong product is probably the number one reason DIY patio patches fail within a year.
| Crack Type | Width / Depth | Best Repair Approach | Product Examples |
|---|---|---|---|
| Hairline surface crack | Under 1/8 inch wide, shallow | Penetrating concrete sealer or liquid crack filler | QUIKRETE Concrete Crack Seal, SAKRETE Concrete Crack Filler |
| Moderate crack, stable | 1/8 to 1/2 inch wide, surface to mid-depth | Polyurethane or hybrid crack filler, caulk-style application | QUIKRETE FastSet Concrete Crack Repair, SAKRETE Concrete Repair Tube |
| Wide or deep crack, stable | Over 1/2 inch wide or full depth | Hydraulic cement or repair mortar to pack and fill, then seal | QUIKRETE Vinyl Concrete Patcher, SAKRETE Top 'N Bond |
| Crack with displacement (one side higher) | Any width with height difference | Level the slab first (mudjacking or foam lifting), then fill | Professional assessment likely needed before DIY fill |
| Structural or leaking crack | Any width with water intrusion or movement | Epoxy injection (structural) or polyurethane injection (leaking) | Sika Sikadur Crack Repair Kit, Sika Sikafix HH+ |
For most homeowners, the sweet spot is a stable crack between 1/8 and 1/2 inch wide with no vertical displacement. That's exactly what products like SAKRETE Concrete Crack Filler and QUIKRETE's FastSet hybrid polyurethane are designed for. For hairline cracks on flagstone, stone, or brick patios, the approach is somewhat different since you're often dealing with mortar joints rather than a solid slab. Those repairs are covered in more detail in the guides specific to those materials.
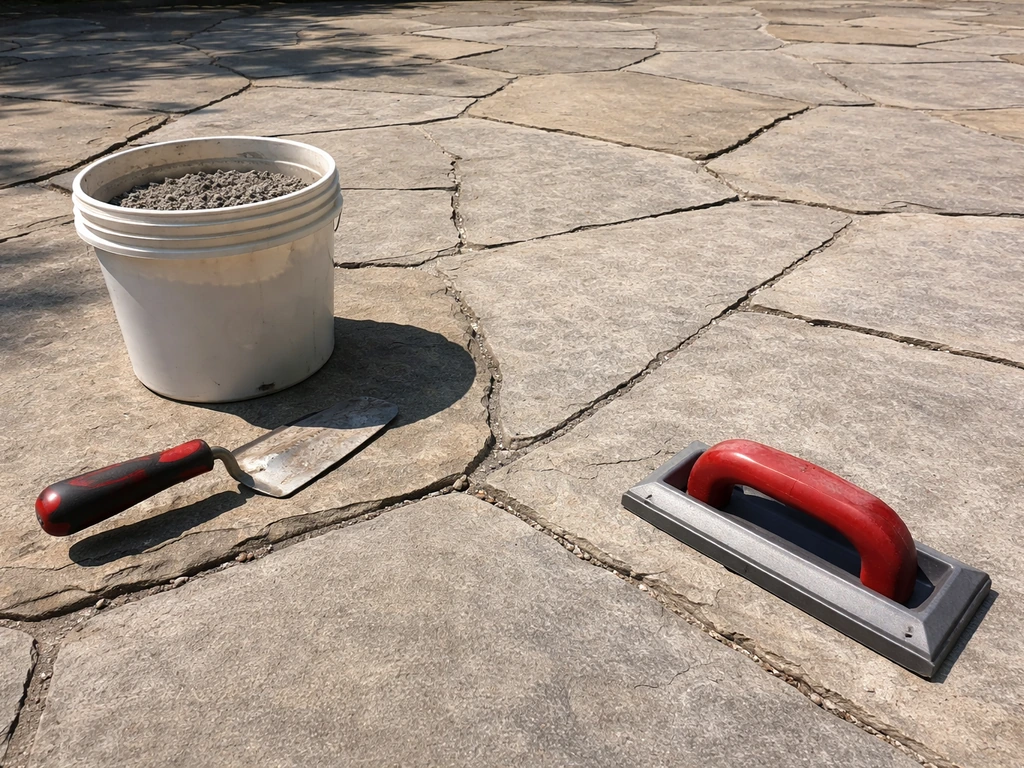
DIY step-by-step for fixing a cracked cement patio slab
This walkthrough covers the most common DIY scenario: a concrete slab patio with one or more stable cracks up to about 1/2 inch wide and no significant vertical displacement. If your crack is much wider, shows heaving, or has water coming through it, jump ahead to the section on when to call a pro.
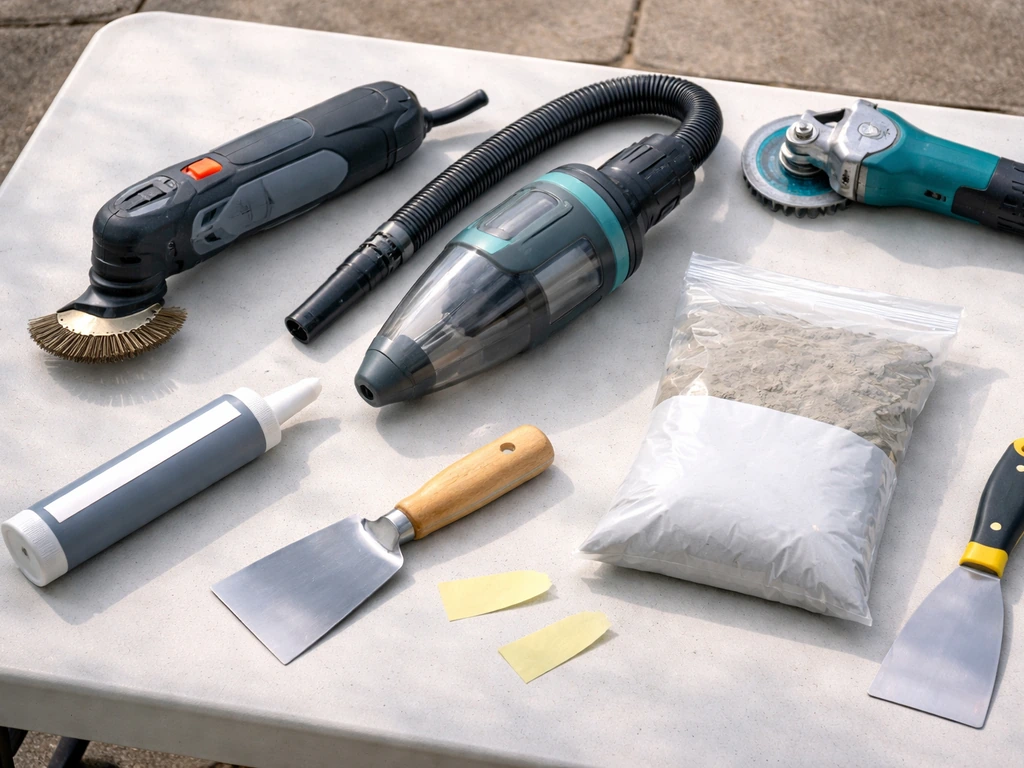
What you'll need before you start
- Wire brush or oscillating tool with wire attachment
- Shop vacuum or compressed air
- Angle grinder with diamond blade (optional, for routing wider cracks)
- Concrete crack filler or repair tube (polyurethane or hybrid type for most cracks)
- Caulking gun if using a cartridge-style product
- Trowel or putty knife for smoothing
- Concrete sealer (penetrating type for after repair cures)
- Safety glasses and gloves
Step 1: Wait for the right conditions
Don't start the repair in cold or wet weather. You want temperatures above 50°F and a dry forecast for at least 24 to 48 hours after the repair. Both SAKRETE and QUIKRETE specifically call this out, and it makes a real difference in how well the material bonds and cures. If rain or freezing temps are in the forecast, wait.
Step 2: Clean the crack thoroughly
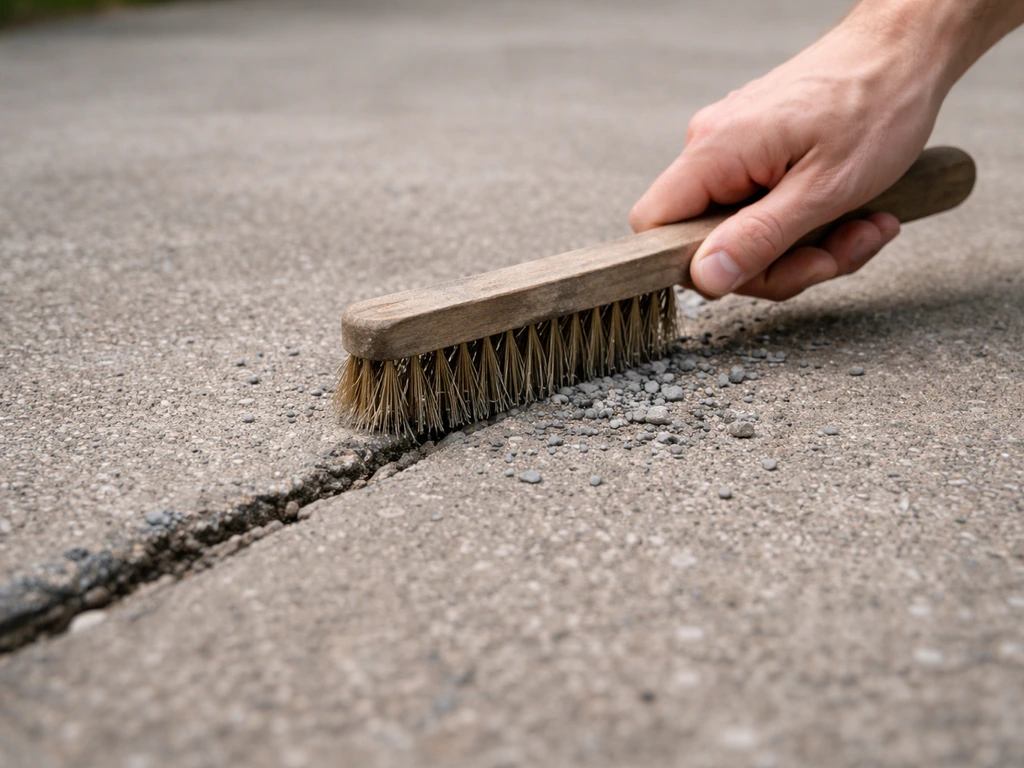
This step gets skipped or rushed more than any other, and it's the main reason patches fail. Use a wire brush to scrub out loose concrete, old filler, dirt, and any moss or debris inside the crack. Then vacuum out all the dust. The substrate needs to be clean, dry, and sound before any repair material goes in. QUIKRETE and Sika both stress this point in their product guidance, and it applies regardless of which product you're using. If the crack edges are crumbling, chip away the loose concrete until you're down to solid material.
Step 3: Route or widen the crack (optional but recommended for better bonding)
For cracks wider than 1/4 inch, consider routing the crack with an angle grinder and diamond blade to create a uniform V-shaped groove. This gives the repair material more surface area to bond to and helps center the filler in the groove so it seals properly. You don't need to go deep, just enough to create clean, consistent edges. Vacuum out the dust again after grinding.
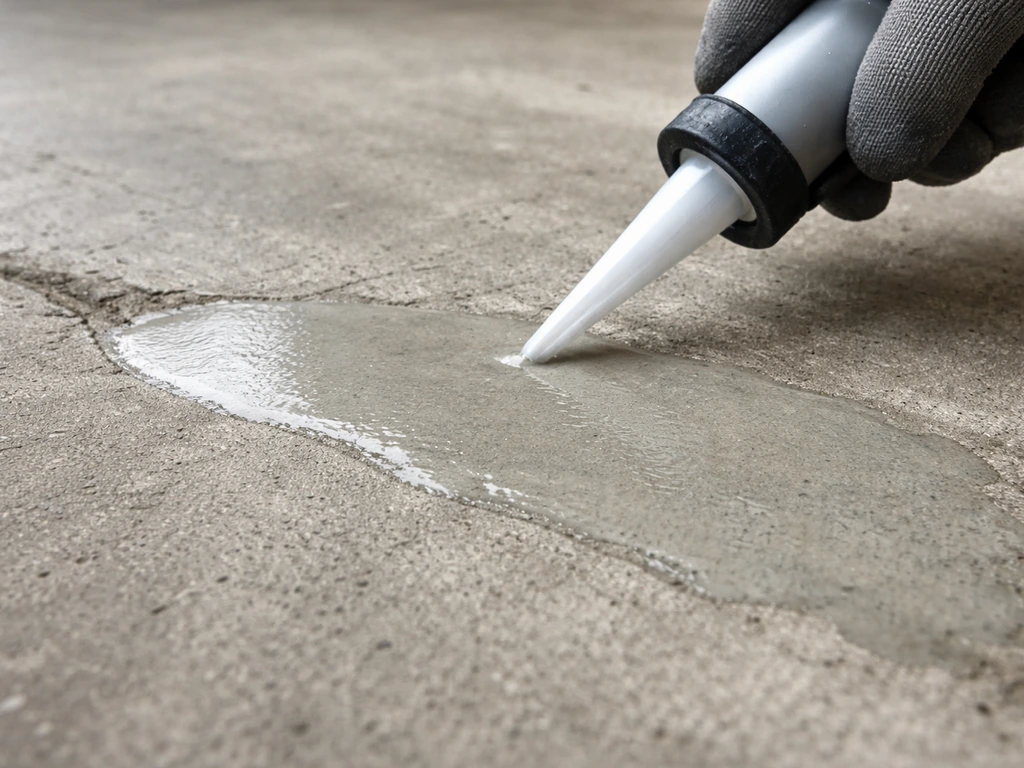
Step 4: Apply the repair material
For cracks up to 1/2 inch wide, load your cartridge product into a caulking gun, cut the nozzle tip to match the crack width, and squeeze the filler into the crack in a steady, consistent bead. Work from one end of the crack to the other without stopping if you can. SAKRETE Concrete Crack Filler is designed for cracks up to 1/2 inch wide and 1/4 inch deep, which covers most residential patio situations. QUIKRETE's FastSet hybrid polyurethane cures rapidly and is a solid option if you want to get through the job quickly. Both require completely dry surfaces and nozzles before application.
For wider or deeper cracks, use a repair mortar or vinyl concrete patcher instead. Mix to a stiff consistency, pack it into the crack in layers no more than 1/2 inch at a time, and compact each layer with a trowel before adding the next. Don't try to fill a deep crack in one pour.
Step 5: Smooth and feather the surface
Use a trowel or putty knife to smooth the filler flush with the surrounding slab surface. Feather the edges so there's no lip or ridge that will collect water. For mortar repairs, work quickly since most repair mortars set faster than regular concrete mix.
Step 6: Cure the repair properly
Keep foot traffic off the repair for at least 24 hours, longer for mortar-based repairs. For cement-based patchers, mist the repair area lightly several times a day for the first couple of days. This slows the curing process and helps the repair bond better and resist shrinkage cracking. Don't let it dry out too fast in hot sun or wind.
Finishing, sealing, and preventing re-cracks
Once the repair has fully cured, sealing the slab is the most effective thing you can do to prevent the crack from reopening and to protect the surrounding concrete from future damage.
For repaired areas specifically, wait until the patch is fully hard and has no surface sheen before applying any sealer. For new concrete that's been poured as part of a larger repair, BEHR's guidance (and most sealer manufacturers) requires a full 30-day cure before applying a floor treatment or sealer. For patched areas using caulk-style fillers, the product's own cure time (usually 24 to 72 hours) applies instead.
Choose a penetrating sealer rather than a film-forming one for most outdoor patios. Penetrating sealers soak into the concrete rather than sitting on top, which means they won't peel, they allow moisture vapor to escape (a big deal for outdoor slabs that sit on soil), and they protect against freeze/thaw damage without creating a slippery surface. Film-forming sealers look great but can trap moisture and eventually flake on outdoor surfaces exposed to weather.
To reduce re-cracking after the repair, also look at what caused the crack in the first place. If water is pooling near the slab, improve drainage away from the patio. If the crack runs near an expansion joint that has dried out or failed, clean and re-fill that joint with a flexible backer rod and polyurethane sealant designed for concrete movement. Rigid fillers in expansion joints will crack again the first time temperature shifts move the slab.
When to replace the slab vs call a pro
I want to be straight with you here: not every cracked patio is a good candidate for DIY repair. If you need help choosing the right DIY method, this guide walks through how to fix cement patio cracks step by step. Some situations call for professional help or full replacement, and doing a surface patch on top of a deeper structural problem just delays the inevitable and costs more in the long run.
Call a pro or seriously consider replacement if you're dealing with any of the following:
- Vertical displacement at the crack (one side is higher than the other). This means the soil underneath has shifted unevenly, and patching the crack without addressing the base will fail.
- The slab is heaving or the crack is actively growing. Measure and date the crack ends; if it's expanding over a few weeks, the underlying cause is still active.
- Multiple intersecting cracks across a large portion of the slab (more than 30 to 40 percent of the surface). At that point you're patching a patchwork, and a replacement may be more cost-effective.
- Water is coming up through the crack, especially after rain. This suggests a drainage or waterproofing failure beneath the slab that needs to be solved before any surface repair will last.
- Tree roots are visible in or near the crack, or the slab is obviously tilted. Root pressure will keep moving the slab regardless of how well you fill the crack.
- The crack is in a load-bearing area, like a patio attached to a foundation or a slab that supports a structure.
For settlement issues specifically, contractors can often lift and relevel a sunken slab using mudjacking (pumping a grout slurry under the slab) or polyurethane foam injection, which is less invasive. These are worth getting a quote on before committing to full replacement. For structural cracks where the slab needs to maintain load integrity, epoxy injection (not DIY polyurethane caulk) is the correct approach. Epoxy injection can be done at pressures ranging from around 200 to 2,500 psi depending on crack width and condition, which is well outside the scope of a caulking gun.
Materials, tools, and costs for common patio crack repairs
Here's a practical breakdown of what you'll spend and how long to set aside. Prices are approximate as of spring 2026 and will vary by region and retailer.
| Repair Type | Key Materials | Approx. Material Cost | DIY Time | Cure Before Use |
|---|---|---|---|---|
| Hairline crack sealing | Penetrating concrete sealer, liquid crack filler | $20 to $50 | 1 to 2 hours | 24 hours |
| Moderate crack (1/8 to 1/2 inch) | Polyurethane/hybrid cartridge filler, caulking gun | $15 to $40 per tube | 1 to 3 hours | 24 to 72 hours |
| Wide or deep crack (over 1/2 inch) | Vinyl concrete patcher or repair mortar, trowel | $20 to $60 per bag | 2 to 4 hours | 24 to 48 hours before light traffic, 7 days full strength |
| Full slab sealing after repair | Penetrating sealer (covers 200 to 400 sq ft per gallon) | $30 to $80 per gallon | 1 to 2 hours | 24 hours before foot traffic |
| Expansion joint re-fill | Backer rod foam, polyurethane joint sealant | $15 to $30 | 1 to 2 hours | 24 hours |
| Professional mudjacking / leveling | Contractor service | $500 to $2,000+ depending on slab size | N/A (contractor) | 24 to 48 hours before use |
For a typical residential patio with two or three stable cracks in a cement slab, a complete DIY repair including materials and sealer will usually run $60 to $150 and take a weekend morning plus a day of curing. That's a realistic number, not a best-case scenario. Budget a little more if you need to rent or buy an angle grinder for routing, which typically adds $30 to $50 to the cost.
One last thing worth noting: the repair approach for a cement slab is different from what you'd do with flagstone, natural stone, or brick patios, where the crack is often in the mortar joint rather than the material itself. If your issue is specifically how to fix cracks in a flagstone patio, focus on the mortar joint and the joint repair products, not standard slab crack filler <a data-article-id="4BE89FDE-9A69-406A-87CC-12FC1B040438">how to fix cracks in flagstone patio</a>. If your patio is one of those materials, the diagnosis and filling process follows a different path, and using standard concrete crack filler in a flagstone or brick joint usually leads to a mismatched, temporary result. If your patio is brick, you will typically want to fill cracks in the mortar joints using the right joint filler and repair steps designed for brick surfaces how to fill cracks in brick patio. Those repairs are worth approaching separately with the right materials for each surface.
FAQ
How do I tell if my cracked patio is stable enough for a DIY concrete crack filler fix?
A crack that is only “hairline” can still be a problem if the two sides are at different elevations or the crack widens after a freeze thaw week. If you see any height change, water tracks, or the pencil marks move more than about 1/16 in over a month, treat it as a settlement or movement issue and stop at patching only after addressing the cause.
What should I do if my crack lines up with an expansion joint?
Before you buy, check whether the crack is continuous across control or expansion joints. Joints are meant to move, so they usually need a backer rod plus polyurethane sealant that stays flexible, not a rigid filler, otherwise the crack will reappear right next to your repair.
My patio crack leaks water during rain, can I still just fill and seal it?
If water comes through the crack during storms or you can see dampness on both sides, use the repair method differently. First fix drainage and locate the source of water, then make the repair only when surfaces are fully dry. Sealing a leaking crack without stopping the water can push moisture behind the patch and shorten its life.
What signs mean my cracked patio problem is more than a surface crack?
If the crack is under a visible dip or you can rock a straightedge across it, the issue may be slab settlement rather than just a surface crack. Patch materials bond to concrete, they cannot correct hollow or sunken areas, so you may need mudjacking, foam injection, or structural crack treatment before patching.
What if my crack is wider or deeper than the crack filler label says?
For caulk-style crack fillers, deeper than the product rating means you should not try to “make it work” by overfilling. When a crack is deeper or wider than the stated limits, use a repair mortar or a patcher designed for depth, or create a routed groove with proper edges, then repair in layers.
Do I need to grind out my crack with an angle grinder, even if it looks small?
Grinding out a V-groove is most useful for wider cracks because it creates clean, bonded edges and centers the sealant. For very fine hairline shrinkage cracks, heavy grinding can create a larger void and increase water pathways, so stick to cleaning and using the right low-width nozzle.
Can I fill a deep crack in one thick pour if I pack it tightly?
Yes, but only if you let each layer cure as the product specifies. For patchers mixed to a stiff consistency, you pack and compact in thin layers (each no more than about 1/2 in) so the material hydrates and sets without shrinking away from the sides. One-thick-pour patches are more prone to voids and early re-cracking.
What should I do if my DIY patio crack repair shows pinholes or a hollow spot after it cures?
If you get bubbles, pinholes, or the patch pulls away at the edges, it usually means moisture contamination, incomplete cleaning, or the wrong temperature window. Remove loose material if you can, re-clean, and only reapply when the slab is dry and temperatures match the product instructions.
When is it safe to seal a newly patched patio, especially if I used a crack-filler caulk?
When applying a penetrating sealer, avoid coating new caulk-style filler too early. Wait until the patch has fully hardened, then make sure the sealer can wet the substrate evenly without beading. If the patch still shows a sheen or feels tacky, delay sealing to prevent trapped moisture under the sealer.
Will sealing prevent the crack from reopening if the cause is ongoing settlement or joint movement?
Sealing helps reduce re-cracking and moisture intrusion, but it does not replace fixing movement at the source. If the crack runs near a dry or failed joint, rework that joint with flexible materials first, then seal the slab. Otherwise, the seal can remain intact while the crack continues opening.
At what point should I stop DIY and call a contractor for a cracked patio?
If the slab is moving, visible settlement continues, or the crack is tied to structural issues, DIY injection methods like caulk-style products are usually the wrong tool. For structural cracks and load-bearing concerns, contractors often use epoxy injection or releveling methods (mudjacking or foam), which you can estimate first with a site inspection.
Next Article
How to Fix Cracks in a Flagstone Patio Step by Step
Step-by-step DIY guide to identify crack causes and fill flagstone patio joints with the right mortar or polymeric sand.