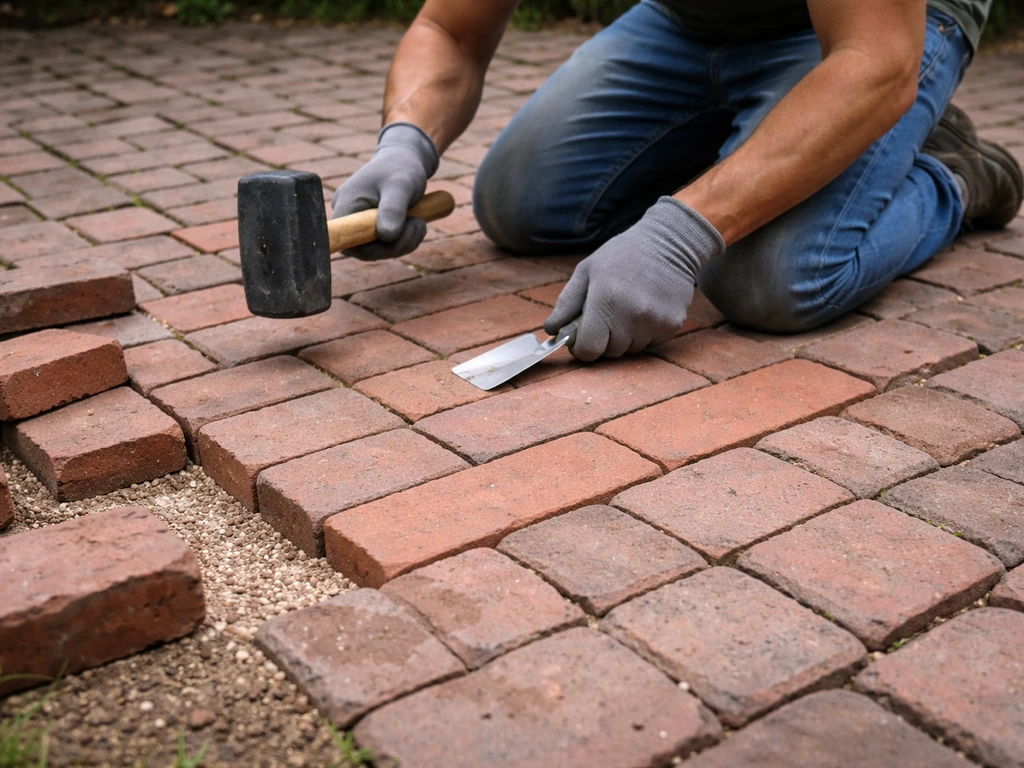
You can attach a pergola to a brick patio, but the method depends entirely on what's under those bricks. Paver-over-sand patios, mortar-set brick, and brick-over-concrete each demand a different approach, and using the wrong one is how you end up with a leaning structure, cracked patio, or a post that pulls free in the first windstorm. The most durable option in most situations is to dig concrete footings down below your local frost line, either through removable pavers or by core-drilling through a slab, and then use a rated post base to connect the pergola post to the footing. Surface-mount anchors into an existing slab can work too, but only when the slab is thick enough, in good shape, and your local code allows it for structural loads.
How to Attach Pergola to Brick Patio: DIY Footing Steps & Tips

What this guide covers and who it's for
This article is written for the practical DIY homeowner who already has a brick patio and wants to add a pergola without destroying the patio or creating a safety hazard. It covers every common patio type (brick pavers over sand, mortar-set brick, and brick over a concrete slab), walks through the four main attachment methods, and then gives you a detailed step-by-step for the most common scenario: installing concrete footings through brick pavers. You'll also find guidance on anchor selection, flashing and weatherproofing, permit and frost-depth rules, and honest red flags for when you should hire a structural engineer or licensed contractor instead of doing it yourself. If you're also thinking about extending your patio footprint or relaying disturbed brick after the work is done, those are related projects worth planning for at the same time. For step-by-step instructions on relaying brick after your work is done, see how to relay a brick patio. If you need detailed steps on planning and executing an extension, see our guide on how to extend a brick patio.
Quick decision checklist: pick your method before you pick up a shovel
Before you buy anything or mark a single brick, work through these four questions. Your answers will point you directly to the right method.
- What's under your bricks? Pull a single brick and probe the base. Loose sand and gravel means pavers over a flexible base. Solid mortar under the bricks means mortar-set construction. A hard concrete surface under a thin brick layer means brick over slab.
- How thick is any concrete involved? Knock on the surface and check around any exposed edges. Surface-mount anchors need a slab that's at least 3.5 inches thick and in sound, uncracked condition. Thinner or damaged slabs require footings below grade.
- Does your pergola attach to the house? A house-attached (lean-to) pergola needs a ledger connection. That ledger must fasten through the house sheathing into the structural rim or band joist, never into brick veneer alone. If your house has brick veneer cladding, you need to plan the ledger attachment carefully.
- What is your local frost depth? Look up your jurisdiction's frost depth (it's in IRC Table R301.2(1) or your local building department). Any footing must sit below that line. In northern climates that can be 36 to 48 inches; in the South, it may be 12 inches or none.
| Patio Type | Best Attachment Method | Notes |
|---|---|---|
| Brick pavers over sand/gravel | Concrete footings through the paver field | Remove pavers, dig to frost depth, pour footing, relay pavers around post base |
| Mortar-set brick over soil | Concrete footings through the brick field | Break out mortar-set bricks at footing locations, treat like masonry demolition; rebrick after |
| Brick over concrete slab (thick, sound slab) | Surface-mount post base anchored to slab, or core-drill and pour isolated footings | Verify slab thickness, condition, and edge distance before using surface anchors |
| House-attached pergola, wood-framed house | Ledger through sheathing into rim/band joist, with post footings at outer edge | Must use approved fasteners and full flashing; never ledger into brick veneer only |
| House-attached pergola, brick veneer exterior | Ledger through veneer and sheathing into structural framing; independent posts on footings | IRC R507 prohibits supporting a ledger on masonry veneer alone |
Know what you're working with: the three brick patio types
This step matters more than most people realize, and getting it wrong wastes time and money. I've seen homeowners try to surface-anchor posts into what turned out to be a 2-inch brick skin over packed clay, and the posts shifted within a season. Here's how to read your patio before you commit to any method.
Brick pavers over a compacted aggregate base (the most common)
This is the flexible paver system used in most residential patios built after the 1990s. Per ICPI standards, the typical assembly is: compacted subgrade, then a compacted aggregate base (typically 4 to 6 inches of crushed stone), then about 1 inch of bedding sand, then the brick or concrete pavers. The bedding sand is not structural. Individual bricks lift out with a flat bar and can be re-laid later. This is the most DIY-friendly patio type for adding footings because you can remove exactly the bricks you need, dig your footing, pour concrete, and relay the pavers cleanly around the post base afterward. The bricks themselves have no structural function, so disturbing a small area doesn't compromise the rest of the patio.
Mortar-set brick over a concrete base
Older patios, especially those built before the mid-1980s, were often laid in a mortar bed on top of a concrete slab, or occasionally directly on tamped soil with mortar joints throughout. The bricks are bonded and can't simply be lifted out. You have to chisel or grind out the mortar and break the bricks free, which is slower and messier. The good news is that once you reach the concrete base, you know the slab's thickness and condition right away. The bad news is that matching old bricks when you relay is sometimes tricky, so factor that into your planning.
Brick veneer over an existing concrete slab
Some patios are built as a poured concrete slab first, with a thin layer of brick (or brick-look pavers) mortared or glued on top as a finish surface. The critical variable here is the concrete slab's thickness and condition. If the slab is 3.5 inches or more of sound, unreinforced or reinforced concrete in good shape, surface-mount post bases with mechanical anchors may be an option, provided the slab meets manufacturer edge-distance and embedment requirements and your local code allows it for structural post loads. Cracked, spalling, heaved, or thin slabs are not good candidates for surface anchors under pergola loads. When in doubt, core through and pour independent footings.
Mounting methods matched to your patio type
There are four realistic ways to attach a pergola to or through a brick patio. Each one makes sense in certain situations and is a bad idea in others.
Method 1: Concrete footings through the paver field (best for most situations)
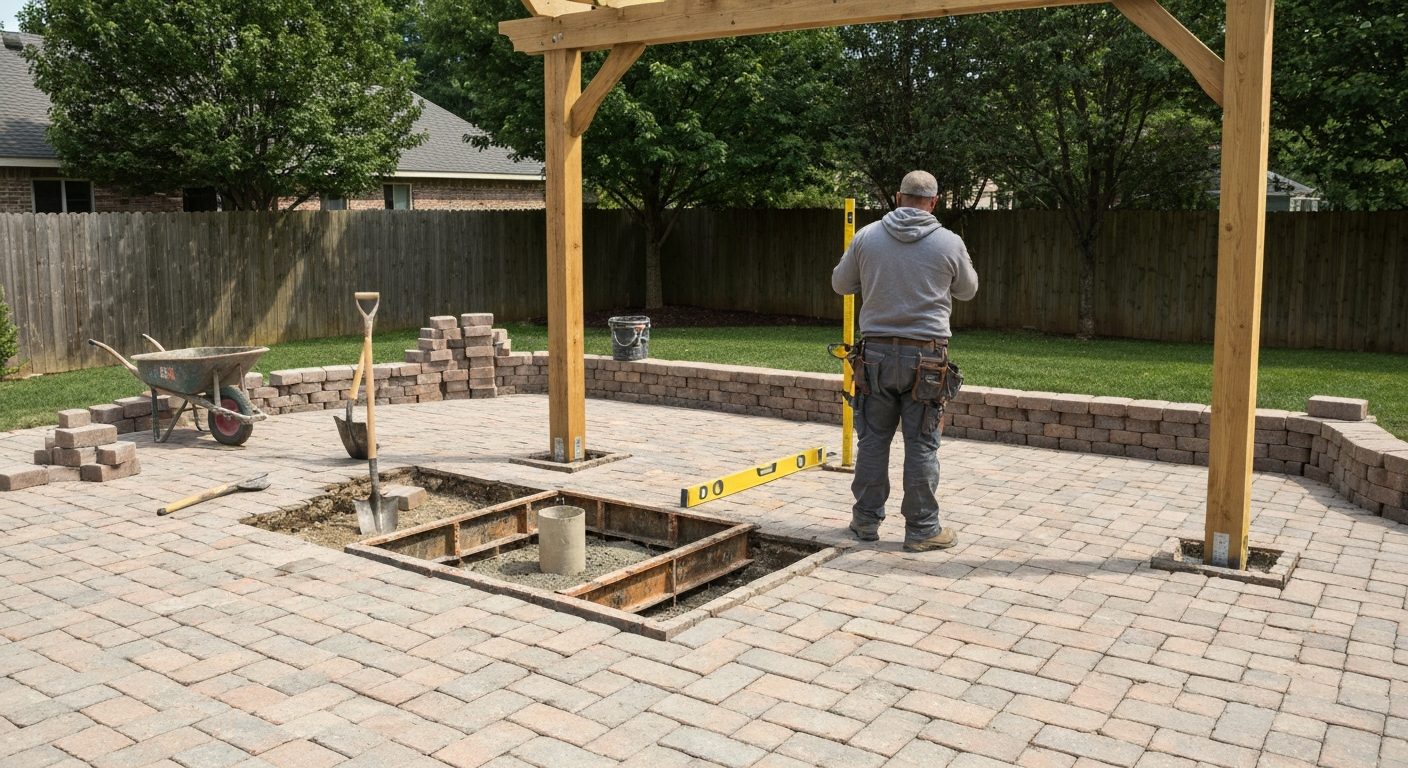
This is the gold standard for durability and code compliance. You remove bricks in the post locations, excavate to below your local frost depth, form a concrete pier (usually a 12-inch sonotube for a standard 4x4 or 6x6 post, or 16-inch for heavier loads or weak soil), pour concrete, embed a post-base anchor, cure, then reinstall trimmed pavers around the post base. This method works for freestanding and house-attached pergolas alike. It's more work upfront, but it's the version you won't be fixing in five years.
Method 2: Surface-mount post bases anchored to an existing concrete slab
If your patio is brick over a sound, adequately thick concrete slab, you can chip away the brick finish at post locations and anchor a rated post base directly to the slab using mechanical anchors (wedge anchors, sleeve anchors, or epoxy anchors). This avoids full excavation but has important limitations: the slab must be at minimum 3.5 inches thick (and thicker for some anchor products), in uncracked and structurally sound condition, with sufficient edge distance and spacing between anchors. Many connector manufacturers de-rate allowable uplift and shear loads for slab-top installations compared to cast-in anchors. Check the Simpson Strong-Tie or equivalent product data sheet for your specific post base before committing to this method.
Method 3: Freestanding pergola with independent footings outside the patio
For some layouts, especially larger pergolas or those where the patio is in good condition and you don't want to disturb it, you can position the pergola posts just outside the patio perimeter and span beams over the patio surface. The posts go into footings in the adjacent lawn or garden area. This avoids cutting into the patio entirely and is the most straightforward structural solution. The tradeoff is that your pergola posts are in the yard rather than on the patio, which affects aesthetics and sometimes means longer beam spans.
Method 4: Ledger attachment to the house wall (house-attached pergolas)
A lean-to pergola that pitches away from the house needs one side fastened to the house as a ledger. This requires attaching through the house exterior into the structural framing (rim joist or band joist), not into brick veneer. The IRC explicitly prohibits supporting a deck or ledger on masonry veneer alone (R507.9.1). If your house has brick veneer cladding, you still need to fasten through the veneer, the sheathing, and into the structural framing behind it with approved 1/2-inch lag screws or through-bolts. Flashing above and around the ledger is required by code and is one of the leading failure points in any house-attached structure. The ICC Building Safety Journal warns that ledger failure, often caused by improper fasteners and missing or incorrect flashing, is the leading cause of catastrophic deck collapse and strongly recommends positive anchorage and proper flashing details for ledger attachments Is your deck safely connected to your house? — ICC Building Safety Journal. More on flashing in the weatherproofing section below.
Permits, codes, frost depth, and when an engineer is not optional
Most jurisdictions require a building permit for an attached pergola and may require one for a freestanding structure over a certain size (commonly 200 square feet, though this varies widely). Don't skip this step. The permit process is what gets your footing depth and post sizing reviewed against local soil conditions and wind/snow loads. If something goes wrong with an unpermitted structure, your homeowner's insurance may not cover it.
The IRC requires footings to be placed below the local frost line (R403.1.4.1), with a minimum footing width of 12 inches and minimum concrete thickness of 6 inches for spread footings. Your local frost depth is listed in IRC Table R301.2(1) for your jurisdiction and is enforced by your local building department. In Minneapolis, that's 42 inches. In Atlanta, it may be 12 inches or zero. A 12-inch diameter sonotube footing is typical for a single 4x4 or 4x6 post under normal residential soil and load conditions; 16 inches is appropriate for larger posts, heavier loads, or softer soils.
You need a licensed structural engineer when any of these conditions apply: your pergola spans more than about 12 to 14 feet between posts, you have poor or unknown soil conditions (fill, expansive clay, high water table), you're attaching to a house with brick veneer and there's any question about what's behind it, or your local building department asks for stamped drawings. The cost of an engineer's review, typically $300 to $800 for a residential pergola, is trivial compared to the cost of a structural failure or a failed inspection.
Tools and materials you'll actually need
This list is for the footing-through-paver method, which is the most involved and covers tools needed for the other methods as subsets. Gather everything before you start. Running to the hardware store mid-excavation, especially with an open hole and loose pavers, is how small projects turn into long weekends.
- Flat pry bar and rubber mallet (for lifting pavers without chipping)
- Chalk line and stakes (for layout and post positioning)
- Spade and post-hole digger or rented power auger
- Tape measure and level (4-foot level minimum)
- Sonotube concrete forms (12-inch diameter for standard posts, 16-inch for heavier loads)
- Premixed or bagged concrete (for smaller pours, 80-lb bags; for larger, consider mixing or ordering ready-mix)
- J-bolt anchor or adjustable post base with cast-in bolt (sized to your post base product)
- Rated standoff post base (Simpson Strong-Tie CBS or ABU series, or equivalent; match to post size)
- Hammer drill with SDS bits (for anchoring into cured concrete if using post-installed anchors)
- Anchor bolts: wedge anchors, sleeve anchors, or epoxy anchor system per your method
- Wire mesh or rebar (for footing reinforcement per local practice or engineer spec)
- Gravel or crushed stone (for drainage layer at base of footing hole)
- Sand (for re-bedding pavers after post installation)
- Edge restraint material and spikes (to re-secure paver perimeter around post)
- Circular saw with diamond blade or angle grinder (for trimming pavers to fit around post base)
- Caulk or flexible sealant (for sealing around post base plate)
- Safety glasses, gloves, and hearing protection
Anchor types explained: how to pick the right one
Anchor selection is where a lot of DIYers go wrong, usually by using whatever is easiest to find rather than what's rated for the load. Here's what each type does well and where its limits are.
Cast-in-place J-bolts or threaded rod
The simplest and strongest option when you're pouring new footings. You embed the J-bolt or threaded rod in the wet concrete at the correct position and let it cure. The post base bolts directly onto it. There's no drilling into hardened concrete, no adhesive cure time, and no question about the connection strength. This is the preferred method whenever you're pouring new footings. Set the bolt position carefully using a template or by holding the post base in place before the concrete sets.
Wedge anchors
Drilled into cured, uncracked concrete. A wedge anchor expands when the nut is tightened, locking it mechanically into the concrete. These are rated for both tension (pull-out) and shear loads and are commonly used to anchor post bases to existing concrete slabs. They require a specific embedment depth (check your anchor's ICC-ES evaluation report) and minimum edge distances. Do not use these in cracked concrete, thin slabs, or hollow brick. Use a hammer drill for installation and clean the hole thoroughly before setting the anchor.
Sleeve anchors
Similar to wedge anchors but use an expanding sleeve rather than a wedge. Generally slightly more tolerant of irregularities in the hole. Still require sound, uncracked concrete or solid grout-filled masonry. Follow the same rules on embedment and edge distance. Useful when you need a cleaner, lower-profile installation in softer masonry.
Epoxy (chemical) anchors
These use a two-part adhesive (like Hilti HIT-HY or HIT-RE) injected into a drilled, cleaned hole, with a threaded rod set into the wet adhesive and left to cure. Epoxy anchors are the right choice when you need high-capacity connections in concrete, when the concrete may have minor cracking, or when minimum edge distances for mechanical anchors can't be met. They're also the correct type for anchoring into grout-filled concrete masonry. Critical: the hole must be drilled, brushed, and blown clean per the manufacturer's instructions. Temperature limits matter too; don't install epoxy anchors in freezing conditions without a cold-weather product. Wait the full cure time (which varies by product and temperature) before loading the anchor.
Concrete screw anchors (Tapcon and equivalents)
These are light-duty fasteners, typically rated for embedments of 1.75 to 3 inches, and are not a suitable substitute for structural post-base anchors under pergola loads. They work fine for attaching ledger boards or light fixtures to concrete, but the allowable tension and shear loads from Tapcon's ICC-ES reports are too low for structural post bases unless the product is specifically rated for that use. Don't use them for post base anchoring.
Through-bolts
For ledger connections and some post-base applications where the substrate is accessible from the other side. A 1/2-inch through-bolt with a washer and nut is the most reliable fastener for a ledger-to-rim-joist connection. IRC R507 specifies 1/2-inch lag screws or through-bolts with approved spacing patterns for ledger attachments. Through-bolts aren't always practical for patio post bases (you can't access the underside of a slab), but they're the right call for ledger connections when access is available.
| Anchor Type | Best Use Case | Key Limitation |
|---|---|---|
| Cast-in J-bolt / threaded rod | New concrete footings | Must be positioned before concrete sets; no retrofit use |
| Wedge anchor | Post bases on existing sound slab | Requires uncracked concrete, minimum edge distance, adequate thickness |
| Sleeve anchor | Post bases, lighter loads in sound masonry | Same concrete quality requirements as wedge; lower load ratings |
| Epoxy / chemical anchor | High-load or cracked concrete, grout-filled masonry | Strict hole prep and cure time; temperature-sensitive installation |
| Tapcon / concrete screw | Light attachments, ledger boards, trim hardware | Not rated for structural post base loads under pergola conditions |
| Through-bolt | Ledger connections into rim/band joist | Requires access to back face; not practical for slab-top post bases |
Site layout and planning before you touch a single brick
Measure your pergola footprint twice before you mark a single brick for removal. Post spacing affects beam span and ultimately the size of lumber you need. A freestanding pergola with 10-foot post spacing needs different beam sizing than one with 14-foot spacing, and getting this wrong costs you a lumber trip and possibly a failed inspection. Confirm your post spacing with the lumber sizing tables your local building department uses, or ask a lumberyard to help you size the members for your specific span and species.
Before digging any footing holes, call 811 (the national call-before-you-dig line in the US) at least three business days in advance. Underground utilities including gas, water, electric, and irrigation lines can run under patios. This is not optional. A broken gas line or severed electrical conduit is a genuine emergency. Even if you're confident there's nothing there, make the call. Utility locating is free.
Mark footing locations with spray paint or stakes and then identify which pavers need to come out. For a 12-inch sonotube footing, plan to remove a zone at least 18 to 24 inches across to give yourself working room for digging and forming the tube. Number or photograph the pavers as you remove them so you can relay them in the same pattern and orientation. Pavers that have been laid for years develop slight color weathering differences on the exposed face; flipping them over or reinstalling them out of order will show. If you plan to extend the patio later or adjust the layout around the new posts, this is the right time to plan that work too.
Check load paths before you finalize post locations. Each post transmits load straight down into its footing. Make sure the footing sits on undisturbed, competent soil, not on a filled trench, root zone, or old drainage swale. If you're placing a post near the house, maintain at least 6 inches of clearance between the post base and any wood siding or framing to prevent moisture trapping. For ledger attachments, identify the structural rim joist location behind the house cladding before you start drilling. A stud finder rated for metal can help locate rim joists; opening a small exploratory hole is sometimes the only reliable way to confirm.
Step-by-step: installing concrete footings through brick pavers
This is the most involved method, but it's also the one that will last. Plan on a full weekend for a four-post pergola if you're renting an auger and doing the concrete work yourself. Two people make this project dramatically easier, especially for setting posts and post bases accurately.
- Mark all footing centers with a stake. Confirm post spacing, square up the layout using the 3-4-5 triangle method (measure 3 feet along one side, 4 feet along the adjacent side, the diagonal should be exactly 5 feet), and double-check before removing any pavers.
- Remove the pavers in each footing zone. Work from the center of the removal area outward. Slide a flat pry bar under the first brick and lever it up. Stack removed pavers neatly nearby, face up, in the same general order they came out.
- Scrape away the bedding sand and expose the aggregate base. Don't disturb sand or aggregate beyond your working area. Set the sand aside; you'll reuse it when you relay the pavers.
- Dig or auger the footing hole to your required frost depth plus the footing thickness (a minimum of 6 inches of concrete at the base). Add 3 to 4 inches of compacted gravel at the bottom for drainage. Keep the hole plumb and as clean as possible at the base.
- Set the sonotube form in the hole, level and centered on your layout mark. Cut it so the top of the tube sits flush with or slightly above the paver base surface, not extending up through the finished paver field.
- Add rebar or wire mesh per local code or your permit drawings. Minimum practice in most areas is two horizontal bars in the footing base.
- Mix or pour concrete. For typical footing depths, 3 to 4 bags of 80-lb concrete mix fills a 12-inch sonotube per linear foot of depth. Work out the math before you start. Tamp the concrete to eliminate voids.
- Set the post-base anchor. If using a cast-in J-bolt or threaded rod, position it precisely now using a template or by holding your post base in place and marking the bolt center. Use a speed square to confirm the bolt is plumb. If you're off by more than 1/4 inch, an adjustable post base can compensate slightly, which is why many professionals prefer adjustable bases.
- Let the concrete cure fully. For standard bags, that means at least 48 hours before loading and ideally 7 days before setting posts under any significant load. Do not rush this step.
- After curing, attach the post base per the manufacturer's instructions. Torque fasteners to the specified values. The post base isolates the wood post from direct concrete contact, which is critical for preventing rot at the base.
- Set your posts, plumb them in both directions with a level, and brace them temporarily before proceeding with beam and rafter installation.
- Reinstall the pavers. Lay the bedding sand back at approximately 1-inch thickness, screed it level, and replace the pavers in the same order and orientation they came out. Cut pavers to fit around the post base using a diamond blade on a circular saw or angle grinder. Maintain a small gap (about 1/4 inch) between cut pavers and the post base plate to allow for drainage and movement.
- Re-establish edge restraint around any perimeter cuts. Secure with new edge restraint spikes if the existing edge restraint was disturbed.
Weatherproofing and flashing
Water management around the post base and ledger connection is where most pergola failures begin, often slowly and invisibly. Address it now rather than after the structure is built.
At the post base, water that pools between the base plate and the paver surface accelerates corrosion of the hardware and can work into any adjacent mortar. Apply a bead of polyurethane or silicone caulk around the perimeter of the post base plate after pavers are reinstalled. This isn't structural; it just keeps water from sitting against the base plate. Don't seal the downhill side completely, leave a small gap for drainage to escape if water does get under the plate.
For ledger connections on house-attached pergolas, the IRC requires flashing above the ledger and integration with the house's weather-resistant barrier (WRB). The approach recommended by building-science sources like Fine Homebuilding is a multilayer system: a peel-and-stick membrane applied to the wall behind where the ledger will sit, then the ledger installed, then self-adhesive flashing tape lapped over the top of the ledger and up the wall, then a rigid cap flashing (aluminum or galvanized) sloped to shed water away from the wall. This layered approach ensures that any water that gets behind the ledger hits the membrane and drains down and out rather than into the rim joist. This matters enormously because a rotted rim joist is a very expensive repair.
If your house has brick veneer and you're attaching a ledger, you have to flash through the veneer too. Brick veneer is not waterproof; water infiltrates through mortar joints and the face of brick routinely. The flashing has to integrate with the wall assembly behind the veneer, not just cap the top of the ledger. This is a situation where consulting a contractor or building-science professional before you start is worth the time.
Red flags: when to call a professional
I'll be direct here because this is the section most DIY articles skip. Some of these situations are genuinely not safe to handle alone, and the consequences of getting them wrong range from a leaning pergola to a structural collapse.
- Your patio slab is visibly cracked, heaved, or spalling and you were planning to surface-anchor into it. Stop. Surface anchors into a compromised slab are not reliable for structural loads.
- You can't identify what's behind your house's exterior wall at the ledger location. Opening walls blindly in a house with unknown framing, insulation, or wiring is a professional job.
- Your local frost depth is 36 inches or more and you need to hand-dig more than two or three footing holes. Rent a power auger or hire someone with one. Hand-digging deep holes in hard soil is exhausting and leads to mistakes.
- The soil at the footing location is fill, soft clay, or expansive soil. These conditions need engineered footing sizing and sometimes different footing types entirely.
- Your pergola spans more than about 12 feet between posts or supports significant roof load (such as a covered pergola with roofing panels). Get an engineer's stamp on the design.
- Your local building department requires stamped drawings for a permit and you don't have them. An engineer's review of a typical residential pergola design is not expensive and removes all liability from you.
- You're attaching to a house with brick veneer and are not certain how the veneer is tied to the structure. This is not something to guess about.
A few things to plan alongside this project
Installing a pergola often surfaces adjacent patio issues that are easier to fix now than after the structure is in place. If your pavers show signs of settling, heaving, or drainage problems at the footing locations, address the subbase before you pour concrete. Similarly, if you're going to extend the patio to match the new pergola footprint, or relay disturbed sections after the footing work, those tasks share excavation and material costs with the footing installation and are more efficient to do together. If you're thinking about changing the surface finish, see our guide on how to tile over brick patio for options and step-by-step guidance on installing tile over existing brick surfaces. If you're also wondering how to cover a brick patio, see a related guide on how to cover a brick patio for options and materials (81a19347-d72f-4fdb-8fe0-f956f99034b0). Patching and relaying brick around post bases is the same process as relaying a settled section anywhere else on a paver patio, just at a smaller scale and in a more constrained area. If you need step-by-step guidance on removing and relaying large areas, see our guide on how to replace a brick patio.
FAQ
Quick decision checklist: How do I decide the right way to attach a pergola to my brick patio?
1) Identify patio construction: brick pavers on sand, mortar‑set brick, or brick laid over a concrete slab. 2) Decide pergola type: freestanding or house‑attached (ledger). 3) Check slab depth/condition or verify there’s structural backup behind brick veneer if planning a ledger. 4) Check local frost depth and permit rules. 5) If pavers over sand or mortar bricks without structural backing, plan independent footings through the bricks. If brick over concrete with adequate thickness and condition, a surface‑mount to slab may be possible. 6) Choose anchors and post bases rated for the substrate and loads. 7) If any of these checks fail (thin/unsupported slab, ledger bearing on veneer, heavy loads, uncertain frost conditions), hire an engineer/contractor.
Which mounting options match each patio type?
- Brick pavers over sand: Freestanding pergola with independent concrete piers poured below frost depth through removed pavers; do not rely on the paver bed for structural support. - Mortar‑set brick (brickbed on compacted base): Dig and form full concrete footings (pier/sonotube) below frost line; you’ll likely need to remove and relay mortar‑set bricks or cut around footings. - Brick over concrete slab: If slab thickness, reinforcement, and condition meet manufacturer minimums and local code, you can use surface‑mount post bases anchored into slab; otherwise install cast‑in or drilled/epoxy anchors into full-depth concrete footings. - House‑attached (ledger): Ledger must bear on structural framing or be bolted through to rim/band joist; ledger cannot be supported by brick veneer alone. If ledger into masonry is considered, require through‑bolts to structural backup or use freestanding posts.
What are the code and permit basics I must follow?
- Always check local building department: many pergolas require a permit or plan review. - Footings that resist frost must extend below the local frost line (IRC R403.1.4.1). - Typical minimum practical footing diameter for single-post piers is 12 in., but sizing depends on loads and soil bearing capacity—follow IRC or engineer calculations. - Ledger attachments must meet IRC ledger rules (approved fasteners, flashing, not bearing on veneer). - Surface‑mounted anchors are limited by slab thickness/condition and manufacturer limits—don’t assume slab is adequate without verification.
What anchors should I choose for brick, concrete, or pavers?
- Concrete slab (sound, adequate thickness): use mechanical expansion anchors or concrete screw anchors per manufacturer embedment/edge/spacing limits for shear and uplift. - Cracked/uncracked concrete or grout‑filled masonry: use manufacturer‑approved chemical (adhesive) anchors installed per instructions (drill, clean, inject, cure) for higher capacities. - Brick units or brick veneer: avoid relying on single anchors in brick wythes for heavy ledger loads; through‑bolting into the structural backup or using freestanding posts is preferred. - For post bases, choose connectors (Simpson, etc.) rated for the expected uplift/shear and install per catalog spacing/edge recommendations. - Always follow ESR/manufacturer data for embedment depth, temperature/cure limits, and spacing.
When is a surface‑mount to an existing slab acceptable versus digging footings through the bricks?
Surface mounts acceptable when: slab is minimum thickness, well‑reinforced, sound (not heavily cracked), and manufacturer allowable embedment/edge distances are met. If slab is thin, on frost‑susceptible soil, cracked, or the load/uplift is substantial, surface anchors are not reliable—install independent footings poured to below frost depth. When in doubt, pour footings.
Step‑by‑step: How do I install concrete footings through brick pavers (common, detailed procedure)?
1) Plan and mark post locations using pergola layout and local setback/clearance rules. 2) Photograph and map existing pavers so you can relay patterns; mark edge restraints. 3) Remove pavers where each pier will go. For small areas, remove a full circle of pavers plus a working ring (about 12–18 in. extra) so you can form the sonotube. 4) Remove bedding sand and any base aggregate down to undisturbed soil to expose depth you must excavate. 5) Excavate to required footing bottom: at least to local frost depth (per local code) and to minimum footing depth/width for loads (typical single‑post pier 12 in. dia and 12–18 in. deep, adjust for your soil/load). 6) Compact bottom, add 2–4 in. crushed stone for drainage if local practice requires. 7) Place a sonotube (cut to wall height) or use form, center reinforcing (rebar) per local practice (often two vertical #4 bars tied to a circular rebar stirrup), and brace tube plumb. 8) Pour concrete to form the pier; if using a post base that requires cast‑in hardware, set the cast‑in anchor or anchor bolts while concrete is wet following manufacturer spacing. 9) Allow concrete to cure per instructions (24–72 hours) before loading or installing epoxy anchors (if used, follow longer cure times and product temperatures). 10) Install post base: either set cast‑in hardware or drill and install epoxy anchors into cured concrete per manufacturer procedure. 11) Trim sonotube flush or slightly below paver level; reinstall pavers around the new pier. For pavers on sand, relay pavers on a compacted sand bed; replace edge restraint and compact joint sand. 12) Install posts and connect to rated post bases with proper fasteners and blocking. 13) Seal gaps around the post base with flexible sealant where needed to prevent water pooling and allow drainage.
How to Relay a Brick Patio Step-by-Step DIY Guide
Step-by-step guide to diagnose and re-lay an uneven brick patio, fix base drainage, reset bricks, and finish joints.