To relay a brick patio, you lift and remove the existing bricks, dig out and recompact the base, re-grade the ground so water drains away from your house at roughly 1/4 inch per foot, lay a fresh 1-inch bedding sand layer, reset the bricks on string lines, and finish by sweeping polymeric sand into the joints and compacting the whole surface. If you are wondering how to cover a brick patio for an updated look, the same base, slope, and jointing principles still apply re-lays. Done right, this fix lasts for decades. Done halfway, meaning you just reset the bricks without fixing the base, and you'll be doing it again in two or three years.
How to Relay a Brick Patio Step-by-Step DIY Guide

Talia Lang
16 Jun 2026
Plan the job: figure out what actually went wrong

Before you touch a single brick, spend 20 minutes walking the patio and being honest with yourself about what you're dealing with. This step determines whether you're doing a weekend DIY project or calling in a contractor.
Push down on every brick. Rock, wobble, or a hollow thud means the bedding sand has washed out or compacted unevenly underneath. Look at the slope: water should be moving away from your house, not pooling in the middle or running toward the foundation. Get a 4-foot level and lay it across the surface in multiple directions. You want to see a consistent fall of 1/8 to 1/4 inch per linear foot. Anything that pools or runs the wrong way is a drainage problem that will keep destroying your patio if you don't correct it now.
Also check the edges. If bricks along the perimeter are pushing outward or gaps are opening up between the outer course and the lawn, the edge restraints have failed or were never installed. That's a lateral creep problem, and it will undo any re-laying work if you don't add proper restraints this time around.
Look for soft spots when you walk the patio. A springy or spongy feeling underfoot usually means organic material, old roots, decomposed debris, is under the base. That material compresses over time, which is why sections sink. Those spots need to be dug out completely and backfilled with compacted granular material, not just topped up with sand.
Finally, document the layout before you start pulling bricks. Take photos of the bond pattern (running bond, herringbone, basketweave) from multiple angles. Sketch or photograph where cuts fall along the edges. You'll thank yourself later when you're trying to remember which way the pattern ran.
Common causes at a glance
- Bedding sand washed out: bricks rock or feel hollow when pressed
- Failed or missing edge restraints: outer bricks creeping outward, gaps forming at perimeter
- Poor original slope: water pools on the surface or drains toward the house
- Soft subsoil or organic material: spongy feel, recurring settlement in the same spots
- Frost heave: random lifting in a pattern that follows freeze-thaw cycles
- Weeds in joints: roots pushing bricks apart over time, especially without polymeric sand
Prep work: removing the bricks and old base cleanly
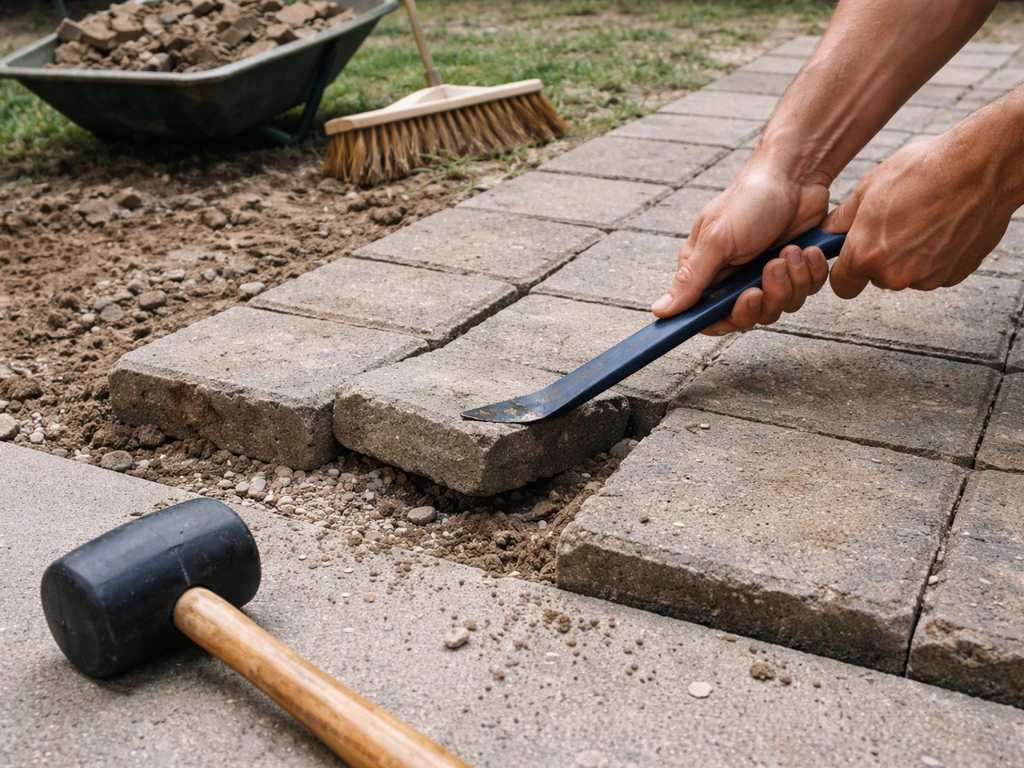
Gather your tools before you start: a paver puller or flat pry bar, a rubber mallet, a stiff bristle broom, a wheelbarrow, and somewhere to stack bricks. Mark off the area you're relaying with spray paint or chalk so you don't pull more than you need to.
Start at an edge or a corner where there's already a gap. Slide a flat bar under the first brick and lever it up gently. Use controlled, light pressure, over-striking or forcing bricks will chip them, and you want to reuse as many as possible. A dedicated paver puller (a long-handled tool with a curved lip) makes this much easier on your back and causes less damage than improvising with a regular crowbar. Once you get the first brick free, the rest lift out more easily.
Stack bricks by type and condition as you go. Cracked or spalled bricks go in one pile. Reusable bricks go in another, stacked flat. Mixing them up wastes time when you're trying to relay the surface. If you need to cut bricks and don't have a wet saw, a right-angle grinder with a dry diamond blade scores cleanly and works well for this scale of project.
Once the bricks are out, remove the old bedding sand completely. Don't try to reuse it, it's contaminated with fines, weed seeds, and whatever caused the failure. Scrape it down to the compacted base beneath. Then assess the base itself. If it's a solid, stable layer of compacted gravel that's just lost some bedding above it, you may be able to work with it. If it's thin, soft, has soft spots, or was never properly installed, you're rebuilding from scratch.
Wherever you find soft spots or areas with visible organic material, dig them out completely. Don't just fill over them. Dig down until you hit firm native soil, then backfill in layers with compacted crushed stone or road base gravel, tamping each 2 to 3 inch lift before adding the next.
Build the base correctly: compaction, grading, and drainage
This is the step that most DIY re-lays skip or rush, and it's exactly why patios fail again within a few years. The base is everything.
For a standard brick patio, you want 4 to 6 inches of compacted crushed stone aggregate as your base layer. If your existing base is solid and at the right depth, great, check it, compact it again, and move on. If you're rebuilding, spread the stone in 2 to 3 inch lifts and compact each lift with a plate compactor before adding more. The goal is to reach at least 95% compaction density (a standard used in the paving industry). Orco's ICPI Tech Spec 2-related technical specification PDF similarly emphasizes compaction targets such as 95% Standard Proctor density and tolerance considerations that impact base and surface performance Orco/ICPI Tech Spec 2. In practical terms, that means the surface doesn't shift or deflect when you walk on it and the compactor stops making the material visibly move.
Grading is where you set up drainage for the life of the patio, so get it right now. The surface of your finished base needs to slope away from the house at 1/4 inch per foot. Over a 10-foot patio, that's a 2.5-inch drop from the house wall to the outer edge. Use a long level or a string line with a line level to check this across the whole base. The base surface dips or mounds should not vary more than 1/4 inch from your intended grade. Fix high spots by raking and recompacting, and fix low spots by adding and compacting more material.
One important note: don't use the house wall as your reference line for layout and slope. Walls are rarely perfectly straight or plumb, and using them as a reference will throw off your whole pattern. Set up independent string lines from fixed stakes driven into the ground beyond the patio footprint.
If drainage was a serious problem, water flowing under the patio from an uphill area, or a chronic wet zone, consider whether you need a perforated drain pipe or French drain system in the base before you close everything up. Relaying bricks over a drainage problem without fixing the water source is a short-term fix at best.
Set bricks: layout, edge restraints, and bedding
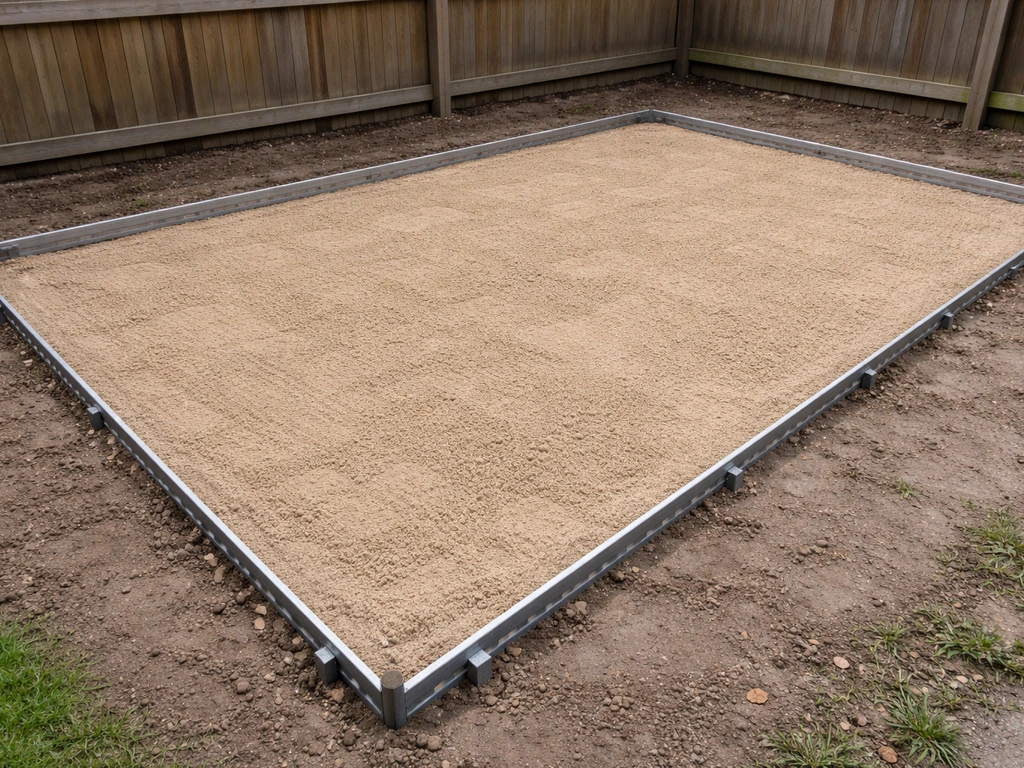
Once the base is compacted and graded, spread your bedding sand. Use coarse, washed concrete sand, not play sand, not stone dust, not polymeric sand. Spread it to a uniform depth and screed it to a 1-inch thickness using two screed rails (pipes or square tubing work well) set at the right height. Pull a straight board across the rails to level the sand. The screed layer should end up at 1 inch after you've settled the bricks into it, not before. Very thin layers under 3/4 inch after compaction won't give you the locking action you need.
Before laying a single brick, install your edge restraints around the full perimeter of the area. These are high-tensile plastic or aluminum strips that pin to the compacted base with 10- to 12-inch spikes. Without them, the outer courses of brick will slowly creep outward over time under foot traffic and freeze-thaw pressure, and eventually the whole surface opens up. This is one of the most common reasons patios need to be relaid in the first place. Don't skip this step.
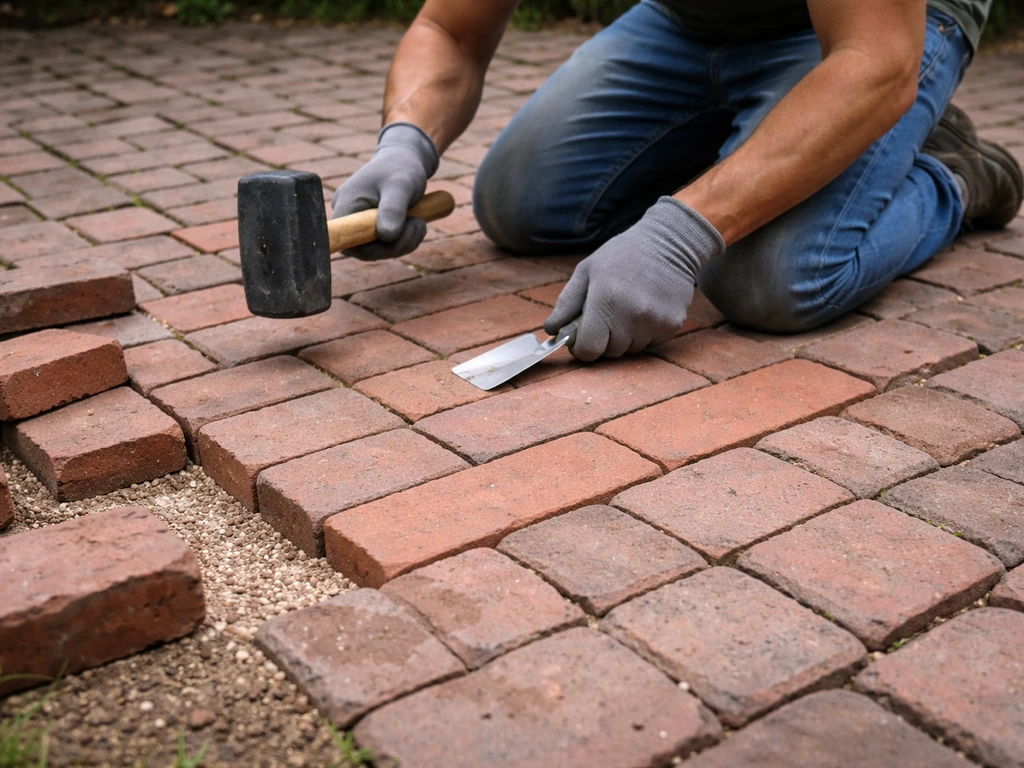
Set up string lines running in both directions across the patio before you start laying bricks. These are your guides for keeping the pattern straight and square. Start laying bricks from one corner, working out diagonally or in rows depending on your pattern. Place each brick gently onto the sand, don't slide them or you'll disturb the bedding. Tap each brick lightly with a rubber mallet to seat it. Check frequently with a straight edge or level across multiple bricks: the finished surface should not vary by more than 1/8 inch across the installed surface.
Keep consistent joint spacing as you go. Most bricks are laid with 1/8 to 3/16 inch joints. Use spacers if you're struggling to keep them even. Work from the laid surface, kneel on a piece of plywood to avoid disturbing bricks you've already placed.
Cutting, leveling, and finishing the surface
You'll need to cut bricks to fit at the edges and around any obstacles. The cleanest method is a wet saw with a diamond blade, which gives a precise cut with minimal chipping. For on-site cuts, a dry diamond blade on an angle grinder works well for scoring and breaking. Always wear eye protection and a dust mask when cutting bricks.
As you lay each section, check your level frequently in multiple directions. If a brick sits too high, lift it, remove a small amount of sand, and reset it. If it sits too low, add a pinch of sand and re-seat. Don't try to force a brick down by hammering harder, you'll just crack it or destabilize the surrounding bricks.
Once all bricks are set, run the plate compactor over the entire surface. This seats the bricks firmly into the bedding sand and helps even out any minor height variations. For plain clay bricks (as opposed to concrete pavers), reduce compactor speed and make multiple slower passes rather than one aggressive pass. If your bricks are older or softer, use a rubber compactor pad or protective mat between the plate and the surface to avoid surface damage.
Jointing and sealing: what to use and what to skip
Choosing the right jointing material is one of the decisions that most affects how long your relaid patio holds up. You have two main options: plain dry jointing sand, or polymeric sand.
| Material | Best For | Pros | Cons |
|---|---|---|---|
| Dry jointing sand | Low-budget repairs, older irregular bricks, heavily textured surfaces | Cheap, easy to apply, allows permeability | Washes out over time, allows weed growth, needs re-application |
| Polymeric sand | Most modern re-lays where joints are reasonably uniform | Resists washout, dramatically reduces weeds, one-time application | More expensive, specific application conditions required, not for heavily textured bricks |
For most re-lays, polymeric sand is the better choice. It forms a near-airtight seal in the joints that significantly reduces weed growth and holds up through rain and freeze-thaw cycles far better than plain sand. Pour it dry over the surface and sweep it into the joints with a stiff bristle broom, working it in multiple directions. Run the plate compactor over the surface again after the first sweep to drive the sand deeper, then sweep again to top up the joints.
Polymeric sand has strict application conditions you need to follow. The temperature must be above 50 degrees Fahrenheit for at least 48 hours after installation. Don't apply it if rain is expected within 6 hours. Sweep it only onto completely dry pavers, sweeping over damp bricks causes it to clump and stain. Remove all excess from the surface with a fine bristle broom or leaf blower before wetting. When you activate it, use a steady, moderate spray, not a fine mist, which can cause hazing. Don't use polymeric sand on heavily textured brick surfaces where grooves will trap polymer particles and leave a permanent residue.
On sealing: it's optional for clay brick patios and genuinely depends on the brick type and your goals. Sealer can enhance color, reduce staining, and slow moss and algae growth. But it also needs to be reapplied every few years and can trap moisture under the surface if applied over damp bricks. If you're going to seal, wait at least 30 days after relaying so the jointing sand has fully cured, and use a breathable penetrating sealer rather than a film-forming one.
Aftercare, troubleshooting, and when it's time to call a pro
Stay off the patio for at least 24 hours after activating polymeric sand, and avoid heavy traffic or furniture placement for 48 to 72 hours while it cures. Check the joints after the first heavy rain, if any areas washed out or didn't cure properly, top them up while the surface is still dry.
If bricks shift or sink again within the first year
This usually means the base wasn't compacted sufficiently, or a soft spot wasn't fully removed before backfilling. Lift the affected section, dig out the problem area, compact fresh granular fill in thin lifts, and relay. If the same spot keeps failing repeatedly, there's likely a subsurface drainage or soil issue driving it, water is moving through the base and washing material away, or organic material is still present and compressing.
Ongoing maintenance
- Inspect joints every spring—top up any that have washed out before weeds establish
- Check the slope after winter: frost heave can alter grade over a season
- Keep edge restraint spikes driven flush—any that work up should be re-driven immediately
- Remove moss and algae annually with a diluted bleach solution or commercial patio cleaner before they physically pry joints apart
- Avoid pressure washing at high pressure directly into joints—it blows out jointing sand fast
When to bring in a professional
Be honest with yourself here. Relaying a brick patio is well within DIY reach if the problem is limited to failed bedding, poor slope, and missing edge restraints. But there are situations where doing it yourself, or doing it without first addressing the root cause, will just cost you money twice.
Call a professional if you have recurring settlement in the same areas despite proper base work, which usually points to subsoil movement or underground water migration. If the patio sits near a retaining wall that's shifting or leaning, that's a structural problem that goes beyond patio relaying. If grading around your house is directing water toward the foundation and the patio is part of that drainage path, you need a grading and drainage specialist before a paver installer. And if the area under your base is more than 50 percent soft or organic material, the excavation and fill work involved starts to become a larger project than most homeowners are set up to handle safely.
If you're unsure whether your situation qualifies as a full replacement versus a relay, the distinction is mostly in the base: a relay reuses the existing bricks on a rebuilt base; a full replacement involves new materials throughout. Similarly, if your patio's problems stem from what's above the bricks rather than below, like wanting to add a pergola attachment point or extend the surface, those are different scopes with different planning requirements. If your goal is to extend a brick patio, you need to treat the new section like a full base build, including proper grading, drainage, and edge restraints. Similarly, if your patio's problems stem from what's above the bricks rather than below, like wanting to add a pergola attachment point or extend the surface, those are different scopes with different planning requirements how to attach pergola to brick patio.
The bottom line: relaying a brick patio yourself is completely doable, and the result will last if you fix the actual cause of the failure instead of just resetting bricks on a bad base. Take your time on the base work, get the slope right, use polymeric sand in the joints, and install edge restraints. Those four things are responsible for 90 percent of whether a DIY relay holds up or fails again in two years.
FAQ
How do I tell if I can do a relay (reuse the bricks) instead of a full replacement?
If the bricks are largely intact and the failure is limited to bedding loss, uneven settling in small areas, or missing edge restraints, a relay is usually workable. If many bricks are chipped, spalled, or the same zones keep sinking after you rebuild the base, plan for a full base rebuild (and possibly new bricks) because the underlying soil or drainage is still moving.
Can I relay without removing every brick (partial relays)?
Yes, for localized failures, but you still need to remove bricks back far enough to reach stable base material, not just patch the exact hole. Cut the work boundaries to straight lines, excavate to solid granular base, and compact in lifts before you reset bricks so the repair does not become a hinge that shifts over time.
What’s the most common mistake that makes a relaid patio fail again quickly?
Rushing the base and grading. If you don’t remove old bedding, rebuild to correct base depth, compact to consistent density, and achieve the correct slope away from the house, the joints will look fine at first but the patio will settle, wobble, and wash out within a short time.
Do I need to use a plate compactor, or is hand tamping enough?
For the base, hand tamping is usually not enough to reach consistent density. A plate compactor is the practical way to compact crushed stone in 2 to 3 inch lifts so the surface doesn’t deflect when stepped on. For older, softer brick surfaces, use a protective mat or lower compactor settings to avoid surface damage.
How deep should I dig out for a relay?
A common target is 4 to 6 inches of compacted crushed stone under the patio surface, plus the sand bedding layer thickness used for setting bricks. If your existing base is unknown depth or has soft spots, excavate down to firm material and then rebuild to the proper total base thickness rather than topping up with sand.
Why do some relaid patios get weeds even when I use polymeric sand?
Polymeric sand reduces weeds, but it cannot compensate for an ongoing drainage issue or contaminated joints. If rain can still push water under the patio, fines and debris move into joints, and weed seeds can survive underneath. Confirm the slope, check for organic material, and keep joints fully filled after compaction.
Can I apply polymeric sand in cool weather or when it’s damp?
Polymeric sand needs a sustained warm window, typically above 50°F for at least 48 hours after installation, and the pavers must be completely dry when you sweep it in. If dew is settling or rain is likely soon, wait. Damp application can clump and leave residue that is hard to remove.
How long should I wait before getting back on the patio after relaying?
After polymeric sand activation, avoid foot traffic for at least 24 hours. Keep heavy traffic and moving furniture off the surface for 48 to 72 hours to allow the joints to set fully, and then check the joints after the first significant rain to see if topping up is needed.
What if my patio bricks are level during installation but become uneven after a few months?
That usually points to base instability, such as a soft spot that wasn’t fully removed, inadequate compaction, or water still traveling under the patio. Lift the affected area, excavate back to stable granular material, backfill in thin compacted lifts, and relay. If the same spot fails repeatedly, investigate subsoil drainage or nearby water sources.
How do I prevent edge creep (bricks pushing outward)?
Install perimeter restraints around the full perimeter before you relay, and pin them properly into the compacted base. Edge creep often starts when restraints are missing, underpinned, or installed after the bricks are already set, so the outer course lacks lateral support.
Should I seal clay brick after relaying?
Sealing is optional and depends on the brick type and what problem you are trying to solve, like color enhancement or stain resistance. If you do seal, wait at least 30 days after relaying so jointing sand can cure, and choose a breathable penetrating sealer. Film-forming sealers can trap moisture if applied at the wrong time or over damp surfaces.
Can I reuse the old bedding sand if it looks clean?
No. Even if it appears fine, old bedding sand typically contains fines and contaminants like weed seeds, and it can interfere with locking and drainage at the base. Remove it completely and replace with fresh coarse, washed bedding sand to maintain the correct thickness and performance.
What’s the best way to keep brick cutting accurate along the edges?
Dry-fit brick rows and measure gaps along both sides before you cut, because patterns can drift slightly with irregular edges. If you score without a wet saw, use a guide and make test breaks on scrap first. Aim for straight, clean cuts and keep joint spacing consistent so the perimeter line does not “wander” visually.
Next Article
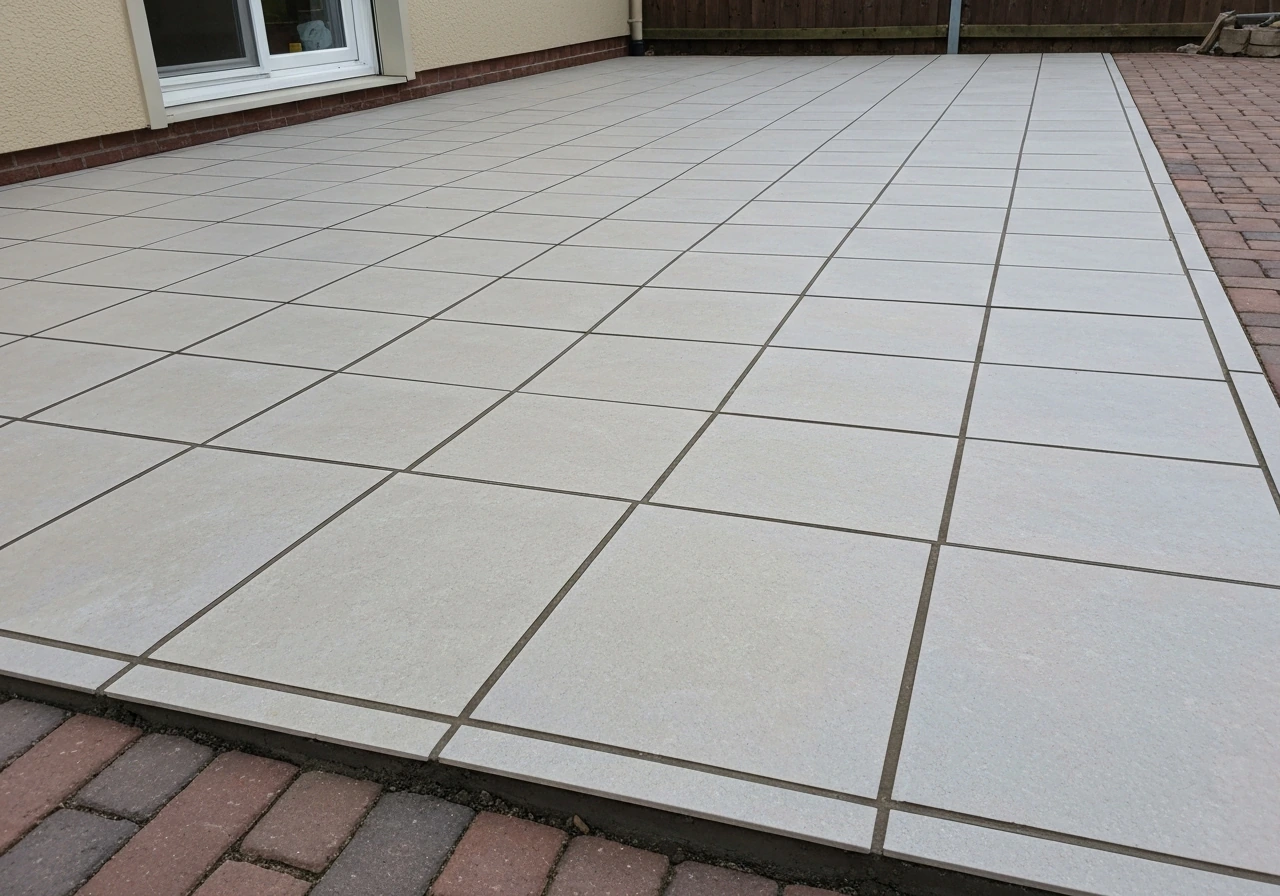
How to Tile Over a Brick Patio: Step-by-Step Guide
Step-by-step how to tile over brick patio: check stability, prep surface, waterproof, set tile, grout, prevent failures.