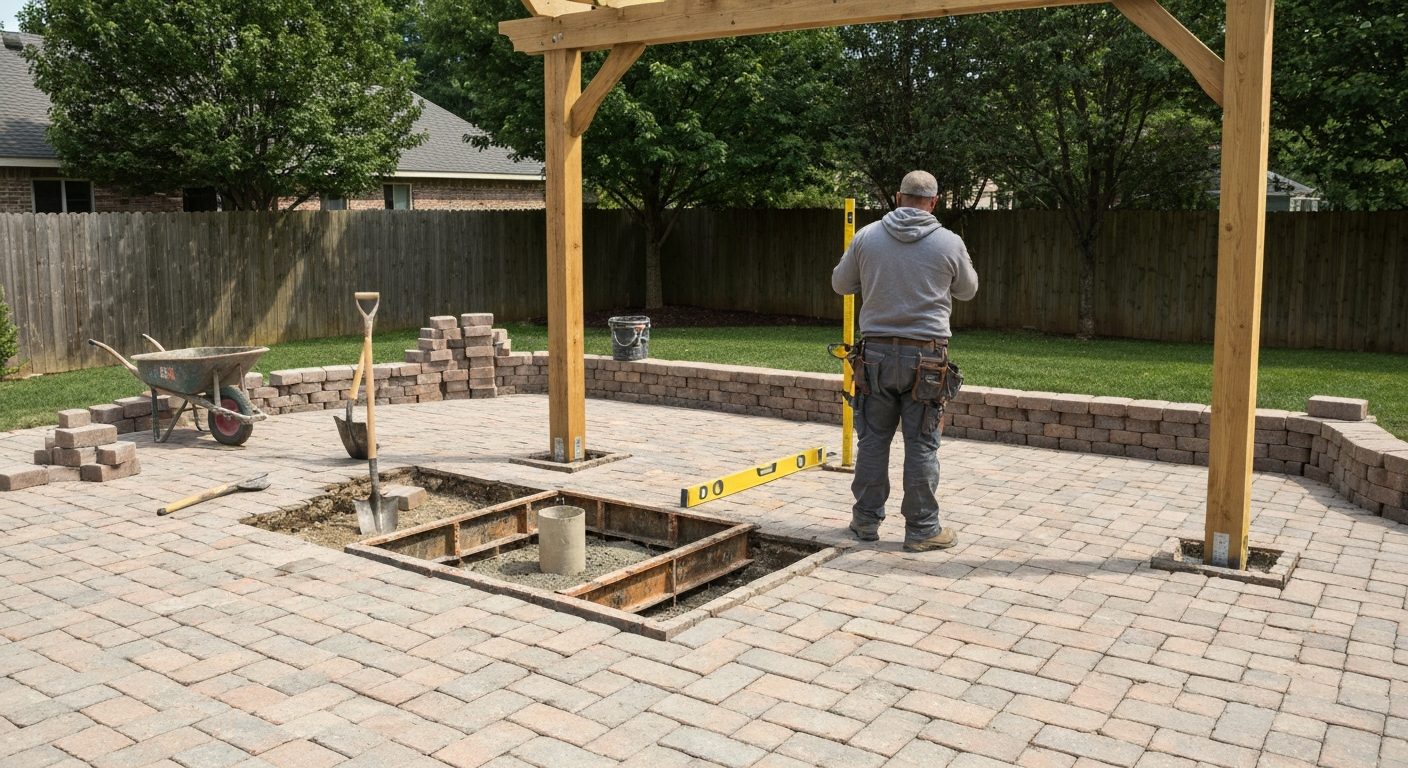
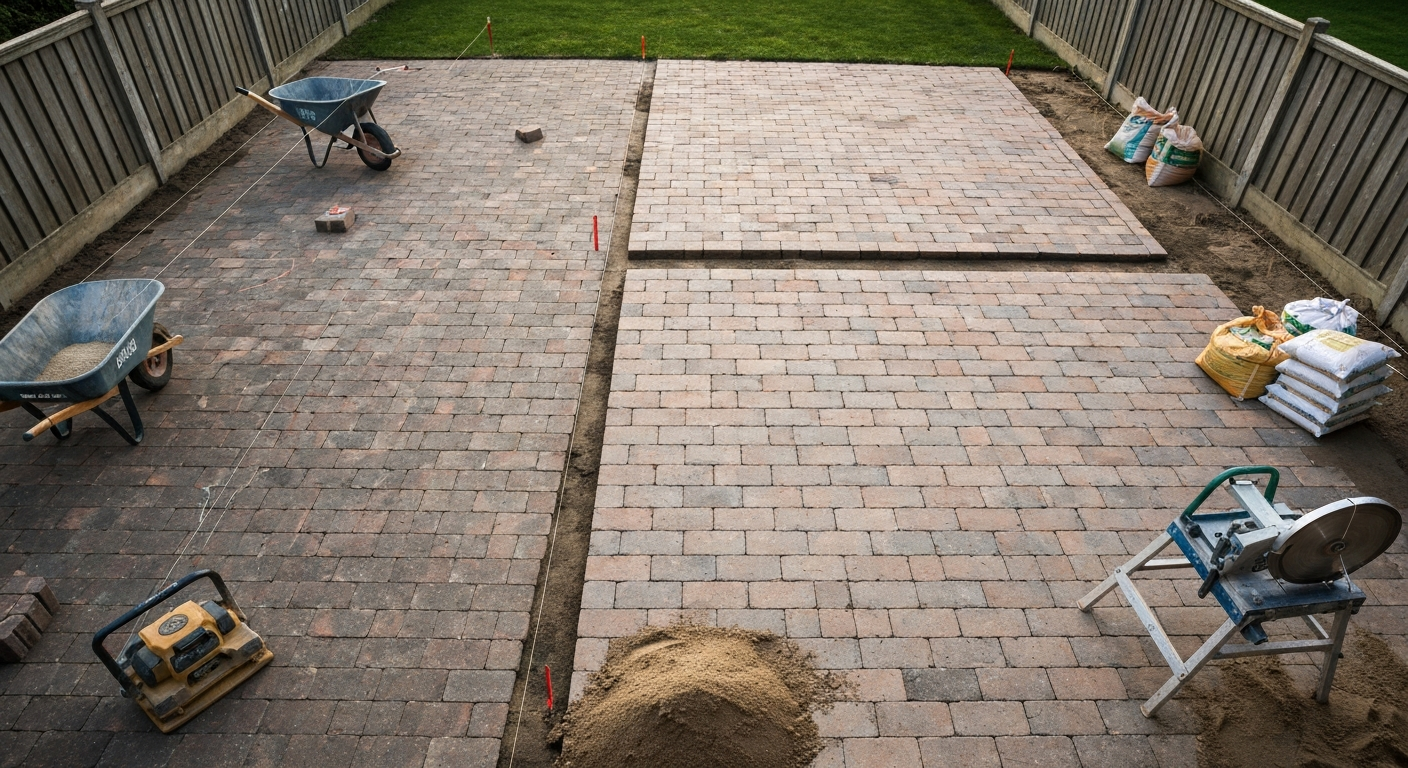
You can extend an existing brick patio yourself, but it takes more planning than most people expect. The job breaks down into four main phases: assessing what you already have, matching your brick and pattern, preparing the ground correctly, and laying the new section so it drains and settles the same way as the original. If the base under your current patio is solid and the drainage works, extending it is genuinely DIY territory. If the existing patio has sunken spots, cracked joints, or standing water after rain, deal with those problems first, otherwise you'll build the extension right into the same failure.
How to Extend a Brick Patio: Step-by-Step DIY Guide

Talia Lang
16 Jul 2026
Who this guide is for, and when to call a pro
This guide is written for homeowners adding footprint to an existing brick patio, not starting from scratch, not repairing a crumbling slab. You should be comfortable with a shovel, a level, and renting a plate compactor. The extension could be sand-set or mortar-set depending on your existing patio's construction and your goals. I'll walk you through both options. If your current patio is mortared to a concrete slab, the extension process is different from a sand-set flexible system, and I'll flag those differences clearly.
Before you start, run through this quick decision checklist:
- DIY is reasonable if: the existing patio is structurally sound, you have time for 2–4 weekends of work, the extension is under 200 sq ft, and you're comfortable with basic excavation and grading.
- Hire a pro if: the existing patio has widespread settling or drainage failure, the soil is unstable or waterlogged, the extension exceeds 300 sq ft and requires significant grading, or you need permits that require licensed contractor sign-off in your jurisdiction.
- Permit triggers to check immediately: many U.S. jurisdictions require a building permit for patios above a size threshold (Prince George's County, MD, for example, requires one for 500 sq ft or larger, or any patio with stairs or ramps regardless of size). An attached patio cover or pergola added to the space may trigger a permit separately — LA County requires a permit for any attached patio cover regardless of size.
- Call 811 before any digging: 811 is the national 'call before you dig' number in the U.S. It's free, required by law, and protects you from cutting into buried gas, electric, water, or telecom lines.
Assess the existing patio and set your goals
Walk your current patio after a rain. That single step tells you more than any tape measure. Look for puddles, soft spots, bricks that rock when you step on them, and joints that have disappeared. Then get out the tape measure and your phone camera. Take photos of every edge, the existing pattern, and any problem areas. You'll refer back to these constantly during the project.
Measure the full existing patio (length x width), then sketch where you want the extension to go. Note any obstacles: downspouts, irrigation heads, steps, light fixtures. Check the direction the patio slopes now, you need the extension to match that slope, which should be at least 1/8 inch per foot away from the house (roughly 1% grade). A 2% slope (1/4 inch per foot) is better in areas with heavy rain. If you can't tell which way your patio drains, lay a level on several bricks and look for the bubble; a straight 4-foot level is easier to read than a shorter one.
Pre-extension assessment checklist
- Measure total existing patio dimensions and sketch to scale on paper or a free tool like Google Slides
- Photograph all four edges, the full surface, and any damaged or settled areas
- Check for rocking, loose, or cracked bricks across the whole surface
- Verify current drainage slope (minimum 1/8" per foot away from the house)
- Identify where water goes after it leaves the patio — is there a swale, a lawn, a drain?
- Confirm the construction method: sand-set (flexible) or mortar-set on concrete slab
- Check joint condition — are joints full, crumbling, or missing entirely?
- Note any existing edge restraints and whether they're holding
- Measure the depth of the existing base if you can access an edge (excavate 6" at a corner if needed)
- Look up permit requirements for your specific municipality before ordering materials
Materials and tools you'll need
Quantities depend on your extension size, but here's how to estimate. For a sand-set extension, plan on 4–6 inches of compacted crushed aggregate base (use 6 inches if your soil is clay or soft), plus a 3/4-inch to 1-inch bedding sand layer on top. Calculate base material in cubic yards: multiply length (ft) x width (ft) x depth (ft), then divide by 27. Add 10–15% for waste and compaction. For bricks, measure the extension area in square feet and add 10% for cuts and breakage. A standard modular brick paver covers roughly 4.5 bricks per square foot in a running bond pattern.
Materials list
- Matching brick pavers (quantity: extension sq ft + 10% overage)
- Crushed aggregate base (Class II or ASTM No. 2–4 equivalent): 4–6" deep across full extension footprint
- Bedding sand (coarse washed concrete sand, NOT play sand): 3/4" to 1" layer
- Geotextile landscape fabric (non-woven): placed under aggregate base to separate it from subgrade
- Polymeric joint sand (example: Techniseal SmartSand or equivalent): roughly 50 lbs per 50–70 sq ft depending on joint width
- Edge restraint: rigid aluminum, steel, or HDPE paver edging with 10" landscape spikes at 12" on center
- Mortar mix (type S) if your existing patio is mortar-set on a slab
- Concrete for new footing/slab if extending a mortar-set patio
Tools list
- Tape measure (25 ft minimum) and long straightedge or string lines
- 4-foot level and line level
- Spade and square-nose shovel
- Wheelbarrow
- Plate compactor (rent one — minimum ~4,000 lbf; a compactor mat/rubber pad is essential to avoid chipping brick surfaces)
- Wet masonry saw or wet tile saw with diamond blade (required for cuts — dry cutting releases hazardous silica dust)
- Safety gear: N100 respirator or P100 half-face respirator, safety glasses, hearing protection, work gloves
- Screed pipes (two sections of 3/4" metal conduit work well) and a long screed board
- Rubber mallet
- Stiff-bristle push broom (for sweeping in joint sand)
- Garden hose with gentle spray nozzle (for activating polymeric sand)
- Marking paint or chalk line
- Hand tamper (for tight spots the plate compactor can't reach)
Matching your brick and pattern
This is the step most homeowners underestimate. Brick color, texture, and size vary between manufacturers and between production runs from the same manufacturer. A 'red brick paver' from Home Depot today will likely not match the red brick paver laid five years ago. Start by pulling one brick from an inconspicuous edge of the existing patio and taking it to masonry suppliers, not just big-box stores. Independent masonry suppliers carry a much wider range of regional brick and are more likely to help you identify what you have.
Check the back of a paver for any manufacturer stamp, it may be faint, but names like Pine Hall Brick, Pavestone, or Belgard give you a starting point. Match not just color but also nominal size (standard modular brick pavers are commonly 3 5/8" x 7 5/8" x 2 1/4" or 4" x 8" nominal), thickness, and surface texture. A slightly different brick is nearly unavoidable with older patios, but you can blend them to minimize the mismatch.
Aging and blending techniques
- Mix old bricks from inconspicuous interior areas into the most visible part of the extension, and put the new bricks in the lower-visibility interior of the existing patio.
- Scatter new bricks randomly through the existing pattern rather than grouping them in one block — this avoids a visible seam.
- Weather new brick by leaving it outside exposed to sun and rain for 2–4 weeks before laying; this dulls the color slightly and allows algae to begin.
- Apply a diluted iron sulfate solution (ferrous sulfate) to new brick to age the color — test on a scrap piece first as results vary by brick type.
- Brush clean sand or soil lightly over new bricks and leave for a week before rinsing; this helps tone down the stark new color.
Reproducing the pattern
Photograph your existing pattern from directly above (stand on a ladder if needed) before you start. Common patterns are running bond (offset rows, like a standard wall), herringbone (45-degree or 90-degree interlocking V-shapes), basketweave (pairs of bricks alternating direction), and stack bond (grid). Herringbone is the most structurally stable for patios and the most forgiving when blending two brick colors. Running bond is the easiest to extend because each row is predictable. Whatever your pattern, extend the layout lines of the existing pattern into the new area before you lay a single brick.
Sand-set vs mortar-set vs full replacement, choosing your method
Your existing patio's construction largely determines which method you should use for the extension. Mixing construction methods between old and new sections creates a visible and structural seam. Match what you have whenever possible.
| Method | Best for | Pros | Cons | Longevity |
|---|---|---|---|---|
| Sand-set (flexible) | Existing sand-set patios; most common residential DIY | Lower cost, easier DIY repairs, accommodates minor ground movement, can be permeable | Requires periodic joint sand replenishment, more weeding, edges must be restrained | 20–30+ years with maintenance |
| Mortar-set on slab | Existing mortar-set patios; areas with heavy foot traffic or furniture | Permanent, low ongoing maintenance, resists point loads and edge shift | Much harder and costlier to repair if it cracks; requires concrete base under extension | 25–40 years if base is solid |
| Full replacement | When existing patio has failed base, widespread settling, or drainage problems | Solves root problems rather than building on a failed base | Highest cost and labor; typically 2–3x the effort of an extension alone | Matches new construction lifespan |
My recommendation: if your existing patio is sand-set and in good shape, extend it with sand-set. It's the most forgiving method for DIY work and the easiest to repair later. For a concise comparison of sand‑set (flexible) and mortar‑set (bonded/rigid) methods, including differences in initial cost, repairability, movement accommodation, permeability, and maintenance, see blank" rel="noopener noreferrer">Masonry Magazine / Brick Paver Installation Methods (comparison of sand‑set, bituminous and mortar‑set). If you're unsure whether your existing patio is sand-set or mortar-set, pry up a brick at the edge. If it lifts clean with a flat bar and sits on sand, it's flexible. If it's bonded solid and resists, it's mortar-set on a slab. If the existing patio has serious issues, widespread settling, crumbling base, drainage failure, consider relaying or replacing that section before extending. Building new onto a bad base guarantees the same failure in both areas.
Permits, utilities, and site logistics
Call 811 at least three business days before you dig. This is not optional, it's the law in every U.S. state, and it's free. A locating crew will come out and mark buried utilities with color-coded paint or flags. Even a shallow 6-inch excavation can hit a buried irrigation line or low-voltage landscape wire. Surprises underground will derail your project and can be dangerous.
For permits, look up your local municipality's building department website directly, rules vary widely. General trigger points to research: total new patio area (some jurisdictions exempt patios under 200–500 sq ft), proximity to property lines (setback requirements commonly range from 3 to 10 feet), any structure added over the patio area (a pergola, awning, or cover attached to the house almost always requires a permit), and whether the work is attached to a dwelling foundation. If you plan to add a pergola to the new extension area, look into those requirements before you finalize the extension footprint, since the support post locations affect your layout.
Check with your HOA if you have one. Many HOAs have rules about patio materials, color, and maximum coverage of the yard. Get written approval before you order materials, some HOAs require submission of a simple sketch. Site logistics matter too: figure out where the delivery truck will drop aggregate and sand (heavy materials come by the ton; a full pallet of bricks can weigh 1,500–3,000 lbs), and protect existing lawn areas with plywood sheets when moving material.
Planning and measurements, step by step
Solid planning on paper prevents expensive mistakes in the ground. Spend an hour on this before you touch a shovel.
- Sketch the existing patio to scale on graph paper or a simple drawing app. Use measurements from your earlier assessment. Mark the house wall, any doors, steps, and obstacles.
- Draw the extension footprint. Keep proportions that look intentional — extending one side of a square patio to create an L-shape, for example, or adding a straight-out extension for a dining area. Odd, irregular shapes are harder to pattern-match and require more cuts.
- Mark the cutlines where new and old pavers will meet. If you're extending along one edge, the cutline is the outer edge of the last row of existing bricks. Mark this line in the field with chalk or marking paint.
- Set your slope. Measure from the house to the far edge of the proposed extension. Multiply that total length (in feet) by 0.125 (1/8" per foot) to get the minimum height difference required for drainage. Example: a 12-foot extension needs at least 1.5 inches of slope across its depth. The high end is closest to the house.
- Calculate materials from your measurements. Extension length x width = square footage of brick. Multiply that by depth (in feet) of base and bedding layers to get cubic feet of each material, then divide by 27 for cubic yards. Add 10–15% overage on everything.
- Order materials 1–2 weeks before your planned start date, especially matching brick. Confirm with the supplier that your order comes from the same production lot if possible.
Site preparation, excavation and grade work
This is the most physically demanding part of the job and the most important to get right. A bad base causes every problem you'll ever have with a brick patio: sinking, heaving, standing water, rocking bricks. Take your time here.
- Mark the extension perimeter with stakes and string lines. Use batter boards set back 12 inches from the edge so you can remove and replace string lines without losing your marks. Double-check corners with the 3-4-5 method (measure 3 ft along one side, 4 ft along the other, and the diagonal should be exactly 5 ft for a true right angle).
- Call 811 to confirm all utilities are marked. Do not skip this step.
- Excavate to the correct depth. For a sand-set pedestrian patio: dig down to accommodate 4–6 inches of compacted aggregate base, plus 1 inch of bedding sand, plus the brick thickness (typically 2 1/4" to 2 3/8"). Total excavation is usually 7.5–9.5 inches below finished grade. For a mortar-set extension: you'll need a concrete sub-slab first, which adds depth and complexity.
- Slope the excavation floor away from the house as you dig. Use a level and a measuring tape to verify slope as you go. The bottom of your excavation should have the same slope as the finished surface.
- Compact the subgrade (the raw dirt at the bottom) with the plate compactor before adding any base material. Make at least 4–6 passes. If the soil is loose, dry, or sandy, wet it slightly before compacting.
- Lay geotextile landscape fabric over the compacted subgrade. Overlap seams by at least 12 inches. This keeps the aggregate base from mixing down into the soil over time, which is what causes patios to sink.
- Add aggregate base in two layers if possible (pour half, compact, pour second half, compact). Total compacted depth should be 4–6 inches. Make 4–6 compactor passes per layer. The base should feel rock-solid when you walk on it with no give.
- Install edge restraints on all sides of the extension that won't be bordered by the house or existing hardscape. Drive 10-inch landscape spikes through the restraint holes at 12 inches on center. Restraints must be flush with or slightly below the finished brick surface.
- Screed the bedding sand layer to 3/4–1 inch thick using two screed pipes set at the correct height as guides. Pull a long, straight screed board across the pipes. Do not compact the sand layer — it's meant to be a loose, leveling bed. Avoid walking on screeded sand before laying bricks.
- Check slope one final time with a level before laying any brick. Correct it now; it's nearly impossible to fix after the bricks are down.
Excavation and prep checklist
- Perimeter marked with stakes and string lines; corners verified square
- 811 call completed and utilities marked
- Excavation depth correct for chosen construction method
- Excavation floor sloped away from house at minimum 1/8" per foot
- Subgrade compacted (4–6 plate compactor passes)
- Geotextile fabric laid with 12" overlapping seams
- Aggregate base added and compacted in two lifts to 4–6" total
- Base feels firm with zero give underfoot
- Edge restraints installed and spiked at 12" O.C.
- Bedding sand screeded to 3/4"–1" depth
- Final slope verified before any brick is laid
Laying the bricks
Start laying from the corner where the new extension meets the existing patio. This anchors the pattern to what's already there. Work outward from that reference corner rather than from the open edges. Set each brick by placing it flat on the sand and pressing it down firmly by hand, then tapping it level with a rubber mallet. Don't slide bricks into position, set them straight down. Sliding disturbs the sand layer and creates uneven bedding.
Keep joint widths consistent. For sand-set installations, typical joints are 1/16 to 3/16 inch (2–5 mm). You can use tile spacers or simply maintain consistent spacing by eye, the bricks themselves will guide spacing if they're the same size. Check your pattern alignment every 4–5 rows with a string line. Small errors compound quickly across a large extension, and it's far easier to correct a half-inch drift in row 5 than a 2-inch drift in row 20.
Cutting bricks
You'll need cuts wherever the extension meets a curved or angled edge, around obstacles, and along the perimeter. Always use a wet masonry saw with a diamond blade. Cutting dry, with an angle grinder or a dry chisel, releases respirable crystalline silica dust, which causes serious lung disease with repeated exposure. OSHA's construction silica standard (29 CFR 1926.1153) specifically requires engineering controls like wet cutting for masonry work. Wet cutting also produces cleaner, more accurate cuts and extends blade life significantly. Wear a P100 or N100 respirator even with a wet saw, and work in a ventilated area.
Compacting, jointing, and sealing
Once all bricks are laid, the extension needs to be compacted and jointed before it's finished. Use the plate compactor with a rubber compactor mat (a neoprene or rubber pad that attaches to the plate) to avoid chipping or abrading the brick surface. Make at least 4–6 passes across the entire extension, overlapping each pass. This seats the bricks firmly into the bedding sand and brings the surface to final grade.
After the first round of compaction, sweep dry polymeric joint sand across the surface and into all joints using a stiff push broom. Polymeric sand contains a binder that hardens when wet, locking the joints against weeds, ants, and erosion. After sweeping, compact again (4–6 passes) to vibrate the sand deep into the joints. Sweep in a second round of sand to top up any joints that settled during compaction. Use a leaf blower on low to clear surface residue from the brick faces before wetting. Then activate the polymeric sand with a fine mist from a garden hose, you want the surface damp, not flooded. Follow the manufacturer's curing instructions; most products (like Techniseal SmartSand) require 24 hours of dry weather after activation to set properly.
Sealing is optional but worthwhile in climates with freeze-thaw cycles or heavy staining potential. A penetrating brick sealer (not a film-forming topcoat) lets moisture vapor escape while protecting against oil, dirt, and surface erosion. Apply sealer only after the patio is fully cured and dry, at least 30 days after laying for a new installation. Sealing too early traps moisture and can cause spalling in cold weather.
Drainage and transition details
The transition between old patio and new extension is a common failure point. If the new section sits even 1/4 inch higher or lower than the existing patio at the seam, you'll feel it every time you walk over it and water will pool or divert unpredictably. Spend extra time verifying the finished surface height at the seam before you compact. Edge restraints are required to prevent lateral migration of pavers; typical plans (see VTrans / Project plan (paver edge restraint notes: 'COMMON LANDSCAPE SPIKE EVERY 1' O.C.')) show plastic, aluminum, or steel restraints anchored with landscape spikes at about 12 inches on center VTrans / Project plan (paver edge restraint notes: 'COMMON LANDSCAPE SPIKE EVERY 1' O.C.). If the old patio has settled slightly lower over the years, you may need to reset a row of existing bricks at the edge to create a smooth transition.
Also think about where the drainage goes after the new extension. If your extension is larger than the original patio, more runoff will flow off the far edge. Make sure that edge drains to lawn, a gravel strip, or a swale, not toward a fence, neighbor's property, or your foundation. If the extension flows toward a low spot in the yard, consider installing a simple channel drain at the far edge to collect and redirect that water before it becomes a problem.
Time and cost estimates
Be realistic about how long this takes. A 100 sq ft sand-set extension on good soil is a 2-weekend project for one person, or a single weekend with a helper. A 200 sq ft extension is closer to 3 weekends solo. Add time if you're matching a complex pattern like herringbone or dealing with difficult soil.
| Item | Estimated Cost (100 sq ft extension) | Notes |
|---|---|---|
| Brick pavers (matching) | $150–$400 | Wide range based on brick type; reclaimed brick costs more |
| Aggregate base (5" depth) | $60–$100 | Delivered by the ton; verify local pricing |
| Bedding sand (1" depth) | $20–$40 | Coarse washed concrete sand |
| Geotextile fabric | $15–$30 | Non-woven, 4 oz or heavier |
| Polymeric joint sand | $30–$60 | Roughly 2–3 bags for 100 sq ft |
| Edge restraint + spikes | $30–$60 | Aluminum or HDPE with 10" spikes |
| Plate compactor rental | $60–$100 per day | Rent for a weekend if needed |
| Wet masonry saw rental | $50–$80 per day | Or $20–$40/day for a small tile saw |
| Miscellaneous (stakes, string, tools) | $20–$40 | |
| Total DIY estimate | $435–$910 | Excludes permit fees and any slab work for mortar-set |
Hiring a contractor for the same 100 sq ft sand-set extension typically runs $1,200–$2,500 depending on region, brick cost, and site conditions. The DIY savings are real, but so is the time investment. If your extension is larger, more complex, or requires significant grading work, the contractor quote becomes more competitive when you factor in equipment rental and your own labor hours.
Troubleshooting common problems
Even a well-executed extension can develop problems. Here's what to look for and what it means:
- Bricks sinking or settling unevenly in the first year: almost always a base compaction problem. The aggregate base wasn't compacted adequately, or the subgrade was soft. Pull up the affected bricks, add and compact more base material, and relay. It's annoying, but sand-set lets you fix it without major demolition.
- Bricks heaving up in winter: frost heave from water in the base or subgrade freezing and expanding. Usually means the base doesn't drain well or the bedding sand was too thick. Check that the aggregate base has good drainage and that geotextile is present under it.
- Joint sand washing out or disappearing: the sand wasn't polymeric, or the polymeric sand wasn't properly activated (flooded too hard rather than misted, or rained on within 24 hours of activation). Re-sweep and reactivate on a dry day.
- Visible seam between old and new sections: either the brick doesn't match well enough or the pattern wasn't properly aligned before laying. If the seam is structural (a height difference), reset the edge row. If it's just color, the aging techniques above can help over time.
- Water pooling on the new extension: the slope was either set incorrectly or the bricks have settled and created a low spot. Identify the exact low point, pull those bricks, add a small amount of bedding sand, and relay.
- Edge restraints pulling out: the spikes were too short or spaced too far apart. Re-drive 10-inch spikes at 12-inch intervals; use concrete anchors if the soil is very loose.
Related projects to plan for now
If you're adding footprint to your patio, now is the time to think about what comes next. If you're considering a different surface, see how to tile over a brick patio for steps and considerations before covering existing pavers. Adding a pergola over the extended area, for example, is much easier before the bricks are laid, post footings need to be dug to proper depth, and concrete footings need to cure. Trying to add post footings after the patio is finished means pulling up bricks, digging, pouring, and relaying, which is a lot of extra work.
If the existing brick surface isn't what you want long-term but the structure is sound, covering or tiling over brick is a viable option, though it adds height and requires careful attention to drainage and transitions. Similarly, if sections of your existing patio failed rather than just being undersized, you may need to relay specific areas before extending. In extreme cases where the base has failed across most of the original patio, a full replacement followed by a correctly sized new installation makes more sense than patching and extending a compromised structure. If a full replacement is needed, see our step-by-step guide on how to replace a brick patio.
The key takeaway: plan the full picture before you start work on any single piece of it. A pergola footprint, a future outdoor kitchen, a change in surface material, all of these affect how you size the extension, where you put edge restraints, and how you manage drainage. Make the decisions on paper first, because undoing work in brick and compacted aggregate is always harder than planning it right the first time.
FAQ
What are the high-level steps to extend an existing brick patio successfully as a DIY homeowner?
1) Measure the existing patio and decide new footprint; sketch to scale and mark utilities. 2) Match brick type, color, size and pattern; source reclaimed/extra bricks or order matching units. 3) Check slope/drainage and plan to maintain or improve it (minimum 1/8" per ft recommended; 1/4" per ft if you need faster runoff). 4) Excavate new area to depth required for base + bedding (usually 4–6" compacted crushed aggregate + 3/4"–1" bedding sand for pedestrian patios). 5) Install geotextile (optional), compacted base, and edge restraint anchored to the existing patio. 6) Lay bricks to match pattern, cut as needed with wet saw, maintain joint width. 7) Compact with a plate compactor using a rubber mat over bricks, sweep/polymeric or joint sand into joints and compact again. 8) Seal if desired and confirm drainage/transition to existing patio. 9) Clean up and let jointing material cure per manufacturer guidance.
How do I plan and measure before I start?
Measure existing patio length/width and note pattern orientation and joint widths. Decide new dimensions and draw a to-scale plan showing: existing patio, new area, slope direction, nearby downspouts, and hard edges. Mark underground utilities (call 811 in the U.S.). Calculate square footage to estimate materials: pavers, base aggregate, bedding sand and joint sand. Allow 5–10% extra pavers for cuts and waste.
How can I match existing bricks and patterns?
First try to locate leftover bricks from the original build or contact the original supplier. If unavailable, look for reclaimed bricks or a close modern match by size, face finish and color. Test-lay sample courses next to the patio to compare. Match bond pattern (running bond, herringbone, basketweave, etc.), joint width and mortar type (sand-set vs mortar-set). If exact color match is impossible, plan a transition band (one or two soldier courses or a contrasting border) to blend the old and new visually.
Which method should I use: sand-set (flexible) or mortar-set (rigid)? When is each best?
Sand-set (flexible): Best for patios that need easier future repairs, slight movement tolerance, and potentially permeable surfaces. Pros: lower initial cost, easier repairs. Cons: needs periodic joint replenishment, can allow weeds, edge failures if restraint is inadequate. Mortar-set (rigid): Best for areas needing a permanent, low-maintenance surface, heavy point loads, or where you want a seamless look. Pros: durable, fewer weeds. Cons: harder/expensive to repair, higher skill required. Use mortar-set to bond new to old when matching a mortar joint profile exactly; use sand-set if the existing patio is sand-set and you want consistent maintenance and repair approach.
What excavation, base and bedding depths do I need?
For a pedestrian patio extension: excavate to allow for 4–6" of compacted crushed-aggregate base plus about 3/4"–1" of screeded bedding sand (final paver surface should match existing). For heavier loads (occasional vehicle use) increase base to 6+ inches and consider a stabilized base or geogrid. Depth is measured from desired finished top surface down: remove topsoil and organic matter and achieve planned slope (minimum 1/8"/ft). Compact subgrade before placing geotextile or base.
Do I need geotextile fabric or geogrid under the base?
Geotextile separated under the base is recommended if the subgrade is fine-grained or wet, as it reduces intermixing and improves long-term drainage; geogrid is useful on weaker soils to stabilize the base. Both add cost but improve durability—use them when drainage or subgrade stability is a concern.
Next Article
How to Attach Pergola to Brick Patio: DIY Footing Steps & Tips
Step-by-step guide to securely attach a pergola to brick patios: assess patio type, pick mounts, dig footings, weather‑t