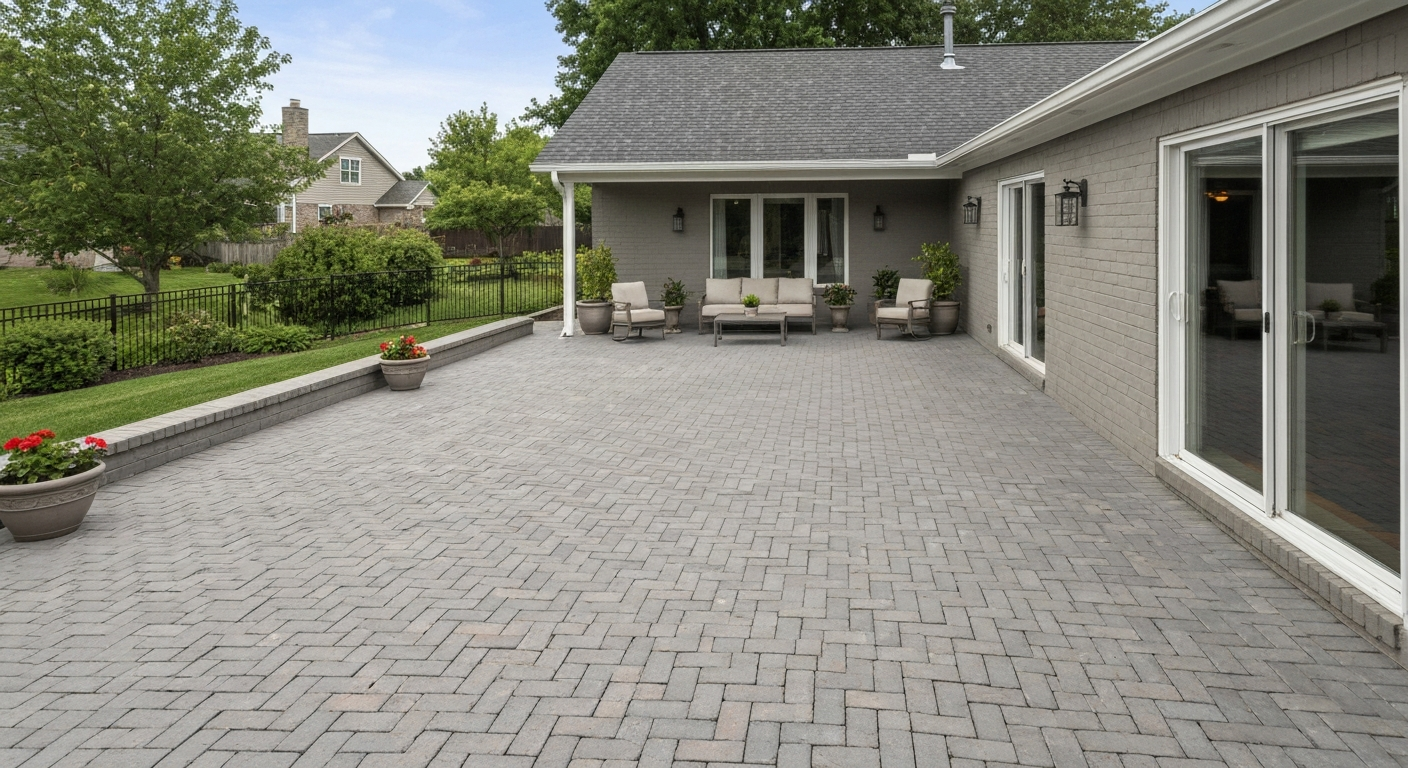
Replacing a brick patio is a full weekend project at minimum, and realistically a two- to three-day job for most homeowners tackling an average 200–400 sq ft space. You'll demolish and haul the old bricks and base, correct whatever caused the original failure (almost always drainage or a bad base), rebuild from the ground up, and relay the surface. Done right, a rebuilt patio lasts 25 to 50 years or more. Done wrong the same way the last one was, you'll be pulling bricks again in five years. This guide walks you through every stage, including how to decide whether a full replacement is even necessary.
How to Replace a Brick Patio: Complete DIY Guide & Costs

Talia Lang
24 Jul 2026
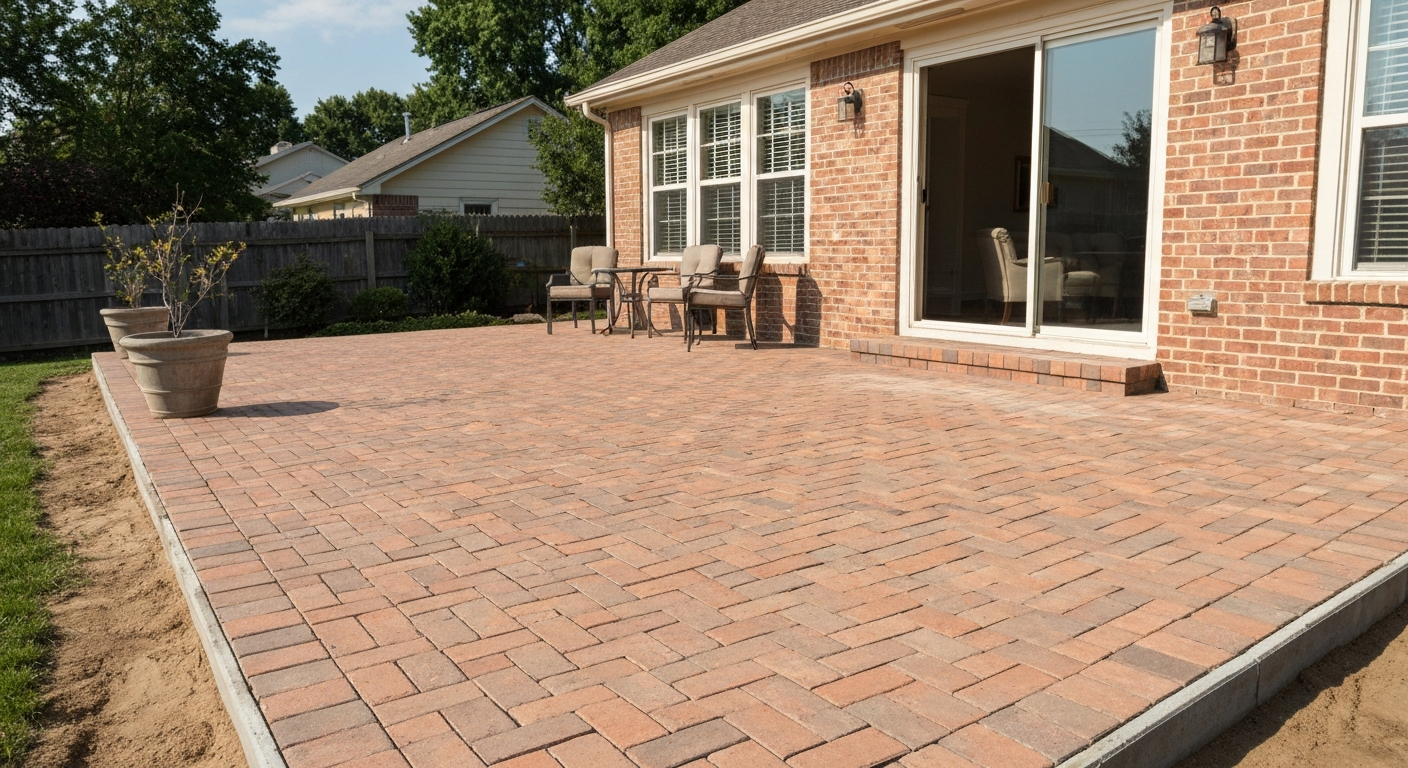
Is full replacement actually what you need?
Before you rent a dumpster, it's worth being honest about what's actually wrong. A lot of patios get ripped out when a few targeted repairs would have done the job. The deciding factor is almost always the base, not the bricks themselves.
If you have a handful of rocking, sunken, or cracked bricks in one area and the rest of the patio is solid and level, that's a localized failure. A lift-and-reset repair, pulling those specific bricks, correcting the base underneath, and relaying them, is the right call. It's cheap, fast, and effective when the base is otherwise sound.
Full replacement makes sense when the failure is widespread, keeps recurring in multiple spots, or was clearly caused by a bad base. Specific triggers include pervasive drainage problems (water pools on or under the patio), base contamination from organic material or fine soil that got mixed into the gravel, extensive root intrusion, or repeated freeze-thaw heaving across the whole surface. If you've already reset pavers twice and they sink again, the base is the problem and no amount of surface-level repair will fix it.
Quick decision guide: relay, fully replace, cover, or tile over
There are four real options when your brick patio is failing. Each one suits a different situation, and picking the wrong one wastes money or just delays the same failure. If you're considering covering rather than replacing, see our step-by-step guide on how to tile over brick patio for a durable cover option.
| Option | Best when | Pros | Cons | Rough cost (DIY materials) |
|---|---|---|---|---|
| Relay (lift and reset) | Damage is localized, base is solid | Cheap, fast, reuses existing bricks | Doesn't fix underlying drainage or base issues | $50–$300 |
| Full replacement | Base has failed, drainage is wrong, widespread heaving or settling | Fixes the root cause, full service life reset | Most labor-intensive and expensive | $800–$4,000+ |
| Cover with pavers or overlay | Surface is ugly but structurally stable | Avoids full demo, fresh look quickly | Adds height, may cause water/threshold issues | $500–$2,500 |
| Tile over | Existing surface is flat and stable, indoor-outdoor aesthetic desired | Clean finish, relatively fast | Requires stable substrate, mortar work, frost risk in cold climates | $600–$2,500 |
Relaying is covered in detail in a companion guide on how to relay a brick patio, and covering or tiling are each worth their own deep dives if those routes suit your situation better. This article focuses on full replacement, which is the most involved option and the one most people get wrong.
Pre-project checklist and site assessment
Don't buy a single thing or rent any equipment until you've done a proper site assessment. Skipping this step is how people end up with the wrong amount of base material, no permit when they needed one, or a perfectly rebuilt patio that drains toward the house.
Measure the patio and calculate quantities
Measure length and width in feet and multiply to get square footage. For irregular shapes, break the area into rectangles, calculate each, and add them together. Add 5–10% overage to your brick count for cuts and breakage. Write down the result before you go anywhere near a hardware store.
Check the existing grading
Use a long level and a tape measure to check slope across the patio. The finished surface needs to fall away from your house at a minimum of 1 inch per 8 feet (about 1%), though 1.5–2% is better and what most installers actually aim for. If the existing patio slopes toward the house or is flat, that's likely a major contributor to whatever failure you're dealing with, and you'll correct it during the rebuild.
Probe the base
At the perimeter of the patio, dig down alongside a brick to see what's underneath. You're looking for the type and thickness of base material. A properly installed residential patio has at least 4 inches of compacted crushed aggregate base (gravel), topped by about 1 inch of bedding sand, and then the bricks. If you find only sand, soft soil, decomposed organic material, or less than 3 inches of gravel, the base was never right and the whole thing needs to come out.
Check for tree roots
Look for surface lifting near trees or large shrubs. If roots are under the patio, you'll need to cut them during demo and consider a root barrier on reinstall. In severe cases, roots will return and lift again, worth knowing before you rebuild the same thing in the same spot.
Determine local frost depth
In cold climates, the frost depth in your area affects how thick your base needs to be. In warm climates with no freeze-thaw cycles, 4 inches of compacted gravel base is typically sufficient for a pedestrian patio. In areas with deep frost, some installers increase base depth to 6 or even 8 inches to reduce heaving. Check your local building department or ICPI resources for your region's guidance.
Call 811 before you dig
This is not optional. In the U.S., call 811 at least two to three business days before any excavation. The one-call center will dispatch utility companies to mark underground gas, electric, water, and communications lines on your property. Even a shallow patio excavation can hit a line, and striking a gas or power line is genuinely dangerous. If you have private utilities (irrigation lines, low-voltage lighting, etc.) that won't be marked by the public system, locate and flag those yourself before you start.
Permits
A simple patio replacement at-grade usually doesn't require a permit in most jurisdictions, but don't assume. If you're changing the footprint, adding drainage structures, or the project is tied to another structure, call your local building department to ask directly. If you're planning to anchor a pergola to the rebuilt patio, that almost certainly triggers a permit requirement under local code and the International Residential Code, especially when footings are involved. Sort this out before you start, not after the inspector shows up.
Tools and materials: what you actually need
Tools
Some of these you probably own. Others are worth renting rather than buying, especially the plate compactor, which you'll use intensively but only for one or two days.
| Tool | Buy or rent | Notes |
|---|---|---|
| Plate compactor | Rent | Essential for base compaction; typically $60–$100/day |
| Brick splitter / guillotine | Rent | Much faster than cutting by hand for straight cuts; ~$50/day |
| Angle grinder with diamond blade | Rent or buy | Needed for curved or notched cuts; own if you do other masonry work |
| Pry bar and flat spade | Buy (own) | For lifting bricks during demo |
| Wheelbarrow | Buy or borrow | You'll move a lot of material |
| Screeding rail and screed board | Buy (inexpensive) | For leveling bedding sand |
| Rubber mallet | Buy | For seating bricks without cracking them |
| Long level (4 ft or 6 ft) | Buy or borrow | For checking slope and flatness |
| Line level and mason's string | Buy (cheap) | For setting grade across the whole area |
| Tape measure, chalk line | Own | Standard layout tools |
| Stiff broom | Own | For sweeping joint sand |
| Garden hose with spray nozzle | Own | For activating polymeric sand |
| Safety glasses, gloves, knee pads, steel-toe boots | Own | Non-negotiable PPE |
Materials
For a 200 sq ft patio as a baseline example, here's what you're typically ordering. Scale proportionally for your actual square footage.
- Bricks or pavers: 200 sq ft + 10% overage = roughly 220 sq ft worth; brick coverage varies by size (standard 4x8 brick lays about 4.5 per sq ft)
- Crushed stone aggregate base (3/4 in compacted gravel or ASTM #57 stone): for 4 in depth over 200 sq ft, approximately 2.5 cubic yards; order 10% extra
- Coarse concrete sand for bedding (ASTM C33 or equivalent): 1 in depth over 200 sq ft is roughly 0.6 cubic yards
- Polymeric jointing sand: one 50 lb bag covers approximately 30–50 sq ft depending on joint width and brick thickness; calculate accordingly
- Edge restraints: enough linear feet to cover all exposed patio edges, plus manufacturer-specified spikes/stakes
- Landscape fabric (optional): for base layer if organic soil is a concern — keeps fine soil from migrating up into the gravel
- Paver sealer (optional): applied after jointing sand cures; one gallon typically covers 100–200 sq ft depending on porosity
On sand: do not use stone dust (crusher fines) as bedding sand. This is a common mistake. Stone dust compacts so tightly when wet that it causes pavers to heave and is nearly impossible to re-level. Use ASTM-grade concrete sand (coarse, washed, and well-graded) for the 1-inch bedding layer. The same applies to jointing sand, you can use properly graded sand or polymeric sand, but not stone dust.
Safety precautions and jobsite setup
Brick demo and base work are physically demanding and carry real injury risks. This isn't a project where you can cut corners on safety and shake it off.
- Wear safety glasses at all times during demo and cutting — brick chips and gravel travel fast
- Wear steel-toed boots; a dropped brick on an unprotected foot is a trip to urgent care
- Use knee pads throughout; you'll spend hours on your knees laying bricks and sweeping sand
- Wear a dust mask (N95 minimum) when cutting bricks with an angle grinder or during base prep in dry conditions
- Gloves for handling bricks — rough edges cause lacerations and older bricks can have abrasive silica-containing dust
- If using a plate compactor, keep feet clear and be aware of vibration fatigue — take breaks every 20–30 minutes
- Never work underneath an unsupported stack of bricks or unstable piles
- Keep children and pets off the work area entirely; loose bricks, tools, and open excavations are serious hazards
On jobsite setup: before starting demo, protect any adjacent planting beds, lawn edges, or hardscape surfaces with plywood or cardboard sheeting. Set up your dumpster or debris staging area as close to the work site as possible to minimize hauling distance. If you're working on a shared driveway or near property lines, give your neighbors a heads up, dust, noise, and blocked access are all real considerations over a multi-day project.
Realistic time and cost estimates
I want to be straight with you here: most articles underestimate how long this takes. Demo is faster than you think, but base prep and precise laying take much longer than beginners expect.
| Patio size | DIY time (2 people) | DIY material cost (approx.) | Pro labor + materials (approx.) |
|---|---|---|---|
| 100 sq ft | 1.5–2 days | $400–$900 | $1,500–$2,800 |
| 200 sq ft | 2–3 days | $700–$1,800 | $2,800–$5,000 |
| 400 sq ft | 4–5 days | $1,300–$3,500 | $5,000–$9,500 |
| 600+ sq ft | 6–8+ days | $2,000–$5,500+ | $8,000–$15,000+ |
Material costs vary significantly by region and brick choice. Basic concrete pavers run $2–$5 per sq ft; clay brick pavers are typically $4–$10 per sq ft; natural stone can be $10–$30+ per sq ft. The base materials (gravel, sand) are relatively cheap but delivery charges add up, especially for smaller quantities. Renting a plate compactor adds $60–$100/day, and dumpster rental typically runs $250–$500 depending on size and location.
Be honest with yourself about skill level. A 400 sq ft replacement with complex drainage corrections, curved edges, or tight cuts around obstacles is a genuine contractor job. Where I'd say hire a pro: when the patio drains toward the house and you're not confident about regrading, when you're dealing with expansive clay soil and need engineered base design, or when the project is attached to a structure and requires permitted work.
Preparing the site before demo starts
Good site prep makes the actual work faster and protects everything around the work zone. This stage takes a few hours but saves you a lot of headaches.
- Mark the patio perimeter clearly with spray paint or chalk — this is your working boundary and helps when setting new edge restraints later
- Remove all furniture, planters, and outdoor lighting from the area
- Clear vegetation along the edges: cut back any ground cover, grass, or plants that have crept onto the patio surface; dig out roots that extend under the brick zone
- Protect adjacent lawn or garden areas with plywood sheets laid flat — plate compactor and wheelbarrow traffic will destroy grass and mulch
- If there's a door threshold or step adjacent to the patio, measure its height relative to the patio surface and note it — you'll need to match or account for that height on the rebuild
- Locate your debris staging area: set up the dumpster or mark where you'll stack salvaged bricks
- Flag or mark any utility lines that were painted by the 811 service — give yourself a visual buffer of at least 18 inches around painted marks when excavating
Step-by-step removal: demo, disposal, and what to save
Step 1: Remove edge restraints and perimeter bricks first
Start at one edge and work inward. If there are plastic or metal edge restraints, pry up the stakes and remove them. Perimeter bricks are often more tightly locked than interior ones, so use a flat pry bar to break the first few loose. Once you have a starting gap, the rest come up much faster.
Step 2: Pull bricks systematically
Work in rows, not randomly. Slide a flat spade or brick pry bar under each brick and lever it up. Trying to just grab and yank often breaks bricks you might want to reuse. Keep a separate pile for bricks you're salvaging and a pile for disposal.
Step 3: Decide what to salvage
Clay fired bricks in good condition are genuinely worth keeping, they're durable and can last 50 to 100 years if the failure was a base issue and not a brick quality issue. See How Much Does a Paver Patio Cost? (HomeAdvisor), lifespan discussion, which notes concrete pavers typically last 25–50+ years while high‑quality clay and natural stone often persist 50–100+ years, and that base and drainage quality primarily determine service life How Much Does a Paver Patio Cost? (HomeAdvisor) — lifespan discussion. Concrete pavers that are spalled, cracked, or badly stained are generally not worth relaying. Sort as you go and be realistic: a brick with a chip on the corner can be used as an interior piece where the chip won't show; a brick cracked through its full thickness is waste.
Step 4: Remove the bedding sand and base material
Once bricks are up, the bedding sand comes out with flat shovels into the wheelbarrow. Then excavate the base gravel. If the base was contaminated with fine soil or organic material (you'll know by the color and texture, it won't look like clean crushed stone), all of it has to come out. Don't try to reuse contaminated base. If the gravel base is clean and well-compacted, you may be able to reuse it with some additions and a fresh compaction pass, but be conservative, the cost difference in fresh gravel is usually not worth gambling the rebuild on.
Step 5: Excavate to correct depth
Your target excavation depth is: brick thickness (typically 2.25 to 3.5 inches for standard pavers/bricks) + 1 inch bedding sand + 4 inches compacted aggregate base = roughly 7.25 to 8.5 inches below finished grade. In cold climates or poor soils, increase base depth to 6 inches. Dig slightly deeper than needed, it's easier to bring the grade up than to remove more material after the fact. Check for soft spots in the subgrade (the native soil beneath the base). Any soft, spongy, or organic soil needs to be removed and replaced with compactable fill.
Step 6: Cut and remove roots
If you find tree roots under the patio, cut them cleanly with a handsaw or reciprocating saw and remove them. Do not grind them in place, they'll continue to decompose and create voids. If the roots are major structural roots from a large tree close to the patio, be careful about how much you remove, cutting too many structural roots can destabilize a tree. In that case, it's worth a conversation with an arborist before you proceed.
Step 7: Dispose of debris responsibly
Concrete and brick can often be recycled. Many concrete recycling facilities accept clean brick and concrete rubble for crushing into aggregate. Call local recycling or demolition facilities before sending everything to landfill. For smaller amounts, check if your municipality offers construction debris drop-off days. If you're hiring a dumpster, ask the company whether they separate and recycle concrete, some do, some don't.
Rebuilding: base prep, drainage, and laying the new surface
Compact the subgrade
Once you've excavated to depth, compact the native soil with the plate compactor before adding any base material. Make two to three passes in perpendicular directions. The target is approximately 95% Standard Proctor compaction (ASTM D698), which in practice means no visible movement or sinking under the machine. If you hit areas that won't firm up, add compactable fill (not topsoil) and compact in layers.
Address drainage before adding base
This is the most important step that most DIYers rush past. Set string lines across the subgrade to verify your slope runs away from the house at 1–2%. Correct the subgrade grade now, not after the base is in. If drainage is a chronic problem, this is also when to install a French drain or channel drain at the low edge of the patio before you build up. Trying to retrofit drainage after the patio is rebuilt is extremely difficult.
Install and compact the aggregate base
Add crushed stone base in lifts no deeper than 3–4 inches, compacting each lift before adding the next. For a 4-inch final depth, that means two lifts. For 6 inches, do three. Compact each lift with two to three passes of the plate compactor, working in a grid pattern. After compaction, the top of the base should be firm and not shift underfoot. The base surface should mirror the intended slope of the finished patio.
Install edge restraints before laying bricks
Set your edge restraints on all open sides of the patio before you screed sand or lay a single brick. This is non-negotiable for sand-set installations, pavers laid without edge restraints will creep and spread over time, opening joints and destabilizing the surface. Plastic edging is the most common for residential use: stake it into the compacted base per manufacturer instructions, keeping it flush with the intended finished brick height. Concrete edging or cast-in-place curbs are more durable but require more effort to set.
Screed the bedding sand
Add 1 inch of concrete sand (not stone dust) over the compacted base. Set two screed rails at the target height and drag a straight board (a screed board) across them to create a perfectly flat, 1-inch-deep sand bed. Remove the rails and fill those channels with sand by hand. Do not walk on the screeded sand or disturb it before laying bricks. If you compact the sand before laying, it defeats the purpose. The plate compactor comes back after bricks are in.
Lay the bricks
Start from a straight edge, usually the house wall or a string line, and work outward. Press each brick into the sand bed and tap it down with a rubber mallet. Keep joints consistent (typically 1/8 to 3/16 inch for concrete pavers; clay bricks are often laid tight). Check your surface level and slope frequently with the long level. Don't try to correct individual bricks by adding sand under them after the fact, if a brick is low, pull it up, add a pinch of sand, and reset it properly.
Cutting bricks
Measure and mark cuts carefully. A brick splitter (guillotine cutter) handles straight cuts quickly and cleanly without dust. An angle grinder with a diamond blade handles curves and notched cuts but produces fine silica dust, always wear an N95 respirator and eye protection when cutting with a grinder. Make cuts on a stable surface away from the sand bed, and always cut the brick before setting it in place.
Compact the finished surface
Once all bricks are laid, make two to three passes with the plate compactor (use a rubber pad or compactor plate protector to avoid cracking bricks). This seats each brick firmly into the sand bed and levels minor height variations.
Fill joints with polymeric sand
Sweep polymeric sand into all joints using a stiff broom. Make two or three passes, sweeping in different directions. Compact again lightly (one pass) to settle sand deep into joints. Sweep again. When joints are full to within 1/8 inch of the top, blow or brush off any polymeric sand sitting on the flat brick face, sand left on the surface will haze over and bond to the brick once activated. Then activate with a gentle water spray per the product's specific instructions. Manufacturer guides (e.g., Alliance Gator, Techniseal) note that when polymeric sand is installed and activated correctly it stabilizes joints against weeds and washout, but it requires dry pavers/joints at installation and controlled watering/curing per the product data sheet What is Polymeric Sand? (manufacturer/contractor guidance summary). Most products require a light misting, then a soaking pass, then a final blow-off. Let cure for 24–48 hours before foot traffic.
Sealing (optional but recommended)
Wait at least 30 days after installing polymeric sand before applying sealer, the joints need to fully cure first. Use a penetrating paver sealer appropriate for your brick type (clay vs. concrete vs. natural stone). Apply per manufacturer instructions, typically rolling it on in thin coats. Sealer protects against staining, enhances color, and helps stabilize the joint sand further. It's not mandatory, but it extends the time between maintenance cycles significantly.
Finishing, cleanup, and what to do in the first 30 days
Remove your protective sheeting from adjacent areas and clean up the work zone as soon as the project is done. Inspect the slope one more time by running a hose onto the patio, water should sheet off uniformly toward the low edge and away from the house. If you see pooling anywhere, address it before the polymeric sand fully cures.
Keep foot traffic off the patio for at least 24 hours after polymeric sand activation, and avoid heavy loads (furniture, grills) for 48 hours. In the first week, watch the joints after any rain event, heavy rain within the first 48 hours of activation can wash polymeric sand out before it's set. If that happens, wait for the joints to dry, sweep in more sand, and re-activate.
Routine maintenance to avoid doing this again
A rebuilt patio should last decades with minimal attention, but there are a few things worth doing on a regular schedule to prevent the same failure modes from coming back.
- Inspect joints annually: if you see gaps, weeds, or washout in joints, refill with polymeric sand before the problem spreads
- Reapply sealer every 3–5 years, or whenever water stops beading on the surface
- Keep the patio free of organic debris (leaves, mulch) that hold moisture and encourage joint breakdown and moss growth
- Check the slope once a year by running a hose across the surface — any change in drainage pattern is an early warning sign
- Never let soil or mulch from adjacent beds build up against the patio edge — this blocks drainage and allows water to migrate under the base
- If one or two bricks start to rock or sink, address them immediately with a lift-and-reset repair before the settling spreads
Related projects: extending the patio or anchoring a pergola
A newly rebuilt patio is a natural time to think about whether you want to expand the footprint or add a pergola overhead. Both are worth planning during the rebuild rather than trying to retrofit later.
If you're considering extending the patio, do the extension work simultaneously if at all possible. Tying new paving into existing work is harder than laying a continuous surface, and the base, grading, and edge restraints all need to be planned as one system. There's a full guide on how to extend a brick patio that covers matching patterns, tying into existing edge restraints, and handling grade transitions.
Anchoring a pergola to a brick patio is a common follow-up project, but it comes with real structural and code considerations. Pergola posts need secure footings, typically concrete piers extending below the frost line, and those footings need to be planned before or during patio construction, not drilled through finished work afterward. Anchoring a pergola also almost universally requires a permit under the IRC when footings are involved or when the structure attaches to the house. Don't skip that step. There's a detailed companion guide on how to attach a pergola to a brick patio that covers footing options, anchor hardware, and code cautions in full.
If a full replacement and rebuild sounds like more than you want to take on but you still want a fresh-looking surface, it may also be worth looking at how to tile over a brick patio or how to cover a brick patio, both viable options when the existing base is structurally sound and you're mainly dealing with appearance.
Troubleshooting common problems during and after the build
| Problem | Likely cause | Fix |
|---|---|---|
| Bricks rocking or sinking after completion | Bedding sand too deep, subgrade not compacted, or base too thin | Pull affected bricks, correct sand depth and base, reset and compact |
| Water pooling on surface | Insufficient slope or low spot in base grade | Pull bricks from low area, re-grade base and sand, relay |
| Polymeric sand washing out after first rain | Rain within 24–48 hrs of activation, or sand not fully worked into joints | Let dry, sweep in fresh polymeric sand, re-activate |
| Haze or white residue on brick surface after polymeric sand | Sand left on brick face during activation | Use a polymeric sand efflorescence remover per product instructions; prevent next time by cleaning surface before activation |
| Edge restraints popping out or tilting | Insufficient staking or stakes into soft soil | Re-stake with longer stakes into the compacted base, not the sand layer |
| Frost heaving after first winter | Base too thin for local frost depth, or drainage not corrected | Increase base depth on rebuild; ensure positive drainage away from patio |
When to hire a professional
I've said it a few times already but it's worth saying plainly: this is a legitimate DIY project for a competent, physically capable homeowner with two to three days and a willingness to rent equipment and do it right. It is not a weekend project for someone who's never touched a compactor, and it's not the right call in every situation. Hire a professional when: the drainage problem involves regrading large areas or installing complex below-grade drainage systems; the subgrade is clay-heavy or expansive and needs engineered base design; the project requires a permit and involves structural work; the patio is larger than 400 sq ft and you're working alone; or the previous failures suggest a soil or site condition you don't fully understand. A good contractor will also warranty the work, which has real value when you're investing thousands of dollars in materials.
FAQ
How do I decide whether to relay, fully replace, cover, or tile over an existing brick patio?
Inspect the patio for extent and cause of failure: lift a few pavers to check the base. If failures are localized, base is sound and drainage is good, lifting and relaying is economical. If large areas are sunken, the base is contaminated/washed out, there is pervasive drainage/backfill or root damage, or repeated freeze‑thaw spalling, plan a full removal and rebuild. Covering or tiling over is viable only when the existing slab or stable paver base is level, structurally sound, and you can meet finished‑height, drainage and attachment requirements — otherwise you’ll trap moisture and create failures. When in doubt about subsurface issues or widespread settlement, choose full replacement or consult a pro.
What permits or utility checks do I need before starting demolition and replacement?
Contact your local building department to verify permit requirements — work that alters grades, adds footings, attaches structures (pergolas/roof covers) or changes drainage often needs a permit. For U.S. projects call 811 (or your local one‑call) before any digging to have underground utilities marked. If adding structural elements (anchored pergola, heavy footings) expect to submit plans and follow local code (IRC guidance varies by jurisdiction). Always confirm local rules early.
What tools and materials will I need for a full brick patio replacement?
Tools: sledgehammer, demo pry bar, wheelbarrow, shovel, pick, plate compactor, vibrating plate with compaction plate, tamper, masonry saw or angle grinder with diamond blade, string line, level/laser level, tape measure, broom, jointing broom, safety gear (gloves, eye/ear protection, dust mask). Materials: geotextile (optional for poor soils), clean crushed aggregate base (compacted to ICPI specs), 1 in bedding sand (ASTM concrete sand), brick pavers or replacement units, edge restraints (manufactured edging, precast curb or poured concrete), polymeric joint sand or jointing sand, coarse drain rock and drainpipe or French drain components if needed, sealant (optional) and concrete or anchors for structural posts. Fasteners/stakes for edge restraints and any required concrete for footings.
How thick should the compacted base be for a backyard brick patio?
Follow use and soil conditions: for pedestrian patios on stable, well‑drained soils a compacted aggregate base of about 4 in (100 mm) is typical. For heavier loads or poor soils increase base depth (6 in or more). ICPI recommends thicker bases for vehicular use (6 in for residential driveways, 8–12+ in for heavier loads). Compact in lifts and target subgrade/base compaction per local standards (≈95% Standard Proctor for pedestrian areas; increase for vehicular or poor soils).
What are the step‑by‑step removal and rebuild procedures?
1) Call utility locate (811) and get required permits. 2) Clear furniture/plants; protect adjacent structures. 3) Demo and remove pavers and old base to a depth accommodating new base+bedding+pavers; dispose or salvage pavers. 4) Inspect subgrade; remove organics, roots, and soft spots. Install geotextile if needed. 5) Regrade for drainage: provide 1–2% slope away from structures. 6) Install and compact aggregate base in lifts to required thickness (compacting each lift). 7) Screed a 1 in bedding layer of concrete sand. 8) Lay edge restraint securely anchored per ICPI guidance. 9) Lay pavers in your chosen pattern with proper spacing; cut edge pieces as needed. 10) Compact the pavers with a plate compactor using a protective pad. 11) Sweep polymeric or jointing sand into joints; compact and repeat until joints are full. 12) Activate polymeric sand per manufacturer (if used) and clean paver faces. 13) Seal if desired and complete site cleanup. Allow recommended curing/settling times before regular use.
How long will the project take and what are realistic cost ranges?
Time: a small patio (100–200 sq ft) by a competent DIYer can take 2–4 days for full removal and rebuild (longer if grading/drainage or footings are needed). Larger projects or difficult access add time. Costs (materials and rental tools only) vary widely: expect roughly $5–$25 per sq ft DIY (basic materials) and $15–$45+ per sq ft for professional installation depending on paver type, base depth, site prep, drainage correction and local labor. Structural additions (pergola footings, stairs) and drainage work increase cost. Get multiple contractor bids and itemize base, pavers, edge restraints, joint sand and drainage to compare.
Next Article
How to Cover a Brick Patio: Paint, Tile, or Build a Deck
DIY methods to cover a brick patio, prep, paint/stain, tile or floating deck; tools, costs, timing, and troubleshooting.