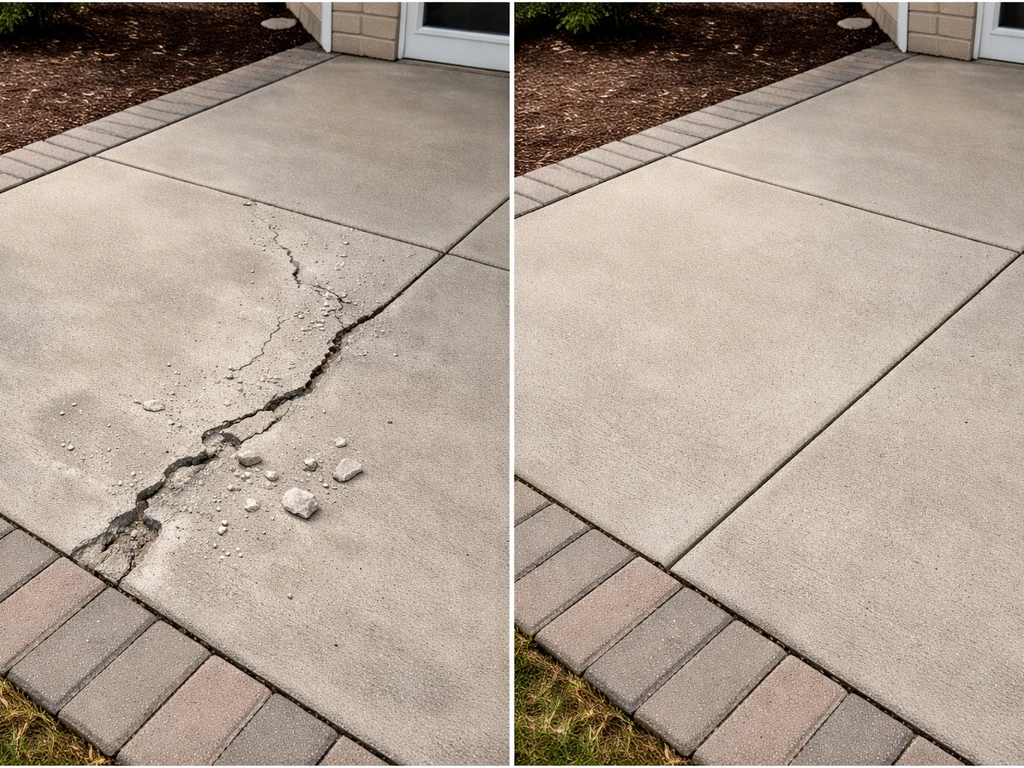
Loose patio steps almost always come down to one of three things: the base underneath has shifted or washed out, the mortar or sand holding things together has failed, or water got in and freeze-thaw cycles did the rest. Once you figure out which one you're dealing with, the actual fix is straightforward for most homeowners. Then follow the same approach to learn how to fix patio flooring issues that come from the same base, joint, and drainage problems. This guide walks you through diagnosing the problem first, then fixing it the right way depending on whether your steps are made of pavers or concrete.
How to Fix Patio Steps: Loose Pavers and Concrete Repairs

Talia Lang
29 Apr 2026
Why steps get loose (and the safety check to do right now)
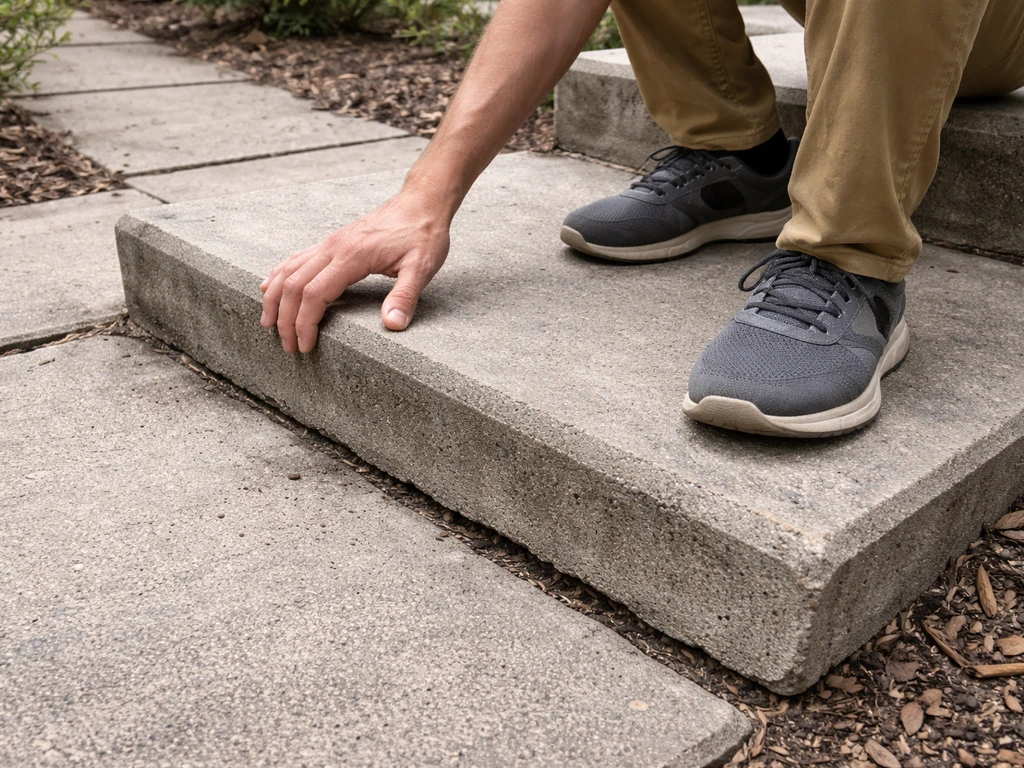
Before you start poking around, do a quick safety walkthrough. Rock each step by hand and with your foot. If any step shifts more than a few millimeters, it's a trip hazard today, not a repair you can put off until the weekend. Tape it off or block it if anyone else uses those steps while you're gathering materials.
Here's what actually causes patio steps to loosen over time. Poor drainage is the biggest culprit: water pools under or around the steps, erodes the base material, and leaves a void. Once there's a void, the step rocks, the sand or mortar joint cracks further, and more water gets in. Freeze-thaw cycles make it much worse. Water freezes below 32°F, expands inside the pores of concrete or the sand joints between pavers, then thaws and contracts. Do that a few dozen times a winter and you'll get cracked mortar, spalled concrete, and shifting pavers. Soil settlement under the base is another common cause, especially in newer construction or if tree roots are nearby. And sometimes the original installation just skipped proper compaction, so the base was always going to fail eventually.
Figure out what you actually have before picking up a tool
The repair approach is completely different depending on what type of steps you have and what part is moving. Spend five minutes doing this before anything else.
Paver steps
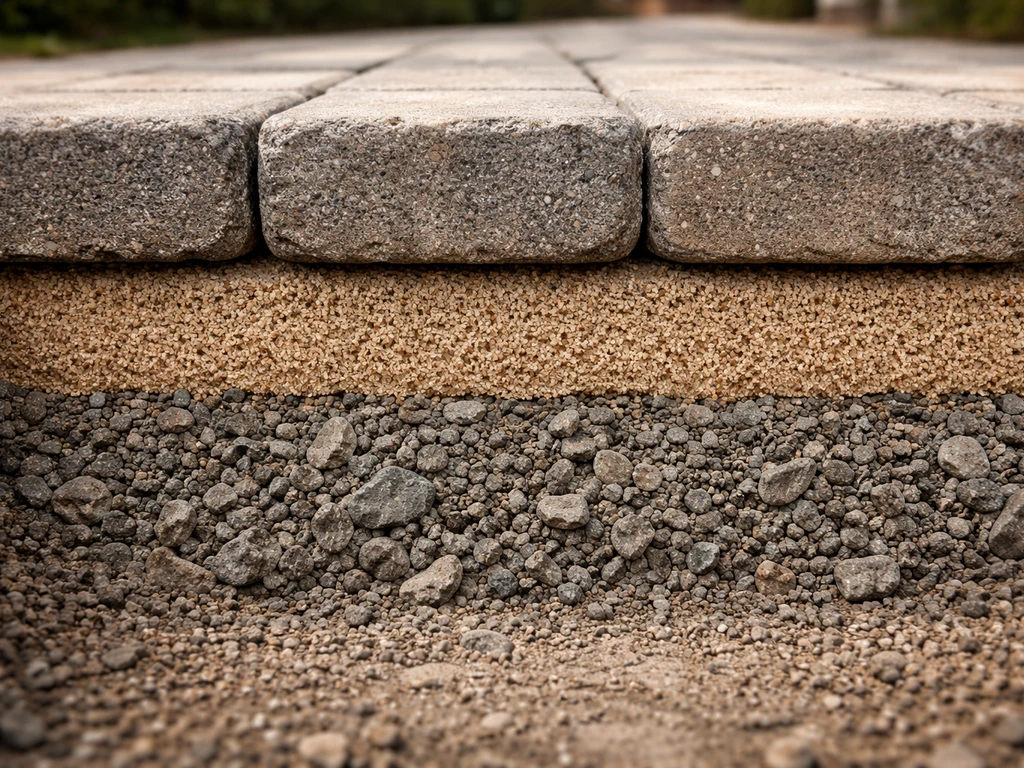
Paver steps are built from individual concrete or natural stone pavers stacked or laid in courses, usually over a compacted gravel base and a bedding sand layer. If you can wiggle individual pavers, or if the whole step rocks as a unit, you're looking at a sand or base problem. Check the joints between pavers: if the joint sand is missing, washed out, or crumbling, that's almost certainly how water got in and destabilized things. Also check the edges. If the outside edge of the step has no edge restraint (a plastic or metal border strip pinned into the base), the pavers can slowly migrate outward and the whole step loses its structure.
Poured concrete or stone steps on a concrete base
Concrete steps are a single cast unit or large stone treads mortared onto a concrete base. Press down on each corner of the step and listen for a hollow thud or feel it flex. That hollow sound means there's a void underneath, the concrete isn't fully supported, and it will eventually crack through if left alone. Look for cracks at the back edge where the step meets the riser or the patio slab: this is classic settlement cracking. Also check whether the step has pulled away from the house foundation or the main patio slab. A gap there means the whole unit has moved, not just surface damage.
Steps with a wood or metal frame
Some patio steps, especially on decks or raised patios, sit on a wood stringer or metal frame. If the frame has rotted, rusted, or its footings have settled, the steps above will rock regardless of what material is on top. Check the structure underneath before assuming it's just a surface problem. Deck and frame repairs are a different job altogether, closer to patio deck repair territory. If your steps are part of a deck or raised patio setup, follow the same principles as in how to repair patio deck work, including checking the frame and drainage patio deck repair territory.
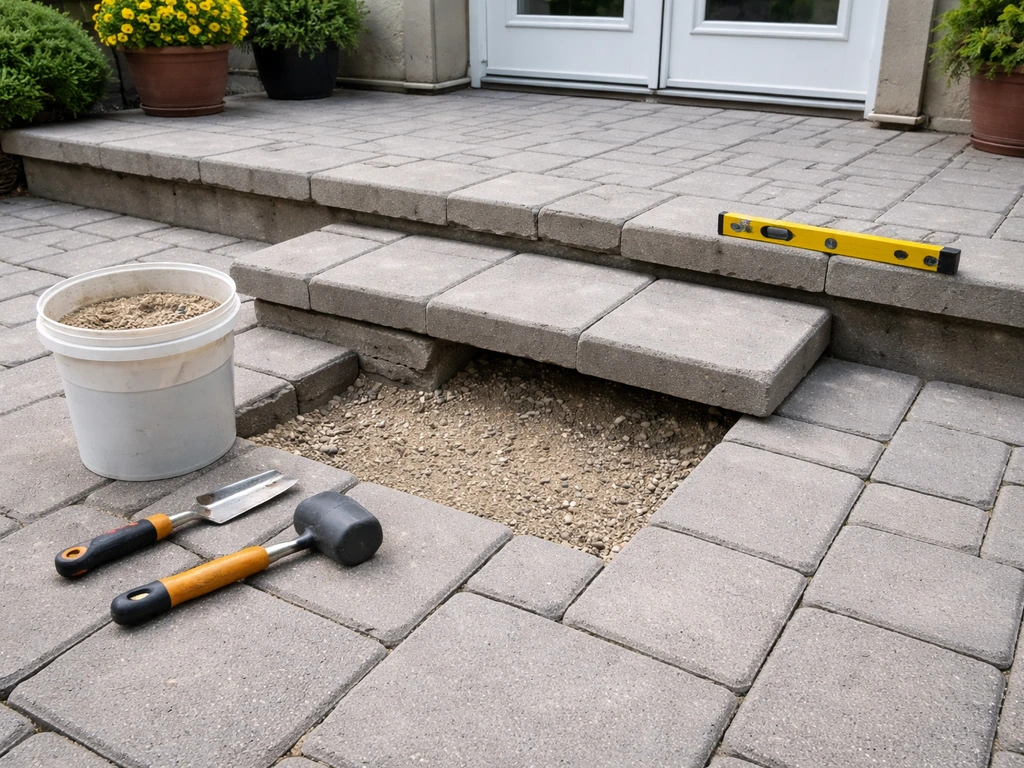
Tools and materials to gather before you start
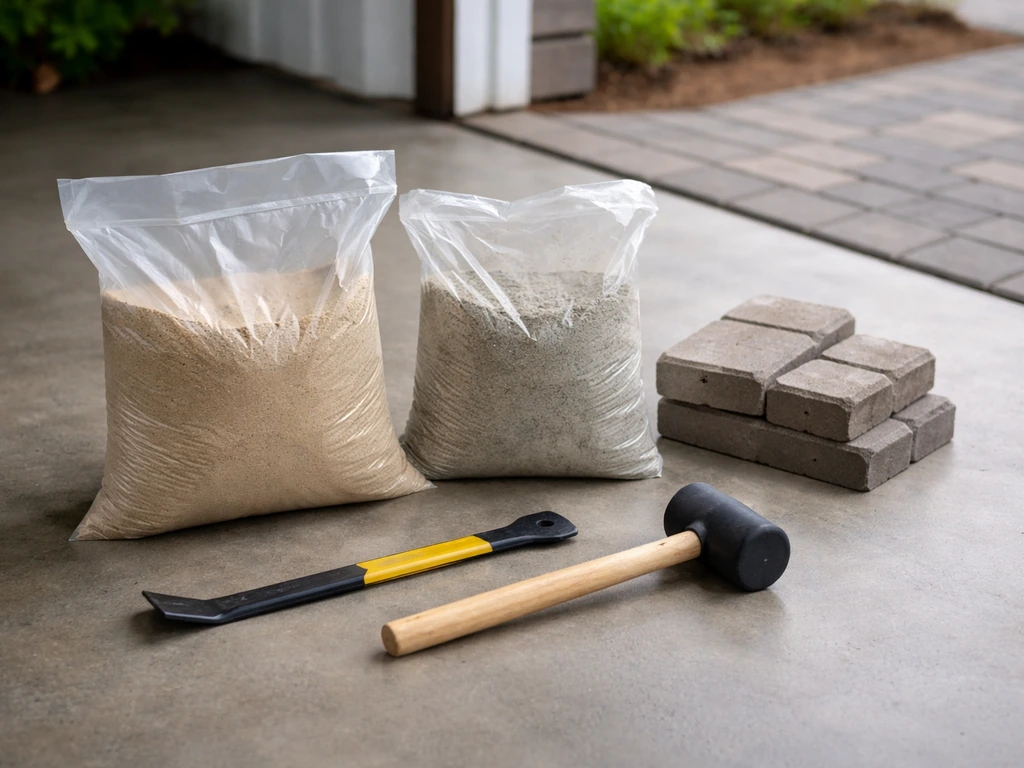
The exact list depends on what you found above, but here's what covers the common scenarios. Having everything on hand before you start saves you from stopping mid-repair with an exposed base in questionable weather.
| Item | Paver Steps | Concrete Steps |
|---|---|---|
| Pry bar or flat bar | Yes | Yes |
| Rubber mallet | Yes | No |
| Margin trowel or pointing trowel | Yes | Yes |
| Level (2-foot and 4-foot) | Yes | Yes |
| Stiff brush or broom | Yes | Yes |
| Garden hose or pressure washer | Yes | Yes |
| Plate compactor or hand tamper | Yes | Sometimes |
| Coarse crushed gravel (¾ inch) | Yes | Sometimes (void fill) |
| Concrete sand or bedding sand | Yes | No |
| Polymeric joint sand | Yes | No |
| Concrete repair mortar (fast-set) | No | Yes |
| Bonding agent/primer | No | Yes |
| Plastic or metal edge restraints + spikes | Yes (if missing) | No |
| Wire brush for surface prep | No | Yes |
| Safety glasses, gloves | Yes | Yes |
For concrete repairs, a fast-setting repair mortar like Sakrete Fast-Setting Cement Patcher is a practical choice for steps because it opens to foot traffic in about 4 hours. Standard repair mortars like Deco-Crete Easy Patch work well too and are typically ready for foot traffic in 3 to 4 hours. Either way, don't apply sealer for at least 24 hours after patching. For paver joints, use polymeric sand rather than plain sand. It hardens when activated with water and resists washout, which is the main reason joint sand fails in the first place.
How to fix loose paver steps
The goal here is to reset the pavers on a properly supported, level base and lock the joints so water can't get back in and start the cycle again. Don't just add sand on top of what's there: if the joints have failed, you need to remove the old material first and start fresh.
- Remove the loose pavers. Use a pry bar and rubber mallet to lift them out cleanly. If they're stacked in courses, work from the top down. Set them aside somewhere flat so they don't tip or crack.
- Dig out and inspect the base. Scrape out the old bedding sand and look at the gravel base underneath. If it's soft, muddy, or uneven, that's your problem. Remove and replace any compromised gravel. The base layer should be compacted crushed gravel, typically 4 to 6 inches deep for steps.
- Re-compact the base. Use a plate compactor if you can rent one, or a hand tamper for smaller areas. The base needs to be firm and smooth. Press down hard with your hand: if it shifts or compresses noticeably, it needs more compaction or more gravel.
- Add and screed the bedding sand. Spread a 1-inch layer of concrete sand over the compacted base. Use a straight board or screed rail to level it. Don't use more than an inch: thicker sand beds compress unevenly and pavers will rock again.
- Check and install edge restraints. If the outer edge of the step had no restraint, install plastic or metal edge restraints now, pinned into the base with landscape spikes at 12-inch intervals. Without these, pavers will creep outward under foot traffic.
- Reset the pavers. Place them back carefully, checking each one with a level as you go. Tap them into the sand bed with a rubber mallet until they're flush with the surrounding pavers and level side to side. Step back and check alignment before moving on.
- Compact the finished surface lightly. A few passes with a plate compactor over the pavers (use a rubber pad to protect the surface) helps seat them firmly into the sand bed. For small repairs, tapping with a rubber mallet across the surface works.
- Apply polymeric joint sand. Sweep it across the pavers and work it into all joints with a stiff broom. Go over it multiple times. The joints should be filled to within about ¼ inch of the top. Blow off any excess from the paver faces with a leaf blower before activating.
- Activate with water. Mist the surface gently with a garden hose. You want to wet the sand without flooding it: too much water too fast will flush the polymer binders right out of the joints. Follow the manufacturer's rate. Keep foot traffic off for at least 24 hours.
- Check the weather before you start this step. Don't apply polymeric sand if rain is forecast within 24 hours, and wait at least 24 hours after significant rainfall before installing it. Cold temps matter too: if it's below about 40°F, the polymer won't cure properly.
How to fix loose concrete steps

Concrete step repairs depend on what's actually wrong. A rocking step with a void underneath needs the void addressed before any surface work. A step with cracked or missing mortar at the joints needs patching after proper prep. The GSA technical procedure for concrete patching compound emphasizes removing unsound or contaminated concrete so the new patching compound bonds to clean, sound material and using the appropriate bonding and primer approach proper prep before patching. If you skip prep and just slap repair mortar over a dirty surface, it will peel off within a season.
Addressing voids and unstable bases
If the step thumps hollow when you knock on it, or rocks noticeably when you press the corners, deal with the void first. For shallow voids along an edge, you can sometimes inject or pack in a fast-setting repair mortar after cleaning the area thoroughly. For larger voids underneath, the honest answer is that you need to lift the step (if it's a separate unit) or have the area foam-injected by a professional. After removing any old concrete or loose material, FHWA notes that you may need to add and compact new subbase material if the removal process damaged it need to lift the step (if it's a separate unit) or have the area foam-injected by a professional.. Trying to patch surface cracks while a void sits underneath is wasted effort: the step will continue to flex and any patch will crack again.
Patching cracks and spalled surfaces
- Remove all loose and deteriorated material first. Use a cold chisel and hammer or an angle grinder to chip out everything that isn't sound. If it's loose, crumbly, or delaminating, it needs to come out. Leaving it in will cause the patch to fail. FHWA guidance on concrete repair is consistent on this point: you cannot bond new material to compromised old material.
- Define clean edges. Undercut the repair area slightly (angled inward) with a chisel or grinding wheel so the patch has mechanical grip. Feathered thin edges crack off quickly.
- Clean the repair area thoroughly. Wire-brush out all dust and debris, then rinse with water. Dust and dirt are bond-killers. Let the surface dry to a saturated surface-dry condition: damp but no standing water.
- Apply a bonding agent. Brush or roll a concrete bonding primer over the repair area and let it get tacky (usually 10 to 20 minutes) before applying the repair mortar. This step is often skipped and often explains why patches fail.
- Mix and apply repair mortar. Mix fast-setting repair mortar to a peanut butter consistency. Pack it firmly into the repair, working it into all corners. Build up in layers if the void is deep rather than one thick fill. Feather the edges into the surrounding concrete.
- Tool and finish. Smooth with a margin trowel. Match the texture of the surrounding concrete as much as possible, using a brush or sponge float to add texture before it fully sets.
- Protect the cure. Keep foot traffic off for at least 4 hours with fast-set products, longer if temperatures are below 55°F. Cold weather slows curing significantly: at temperatures near freezing, some repair mortars may not cure properly at all. Don't seal the patch for at least 24 hours.
- Re-anchor if the step has pulled away from the structure. If the step has separated from the house foundation or main slab, cleaning out the gap and packing it with flexible polyurethane caulk (not rigid mortar) lets the joint flex without cracking again. For steps that have shifted substantially, reanchoring with masonry anchors and construction adhesive may be needed before patching.
After the repair: finishing steps
Once the repair mortar has fully cured (24 hours minimum, 48 hours preferred in cool weather), apply a penetrating concrete sealer to the repaired area and the surrounding step surface. Sealer reduces water absorption, which is the main driver of future freeze-thaw damage. This is especially important if spalling from freeze-thaw cycles is what broke things down in the first place. Clean up any mortar smears from adjacent surfaces with water before they fully harden.
When to stop DIY and call a pro
Most loose patio steps are DIY-fixable. But there are specific signs that tell you the problem is bigger than resetting pavers or patching concrete, and pushing ahead without understanding the full picture usually means the repair fails and you're back to square one.
- The step (or the entire stair assembly) has dropped more than an inch from its original position. That much settlement usually means significant soil washout or a void large enough that surface patching won't hold.
- You can hear or feel a hollow void under a large portion of a concrete step, not just at an edge. Foam injection or lifting by a concrete raising contractor is the right call here.
- Water is actively draining toward the steps from a higher grade or from a downspout. Fix the drainage problem first, or any repair you do will fail again within a year. This may involve regrading the surrounding patio area.
- The steps have cracked through structurally, not just surface spalling. A full-depth crack through a step tread means the step is compromised and needs replacement, not patching.
- The house foundation or attached wall is showing cracks near where the steps connect. This crosses into foundation work, which is not DIY territory.
- Multiple steps have shifted and the whole staircase is out of alignment. Rebuilding the stair base from scratch is a bigger project and benefits from professional assessment, especially if drainage or grading is contributing.
If you're not sure which side of the line you're on, the safest move is to have a concrete contractor or masonry professional take a look before you invest time and materials in a repair. A good contractor can tell you in 15 minutes whether it's a straightforward reset or something more involved.
Keep them from loosening again
The repairs above fix what's broken today. Preventing it from coming back means dealing with the underlying conditions. Fix a patio step by step by starting with the same diagnosis, then addressing the base, joints, and drainage that caused the loosening underlying conditions. Make sure water drains away from the steps, not toward them. Check that downspouts aren't depositing water near the base. Inspect paver joint sand every spring and top it off if it's eroding: this is a 20-minute job that prevents much bigger problems. Seal concrete steps every two to three years, especially in climates with hard winters. Keeping moisture out of the concrete is the single most effective thing you can do to stop freeze-thaw cycles from destroying the surface over time.
If you're dealing with broader patio issues beyond just the steps, the same diagnostic thinking applies: identify whether you have a base problem, a surface problem, or a drainage problem before starting work. Patio edging failures, sunken patio sections, and general patio surface damage all follow similar patterns, and fixing the steps properly is often the starting point for addressing the whole patio.
FAQ
Can I just add more sand under or between loose pavers to fix patio steps?
Yes, but only if you identify the cause first. If individual pavers wiggle because the bedding sand or gravel base washed out, leveling with extra sand over the existing failed joints will re-loosen quickly. Remove the loose joint sand first, re-bed and re-compact the base material if it is soft, then reset and lock joints with polymeric sand.
Should I seal patio steps right away after patching or resetting?
Avoid that. Sealing or “glazing over” fails when the joint area is still washed out or cracked, because trapped water continues the freeze-thaw cycle and undermines the step from below. The practical order is repair joints and base first, allow full cure, then apply a penetrating sealer to reduce water absorption afterward.
What should I do if the concrete step has hairline cracks but also sounds hollow?
If you have a hollow sound or visible movement, treat it as an under-support issue, not a surface crack issue. Surface patching over a void is likely to peel or crack again because the concrete still flexes. The decision point is whether the step flexes when you press corners, if yes address the void before patching.
When does a “small” loose spot on patio steps mean the whole base needs repair?
A small loosened area might be a localized base washout, you can sometimes lift just that section (for pavers) and re-pack. But if multiple treads rock, there may be settlement of the whole supporting base or loss of edge restraint. If rocking is across the full width or you see gaps forming at the back edge, consider professional assessment.
How can I make sure polymeric sand joints actually lock in on patio steps?
Polymeric sand is usually the right choice for paver joints, but it still needs the correct setup. Remove all loose old sand and clean the joints thoroughly, then install polymeric sand in dry conditions and activate it with a controlled mist or light wetting per product instructions. Overwatering or skipping activation can make it stay sandy and wash out.
Can I repair patio steps in cold or rainy weather, and how do cure times change?
Yes, temperature and moisture matter. Many repair mortars and patch mixes cure slower in cold weather, so the “open to foot traffic” time can stretch and the sealer timing can shift. A safe rule is to wait at least 24 hours before sealer on patched areas, and in cool or damp weather extend cure toward 48 hours, or follow the product label if it differs.
How do I confirm drainage is the real problem before I start repairs?
If water is pooling near the steps, the repair will fail faster. Check grading by pouring a small amount of water near the base and watch where it flows, also inspect downspout discharge points and any low spots that funnel runoff. Fixing drainage might mean re-sloping, adding a small swale, or redirecting downspouts before you reset pavers or patch concrete.
What if the patio steps loosen but they’re part of a raised deck or supported frame?
For concrete steps on a separate frame or stringer (raised decks), the top surface can look cracked even when the structure is failing. If you see rusted supports, rot, shifting anchors, or consistent rocking that matches movement of the frame, stop and focus on structural repair first. This is different from routine concrete patching and can require specialized work.
Do I need edge restraint for paver patio steps, and what happens if it’s missing?
Not always. For pavers, missing or damaged edge restraint often leads to outward migration. If the outside edge of the step lacks a pinned border strip or it is detached, reinstall or replace the restraint after you reset the pavers, otherwise the repaired joints will be stressed and can wash out again.
Next Article
How to Repair Patio Damage Step by Step by Material
Step by step patio repair by material: diagnose cracks, pavers, spalling, drainage issues, then relevel, rejoint, seal,