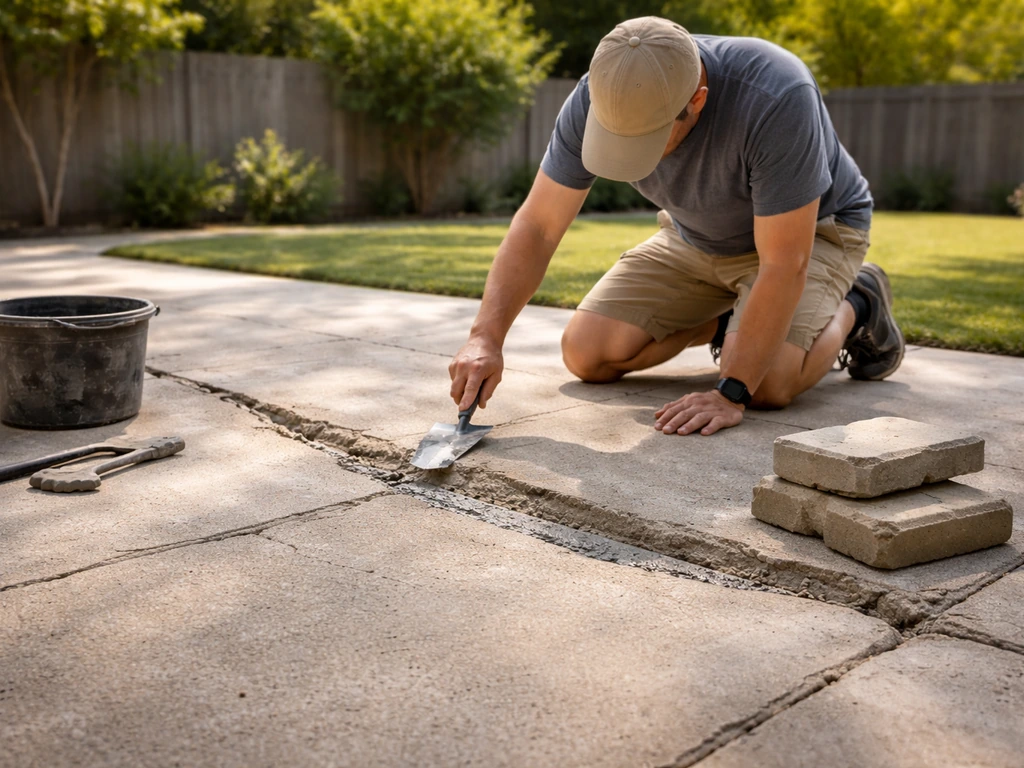
Most patio repairs come down to three things: figuring out what's actually wrong, fixing the root cause instead of just patching the surface, and finishing it in a way that holds up. Whether you're dealing with cracked concrete, sunken pavers, spalling, or failed grout joints, the fix is usually manageable as a DIY project, as long as you diagnose it correctly first and don't skip the base or drainage work.
How to Repair Patio Damage Step by Step by Material

Talia Lang
29 Apr 2026
Quick diagnosis: what's wrong with your patio
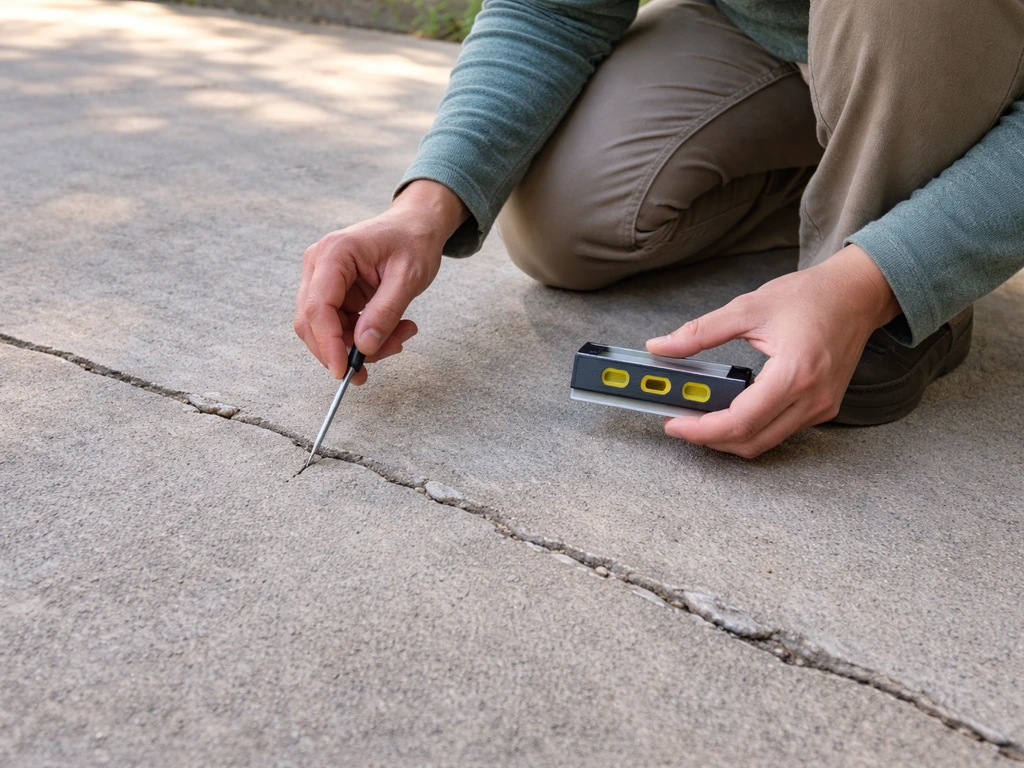
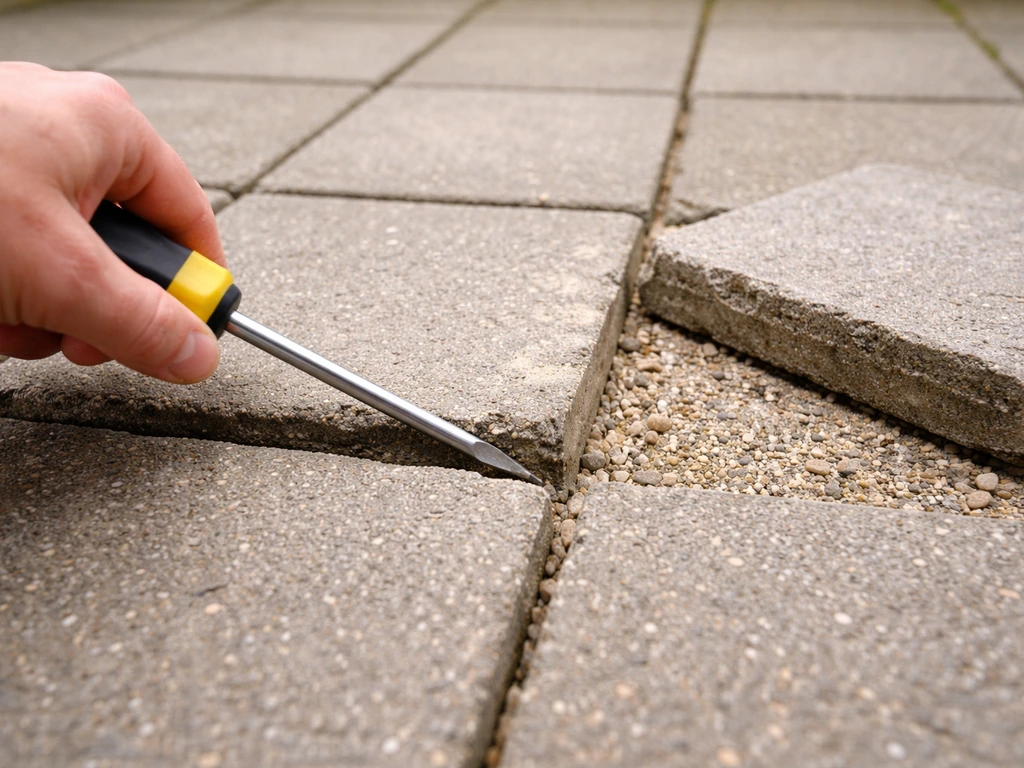
Before you buy a single bag of patching compound, spend 15 minutes doing a proper inspection. Walk the entire patio and look, and listen, carefully. Bring a screwdriver, a level, and something to tap the surface with (a coin or the handle of a hammer works fine).
Tap concrete surfaces systematically across the whole slab. A solid, dense sound means the concrete is intact underneath. A hollow or drumming sound means the surface layer has separated from what's below it, that's delamination, and it tells you the damage goes deeper than the surface. Any hollow area you find needs to be fully removed before you patch, or your repair will pop off within a season.
Use your level (or just crouch down and sight along the surface) to check for differential elevation, one side higher than the other. If you see that, you're not just dealing with a crack from normal shrinkage. The slab or pavers have actually moved, which usually means the base beneath them has shifted, settled, or been undermined. Cracks are often the first sign of this kind of settlement, so if you see new cracks combined with any unevenness, treat it as a base problem, not just a surface problem.
- Surface cracks only (no movement, no hollow sound): normal shrinkage or surface wear, easiest to fix
- Hollow sound when tapping: delamination or spalling, requires full removal of the affected layer
- One side higher or lower than the other: slab movement or paver settlement, base repair needed
- Broken or rocking pavers: individual paver failure or sand base washout
- Crumbling surface with flaking layers: spalling, often from freeze-thaw damage or poor original concrete
- Water pooling on the surface or against the house: drainage problem, needs grading or drainage fix
- Gaps in paver joints: jointing sand has washed out, leaving pavers loose and vulnerable
Identify your patio material and damage type
The right repair depends entirely on what your patio is made of. Using the wrong product or method for the material is one of the most common reasons DIY patio repairs fail within a year.
| Patio Material | Common Problems | Key Repair Approach |
|---|---|---|
| Poured concrete slab | Cracks, spalling, surface scaling, settling | Crack filler or resurfacer for surface; mudjacking or slab replacement for movement |
| Concrete pavers | Broken pavers, rocking, sunken sections, joint sand loss | Replace individual pavers; re-level sand base; re-joint with polymeric sand |
| Natural stone (flagstone, slate, travertine) | Cracked or broken pieces, loose stones, sunken areas, efflorescence | Replace individual stones; re-bed in mortar or sand; re-point joints |
| Brick pavers | Spalling bricks, loose or sunken sections, joint erosion | Replace damaged bricks; re-level base; re-point mortar or re-sand joints |
| Stamped/decorative concrete | Surface cracks, color fading, sealant failure | Flexible crack filler; resurfacer; re-seal with compatible product |
If you have a mortar-set patio (stones or pavers set in mortar over a concrete slab) versus a sand-set patio (pavers laid over compacted gravel and bedding sand), the repair method is completely different. Mortar-set patios need mortar-based repairs; sand-set patios let you lift and re-lay individual pieces. If you're not sure which you have, look at the joints. Filled with a rigid, gray material that feels like concrete? That's mortar. Fine sand or a softer, slightly flexible fill? That's jointing sand, and you have a sand-set patio.
Step-by-step repairs for common problems
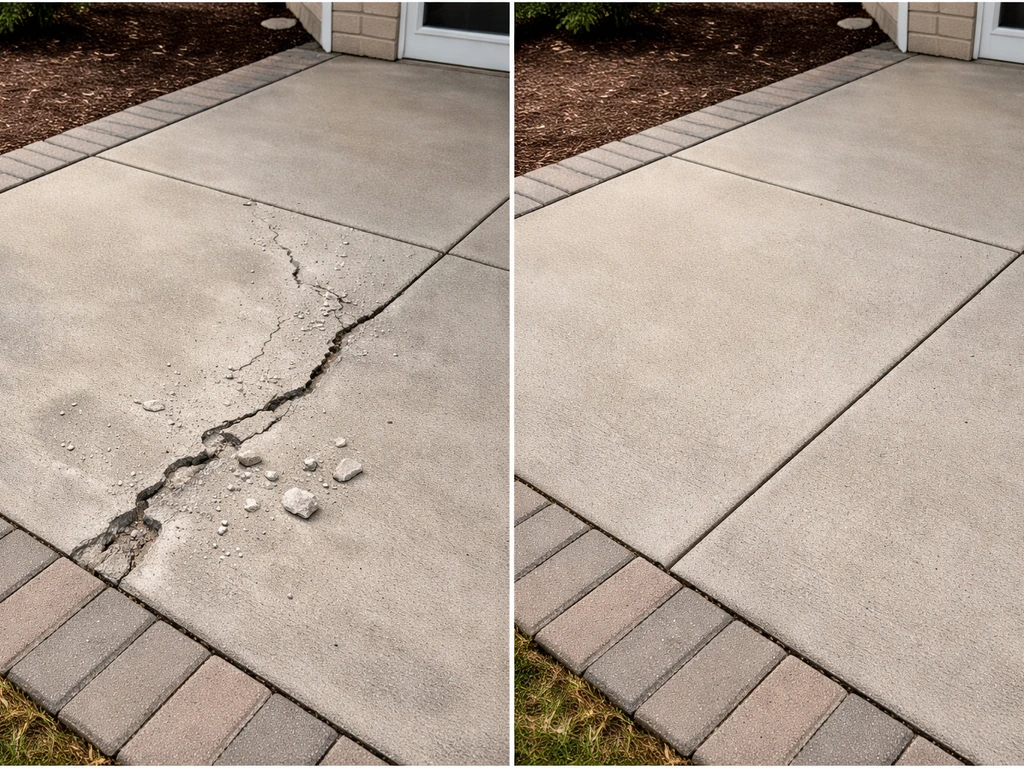
Filling cracks in a concrete patio
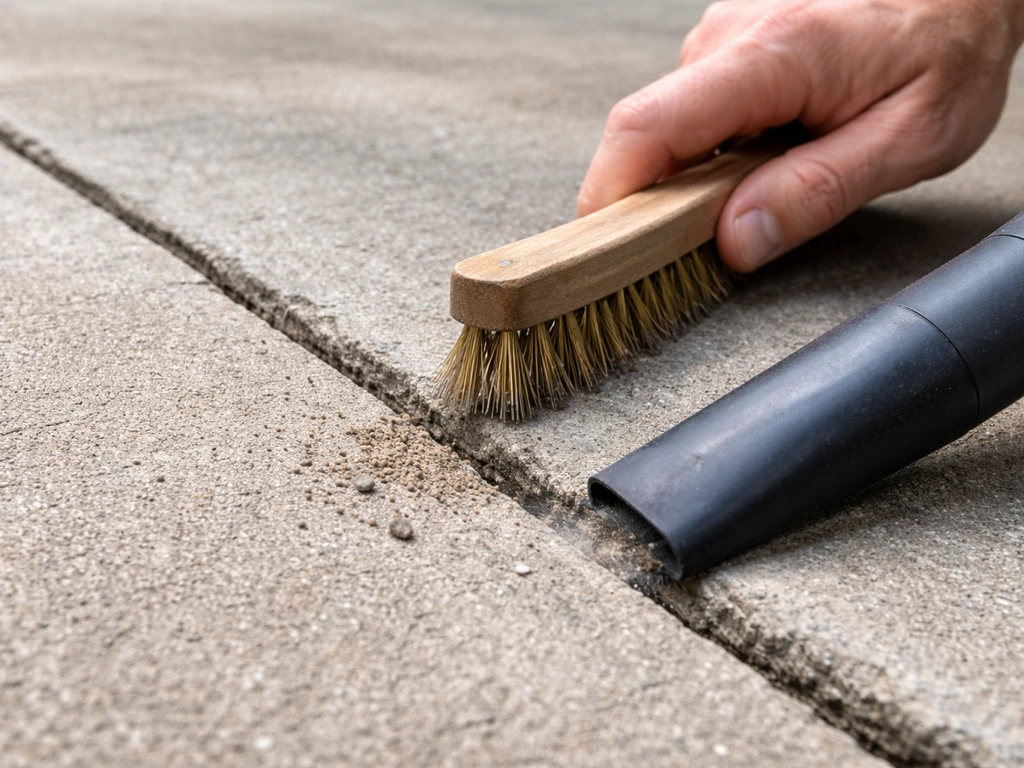
Small surface cracks (under 1/4 inch wide, no movement) are the most forgiving repair. Clean the crack thoroughly first, use a wire brush, vacuum out the dust, and blow out any debris with compressed air or a can of air. If there's any loose concrete, chip it out. The crack needs to be clean and dry, or the filler won't bond.
- Clean and dry the crack completely; remove all loose material
- For cracks narrower than 1/8 inch, use a self-leveling concrete crack filler (a polyurethane or epoxy product works well here)
- For cracks between 1/8 and 1/2 inch wide, use a vinyl concrete patcher or hydraulic cement, packed in with a trowel
- For cracks wider than 1/2 inch, use a backer rod (foam rope) to fill the depth first, then apply a flexible sealant or patching compound over it
- Feather the edges of the patch with a trowel so it blends with the surrounding surface
- Let it cure fully (check product label — usually 24 to 48 hours minimum before foot traffic)
- Once cured, seal the entire surface to protect the repair and match the sheen
One honest note: no crack filler will be invisible on bare concrete. If appearance matters, plan to resurface or seal the whole slab after patching, which will unify the look.
Repairing spalled or delaminated concrete
Spalling is when the surface of concrete flakes, chips, or peels away. It's extremely common in climates with freeze-thaw cycles, water gets into the surface, freezes, expands, and literally blows the top layer apart. Spalling paired with an internal cracking pattern that runs parallel to the surface is a classic freeze-thaw distress sign. The key rule here: any hollow-sounding area (that delamination test from earlier) must be fully chipped out before you patch. If you skim over a hollow spot, your patch will delaminate within months.
- Use a cold chisel and hammer to chip out all spalled and delaminated concrete — go until you hit solid material
- The repair area should have rough, irregular edges (not smooth or feathered), so the patching material has something to grip
- Vacuum and rinse the area; let it dry or follow the product instructions for moisture requirements
- Apply a concrete bonding adhesive to the prepared area and let it become tacky
- Mix a polymer-modified concrete resurfacer or vinyl patcher to a stiff consistency
- Pack the repair material firmly into the void, working in layers if the depth exceeds 1/2 inch (most patchers can't be applied too thick in one go)
- Trowel smooth and texture to match the surrounding surface
- Cure and protect from rain and direct sun for at least 24 hours; follow product specs
- Seal the entire slab after the repair cures fully
Replacing broken or rocking pavers
This is genuinely one of the most satisfying DIY patio repairs, it's straightforward and the result looks great. Whether you have concrete pavers, brick, or natural stone, the process is similar.
- Use a flathead screwdriver or paver puller to work the damaged paver out of its spot; for a mortar-set patio, use a cold chisel to break the mortar joints first
- Once the paver is out, inspect the base underneath — if the sand or mortar bed looks washed out, disturbed, or uneven, fix it now (see the leveling section below)
- For sand-set patios: add or remove bedding sand to get the correct height, then compact it lightly with a hand tamper
- For mortar-set patios: remove old mortar completely, apply fresh mortar, and set the new paver
- Set the replacement paver in place and check it with a level; it should sit flush with the surrounding pavers
- Re-fill the joints with polymeric sand (sand-set) or mortar (mortar-set) and compact or tamp as needed
- For polymeric sand: mist lightly with water to activate; it will harden and lock the pavers in place
Try to save a few original pavers when you install a patio, or pull one from a hidden area under furniture. Color matching replacement pavers to weathered originals is genuinely difficult, and a paver that's even slightly off will stand out.
Leveling and base fixes for sunken or uneven areas
This is where most DIY patio repairs either succeed or fail long-term. Patching the surface without fixing why it settled means you'll be doing the same repair again in a year or two. If you need a deeper walkthrough, this guide on how to fix patio flooring will help you match the repair to the cause. If you need step-by-step details on how to repair patio deck surfaces, follow a method matched to the cause and material so the fix lasts longer. If you need to fix a patio that has settled, the key is addressing the base and drainage so the surface doesn't just fail again soon. Sunken concrete slabs and sunken paver sections almost always come back to one of three root causes: soil erosion or washout under the base, inadequate base compaction when it was first installed, or water that has no path to drain away and is undermining the structure.
Fixing sunken pavers
For sand-set paver patios, you can fix a sunken section yourself. Remove the pavers in the affected area, set them aside carefully (stack them so they don't chip). Dig out and inspect the base layers. You should see compacted gravel (the base) topped by a 1-inch layer of bedding sand. If the gravel is washed out or there are voids, you need to add compacted gravel before re-sanding. Fill voids with clean crushed gravel, compact it in 2-inch layers with a plate compactor or hand tamper, then re-add your bedding sand screeded to a consistent 1-inch depth. Re-lay the pavers, check for level, re-joint with polymeric sand, and compact the entire section.
Fixing a sunken or uneven concrete slab
A sunken or tilted concrete slab is a bigger decision point. If the differential (one side higher than the other) is under about 1.5 inches and the slab is structurally intact, mudjacking (also called slabjacking) is a common repair: a contractor pumps a grout mixture under the slab through drilled holes to lift it back into position. Polyurethane foam injection is a newer, lighter alternative. Both are professional services, not DIY jobs. If the slab is severely cracked, broken up, or the settlement is extreme, replacement is usually the right answer.
For minor unevenness that's a trip hazard but doesn't justify mudjacking, a concrete grinder can knock down a raised edge, and a self-leveling concrete overlay can build up a low spot. These are DIY-accessible options, but be realistic: if the base is still moving, these fixes are temporary.
Fixing the drainage problem
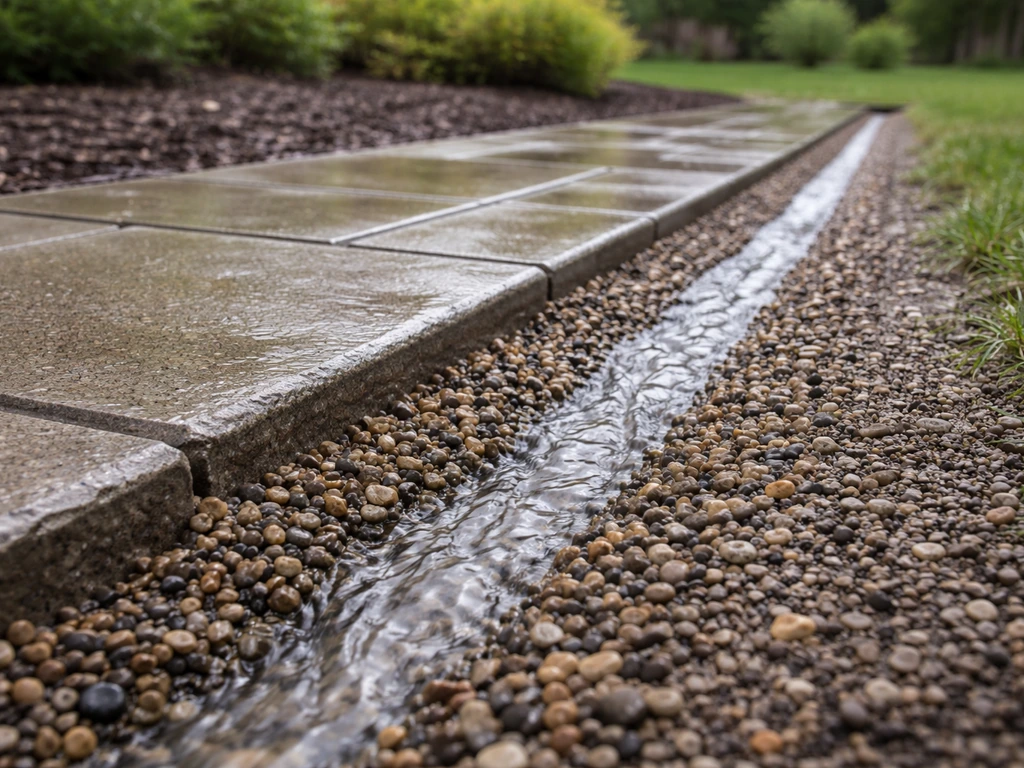
If water is pooling on your patio or draining toward your house, that's the cause of most of your other problems, and it needs to be fixed, not just the surface damage it caused. A patio should slope away from the house at a minimum of 1/4 inch per foot. Check your current slope with a level and a tape measure. If your patio slopes toward the house or is flat, you have a few options depending on material: re-grading a paver patio is practical (just relay the pavers on a corrected base); re-grading a concrete slab usually means breaking it up or using a thick overlay, which gets expensive. Adding a channel drain at the edge closest to the house is often the most practical fix for an existing concrete patio.
Re-sealing, re-jointing, and finishing for lasting protection
Once you've made your repairs, finishing properly is what separates a repair that lasts five or more years from one that looks tired in two seasons. Don't skip this step.
Re-jointing paver and stone patios
If your joints are depleted, missing, or you've disturbed them during a repair, re-joint before sealing. For sand-set patios, polymeric sand is the best option, it contains a binder that hardens when wet and resists washout, insects, and weeds far better than regular jointing sand. Sweep it into the joints dry, compact the pavers to settle the sand down, then sweep again to fill completely. Blow off any excess from the paver faces carefully (excess polymeric sand that cures on top of the paver surface is hard to remove). Mist lightly with water to activate, and keep off the patio for 24 hours.
Sealing concrete and pavers
Sealing after a repair protects the new material, unifies the appearance, and prevents future water intrusion. The sealant must match the material and the look you want. Penetrating sealers (silane or siloxane-based) soak into the surface, provide excellent protection, and don't change the look, good for natural stone and for people who want a natural finish. Film-forming sealers (acrylic or polyurethane) sit on top of the surface and provide a wet, shiny, or satin look, common for stamped concrete and decorative pavers. Avoid applying sealer to a surface that isn't fully clean and dry. Use a pressure washer to clean first, let the surface dry for at least 24 hours (48 is better), and apply sealer in thin, even coats rather than one heavy coat.
If your existing patio has old sealer that is peeling or flaking, you need to strip it before applying new sealer. Applying new sealer over failing old sealer is one of the most common finishing mistakes, it will peel just as fast as the old layer did.
Tools, materials, safety, mistakes to avoid, and when to call a pro
What you'll need
| Tool / Material | Used For |
|---|---|
| Cold chisel and hammer | Removing spalled concrete, breaking mortar joints |
| Wire brush and vacuum | Cleaning cracks and repair areas |
| Margin trowel and finishing trowel | Applying and smoothing patching compounds |
| 4-foot level | Checking slope and paver level |
| Plate compactor or hand tamper | Compacting base layers under pavers |
| Pressure washer | Cleaning before sealing and repair |
| Polymer-modified concrete patcher or resurfacer | Filling cracks and spalled areas in concrete |
| Concrete bonding adhesive | Improving adhesion for concrete patches |
| Polymeric jointing sand | Re-jointing paver and stone patios |
| Penetrating or film-forming sealer (matching material) | Protecting the finished surface |
| Safety glasses and work gloves | Eye and hand protection during chipping and mixing |
| Knee pads | Comfort for extended paver work |
Common mistakes that cause repairs to fail
- Patching over a hollow or delaminated area without removing it first
- Skipping the bonding adhesive on concrete patches — the patch will pop off
- Applying patching compound too thin (most products need at least 1/4 inch minimum depth to bond properly)
- Using regular sand instead of polymeric sand for paver joints — it washes out again within a season
- Sealing over dirty or damp surfaces — the sealer traps moisture and fails quickly
- Applying sealant over old failing sealant without stripping
- Fixing only the surface damage without addressing the drainage or base problem that caused it
- Not matching the repair product to the material (e.g., using a rigid mortar to repair a flexible paver joint)
Safety
Wear safety glasses whenever you're chipping concrete or breaking mortar, chips and dust travel fast. Wear gloves when working with concrete mixes and sealers; both are caustic over prolonged skin contact. Work in ventilated conditions with sealers and bonding adhesives. If you're pressure washing, never direct the stream at your feet or legs, and be careful around paver joints, high pressure can blow out the sand you're trying to keep.
When to call a professional
Some patio problems are genuinely beyond DIY scope, and being honest about that saves you money in the long run. Call a professional if: your concrete slab has significant differential elevation (one section noticeably higher or lower than another) and you suspect soil settlement or erosion underneath; you have large areas of spalling or cracking across most of the slab rather than isolated spots; you see cracks that are actively growing or moving; water is draining toward your foundation and you haven't been able to correct it with surface grading; or the base failure is widespread enough that re-laying the entire patio is the right answer. Mudjacking/slab lifting, deep base remediation, and full patio removal and reinstallation are all jobs where professional equipment and expertise make the difference between a lasting fix and a recurring problem.
The repairs covered here, cracks, spalling, individual broken pavers, sunken paver sections, lost joint sand, and failed sealant, are all realistic DIY projects for a careful homeowner with a weekend and the right materials. If your situation seems more complex, especially if the problem involves significant base movement or structural damage, it's worth getting a professional assessment before you invest time and money in surface repairs that won't hold. Related problems like patio edging failure, damaged patio steps, and deteriorating patio flooring each have their own specific approaches worth understanding as you plan your full repair. If you have damaged patio steps, the same diagnosis-first approach helps you decide whether to repair the surface, rebuild the base, or correct drainage before you patch. If you suspect patio edging has failed, focus on the base support and drainage around the edge before re-setting it patio edging failure.
FAQ
I hear a hollow sound when I tap my concrete patio. Do I still just fill the crack or spall?
If the surface is hollow-sounding when tapped, the fix is not just patching. You need to fully remove back to solid concrete, rebuild whatever was separating (for example, recompact base material or remove all delaminated layers), then patch with a product intended for the patio material and the depth you’re filling.
How can I tell whether a crack will keep reopening after I fill it?
For small cracks that are staying put, use crack cleaning and drying as the primary prep step, but also check whether water is getting into the crack during rain. If water keeps entering and expanding the crack, you’ll need to address drainage or you’ll get recurring filling failures even when the crack filler bonds at first.
Can I repair a sunken paver area by just adding sand or patching the low spot?
Yes, but only when the patio is sand-set and the issue is localized. For a sunken section, lift and reset the pavers after rebuilding the base layers (gravel first, then the correct 1-inch bedding sand depth, then jointing sand), and compact the section. Don’t rely on thin leveling mortar or filler under pavers, it won’t correct base washout.
Why did my polymeric sand jointing wash out or fail after repair?
Polymeric sand is designed to harden when activated with moisture, but it also depends on the joints being filled completely and the paver spacing not being blocked by debris. If joints are unevenly filled or contaminated with dust, polymeric sand can fail, so you should sweep out joints thoroughly and compact pavers after initial filling.
My new patch looks fine at first, then sealer peels. What went wrong?
If your patio joints look filled but the sealer later peels or patch edges pop, it’s often because moisture was trapped or the surface wasn’t properly cured or stripped. Make sure the concrete is fully dry before sealing, and if there is any peeling old sealer, remove it first rather than painting over it.
How long should I wait before sealing a repaired patio?
A common mistake is sealing too soon after repair or after pressure washing. Dry times vary, but a practical rule is at least 24 hours after cleaning, and 48 hours is safer for many climates, especially if humidity is high or temperatures are low.
How do I choose between penetrating and film-forming sealer for my patio?
Match the sealant to the existing surface type and the finish you want. If your patio looks like it already has a film that gives a glossy or wet look, another film-forming sealer is usually compatible; if it’s naturally matte or porous, a penetrating sealer is typically a safer choice. When unsure, test in a small hidden area.
Do I really need special safety gear for patio repairs?
Yes, and it’s a major safety and quality issue. Cutting, chipping, and grinding create dust that can irritate eyes and lungs, and concrete products are caustic on skin. Wear eye protection during any concrete removal, and keep people and pets away from dust and wash water.
Is it okay to fix a trip hazard with grinding or overlay if the slab already looks like it’s settling?
Re-leveling or resurfacing over a moving base is usually temporary. If you have new cracking plus noticeable elevation changes, treat it as base or drainage failure. Grinding a raised edge or applying an overlay can reduce trip hazards, but it won’t stop renewed settlement.
When should I stop DIY and call a contractor to repair a patio?
Consider professional help when you suspect the base has widespread failure, when the patio has significant differential elevation, or when cracks are actively growing or water consistently drains toward your foundation. These conditions often require lifting, deep base remediation, or full reinstallation with equipment that DIY work can’t replicate.
Can I reuse the pavers I removed during a repair?
Yes. For sand-set patios, you can reuse some intact pavers, but only if they’re handled carefully, stacked so they don’t chip, and re-laid with the correct base and bedding sand depths. If a paver is cracked or noticeably uneven after cleaning, replace it to avoid repeating the problem.
How do I verify the drainage problem is fixed, not just the damaged area?
A minimum slope of about 1/4 inch per foot away from the house is a useful target, but also check where water actually goes during a rain. If water still pools at edges or flows toward the foundation, you may need an edge channel drain or regrading, not just patching.
Next Article
Fix a Patio: Diagnose Damage and Repair Fast DIY
Step-by-step DIY to fix patio damage fast: diagnose cracks, pavers, leveling, drainage, weeds, joint repair.