You can fix an uneven flagstone patio yourself in most cases. The core approach is this: figure out why the stones moved, pull up the problem stones, fix what's underneath (bedding, base, or drainage), and re-set everything so it's locked in place. A few rocking or sunken stones is a weekend project. A whole section that's sinking because the gravel base washed out is a bigger job, but still doable if you're comfortable with some digging and mixing. Here's how to work through it from start to finish.
How to Fix Uneven Flagstone Patio: Step-by-Step DIY Guide

Talia Lang
17 May 2026
Quick diagnosis: why your flagstones are uneven
Before you touch a single stone, spend 10 minutes figuring out what caused the problem. The fix depends entirely on the cause, and skipping this step is how people end up doing the same repair twice.
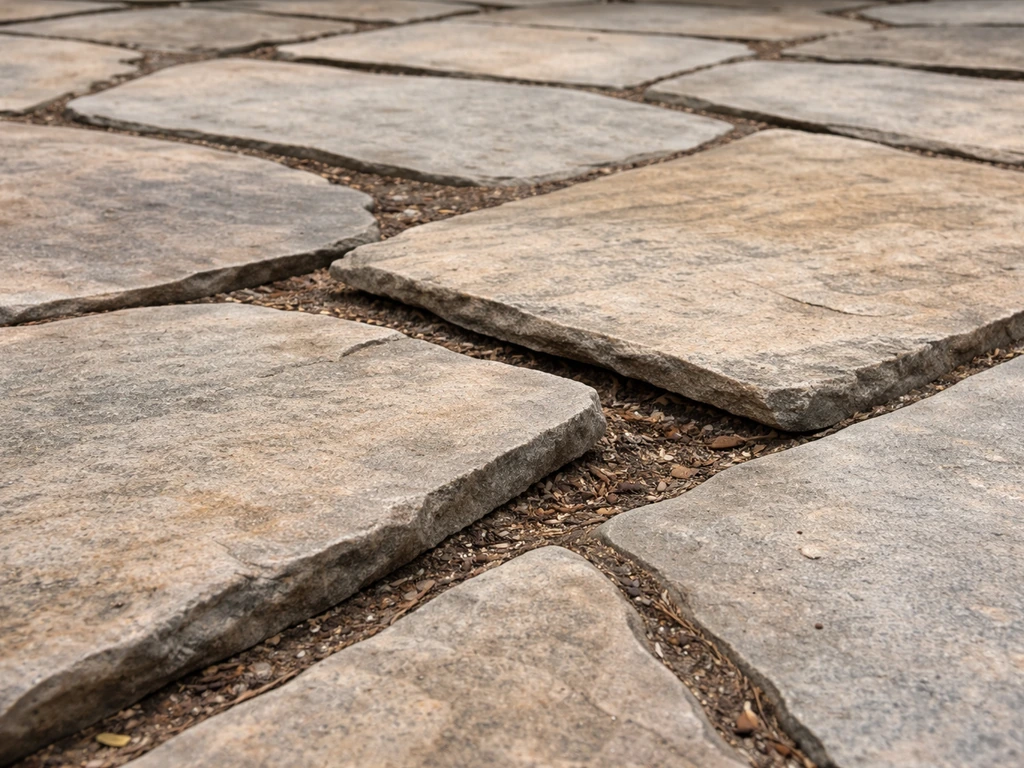
Walk the patio and step firmly on each stone. If a stone rocks, that almost always means the bedding material underneath (usually sand or mortar) has either washed out, compacted unevenly, or was never properly applied to begin with. If you’re dealing with loose patio bricks, the most common causes are washed-out bedding or base failure, so you’ll need to diagnose first before re-setting anything fix loose patio bricks. If you're dealing with the same kind of settling or washing out under an uneven brick patio, the steps for diagnosing the cause and rebuilding the base follow the same logic. A stone that's sunk below the surrounding surface usually points to base failure, meaning the gravel or compacted sub-base beneath the bedding layer has shifted or settled. Stones near the edge of the patio that have spread outward typically have a blank" rel="noopener noreferrer">broken or missing edge restraint letting the perimeter creep.
Look at the joints between stones too. If you see sand loss after rain, wide gaps, or weeds growing through, that tells you water is moving through the joint system and carrying material with it. That same water movement is often what's causing the rocking or sinking in the first place. Weed growth is actually a useful diagnostic clue: it means the jointing material has broken down enough to let roots establish, which usually means the bedding below is also compromised.
Here are the most common causes at a glance:
- Washed-out bedding sand: water gets under the stone and carries fine material away, leaving a void
- Poorly compacted base: the gravel or crusher run base wasn't compacted enough when the patio was first built
- Frost heave: repeated freeze-thaw cycles push stones up unevenly, especially in cold climates
- Drainage failure: water pooling under the patio has nowhere to go and softens the sub-base over time
- Missing or broken edge restraints: perimeter stones migrate outward, opening gaps and triggering a chain reaction
- Failed mortar joints: original mortar cracked and fell out, allowing movement and water infiltration
- Tree roots or organic material: roots growing beneath or old buried organics that rotted and left voids
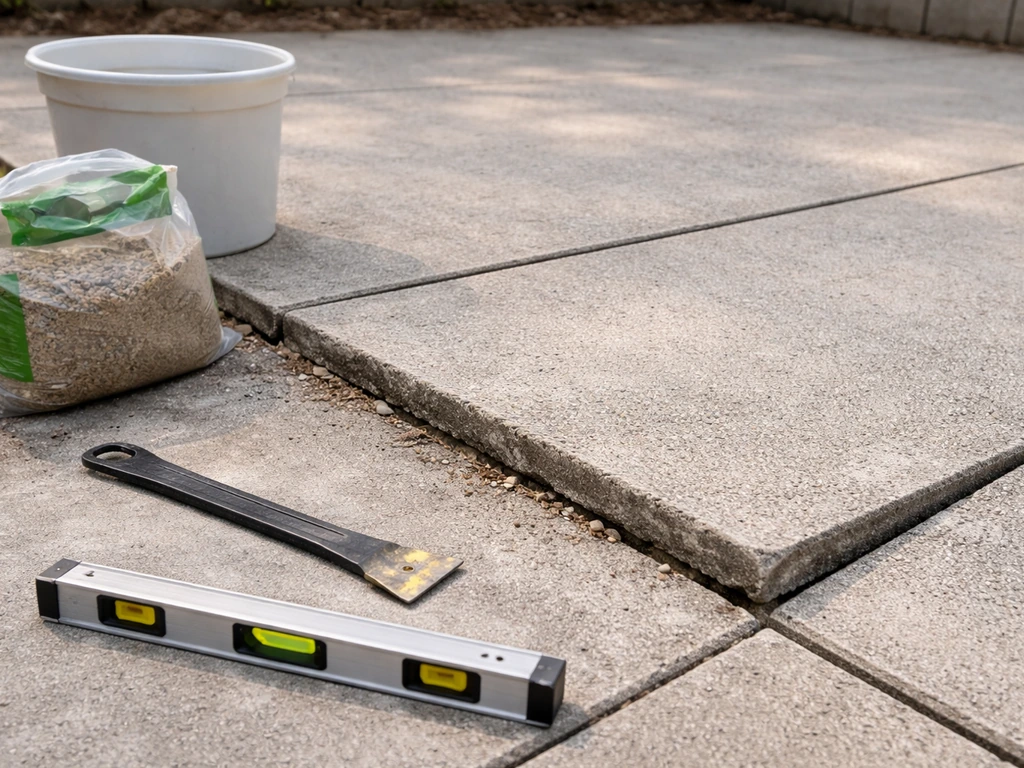
Tools and materials you'll need
Get everything together before you start. There's nothing worse than having flagstones pulled up and realizing you're missing something critical.
- Pry bar or flat bar (for lifting stones without chipping edges)
- Rubber mallet
- 4-foot level (a 2-foot level works for small stones, but longer is more accurate)
- Tape measure
- Pencil and notepad for marking high/low measurements
- Garden spade and hand trowel
- Plate compactor or hand tamper (compactor rental is worth it for any section bigger than 10–12 square feet)
- Stiff-bristle broom
- Safety glasses and work gloves
- Coarse bedding sand (also called concrete sand or all-purpose sand, not play sand)
- Crushed gravel or crusher run (for base repairs)
- Polymeric jointing sand (for filling gaps between stones after re-setting)
- Thinset mortar or Type S mortar (needed if stones were originally set in mortar, or if you're setting over concrete)
- Exterior patio sealant (optional but recommended after jointing)
- Replacement edge restraints and spikes if perimeter stones have moved
On bedding material: if your patio was originally set in sand, plan to re-set in sand. If it was mortar-set, re-set in mortar. Mixing the two approaches on the same patio creates uneven movement over time. Coarse bedding sand (not fine play sand) is the right choice for sand-set work because it compacts well and drains rather than holding water.
Measure the problem and check drainage first
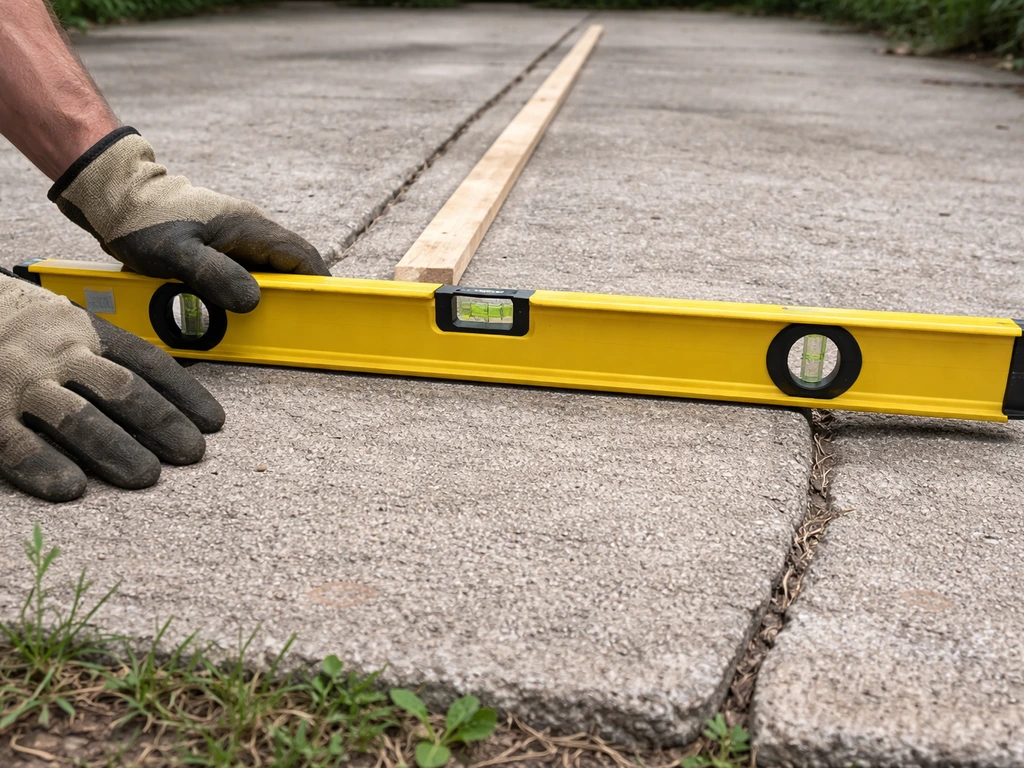
Before you lift anything, take measurements so you know the actual extent of what you're dealing with. Lay your 4-foot level across the uneven area and measure the gap between the level and the low stone. A dip of less than half an inch across a single stone is usually a bedding issue. A dip of an inch or more, especially spread across multiple stones, almost always means the base below has failed and will need to be rebuilt, not just topped up. If you’re specifically dealing with a low spot in a paver patio, the same diagnosis and rebuilding steps apply once you confirm whether the issue is bedding or the base how to fix low spot in paver patio.
Also check drainage slope. A correctly built patio drops about 1 inch for every 8 feet of horizontal run away from the house. To measure this, hold your level at the house end of the patio and check how much drop you have at the far end over that span. If the patio is level or sloping back toward the house, that's a drainage problem that will keep causing failures no matter how many times you re-set the stones. After you confirm the drainage issue, you can follow the steps in how to fix uneven patio slabs to make the repair last re-set the stones. Fix the slope, or water will continue undermining your work.
While you're at it, look around the perimeter for signs of erosion or clogged drainage channels. If the ground around the patio is soggy or there's a clear low spot where water pools, that's part of the problem and needs to be addressed before you reset anything. Sometimes the fix is as simple as regrading the surrounding soil. Other times, a French drain or additional gravel drainage layer needs to be added.
Spot repair: lifting, re-bedding, and re-leveling individual stones
If you've got a handful of rocking or slightly sunken stones but the rest of the patio is solid and the measurements show shallow dips (under an inch), this is your repair. It's manageable in a day.
- Mark every problem stone before you start. Use painter's tape or chalk so you don't forget which ones need work once you're moving quickly.
- Lift each stone carefully. Work the pry bar under one edge and lever it up gradually. Large flagstones can be heavy (50–150+ pounds), so have a helper or use a piece of cardboard to slide the stone onto rather than trying to carry it far.
- Scrape out the old bedding material completely. Don't just add new sand or mortar on top of the old. Get down to the gravel base or firm sub-base. If the old bedding was mortar and it's crumbled, chisel it off the underside of the stone and off the base.
- Inspect the base underneath. If it looks solid and undisturbed, great. If it looks loose, soft, or washed out, tamp it firm with your hand tamper before doing anything else. Add a thin layer of compacted gravel if there's a void.
- For sand-set patios: add fresh coarse bedding sand to bring the level up to just slightly proud of where the finished stone surface needs to be (typically 1 to 1.5 inches of sand bed). Screed it flat using a straight board or screed rail.
- Set the stone back in place and tamp it down firmly with your rubber mallet. Check with your level in multiple directions. If one edge is high, tap it down. If low, lift the stone, add a pinch more sand, and reset.
- For mortar-set patios: mix Type S mortar to a peanut butter consistency and apply it to the base (not the stone) in a consistent layer. Set the stone, tap to seat, and check level. Clean any squeeze-out immediately before it hardens.
- Once the stone is level and stable (test by standing on it), move to jointing (covered below).
One thing people get wrong here: they get in a hurry and don't check whether the re-set stone matches the height of its neighbors. Use your level to bridge across to the adjacent stones, not just to check flat. The goal is a continuous even plane, not individual stones that are each individually level but sit at slightly different heights.
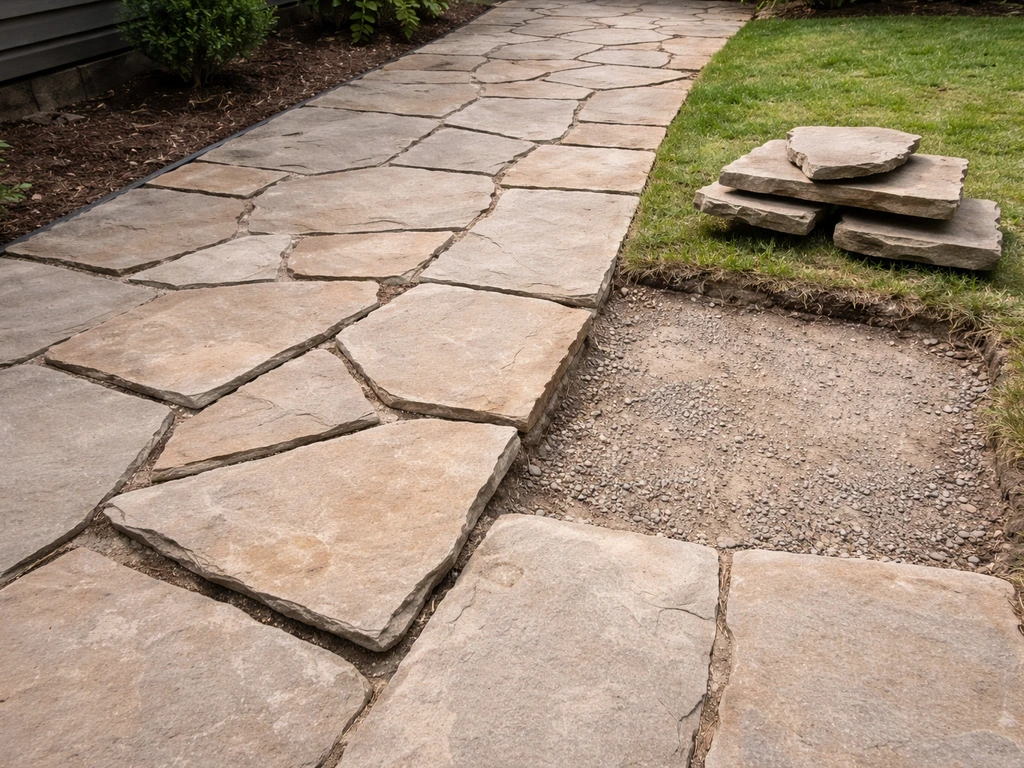
Bigger fix: rebuilding the base under a sunken section
If you've got a section of the patio, say 20 or 30 square feet or more, that has sunk noticeably, or if your measurements show dips greater than an inch and the ground underneath feels soft when you probe it, spot repair won't cut it. You need to rebuild the base. This is a half-day to full-day job and requires a plate compactor rental, but it's the only fix that will actually last.
- Remove all the flagstones in the affected section and stack them nearby. Keep them organized so you know roughly where each one goes back (flagstones are often irregular shapes, and re-fitting a large section without any record of original placement is a headache).
- Dig out the failed base material. You want to get down to firm, undisturbed soil. In most cases this means removing 4 to 6 inches of existing material. If you hit soft, wet, or organic soil, dig deeper until you reach something solid.
- If there's a drainage problem (water sitting in the excavated area, soft saturated soil), address it now. This might mean adding a layer of clean coarse gravel with a slight slope to drain away from the house, or installing a simple perforated drainage pipe at the low end. Don't skip this. Filling back over a wet base just restarts the clock on the same failure.
- Add a base layer of compacted crushed gravel or crusher run. For a residential flagstone patio, you want a minimum of 4 inches of compacted gravel base, and up to 6 inches in areas with cold winters or clay-heavy soil. Add in 2-inch lifts, compacting each lift before adding the next.
- Run the plate compactor over the entire excavated area after each lift. A hand tamper works but takes much longer and leaves a less consistent result.
- Check your drainage slope at this stage (1 inch drop per 8 feet away from the house) and adjust the graded base before you add bedding material.
- Add your bedding layer (coarse sand or mortar, depending on your setup) over the compacted base and screed it smooth.
- Re-set all the flagstones, checking each one for level and for matching height with the surrounding stones. Work from one end to the other in a consistent direction so you're not reaching over freshly set stones.
If frost heave is your problem, specifically, the base depth matters a lot. In cold climates, getting your gravel base down below the frost line (or at least getting maximum drainage so water doesn't sit under the patio to freeze) is what prevents the problem from recurring every spring. Talk to a local supplier about frost depth in your area if you're not sure, it varies considerably by region.
Re-setting joints so the stones stay locked in place
Re-setting the stones is only half the job. How you finish the joints determines whether the patio stays put or starts rocking again within a season or two.
For sand-set flagstone, polymeric jointing sand is the right choice. It's infused with a binding agent that activates when wet and then hardens, locking the joint material in place and resisting washout far better than regular sand. Pour it over the dry patio surface, sweep it into all the joints with a stiff broom, then use a plate compactor (with a rubber pad to protect the stone surface) or a hand tamper to vibrate it down into the joints. Sweep in a second pass to fill any gaps, then lightly mist with water per the manufacturer's instructions to activate the binder. Don't soak it, just mist. Let it cure for 24 hours before allowing foot traffic.
For mortar-set flagstone, pack mortar into the joints with a trowel and smooth it flush (or slightly recessed) with the stone surface. Strike the joints with a jointing tool or the edge of the trowel for a clean finish. Keep the mortar off the stone face, or clean it quickly with a damp sponge before it hardens.
Check your edge restraints while you're finishing up. If perimeter stones were moving outward before the repair, install plastic or aluminum edge restraint along the outside edges and spike it into the ground every 12 inches. This is an often-skipped step that causes a lot of repeat failures, because without physical confinement the outward pressure from foot traffic and freeze-thaw cycles will gradually push the perimeter stones out again and the whole patio starts spreading.
Sealing is optional but worth considering after jointing. A penetrating exterior stone sealer won't make the patio indestructible, but it reduces water infiltration, slows staining, and can extend the life of polymeric jointing sand by reducing UV and freeze-thaw degradation. If you seal, wait at least 48 to 72 hours after jointing, make sure the surface is completely dry, and apply in mild temperatures (above 50 degrees Fahrenheit).
How to keep it from happening again
Most flagstone patios don't fail because of bad stone or bad luck. They fail because of drainage problems that were never addressed, base material that wasn't deep or compacted enough, or joint sand that washed out and was never replaced. Once you've done the repair, these habits will keep you from repeating it:
- Inspect the joints every spring. If you see sand loss, weed growth, or widening gaps, top up with polymeric sand before the problem compounds
- Keep the drainage slope clear. Make sure the area around the patio doesn't grade back toward it after heavy rain or soil settlement
- Deal with weeds immediately. Weeds exploiting joint gaps accelerate sand loss and signal that the jointing material has already broken down
- Check edge restraints annually and re-stake any that have lifted or loosened
- Avoid letting downspout discharge near the patio edge; a buried downspout extension to move water away is cheap and prevents a lot of base damage
When to call a professional instead
This repair is DIY-friendly for most homeowners, but there are situations where bringing in a pro makes more sense than pushing through yourself. Be honest about what you're looking at.
- The entire patio or a large majority of it has sunk or shifted: full-patio removal and base reconstruction is a significant undertaking involving heavy equipment and a lot of material
- There's an ongoing drainage failure that requires engineering, like a high water table, a failed French drain system, or poor grading that involves the yard around the house
- The stone is large-format and very heavy (some natural flagstones top 200 pounds per piece) and you don't have a helper or lifting equipment
- The patio is mortar-set over a concrete slab and the slab itself has cracked or shifted, which is a structural issue beyond what re-bedding can fix
- You've repaired the same section more than once and it keeps failing, which usually means there's an underlying drainage or soil problem that needs professional diagnosis
If you're tackling a simpler version of this problem, like a single loose stone or a small section of pavers rather than full irregular flagstone, the diagnostic approach is similar but the repair steps are somewhat different. If you need help with just one loose patio stone, follow the same diagnosis steps, then lift and re-bed it based on whether your patio is set in sand or mortar. The method for re-leveling individual paver units or lifting and re-setting smaller uniform stones follows the same logic but with tighter tolerances and different jointing expectations. If you’re dealing with loose patio pavers, focus on identifying the cause under the stones, then re-bed and re-level so the surface stays locked in place.
Start today by walking the patio with your level and a notepad. Mark every stone that rocks or sits low. Measure your worst dips. Check the drainage slope. That 15-minute assessment tells you whether you're looking at a few hours of spot work this weekend or a full section rebuild that needs a compactor rental and some extra hands. If you still see uneven patio pavers after the first pass, it may be time to rebuild the base and address drainage so the problem does not return spot work.
FAQ
How can I tell if the problem is only the bedding, or the base is actually failing?
Use a long level across several neighboring stones, not just one. If multiple stones show a dip and you can probe the area and feel “give” in the gravel below the bedding layer, that usually means sub-base movement, not a simple top-up. Bedding-only issues tend to feel firm when you probe and are usually limited to shallow dips under individual stones.
Why does my patio look level right after resetting stones, but becomes uneven again after a season?
The most common cause is jointing and confinement problems. If polymeric sand or mortar joints wash out early, or if edge restraints are missing, water and movement resume. Another frequent mistake is vibrating or compacting without protecting stone edges, which can subtly shift stones out of plane even if they look correct at the moment.
Can I “top up” sand under a low flagstone instead of lifting it?
Usually not if the stone is rocking or the jointing material has washed out. Top-ups can create a thin, unstable sand layer that doesn’t compact the same way and can lead to repeat settling. If the surrounding joints show sand loss, wide gaps, or weed growth, plan to lift and rebuild the bedding correctly rather than trying to fill from above.
What bedding sand should I use, and what should I avoid?
For sand-set flagstone, use a coarse, compactable bedding sand that drains well. Avoid fine play sand or very dusty material, because it tends to hold more water and compacts unevenly, which can worsen rocking and freezing problems. Also, don’t switch sand to mortar on part of the patio, inconsistent setups can cause differential movement.
How deep should the base be, and do I need to get below the frost line everywhere?
Base depth depends on local frost depth and site drainage, but the key principle is preventing water from sitting under the patio and freezing. In cold climates, deeper or better-draining sub-base helps prevent frost heave recurrence. If you are unsure, ask your local supplier or building department for typical frost-related guidance for patios in your region.
What’s the right way to check drainage slope without guessing?
Measure the drop at the house end compared with the far edge using the same level setup and span you actually built. The target is about 1 inch of drop per 8 feet away from the house. If the patio is level or slopes back toward the home, no amount of re-setting will last because water will keep undermining the bedding and base.
How do I know whether edge restraints are the real culprit?
Look for spreading at the perimeter, especially where stones creep outward or joints open along the edge. If water funnels toward the outer boundary or you see signs of erosion near the patio border, edge containment and drainage are likely involved. Fixing the interior alone often fails when the perimeter is free to move under freeze-thaw and foot traffic.
Is polymeric jointing sand really necessary, and what happens if I use regular sand instead?
Polymeric sand is often the right choice for sand-set flagstone because it hardens after misting and resists washout through rainfall. Regular sand can work initially but commonly breaks down and gets carried out, reopening joints and letting bedding shift. If you already have frequent washouts or weed growth in joints, polymeric jointing is especially important.
How much water should I use after installing polymeric jointing sand?
Mist lightly to activate the binder, don’t soak. Overwatering before curing can cause premature breakdown or uneven hardening, which can reduce joint stability. Follow the product instructions for misting duration, and keep traffic off the patio for the full curing time.
When using mortar-set joints, should mortar be flush with the stone face?
It’s best to keep mortar from slumping onto the stone top. Smooth joints flush or slightly recessed so water doesn’t pool on high mortar ridges, and clean the face quickly before mortar hardens. Patching messy mortar later can look fine but can trap water and contribute to staining or accelerated breakdown.
Do I need a plate compactor for any job, or can I do it by hand?
Hand tampering can work for very small, localized bedding corrections, but reconstructing a failed section or rebuilding the base typically requires a plate compactor to achieve uniform density. If your diagnosis indicates base failure (deep dips, soft probing, large area), renting a compactor is usually the difference between a one-time fix and a repeat repair.
After I repair unevenness, should I seal the flagstone or just focus on joints?
Sealing is optional, but it helps reduce water infiltration and staining, which can extend the life of jointing materials. If you seal, wait several days after jointing so joints cure fully, apply on a dry surface, and use a penetrating exterior product. Note that sealing won’t stop movement caused by poor drainage or a failing base.
How can I prevent repeat unevenness after the repair?
The biggest prevention levers are keeping water away from the patio and maintaining joint stability. Make sure the drainage slope is correct, clear any nearby pooled areas or clogged drainage paths, and address perimeter erosion early. Also consider periodic re-evaluation of joint loss and weed growth after heavy rain, catching washout sooner limits how much bedding the water can undermine.
Next Article
How to Fix Uneven Patio Slabs: Step-by-Step DIY Guide
Diagnose and fix uneven patio slabs with DIY steps: lift and re-level, rebuild base, improve drainage, then seal and pre