Uneven patio slabs are almost always caused by one of four things: soil that wasn't properly compacted before the slab was poured, water washing away or softening the base material beneath the concrete, frost heave pushing slabs up from below, or tree roots slowly lifting sections over time. Once you know which one you're dealing with, the fix becomes much clearer. After you identify the cause, you can follow the right leveling approach to fix an uneven brick patio.
How to Fix Uneven Patio Slabs: Step-by-Step DIY Guide

Talia Lang
16 May 2026
In most cases you can lift and reset the affected section yourself over a weekend, though slabs that have sunk badly or cracked through may need the base rebuilt before you reset anything. Once the cause is clear, you can fix a loose patio stone by lifting the affected section, rebuilding the base, and resetting it level.
If your patio pavers are loose, you can often fix them by lifting the affected sections, rebuilding the base, and resetting everything level fix loose patio pavers.
Why Your Patio Slabs Are Uneven
Before you grab a pry bar, spend five minutes figuring out what actually went wrong. Fixing the slab without fixing the cause is just doing the job twice.
Soil settlement and poor compaction
This is the most common culprit, especially on patios built in the last ten years or on newer construction. If the soil beneath the base wasn't compacted in layers before the concrete was poured, it settles gradually under load and the slab sinks with it. You'll usually see a broad, gradual dip rather than a sharp edge between two slabs.
Water and drainage failure
Water is responsible for more patio problems than anything else. When water pools under a slab, it erodes or softens the base material, creating voids the concrete then sinks into. You can usually spot this cause by looking at where water flows (or doesn't flow) during rain. If a section of the patio holds standing water, or if water drains toward the house instead of away from it, a drainage problem is almost certainly involved.
Frost heave
In colder climates, frost heave is a major cause of uneven slabs. It works through ice segregation: when water in the soil below the slab freezes, blank" rel="noopener noreferrer">ice lenses form and grow, pushing the concrete upward. When the ground thaws, the slab may not settle back to its original position, leaving it raised relative to adjacent sections. If your patio gets worse every spring and recovers partially by summer, frost heave is the likely cause.
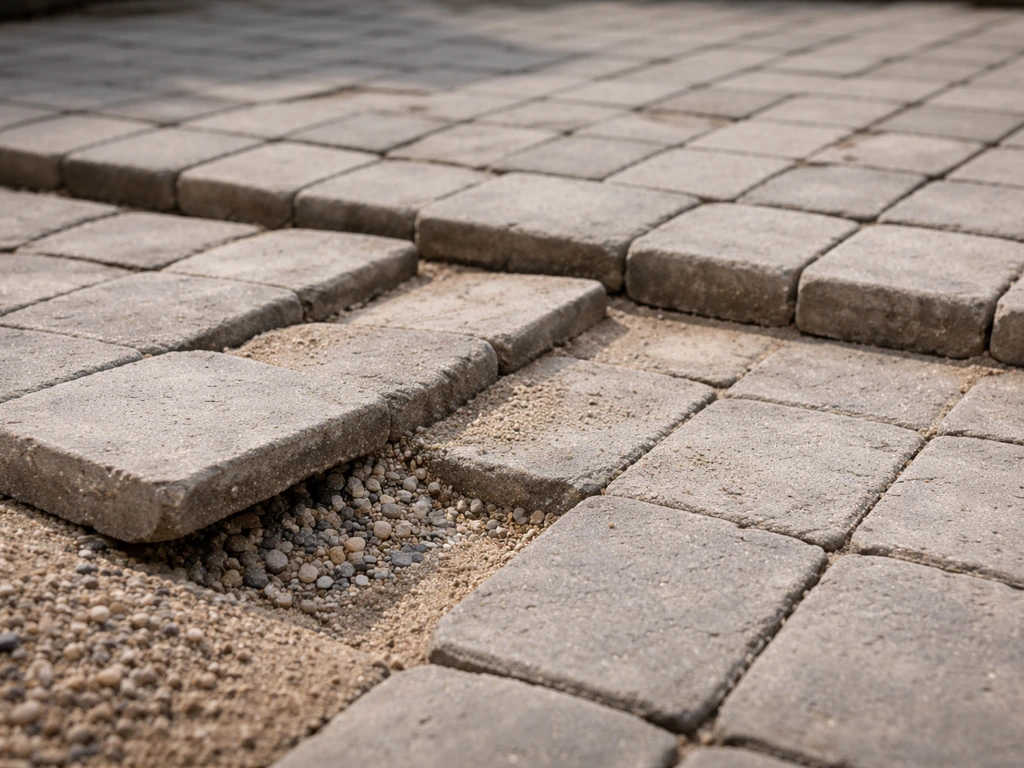
Tree roots and base failure
Roots growing under a slab will lift it unevenly, usually on one edge or corner. The tell is that the lifted section looks like it was pushed from below rather than having sunk. Base failure, where the gravel or compacted stone layer beneath the concrete has washed out or was too thin to begin with, causes slabs to rock or tip when you walk on them.
Safety Check: What to Inspect Before You Touch Anything
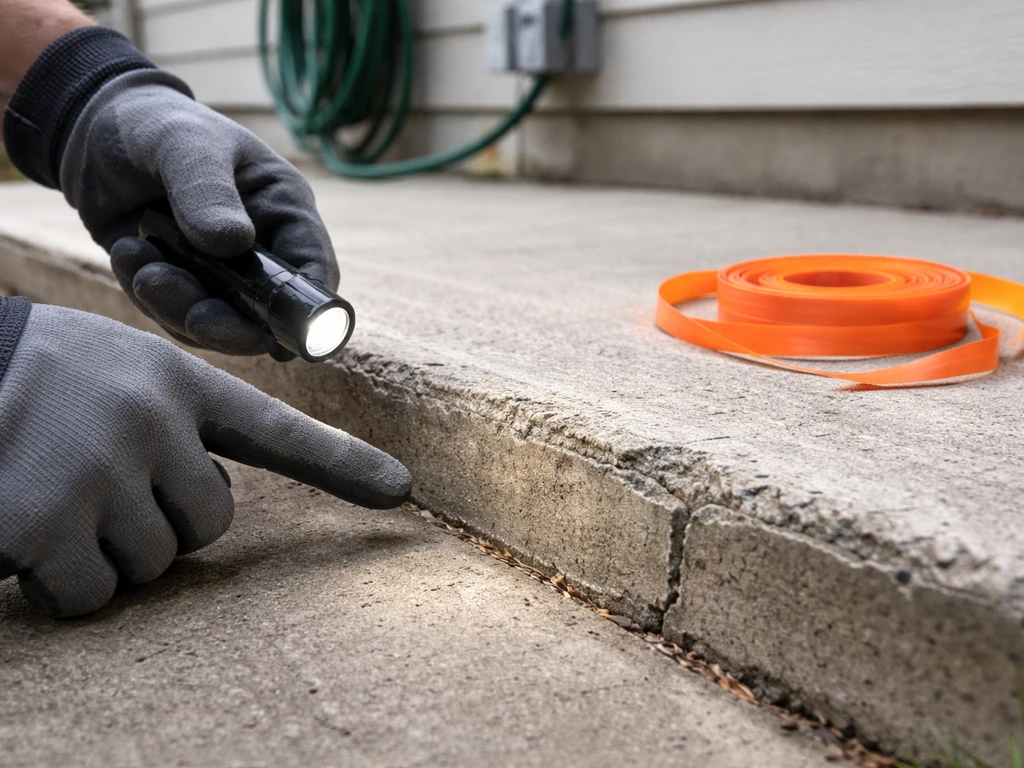
Don't start prying up concrete before you've done a proper inspection. Slabs are heavy, the edges can be sharp, and working blind can make the problem worse or get someone hurt.
- Check for utility lines. Before you dig or drill anywhere near the patio, call 811 (in the US) to have underground utilities marked. Gas, electrical, and water lines can run under or alongside patios.
- Walk the slab and feel for rocking. A slab that tips underfoot has a void beneath it. Don't stand on the tipping edge while prying the opposite side.
- Look for cracks running through the slab, not just surface crazing. Structural cracks that go all the way through the concrete mean the slab may break during lifting. Cracked slabs often need to be broken out rather than lifted intact.
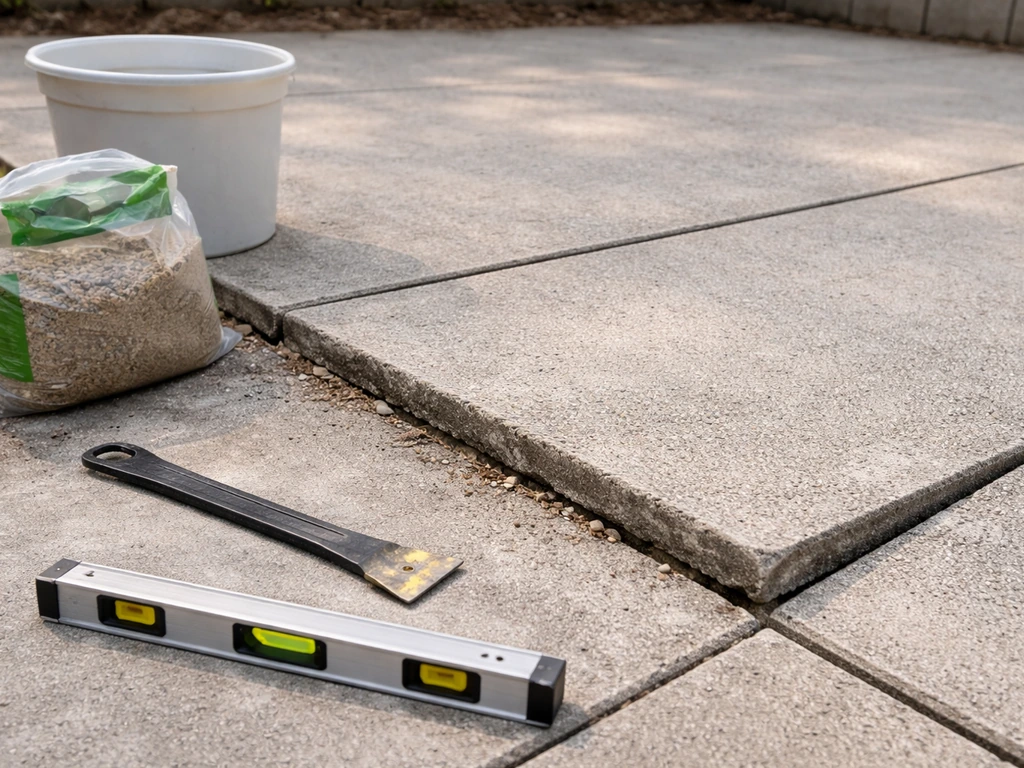
- Check the height difference at joints. A lip of more than about 3/4 inch is a tripping hazard and often indicates significant base movement underneath, not just surface settling.
- Look at the edges and joints for erosion or washout. Missing or crumbling joint material usually signals water intrusion, which tells you the base may be compromised even if it isn't obvious yet.
- Note any slope toward the house. The patio should drain away from the foundation, ideally at a slope of at least 1/8 to 1/4 inch per foot. If water flows toward the house, that has to be corrected when you reset the slab.
- Wear steel-toed boots and heavy gloves any time you're handling concrete slabs. A dropped slab edge will break fingers.
Tools and Materials You'll Need
The specific tools depend on whether you're doing a minor lift-and-reset or a full remove-and-rebuild. Here's a practical list for both scenarios.
| Item | What It's For | Notes |
|---|---|---|
| Pry bar (36 in. or longer) | Lifting slab edges | A longer bar gives you better mechanical advantage on heavy slabs |
| Hydraulic floor jack or bottle jack | Lifting thick or heavy slabs safely | Pair with a wood block to distribute load on the slab edge |
| Hand tamper or plate compactor | Compacting base material in layers | Rent a plate compactor for any area larger than a few square feet |
| Shovel and garden trowel | Digging out, adding, and shaping base material | A flat spade works best along slab edges |
| Compactable gravel (crusher run or road base) | Rebuilding the base layer | Aim for a minimum 4-inch compacted depth beneath the slab |
| Coarse sand | Fine-leveling the top of the base before resetting | Use concrete sand, not play sand |
| Level (4 ft.) and straight edge | Checking slope and height during reset | Essential for getting the slab sitting correctly |
| Rubber mallet | Seating the slab after lowering it onto the base | Helps avoid cracking the concrete during final positioning |
| Joint sand or polymeric sand | Refilling gaps between slabs after resetting | Polymeric sand resists washout better than plain sand |
| Concrete or masonry sealer | Protecting slabs and joints after the work is done | A penetrating silane/siloxane sealer works well on outdoor concrete |
| Safety glasses, heavy gloves, steel-toed boots | Personal protection | Non-negotiable when working with concrete slabs |
How to Level Uneven Slabs: Lifting, Adjusting, and Resetting
This approach works when the slab itself is intact (no structural cracks), the height difference is modest (roughly 1 to 3 inches), and the underlying cause is base settling or minor erosion rather than a complete base failure. If the slab has sunk more than 3 inches, rocks badly, or has cracked through, skip to the next section.
- Clear the patio surface and remove any furniture, planters, or edging near the affected slab. Give yourself room to work.
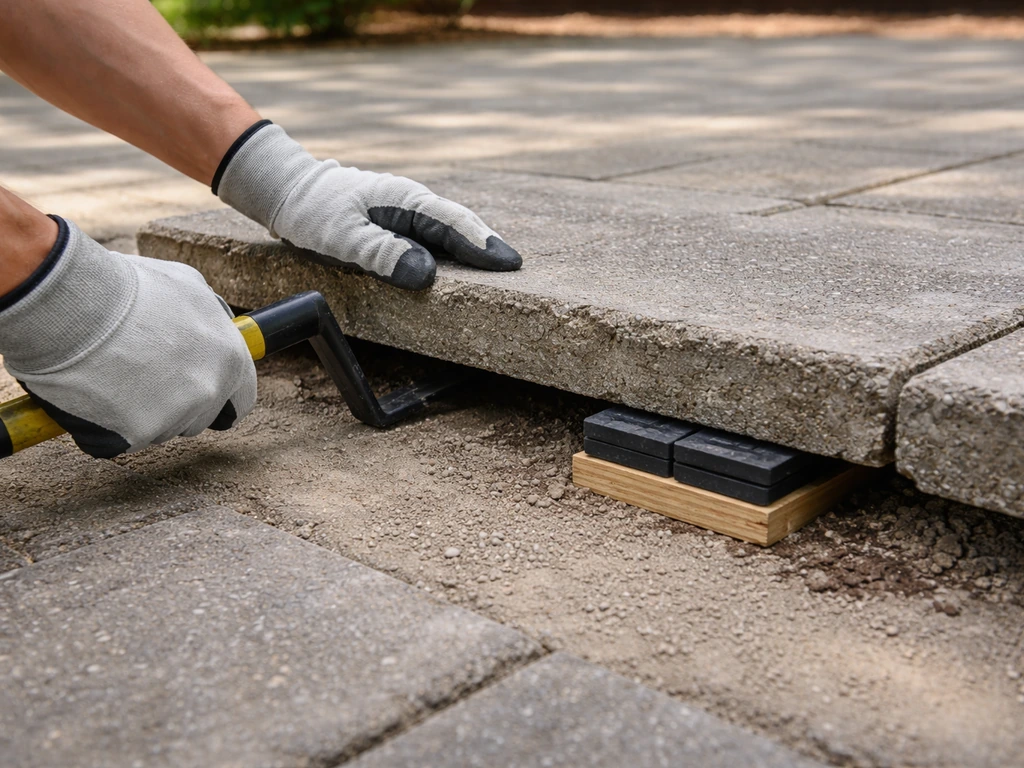
- Use a pry bar to get under the edge of the slab. Insert the tip into the joint between slabs and lever up slowly. If the slab is stubborn, use a bottle jack with a wood block under the slab edge to avoid cracking it. Lift only enough to get clearance (2 to 3 inches is usually enough).
- With the slab lifted or propped, examine the base beneath it. Look for voids, soft spots, and signs of erosion or root intrusion. This tells you what material you need to add.
- Add compactable gravel or road base to fill any low spots. Add it in layers no thicker than 2 inches, and compact each layer with a hand tamper before adding the next. Don't try to add 4 inches of fill all at once—it won't compact properly and will settle again.
- Once the base is roughly at the right height, add a thin layer of coarse sand (about 1 inch) on top of the compacted gravel. This lets you fine-tune the exact height and slope of the slab.
- Use your 4-foot level and straight edge to check the height and slope of the prepared base. The surface you're preparing should mirror the correct final slope of the slab.
- Lower the slab back onto the prepared base carefully. Don't drop it, lower it. Have a helper if the slab is large. Use the pry bar to guide it into position.
- Walk on the slab to test for rocking. If it moves, lift it again, identify the high spot in the base, and scrape away a little sand. Repeat until the slab sits solid and flush with adjacent sections.
- Use a rubber mallet to tap the slab down firmly and settle it onto the sand layer.
Re-Leveling Sunken Slabs: When You Need to Remove and Rebuild
When a slab has sunk significantly, the base beneath it has failed or been washed away to the point that just lifting and shimming won't give you a stable result. You need to get the slab out, rebuild the base properly, and reset it. If you need a step-by-step approach to fix a low spot in a paver patio, follow the same diagnosis-and-reset process described for sunken slabs. It's more work, but it's the fix that actually lasts.
It's worth knowing that professionals sometimes use a technique called slabjacking (or mudjacking) instead of full removal. This involves drilling holes through the sunken slab and pumping grout or expanding foam beneath it to fill voids and lift the concrete back toward its original elevation. It can be a good option when the slab is structurally sound and you don't want to deal with removal. For a DIY project, though, manual removal and base rebuild is the more practical route unless you're renting specialized equipment.
- Score the joints around the slab with a circular saw or angle grinder fitted with a diamond blade. This breaks any bond between adjacent slabs and makes removal cleaner.
- Pry up the slab using a long pry bar and bottle jack. Work from multiple edges rather than forcing one side. For large slabs (anything over about 4 feet square), you may need to break the slab into sections with a rotary hammer and chisel, then remove the pieces. Whole slabs can weigh several hundred pounds.
- Once the slab or sections are removed, dig out the base material until you hit stable, undisturbed subgrade soil. If the soil itself is soft or wet, let it dry out before proceeding, or address any drainage issue first.
- Address the root cause before adding new base material. If water is pooling, install or improve drainage (see the section below on base prep and slope). If tree roots caused the heave, decide whether to remove them now or choose a different approach.
- Add compactable gravel or road base in 2-inch layers. Compact each layer to at least 95% density using a plate compactor (rent one if you don't own one). Build up to a minimum compacted depth of 4 inches. For slabs that see heavy loads or foot traffic, 6 inches is better.
- Add a 1-inch layer of coarse concrete sand on top of the compacted gravel base. Screed it flat using a straight board, checking your slope with a level as you go.
- Lower the slab back into place. If you broke it out in pieces, you'll need to either pour new concrete or purchase replacement slab sections. For replacement slabs, pre-cast concrete stepping stones or patio slabs from a landscape supplier are often a practical option.
- Test for stability by walking on it and checking with a straight edge across adjacent slabs. Make any fine adjustments by lifting an edge and adding or removing sand beneath.
- Compact the slab lightly with a rubber mallet and check the joint gaps around the perimeter.
How to Level the Ground for Patio Slabs: Base Prep and Slope
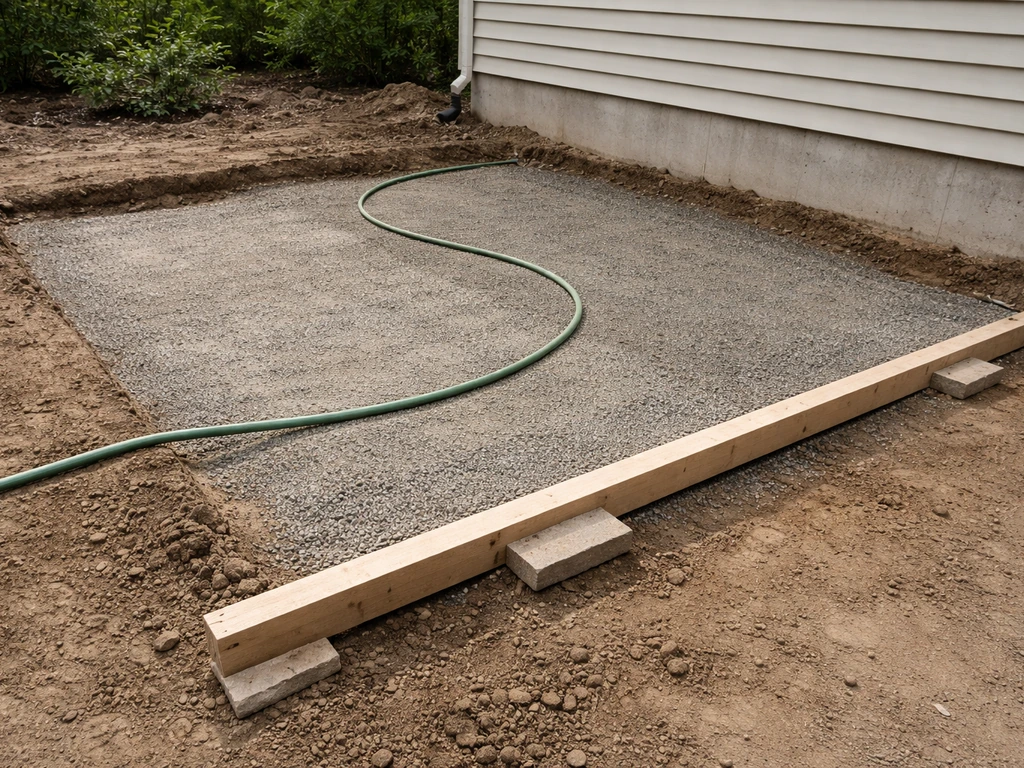
Whether you're resetting a sunken slab or rebuilding from scratch, the base preparation is what determines whether the patio stays level for years or starts shifting again in the next freeze-thaw cycle. Getting this right isn't complicated, but it does require patience.
Getting the slope right
The patio surface should slope away from your house at a rate of 1/8 to 1/4 inch per foot. Over a 10-foot-wide patio, that's a total drop of 1.25 to 2.5 inches at the outer edge. This sounds small but it's enough to drain water away from the foundation reliably. Use a 4-foot level with a small shim to check your slope during base prep. Don't rely on eyeballing it.
Compacting base material correctly
The most common DIY mistake is dumping a thick layer of gravel into an excavated area and compacting it once. Base material needs to be added and compacted in 2-inch lifts (layers). Each lift gets compacted before the next one goes in. The target compaction for a concrete subbase is at least 95% of maximum density, which is the standard referenced by the American Concrete Pavement Association. In practical terms, this means a plate compactor making multiple passes over each layer, not a hand tamper tapped a few times. For any area larger than a couple of square feet, rent a plate compactor. It's worth it.
Subbase depth
A minimum of 4 inches of compacted granular subbase (crushed stone or road base) is the industry standard for residential concrete flatwork. In areas with heavy clay soil, poor drainage, or significant frost depth, 6 inches is a better target. Don't shortcut this. Thin subbases are the primary reason residential patios fail within a few years.
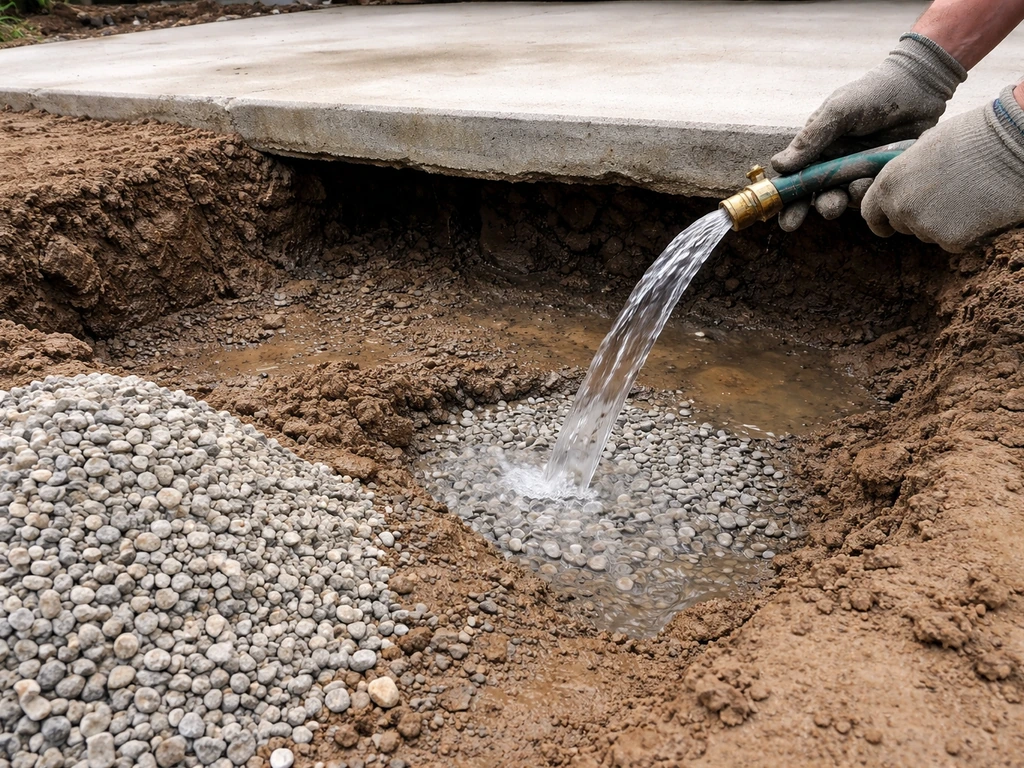
Managing water under the base
If you discovered erosion or soft, saturated soil when you lifted the slab, you need to deal with where that water is coming from before rebuilding the base. Common sources include poor grading around the patio, downspout discharge too close to the surface, or a high water table. Extending downspouts, installing a simple French drain along the patio edge, or regrading the surrounding area can all help. Rebuilding the base without addressing the water source is a temporary fix at best.
Finishing Up: Joints, Sealing, and Keeping It Level
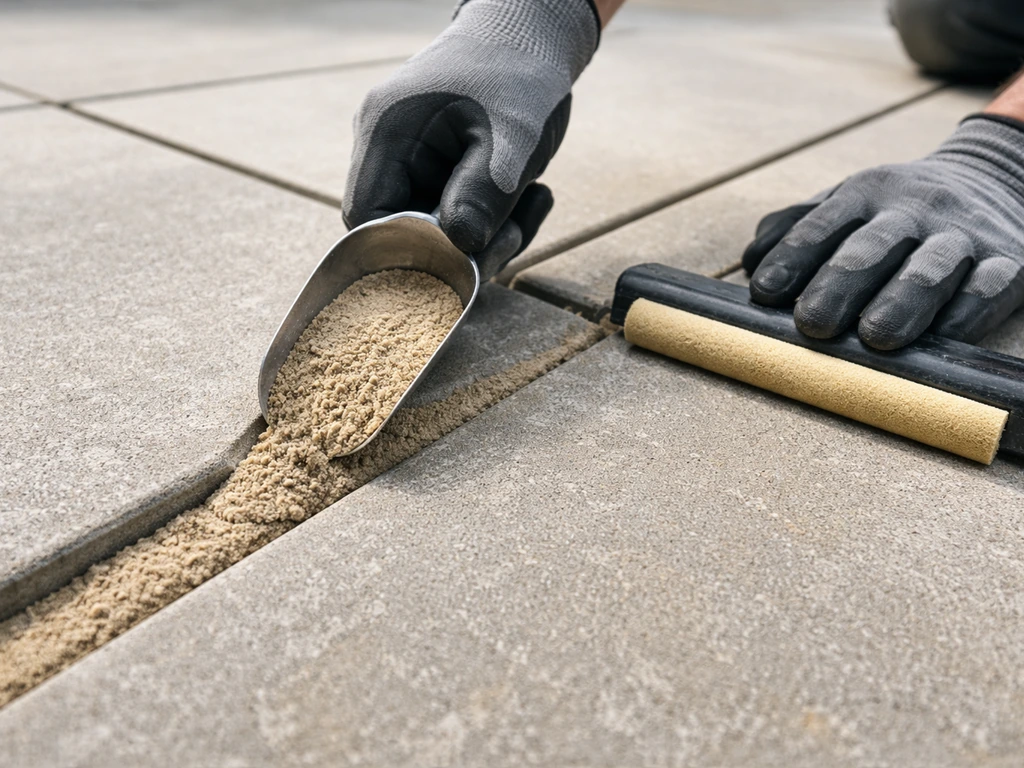
Filling the joints
Once the slabs are reset and stable, fill the joints between them. For slabs set on a sand base, polymeric sand is a much better choice than regular joint sand. It contains a binding agent that, when activated with water, hardens slightly and resists being washed out by rain. Pour it dry into the joints, sweep it in, and compact it by tapping the slab edge with a mallet. Then activate it by misting with water according to the manufacturer's instructions. For slabs with tight, narrow joints, a caulk-style exterior concrete joint filler gives a more finished look and provides good water resistance.
Sealing the surface
Sealing concrete slabs after a repair serves two purposes: it helps protect the concrete from water intrusion and freeze-thaw damage, and it reduces the likelihood of joint erosion starting the whole cycle again. A penetrating silane or siloxane sealer is generally the best choice for outdoor concrete because it soaks into the surface rather than forming a film on top, which means it won't peel or trap moisture. Apply it after the joints have fully cured (usually 24 to 48 hours for polymeric sand). Follow the label instructions on coverage and drying time.
Proper joint sealing also matters for long-term stability. Joints that are left open allow water to get beneath slabs, which starts the whole erosion and settlement cycle over again. The principle here is similar to what's used in engineered concrete joint design: keep water out of the joint reservoir, and the slab underneath stays in a more stable environment.
Preventing it from happening again
The honest reality is that most patio slabs shift again eventually if the underlying conditions aren't corrected. Here's what actually prevents recurrence:
- Fix the drainage first. If water is pooling on or under the patio, that's the highest-priority issue. No amount of re-leveling will hold if the base keeps getting saturated.
- Don't plant large trees close to the patio. Roots from trees within 10 to 15 feet can work their way under slabs within a few years.
- Recheck and refill joints annually, especially after winter. Joint sand washes out gradually, and topping it up every spring prevents water from getting underneath.
- Reseal the surface every 2 to 3 years depending on your climate and foot traffic. High-freeze climates need more frequent attention.
- If frost heave is a recurring problem in your area, consider improving subsurface drainage or extending the subbase depth to get below the frost line, which reduces the available water that drives ice-lens formation.
- After major rain events, walk the patio and check for new rocking or height differences at joints. Catching a small shift early means a simple adjustment rather than a full reset.
When to call a professional
If you're dealing with multiple large slabs that have sunk 4 or more inches, a patio adjacent to a foundation that's showing signs of movement, or a drainage problem that requires significant regrading of your yard, those are situations where a professional concrete contractor or landscape engineer is worth the money. The same goes for slabjacking: while the concept is DIY-adjacent, the equipment and technique really aren't, and a poorly executed mudjacking job can crack a slab that was otherwise salvageable. Be realistic about scope before you start.
For straightforward cases involving uneven pavers rather than poured concrete slabs, the process shares some similarities but differs in important ways, particularly when dealing with uneven flagstone, brick, or individual loose stones. For a deeper walkthrough of uneven patio pavers, follow the steps for base prep, leveling, and fixing the cause of the sinking. If you’re specifically working with patio pavers rather than poured concrete slabs, the leveling approach is similar, but the reset steps can differ based on the paver type uneven pavers. Those materials each have their own reset techniques worth looking into if your patio uses something other than poured concrete slabs.
FAQ
How can I tell whether I should lift-and-reset or remove-and-rebuild a sunken slab?
Use a straightedge to check how much the slab is off level at multiple points, not just one corner. If you see a smooth, broad dip, it often points to settlement or base erosion. If you see a sharp step between two slabs or twisting/rocking as you step, that points more toward base failure, voids, or cracking that may require a full reset rather than shimming.
If my slab has hairline cracks, does that automatically mean I need to remove-and-rebuild?
Don’t rely on the slab crack as your only indicator. Look for hairline cracking that runs with movement, plus signs of rocking (check with a firm push at the edge), and check whether the slab sounds hollow when tapped. Hollow or rocking usually means voids under the slab, which makes thin shimming unreliable.
What drainage clues should I look for besides pooling under the slab?
After rain, check where water actually goes along the patio, including along slab joints. If water collects at the same location repeatedly, that area needs drainage correction before rebuilding, otherwise the new base gets eroded again. Also watch whether downspouts discharge onto the patio surface, onto a low seam, or near the foundation.
How can I confirm frost heave versus soil settling?
A typical tell is whether the lifted section looks like it rose as a unit (pushed up from below) or whether it sank unevenly into a soft spot. Frost heave tends to worsen each spring and partially improve after thaw, while base settling often progresses steadily under load without seasonal cycling.
Can I fix only one small area of an uneven patio slab without disturbing the surrounding slabs?
Yes, but only if the slab is structurally intact and you have enough stability to rebuild the base correctly. If you’re doing a partial reset, lift the slab, remove all loose or saturated base material, and re-compact in 2-inch lifts. If the removed area reveals extensive washout or repeated saturation, plan on rebuilding a larger footprint.
What should I do if I uncover saturated soil when the slab comes up?
If you find soft or saturated soil, stop and address the source, then let the area dry enough to compact properly. Replacing base without changing grading or water entry often leads to re-sinking within the next freeze-thaw or heavy rain cycle. A practical decision point is, if the soil turns mud during probing, you will likely need drainage work and a deeper rebuild.
What’s the biggest mistake that causes slab leveling to fail soon after the repair?
Don’t top up with loose gravel. The key is adding and compacting granular base in layers, so voids are eliminated throughout the depth. For larger areas, a rented plate compactor with multiple passes per lift gives more consistent compaction than hand tamping.
How do I choose the right subbase thickness for my patio conditions?
Thickness targets matter because thin subbase allows the concrete to respond to moisture and temperature changes. If you’re in heavy clay, poor drainage, or a colder climate, aim higher than the minimum standard. If you’re unsure, base prep that reaches the higher thickness plus proper drainage is safer than trying to save time with a shallow rebuild.
How do I maintain the correct slope when I’m resetting multiple slab sections?
If you can’t achieve the required slope (1/8 to 1/4 inch per foot away from the house), the patio will stay wet or direct water back toward the foundation. Use a 4-foot level and check multiple points, then build the subbase height to match the slope before you set the slab. If you discover a big grade issue, regrade surrounding ground as part of the repair plan.
Should I use regular joint sand or polymeric sand after leveling?
For joint fill, polymeric sand is typically the better choice for slabs set on a sand base because it binds slightly after water activation and resists washout. Regular sand can get rinsed out, leaving gaps that refill with water and restart settlement.
Can I seal the concrete right after I do the repair and fill the joints?
Yes, but timing matters. Wait until joints are fully cured (polymeric sand needs time to harden) and only then seal. Sealing too early can trap moisture, and sealing without addressing joint sealing can still allow water underneath where it does the most damage.
What’s the best way to handle joints that keep widening after a repair?
If there are large gaps or repeated differential movement, the joint needs to stay functional and water-resistant, not rigidly sealed over a void that could move again. Consider joint fillers designed for exterior concrete and ensure the joint reservoir stays clean so the filler can bond properly.
When is slabjacking a bad idea for uneven patio slabs?
Slabjacking can be appropriate when the concrete is structurally sound and you want minimal surface disruption, but it still depends on having a stable void-free base environment. If the slab base is extensively washed out or the slab is cracked through, grout pumping may not produce lasting support and can worsen cracking from stress transfer.
When should I stop DIY leveling and hire a pro?
For any repair adjacent to a foundation, if the foundation shows active movement, or if multiple slabs are involved with significant sinking (for example, several inches), DIY leveling is often not the root fix. In those cases, a contractor or landscape engineer can evaluate grading, drainage, and whether underlying soil or structural movement is driving the problem.
Next Article
How to Fix Uneven Patio Pavers: Step-by-Step DIY
Diagnose why patio pavers sink or rock, then lift, rebuild base and bedding, reset level, and prevent washout and draina