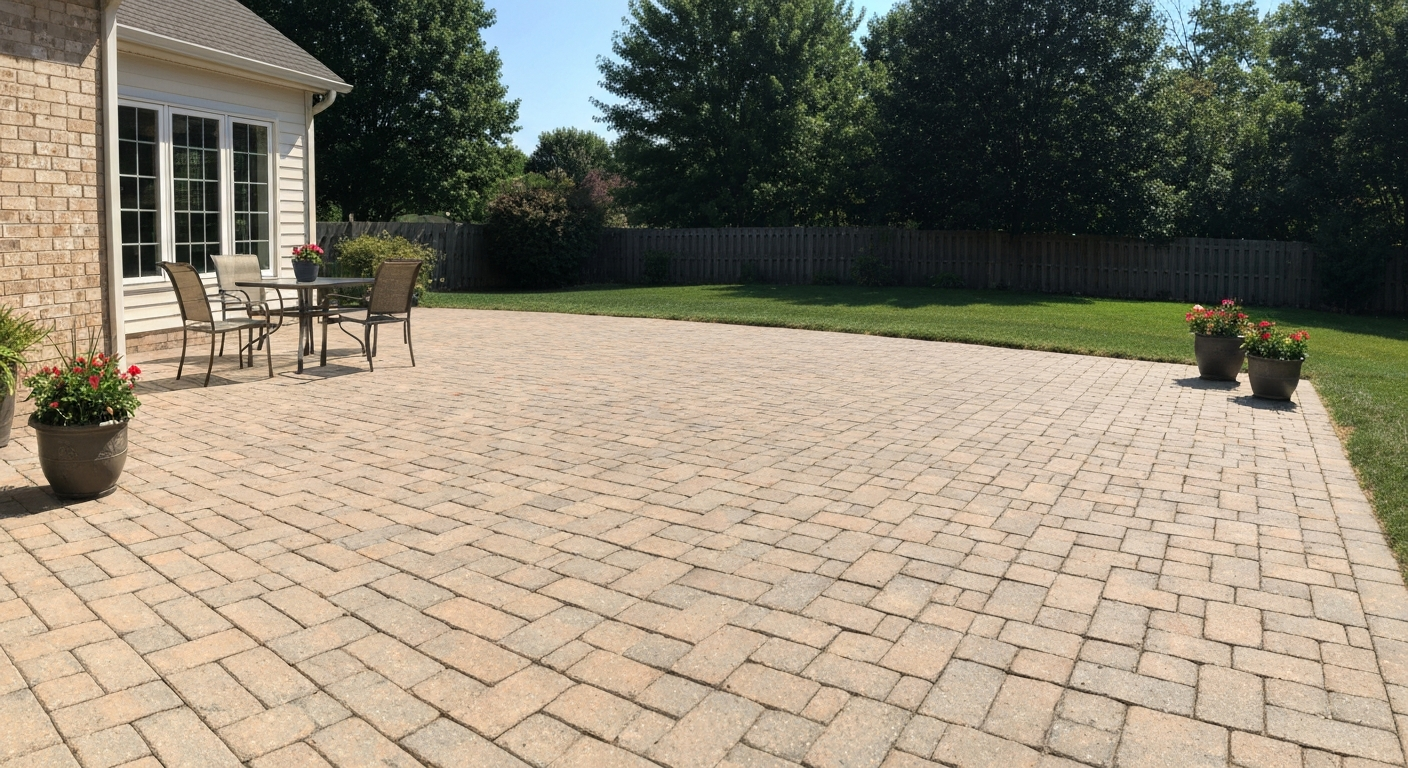
Most old patios don't need to be replaced, they need to be cleaned, repaired in the right order, and protected so the damage doesn't come back. Whether you're dealing with a cracked concrete slab, sunken or stained pavers, or a pea gravel surface that's spread itself across the lawn, there are real, cost-effective fixes for each one. This guide walks you through how to assess what you've actually got, what tools and materials you'll need, and which repairs are genuinely DIY-friendly versus which ones are worth calling a pro for.
How to Make an Old Patio Look Better: DIY Repair & Resurface

Talia Lang
4 Aug 2026
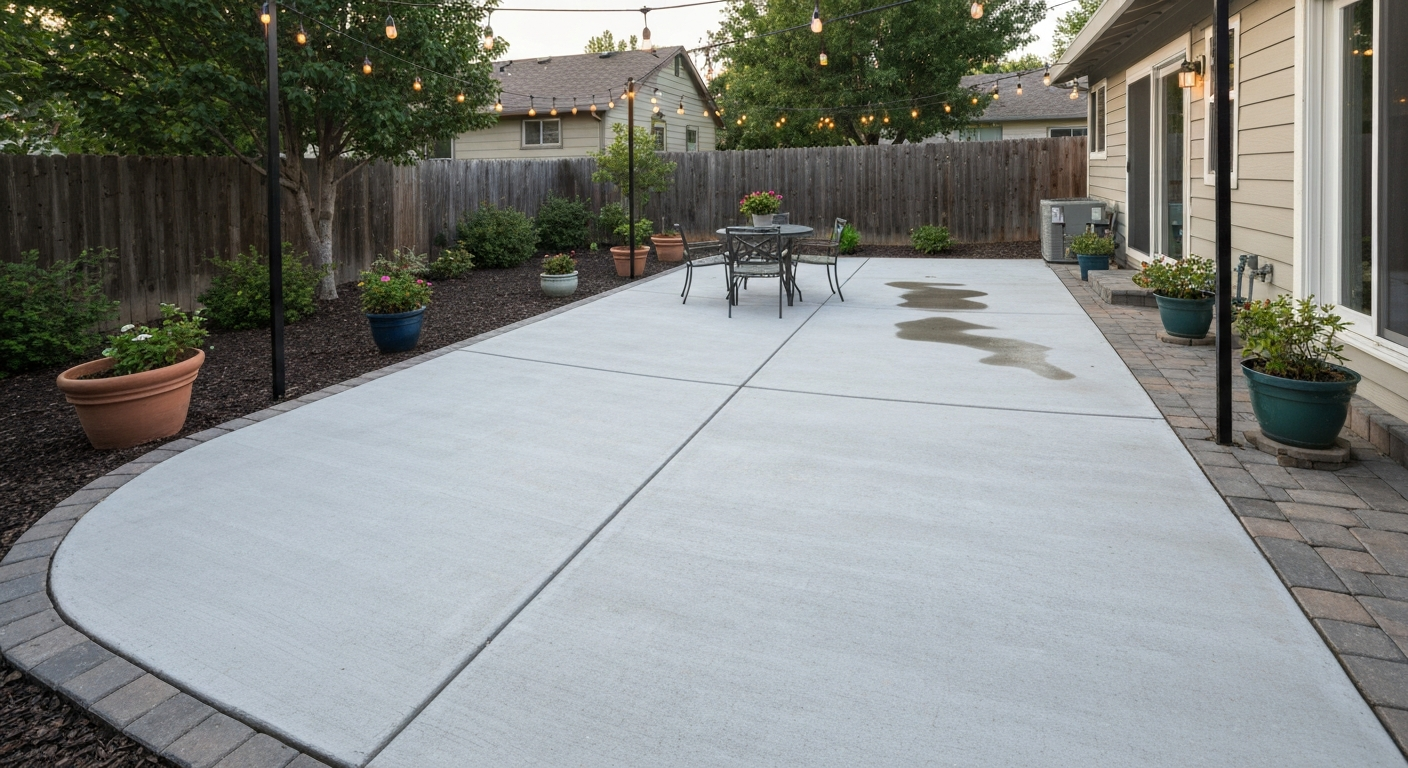
What this guide covers and who it's for
This is a repair-first guide for homeowners who want to fix what they have before spending money on replacement. It covers three of the most common residential patio bases: concrete slabs, interlocking pavers, and pea gravel. If you've been searching for how to make an old patio look new again, the honest answer is that most of the work is preparation, cleaning, leveling, and fixing the underlying problem, and the cosmetic improvements follow naturally from that. I'm going to walk through the full process, from your first look at the patio all the way through sealing, resurfacing, and preventing the same issues from coming back.
Quick assessment checklist before you touch anything
Spend 20 minutes doing an honest assessment before you buy a single bag of material. What you find here determines everything, the right repair approach, the realistic budget, and whether this is a weekend project or a job that needs professional involvement.
Step 1: Identify your patio material
- Poured concrete slab: one continuous surface, may have control joints (planned grooves), looks monolithic
- Concrete or clay pavers: individual units with visible joints between them, may be mortared or sand-set
- Natural stone (flagstone, slate, bluestone): irregular or cut pieces, usually mortared or sand-set
- Pea gravel or crushed stone: loose aggregate, no rigid surface
- Poured asphalt: rare for patios but occasionally found in older homes
Step 2: Categorize the damage
| Damage type | What it looks like | Likely cause | DIY-friendly? |
|---|---|---|---|
| Hairline cracks (under 1/8 in) | Fine surface lines, no vertical displacement | Shrinkage, thermal movement | Yes |
| Moderate cracks (1/8–1/4 in) | Visible gap, surface-level, no step | Settlement, age, freeze-thaw | Usually yes |
| Wide or stepped cracks (over 1/4 in) | Gap wider than a pencil, one side higher than other | Base failure, subsidence | No — get a pro assessment |
| Sunken or heaved sections | Visible slope change, trip hazard | Soil erosion, frost heave, poor base | Depends on scope |
| Surface scaling or spalling | Flaking surface layer, exposed aggregate | Freeze-thaw, deicing salt damage | Yes if base is sound |
| Efflorescence | White chalky deposits on surface | Moisture wicking soluble salts | Yes — cosmetic fix, address moisture |
| Joint sand loss (pavers) | Gaps between pavers, rocking units | Erosion, age, poor original install | Yes |
| Gravel migration | Pea gravel spreading, thin spots | No edging, no compaction | Yes |
Step 3: Check for drainage problems
Pour a bucket of water on different sections of the patio and watch where it goes. Water should move away from the house, a minimum slope of 1/8 inch per foot is the standard recommendation. If water pools in the middle, runs toward the foundation, or disappears into a crack and doesn't come out, you have a drainage issue that needs to be fixed before any cosmetic work. Resealing or resurfacing over a drainage problem just delays, and usually worsens, the underlying failure.
Step 4: DIY vs. pro decision points at a glance
- Cracks wider than 1/4 in (about 6 mm) with vertical displacement: get a structural assessment first
- Large sunken sections (more than one or two pavers, or a slab section larger than about 4 sq ft): base failure likely, may need excavation
- Active water intrusion through a crack (water appears on the underside or in a basement): needs proper drainage repair, not just sealing
- Heaving or movement that keeps coming back season after season: underlying soil or drainage problem, not a surface fix
- Patio attached to the house foundation that has shifted: contact a structural engineer before any repair
DIY or hire a pro, making the real call
I'll be direct here: most patios I've looked at can be meaningfully improved by a capable DIYer. But some situations genuinely warrant professional help, and going in with the wrong plan costs more in the end than just calling someone in the first place.
Red flags that mean call a pro
- Cracks are progressive — they've visibly widened since last year
- The slab or paver area has a visible tilt toward the house foundation
- You have a reinforced concrete slab (rebar or wire mesh inside) and the crack shows rust staining — the rebar is corroding and expanding the crack from inside
- The patio is attached to a deck or structure and the connection point has shifted
- You're in an area with known expansive clay soils or sinkholes
Permits and cost triggers
Repairs and cleaning don't require permits in most jurisdictions, but full removal and replacement often do, especially if the new patio changes the footprint, adds drainage structures, or is attached to the house. If you're planning to repave or fully rebuild, check with your local building department before you start. A permit for a modest patio replacement typically runs $50–$200, and skipping it can complicate a future home sale. On the cost side, a professional concrete crack injection repair on a small slab runs roughly $200–$600 depending on crack length and method. Full slab replacement in a typical backyard patio (200–400 sq ft) can run $2,000–$8,000 or more depending on region and complexity. Knowing those numbers helps you decide whether a $150 DIY repair kit is worth the attempt.
Materials and tools you'll actually need
Universal tools for any patio type
- Pressure washer (1,500–3,000 PSI for concrete; gentler settings or 15–25 degree nozzle for pavers)
- Stiff bristle brush and push broom
- Safety glasses, N95 or P100 half-face respirator (required whenever cutting or grinding concrete — silica dust is a serious lung hazard under OSHA 29 CFR 1926.1153)
- Knee pads and chemical-resistant gloves
- Garden hose with adjustable nozzle
- Tape measure and level (4 ft level minimum)
- Bucket and mixing paddle or drill mixer
- Wire brush for crack prep
- Painter's tape and plastic sheeting for masking
- Wet/dry vacuum (HEPA filter preferred for concrete dust)
Concrete-specific materials
- Concrete crack filler (polyurethane caulk for moving/surface cracks; epoxy injection kit for dormant structural cracks)
- Hydraulic cement (for active water leaks only — not a long-term crack fix)
- Concrete cleaner/degreaser and efflorescence remover
- Polymer-modified concrete resurfacer or microtopping (for overlays — typical thickness 1/8 to 3/8 in)
- Concrete bonding agent if product requires it
- Diamond grinder or angle grinder with diamond cup wheel (for surface profiling)
- Concrete sealer (penetrating silane/siloxane for most climates; film-forming for decorative finish)
- Acid etching solution (muriatic acid diluted, or proprietary etcher) if mechanical profiling isn't used
Paver-specific materials
- Polymeric jointing sand (for joint refilling — requires clean, dry joints for proper cure)
- Regular bedding sand (coarse concrete sand) for re-leveling base
- Plate compactor (rent from a big-box store — typically $60–$100/day; always use rubber pad or carpet over pavers to protect faces)
- Paver puller or flathead screwdriver for removing individual units
- Paver cleaner and paver-rated sealer
- Replacement pavers (buy a few extra matching units)
- Gravel or crushed stone for base repair (3/4 in clean crushed stone)
Pea gravel-specific materials
- Fresh pea gravel to top up thin areas
- Steel or aluminum landscape edging (or concrete border edging) to contain gravel
- Geotextile fabric if reinstalling from scratch
- Geocell/gravel grid panels if converting to a stabilized surface (expanded cellular confinement system)
- Hand tamper or plate compactor for compaction after topping up
Safety tips and mistakes that cost people time and money
Concrete dust is the single most underestimated hazard in patio DIY. Any time you're cutting, grinding, or even dry-sweeping a concrete surface, you're generating respirable crystalline silica particles that cause irreversible lung disease. OSHA's silica standard for construction (29 CFR 1926.1153) requires wet methods, HEPA vacuums, and respiratory protection for professional tasks involving concrete cutting. At home, that means: always use water when grinding, vacuum before sweeping, and wear at least an N95 respirator, not a paper dust mask, whenever you're generating dust.
- Always wear eye protection and a proper respirator when grinding, cutting, or pressure-washing concrete
- Never apply concrete resurfacer or overlay to a wet slab — wait a minimum of 24–48 hours after rain and test moisture with plastic sheeting taped down overnight
- Don't use a pressure washer nozzle closer than 6–8 inches to paver joints — you'll blow the joint sand out faster than the weeds grew
- Don't seal a damp surface — trapped moisture turns a sealer milky and causes peeling within weeks
- Check local stormwater rules before washing with acid cleaners or heavy degreasers — many municipalities prohibit detergent runoff into storm drains; divert to a gravel or lawn area where allowed
- Don't skip the test patch — apply any cleaner, stain, or sealer to a small hidden area first and wait the full cure time before committing to the whole surface
- Avoid applying polymeric sand on a humid or damp day — it needs dry joints and low humidity to cure properly; applying it wrong means it turns into a gray paste that's very hard to remove
- Don't fill a crack and overlay the surface without addressing why the crack formed — movement cracks will just re-crack through the new material
Fast, low-cost wins to make an old patio look better right now
Before you commit to any structural repair, there's a surprising amount of visual improvement you can get out of a day's worth of cleaning and tidying. I've seen patios that looked like they needed replacing turn into something genuinely attractive after a thorough wash and some basic staging. These quick wins also help you see the actual surface clearly, dirt and algae hide a lot.
- Pressure wash the entire surface (1,500–2,500 PSI for concrete; lower settings for pavers). Use a surface cleaner attachment for consistent results on large areas. Expect to be surprised at how different it looks when wet staining and biological growth are gone.
- Apply an efflorescence or masonry cleaner to any white-chalky deposits. Scrub with a stiff brush, rinse thoroughly, and let it dry fully. Efflorescence is cosmetic — caused by moisture carrying soluble salts to the surface — but it keeps coming back if you don't address moisture sources.
- Pull weeds from paver joints by hand or with a weeding tool. Follow up with a direct application of a patio-safe weed killer if needed, then sweep away debris.
- Sweep fresh jointing sand into paver gaps where the old sand has eroded. Even regular coarse sand is a short-term improvement; polymeric sand is the durable fix (covered in the paver section below).
- Define the patio edges. Trim back grass and vegetation that's crept over the border. Clean lines make any surface look intentional.
- Add furniture, planters, or a simple outdoor rug to draw the eye to the usable space rather than the surface condition. This isn't a fix, but it's a realistic bridge while you plan the repair work.
These steps take a few hours and cost very little (pressure washer rental is typically $40–$80 for a half day if you don't own one). They're also how you should start any more involved repair, since you need a clean, dry, clearly visible surface to work from.
Concrete patios, what you're actually dealing with
Concrete patios are durable when installed correctly, but they're not permanent. Most of the problems I see on older slabs fall into a few predictable categories, and nearly all of them have workable DIY solutions, as long as the slab's structural base is still sound.
Common concrete patio problems
| Problem | Typical cause | DIY repair? | Rough cost range (DIY materials) |
|---|---|---|---|
| Hairline surface cracks | Shrinkage, thermal cycling | Yes | $10–$30 per crack (polyurethane caulk) |
| Moderate cracks (1/8–1/4 in, no displacement) | Settlement, age, freeze-thaw | Yes | $30–$80 (crack filler or epoxy kit) |
| Wide/stepped cracks (over 1/4 in) | Base failure, subsidence | Pro assessment needed | Varies significantly |
| Surface spalling or scaling | Freeze-thaw, deicing salt, poor finish | Yes if base is sound | $50–$200 (resurfacer) |
| Efflorescence (white deposits) | Moisture migration and salt | Yes (cosmetic) | $15–$40 (efflorescence cleaner) |
| Overall dull/gray/stained appearance | Age, oxidation, organic staining | Yes | $20–$80 (cleaner + sealer) |
When repair actually works, and when it doesn't
Concrete repair works well when the slab is structurally stable and the damage is surface-level. If the slab has cracked because the base beneath it settled unevenly, or because a tree root pushed it up, fixing the crack without addressing that underlying cause is temporary at best. The ACI's guidance (ACI 224R) draws the practical line around crack width: hairline cracks under about 1/8 inch are cosmetic and suitable for DIY sealing and monitoring. Cracks at 1/4 inch or wider, especially with any vertical displacement between the two sides, warrant a closer look before you spend money on materials. If you're unsure, measure across the crack with a feeler gauge or even a credit card, if a credit card fits in the crack easily and one side is higher than the other, get a second opinion before proceeding.
Cleaning and prepping a concrete patio properly
Preparation is genuinely where concrete work succeeds or fails. An overlay that peels within a year almost always peeled because the surface wasn't clean and profiled correctly, or because it was applied to a damp slab. I've made that mistake, and it's a frustrating one. Don't rush this part.
Pressure washing concrete
Start with a thorough pressure wash. For concrete, 2,000–3,000 PSI is effective for general cleaning and organic stain removal. Use a 25-degree nozzle for general cleaning and a surface cleaner attachment on large areas for even coverage. Keep the nozzle moving, holding it in one spot on an older or softer slab can etch or pit the surface. If you're renting a unit, a medium-duty gas or electric machine in the 2,000–2,800 PSI range handles most residential concrete without causing damage. After washing, let the slab dry completely, 24 to 48 hours depending on weather.
Degreasing and stain treatment
Oil and grease stains, common under cars, grills, and older patio furniture, need a dedicated concrete degreaser applied before washing, not after. Work the degreaser into the stain with a stiff brush, let it dwell for the time specified on the product label, then wash off. For rust stains, use an oxalic acid-based rust remover (follow label directions carefully and protect adjacent plants). For efflorescence, a proprietary efflorescence cleaner or dilute acid wash works, but the deposit will return unless the moisture source is fixed. Once clean, check local stormwater rules, many municipalities restrict dumping cleaning runoff into storm drains. Divert the rinse water to a gravel area or lawn where possible.
Surface profiling for overlays and sealers
If you're planning to apply an overlay or resurfacer, cleaning alone isn't enough. The surface needs to be profiled so the new material has something to grip. Manufacturers like Sika specify a Concrete Surface Profile (CSP), essentially a light roughness, achieved by diamond grinding, scarifying, or acid etching. For most DIY resurfacing projects, a diluted muriatic acid etch (typically 10:1 water to acid, always add acid to water, never the reverse) or a proprietary etching product is the accessible option. The surface should feel like medium-grit sandpaper after etching and rinsing. If you're applying a sealer rather than an overlay, acid etching also improves penetration on slick or power-troweled surfaces. Any cracks visible after cleaning need to be addressed before the overlay goes down, applying a polymer-modified overlay over an actively moving crack just means the crack reflects through the new surface.
For detailed crack repair options on concrete, including when to use epoxy injection versus polyurethane caulk versus routing and sealing, the guidance on cracked concrete repair covers the specific methods, products, and decision criteria in full.
Applying a concrete overlay or resurfacer
A polymer-modified cementitious resurfacer is the most practical way to give an old, sound concrete slab a fresh, uniform appearance without replacement. Products in this category are applied at 1/8 to 3/8 inch (3–10 mm) thickness for microtoppings and thin overlays, thick enough to cover minor imperfections, thin enough to be cost-effective. For deeper leveling, a self-leveling underlayment can go up to about 1 inch. The critical requirement is that the slab must be structurally sound, non-moving, and properly prepared. Follow the manufacturer's technical data sheet (TDS) for mix ratios, ambient temperature limits, and cure times, most products shouldn't be applied below 50°F (10°C) or above 90°F (32°C). After cure, the surface can be sealed for protection and a finished appearance.
Sealing and staining old concrete
Sealing is the single most impactful thing you can do to protect cleaned or resurfaced concrete and slow future deterioration. For most climates, a penetrating silane/siloxane sealer is the best long-term choice, it soaks into the concrete, repels water and salts, and doesn't create a film that can peel. Film-forming acrylic or polyurethane sealers give a glossier appearance and work well for decorative surfaces, but they require reapplication every 2–5 years and can trap moisture if applied too soon. If you want color, a concrete stain (acid-based for mottled, reactive tones or water-based for more predictable color) applied before sealing is a legitimate way to dramatically change how an old gray slab looks. Always test the stain on a small section first, since aged concrete absorbs color unevenly.
Repairing and refreshing paver patios
Paver patios are actually more forgiving to repair than concrete slabs in many ways, individual units can be removed and replaced without disturbing the rest of the surface. The most common problems I see are sunken or rocking pavers (base or bedding sand failure), weed-filled joints (joint sand erosion), and surface staining or efflorescence. Refreshing pavers is covered in more detail in the guide on how to refresh patio pavers, but the core repair steps are here.
Fixing sunken or rocking pavers
ICPI (Interlocking Concrete Pavement Institute) installation guidance is clear on this: the right fix for a sunken paver area is to remove the pavers, address the base, and re-lay them properly. Simply shimming a sunken paver with extra sand is a short-term patch that will fail again. To do it right: pull the affected pavers using a paver puller or two flathead screwdrivers, excavate the area to check whether the crushed stone base has eroded or shifted, compact fresh 3/4-inch crushed stone into the void, re-screed a 1-inch layer of coarse bedding sand, and re-lay the pavers. Check that the surface is level and consistent with surrounding pavers before compacting. Use a plate compactor with a rubber pad or carpet over the pavers to protect their faces, ICPI recommends 4–6 passes to properly seat pavers into bedding sand.
Re-sanding and repointing joints
Eroded joint sand is the most common reason pavers start rocking and weeds take over. The durable long-term fix is polymeric sand, a polymer-modified jointing sand that hardens when activated with water and resists erosion and weed growth much better than regular sand. The catch is that it requires properly dry, clean joints to cure correctly. If you apply polymeric sand to damp joints or on a humid day, it can cure improperly and leave a gray haze on the paver faces that's very difficult to remove. Clean the joints thoroughly with a blower or broom, let everything dry completely (24–48 hours after any rain or washing), sweep the sand in, compact lightly, and then activate with a gentle spray. Follow the specific product instructions, cure times and activation steps vary by brand.
Cleaning and sealing pavers
Pressure wash at a lower PSI than you'd use for concrete, around 1,200–1,800 PSI with a 25-degree nozzle, or use a rotating surface cleaner, to avoid blasting out existing joint sand. Use a paver-specific cleaner for organic staining and efflorescence. After cleaning and drying, a penetrating paver sealer enhances color and helps joints resist erosion. For a more thorough treatment, the guide on how to rejuvenate patio pavers covers the full cleaning, joint-prep, and sealing sequence with material recommendations.
Repairing and improving a pea gravel patio
Pea gravel patios are inexpensive to install and easy to top up, but they have two persistent problems: the gravel migrates away from the surface over time, and they don't compact into a firm surface the way crushed stone does. The right approach depends on how bad the migration is and whether you're willing to do a more involved conversion.
Quick fixes: raking, edging, and topping up
If the gravel has just spread or compacted thin in high-traffic areas, rake it back into place, top up with fresh pea gravel to restore a 2–3 inch depth, and compact lightly. More importantly, check and reinforce the edging. Missing or failed edging is almost always the reason gravel migrates, without containment, it just keeps spreading onto the lawn or into surrounding beds. Steel or aluminum landscape edging staked firmly at grade, or a concrete or brick border, makes a meaningful difference.
Converting to a stabilized surface
If you're tired of constant maintenance, a geocell (cellular confinement) grid is the most practical DIY conversion option. You install a geotextile fabric on the sub-base, expand and stake the geocell panels across the area, fill with angular gravel or pea gravel, and compact lightly. The cellular walls hold the gravel in place and distribute foot traffic load, which dramatically reduces migration. The trade-off is cost, geocell panels and installation materials run roughly $1.50–$3.00 per square foot depending on depth and product, compared to under $1.00 per square foot for loose gravel, but the maintenance reduction is significant. For a full step-by-step on this approach, the guide on how to resurface a pea gravel patio covers the conversion process in detail.
When to consider a full re-base
If your pea gravel patio has no geotextile fabric beneath it (common in older installs), the gravel may be mixing with the soil below, creating a muddy, soft surface that no amount of topping up will fix long-term. In that case, the right repair is a full excavation, geotextile installation, and fresh compacted gravel base. The guide on how to repair a pea gravel patio walks through that full process. It's a half-day to full-day job depending on the size of the area, but it's genuinely a DIY-accessible repair.
When repaving makes more sense than repairing
There's a point where repair costs and complexity tip in favor of just starting fresh. For a concrete slab, that point is usually when you have widespread base failure, multiple large stepped cracks, or extensive spalling across more than about 30–40% of the surface. For pavers, it's when so many units are broken, missing, or deeply stained that the cost of sourcing matching replacements and doing extensive base work approaches the cost of a new install. For pea gravel, it's essentially the full re-base scenario described above. If you're in that territory, the guide on how to repave a patio covers the full replacement process, including base construction, material selection, and realistic cost ranges.
Realistic time and cost ranges
| Project | Time estimate (DIY) | Rough material cost | Notes |
|---|---|---|---|
| Full pressure wash and clean (any surface) | 2–4 hours | $40–$80 (rental) or free if you own | Includes degreaser and cleaner products |
| Concrete crack filling (hairline to moderate) | 1–3 hours per crack | $15–$80 per crack | Depends on crack length and method (caulk vs. epoxy kit) |
| Concrete overlay/resurfacer (200 sq ft) | 1 full day + cure time | $150–$400 | Includes profiling, materials, sealer |
| Concrete sealing only (200 sq ft) | 2–4 hours | $50–$150 | Penetrating sealer; film-forming costs similar |
| Paver leveling — small area (up to 20 sq ft) | 3–6 hours | $50–$150 | Includes compactor rental, sand, gravel |
| Polymeric sand repointing (200 sq ft patio) | 2–4 hours | $40–$100 | Sand only; requires dry conditions |
| Pea gravel top-up and edging | 2–4 hours | $50–$200 | Depends on area and edging type |
| Geocell conversion (200 sq ft) | 4–8 hours | $300–$600 | Includes panels, geotextile, fresh gravel |
Keeping it looking good, prevention and maintenance
The most common reason patios deteriorate faster than they should is deferred maintenance. A crack that gets filled promptly stays a minor issue. A crack that gets ignored for two winters and lets water in, freeze, and expand becomes a structural problem. The same is true for joint sand, edging, drainage, and sealer. These are genuinely fast annual tasks once you know what to look for.
- Inspect for new or widening cracks each spring after freeze-thaw season; fill hairline cracks promptly
- Recheck patio slope after any significant soil movement or heavy rainfall season
- Blow out or wash paver joints annually and top up sand as needed before weed season starts
- Reapply sealer on a schedule based on product type — penetrating sealers typically last 3–7 years; film-forming sealers 2–4 years
- Keep gutters and downspouts directed away from the patio area — one of the most common causes of repeated paver sinking and concrete cracking is concentrated roof runoff
- Avoid deicing salts on concrete patios in winter — they accelerate surface scaling. Sand provides traction without the chemical damage
- Trim back vegetation at patio edges annually to prevent root intrusion under pavers and concrete
FAQ
Quick assessment: what should I check first to decide DIY vs pro for an old patio?
Do a quick visual and hands-on checklist: 1) Material: concrete, pavers, or pea gravel. 2) Surface damage: stains, efflorescence, algae, surface spalling. 3) Cracks/settlement: measure widest cracks—hairline (<1/8 in / ~3 mm) are usually cosmetic; cracks ≥1/4 in (~6 mm), stepped cracks, vertical displacement, or progressive widening indicate structural or subbase issues and likely need a pro. 4) Drainage: water pooling or poor slope toward house requires fixing before resurfacing. 5) Edge restraint and base: loose edges, sinkage, or soft spots under pavers/gravel mean base repair. 6) Safety hazards: trip hazards, exposed rebar, large voids. Decision rules: If damage is mostly surface dirt/stains, small hairline cracks, minor sinking under localized areas you can dig out and recompact, or simple joint re-sanding—DIY is reasonable. If you find large cracks/settlement, active leaks, structural displacement, or poor grading/drainage affecting the slab, call a pro for diagnosis (structural/engineer or experienced concrete/paver contractor). (References: ACI crack guidance for acceptable widths and repair approaches.)
What are step-by-step DIY repairs for an old concrete patio?
1) Clean: sweep, then pressure-wash (home units ~1,900–2,800 PSI) with detergent for organics; test a small area first. Collect runoff if local rules require. 2) Inspect cracks: measure and mark active vs dormant. 3) Small hairline cracks (<1/8 in): route (if desired) and fill with elastomeric concrete sealant or concrete caulk. 4) Cracks 1/8–1/4 in: use polyurethane caulk or routing-and-sealing; for dry, dormant structural cracks consider epoxy injection (DIY kits exist but follow instructions). 5) Active leaks: stop with hydraulic cement for rapid plug, then plan permanent fix/consult pro. 6) Patching spalls/surface delamination: remove loose concrete, clean, use patching mortar or polymer-modified repair mortar per product guidance. 7) Leveling localized low spots: for shallow dips (≤1/2 in) use self-leveling cementitious repair; larger depressions require cutting out and re-pouring or slab jacking (pro). 8) Resurfacing: if slab is structurally sound and movement is controlled, apply a polymer-modified overlay/microtopping (follow surface profiling and product TDS). 9) Finish: stain or concrete dye if desired; seal with appropriate concrete sealer once cured. 10) Protect and maintain: re-seal every 2–5 years depending on sealer. Time/cost cues: cleaning + small crack repairs = 1 day–week, $50–$300 DIY; resurfacing overlay = 1–3 days plus cure, $150–$800 materials for small patios; professional slab replacement or slab-jacking = several days–weeks, $1,500–$10,000+. Safety: use eye/respiratory PPE when grinding/cutting; follow OSHA silica controls (wet methods/respirator). (See related: cracked concrete repair; overlays.)
How do I restore paver patios (cleaning, leveling, joint repair, sealing)?
1) Clean: sweep, then pressure-wash using gentler settings/nozzles to avoid joint erosion; use paver cleaner for efflorescence or organic stains. 2) Re-sand joints: remove weeds and loose sand; refill with joint sand or polymeric sand (joints must be clean/dry for polymeric sand). 3) Re-level sinking pavers: for localized settlement remove pavers, regrade and compact base (replacing bedding sand), then re-lay and plate‑compact (use a rubber pad to protect faces). If settlement recurs or base is soft over a large area, plan remove-and-relay with proper base depth—consider calling a pro. 4) Edge restraint: repair or install firm edging to prevent lateral movement. 5) Sealing: optional—use sealer to enhance color and reduce staining; choose breathable sealer and follow manufacturer. Time/cost: cleaning + joint re-sanding = 1 day, $50–$300 DIY; remove-and-relay small area = 1–2 days DIY with rental compactor, $100–$500 materials; full repave = several days–weeks, $2,000–$8,000+. Safety: wear gloves, kneepads, eye protection; use proper lifting techniques. (See related: repaving; polymeric sand guidance; ICPI best practices.)
What are the practical fixes for pea-gravel patios to make them look new?
1) Clean & grade: rake to redistribute gravel, remove debris and weeds; add fresh pea gravel to restore depth (typically 1–3 in). 2) Compact and edge: compact existing gravel with plate compactor; add or repair edge restraints to reduce migration. 3) Stabilize options: for less migration and a firmer surface install geotextile underlayment plus geocell/gravel-grid panels and infill with angular gravel, or use resin-bound/bonded surfacing systems—these increase cost but reduce maintenance. 4) Re-grading/drainage: ensure slope away from house. 5) Simple repaving: convert to pavers or concrete over compacted base if long-term low-maintenance desired. Time/cost: simple refresh (rake, add and compact gravel) = half day–1 day, $50–$300; geocell/resin stabilization = 1–3 days, $500–$3,000+ depending on size; conversion to pavers/concrete = several days–weeks, higher cost. Safety: wear dust mask if moving dry gravel; watch for sharp stones. (See related: gravel stabilization and geocell systems; drainage fixes.)
What tools and materials will I need for these DIY patio refresh projects?
answer":"Common tools: broom, stiff-bristle brush, garden rake, shovel, wheelbarrow, pressure washer (rent if needed), plate compactor (rental), rubber‑pad for compactor, tamping tool, masonry chisel/hammer, angle grinder with diamond blade (for control joints or cutting pavers, use dust controls), shop vacuum (HEPA for silica), caulking gun, trowels, mixing bucket, float. Materials: joint sand or polymeric sand, bedding sand, pea gravel, polymer‑modified patching mortar, concrete crack sealant (elastomeric or polyurethane), epoxy or polyurethane injection kits (for dormancy or water-bearing cracks respectively), hydraulic cement (for active leaks), polymer-modified overlays or microtopping, concrete or paver sealer, edging restraints. Consumables/PPE: gloves, safety glasses, N95/half-mask/respirator for silica tasks, ear protection, kneepads. Rentals: plate compactor, pressure washer, saw or grinder. Cost notes: tools can be rented to reduce upfront costs."
What are realistic time and cost ranges for DIY vs pro for common patio jobs?
answer":"Quick cleans and minor repairs: DIY time 1 day; materials $20–$300. Joint re-sanding or spot paver relay: DIY 1–2 days; $50–$500. Crack sealing and small patching: DIY 1 day–week depending on cure times; $50–$400. Resurfacing with microtopping (DIY for small areas): prep + application 1–3 days; materials $150–$800. Converting pea gravel to stabilized surface (geocell or resin): DIY 1–3 days; $500–$3,000+. Major work (full slab replacement, full repave, extensive base rebuilding, slab jacking): pro only—time several days–weeks; typical costs $1,500–$10,000+ depending on size and complexity. Always get multiple contractor bids for larger jobs and factor in permit costs where applicable."},{
Next Article
How to Refresh Patio Pavers: DIY Cleaning, Repair & Seal
How to refresh patio pavers: step-by-step DIY cleaning, repair, re-sanding, sealing, and cost/time estimates.