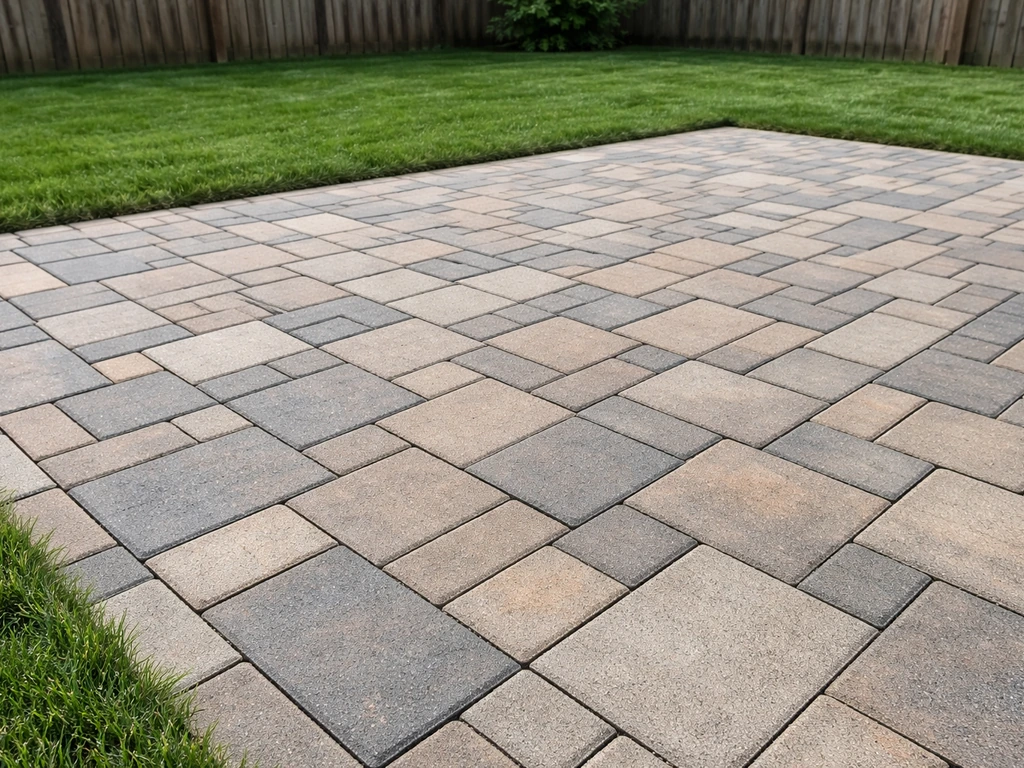
Refreshing patio pavers means cleaning them, repairing or replacing damaged units, refilling joints, and sealing the surface so everything looks good and holds up properly again. Depending on your patio's condition, that could take a single afternoon or a full weekend with a helper. Most homeowners can handle this themselves if the base is sound, the damage is localized, and the drainage is working. Where things get complicated is when sunken areas, widespread cracking, or edge-restraint failures point to a failing base underneath, which no amount of cleaning or sealing will fix.
How to Refresh Patio Pavers: DIY Cleaning, Repair & Seal

Talia Lang
22 Jul 2026
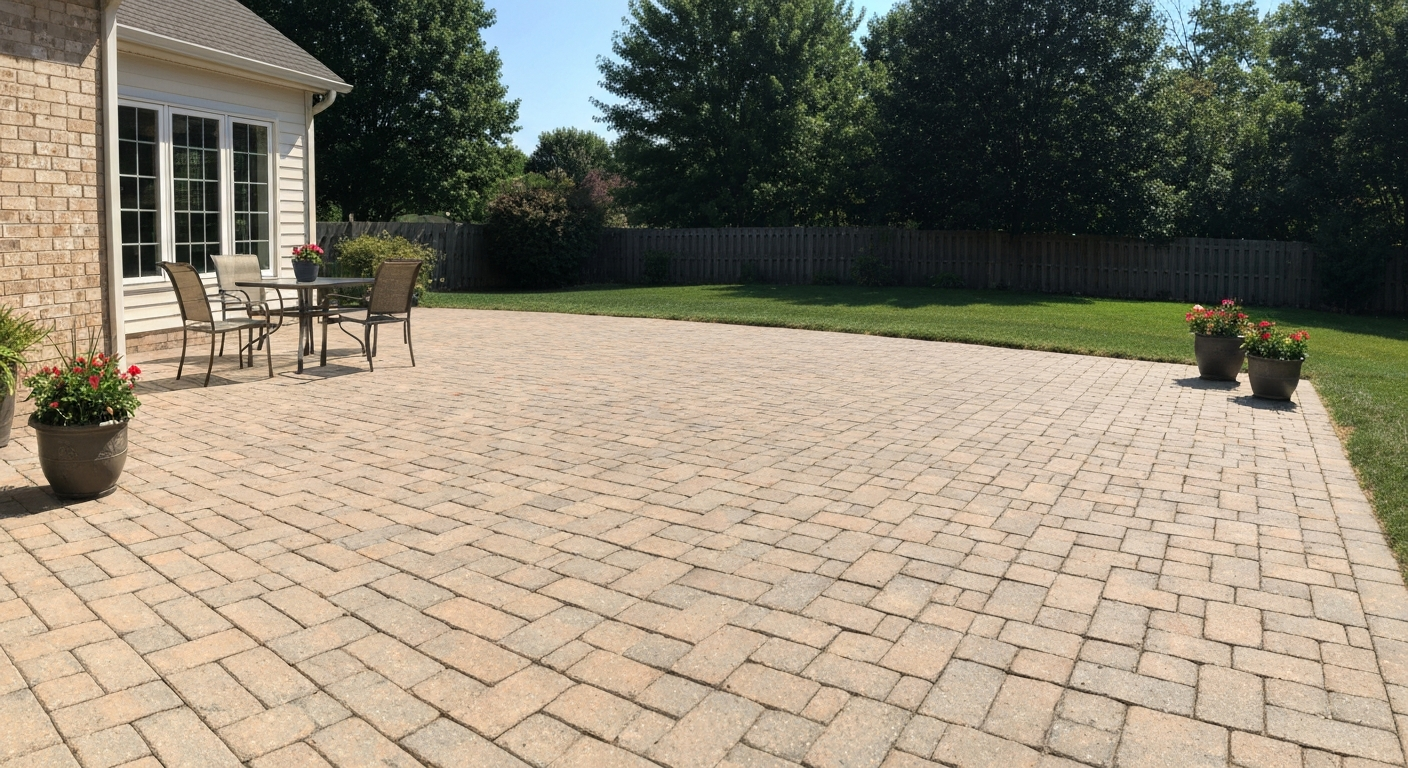
Refresh, resurface, or repave? How to pick the right approach
Before you drag out the pressure washer, it's worth spending 15 minutes figuring out what you actually need. A lot of people skip this and end up either under-doing it (cleaning a patio that really needs base work) or over-doing it (tearing out a patio that just needed new joint sand and a sealer). The table below gives you a quick decision framework.
| What you're seeing | What it likely means | Right approach | DIY or pro? |
|---|---|---|---|
| Faded color, dirty surface, weedy joints | Surface-only wear, base is fine | Refresh: clean, re-sand joints, seal | DIY |
| 1–3 cracked or chipped pavers, stable base | Localized unit damage | Refresh: replace damaged units, re-sand, seal | DIY |
| Pavers offset more than 1/4 inch from neighbors, small sunken area | Settled base in one spot | Partial re-level: lift pavers, re-grade bedding sand, relay | DIY if confined; pro if widespread |
| Widespread sinking, multiple sunken zones, water pooling | Base failure or drainage problem | Repave with base rebuild | Pro recommended |
| More than roughly 5–10% of units cracked or broken in a concentrated area | Significant structural failure | Full or partial repave | Pro |
| Edge restraints pulling away, patio spreading at edges | Edge failure, possible base erosion | Edge repair plus assessment of base | DIY edge fix; pro if base is undermined |
| Pea gravel patio: bare spots, compaction loss, weeds throughout | Surface wear, no structural failure | Add gravel, compact, treat weeds, consider binder or geotextile | DIY |
One honest note: if you're looking at a full repave or a base rebuild, that's a different project entirely. This article focuses on the refresh side of things, but knowing when you've crossed that line is just as important as knowing how to clean and seal. If the repave route is where you're headed, it's worth reading up on what that process actually involves before committing. If the repave route is where you're headed, it's worth reading up on what that process actually involves before committing, see a guide on how to repave a patio.
Assessing your patio before you do anything else
Walk the whole patio slowly and take photos as you go. You'll refer back to them when you're buying materials and deciding which areas to tackle first. Here's what to look at:
Paver surface and units
- Check each paver for cracks, chips, and surface spalling. Any unit cracked through its full depth needs replacing.
- Look for pavers that are offset or rotated relative to their neighbors. More than about 1/4 inch (6 mm) of height difference is a trip hazard and a signal that the bedding sand has shifted.
- Note discoloration: white powder (efflorescence), black or green patches (algae/moss), orange streaks (rust), or dark spots (oil/grease). Each needs a different treatment.
- Estimate roughly what percentage of the surface looks damaged or badly stained. If it's concentrated in one zone, you have a localized problem. If it's spread across the whole patio, your approach will be different.
Joints
- Are joints mostly full, or have they eroded down? Shallow or empty joints mean pavers can shift and weeds establish easily.
- Is there visible vegetation in joints across more than about 20–25% of the surface? That's a sign joint sand has been depleted for a while.
- If you had polymeric sand installed before, is it powdery or crumbling? That usually means it was applied on damp pavers or got rained on during cure.
Base and drainage
- Check drainage slope: water should shed away from the house at roughly 1–2% grade (about 1/8 to 1/4 inch per foot). Stand on the patio during a rain or run a hose and watch where water goes.
- Look for persistent puddle marks or discoloration from standing water. That usually means inadequate slope or a clogged drainage path.
- Press down on suspect areas. Any flex or hollow sound means the bedding sand or base material has shifted below.
- Walk around the perimeter and check edge restraints (plastic or metal border pieces). If they're cracked, pulled away, or missing entirely, the patio edges will migrate over time.
Edging
- Pull back any vegetation at the patio edge to see if the restraint is still staked down and intact.
- Look for pavers at the perimeter that have rotated outward. That's a classic sign of restraint failure.
- Check whether sod, mulch, or soil has built up over the edge of the pavers. This traps moisture and accelerates joint erosion.
Tools, materials, and what this realistically costs
The range here is wide because a simple clean-and-seal job is very different from a full paver-lift-and-relay. I've broken this down by task so you can add up what applies to your situation.
| Task | Key tools | Key materials | Rough DIY cost | Time estimate |
|---|---|---|---|---|
| Full surface clean | Pressure washer (rent or own), surface cleaner attachment, 25–40° fan tip, stiff nylon brush | Paver cleaner or concrete degreaser, garden hose | $30–$80 (if renting washer) | 2–4 hours for average patio |
| Stain removal | Stiff nylon brush, plastic scraper, rubber gloves, safety glasses | Oxalic acid or rust remover, alkaline degreaser, cat litter (absorbent) | $15–$40 depending on stain type | 1–3 hours |
| Re-sanding joints (polymeric sand) | Leaf blower, push broom, plate compactor (rent) | Polymeric sand (1 bag covers roughly 25–40 sq ft depending on joint width and depth) | $40–$120 for materials; $60–$120/day plate compactor rental | Half day for average patio |
| Replacing individual pavers | Flat pry bar, rubber mallet, margin trowel | Replacement pavers, bedding sand, joint sand | $20–$60 per paver depending on type | 1–2 hours per small area |
| Sealing | Pump sprayer or roller, paintbrush for edges, lint-free rags | Penetrating silane/siloxane sealer (covers ~125–350 sq ft per gallon depending on porosity) | $60–$180 per gallon; most patios need 1–2 gallons | 2–4 hours application plus 24+ hr cure |
| Edge restraint repair | Hammer, spike driver or drill, snips | Replacement edge restraint sections, 10-inch galvanized spikes | $30–$80 for materials | 2–3 hours |
For a full refresh on a 200–300 sq ft patio (clean, re-sand, seal, minor paver replacements), budget roughly $150–$400 in materials and a full weekend of work. Hiring a contractor for the same scope typically runs $500–$1,200 depending on your region. The DIY savings are real, but so is the time commitment.
Safety, site prep, and protecting what's around the patio
This part gets skipped too often. Before you start, a little prep saves you from damaging plants, staining siding, or creating a slip hazard.
- Wear eye protection and chemical-resistant gloves whenever you're working with degreasers, acid-based stain removers, or sealers. Some of these products are genuinely irritating to skin and eyes.
- Move furniture, planters, and grills off the patio completely. This also gives you a chance to inspect the surface underneath them, which is often the worst-stained area.
- Wet down nearby garden beds and grass before you start pressure washing or applying any chemical cleaner. This dilutes any overspray before it can concentrate on plant roots. Rinse them again after you're done.
- Cover wood fence boards, stained concrete, painted surfaces, or siding within 3–4 feet of the work area with plastic sheeting before pressure washing. Deflected spray and chemical runoff can cause staining or surface damage you didn't plan for.
- Check the weather forecast. Plan cleaning and sealing for a stretch of dry days: you need the surface to be bone dry before applying polymeric sand or sealer, and both products need protection from rain during their cure window.
- If you're applying any herbicides, degreasers, or acid products, contain the runoff so it doesn't reach storm drains, ponds, or ditches. A simple berm of absorbent material at the patio edge works fine for small applications.
- Disconnect and cap any drip irrigation or landscape lighting that runs along the patio edge before you lift pavers or adjust edging.
How to clean pavers properly
Cleaning is always the first step, even if you're planning to replace pavers or re-sand joints. You need to see the actual surface condition before you make decisions about what else needs doing, and polymeric sand and sealer both need a clean, dry surface to bond properly.
Pressure washing
Use 1,200–2,000 PSI with a 25–40 degree fan tip, or better yet, a surface cleaner attachment if you have access to one. Surface cleaners clean evenly and don't displace joint sand the way a direct jet does. Keep the wand moving and maintain about 12–18 inches of distance from the surface. Do not point the jet directly into the joints at close range, you'll blast out whatever sand is still in there and you'll need to re-sand before you do anything else. Work in sections, rinsing each one fully before moving on. If the patio still looks dingy after a plain water wash, apply a dedicated paver or concrete cleaner according to the product instructions (most recommend wetting the surface first, applying the cleaner, scrubbing with a stiff nylon brush, then rinsing).
Gentle scrubbing for older or softer pavers
Some older concrete pavers, clay brick, or natural stone surfaces are soft enough that aggressive pressure washing causes surface pitting or removes the textured face over time. If you're not sure, test one inconspicuous paver at your intended pressure before doing the whole surface. If you see any surface erosion or roughening, drop to 1,200 PSI or lower and rely more on dwell time with a good cleaner plus a stiff nylon brush (not wire, which leaves metal particles that rust on the surface). Rinse thoroughly.
Stain-specific pre-treatment before washing
General pressure washing won't fully remove oil, rust, efflorescence, or deep organic stains. Treat those specifically before or during the cleaning step, which is covered in detail in the next section. Don't seal over stains expecting them to disappear. They won't, and the sealer will lock them in.
Removing stains and efflorescence
Different stains need different chemistry. Using the wrong product either doesn't work or actively damages the paver surface. Here's what actually works for the common ones.
Oil and grease stains
Fresh oil is easy. Cover it immediately with clay cat litter or another absorbent, leave it for at least 4 hours (overnight for large spills), sweep it up, then apply an alkaline degreaser like TSP, Oil Eater, or Purple Power. How to Remove Concrete Stains (BobVila), oil/grease guidance (absorbent, degreaser, poultice): recommends absorbing fresh oil with cat litter, using an alkaline degreaser (15–30 minute dwell) with a stiff nylon brush, and applying a degreaser poultice left overnight for deep set stains How to Remove Concrete Stains (BobVila) — oil/grease guidance (absorbent, degreaser, poultice). Let it dwell for 15–30 minutes, scrub with a stiff nylon brush, and rinse. For older, set-in oil stains that have penetrated deeper, make a poultice: mix your degreaser with an absorbent material (sawdust, cat litter, or Fuller's earth) into a paste, spread it over the stain, cover with plastic, and leave it overnight. The poultice draws the oil out of the pores as it dries. Scrape it up and rinse the area thoroughly. You may need two applications on really old stains. Wear gloves and eye protection with any of these products, and prevent runoff from reaching drains.
Rust stains
Rust responds to oxalic acid or phosphoric acid-based rust removers. Apply the product per the manufacturer's instructions, let it dwell (typically 10–20 minutes), agitate with a nylon brush, and rinse thoroughly. Rinse with plenty of water because acid residue left on the surface can interfere with sealer adhesion later. If you're dealing with recurring rust stains, find the source: it's usually a metal planter, furniture foot, or irrigation fitting sitting directly on the paver. Remove it or put rubber feet under it.
Efflorescence
Efflorescence is that chalky white powder or bloom you see on pavers, especially on newer installations. It's soluble salts migrating from the concrete or mortar to the surface as water moves through the material. It's not structural damage, but it does look bad. Use an approved efflorescence cleaner or a mild acid wash (per the paver manufacturer's recommendations) and rinse very thoroughly. One important note from paver manufacturers: if your patio is relatively new (less than a year old), wait it out before sealing. Sealing over active efflorescence traps the salts under the film and you'll end up with cloudy or peeling sealer. Give it a year for the salts to work their way out, clean it, then seal.
Organic stains (mold, mildew, leaf tannins, berries)
Most organic staining comes off with an oxygen bleach-based cleaner (sodium percarbonate products are widely available and safer for nearby plants than chlorine bleach). Mix per instructions, apply to a wet surface, let it dwell, scrub, and rinse. Avoid using straight chlorine bleach regularly as it can degrade polymeric joint sand and some paver pigments over time.
Paint and hardened mortar or cement splatter
These usually need mechanical removal first: carefully scrape with a plastic scraper or stiff putty knife to remove the bulk, then apply a masonry-specific paint stripper or mortar dissolver, follow the product's dwell time, scrub, and rinse. Always test a small area first because some strippers can lighten or etch certain paver finishes. Follow the product's SDS (safety data sheet) for ventilation and PPE requirements, and contain the runoff.
Dealing with moss, algae, and weeds
These three problems have different causes and different solutions, but they share one root issue: compromised joint sand. When joint sand erodes, you get gaps that fill with moisture, organic debris, and eventually plant material. Cleaning them off without fixing the joints means they'll be back in a season or two.
Moss and algae removal
Start with mechanical removal: a stiff-bristle brush or a pressure washer running at moderate pressure (stay in the 1,200–1,500 PSI range and use a wide tip so you don't blast the joints open). For active infestations, ferrous sulfate-based moss killers or biocidal cleaners formulated specifically for masonry can be effective. Apply per the label instructions and keep the product off nearby grass and garden beds. Always follow local regulations about what products can be used near storm drains, because iron-based and biocidal products can affect waterways. Once you've cleaned the surface, address the environment that let moss and algae establish: improve drainage, trim back overhanging trees or shrubs to increase sunlight on the surface, and refill joints with polymeric sand to limit the moisture and organic matter accumulation that feeds growth.
Weeds in joints
Pull visible weeds manually first, getting as much of the root as you can. For persistent, widespread weed growth in joints, spot-applied herbicides (glyphosate-based products labeled for hardscape use) can be effective when applied carefully according to label rates and timing. University extension programs are consistent about this point: follow the label exactly, apply only when there's no rain forecast and no wind that could carry drift onto nearby plants, and don't let runoff reach waterways. That said, herbicides alone are a temporary fix. The real solution is stabilizing the joints with polymeric sand after cleaning, which is covered below. Polymeric sand creates a firm, slightly flexible bond that dramatically reduces the seed germination and moisture retention that let weeds establish.
Prevention going forward
- Refill eroded joints with polymeric sand every few years, or whenever you can see they've dropped more than about 1/4 to 1/2 inch below the paver surface.
- Keep organic debris (leaves, mulch, soil blown from beds) swept off the patio regularly. It decomposes into the joints and feeds moss and weed growth.
- Make sure water drains away from the patio. Persistent moisture in shaded areas is the main driver of moss and algae.
- If you have a consistently damp, shaded corner of the patio, a penetrating sealer can help slow moisture absorption into the surface, reducing the hospitable environment for growth.
Re-sanding joints with polymeric sand
This is one of the highest-impact steps in a paver refresh, and also one of the most commonly botched. Polymeric sand is water-activated: the polymer binders cure when you mist the sand with water, creating a firm joint that resists erosion, weeds, and insect activity. But several things can cause it to fail, and most of them come down to skipping a step.
- Wait until the paver surface and joints are completely dry. This is non-negotiable. Applying polymeric sand to damp pavers means the polymer activates prematurely and won't cure properly. Give the patio at least a full day of dry weather after cleaning.
- Check the temperature. Most polymeric sand products specify a minimum ambient temperature of around 32–35°F (0–2°C) and perform best in moderate conditions. Don't apply if it's going to freeze overnight during the cure period.
- Pour sand over the surface and work it into the joints using a push broom, moving it in multiple directions until joints are filled to about 1/8 inch below the paver surface. Don't overfill.
- Run a plate compactor (rented, with a rubber pad or rubber mat to protect the pavers) over the surface to seat the sand into the joints. This step is important and often skipped when people do this by hand. Without compaction, the sand stays loose.
- Blow or sweep any remaining sand off the paver surface completely before activating. Sand left on the surface will haze or crust when wet, and it's very difficult to remove afterward.
- Mist the joints lightly with a garden hose on a gentle setting, not a pressure washer. You want to activate the polymer without washing the sand out. Most products specify two or three light misting passes, letting water soak in between each pass.
- Keep the surface dry for 24–48 hours at around 70°F. In cooler or more humid weather, that window extends. Check the product's technical data sheet for specific cure guidance.
- Don't let heavy rain hit the surface during cure. If unexpected rain is coming in the next 24–48 hours, cover the patio with plastic sheeting.
If your previous polymeric sand went powdery and crumbled out, one of those steps was likely missed. The fix is to clean out the failed sand, let everything dry completely, and start fresh with the correct process. There's no shortcut for reactivating sand that was applied wrong.
Leveling and replacing sunken or broken pavers
Isolated pavers that have settled, cracked, or rotated can be lifted and reset without disturbing the rest of the patio, as long as the base underneath is still solid. ICPI guidance recommends repairing or replacing pavers offset by more than about 1/4 inch (6 mm) and provides technical specifications for reinstatement after utility repairs ICPI recommends repairing pavers offset by more than about 1/4 inch (6 mm). If you find soft, wet, or washed-out base material when you lift a paver, that's a bigger problem than a simple relay will fix.
Lifting and resetting a settled paver
- Use a flat pry bar or two wide putty knives to carefully pry up the affected paver and any immediate neighbors that need adjustment. Work carefully to avoid chipping edges.
- Scrape out the bedding sand from that area with a margin trowel and inspect what's underneath. The base material (usually compacted gravel) should be firm and dry. If it's soggy or has eroded, you'll need to add and compact new base material before proceeding.
- Add or remove bedding sand (coarse concrete sand, not fine play sand) to bring the paver back to the correct height. Aim for the paver surface to match its neighbors within about 1/8 inch.
- Set the paver back in place and tap it level with a rubber mallet. Use a level or straightedge to confirm it sits flush with adjacent pavers.
- Recheck drainage slope at that area. The whole point of the repair is lost if you relay the paver at a pitch that directs water toward the house.
- Refill the joints around the repaired area with polymeric sand and follow the full activation process.
Replacing a cracked or broken paver
The process is the same as above, with one added step: you need a matching replacement paver. This is where old patios get tricky. If the original pavers are discontinued, you may need to source a close match, or strategically use pavers from a less visible area (under a deck or along an edge) to replace visible damaged ones, then fill the less visible spots with the closest available match. Take a paver sample to a masonry supplier rather than guessing from a photo.
Fixing edge restraints
Edge restraints keep the patio from slowly migrating outward over years of use and freeze-thaw cycles. If yours have failed, pavers near the edge will already be showing some rotation or displacement. The repair is straightforward: pull back any sod or mulch along the patio edge, remove the damaged restraint section, and install new sections of compatible plastic or metal edging. Stake them with 10-inch galvanized spikes at roughly 12-inch intervals (closer on curves). Before reinstalling, check whether the perimeter pavers need to be nudged back into alignment, and re-sand those joints once the edge is secured. This is a good time to also make sure the edging sits slightly below the paver surface so it doesn't become a mowing hazard.
Sealing your pavers: what to use and how to do it right
Sealing is optional but genuinely useful. It slows stain absorption, reduces efflorescence, discourages moss and algae, and makes future cleaning easier. The two main sealer categories behave very differently, and choosing wrong can leave you with a patio that looks worse than before.
Penetrating sealers vs topical sealers
| Feature | Penetrating silane/siloxane sealer | Topical acrylic or urethane sealer |
|---|---|---|
| Appearance | Invisible, no sheen change | Adds wet-look or satin sheen; can change paver color |
| Slip resistance | Maintained (no surface film) | Can reduce traction, especially when wet |
| Durability | Multi-year service life in most climates | Typically needs recoating every 2–3 years |
| Failure mode | Gradually becomes less effective; no visible failure | Peeling, hazing, ambering, or trapping moisture |
| Best for | Most concrete and natural stone pavers; any patio where you want invisible protection | Pavers where enhanced color/gloss is the goal |
| Application temp range (example) | 45–85°F (Foundation Armor SX5000) | Varies by product; check TDS |
| Coverage (approximate) | 125–350 sq ft per gallon depending on porosity | 200–400 sq ft per gallon depending on product |
My recommendation for most homeowners: use a penetrating silane/siloxane sealer. You get real protection without committing to a film that can peel, yellow, or trap moisture under it if applied incorrectly. Topical sealers can look great when freshly applied, but they add an ongoing maintenance burden that penetrating sealers don't.
How to apply sealer
- Make sure the surface is completely clean, dry, and that polymeric sand has fully cured (usually at least 48–72 hours after activation, more in cool weather).
- Test a small 5x5 foot area first, especially with a topical sealer, to confirm the appearance and absorption rate before doing the whole patio. This step is recommended by virtually every sealer manufacturer and takes 10 minutes. Skip it and you might not love the result on 300 square feet.
- Apply on a dry day when temperatures are in the product's recommended range (commonly 45–85°F). Avoid direct midday sun for water-based products, as they can dry too fast and leave lap marks.
- For penetrating sealers, apply with a pump sprayer or roller in a thin, even coat. The product should absorb into the surface, not pool. If it beads and doesn't absorb, the surface isn't ready or the pavers may already have a sealer on them.
- For topical sealers, use a roller or brush for even coverage. Follow the product's recommended recoat window for second coats.
- Keep the surface dry and free from foot traffic for at least 24 hours (longer in cool or humid weather).
Refreshing a pea gravel patio
Pea gravel patios wear differently than interlocking pavers. They don't crack or shift as distinct units, but they do thin out, compact unevenly, develop ruts in high-traffic paths, and accumulate weeds and debris throughout. The good news is that refreshing one is generally quicker and cheaper than working on a paved surface.
- Start by raking the existing gravel level and removing any accumulated organic matter, which feeds weed growth.
- Check whether there's still a geotextile landscape fabric underneath. If weeds are coming through, the fabric may have deteriorated or may not have been installed originally. If it's gone, you can remove the old gravel, install new woven geotextile fabric (not the thin non-woven type, which roots punch through easily), and replace the gravel on top.
- Add fresh pea gravel to thinned areas. Most patios need a finished depth of about 2–3 inches of compacted gravel. New gravel is typically sold by the cubic yard (one cubic yard covers about 100 sq ft at 3 inches deep) or in 50-lb bags for smaller areas.
- Compact the replenished gravel with a hand tamper or plate compactor. Gravel that isn't compacted migrates under foot traffic and settles unevenly.
- For a more stable pea gravel surface that doesn't scatter as much, consider a resin binder or gravel stabilizer product. These come as liquid binders that you apply to the compacted gravel surface, binding the top layer together while still draining freely.
- Re-edge the patio. Pea gravel migrates out of beds without proper edging. Solid steel edging staked firmly is more effective than plastic for containing gravel long-term.
If your pea gravel patio has persistent drainage or base issues, a full resurface involves stripping the existing material, regrading the sub-base, and reinstalling with fresh geotextile and gravel. That's a step beyond a simple refresh but is still manageable as a DIY weekend project for most homeowners. If you need step-by-step instructions, see our guide on how to resurface a pea gravel patio. For step-by-step guidance on how to repair a pea gravel patio, see our how to repair a pea gravel patio guide.
Ongoing maintenance to avoid doing this again in two years
A refreshed patio can look and perform well for many years if you stay on top of a few simple habits. Most patio problems I've seen could have been prevented or caught much earlier with annual attention. For step-by-step tips and project ideas on how to make an old patio look better, see this guide.
- Sweep the patio seasonally and clear leaves, mulch, and soil before they decompose into the joints.
- Inspect joint sand levels every spring. Top up with polymeric sand if joints have dropped noticeably. Catching this early prevents the wider erosion, weed establishment, and paver instability that comes with fully depleted joints.
- Check edge restraints after each winter. Freeze-thaw cycles and root intrusion are the two main things that work restraints loose over time.
- Look for any new low spots where water is ponding and address them before the next frost. Water that freezes in a bedding sand layer accelerates heaving.
- Reapply penetrating sealer every 3–5 years or when water no longer beads on the surface. The sealer isn't damaged visually when it's depleted, so do a water bead test annually.
- If you have trees overhead, check for root intrusion along the patio perimeter every year. Catching a root before it gets under the base is far easier than repairing after it's caused a full heave.
When to call a professional
I'm a fan of DIY for most patio refresh work, but there are situations where it genuinely doesn't make sense to try to tackle it yourself. If your assessment turned up widespread base failure, significant drainage problems with no obvious DIY solution, large areas of sinking that span multiple zones, or structural issues with the surrounding landscape (retaining walls, tie-ins with drainage systems), a professional hardscape contractor will save you money compared to the cost of fixing a DIY attempt gone wrong. Get at least two quotes, ask specifically about base inspection before any surface work is done, and be wary of anyone who quotes a surface-only fix without looking at what's underneath.
FAQ
What are the first steps to assess whether my patio pavers need a quick refresh or a full repave?
Do a systematic inspection: photograph the patio, map problem areas and note percent area affected. Check for: cracked/broken pavers, units rotated/offset >1/4 in (6 mm), joint erosion/vegetation, settled/sunken areas, missing/failed edge restraint, and poor drainage/slope. If base loss or concentrated damage affects more than a localized patch (contractor guidance often uses ~5–10% damaged units in one area or visible base failure) consider full reinstatement or pro evaluation; otherwise a targeted DIY refresh is usually appropriate.
How do I safely clean patio pavers (dirt, algae, efflorescence) without damaging joints or the base?
Start with dry debris removal using a broom or leaf blower. For general grime use a surface cleaner or pressure washer set moderate (≈1,200–1,500 PSI) with a wide fan nozzle or a surface-cleaning attachment; never direct a narrow high-pressure jet into joints to avoid washing out sand. For algae/moss scrub with a stiff nylon brush and a masonry biocide or diluted bleach solution (follow label and environmental precautions). For efflorescence use an approved efflorescence/masonry cleaner per manufacturer instructions, rinse thoroughly, and test a small area first.
How do I remove oil, grease or rust stains from pavers?
For fresh oil: absorb with cat litter or other absorptive material for 4–24 hours, sweep up, then apply an alkaline degreaser, scrub with a stiff brush, and rinse. For deep-set oil use a degreaser poultice (absorbent plus solvent) left overnight. For rust stains use an oxalic-acid or commercial rust remover per product instructions (dwell, agitate, rinse). Always wear PPE, contain and properly dispose of runoff, and test in an inconspicuous spot first.
What's the proper way to repair joint sand and stop weed regrowth between pavers?
Remove loose joint sand and weeds (mechanical removal and a leaf blower). For conventional joints re-sand with compactable kiln-dried sand and compact using a plate compactor with a protective pad. For longer-lasting results use polymeric (water-activated) joint sand: joints and pavers must be dry, ambient temps generally above ~32–35°F (0–5°C) per TDS, sweep dry sand into joints, compact, remove excess, then mist lightly to activate. Protect from rain during the 24–48 hr cure window (longer in cool/damp weather). Preventive tip: ensure tight joints and proper edge restraint to limit movement and weed encroachment.
How do I re-level sunken or uneven pavers?
For small localized sunken areas: remove the affected pavers, clear and inspect the bedding and base. If the bedding sand is just displaced, add and grade new bedding sand (or coarse sand) to the correct level, compact the base lightly with a tamper or plate compactor and re-set pavers. If the base shows erosion or loss (soft spots, large depressions) excavate to stable base, add and compact aggregate base (typically 4–6 in of crushed stone for pedestrian patios) in 1–2 in lifts, re-level bedding sand and reset pavers. Replace broken units as needed. Edge restraint should be reinstalled if failed.
When should I replace the base or edge restraint rather than just re-leveling pavers?
Replace base or edge restraint if you find: widespread base washout or soft/voided areas, recurring settlement after re-leveling, failing or missing edge restraints that allow lateral movement, or if damage affects more than a localized patch (contractor thresholds often flag base failure or >5–10% damaged in a concentrated area). If drainage problems are present you may need to regrade the base or add drainage solutions before repaving.
Next Article
How to Rejuvenate Patio Pavers: DIY Steps, Fixes, and Sealing
DIY steps to rejuvenate patio pavers: diagnose stains and settling, clean safely, relevel, resand, and seal for lasting