Yes, you can paint a brick patio floor and get results that last for years, but only if the brick is in decent shape and you do the prep work properly. If you are wondering how to redo a brick patio, start by assessing the brick and mortar and fixing moisture issues so a new finish can bond properly. Skip the prep and you will be peeling paint off that same patio in six months.
How to Paint a Brick Patio: Step-by-Step DIY Guide

Talia Lang
19 May 2026
Get the surface clean, dry, and repaired first, use the right masonry coating, and apply it in the right conditions, and a painted brick patio holds up better than most people expect. If your goal is to make a brick patio look new, focus on cleaning, fixing moisture issues, and applying the right masonry coating so it stays smooth and even.
Quick check: is your brick patio actually paintable?
Before you buy a drop of paint, walk the patio and look for problems that will kill any coating job before it starts. Not every brick patio is a good candidate for paint, and catching the deal-breakers now saves you a lot of wasted effort.
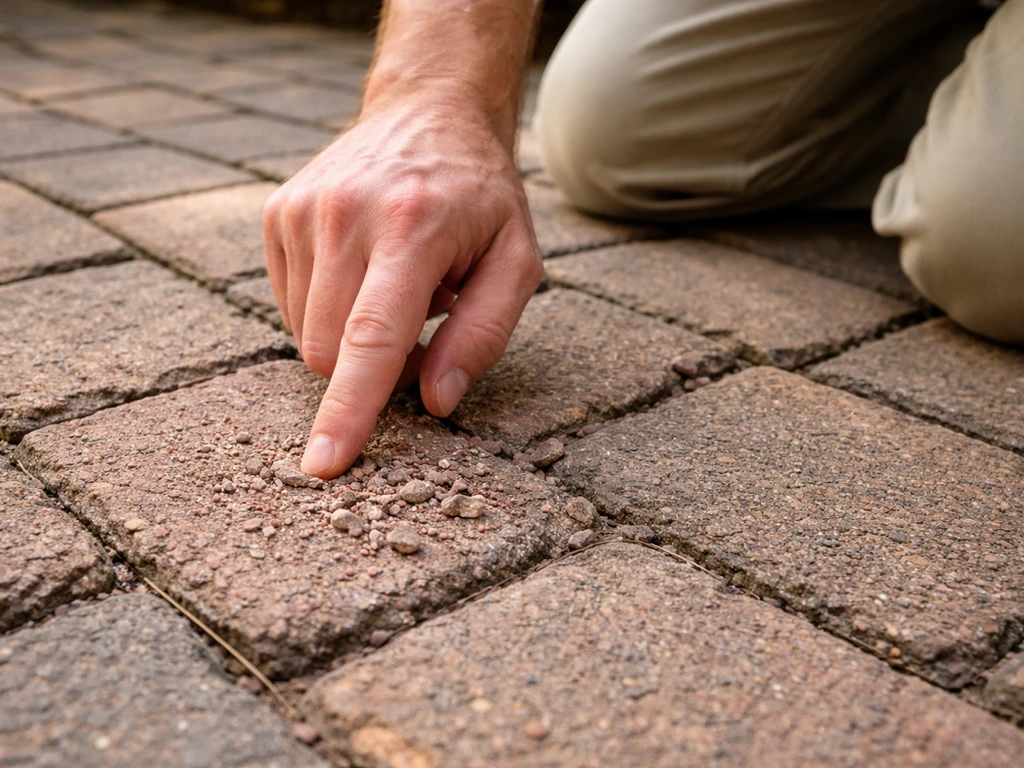
Look for spalling bricks, which means bricks that are flaking, crumbling, or have chunks broken off the face. Spalling almost always means water has been getting into the brick, freezing, and breaking it apart from the inside. Painting over actively spalling brick will not fix the problem, and the coating will delaminate quickly as the brick surface keeps breaking down underneath it. Similarly, check the mortar joints. If they are cracked, crumbled, or soft enough to gouge with a key, water is already getting through, and you need to address that before anything else. Repointing those joints is a mandatory first step, not optional.
Also check whether the patio has drainage problems. If water pools on the surface or runs toward a wall or foundation, painting over that situation traps moisture against the brick and makes everything worse. If you are dealing with ongoing drainage or water intrusion behind the patio, that is an underlying structural issue that paint cannot solve. You might want to look at options for repairing or redoing the patio entirely before committing to a surface coating.
If the brick is structurally sound, the mortar is intact, and water drains away from the surface correctly, you are in good shape to proceed. Minor surface weathering, faded color, and cosmetic imperfections are exactly what paint is designed to address.
Surface testing: moisture, efflorescence, and old coatings
Two things will guarantee paint failure faster than anything else: moisture in the brick and existing coatings that have not been properly prepared. You need to check for both before you do a single thing to the surface.
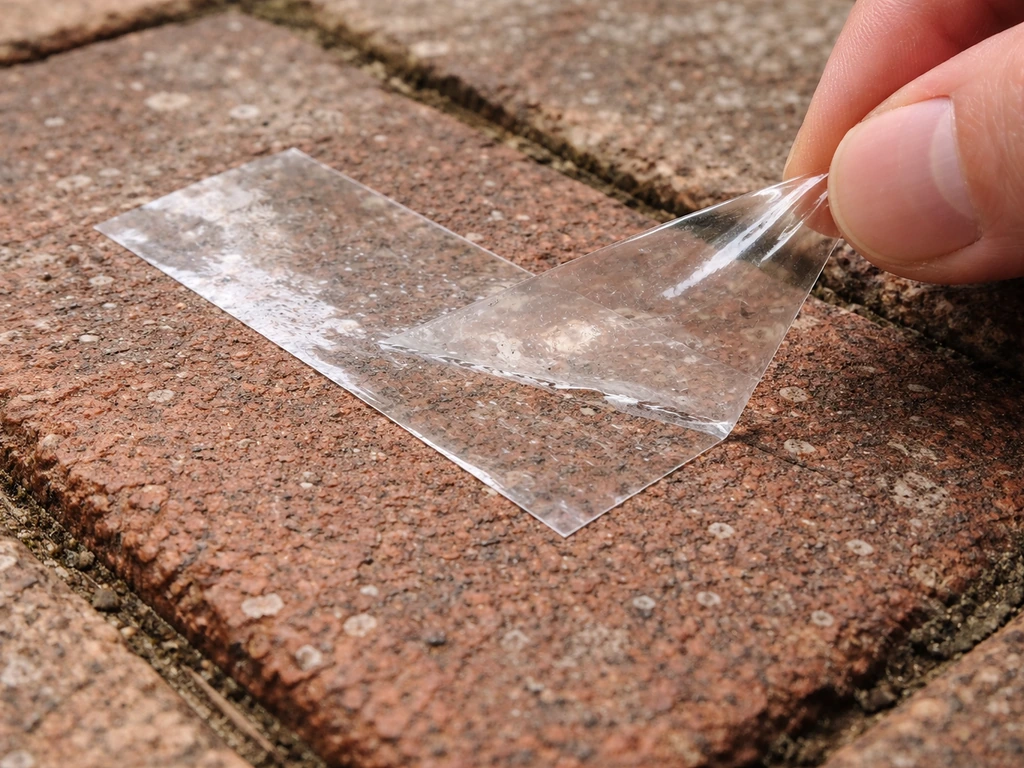
The plastic sheet moisture test
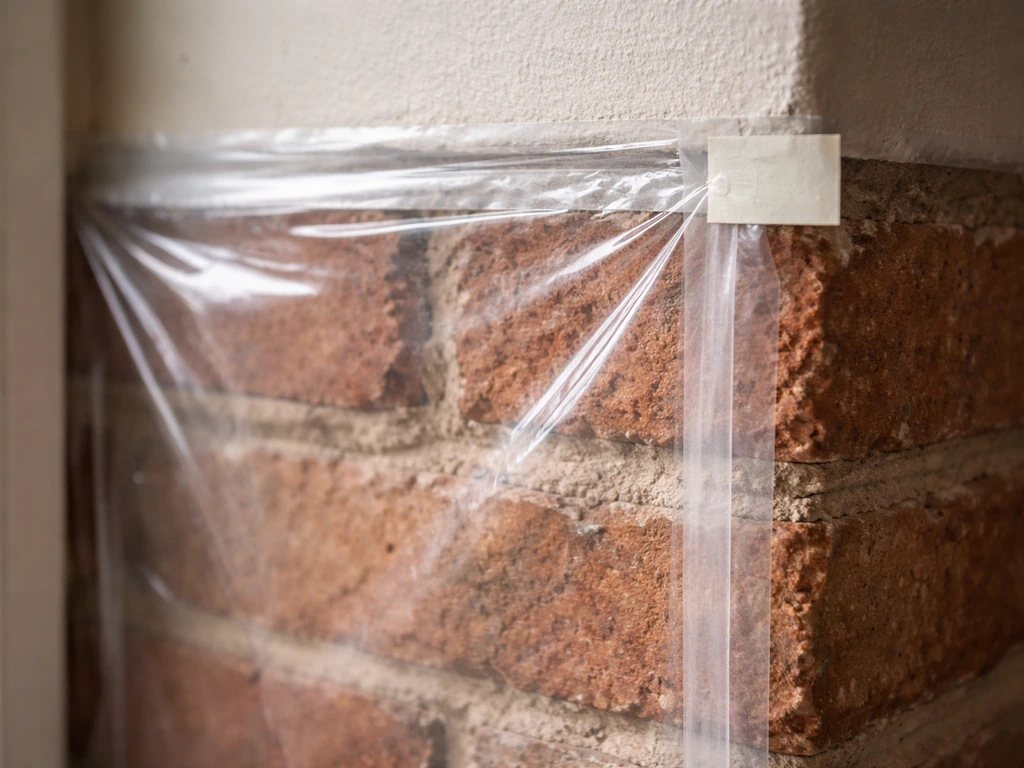
Even if the surface looks dry, moisture can be migrating up through the brick from below. The standard way to check for this is the ASTM D4263 plastic sheet test, and it is simple enough to do yourself. Tape a roughly 18-inch square of clear plastic sheeting directly to the brick using duct tape on all four edges, sealing it completely. Leave it in place for at least 16 hours, ideally 24. If you come back and find condensation or wet spots under the plastic, the brick has moisture vapor moving through it, and it is not ready to coat. Painting over a wet or damp surface leads directly to bubbles and peeling, often within weeks.
Efflorescence: the white powdery warning sign
Efflorescence is that white, chalky, powdery deposit you sometimes see on brick and masonry. It is caused by water moving through the brick, picking up soluble salts, and depositing them on the surface as the water evaporates. Here is what matters for painting: if you coat over efflorescence, the paint will not bond properly to the surface, and it will eventually peel off in sheets.
The salts also indicate that moisture is actively moving through the masonry, which is the underlying problem. Efflorescence is water-soluble, so it can be scrubbed off, but if the moisture source is not addressed, it will come back and bring your paint with it. GSA also advises manually scraping loose paint or efflorescence, then rinsing completely and letting the surface dry before repainting brick masonry [Efflorescence is water-soluble, so it can be scrubbed off](https://www. gsa.
gov/real-estate/historic-preservation/historic-preservation-policy-tools/preservation-tools-resources/technical-procedures/chemically-removing-paint-from-and-repainting-brick-masonry). Remove all visible efflorescence as part of your prep, and confirm the moisture test passes before proceeding.
Previous paint or sealer
If the patio was previously painted or sealed, you need to know what you are dealing with. Do a simple tape adhesion test by pressing a piece of strong tape firmly onto the existing coating, then pulling it off sharply. If chunks of the old coating come up with the tape, that coating is failing and needs to be removed before you add anything new. Painting over a loose or peeling existing coat is one of the most common reasons DIY patio paint jobs fail. If the existing coating is bonded tightly and passes the tape test, you can paint over it with the right primer, but you still need to clean and scuff the surface first for good adhesion.
Prep work step-by-step
Good prep takes longer than the actual painting. Plan to spend at least a full day on this phase, sometimes two, depending on how much repair work the patio needs. Do not rush it.
- Repoint any damaged mortar joints first. Use a grout saw or oscillating tool to remove crumbled mortar to a depth of about 3/4 inch, then pack in new mortar or masonry caulk. This seals out water and chemicals from getting in during cleaning and gives paint something solid to adhere to at the joints. Allow new mortar to cure for at least 3 days before continuing.
- Scrape off any loose or peeling existing paint. A stiff metal scraper or wire brush works for small areas. For larger areas with widespread failing paint, a pressure washer helps strip the loose material.
- Remove all efflorescence. Scrub the affected areas with a stiff brush and a diluted masonry cleaner or a solution of one part white vinegar to five parts water. For heavy deposits, use a dedicated efflorescence remover product. Scrub thoroughly, then rinse completely with clean water. Avoid just wetting and wiping efflorescence, as driving the dissolved salts back into the surface can make the problem worse when it dries.
- Pressure wash the entire patio. Use 500 to 1,000 PSI, which is enough to blast out dirt, grime, and loose debris without damaging the brick or mortar. Apply a masonry-appropriate detergent, let it dwell for 5 to 10 minutes, then rinse thoroughly. If there are any oil or grease stains from outdoor furniture or a grill, treat those spots with a degreaser before pressure washing.
- Let the surface dry completely. This is the step most people skip. After pressure washing, brick typically needs at least 24 to 48 hours of dry weather to fully dry out, sometimes longer in cool or humid conditions. Run the plastic sheet moisture test again after the brick looks dry to visually confirm it is actually dry enough to coat.
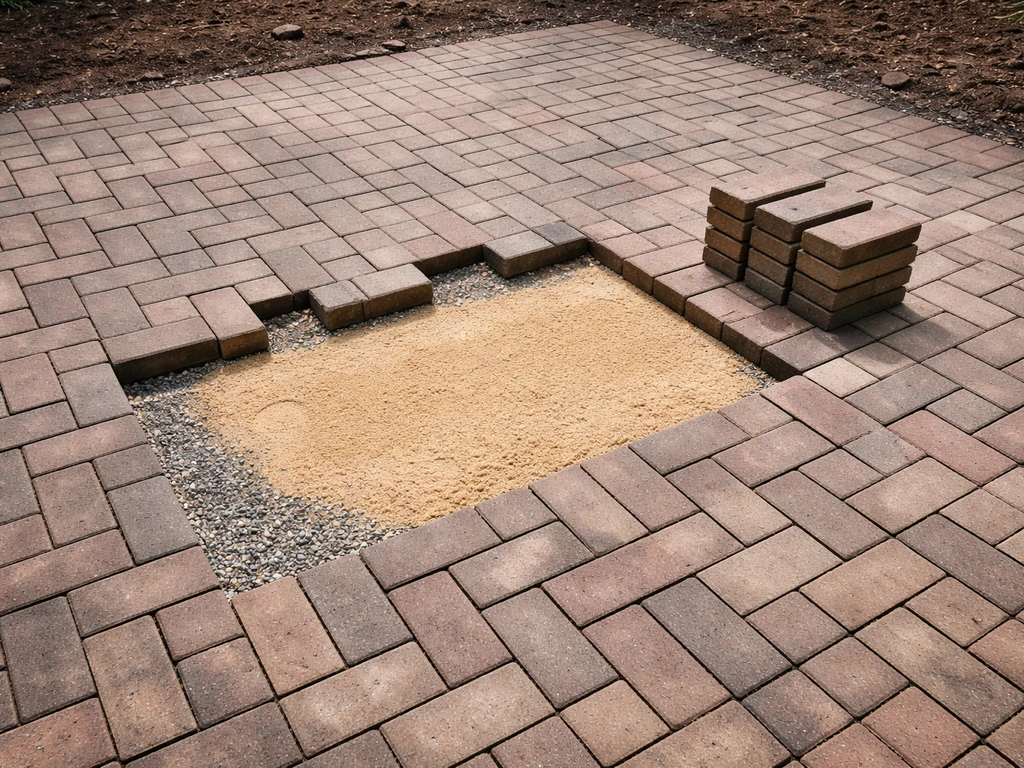
If the brick has significant spalling, cracks in the brick face, or widespread mortar failure, you will need to repair those before painting as well. Minor surface cracks can be filled with a flexible masonry patching compound. Significant structural damage is a sign the patio may need more than a paint job, and it is worth considering whether repair or resurfacing is the right path. To truly resurface a brick patio, you still need to start with cleaning, moisture testing, and any necessary repairs before you apply a proper masonry coating.
Choosing the right paint system for outdoor brick
Not all exterior paint is suitable for a horizontal masonry surface that gets walked on, rained on, and exposed to freeze-thaw cycles. Using regular exterior wall paint on a patio floor is a mistake you will regret by next spring. Here are your real options.
| Coating Type | Best For | Key Benefit | Main Limitation |
|---|---|---|---|
| Masonry paint (acrylic latex) | Brick in good condition, above-grade surfaces, moderate foot traffic | Good color range, breathable, easy to apply | Less flexible than elastomeric, not ideal for cracked surfaces |
| Elastomeric masonry coating | Brick with hairline cracks, surfaces prone to minor movement, wetter climates | Up to 400% elongation bridges small cracks, excellent water resistance | Thicker film can trap moisture if applied over damp brick, higher cost |
| Exterior concrete/patio floor paint | High foot traffic patio floors, areas needing durability | Formulated for horizontal surfaces and wear | Usually less vapor-permeable, strict moisture prep required |
| Penetrating masonry sealer (not paint) | When you want protection without changing appearance | Invisible, breathable, does not peel | No color change, not a paint solution |
For most DIYers painting a brick patio floor, a high-quality acrylic masonry paint or an elastomeric masonry coating is the right choice. Products like BEHR Premium Masonry, Stucco and Brick Paint are a reasonable starting point for most patios. If your brick has hairline cracks or you live somewhere with significant rainfall or freeze-thaw cycles, stepping up to an elastomeric coating is worth the extra cost because its flexibility allows it to expand and contract with the masonry without cracking.
For finish, flat or satin sheens are the most practical for outdoor floors. Gloss finishes show every surface imperfection and get slippery when wet, which is a real safety issue on a patio. Satin is usually the sweet spot: it has enough sheen to wipe clean easily but does not look or feel like a bowling alley.
Priming and sealing: when and why
Whether you need a primer depends on the condition of the brick and what you are applying over it. Here is how to think about it: fresh or bare masonry is alkaline, porous, and will soak up your topcoat unevenly if you skip primer. A dedicated alkali-resistant masonry primer, such as MAPEI Elastocolor Primer AR or a comparable product, neutralizes the surface pH and seals the pores so the topcoat bonds evenly and lasts longer. If you are painting bare or newly repaired brick, use a primer. If you are painting over a sound, previously painted surface that passed the tape test, a primer is still a good idea but less critical.
If there was efflorescence and you have resolved the moisture issue, a masonry bonding primer helps the topcoat grip onto the cleaned surface more securely. Products like DRYLOK Wet Wall Bonding Primer are designed specifically for this situation. DRYLOK Wet Wall Bonding Primer also specifies application over masonry pores and pinholes on a surface that is clean and free of loose or peeling paint and contaminants like oils or grease. Make sure the surface is completely clean, dry, and free of any remaining chalky material before applying primer.
One timing note: if you have done any fresh mortar repairs, let that mortar cure for at least 3 days before applying primer, and ideally longer. Fresh cementitious material is very alkaline and can cause problems for coatings applied too soon. For brand-new masonry construction, the standard recommendation is to wait 30 days before painting. Most repaired patios will have small repaired areas surrounded by older brick, so you do not need to wait a full month, but do let any repairs cure fully.
Painting method and coat schedule
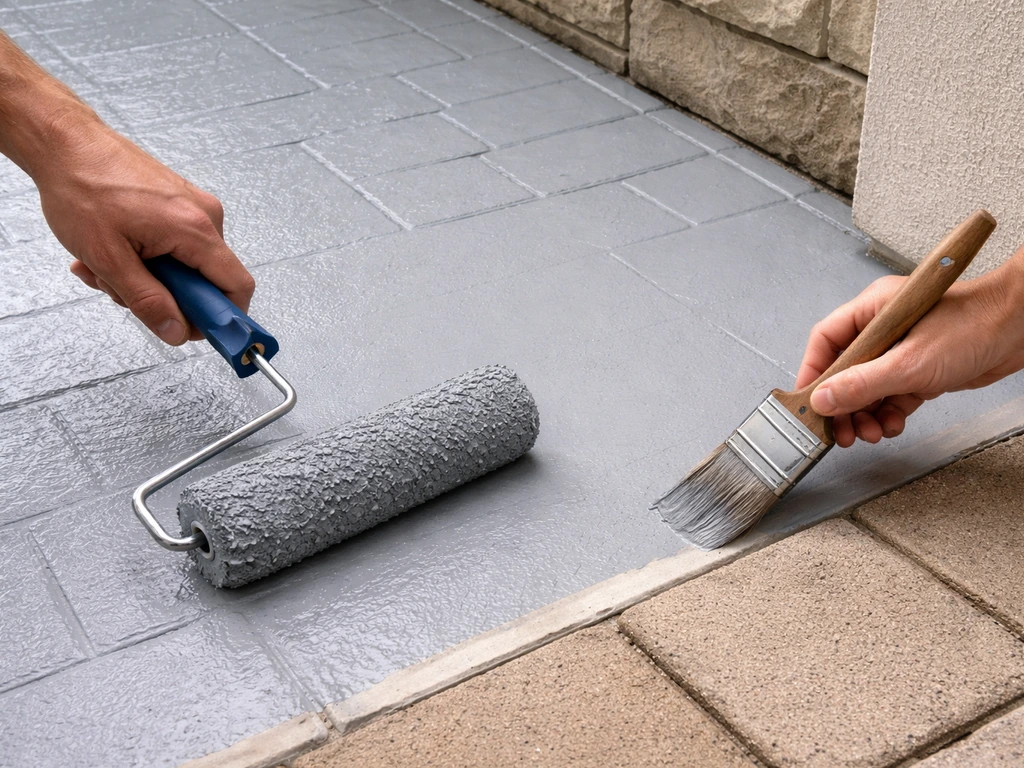
For a brick patio floor, rolling is the most practical application method for the field areas, with brushing for edges and joints. A 3/4-inch nap roller cover handles the texture of brick well and gets paint into the surface without leaving excessive buildup. Thinner nap rollers will skip over the surface and leave gaps in coverage. Spraying is faster but requires more masking and skill to avoid over-application and runs, and it can miss deep mortar joints entirely, so it is not the best choice for most DIYers working on a patio floor.
The right order to work
- Cut in all the edges along walls, steps, and borders with a brush first. Brick mortar joints at borders need brush work to get full coverage into the texture.
- Roll the main field area, working in sections of about 4 to 6 feet at a time. Keep a wet edge to avoid lap marks: do not let one section dry before rolling into the next.
- Go back over the mortar joints with a brush if the roller has skipped them. Joints are the most vulnerable spots for water entry, so make sure they have full paint coverage.
- Allow the first coat to dry per the product's instructions, typically 2 to 3 hours for most acrylic masonry paints at normal temperatures (around 73°F and 50% relative humidity).
- Apply a second coat using the same method. Two coats is the minimum for a patio floor. Three coats is better for a heavily used or exposed surface.
To avoid lap marks and streaking, always maintain a wet edge while you work. If you need to stop mid-section, stop at a natural break like a control joint or a distinct line in the patio rather than in the middle of an open field. Rolling in one consistent direction also helps keep the finish even. Avoid painting in direct midday sun on hot days, as the paint dries too fast on the hot surface, which causes poor adhesion and visible lap marks.
Temperature and humidity matter a lot here. Most masonry paints should be applied when air and surface temperatures are between 50°F and 90°F, with no rain forecast for at least 24 to 48 hours. Do not paint if rain is expected within 24 hours.
Drying, curing, and protecting the patio until it's safe to use
Dry time and cure time are not the same thing. Paint feels dry to the touch in a few hours, but it does not reach full hardness and durability for much longer. Walking on a freshly painted patio floor too soon is one of the most common ways to ruin the finish.
As a general guideline for acrylic masonry paints: the surface will be dry to the touch within 2 to 3 hours, ready for a recoat in about 4 hours, and safe for light foot traffic after about 24 hours. Full cure, meaning the paint has reached its full hardness and resistance to scuffing, typically takes 7 to 14 days depending on temperature, humidity, and the specific product. During the full cure period, keep furniture, heavy pots, and grills off the surface. Even after 24 hours, dragging anything across the surface can scuff or scratch the still-softening paint film.
If temperatures drop below 50°F at night during the curing period, the paint cures more slowly and unevenly. Try to time your project so the patio has at least a week of mild, dry weather to cure in. If you get unexpected rain within the first 24 hours after painting, check the surface carefully once it dries out. Light rain on a nearly dry surface may be fine, but heavy rain on freshly applied paint can wash the film or cause streaking.
Troubleshooting and maintenance after painting
Common problems and what to do about them
- Bubbling or blistering shortly after application: This almost always means moisture was present in the brick when you painted. The moisture vaporizes under the coating and pushes it up. The fix is to scrape off the affected areas, let the surface dry completely (re-run the plastic sheet test), and repaint. There is no shortcut here.
- Peeling or delamination: Either the surface was not clean enough, moisture was present, or there is an adhesion problem from existing efflorescence or a previous coating that was not properly prepared. Scrape all loose paint back to a solid edge, feather the edges with sandpaper, prime, and repaint those sections. If peeling is widespread, you may need to strip the whole surface and start over.
- Uneven coverage or streaking: Usually caused by painting in direct sun, letting sections dry before rolling into them, or not backrolling over sprayed sections. Lightly sand the streaky areas once fully dry and apply another even coat, maintaining a wet edge throughout.
- Paint will not bond to one area: Often a sign of a residual oil, grease, or sealer in that spot. Clean the area with degreaser, scuff it with coarse sandpaper, prime with a bonding primer, and repaint.
- Efflorescence returning through the paint: This means the underlying moisture problem was not solved. The paint is not the fix here. You need to address the moisture source, which could be drainage, a cracked mortar joint letting water in, or ground moisture wicking up through the brick. This may require professional assessment if you cannot identify and stop the source yourself.
Ongoing maintenance to make the finish last
A well-applied masonry paint on a properly prepped brick patio should last 5 to 10 years before needing a full recoat, though heavily used patios or those in harsh climates may need attention sooner. Inspect the surface each spring. Look for any areas where the paint is starting to peel, crack, or where efflorescence is trying to push through. Catching these early and spot-repainting is much easier than dealing with widespread failure later.
For routine cleaning, use a garden hose or low-pressure wash with a mild detergent. Avoid high-pressure washing over painted brick because it can erode the paint film over time, especially at edges and joints. Do not use bleach-based cleaners on painted masonry regularly, as they can break down the coating. For stubborn stains, a soft-bristle brush with a masonry-safe cleaner is the right approach.
When the finish starts looking thin or you notice the color fading significantly, you do not need to strip everything and start over. Clean the surface, check adhesion with the tape test, spot-repair any failing areas, and apply a fresh topcoat. One maintenance coat every few years is far easier than a full repaint after full failure.
When to call a professional
Most of this project is well within DIY range if the patio is in reasonable condition. But there are a few situations where calling in a professional is the honest answer. If you have ongoing water intrusion behind the patio from drainage issues, a high water table, or a failed waterproofing membrane, painting over that is not going to work no matter how good your prep is. Similarly, if the brick has widespread spalling or structural movement is causing repeated mortar joint cracking, that is a foundation or drainage problem that needs to be solved before any coating makes sense. Painting in those situations just postpones the inevitable and can make underlying issues harder to diagnose later.
FAQ
Can I paint a brick patio if it was sealed or previously painted?
Yes, but only if the surface is still firmly bonded and the moisture tests pass. If the tape test lifts old material in chunks, you need to remove the failing coating first, then clean and prime with an alkali-resistant primer before painting again.
What if the patio looks dry but fails the plastic sheet moisture test?
Do not apply paint if condensation is present under the plastic sheet test. Even light dampness can cause bubbles and early peeling, so wait until the brick is truly dry and the efflorescence and chalkiness are fully resolved.
Efflorescence keeps coming back after I clean it. Should I still paint?
If efflorescence returns after you scrub it, treat that as a sign the moisture pathway is still active. Stop and address the source (drainage, grading, or water entry), because recoating without fixing moisture will usually peel again.
How long should I wait after repointing or patching before painting?
For concrete patches or mortar repairs that are newly filled, let them cure longer than the minimum when temperatures are cool or damp. A safe approach is to wait until the repaired areas are hard, dry, and no longer chalky, then spot-prime only the repaired zones if needed.
How can I prevent streaks or lap marks when painting a large patio?
Avoid painting in direct sun and on hot surfaces, and use a wet-edge workflow. If a section dries too fast, you can get visible lap marks, and you may need to spot-recoat those areas after full cure.
Can I mix paint types or thin masonry paint to make it easier to apply?
Use the same product system across the patio. Mixing different masonry paints or adding thinners beyond what the label allows can change cure and adhesion, especially on high-traffic horizontal surfaces.
Is elastomeric coating necessary for hairline cracks in brick?
For brick with hairline cracks, a flexible elastomeric masonry coating is often the better choice, but only after you confirm the mortar is sound and water is not moving through the cracks. Otherwise the crack is just one visible symptom of moisture.
When can I walk on and place furniture on the freshly painted patio?
Light foot traffic after about 24 hours is typical, but durability keeps improving for 7 to 14 days. During that window, avoid dragging planters, rolling grills, or moving furniture without padding because scuffs and scratches become permanent defects.
How do I check if the existing coating is actually bonded well enough to paint over?
Do a simple tape test on the edges and any areas that have been exposed to water longer, since those zones fail first. If tape pulls up coating at the perimeter, plan on stripping and re-priming those specific areas before topcoating.
Can I pressure wash my patio before painting?
Yes, but do it carefully. Use a low-pressure cleaner and keep the nozzle moving to avoid eroding paint along joints. After washing, let the patio dry fully and confirm there is no chalky residue or remaining loose material.
If only part of the painted patio is peeling, do I have to repaint everything?
Strip and repaint is not always required. If only small areas fail, clean, scrape back loose coating, re-run the adhesion check on the surrounding intact areas, spot-repair, prime the bare spots, then feather-coat so you do not create a thick ridge.
What drainage problems make painting a brick patio a bad idea?
If water is pooling or running toward a wall, painting will usually trap moisture and accelerate peeling. The practical decision aid is to solve drainage, grading, or membrane issues first, then re-test dryness before coating.
What happens if it gets cold or damp during the curing period?
Most masonry paints should cure under the planned temperature range, and cure slows significantly below about 50°F at night. If cold snaps are coming, delay painting so you can get at least a week of mild, dry weather to build full hardness.
What sheen should I choose for a painted brick patio floor?
A satin or flat finish is typically the safest choice because it helps reduce slipperiness when wet and hides minor texture variations better than gloss. If slip resistance is a concern, choose a finish that is labeled for exterior floor use rather than an interior sheen.
When is it better to hire a professional instead of painting DIY?
A pro is especially worth it if you suspect repeating joint cracking, shifting brickwork, or ongoing seepage behind the patio. Those issues are often structural or waterproofing related, and paint can postpone diagnosis while making later repairs harder.
Next Article
How to Redo a Brick Patio: Step-by-Step DIY Guide
Step-by-step DIY to redo a brick patio: diagnose settling, fix grading and drainage, rebuild the base, relay pavers, and