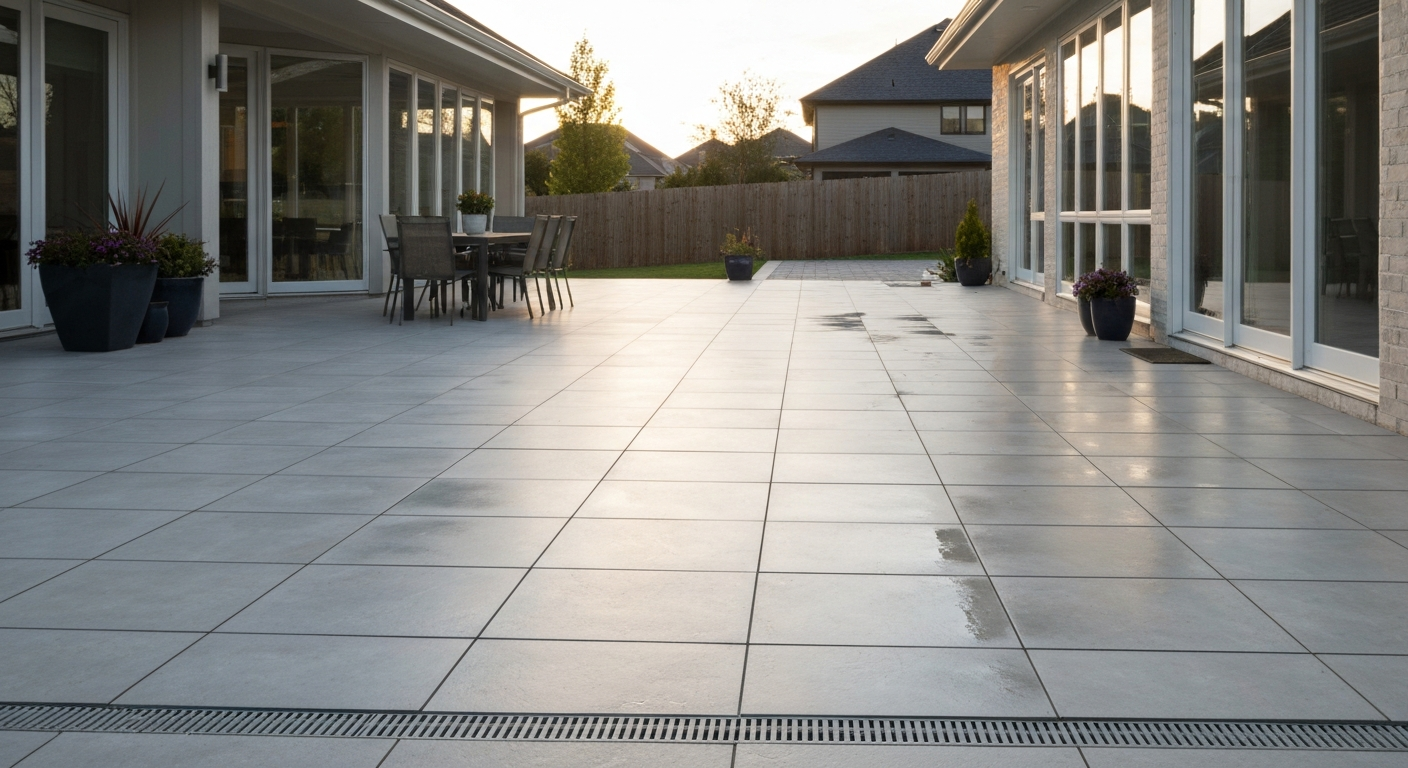
You can install porcelain tile on an outdoor patio yourself, but the job lives or dies on what you do before the first tile goes down. Get the slab flat, sloped, and crack-free, choose a polymer-modified mortar rated for exterior use, honor every control joint, and leave proper movement gaps, and you'll have a surface that holds up through freeze-thaw cycles and heavy rain for decades. Skip any of those steps and you'll be chipping up tile within a couple of winters.
How to Porcelain Tile Patio: DIY Guide for Durable Outdoor

Talia Lang
30 Jul 2026
What this guide covers and who it's for
This is a full installation guide for homeowners who want to tile a concrete patio with porcelain from start to finish. I'll walk you through deciding whether porcelain is the right choice for your specific situation, checking your slab and drainage before you buy a single tile, inspecting supports and posts that could affect the job, understanding when a problem is bigger than a DIY fix, shopping for materials, and then actually installing the tile step by step across the most common base types: a bonded installation on an existing concrete slab, a mortar bed, a pedestal system, and a tile-over-pavers approach. I'll also cover cutting and layout, expansion joints, grouting, sealing, and realistic maintenance expectations. If you're also looking at tiling a patio table or replacing a glass tabletop with tile, those are separate jobs I cover in companion articles.
Is porcelain tile right for your patio?
Porcelain is genuinely excellent for outdoor use when conditions match its strengths. Under ANSI A137.1, a tile only qualifies as porcelain if it absorbs 0.5% water or less when tested per ASTM C373. That near-zero absorption is what makes it freeze-thaw resistant: water can't penetrate the body of the tile, so there's nothing to expand and crack it in cold weather. It's also dense enough to resist staining, harder to scratch than most pavers, and available in large formats that look clean and modern with minimal grout lines. On a properly prepared slab it's genuinely low maintenance.
The honest downsides: porcelain is unforgiving of a poorly prepared substrate. It doesn't flex, so any movement in the slab that isn't accounted for with proper joints shows up as cracked tile or blown grout joints, sometimes within one freeze-thaw season. It's also slippery when polished and wet, so for a patio you want a tile with a coefficient of friction (COF) rating of at least 0.60 when tested wet, which most outdoor-rated porcelain meets but you have to check the spec sheet. Large-format porcelain (anything with an edge over 15 inches) is heavy, requires a very flat substrate, and is harder to cut cleanly without a wet saw. And the job itself is more involved than laying pavers, which you can reset if something shifts.
Quick decision checklist
- Your slab is structurally sound, not actively settling or heaving
- The surface already has or can be corrected to at least 1/4 inch per foot slope away from the house
- You're in a freeze-thaw climate and will choose tile rated ≤0.5% water absorption (ASTM C373)
- You want a hard, low-maintenance surface and don't mind the installation complexity
- You're choosing a tile with a wet COF of at least 0.60 (check the spec sheet, not just the label)
- Your budget covers not just tile but mortar, grout, movement joint sealant, and prep materials
- You own or can rent a quality wet saw — a dry-cut tool won't give you clean edges on dense porcelain
If your slab is actively moving, has large open cracks, or drains toward the house, porcelain on a bonded installation is the wrong choice until those issues are resolved. A pedestal system over an existing problem slab can sometimes work, but it doesn't fix poor drainage.
Site suitability: your pre-work inspection checklist
Spend at least an hour on a thorough inspection before you buy anything. The decisions you make here determine which installation method you use, whether you need professional help, and how long the finished job will last.
Slab condition
Walk the slab and look for cracks, spalling, and soft spots. Tap the surface with a rubber mallet: a hollow sound means the concrete has delaminated from the subgrade underneath. Hairline cracks (under 1/8 inch wide, not moving) can be filled and tiled over with a crack isolation membrane. Cracks wider than 1/8 inch, cracks that are stepped (one side higher than the other), or any crack that's actively growing are structural red flags. For a bonded tile installation, the substrate deflection must be no more than L/360 under live load, and for large-format tile many installers and engineers tighten that to L/720. If the slab bounces or flexes when you jump on it, it won't hold tile.
Slope and drainage
TCNA guidance for exterior tile assemblies requires a minimum slope of 1/4 inch per foot (roughly 2%) to move water away from the structure and toward a drain, scupper, or open edge. Set a 4-foot level on the slab in multiple directions and measure the gap under the low end. If you're getting less than 1/4 inch of drop per foot, water will pool under freeze-thaw conditions and eventually lift the tile. You can build up slope with a mortar bed or self-leveling compound, but that adds cost and complexity. Also check where water goes when it leaves the patio: it should drain away from the foundation, not pool against the house.
Existing control joints and cracks
Mark every control joint, construction joint, and visible crack on a rough sketch of the slab. Per TCNA EJ171 and industry standards, every slab control joint must be honored through the tile assembly, meaning your tile layout has to include a movement joint directly above each one. You cannot bridge a slab control joint with a rigid mortar bond. If you tile over one without a corresponding movement joint in the tile, that joint will telegraph through the tile within a season or two.
Adjacent features and transitions
Note where the patio meets the house wall, any steps, door thresholds, garden borders, or lawn edges. Each transition point needs a perimeter movement joint. If you're adding tile thickness to an existing slab, check that door thresholds and sliding door tracks will still clear the finished tile height. Also check whether there are any underground utilities, drain lines, or conduits in the slab that would be affected by core drilling for drains.
Moisture testing
For a bonded installation on a concrete slab, moisture coming up through the concrete can break the adhesive bond over time. ASTM F1869 (the calcium chloride moisture vapor emission rate test) and ASTM F2170 (in-situ relative humidity probe test) are the two standards used to assess this. Most mortar manufacturers publish acceptable MVER and RH limits in their technical data sheets. For a typical outdoor slab that drains freely, this is less of a concern than for a slab on grade in a wet climate, but if you see efflorescence (white salt deposits) on the slab surface, that's moisture moving through and you need to address it before tiling.
Inspecting and replacing posts, supports, and railings before you tile
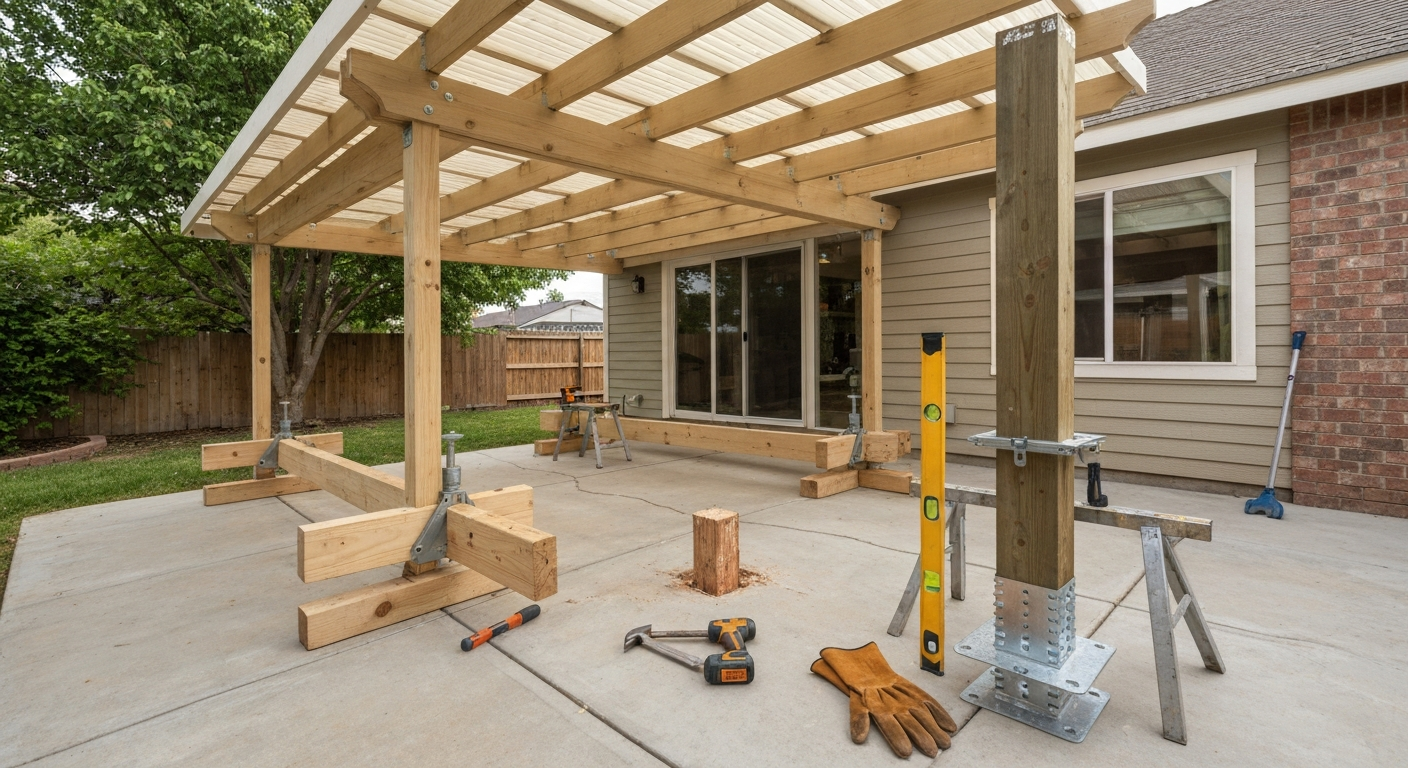
If your patio has posts, columns, pergola supports, or railings, inspect them before any tile work begins. This is one of the most commonly skipped steps, and it creates a real problem: once tile is installed around the base of a rotting post or a rusted metal support, you either have to chip out tile to replace it or live with a structural problem. Check wood posts for soft spots, rot at the base, and whether the post base hardware is still mechanically sound and properly flashed. Metal posts should be inspected for rust at the base plate and where they contact the concrete.
If a post or support needs replacing, do it now, before the tile goes in. That means any anchor bolts or base hardware set into the concrete should be re-set and properly waterproofed before you tile around them. Post base hardware that sits proud of the finished tile surface needs to be compatible with the new tile height. Replacing a patio post is a separate job covered in detail in a companion article on this site, but the key point here is sequencing: structural repairs first, tile second.
Railings attached to the edge of the slab also need attention. If the railing is anchored through the slab, the anchor penetrations need to be properly sealed and any movement between the railing and the slab accounted for. A railing that shifts or vibrates will eventually crack tile if the two are rigidly connected without any flexible joint between them.
When the job needs a professional, not a DIYer
I want to be honest about this because I've seen homeowners spend a lot of money on tile only to have it fail because the underlying problem was beyond a DIY repair. Here are the situations where I'd recommend calling a structural engineer, a licensed contractor, or a drainage specialist before proceeding.
- The slab has stepped cracks (differential settlement), meaning one side of a crack is higher than the other — this means the slab is moving and a bonded tile installation will fail
- The slab has multiple wide cracks (over 1/4 inch) or areas of significant spalling that go more than 1/2 inch deep
- There is evidence of subgrade washout — visible voids under the slab edge, or areas where the slab feels springy
- Water drains toward the house foundation and regrading or a drainage system is needed before tiling
- You're installing on a deck, balcony, or elevated structure — waterproofing and structural loads for these assemblies (TCNA F103/F104 methods) are complex and mistakes cause serious water damage
- Any load-bearing post or column shows rot, structural failure, or a compromised footing
- The slab is on an actively expanding clay soil and shows seasonal heave
- You need permits and your local jurisdiction requires a licensed contractor for tile installation above a certain project value
A pedestal system can sometimes provide a practical workaround for a slab with moderate imperfections, since the tiles are not bonded and can be lifted for access and adjustment. But pedestals don't solve drainage problems, structural movement, or rotted supports.
Permits, local codes, and HOA rules to check first
Many homeowners skip this step and regret it. Requirements vary significantly by municipality, but here's what to check before you start work.
- Contact your local building department and ask whether adding tile to an existing patio slab requires a permit. In many jurisdictions it does not, but if you're changing drainage, adding structures, or working on an elevated deck, a permit is often required.
- If you're in an HOA, review your CC&Rs or architectural guidelines. Some HOAs restrict tile colors, materials, or require approval for any change to a patio surface visible from common areas.
- Check your local zoning rules for setback requirements if the tiling work involves any expansion of the patio footprint.
- If you're in a historic district or a planned community, exterior material changes sometimes require board approval.
- Confirm whether your homeowner's insurance requires notification for significant structural or surface changes.
Getting permits pulled after the fact is more expensive and disruptive than doing it right first. A quick phone call to your building department takes ten minutes and can save you from having to remove tile to pass an inspection.
Materials and tools: what you actually need
Tile selection
For an outdoor patio, confirm that the tile you choose meets the ANSI A137.1 porcelain standard (≤0.5% water absorption per ASTM C373) and has a slip-resistance rating adequate for wet outdoor use. A wet COF of 0.60 or higher is the general benchmark. Also check the tile thickness: most outdoor porcelain is 3/8 to 1/2 inch thick, and thicker tiles are more forgiving over slightly imperfect substrates. For freeze-thaw climates, look for tile specifically labeled as frost-resistant.
Mortar and adhesives
Don't use standard gray thinset on an outdoor porcelain installation. You need a polymer-modified mortar rated for exterior use. The three products I'd suggest looking at are Laticrete 254 Platinum, Mapei Ultraflex (or Kerabond mixed with Isolastic for large-format tiles), and ARDEX X77 Microtec. All three meet ANSI A118.15 or equivalent and are specifically formulated for exterior porcelain and large-format tile. They have better freeze-thaw resistance, higher bond strength, and better deformability than basic thinsets. Read the technical data sheet for the one you choose: they have different open times, temperature minimums (don't apply below about 40°F/4°C), and cure times before grouting.
For exterior installations, ANSI A108 and TCNA guidance require 95% mortar contact coverage, versus the 80% acceptable for dry interior work. That means you almost always need to back-butter large-format tiles in addition to combing mortar onto the substrate. Use a notched trowel sized to the tile: a 1/2-inch by 1/2-inch square-notch or U-notch trowel is typical for tiles over 12 inches. After setting a tile, pull it up and check the coverage on the back before you commit to the layout.
Grout
For outdoor porcelain in a freeze-thaw climate, I'd seriously consider epoxy grout (such as LATICRETE SpectraLOCK or MAPEI Kerapoxy) over standard cement grout. Epoxy grout is chemically resistant, virtually stain-proof, and holds up significantly better through freeze-thaw cycles. The trade-off is that it's harder to work with: it has a shorter working time, is temperature-sensitive, and requires more careful cleanup. If you use cement grout, choose a polymer-modified sanded grout for joints over 1/8 inch and apply a penetrating grout sealer after cure.
Movement joints and sealant
TCNA EJ171 prescribes movement joints in the field of exterior tile every 8 to 12 feet (compared to 20 to 25 feet for interior tile), at all perimeters, and directly over every slab control joint. These joints are filled with an ASTM C920-compliant elastomeric sealant, not grout. Silicone or urethane sealant in a color matching your grout is the standard approach. Each joint also needs a closed-cell foam backer rod installed first to control joint depth and prevent three-point adhesion, which weakens the sealant.
Tools
- Wet saw with a diamond blade rated for porcelain (not a basic tile saw — dense porcelain will chip on underpowered equipment)
- Angle grinder with a diamond blade for notch cuts and outlet cutouts
- 4-foot level and a long straightedge (8–10 ft) for checking flatness and slope
- Rubber mallet and notched trowel (size matched to tile format)
- Tile spacers or wedge leveling clips (highly recommended for large-format tile to prevent lippage)
- Rubber grout float
- Margin trowel and mixing paddle
- Chalk line and measuring tape
- Knee pads and safety glasses
- Bucket and sponges for cleanup
- Caulk gun for movement joint sealant
- Pump sprayer or roller for sealant application
Materials estimate: how much to buy
Start by measuring your patio's length and width in feet and multiplying for square footage. Add 10% waste for a standard layout, 15% if you're doing a diagonal or herringbone pattern, and an extra 5% for large-format tiles where cuts waste more material. Then use the table below to estimate quantities for each material. The figures are approximate and based on typical coverage rates, always check the product's technical data sheet for the specific coverage listed.
| Material | Coverage / Unit | Estimate per 100 sq ft | Notes |
|---|---|---|---|
| Porcelain tile | Varies by tile size | 110–115 sq ft (includes 10–15% waste) | Order by the box; round up to nearest full box |
| Polymer-modified thinset mortar (e.g., Laticrete 254 Platinum) | ~40–50 sq ft per 50 lb bag (with back-buttering) | 2–3 bags per 100 sq ft | Back-buttering large-format tiles increases consumption |
| Epoxy or polymer grout | ~25–40 sq ft per unit (varies by joint width and tile size) | 2–4 units per 100 sq ft | Wider joints and smaller tiles consume more grout |
| Crack isolation / uncoupling membrane (e.g., DITRA-DRAIN) | Roll coverage per product spec | 100 sq ft + 10% overlap | Use for exterior bonded install on imperfect slabs |
| Cement backerboard (if over wood subfloor or mortar bed) | 3x5 ft sheets | ~7 sheets per 100 sq ft | Not required for bonded-to-concrete install |
| Pedestal supports (pedestal system only) | 1 per tile corner (shared) | ~25–50 pedestals per 100 sq ft (tile-size dependent) | Adjust for tile format and head-height needed |
| ASTM C920 sealant for movement joints | ~20 linear ft per cartridge at 3/8 in joint | 2–4 cartridges per 100 sq ft perimeter + field joints | Closed-cell backer rod required in each joint |
| Penetrating sealer (if using cement grout) | ~200–300 sq ft per quart | 1 quart per 100 sq ft (first coat); reapply annually | Not needed for epoxy grout; apply after grout cures fully |
To measure accurately, sketch the patio on graph paper (one square = 1 foot works well). Mark all fixed features like posts, drains, steps, and door openings. Calculate the net tileable area by subtracting any features that won't be tiled. Note where control joints fall, because those locations determine where your movement joints go and affect how you lay out your tile grid.
Step-by-step installation
Step 1: Prepare the substrate
Chip out any loose concrete, grind down high spots, and fill low spots and cracks with a polymer-modified patching compound or self-leveling underlayment. The flatness standard for large-format tiles (any edge 15 inches or more) is no more than 1/8 inch variation in 10 feet and no more than 1/16 inch in 2 feet. For smaller tiles, 1/4 inch in 10 feet is the standard. Use your long straightedge to check in multiple directions across the slab. Mark high and low spots with a marker and grind or fill as needed. Confirm your slope is at least 1/4 inch per foot in the direction water needs to drain.
Step 2: Apply crack isolation or uncoupling membrane (recommended)
For most outdoor concrete slabs, I recommend installing an uncoupling or crack isolation membrane before setting tile. Products like Schluter DITRA-DRAIN are specifically designed for exterior use and provide uncoupling (so minor slab movement doesn't crack the tile), a defined drainage plane, and a consistent mortar bed. Follow the manufacturer's installation instructions exactly: these membranes are set in unmodified thinset, and you tile into the modified mortar on top. Note that Schluter explicitly states their DITRA-HEAT heated mat is not for outdoor use, that's an indoor-only product. DITRA and DITRA-DRAIN are the exterior-approved options.
Step 3: Plan your layout
Snap chalk lines to establish your working grid. Find the visual center of the patio or the most prominent sight line (often from the house looking out) and work outward. Dry-lay a row of tiles in both directions to check how the pattern will end at the edges, you want balanced cuts on opposite sides, not a sliver of tile on one end. Account for movement joint locations in your layout: field joints every 8 to 12 feet, perimeter joints along every wall and fixed feature. Mark these on the slab with chalk before you start setting tile.
Step 4: Mix and apply mortar
Mix your polymer-modified mortar to a peanut butter consistency, it should hold a notch without slumping but spread smoothly. Don't mix more than you can use in the open time listed on the product data sheet, typically 20 to 30 minutes in moderate temperatures (shorter in heat, longer in cool weather). Comb mortar onto the substrate with your notched trowel, then back-butter the back face of each tile with a thin skim coat of mortar using a flat margin trowel before pressing it into place. This is what gets you to the required 95% contact coverage for exterior work.
Step 5: Set tile with leveling clips
Press each tile firmly into the mortar with a slight twisting motion, then set it with a rubber mallet tapping through a beating block (a piece of scrap wood or rubber pad). Use tile leveling wedge clips between tiles to prevent lippage, which is the height difference between adjacent tiles that you can feel underfoot and that catches dirt. Pull up one tile every 15 minutes or so to verify mortar coverage on the back. Let the mortar cure for at least 24 hours (check the product TDS, some require longer before grouting) before walking on the tile.
Step 6: Cut tiles
Make all straight cuts on the wet saw. Run the tile slowly through the blade and keep the water running to prevent chipping. For L-shaped cuts, make two straight cuts. For notch cuts around posts or obstacles, use an angle grinder with a diamond blade, making a series of relief cuts first. Porcelain chips along the cut edge if you rush it, take your time and the edge will be clean enough that it's hidden under the tile's edge or base hardware anyway.
Step 7: Install movement joints
Before grouting, go back and install backer rod in all movement joint locations: perimeter joints, field joints, and joints over slab control joints. Press closed-cell backer rod into the joint to a depth that leaves room for 1/2 to 2/3 of the joint depth for sealant. Apply ASTM C920-compliant elastomeric sealant (silicone or urethane) over the backer rod, tool it smooth, and let it cure fully before grouting. Never grout a movement joint.
Step 8: Grout
Apply grout with a rubber float held at a 45-degree angle, pressing grout firmly into joints and removing excess with a diagonal stroke. For epoxy grout, work in small sections (4 to 6 square feet at a time) and clean up before the epoxy begins to harden, it's much harder to remove once cured. For cement grout, let it firm up slightly (15 to 20 minutes), then clean the haze with a damp sponge in circular motions, rinsing frequently. Avoid overwatering the sponge, which weakens the grout. Final buff with a dry cloth after the haze dries.
Pedestal systems: a different approach
If you're installing over an existing surface that you don't want to bond to (an existing paver patio, a questionable slab, or a rooftop deck), a pedestal system is a legitimate option. Adjustable pedestals screw up or down to level the tile surface independent of what's underneath. Tiles rest on the pedestals without mortar, so they can be lifted for access and adjusted if a pedestal settles. The downsides: you need enough head height to accommodate the pedestal height (minimum 1 to 2 inches typically), tile edges are more exposed to foot traffic and may chip over time, and the system needs proper perimeter edging to keep tiles from shifting. Pedestal systems are a real solution for difficult substrates, but they're not a cheap or simple shortcut.
Finishing and maintenance
If you used cement grout, apply a penetrating sealer once the grout has fully cured (typically 72 hours minimum, but check the grout manufacturer's instructions). Reapply the sealer annually or whenever water stops beading on the grout surface. Porcelain tile itself doesn't need sealing, but the grout joints do in a cement grout system. If you used epoxy grout, no sealing is needed.
For ongoing maintenance, sweep or blow off debris regularly to prevent grit from grinding against the tile surface. Hose down the patio with water to clean it; for stubborn stains use a pH-neutral cleaner. Avoid acid-based cleaners on cement grout, they etch the surface and weaken it over time. Inspect movement joints each spring: if the sealant has shrunk, cracked, or pulled away from the tile, scrape it out and reapply. A 20-minute maintenance job with a caulk gun beats re-setting cracked tile.
Realistic time and cost expectations
For a first-time DIYer, budget a weekend for a 100 to 150 square foot patio with a straightforward layout on a prepared slab. Day one covers prep and membrane; day two covers tile-setting; day three (or the following weekend) covers grouting and joints. Large-format tile, complex layouts, or significant substrate prep add time. On materials cost, expect to spend roughly $4 to $8 per square foot for decent outdoor porcelain tile, $1 to $2 per square foot for polymer-modified mortar, $1 to $3 per square foot for epoxy grout (more than cement grout but worth it outdoors), and another $1 per square foot for membrane, sealant, and miscellaneous materials. Tool rental for a quality wet saw runs $50 to $80 per day. Total materials cost for a typical 150 square foot patio runs $1,000 to $2,000 depending on tile selection. Professional installation in the same area would typically run $3,500 to $6,000 or more, so the DIY savings are real if you're willing to put in the prep work.
Troubleshooting common failures
| Problem | Likely cause | Fix |
|---|---|---|
| Tiles cracking or popping off after first winter | Insufficient movement joints, wrong mortar, or tile installed over active slab crack | Remove failed tiles, address slab movement or crack, reinstall with proper joints and exterior-rated mortar |
| Grout cracking at perimeter or over slab joints | Movement joint installed with rigid grout instead of elastomeric sealant | Rake out grout, install backer rod, fill with ASTM C920 sealant |
| Hollow-sounding tile (not bonded) | Insufficient mortar coverage (under 95%) or trapped air; mortar skinned over before tile was set | Remove tile, scrape back substrate, reset with fresh mortar and back-butter |
| Water pooling on patio surface | Insufficient slope or drain blocked | For pedestals: adjust pedestal heights; for bonded install: add sloped mortar bed if pooling is minor, or call a drainage pro for major issues |
| Tile chipping at cut edges | Dull saw blade, too-fast cut, or wrong blade type for dense porcelain | Use a fresh diamond blade rated for porcelain; run the cut slowly with steady pressure |
| Grout staining or discoloring | Cement grout not sealed or sealer worn off | Clean with appropriate cleaner, dry fully, apply penetrating grout sealer; consider epoxy grout if regrouting |
A note on related projects: table tiling and post replacement
If your project extends to tiling a patio table or replacing a glass tabletop with tile, those are distinct jobs with different substrate and adhesive considerations, a patio table surface flexes more than a concrete slab and needs a more flexible adhesive system. Similarly, if you're replacing the tile on an existing patio table or looking to retile one, the sequencing and material choices differ from a floor installation. And as mentioned earlier, replacing or repairing a patio post before you tile around it is a job that needs to be done in the right order to avoid tiling yourself into a problem. Each of those tasks is covered in its own guide on this site. See our separate guide on how to replace tile on patio table for step-by-step instructions and adhesive recommendations.
FAQ
Is porcelain tile a good choice for an outdoor patio?
Yes—if you pick true porcelain (ANSI A137.1 / ASTM C373: water absorption ≤0.5%) with frost‑ and slip‑resistant finish. Porcelain resists moisture better than non‑porcelain ceramics and, when installed with proper slope, drainage and freeze‑thaw‑rated materials, provides a durable low‑maintenance patio surface. Avoid indoor‑only glazed porcelains and confirm manufacturer’s exterior rating.
How do I decide whether porcelain is right for my patio?
Decision checks: climate (freeze‑thaw? requires true porcelain and appropriate joints), existing substrate (concrete slab vs pavers vs wood/deck), slope and drainage (minimum 1/4 in/ft away from structure), foot loads and deflection (substrate deflection ≤L/360; use L/720 for large formats or sensitive installations), nearby vegetation/chemicals, and desired look. If you have structural movement, poor drainage, or a wood joist deck, consider alternative surfacing or hire a pro.
What pre‑work inspection checklist should I follow?
Inspect: slab condition (cracks, deteriorated concrete, previous coatings), slab flatness (ANSI/TCNA flatness limits: 1/4 in/10 ft for common tiles; 1/8 in/10 ft for large‑format), slope (≥1/4 in/ft), drainage points/scuppers, slab control/expansion joints, moisture (ASTM F1869 MVER and/or ASTM F2170 RH), adjacency to posts/railings (check rot/corrosion), utilities and canopy interactions. Note anything requiring structural repair or improved drainage—stop and fix before tiling.
What materials and tools will I need for a typical exterior porcelain tile installation on concrete?
Materials: exterior‑rated porcelain tile, polymer‑modified thin‑set (ANSI A118.15 / C2FT or equivalent), epoxy/urethane or high‑performance cement grout for exterior use, ASTM C920‑compliant elastomeric sealant + backer rod for movement joints, uncoupling/drainage membrane if required (e.g., Schluter DITRA‑DRAIN), primer/repair mortar for cracks, edge profiles and drains. Tools: wet/lower‑dust tile saw with diamond blade, notched trowels, rubber float, level, straightedge, wedges/spacers, grout sponge, mixing drill, caulking gun, moisture meter/ASTM test kits, protective gear (glasses, gloves, knee pads).
How do I estimate how much material I’ll need?
Simple estimate table: measure patio area in sq ft. Tile quantity = area ÷ tile area (add 7–10% waste; 15% for diagonal layout). Thin‑set: ~1.5–3.0 lb/sq ft depending on trowel size and tile size; follow product TDS. Grout: ~0.02–0.1 lb/sq ft depending on joint width and tile size—use grout calculator from manufacturer. Backer rod/sealant: linear feet of movement joints. For precise numbers use manufacturer calculators and include extra for cuts and waste.
What are the common base/substrate methods and how do I install on each?
Common bases: 1) New or existing concrete slab: repair cracks, test moisture, correct flatness/slope, install appropriate membrane or primer if needed, use high‑performance modified thin‑set, achieve ≥95% mortar contact (back‑butter large tiles), install movement joints aligned with slab joints. 2) Mortar bed (wet bed) over concrete or sleepers: build correct slope with compacted mortar, cure per spec, use suitable bonding mortar and grout; honor control joints. 3) Pedestal/adjustable supports over pavers or roof decks: use manufacturer‑approved pedestals with drainage plane; ensure load and slope compatibility; follow pedestal spacing and tile edge support guidance. 4) Over existing pavers: ensure stable, compact base; consider leveling mortar or pedestals; do not tile over heavily deflecting or unstable pavers. For each method follow TCNA F‑methods and manufacturer instructions.
Next Article
How to Replace Patio Post: Step-by-Step Guide for DIYers
How to replace patio post: safe, code-aware steps to shore, remove, and install a properly anchored replacement.