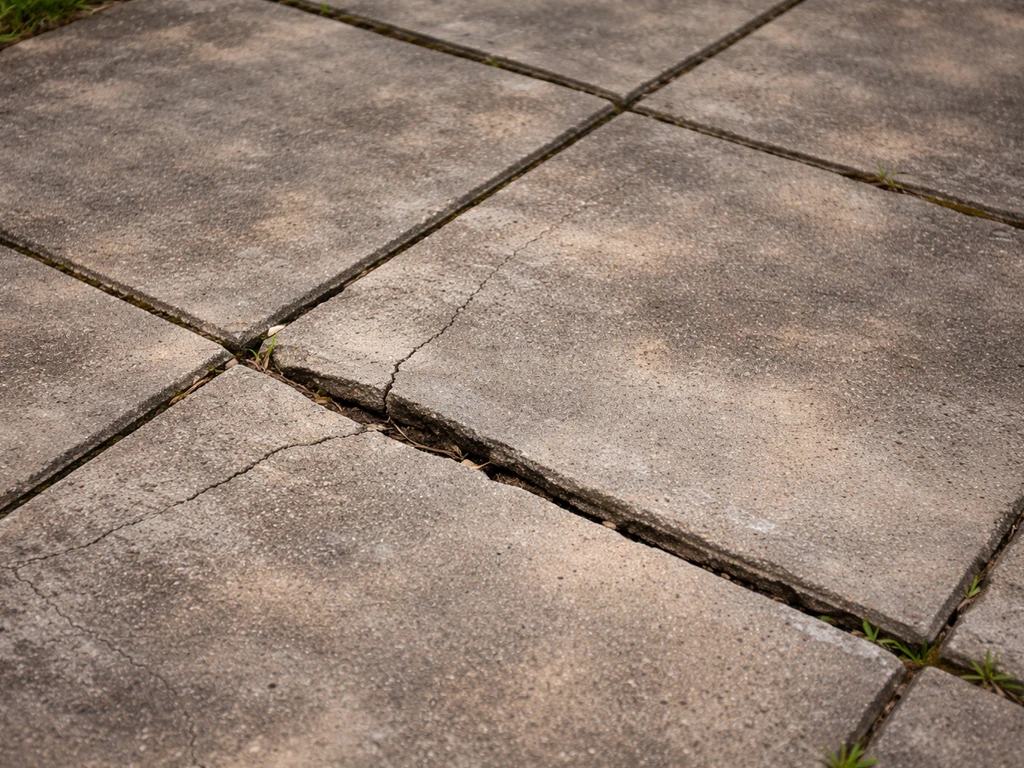
Renewing patio slabs means working through a clear sequence: diagnose what's actually wrong, clean the surface properly, fix any structural problems (cracks, sunken slabs, failed joints), then refresh the appearance with paint, stain, or sealer. For step-by-step tips on brightening and revitalising old paving, see how to brighten up patio slabs. Skip any of those steps and the cosmetic work won't last. Most homeowners can handle cleaning, repointing, and basic crack repairs themselves in a weekend or two. Slab re-leveling, sub-base failure, and widespread structural cracking are the points where calling a professional makes more sense than fighting the job alone.
How to Renew Patio Slabs: Complete DIY Guide for Homeowners

Talia Lang
15 Jul 2026
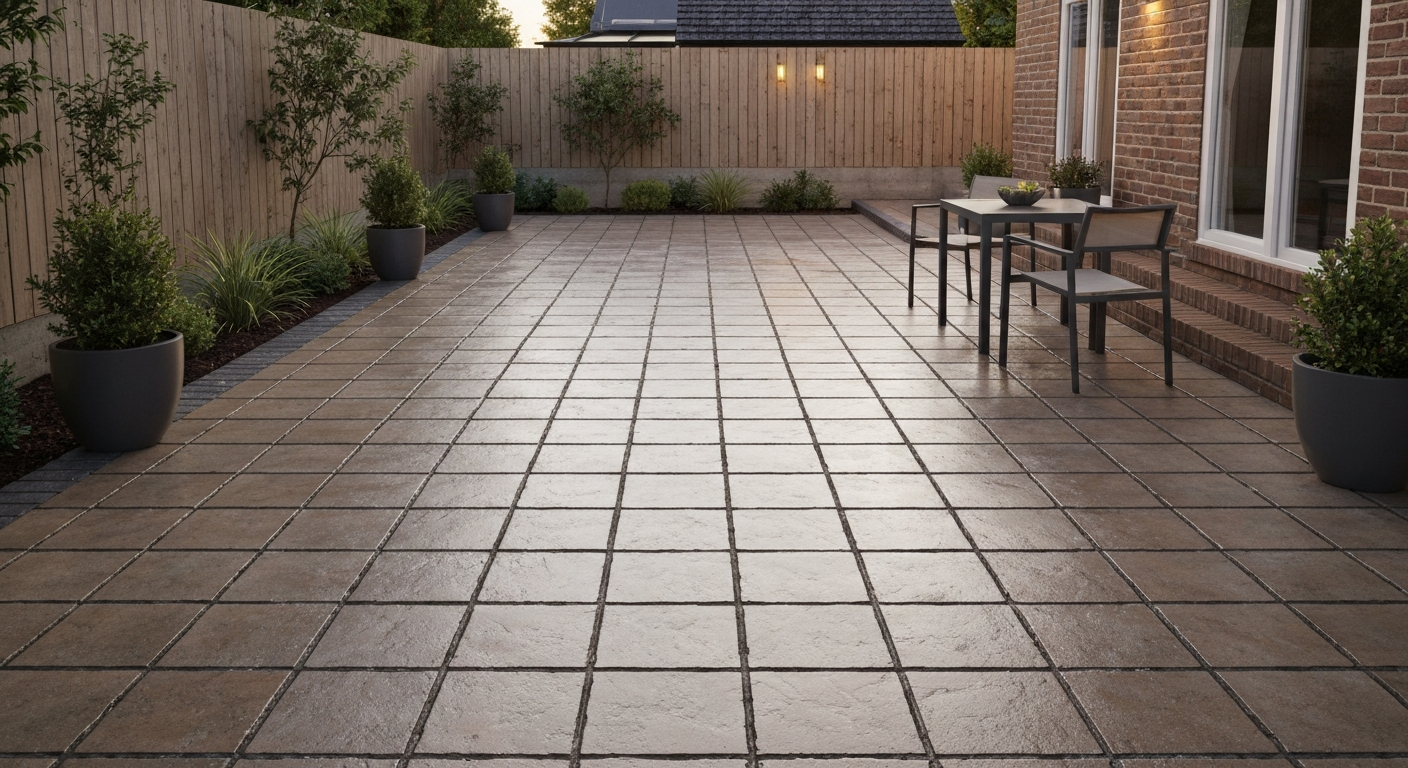
What this guide covers and what to expect
This guide is for homeowners dealing with a patio that looks tired, stained, cracked, or uneven, and who want to understand exactly what needs doing before spending money on products or a contractor. It covers every stage: assessing the condition of your slabs, cleaning them correctly, repairing structural faults, refreshing the surface appearance, and maintaining the result so it lasts. For step-by-step instructions on how to update patio slabs, read the dedicated guide on how to update patio slabs. For a step-by-step walkthrough on how to revamp patio slabs, consult our practical guide. Whether your slabs are concrete, natural stone, or clay pavers, the diagnostic and repair logic is largely the same, though material choices vary. For step-by-step tips on how to make your patio slabs look better, see our detailed guide.
Realistically, a thorough clean and repoint of an average 20–30 sq m patio takes a weekend. Add another day for crack filling or surface coating. Re-leveling sunken slabs or replacing the sub-base is a multi-day project, and the cost rises sharply. Set your expectations at the start: this guide will tell you what's achievable DIY, what's borderline, and what genuinely needs a pro.
Safety, PPE and site prep before you touch anything
Before starting any patio work, gather your PPE. You'll need safety glasses or goggles (mandatory for pressure washing, acid cleaning, and angle grinding), chemical-resistant gloves for any biocide or acidic cleaner, knee pads for extended ground work, and steel-toe boots if you're shifting slabs. A dust mask (P2 minimum) is worth wearing when dry-brushing old mortar joints or cutting with a grinder.
Clear the patio completely: furniture, planters, barbecue, all of it. Check for any overhead cables, drain covers, or outdoor sockets that could be affected by water or cleaning chemicals. If you're using a biocide or acid-based cleaner, read the SDS (Safety Data Sheet) first, most require you to wet surrounding soil and plants, cover drainage gullies, and neutralise runoff before it reaches a drain. Working in breezy conditions with a pressure washer or sprayer can blow chemicals back at you, so check the wind direction.
- Safety glasses or goggles (chemical splash and debris rated)
- Chemical-resistant gloves (nitrile or rubber, not latex for acid cleaners)
- P2 dust mask (for dry mortar removal, grinding, or sanding)
- Knee pads for joint work and crack repair
- Steel-toe boots if lifting or shifting slabs
- Protective sheeting for planted borders and drainage points when using chemicals
- Non-slip footwear when pressure washing wet surfaces
Diagnosing the patio: cosmetic vs structural problems
Before you buy a single product, spend 20 minutes doing a proper assessment. The biggest mistake I see is people applying a fresh coat of sealer or patio paint over slabs that have underlying structural problems. The cosmetic fix fails in months and you're back to square one. Here's how to tell what you're actually dealing with.
The tap test for hollow slabs and failed bedding
Walk the patio slowly and tap each slab firmly with a small hammer or a length of chain dragged across the surface. A solid slab gives a crisp, dense sound. A hollow or dull thud means there's a void underneath, the slab is no longer fully bonded to its mortar bed. This is the single most useful field test you can do, and it takes minutes. Any slab that sounds hollow under load is a trip hazard and needs re-bedding before any surface treatment.
Efflorescence vs biological staining
White powdery deposits on the slab surface are almost always efflorescence, soluble salts drawn to the surface as water evaporates through the concrete or stone. It often brushes off and reappears after rain. To confirm, brush a dry area with a stiff bristle brush: if the white residue crumbles off cleanly, it's efflorescence. If it doesn't shift with dry brushing, it's more likely a biological crust or mineral deposit requiring a different approach. Efflorescence can be treated with a dilute acid wash (manufacturer guidance applies, always trial on a hidden area first, as acid can alter stone colour permanently). Biological growth, moss, algae, lichen, has a different texture and colour, ranging from green-black algae to grey-green lichen patches.
Cosmetic vs structural: the checklist
| Problem | Type | DIY Fixable? |
|---|---|---|
| Green/black algae, moss, lichen staining | Cosmetic | Yes |
| Efflorescence (white powdery bloom) | Cosmetic | Yes |
| Surface dirt, grime, grease staining | Cosmetic | Yes |
| Failed or crumbling joint mortar/sand | Minor structural | Yes |
| Hairline surface cracks (<2 mm, stable) | Minor structural | Yes |
| Wider cracks (2–6 mm, stable, non-moving) | Structural | Yes, with epoxy filler |
| Active/moving cracks that change with seasons | Structural | Borderline — see below |
| Hollow-sounding slabs (failed bedding) | Structural | Yes, with effort |
| Sunken or rocking slabs (sub-base issue) | Structural | Borderline — see below |
| Persistent standing water toward the house | Drainage/structural | Sometimes — depends on cause |
| Widespread slab heave, cracking, or settlement | Structural | No — professional needed |
Repair, full replacement, or call a professional?
Most patio problems fall into a repair-worthy category if you catch them early. The decision tree is straightforward: cosmetic issues and minor structural faults are DIY territory; widespread base failure or drainage toward the building pushes you toward a professional. Here's how to think through it.
When DIY repair makes sense
If fewer than 20–25% of slabs are hollow-sounding, cracked, or sunken, targeted repairs are practical and cost-effective. Cleaning, repointing, and filling stable cracks are all realistic one- or two-person weekend jobs. Re-bedding a handful of individual slabs is feasible DIY if you're comfortable with mixing mortar and cutting with a saw.
When to think about full replacement
Full replacement becomes the honest answer when the sub-base has failed broadly, meaning more than a third of the area has sunk, heaved, or separated. Patching on top of a compromised base just delays the same failure. If you're finding soft, wet spots under the slabs when you lift them, or the compacted base depth is clearly under 100 mm (4 inches) for pedestrian use, the foundation itself needs addressing before any surface work is worthwhile.
Red flags that mean call a professional
- Water is draining toward the house rather than away — correct patio drainage should slope at roughly 2% (about 1/4 inch per foot) away from the building within 10 feet of the foundations; if your patio drains toward the house, that's a foundation moisture risk that needs proper re-grading, not just patching
- Cracks are active and growing — measure and mark them, then check after 4–6 weeks; if they're widening or moving seasonally, there's ongoing ground movement that no surface repair can fix
- Multiple slabs have heaved upward, suggesting tree root intrusion or frost heave in the sub-base
- Slab lifting or mudjacking is needed across large areas — polyurethane foam injection is fast (walkable same day) and effective, but it requires specialist equipment and trained installers
- Any slab work within 1 metre of a gas or drainage pipe you can't clearly locate
Tools and materials: the full checklist
Getting your kit together before starting saves multiple trips to the builders' merchant. Below is everything you're likely to need across the full renewal process. You won't need every item for every job, cross-reference against your diagnostic results.
Cleaning
- Stiff-bristle deck brush or yard brush
- Garden hose with adjustable nozzle
- Pressure washer (1,200–1,800 PSI for pavers and natural stone; up to 2,500–3,000 PSI for plain concrete) with 25°–40° fan nozzle
- Surface cleaner attachment (rotary head) — avoids streaking and joint erosion
- pH-neutral patio cleaner or detergent for general cleaning
- Patio biocide (for moss, algae, lichen — check it's approved for your slab type)
- Dilute acid-based efflorescence remover (test on inconspicuous area first)
- Pump sprayer (for applying biocides and cleaners)
- Plastic sheeting to protect borders and cover drain gullies
Joint repair
- Cold chisel and club hammer (for raking out old mortar)
- Oscillating multi-tool or angle grinder with mortar rake blade (faster on large areas)
- Pointing trowel and small margin trowel
- Polymeric jointing sand (check manufacturer TDS for joint width minimums — most specify at least 1/8" joint width) or hydraulic lime mortar for natural/historic stone
- Ready-mix cementitious mortar for standard concrete slabs
- Brush (for activating polymeric sand — a soft broom for sweeping in, a fine-mist hose for wetting)
- Joint raker or scutch comb
Crack repair
- Angle grinder with diamond blade (for routing cracks wider before filling)
- Vacuum or compressed air (for cleaning crack debris)
- Two-part epoxy crack filler or injection resin (for stable cracks roughly 0.002"–0.25" wide)
- Flexible polyurethane sealant (for moving or active cracks, or wet conditions)
- Flexible filler or backer rod (for wide cracks before topping with flexible sealant)
- Putty knife and smoothing tool
Surface treatment and finishing
- Patio paint, concrete stain, or colour enhancer (check compatibility with your slab type)
- Penetrating masonry sealer or film-forming sealer (wet-look or natural finish)
- Anti-slip additive (for sealer or paint — fine grit or aggregate additive)
- Roller with extension pole (long-pile roller for textured surfaces)
- Paintbrush for edges and cut-in work
- Paint tray and spare sleeves
How to soft-clean patio slabs (step-by-step)
Soft cleaning, using detergents or biocides rather than high-pressure water, is the right first approach for most slabs, and the only appropriate method for delicate natural stone, old sandstone, and any surface where joint sand needs protecting. For a complete step-by-step walkthrough on how to revive patio slabs, see our detailed guide. For a full step-by-step walkthrough on how to refresh patio slabs, see our detailed guide covering cleaning, repairs, and sealing. It's lower risk than a pressure washer misused, and it treats biological growth at the root rather than just blasting it off the surface.
- Sweep the patio clear of leaves, loose soil, and debris. Remove anything sitting on the surface.
- Cover planted borders and any open drain gullies with plastic sheeting or damp newspaper. Wet nearby soil and grass before applying any chemical to reduce absorption.
- Pre-wet the slab surface with clean water. This reduces the concentration of cleaner absorbed by porous stone and helps spread the product more evenly.
- Mix your pH-neutral detergent or biocide to the manufacturer's dilution rate — don't go stronger than recommended, as some products can bleach or etch stone if overdosed.
- Apply the solution evenly with a pump sprayer or a stiff brush, working in sections of 2–3 sq m at a time so the product doesn't dry on the surface before you work it.
- Agitate firmly with a stiff-bristle brush, working in circular motions on heavily stained areas. For algae and lichen, expect to scrub — these organisms grip porous stone and won't just rinse off.
- Allow the product to dwell for the time specified on the label — typically 10–30 minutes for biocides. Don't let it dry completely.
- Rinse thoroughly with clean water from a garden hose, working from the highest point of the patio downward so dirty runoff doesn't re-contaminate clean areas.
- Inspect under good light. Repeat for persistent stains. Some biocides continue working over several days, causing biological growth to turn brown and flake away naturally — don't assume one application has failed if growth is still visible immediately after treatment.
- Dispose of chemical rinse water appropriately — don't let concentrated runoff enter stormwater drains directly.
How to pressure-wash patio slabs (step-by-step)
A pressure washer is faster than a brush and effective for shifting embedded dirt, algae, and surface soiling from robust slabs. The risks are equally real though: wrong pressure or nozzle angle strips joint sand, erodes soft stone surfaces, and drives water into cracks. Use it as a tool with specific settings, not a hose you point at the problem.
Pressure settings and nozzle guide
| Slab Type | Recommended PSI Range | Nozzle Angle | Notes |
|---|---|---|---|
| Concrete pavers (modern, standard) | 1,200–1,800 PSI | 25°–40° | Start at lower end; test first |
| Natural stone (sandstone, limestone) | 500–1,200 PSI | 40° | Always test on hidden area; acid-sensitive |
| Plain concrete (brushed or broom finish) | 1,500–2,500 PSI | 25°–40° | Use surface cleaner head to avoid streaking |
| Porcelain tiles (outdoor rated) | 1,000–1,500 PSI | 40° | Grout lines vulnerable — use surface cleaner |
| Old or handmade clay pavers | 500–1,000 PSI | 40° | Very soft surface — soft-clean preferred |
- Set up the pressure washer with the correct nozzle for your slab type — a 25° or 40° fan nozzle, or a rotary surface cleaner head. Never use a 0° or pinpoint nozzle on patio slabs.
- Test your chosen settings on an inconspicuous corner first. Hold the lance at least 30 cm (12 inches) from the surface and check that no material is being lifted from the slab face or joints.
- Work in consistent, overlapping passes parallel to the joint lines — not diagonal, which drives water and grit into the joints. Keep the nozzle moving at all times; hovering causes surface erosion.
- Maintain a consistent standoff distance throughout. Most damage from pressure washing comes from varying distance — closer in tight corners and then backing off on open areas.
- Rinse from the highest point downward. Flush all chemical or biological residue off the surface completely.
- After pressure washing, inspect joint sand or mortar. If the joints have been eroded or are now loose, they need to be replenished before any sealer or surface treatment is applied — a sealer applied over failed joints will crack and peel in those areas.
Pressure washer pros and cons
| Aspect | Pressure Washing | Soft Cleaning |
|---|---|---|
| Speed | Fast — large areas in hours | Slower — dwell time required |
| Effectiveness on heavy soiling | High | Moderate to high (with correct product) |
| Risk to joint material | High if misused | Low |
| Suitability for delicate stone | Risky — low PSI only | Preferred method |
| Treats biological growth at root | No — removes visible growth only | Yes — biocide kills spores |
| Equipment cost | Moderate (hire or buy) | Low |
| Runoff and water use | High water volume | Lower volume, chemical disposal needed |
Removing moss, algae and lichen: treatments and preventing regrowth
Moss, algae, and lichen are the three most common biological growths on patio slabs, and they behave differently, which matters when you're choosing a treatment. Algae is the green or black slippery film most people notice first; it establishes fast on any damp, shaded surface. Moss forms soft cushions in joints and on textured surfaces. Lichen is the most stubborn: it's a composite organism (fungus plus algae), grips stone tightly, and produces mild acids that can etch some softer stones over time, including sandstone and limestone. For that reason, lichen left long-term isn't just an appearance issue, it can genuinely damage the slab surface.
Choosing the right biocide
For general algae and moss, a sodium hypochlorite-based or quaternary ammonium compound (QAC) patio cleaner works well and is widely available. For lichen, you need a product specifically labelled for lichen, often containing a stronger biocidal active ingredient with a longer dwell time. Always check that the product is compatible with your slab material, some bleach-based products can lighten certain natural stones. GSA and conservation guidance recommends testing on an inconspicuous area first, particularly for sandstone and softer limestones.
Step-by-step biological treatment
- Choose a dry period — most biocides need 24–48 hours of dry weather after application to penetrate properly before any rain.
- Sweep the patio surface to remove loose debris and any dry moss you can lift physically. This improves biocide contact with the actual growth.
- Apply the biocide according to label dilution rates using a pump sprayer, working in manageable sections. Saturate growth areas — don't just mist.
- Allow full dwell time (often 24 hours or more for lichen treatments). Resist the urge to rinse too soon — the chemistry needs time to kill the organism at its root, not just on the surface.
- After dwell time, scrub with a stiff brush. Lichen may need physical agitation even after chemical treatment to detach fully from the surface.
- Rinse thoroughly with clean water. Some growth will turn brown and flake away over the following days or weeks — this is normal and expected.
- For lichen on natural stone: if growth is heavy and long-established, a second treatment a few weeks later is often needed. Don't increase product concentration beyond label guidance — you'll risk staining or etching the stone.
- Once the surface is clear and fully dry, apply a penetrating biocide-inhibitor treatment or a sealer with built-in biocide protection to slow future recolonisation.
Preventing regrowth
Biological growth returns fastest on north-facing, shaded patios and anywhere surface water sits after rain. The best long-term control is a combination of physical and chemical prevention: apply a residual biocide treatment annually (typically in autumn before wet weather sets in), keep overhanging plants trimmed back to improve light and airflow, and make sure the surface drainage is working properly. Standing water is the primary driver of algae and moss, so fixing any pooling is as important as any chemical treatment. Building codes and common practice recommend a minimum 2% (about 1/4 in per foot) slope away from the house for patios within roughly 10 ft of foundations to prevent water running toward the building Building codes and common practice recommend a minimum 2% (about 1/4 in per foot) slope away from the house for patios within roughly 10 ft of foundations to prevent water running toward the building.. A quality penetrating sealer also helps by reducing the surface porosity that moss and algae spores grip onto.
FAQ
How do I assess the condition of my patio slabs before starting work?
Start with a visual walk-through: note cracks, spalling, staining, moss/algae, loose or sunken slabs, and blocked joints. Perform quick functional checks: tap each slab with a small hammer or drag a chain—hollow or dull sounds indicate voids or debonding. Check falls: measure slope away from the house (aim for ~2% / 1/4" per foot within 10 ft of the building). Probe joints and bedding with a screwdriver to see if joints are loose or aggregates are failing. Identify stain type: biological (green/black, soft, scrubs off) versus efflorescence (white, powdery, reappears after wetting). Photograph and mark areas by severity to plan priority repairs.
What cleaning methods should I use to brighten slabs and remove moss, algae, and efflorescence?
Follow a test-first, least-aggressive approach. Sweep and remove loose debris. For biological growth use a stiff bristle brush with water and a biological detergent or proprietary moss cleaner; let product dwell per instructions and rinse. For stubborn growth or delicate stone, use low-pressure soft-wash chemical cleaning rather than high-pressure jets. For efflorescence, brush dry and test an inconspicuous acid wash per manufacturer guidance — acids can change stone colour and should be used only after testing and rinsing. If using a pressure washer, start at low psi (500–1,200) with a wide-angle nozzle and keep nozzle at a distance; test first. Avoid blasting polymeric sand from joints — use surface cleaners or wide-head tools and work parallel to joints.
How do I decide between pressure washing and soft/chemical cleaning?
Choose based on surface type, joint material, and condition. Use pressure washing for robust concrete slabs that can tolerate higher psi, but start low and test; avoid narrow nozzles and keep distance. Use soft/chemical cleaning for delicate natural stone, textured pavers, newly pointed joints, or where polymeric sand is present. If joints or surface shows delamination, sanding-out or grout damage, or if biological staining is extensive on porous stone, prefer soft-cleaning and manual brushing.
How can I repair cracks in patio slabs and when should I use epoxy vs flexible grout?
First classify cracks: hairline/static cracks (<0.25" and stable) vs active/moving or leaking cracks. For dry, non-moving cracks where structural restoration is desired, epoxy injection can restore monolithic behaviour (suitable within typical epoxy limits) — follow manufacturer guidance and keep cracks dry during injection. For wet or actively moving cracks, use polyurethane flexible injection grout to seal and accommodate movement — it will not restore tensile strength but provides waterproofing. For wider surface cracks, rout-out and fill with a flexible sealant or repair mortar appropriate to slab material. Always clean joints and remove loose material before repair; test repair materials on a sample area if aesthetics are important.
How do I re-point joints and what materials should I use?
Remove old, loose jointing material to a suitable depth (usually to the bedding or to manufacturer-specified depth). Match the mortar to the substrate: use cementitious pointing or resin/polymeric sand for modern concrete pavers (follow product TDS for joint width/depth and dry conditions). For historic or soft natural stone use lime-based or natural hydraulic lime mortars to allow breathability and avoid trapped moisture. For polymeric sand, ensure joints and paving are dry, temperatures are within product limits, sweep in, compact, and mist to activate per TDS to avoid haze. Consider anti-weed or herbicidal pre-treatments where permitted.
What are practical methods for re-leveling sunken slabs and pros/cons?
Options: re-bed on fresh mortar (traditional, durable but invasive and time-consuming); full re-lay with corrected sub-base (most durable, higher cost); mudjacking/cement slurry injection (economical but heavier and can re-settle); polyurethane slab lifting (small holes, rapid expansion foam, lightweight, quick cure and same-day walkability). Choose by scale and budget: small localized sinks often suit polyurethane lifting (fast, minimal disruption). Large areas with poor or compromised sub-base typically require full excavation and re-lay to correct drainage and compaction.
Next Article
How to Revive Patio Slabs: Restore, Repair, Seal
Learn how to revive patio slabs: diagnose cracks, stains, sunken sections, repair properly, then clean and seal for last