You can revive most worn patio slabs yourself, but the fix depends entirely on what's actually wrong. Surface staining, efflorescence, and minor cracking are straightforward DIY jobs. Spalling, delamination, and sunken sections take more work and sometimes point to deeper problems with the base or drainage that you need to sort out first, otherwise any repair you make will fail again within a season or two. Start by figuring out which category your slabs fall into, then work through cleaning, repair, and sealing in that order. If you follow the right cleaning, repair, and sealing order, you can renew patio slabs and prevent the problems from coming back quickly.
How to Revive Patio Slabs: Restore, Repair, Seal

Talia Lang
6 Jun 2026
Why your patio slabs look worn or failing
Before you spend a weekend scrubbing and patching, spend ten minutes actually looking at what you've got. Most patio slabs that look awful fall into one of a few categories, and each one has a different root cause.
- White powdery deposits (efflorescence): This is mineral salt carried to the surface by moisture moving through the slab. It looks like dry white chalk sitting in the pores of the concrete. It's cosmetic in most cases, but repeated efflorescence is a sign there's ongoing moisture movement, which is worth investigating.
- Rust stains: Orange or brown streaking usually traces back to metal on or near the patio, such as furniture legs, iron railings, or tools left sitting on the surface. It can also appear when embedded steel reinforcement (rebar or mesh) starts to oxidize and the rust migrates outward.
- General grime, algae, and biological growth: Green or black staining from algae, moss, and mildew is extremely common on shaded or poorly drained slabs. This is almost entirely a cleaning job.
- Hairline cracks: Fine surface cracks under about 1/8 inch (3 mm) wide are usually non-structural, caused by normal concrete shrinkage or thermal movement. Ugly, but rarely dangerous.
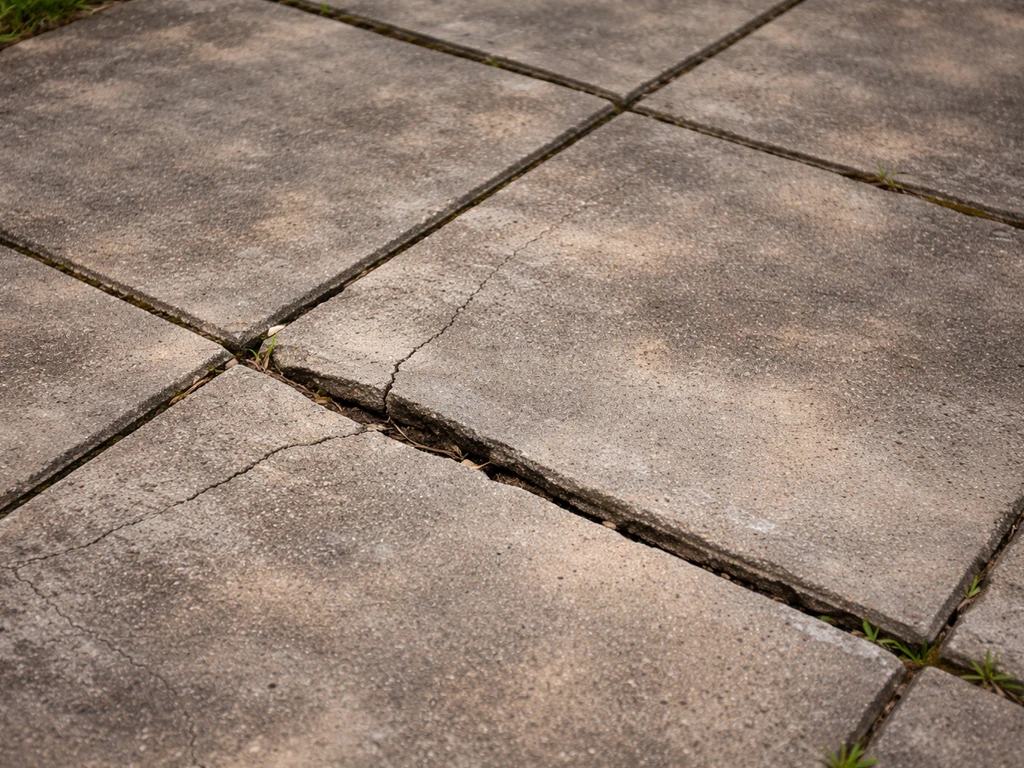
- Wide or growing cracks: Cracks wider than 1/8 inch, cracks that are uneven in height across the gap (one side higher than the other), or cracks that are visibly growing over time are a different story. These need repair and investigation.
- Spalling and scaling: Pitted, flaky surface where the top layer is breaking away. Often caused by freeze-thaw cycles, de-icing salt damage, or poor finishing during the original pour.
- Sunken or uneven slabs: One section sitting lower than its neighbor. This almost always comes back to base erosion, poor compaction, or drainage problems rather than the slab itself failing.
Assess the damage before you pick up a trowel

The most important tool for diagnosing patio slabs costs nothing: your knuckles. Walk the slab and knock on it firmly with your hand or a small hammer. Sound concrete gives a solid, dense knock. If you hear a hollow or 'dead' sound, you've found a delaminated area, which is where the surface layer has separated from the body of the slab below it but hasn't fully broken away yet. This is called a sounding test, and it maps out weak areas that aren't obvious just from looking.
Delamination is a bond failure running parallel to the surface. It looks fine until it doesn't, and then it pops off in sheets. Patching over a delaminated area without removing the loose concrete first is one of the most common DIY mistakes. You'll spend time and money on a repair that peels away within months.
| Damage Type | What it Looks Like | DIY-Able? | Root Cause to Check |
|---|---|---|---|
| Efflorescence | White powdery deposits on surface | Yes | Moisture movement through slab |
| Rust stains | Orange/brown streaking | Yes | Metal contact or oxidizing rebar |
| Algae/moss/grime | Green, black, or grey biological growth | Yes | Shade, moisture, poor drainage |
| Hairline cracks (<1/8 in) | Fine surface lines | Yes | Shrinkage or thermal movement |
| Wide/structural cracks (>1/8 in) | Visible gaps, uneven edges | Sometimes | Settlement, base failure, drainage |
| Spalling/scaling | Pitted, flaky, crumbling surface | Yes, if limited | Freeze-thaw, salt, poor original pour |
| Delamination | Hollow sound, surface layer lifting | Partial | Poor bond, moisture, finishing issues |
| Sunken sections | Low spots, uneven surface, pooling water | Sometimes | Base erosion, drainage failure |
If your slabs are cracked wider than about 1/8 inch AND the edges are at different heights AND you've got more than one or two affected sections, that's a pattern. It usually means the base underneath is failing in multiple spots. At that point, you're better off calling a professional for an assessment before you start patching, because the real problem is underground.
Clean and prep first, repair second
This step gets skipped constantly, and it's the reason most patio repairs fail prematurely. Patching over a dirty, greasy, or damp surface means the repair material never bonds properly. Sealers applied over algae or efflorescence trap the problem underneath. Do the prep properly and everything else works better.
Basic cleaning sequence
- Clear the patio completely. Remove all furniture, planters, and debris.
- Rinse the surface with a garden hose to get rid of loose dirt.
- Treat biological growth (algae, moss, lichen) with a patio cleaner or a diluted bleach solution (roughly 1 part bleach to 10 parts water). Let it sit for 15 to 20 minutes, then scrub with a stiff bristle brush.
- For efflorescence, use a diluted acid-based cleaner designed for masonry, or a proprietary efflorescence remover. Apply to a dry surface, scrub, and rinse thoroughly. Never apply acid cleaner to a wet slab.
- For rust stains, use an oxalic acid-based rust remover. Apply according to the product instructions, allow dwell time, scrub, and rinse. For stains coming from rebar below the surface, clean what you can see, but understand the source needs addressing during any structural repair.
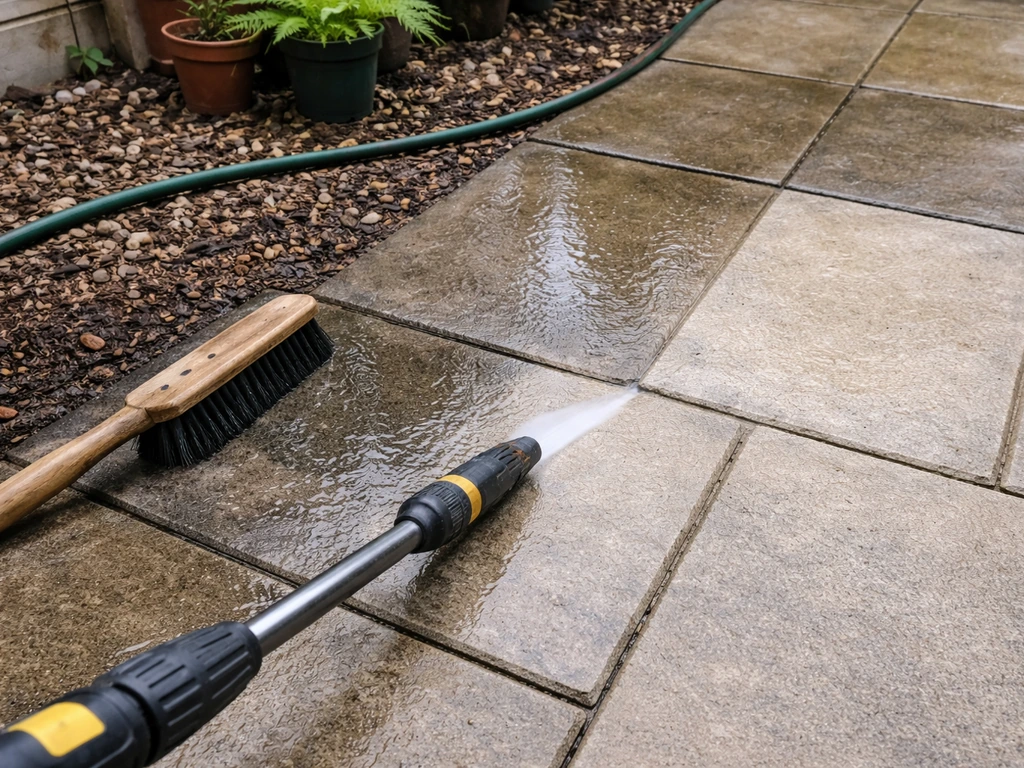
- Pressure wash the whole surface. A 2,000 to 3,000 PSI pressure washer is appropriate for most concrete slabs. Keep the nozzle moving and maintain a consistent distance to avoid etching. Do not use the highest pressure setting directly on spalled or already-fragile areas.
- Allow the slab to dry completely before any repair or sealing work. For products like sealers, you typically need the surface fully dry, and if you're working with freshly poured or repaired concrete, allow a full 28-day cure before sealing.
After cleaning, go back and re-do your damage assessment. Cleaning often reveals damage that was hidden by grime, and it sometimes makes things look better than they are because discoloration disappears. Check again with the sounding test.
Repairing cracks, spalling, and surface damage
Hairline and narrow cracks
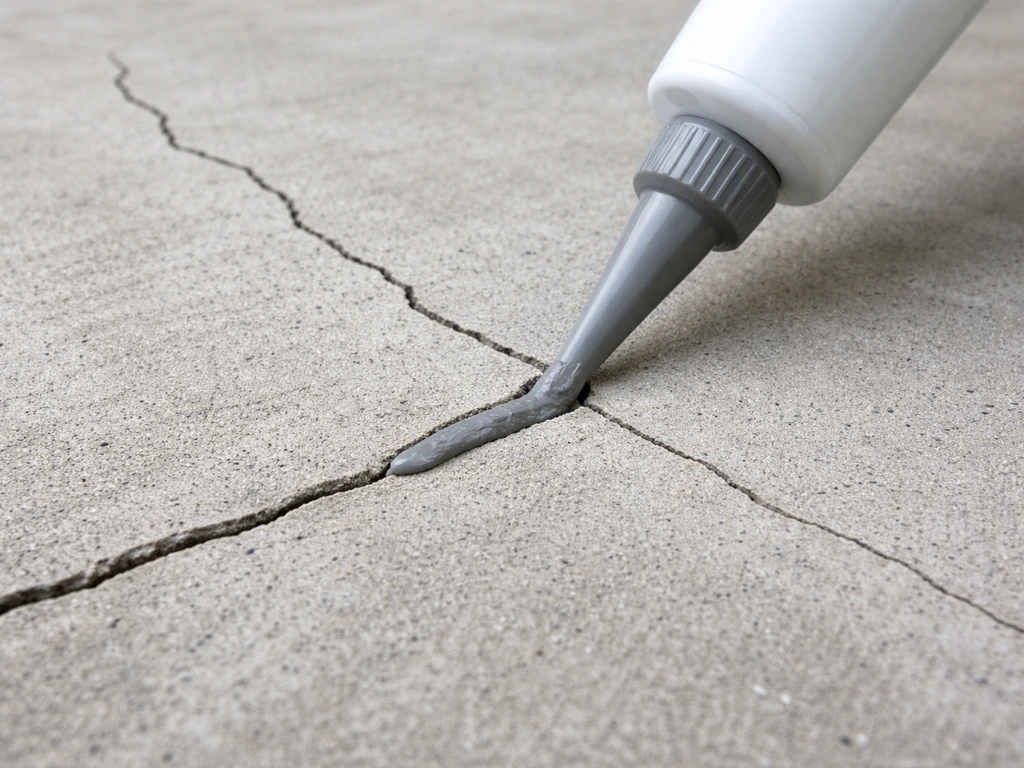
Cracks under 1/8 inch wide that aren't moving are primarily cosmetic. You can fill them with a concrete crack filler (the kind that comes in a squeeze bottle or caulk tube) to stop water from getting in and making things worse over time. Clean the crack out with a wire brush, blow out any dust, and apply the filler. Don't expect it to be invisible, but it seals the crack and prevents water infiltration.
Wider structural cracks
For cracks over 1/8 inch, especially ones with any differential height across the gap, you need to decide between two main approaches. Polyurethane injection is typically used for non-structural cracks that may be allowing water movement, such as shrinkage cracks or minor settlement cracks. Epoxy injection is used for cracks where you want to restore structural integrity, bonding the two sides back together.
Both methods involve installing surface ports (small injection entry points) along the crack, sealing the surface between them, and then injecting the repair material under pressure so it penetrates deep into the crack rather than just sitting on top. Kits for both approaches are available at most building supply stores. Follow the port spacing instructions carefully because underfilling is the most common mistake.
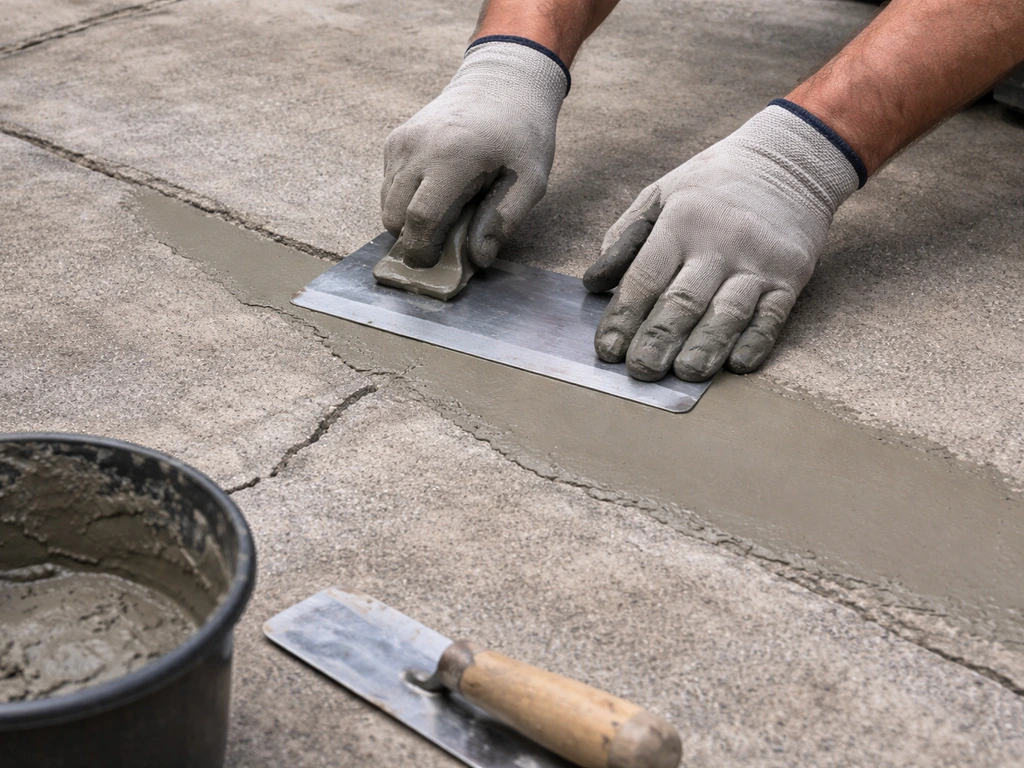
Spalling and surface scaling
Spalling is where the surface layer of the concrete breaks away, leaving a rough, pitted appearance. For partial-depth spalling repair, the key rule is to remove all the deteriorated concrete before you apply anything new. This is non-negotiable. Chipping or grinding back to sound concrete and then extending the repair area a few inches beyond the visible damage edge gives the patch material a stable perimeter to bond to. Use a cold chisel and hammer or an angle grinder with a diamond cup wheel to remove the loose material, then clean out all dust and debris before applying your repair mortar.
Use a polymer-modified concrete repair mortar for spalling repairs. Standard concrete mix doesn't bond well to existing concrete without an adhesion primer, so either use a repair mortar that includes bonding agents, or apply a concrete bonding adhesive to the prepared area first and let it become tacky before applying the mortar. Feathering the edges thin rarely works with concrete, so aim for a minimum depth of about 1/4 inch (6 mm) wherever you're patching.
Delamination
If your sounding test revealed hollow areas, those sections need to come off. You cannot bond new material to a layer that has already separated from the slab below. Use a chisel or grinder to remove everything that sounds hollow, get back to solid concrete, clean thoroughly, and then treat it as a spalling repair. If the delaminated area covers a significant portion of the slab and the remaining concrete below it looks sound, a resurfacing product (a thin overlay designed for concrete) applied over the whole cleaned slab can give you a fresh surface. But this only works if the substrate is solid.
Dealing with sunken slabs and drainage problems
A sunken patio section is one of the more frustrating problems because the temptation is to just fill it in or top it up, but that almost never works long term. The slab sank because the material underneath it moved, was washed away, or was never properly compacted in the first place. If you don't fix what's underneath, any repair on top will follow the same path.
Before you decide on a fix, look at the drainage pattern. Does water pool on the patio after rain? Is there a low spot at the edge near the house, or is water running toward the building? Both are red flags. Patios should slope away from the house at about 1/8 to 1/4 inch per foot. If yours doesn't, that's likely contributing to the base erosion that caused the sinking.
DIY options for sunken sections
If the slab has sunk by a small amount (under an inch or so) and is otherwise in reasonable condition, slab jacking (also called mudjacking or foam lifting) is an option. This involves drilling small holes through the slab and pumping material underneath to lift it back to level. Foam lifting (polyurethane foam injection) is a more modern version of this and can be done by specialist contractors. It's not a DIY job unless you have access to the equipment, but it's less disruptive than replacement.
For smaller sections or individual pavers that have sunken, lifting and re-bedding is manageable as a DIY project. Remove the slab or slabs, check the condition of the base material, add compacted hardcore or sharp sand as needed to bring the level up, and relay. If you see that the base material looks washed out or there's a void, investigate where the water is coming from. Adding a channel drain or improving the fall of the surrounding ground might be part of the fix.
If a large section of your patio has dropped significantly, or if multiple areas are sinking in different spots, that's a sign of a more widespread base failure. A concrete contractor or a drainage specialist can assess whether the subbase needs full excavation and replacement. It's one of those situations where DIY patching will only delay the inevitable.
Sealing and finishing to restore appearance and protect
Sealing is the last step, not the first. A lot of people reach for a sealer as a quick fix for a tired-looking patio, but a sealer applied over damaged, dirty, or damp concrete won't make it look better for long, and it can trap moisture and make underlying problems worse. Get to this step only once the cleaning and repairs are done and everything has had time to cure and dry.
Choosing the right sealer
There are two broad categories to understand. Penetrating sealers, particularly silane and siloxane water repellents, soak into the concrete and reduce water absorption without changing the surface appearance much. These are excellent for protection against moisture, efflorescence, and freeze-thaw damage, and they're the right choice when you want to protect the slab without altering its look. Film-forming sealers (acrylics, polyurethanes, epoxies) sit on the surface and can add a sheen or colour enhancement. These change how the patio looks more noticeably and need reapplication more frequently as they wear.
For most homeowners reviving an older patio, a penetrating silane-siloxane sealer is the safer, lower-maintenance choice. It's forgiving to apply, doesn't peel or flake as it ages, and does the most important job of keeping water out. If you've just repaired or resurfaced sections, allow the concrete to cure for a full 28 days before sealing, and make sure the surface is completely dry before application.
Application tips

- Apply sealer on a dry day when rain isn't forecast for at least 24 to 48 hours and temperatures are between roughly 50°F and 85°F (10°C to 30°C).
- Use a pump sprayer or roller. For penetrating sealers, a low-pressure sprayer gives better, more even penetration.
- Apply in thin, even coats. Puddling the sealer on thick doesn't improve protection and can leave a patchy finish.
- For penetrating sealers, a single coat is often sufficient. Check the product data sheet, but avoid over-application.
- Allow full cure time before putting furniture back or allowing heavy foot traffic.
When to call a professional instead
Most cosmetic restoration work, cleaning, minor crack filling, patching, and sealing is genuinely DIY-friendly if you're comfortable with the tools and willing to do the prep properly. But there are clear situations where professional assessment is the smarter move.
- Multiple sections are sunken or the whole patio has shifted, suggesting widespread base failure.
- Cracks are wide, numerous, and show differential movement (one side higher than the other), pointing to structural settlement.
- The sounding test reveals large hollow areas across most of the slab, not just isolated patches.
- Water is pooling near the foundation of the house and the patio slope is contributing to it.
- You suspect rebar corrosion is the source of rust staining, meaning the structural reinforcement inside the slab is compromised.
- Any repair you've attempted previously has failed within a year or two, which usually means the root cause was never addressed.
Getting a professional opinion doesn't mean the whole patio needs replacing. It often just means getting a clearer diagnosis before you spend money on repairs that won't hold. A good concrete contractor or structural engineer can tell you in an hour whether you're looking at a surface restoration job or something more involved.
Keeping it looking good once you've done the work
The number one thing that brings patio slabs back to a poor state is water. If you want your patio slabs to look brighter right away, focus on the cleaning and sealing steps that lift stains without damaging the surface brighten up patio slabs.
Managing drainage properly, reapplying a penetrating sealer every two to five years depending on wear and the product used, and keeping the surface clean of organic matter (which retains moisture) will extend the life of your restoration work significantly. Once you’ve cleaned, repaired, and sealed the slab properly, you can follow a clear plan for how to revamp patio slabs without quick fixes that fail.
If your patio connects to a revamp or visual refresh beyond just repairs, consider whether the slope, jointing, and drainage are all sorted before putting effort into the cosmetic side. Everything else builds on that foundation.
FAQ
How long should I wait after cleaning before I decide what repairs are needed?
Do a full re-check after the slab is completely dry, not just after the surface looks clean. Efflorescence, damp patches, and algae can hide hairline cracking or outline weak spots, so repeat the knuckle sounding test once moisture has evaporated, then mark any areas that sound hollow or dead before you start patching.
Can I power wash patio slabs to remove stains and prep for sealing?
You can, but avoid blasting at close range or using excessive pressure. High-pressure washing can open up pores, dislodge weak surface material, and leave micro-damage that later accelerates spalling. If you do use a washer, keep the nozzle farther back, use a moderate setting, and let the patio dry fully before any repairs or sealer.
Should I seal immediately after filling cracks or patching spalled areas?
No. Repairs need time to cure and dry, even if the surface feels hard. Plan on waiting until the patched concrete has fully cured (typically around 28 days for new repair mortar) and the slab is dry, otherwise trapped moisture can discolor the patch and reduce bond performance.
What’s the difference between efflorescence and mold or algae, and does it change what I do?
Efflorescence is mineral salt coming up from moisture, it needs cleaning and usually points to a moisture source. Algae and organic staining are surface growth, they need removal and keeping the surface cleaner. In both cases, don’t seal over anything that isn’t fully removed and dry, but efflorescence also requires you to check drainage and water paths.
Why do my patches keep peeling even when I used repair mortar?
Most peeling failures come from bond loss due to skipping prep. Common causes are patching over dust, grease, damp concrete, or a delaminated layer that was still sounding hollow. Re-sounding after cleaning, grinding to solid material where needed, and using the right bonding approach (bonding adhesive or polymer-modified mortar) usually prevents repeat failures.
How do I know if a hollow-sounding area is delamination versus something smaller like surface pop-outs?
Delamination typically sounds hollow over a broader area and can release in sheets, not just small chips. If the hollow tone expands as you probe with a chisel, that suggests a bond failure parallel to the surface. Remove until you reach fully solid concrete, then switch to spalling or resurfacing logic based on how much of the area is affected.
Is epoxy injection always better than polyurethane injection for cracked slabs?
Not always. Epoxy is used when you need to restore structural bonding between sides, while polyurethane is typically used when the crack is non-structural and may allow some water movement. The decision depends on crack behavior and whether you see height changes across the gap, so match the injection type to the crack pattern instead of choosing by brand or convenience.
What should I do about sunken slabs if the patio slopes the wrong way?
Fix the slope and water movement first, otherwise lifting or re-bedding will be undermined again. Check where water pools after rain, measure the fall away from the house, and look for grading or drainage issues at the low edges. If water is running toward the building, correcting fall and adding drainage can be necessary before you invest in lifting or replacing slabs.
Can I lift a sunken slab myself, and when is it better to hire a contractor?
You can DIY re-laying for individual small units or pavers, if you can remove them and access the base. For whole-slab lifting (slab jacking, mudjacking, or foam lifting), contractors typically have the equipment and method control to avoid over-lifting or creating stress. If the slab is large, significantly sunk, or multiple areas are dropping, hire an assessment before proceeding.
Do I need to reapply a penetrating sealer, and how often should I plan for it?
Plan for reapplication based on wear and the specific product, typically every two to five years for older patios. Re-seal only after cleaning and any repairs are fully cured and dry. If the surface stays dark and damp for long periods after rain, you may be overdue or the sealer may not match the condition of the substrate.
How can I keep stains from coming back after I revive the patio?
After the work is done, keep organic sources off the surface (leaves, mossy debris, planter runoff), because organic matter retains moisture and supports regrowth. Regular brushing and rinsing, plus re-sealing on schedule with a penetrating silane-siloxane type, helps prevent stains that originate from repeated moisture cycling.
Next Article
How to Revamp Patio Slabs: Step-by-Step Repair and Resurfacing
Step-by-step DIY to diagnose, repair and resurface cracked, spalling or uneven patio slabs for a durable sealed finish.