Updating patio slabs usually means one of three things: cleaning and brightening a surface that's gone green and grimy, repairing cracks or sunken slabs before they become a trip hazard, or resurfacing and sealing for a fresh look. Most of it is genuinely DIY-friendly if you assess the condition honestly first, choose the right fix, and work methodically. This guide walks you through the whole process, from initial inspection to the last coat of sealer, with realistic time and cost estimates at each stage.
How to Update Patio Slabs: DIY Cleaning, Repair & Sealing

Talia Lang
18 Jul 2026
Start here: assessing what your patio actually needs
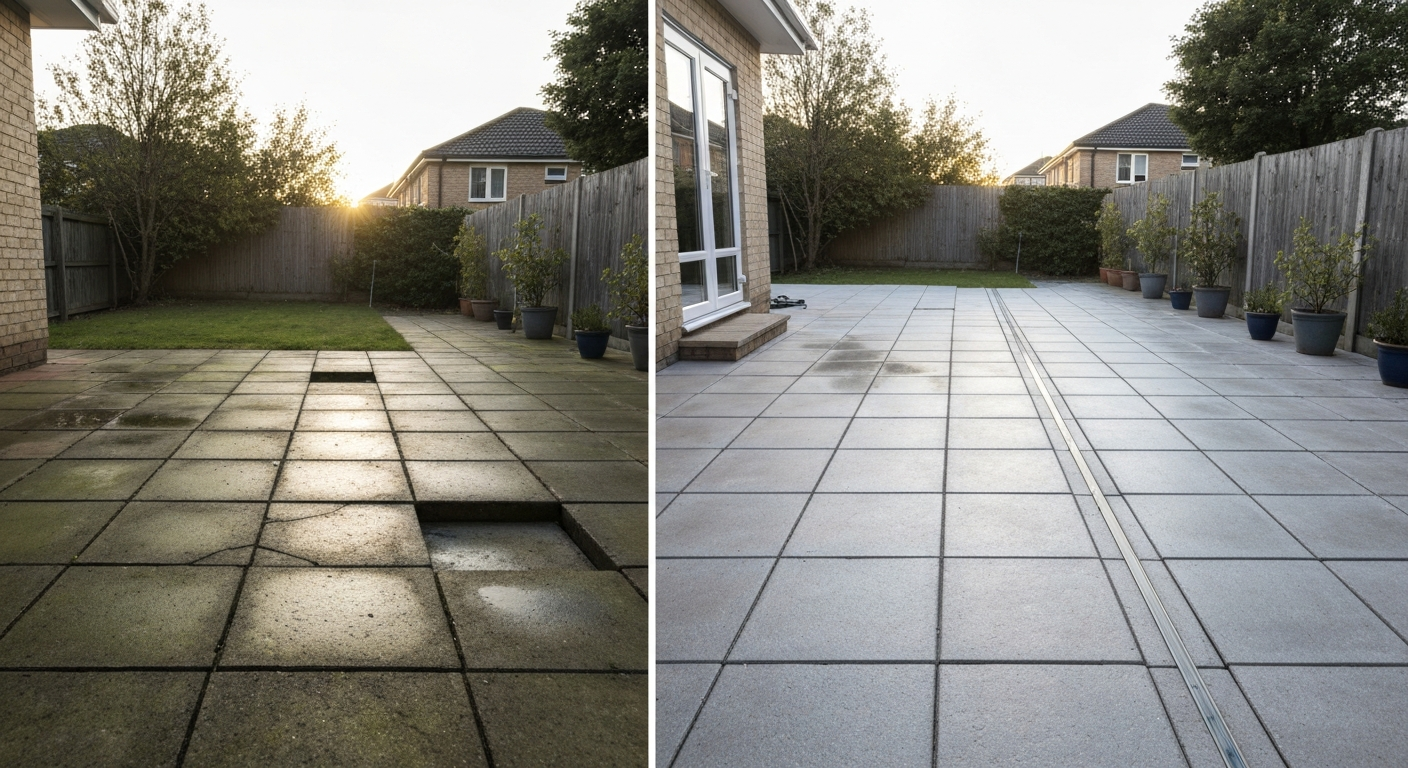
Before you buy anything or hire anyone, spend 20 minutes walking the patio and taking notes. A proper assessment separates cosmetic surface problems (which you can fix yourself over a weekend) from structural ones (which need an engineer or a full re-lay). Rushing past this step is how people waste money patching symptoms rather than fixing causes.
Quick assessment checklist
Work through this list methodically. Grab a screwdriver, a measuring tape, and a garden hose. Take photos as you go so you have a before record and can track whether anything changes.
- Drainage: Run the hose on the patio for two minutes. Does water pond anywhere, or drain toward the house? Ponding that saturates the base is a root cause, not just a symptom.
- Crack width and type: Measure any cracks. Cracks or offsets under 1/8 in (3 mm) are generally cosmetic. Anything at 1/8–1/4 in (3–6 mm) needs monitoring. Cracks or vertical displacement at or above 1/4 in (6 mm), or any crack that's visibly growing, is a structural warning sign.
- Joint condition: Are the joints between slabs wide, crumbling, or missing sand? Probe with a screwdriver. If the bedding sand is wet, loose, or comes out easily, the base may be saturated or undermined.
- Vertical displacement: Place a straightedge or long level across adjacent slabs. A step-up between slabs is a trip hazard and indicates movement, not just settling.
- Edge restraint: Check whether slabs at the perimeter are creeping outward or dipping. Missing or failed edge restraints cause progressive spread.
- Root or frost heave: Look for curved or radiating crack patterns around tree roots, or a seasonal heave-and-settle pattern (worse after winter) that suggests frost action in the subbase.
- Void or undercutting: Press down firmly on each slab. Any rocking or hollow sound suggests a void underneath — either from erosion or poor original bedding.
- Wider structural clues: Check nearby doors and windows. If any stick or no longer close square, or if you can see leaning walls or chimney stacks, those symptoms combined with slab movement can indicate foundation or subsidence issues — stop DIY planning and get a structural engineer.
If you see repeated progressive sinkage across multiple slabs, ongoing movement, signs of utility lines under the patio (look for any access covers, inspection chambers or old ducting), or the affected area exceeds roughly 100–200 square feet, those are the thresholds where a professional assessment becomes genuinely worth the money before you do anything else.
Repair, resurface or replace: how to decide
There's no single right answer here, but there is a logical sequence. Start with the least invasive option that actually addresses the cause, not just the appearance.
| Scenario | Best approach | Typical DIY cost | Realistic time |
|---|---|---|---|
| Surface is dark, green, stained or dull but slabs are structurally sound | Clean and brighten (pressure wash, treat stains, re-joint, seal) | $50–$200 for a standard patio | 1–2 days |
| One or two slabs are sunken or rocking, base is sound | Re-lay those slabs, improve bedding and jointing | $30–$80 in materials per slab | Half a day per 2–3 slabs |
| Hairline or non-structural cracks in concrete slabs | Route and seal with flexible polyurethane or epoxy sealant | $20–$60 in materials | A few hours |
| Multiple slabs sunken, drainage failing, base saturated | Full or partial re-lay with improved drainage and base | $200–$600+ in materials | Full weekend or more |
| Surface is sound but pitted, faded or aesthetically tired | Resurface or paint with masonry coating or concrete overlay | $100–$350 in materials | 2 days including cure time |
| Slabs are crumbling, spalling badly, or offset ≥1/4 in across the area | Replace slabs; engineer review if movement is progressive | $300–$1,500+ depending on size | Multiple days to a week |
One thing worth saying plainly: if your patio looks terrible but is otherwise stable and flat, a thorough clean and reseal can transform it for under $150. Brightening and refreshing the surface is often all that's needed, and it's worth doing that first before committing to a more invasive job. If you want step-by-step tips and product recommendations on how to make your patio slabs look better, see this practical guide.
Tools and materials: the core DIY kit
You don't need to buy everything at once. The list below covers the general kit that applies across almost every patio update job. Task-specific additions follow in the next section.
- Pressure washer (rented or owned) — 1,500–3,000 PSI for concrete; 800–1,600 PSI for natural stone or soft sandstone
- Surface-cleaner attachment for the pressure washer (distributes pressure evenly, prevents streak marks)
- Wide-fan (25–40 degree) nozzle — never a zero-degree/needle nozzle on paving
- Stiff-bristle deck brush or masonry scrubbing brush
- Low-pressure pump sprayer (garden sprayer, 30–100 PSI) for applying cleaners and sealers
- Rubber mallet and bolster chisel (for lifting and re-laying slabs)
- Long straightedge or spirit level (1.2 m or 4 ft minimum) for checking flatness
- Tape measure and screwdriver (for probing joints and bedding)
- Bucket, safety glasses, chemical-resistant gloves and knee pads
- Stiff broom and leaf blower (for sweeping in joint sand and general prep)
Tools and materials by task
Cleaning and brightening
- Pressure washer with surface-cleaner attachment
- Oxygen-based patio cleaner or algaecide masonry cleaner (e.g., Patio Magic, Wet & Forget, or own-brand patio cleaner)
- Efflorescence cleaner (dilute acid-based, for white mineral deposits on concrete — follow SDS carefully)
- Stiff scrubbing brush for hand-working stubborn patches
- Low-pressure pump sprayer for chemical application
Repairing cracks and joints
- Flexible polyurethane or epoxy joint sealant (for hairline to moderate cracks)
- Epoxy injection resin (for structural crack bonding where faces can be bonded — follow ACI guidance or manufacturer instructions)
- Angle grinder with diamond blade (for routing wider cracks or cutting out damaged sections)
- Polymeric jointing sand (e.g., Alliance Gator G2 or similar — check joint-width compatibility, some products cover joints from 1/8 in up to several inches)
- Trowel and pointing tool for bedding and joint work
Levelling and re-laying sunken slabs
- Rubber mallet and bolster chisel (to lift slabs cleanly)
- Sharp sand and cement (for dry mix or wet mortar bedding)
- Compactible aggregate (MOT Type 1 or road base) for base top-up
- Plate compactor (rentable, around $60–$100/day) for base work
- Spirit level and straightedge for re-checking finished level
- Edge restraint material (plastic or metal paver edging, or concrete haunching mix) if edges are failing
Resurfacing and sealing
- Masonry primer (required before most overlay or paint products)
- Concrete overlay or resurfacing compound (for hiding pitting and surface damage)
- Masonry patio paint or concrete stain (water-based acrylic formulations are generally most durable outdoors)
- Patio sealer — solvent-based or water-based depending on slab material (test on a small hidden area first)
- Roller frame with extension handle and 3/4 in nap roller sleeve, plus brush for edges
- Painter's tape and plastic sheeting to protect adjacent surfaces
Safety, prep and protecting your site
Patio work involves chemical cleaners, power tools, heavy lifting and working at ground level for extended periods. None of it is especially dangerous if you respect the basics, but skipping safety prep is how minor jobs turn into trips to urgent care.
Personal protective equipment
- Safety glasses or goggles — mandatory when pressure washing, cutting, or applying acid-based cleaners
- Chemical-resistant gloves (nitrile or neoprene, not standard latex) for any cleaner or sealer work
- Dust mask or P100 respirator when grinding or cutting concrete
- Knee pads for any extended ground-level work
- Closed-toe footwear — never flip-flops around a pressure washer or angle grinder
Site preparation
- Locate utilities before any digging or lifting near the house. Call 811 (US) or your local utility marking service — even if you're just re-laying slabs close to the foundation.
- Move patio furniture, planters and grills well clear of the work area.
- Cover any plants or lawn areas adjacent to the patio with plastic sheeting before applying cleaners or sealers — runoff from acid-based cleaners or solvents can kill plants.
- Warn neighbours before starting pressure-wash or grinding work, especially early in the morning.
- Check weather: don't apply sealers, polymeric sand or resurfacing compounds if rain is forecast within 24–48 hours, or if temperatures will drop below 50°F (10°C) during cure.
- Remove all furniture, debris and loose material from the patio surface and let it dry thoroughly before assessment — a wet surface hides a lot of defects.
Step-by-step: cleaning and brightening patio slabs
This is the highest-value first step regardless of what you're planning to do next. For detailed step-by-step instructions on how to refresh patio slabs, read our dedicated guide. A properly cleaned patio reveals the true slab condition, allows sealers and repairs to bond correctly, and often looks dramatically better by itself. Many patios that seem like they need replacing just need a thorough clean. For a detailed, step-by-step walkthrough on how to revive patio slabs, see our dedicated guide on that topic. For detailed step-by-step advice on how to revamp patio slabs, consult the full guide. For step-by-step instructions and a full checklist on how to renew patio slabs, see our practical guide. For a focused walkthrough on cleaning techniques and products, see our guide on how to brighten up patio slabs.
- Clear and sweep the patio. Remove all furniture, pots and debris. Sweep thoroughly with a stiff broom, then blow out joints with a leaf blower to remove loose material.
- Pre-soak with an appropriate cleaner. For biological growth (algae, moss, lichen), apply an oxygen-based or algaecide patio cleaner using a pump sprayer at low pressure. Follow the product's dwell time — typically 10–30 minutes. Don't let it dry on the surface. For efflorescence (white powdery staining), use a dilute acid-based efflorescence cleaner, applied the same way. Read the SDS before mixing or applying any acid product.
- Set up the pressure washer. For natural stone and flagstone, stay at 1,000–1,600 PSI with a 25–40 degree fan nozzle and keep the wand 12–18 inches from the surface. For concrete slabs, you can go up to 2,000–3,000 PSI but start lower and test in a hidden corner first. Always use a surface-cleaner attachment if you have one — it prevents the classic tiger-stripe marks you get from wanding manually.
- Wash in sections, keeping the wand moving. Never hold the wand stationary. Work in overlapping passes and keep the nozzle angled (not perpendicular to the surface) to lift rather than blast the surface. Avoid directing the jet straight into joints — this strips joint sand rapidly.
- Scrub stubborn patches by hand. After washing, some stains need a stiff brush and a second pass with cleaner. Work the cleaner into the surface, leave for 5–10 minutes, then rinse off.
- Rinse thoroughly. Any chemical residue left on the surface can interfere with sealer adhesion and can damage plants via runoff. Rinse until the water runs clear.
- Allow to dry fully before proceeding. Concrete and stone need at least 24–48 hours of dry weather before sealing. If you're re-jointing, check the manufacturer's recommendation — some polymeric sands require a damp (not wet) surface.
Pressure washer rental typically runs $45–$120 per day for a 2,000–3,600 PSI cold-water unit. Adding a surface-cleaner attachment is $25–$40/day extra and is genuinely worth it for anything larger than a small balcony. The Kärcher Operation and Safety Guide (pressure washers) advises using a wide fan nozzle or a rotating surface‑cleaner attachment, keeping the wand moving and held at an angle or recommended distance to avoid etching, and testing in a small hidden area first. If you're renting, factor in the time to collect, set up, use and return it, allow a full day even for a medium-sized patio.
Removing common stains from patio slabs
Different stains need different chemistry. Using the wrong product either does nothing or makes the stain worse. Here's what actually works for the four most common problems. For stain‑specific protocols (oil/grease: absorb then use an alkaline degreaser or engineered poultice and scrub, then pressure‑wash; rust: oxalic acid or iron‑chelating commercial rust removers or a poultice; biological: soft scrub with mild detergent or a biocide then rinse; always neutralize and rinse thoroughly and consult the SDS for disposal) see Maintenance and Repair - Stains | PavingExpert.
Oil and grease stains
- Absorb fresh spills immediately with cat litter, sawdust or a commercial absorbent powder. Leave for at least an hour, then sweep up and dispose — don't wash it into drains.
- Apply an alkaline degreaser (look for products labelled for concrete or masonry degreasers) or a purpose-made poultice product. Work it into the stain with a stiff brush.
- Leave to dwell according to the product instructions — typically 15–30 minutes.
- Scrub again, then rinse with the pressure washer. Repeat for old or set-in stains; they rarely lift completely in one application.
- For very stubborn old grease stains, a poultice made from an absorbent material (diatomaceous earth or talc) mixed with a solvent-based degreaser and left covered overnight can draw the oil back out of the pore structure.
Algae and moss
- For light growth, a soft scrub with warm water and washing-up liquid followed by pressure washing is often enough.
- For established moss or algae, apply a biocide or algaecide cleaner (Wet & Forget, Patio Magic, or similar) via pump sprayer at the product's recommended dilution. Do not apply on a windy day.
- Allow the dwell time specified on the label. Most products start working within 30 minutes; full kill of deep-rooted growth can take longer.
- Scrub with a stiff brush and rinse thoroughly. Dead material will brush or wash off.
- To prevent regrowth, improve drainage, reduce shade where possible, and seal the patio after cleaning. Tightly jointed slabs with polymeric sand also significantly reduce biological colonisation.
Rust stains
- Identify the source — usually a metal furniture foot, a fertiliser spill (iron-based fertilisers are a major culprit) or corroding reinforcement leaching through the surface.
- Apply an oxalic acid-based rust remover or a commercial iron-chelating product (products labelled for masonry rust removal). Apply with a brush or pump sprayer, not high pressure.
- Allow to dwell for the time specified — usually 5–15 minutes. You'll see the stain change colour as the chemistry works.
- Scrub and rinse thoroughly. Neutralise with water and a mild alkaline rinse if the product SDS recommends it.
- If the stain returns, the source hasn't been removed. Corroding rebar inside a concrete slab is a structural issue, not just a staining problem — seek professional advice.
Paint stains
- Fresh paint: blot up as much as possible immediately. Don't spread it. Rinse with water (for water-based paint) or use a rag with mineral spirits (for oil-based paint), then scrub.
- Dried water-based paint: apply a proprietary masonry paint remover or a strong paint stripper labelled safe for concrete. Leave to soak, then scrub with a stiff brush and pressure wash.
- Dried oil-based paint: use a solvent-based paint stripper. Apply, cover with plastic sheeting to slow evaporation, leave for the dwell time, then scrub and rinse.
- Very large or old paint spills may not come off completely with chemical treatment alone. Mechanical removal with an angle grinder and flap disc is an option for concrete, but it will visibly mark the surface — factor that into your decision.
A quick note on prevention: once the patio is clean, this is the right moment to think about sealing and re-jointing, which makes future cleaning much easier and reduces stain penetration significantly. That crossover with refreshing and renewing the overall surface is where most of the practical payoff lives, and it's worth planning the whole job as a sequence rather than a series of separate tasks.
FAQ
What quick assessment checklist should I use before starting any patio-slab DIY work?
Inspect for ponding/drainage toward or on the patio, new or widening cracks, joint sand loss, vertical displacement between adjacent slabs, progressive sinkage or sunken slabs, sticking doors or trim adjacent to the patio, leaning chimneys/walls or other signs of settlement, visible root bulges/lifting, and vegetation or persistent damp lines along edges. Do simple field checks: probe joints/bedding with a screwdriver for loose/wet sand, probe exposed edges for undercutting/voids, and run a hose to observe drainage/ponding. Record dimensions of any offsets/cracks and photograph for monitoring.
What measured tolerances indicate a likely DIY fix versus a professional evaluation?
Use conservative trigger levels: cracks or offsets >3 mm (≈1/8 in) warrant attention and monitoring; cracks or offsets ≥6 mm (≈1/4 in) or ongoing movement generally require a professional/engineer. For large surface tolerances, bedding-course surface tolerance is ≈±10 mm (±3/8 in) over 3 m and compacted aggregate base ±25 mm (±1 in) over 3 m — deviations beyond those may indicate installation/base problems needing pros.
Which tools and materials should a typical homeowner expect to need?
Essential tools: pressure washer (or hire), broom, stiff brush, garden hose, screwdriver/probe/soil bar, rubber mallet, spirit level and straightedge, shovel/trowel, pointing tools, hand saw or angle grinder with diamond blade (for cutting slabs), wheelbarrow, compaction plate/tamper (rental), and PPE (safety glasses, gloves, ear protection, dust mask). Materials: masonry cleaner/biocide, oxygen-based cleaners, degreaser, polymeric joint sand, kiln-dried sand, cementitious or resin-based repair mortars, flexible sealant for joints, epoxy or injection products (for structural bonding only if competent), concrete patch for small spalls, replacement slabs/pavers, drainage aggregate (Type 1/crusher-run), geotextile (optional), edge restraint materials, and sealer or resurfacer products.
What are safe, effective pressure-washing guidelines by material?
Start with the lowest effective pressure and test in a hidden area. Recommended ranges: natural stone/flagstone ~1,000–1,600 PSI with wide-fan nozzle (25–40°) at 12–18 in; clay pavers and softer sandstones ~800–1,200 PSI; concrete pavers/plain concrete 1,500–3,000 PSI but start low and use surface-cleaner or wide fan at 12–24 in. Always keep the wand moving, avoid zero-degree nozzles on faces or joints, avoid blasting joints directly to prevent joint-sand loss, and use a surface-cleaner attachment for even results.
What cleaning chemicals and stain-removal steps work best?
For biological growth use oxygen-based or recommended biocide cleaners; apply at low pressure with pump sprayer, let dwell per product instructions, then rinse. For oil/grease: absorb with cat litter or absorbent, apply alkaline degreaser or engineered poultice, scrub, then pressure-wash. For rust: use oxalic acid-based or commercial rust removers and poultices. For efflorescence: use manufacturer-recommended efflorescence cleaner, dilute and rinse thoroughly. Always follow product SDS/TDS for PPE and disposal; avoid bleach on polymeric joints.
How do I repair hairline and non-structural cracks in concrete slabs?
For hairline/non-structural cracks: clean out loose material, route the crack slightly to form a U/V groove if needed, remove dust and moisture, then fill with a suitable flexible masonry joint sealant or polymer-modified mortar per manufacturer instructions. For larger but non-active cracks, use epoxy or specialized concrete repair caulk. Monitor for movement after repair; if crack re-opens or grows, consult a professional.
Next Article
How to Renew Patio Slabs: Complete DIY Guide for Homeowners
DIY guide: renew patio slabs, clean, repair, relevel, seal or refinish with tools, costs, timelines and tips.