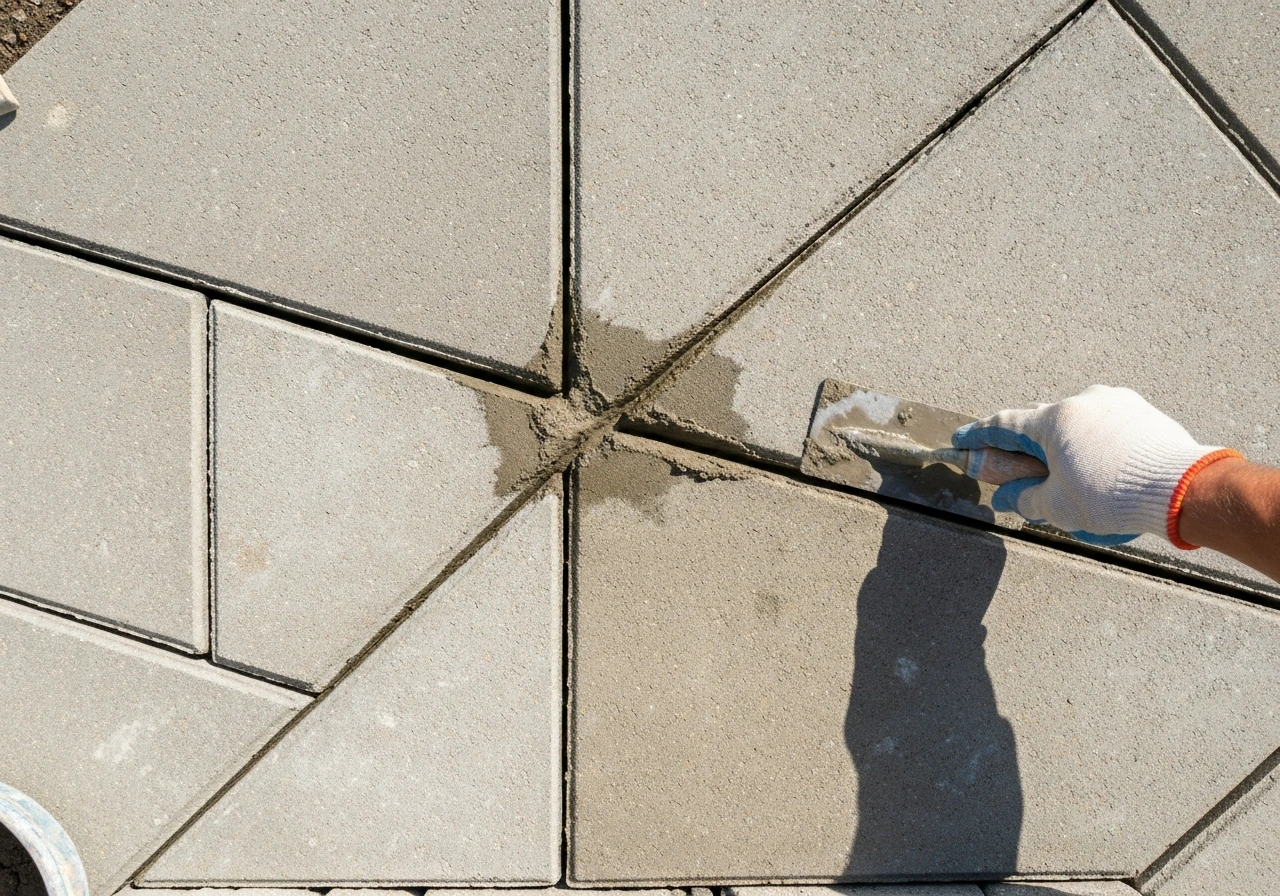
Repointing a patio with a dry mix means removing the old, crumbled joint material between your pavers and replacing it with either polymeric sand or a dry mortar mix, without premixing anything wet before it goes into the joints. The dry material gets swept or packed in, then either misted with water to activate a polymer binder (polymeric sand) or left to cure as a semi-rigid mortar. Done right, it stops weeds, locks pavers in place and keeps rainwater from undermining the bedding layer underneath. It's a realistic weekend job for most homeowners on a standard paved patio, as long as the base underneath is still sound.
How to Repoint a Patio Dry Mix: Step-by-Step DIY Guide

Talia Lang
16 Jul 2026
What repointing actually involves (and your two dry-mix options)
Repointing just means refilling the joints between pavers after the original filler has washed out, cracked, or been colonised by weeds. The joint material does more than look tidy: it transfers load between pavers, prevents lateral movement and stops water from pooling under individual stones. When it fails, pavers rock, edges chip and the whole surface starts to sink unevenly.
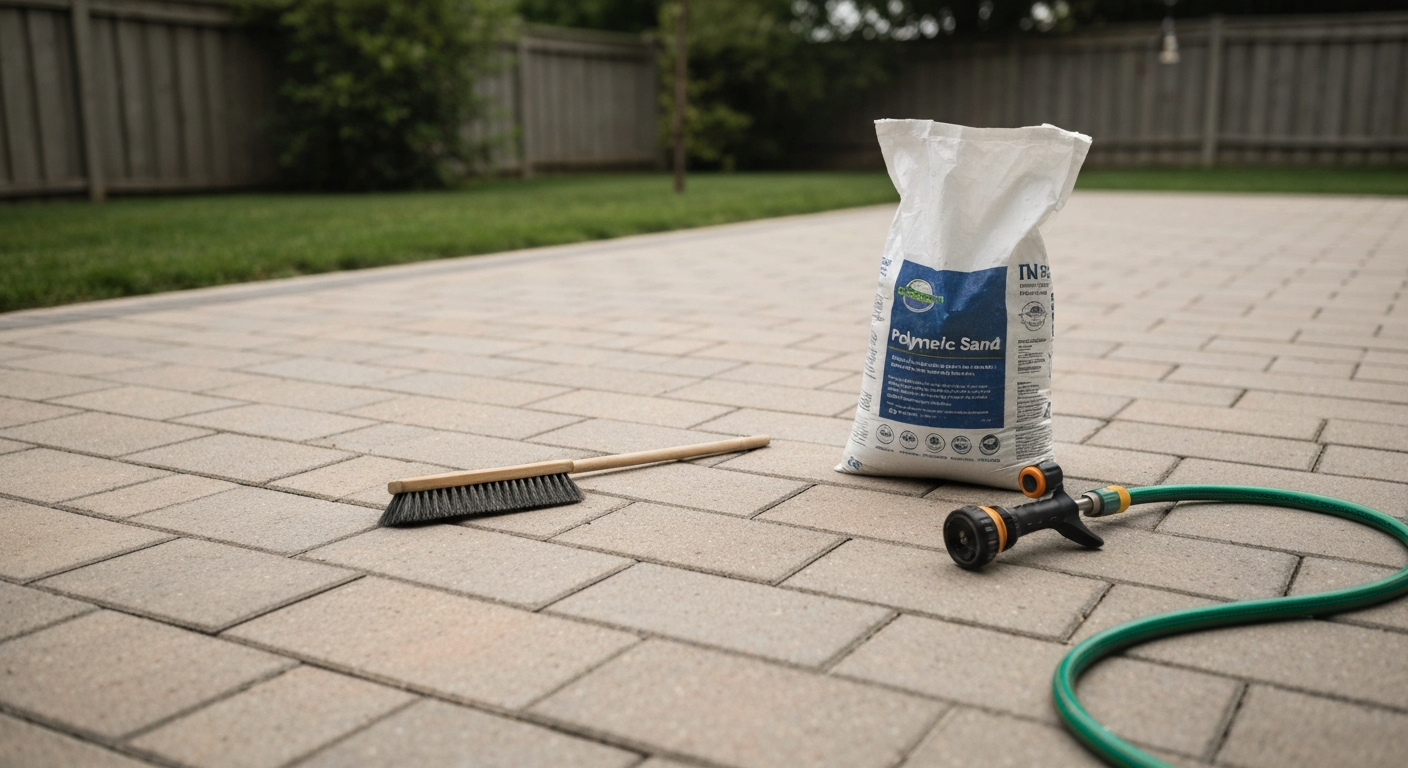
For dry-mix work, you're choosing between two main products. Polymeric sand is a fine kiln-dried sand blended with polymer binders; it sweeps into joints dry and then sets firm when you activate it with water. Joint-sand gradation is commonly specified to ASTM C144 or to ASTM C33/C33M – Standard Specification for Concrete Aggregates (ASTM), and gradation is verified by sieve testing per ASTM C136. Dry mortar is a pre-blended or site-mixed sand-and-cement ratio that goes in dry and hardens gradually as it draws moisture from the air and substrate. Both are 'dry' in the sense that you're not mixing up a wet batch before application, but they behave very differently once installed. Polymeric sand is the easier, more forgiving option for most DIYers. Dry mortar is better for wider or deeper joints on natural stone or where you want a harder, more permanent finish, but it's less tolerant of mistakes.
Dry mix or sand-and-cement grout: which one is right for your patio
The choice comes down to joint width, paver material, traffic load, and how permanent you want the result to be. Polymeric sand works best when joint widths are between roughly 1/4 inch (6 mm) and 1.5 to 2 inches (38 to 50 mm). For very narrow joints under 1/8 inch (3 mm), neither dry mix works well because there's not enough space to pack material in properly. For joints wider than 2 inches, a sand-and-cement wet grout gives a more durable result.
Dry mortar is the better call for natural stone flags like sandstone or limestone, where the joints tend to be irregular and wider, or where a traditional look matters. It's also appropriate for patios that were originally pointed with mortar, since ripping that out and replacing it with polymeric sand can look mismatched. The classic sand-and-cement dry mix for pointing is typically a 4:1 or 5:1 ratio (sharp sand to ordinary Portland cement by volume), brushed into joints dry and left to cure. If you want to go deeper on that method, the process for how to point a patio with dry mix covers the specifics of the brush-in technique in detail.
| Situation | Best choice | Why |
|---|---|---|
| Concrete or clay brick pavers, joints 1/4"–1.5" wide | Polymeric sand | Easy application, good flexibility, weed and ant resistance |
| Natural stone flags with irregular wide joints | Dry mortar (4:1 or 5:1 sand:cement) | Fills irregular gaps better, harder finish, traditional look |
| Existing wet-mortared patio needing patch repair | Dry mortar (matching original) | Avoids mismatch; keeps joint material consistent |
| High foot traffic, needs semi-rigid result quickly | Polymeric sand (rapid-set variant) | Open to foot traffic in 24 hours, mechanically stable |
| Budget job, large area, wide joints over 2" | Sand-and-cement wet grout | More economical per joint volume, better for very wide gaps |
| DIY first-timer, small to medium patio | Polymeric sand | Most forgiving, clear instructions on packaging, no mixing |
One scenario where people get tripped up: they see sand washing out of their joints after heavy rain and assume repointing is the fix. Sometimes it is. But if the pavers are also rocking or sinking, the problem is underneath, in the compacted base or bedding layer. No amount of joint sand will fix an unstable base. You'd be repointing the same patio again in six months. More on how to identify that below.
Materials, quantities and mix ratios
Coverage varies by joint width, depth and paver size, but as a rough starting point: a 50 lb (22 kg) bag of polymeric sand covers approximately 25 to 75 square feet depending on joint width and depth. Manufacturers print coverage tables on the bag, so check those before you buy. For a standard 200 sq ft patio with 3/8 inch joints, budget around 4 to 6 bags. Always buy one extra bag. Running out halfway through is a real problem because you can't leave joints half-filled overnight.
Polymeric sand: what to check on the label
- Minimum and maximum joint width: Sakrete PermaSand specifies 1/4" (6.4 mm) minimum and 1.5" (38 mm) maximum; Alliance Gator SuperSand G2 allows down to 1/8" (3 mm) minimum up to 2" (50 mm). Match the product to your joint size.
- Minimum joint depth: Gator SuperSand G2 requires at least 1.5" (38 mm) of depth. Shallow refilled joints won't hold.
- Temperature window: install only above 40°F (4°C) with no rain forecast. Sakrete PermaSand specifies at least 24 hours rain-free after installation.
- Sand gradation: reputable products will reference ASTM C-144 compliance on the label. This tells you the sand particle sizes are correct for jointing work. Avoid cheap bulk bags with no grading reference.
- Rapid-set vs standard: rapid-set variants can open to foot traffic faster but give you less working time after wetting. Pick the one that suits how much area you can complete in a session.
Dry mortar: mix ratios and what to buy
For a site-mixed dry mortar pointing job, the standard DIY ratio is 4 parts sharp sand to 1 part ordinary Portland cement (OPC) by volume. Some people use 5:1 for a slightly softer mix, which is preferable for older or softer pavers where a very hard mortar can cause cracking at the paver edge. This roughly mirrors a Type N or Type S mortar under ASTM C270 guidance, which specifies mix proportions for masonry mortar. Preservation guidance (from sources like the National Park Service) recommends matching the mortar strength to the host material: a softer stone needs a softer mortar. See National Park Service, Preservation Briefs (Repointing Mortar Joints) and guidance for testing original mortar and selecting compatible lime or cement binders and mortar strength in line with ASTM C270 National Park Service — Preservation Briefs (Repointing Mortar Joints) and guidance. Pre-bagged dry pointing mixes are available and are a good choice if you're doing a small area and want consistent results without measuring. Check the label for the sand-to-cement ratio, the setting time, and whether it's suitable for external use.
Tools you'll need (and what to use if you don't have them)
You don't need specialist kit for most repointing jobs, but a few tools make a genuine difference to the result. Here's what's useful and what you can substitute if you're working with what's in the shed.
| Tool | Purpose | DIY substitute |
|---|---|---|
| Angle grinder with diamond blade or oscillating multi-tool | Cutting out old joint material cleanly | Cold chisel and hammer (slower, harder on hands) |
| Wire brush or stiff-bristle brush | Clearing loose debris from joints | Old kitchen brush, nail brush |
| Leaf blower or shop vacuum | Removing dust and grit before applying product | Dustpan brush and patience (less effective on deep joints) |
| Vibratory plate compactor (rubber pad fitted) | Compacting polymeric sand into joints | Broom handle or rubber mallet tapping on a timber batten — acceptable for small areas only |
| Garden hose with spray nozzle (shower setting) | Activating polymeric sand | Watering can with rose head |
| Soft-bristle broom | Sweeping polymeric sand across paver surface | Any stiff household broom |
| Pointing trowel or margin trowel | Packing dry mortar into joints | Old butter knife, strip of thin wood |
| Bucket and measuring container | Mixing correct sand:cement ratios | Any marked container; old yoghurt pots work fine |
The compactor question comes up a lot. Sakrete's own technical data sheet says that if a plate compactor is not practical, you can manually tap pavers with a broom handle to settle the sand into joints. It works for very small patios or tight corner areas, but it's noticeably less effective on deep or narrow joints where vibration is what drives the sand down. If you're doing anything over about 50 square feet, it's worth renting a small plate compactor (machines like the Bomag BVP18/45 are commonly available at hire shops). Always fit the rubber pad or mat to avoid scratching or cracking the paver surface. If you want to explore pointing approaches that skip specialist tools entirely, there's more on that in a guide specifically covering how to point a patio without a pointing tool.
Safety, weather and timing: get these wrong and redo the whole job
Rain is the biggest enemy of a polymeric sand job. If it rains before the sand has been properly activated and had time to start setting, the polymer binders wash out and you're left with ordinary sand that will erode straight away. Sakrete PermaSand requires no rain for 24 hours after installation. Some rapid-set variants only need 15 minutes of rain-free time after the activation wetting step, but 24 hours of protection is the safe target for all standard polymeric products. Check a 48-hour forecast, not just the day you're working.
Temperature matters too. Don't install polymeric sand below 40°F (4°C). The polymer binders won't activate properly in cold conditions and the sand will appear to set but will fail when it warms up. Equally, avoid working in direct midday sun on hot days if the paver surface is extremely hot to the touch: the water can evaporate too quickly during activation before the binders have time to work. Early morning on a mild, cloudy day is ideal.
PPE is worth taking seriously. Both polymeric sand and dry mortar mixes contain fine silica particles. Wear a dust mask (at minimum an FFP2/N95 rated respirator) when sweeping and blowing material, especially in the cutting-out stage. Safety glasses and gloves when using an angle grinder are non-negotiable. On the environmental side: don't hose waste material into drains or onto grass. Polymeric sand and cement washwater are both covered by disposal guidance that prohibits flushing to sewers or waterways. Sweep up excess material into a bag and bin it, or let liquid waste set in a bucket before disposing as solid waste.
Inspect before you start: is the base still good?
Walk the patio slowly and press down firmly on each paver with your foot. A stable paver should not rock, dip or click against its neighbour. If you find pavers that move, the bedding layer or the compacted sub-base underneath may have shifted. Repointing over a moving paver will fail within a season because the joint will crack open every time the paver flexes. Those sections need to be lifted, the base re-levelled and re-compacted before you point.
Check joint depth with a thin ruler or a piece of wire. Most polymeric sand products require a minimum of 1.5 inches (38 mm) of joint depth to grip properly. If your joints are shallower than that because the pavers have settled high or because previous filler has only partially been removed, the product won't perform as advertised. Also look for joints that are barely visible because sand or grit has compacted almost flush with the paver surface: you'll need to scrape those out to the correct depth before refilling.
While you're down there, look at the overall patio level and drainage direction. Water should always run away from the house: a fall of at least 1 in 60 (roughly 1/2 inch per 3 feet) is typical. If the patio is holding puddles in areas where it didn't used to, it's often a sign the base has settled unevenly rather than just a pointing problem. A guide on how to compact a patio base goes into more detail on diagnosing and fixing that layer if you find problems here.
Signs you need a professional instead of a DIY repoint
- More than 20-25% of pavers are rocking or have dropped more than 10 mm below their neighbours: this points to a base failure, not a joint problem
- You can see the edge of the sub-base through gaps between pavers: the bedding layer has washed away
- The patio has heaved upward in winter and not settled back flat in spring: possible tree root intrusion or drainage failure under the slab
- Mortar joints have blown out in a pattern that follows a single line across the patio: often indicates a structural crack in a concrete base beneath the pavers
- Water is pooling against the house wall: drainage has failed and a repoint won't address the gradient problem
Preparing the work area before you touch the joints
Clear the patio completely. Move furniture, pots and anything else off the surface. You need to work across the whole area in one session (or defined sections), and objects in the way force you to skip patches and come back, which creates inconsistencies in the finished result.
Protect adjacent surfaces. If your patio meets a wall, fence or lawn edge, tape or wedge cardboard along those edges to prevent joint material from staining them. Polymeric sand in particular can leave haze marks on walls if it gets wet while still on a vertical surface. Lay a tarp or plastic sheeting on any lawn directly adjacent to where you'll be working: cement dust and polymeric sand are both harmful to grass.
For a large patio, divide it into manageable sections of roughly 100 to 150 square feet and mark them with chalk or a string line. This keeps the work rate manageable and means if rain comes unexpectedly, you can prioritise getting one complete section fully activated rather than having the whole patio half done. Work from the far end of the patio back toward your exit point so you're never standing on freshly filled joints.
Cleaning the joints: the step that most DIY guides underestimate
This is genuinely the most important part of the whole job. New joint material applied over old, loose or dirty material will fail early because it can't bond or compact properly. Spend as much time on cleaning as you do on filling.
Step-by-step joint cleaning
- Cut out the old material: Use an angle grinder with a 4-inch diamond blade, or an oscillating multi-tool with a grout blade, to cut down each joint to at least 1.5 inches (38 mm) depth. Keep the blade centred in the joint and go slowly. If you're using a cold chisel and hammer instead, work at an angle along the joint and avoid striking directly down onto paver edges. Target depth is 1.5 to 2 inches (38 to 50 mm). Shallower than that and polymeric sand won't have enough depth to lock.
- Remove the bulk debris: Once you've cut or chiselled along the joints, rake or scrape out the loosened material with a narrow trowel or an old screwdriver. A wire brush dragged along the joint length pulls out grit and old sand effectively.
- Brush the surface: Sweep the whole patio with a stiff brush to clear loose material from both the joint openings and the paver surface. Work in multiple directions so material doesn't just get pushed back into joints.
- Blow or vacuum: This step separates a good result from a failed one. Use a leaf blower on a low setting (or a shop vacuum with a narrow nozzle) to pull fine dust and grit out of the joint bottoms. Alliance Gator's technical guidance says to blow until dust no longer rises from the joints. For tight joints under 1/4 inch wide, a compressed air nozzle pushed into the joint mouth is the most effective way to clear the bottom. If you don't have compressed air, a flexible drinking straw and a strong blow will shift grit from very narrow joints.
- Check for wet or damp material: After cleaning, run your finger along several joint bottoms. If anything feels damp or cool, the joint is not ready. This is especially critical for polymeric sand: pavers and joints must be completely dry before you sweep in the product. If the patio was wet recently, wait at least one full dry day, ideally two, before proceeding.
- Check and treat organic material: If there's moss, algae or root material in the joints, brush it out and apply a diluted patio cleaner or moss killer, then let it dry fully before proceeding. Leaving organic material in the joint will cause new pointing to fail faster as it rots and creates voids.
- Final dry check: Crouch down and look along the joints at a low angle. You should see clean, open voids with no loose material sitting in the bottom. The joint sides (the paver edges) should look clean and even. Only now is the surface ready for filling.
For wet versus dry cleaning: dry methods (brushing, blowing, vacuuming) are strongly preferred for a polymeric sand job because the surface must be dry before you sweep in the product. If you've used water to clean off algae or moss, you must allow full drying before proceeding. The only scenario where wetting is appropriate before polymeric sand installation is if you're rinsing off a cleaning chemical that would interfere with the polymer binder, and even then you'd wait at least 24 hours for complete drying. For dry mortar pointing, light damp is acceptable since the mortar draws moisture from the substrate to cure, but you still want no standing water or pooled grit in the joint bottoms.
Tight joints under 3/8 inch wide need extra attention because dust and fine grit pack in hard and don't come out easily with a brush alone. Fold a piece of stiff cardboard into a thin scraper, drag it along the joint to loosen the packed base, then blow. Repeat two or three times. It's tedious but it's the difference between joints that hold for a season and joints that hold for a decade. If you're working with particularly narrow or irregular joints on natural stone, you might also look at how to grout patio slabs with sand and cement, which covers some specific techniques for awkward joint geometries.
FAQ
When is a dry mix (polymeric sand or dry mortar) the right choice for repointing a patio versus a wet sand‑and‑cement grout?
Use polymeric sand or dry mortar when joints are primarily for stabilizing pavers, preventing weed growth, and controlling insect intrusion without changing structural support. Polymeric sand is appropriate for joints that are: clean and dry, at least about 1/8–1/4" (3–6 mm) wide and usually up to about 1.5–2" (38–50 mm) wide, and at least ~1.5" (38 mm) deep when recommended by the product. Use a cementitious dry mortar (preblended dry mortar or polymeric mortar) when you need stronger adhesion, joint profiles that resist heavy concentrated loads, or when the joint material must be routed closer to traditional mortar appearance. If the base or bedding has failed (settling, voids, dish‑shaped areas, moving pavers) you must recompact or rebuild the base rather than rely on joint material — call a pro if the patio shows widespread movement, edge failure, or pooling water indicating subbase problems.
What preparatory steps are required before installing polymeric or dry joint mixes?
1) Wait for dry weather and temperatures above the product minimum (commonly above ~40°F / 4°C for many polymeric sands). 2) Remove old joint material, weeds, roots, and organic debris to full joint depth (use a joint raker, screwdriver, or grinder where needed). 3) Clean joints and paver surfaces of dust — sweep, then leaf‑blow until no dust rises and joints are dry. 4) Repair or replace any loose or badly damaged pavers; ensure edges are supported. 5) If salts, efflorescence, oil or stains are present, clean and allow to dry. 6) Verify joint widths and depths are within the chosen product’s limits (manufacturers typically specify minimum ~1/8–1/4" width and minimum depth ~1.5"; check the product TDS). 7) Protect storm drains and watercourses — do not allow loose dry material to wash into drains or waterways; contain and collect sweepings for proper disposal.
What tools do I need — and what are practical tool‑free alternatives — for a DIY repoint with dry mix?
Recommended tools: stiff joint rake or small masonry chisel, wire brush, leaf blower, stiff broom, hand broom & dustpan, shop vacuum, rubber‑pad vibratory plate compactor (rental), tamper or rubber mallet, push broom to work sand into joints, garden hose with a spray/shower nozzle for activation, protective gloves, eye protection, dust mask. Tool‑light alternatives for very small areas: manual tapping with a rubber mallet or broom handle instead of a plate compactor, hand‑packing with a putty knife or wooden stick to press sand in, and firm sweeping/brush packing. Note: manual methods are acceptable only for small patches — mechanical compaction gives much denser, longer‑lasting fill for larger areas.
What exact mixing and placement procedures do manufacturers require for polymeric sand?
Use polymeric sand dry — do not pre‑wet. Broadcast sand over joints and sweep until joints are filled flush with or slightly below the paver surface. Compact the dry sand into joints: for best results use a vibratory plate compactor with a rubber pad, making multiple passes in different directions until joints are densely filled. Remove surface sand by sweeping and use a leaf blower on low to remove dust without emptying joints. Only after compaction and surface cleaning, water‑activate per product instructions (commonly a continuous 'shower' spray until sand rejects water and a slightly damp film forms). Follow manufacturer timing for activation and protection from rain (typical precautions: do not wet if rain expected for 24–72 hours for many products; some rapid‑set products require shorter protection). Adhere strictly to the product’s written directions.
What are the common product limits for joint width, joint depth, and temperature when using polymeric sands?
Common limits (vary by product): minimum joint width typically 1/8" (3 mm) to 1/4" (6 mm); manufacturers often recommend a minimum joint depth of roughly 1.5" (38 mm) or filling the full joint depth; maximum recommended joint width often 1.5" (38 mm) to 2" (50 mm). Temperature constraints commonly require installation above ~40°F (4°C) and no rain expected for the curing window (24–72 hours depending on product). Always check the specific technical data sheet for exact numeric limits for your chosen product.
How do I compact polymeric sand correctly and what if I don’t have a plate compactor?
Proper compaction: use a vibratory plate compactor fitted with a rubber pad and make multiple passes in at least two perpendicular directions until joints are tightly packed and no settling occurs. For DIY small areas without a compactor: manually tap pavers with a rubber mallet or broom handle and repeatedly sweep sand into the joints, packing by hand. This manual approach may be adequate for individual pavers or small patios but won’t achieve the density or durability of mechanical vibration, especially in deep or narrow joints; plan to rent a small plate compactor for areas larger than a few square feet.
Next Article
How to Grout Patio Slabs With Sand and Cement
Learn how to grout patio slabs with sand and cement: prep, mix ratio, apply, cure, clean, and fix common failures