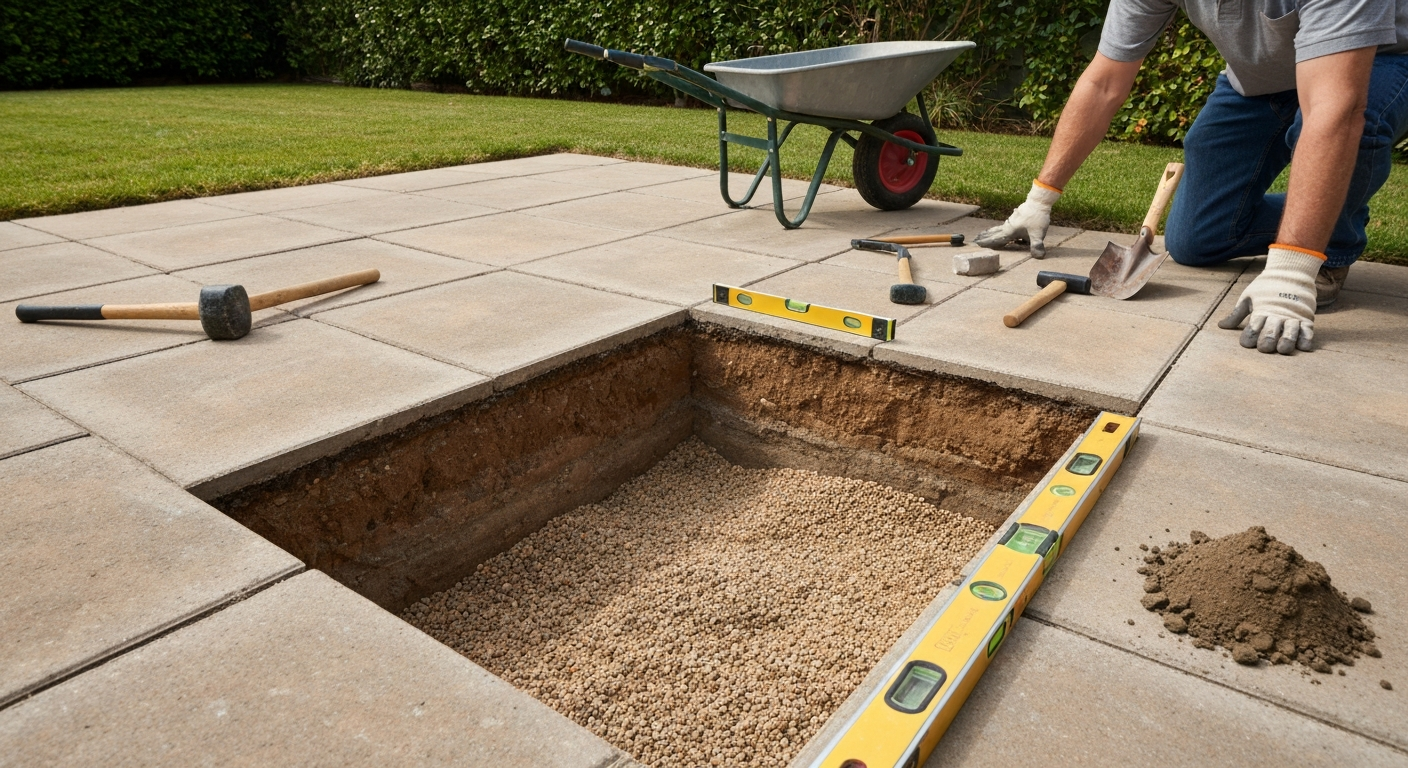
You can stick down a loose patio slab yourself in most cases, but only if the sub-base underneath it is still solid and the void between the slab and the bed is small. If the gap is larger than a few millimetres across most of the slab's underside, or if the ground beneath feels soft and springy, you are better off lifting the slab, fixing the bed, and re-laying it properly. Trying to glue a slab down over a washed-out or sunken base almost always fails within a season.
How to Stick Down a Loose Patio Slab: Step-by-Step Fix

Talia Lang
8 Aug 2026
When sticking down actually works (and when it doesn't)
A stick-down repair is a legitimate, durable fix under the right conditions. The slab needs to be structurally intact, the sub-base underneath needs to be sound and dry, and the gap between the slab and its old bed has to be genuinely small. We're talking about a localised loss of bedding mortar or jointing sand at one edge, not a slab that's floating on thin air across its whole footprint.
If those conditions are met, a good paving adhesive or polymeric mortar can bond the slab back in place with real permanence. If they're not, you're just masking the problem. Expect a stick-down repair on a well-supported slab to last as long as the original installation. Expect it to fail within twelve months if the root cause is a collapsed sub-base or persistent water ingress.
Safety and setting up your work area
Before you touch the slab, deal with the safety basics. A loose patio slab is a tripping hazard and a crush hazard during repair. Large paving slabs (600 mm x 600 mm or bigger) can weigh 40 to 60 kg or more, so plan on having a second person available if you need to lift one. Wear sturdy work boots with steel toe caps, thick gloves, and knee pads if you'll be working at ground level for any length of time.
- Cordon off the loose slab with temporary barrier tape or a warning cone if it's in a path people use regularly.
- Clear the area of garden furniture, plant pots and any other trip hazards within a metre of the work zone.
- Have a bucket of clean water and a dry cloth nearby when working with cement mortar or adhesive, both can irritate skin with prolonged contact.
- Check the weather forecast: you need at least 24 to 48 hours of dry weather and temperatures above 5 degrees Celsius for mortar or adhesive to cure properly.
- If you're using an angle grinder to cut out old jointing material, wear eye protection and a dust mask rated at least FFP2.
Diagnosing why your slab is loose
Don't skip this step. The repair method you choose depends entirely on what caused the slab to come loose in the first place. Getting the diagnosis wrong is the single biggest reason DIY patio repairs fail a second time.
The tap test and rock test
Start simple. Step on the slab in different corners and feel for movement. Then kneel down and tap it firmly with your knuckle or a rubber mallet. A well-bedded slab produces a dull, solid thud. A loose one sounds hollow, almost like knocking on a door. A hollow sound doesn't always mean the entire bed has gone, but it tells you there's at least a partial void and you need to investigate further.
Checking for visible gaps and sub-base condition
After rain is actually a good time to inspect. If you can see damp subsoil or exposed aggregate appearing at the slab edges, the bedding mortar has eroded. Use a thin screwdriver or a piece of stiff wire to probe the joint and edge gap. If it goes in more than 10 to 15 mm without hitting solid material across a wide section of the slab perimeter, the bed has failed substantially. Try gently lifting one corner with a pry bar to check the underside. Industry best practice (referenced in UK paving standards under BS 7533) uses roughly 80% underside contact as the benchmark for a properly bedded slab. If the contact area looks significantly less than that, you're looking at a lift-and-re-bed job, not a stick-down.
Common causes and what they look like
| Cause | What you'll see or feel | Likely repair |
|---|---|---|
| Washed-out bedding mortar | Hollow tap sound, visible voids at edges after rain, slab rocks diagonally | Lift and re-bed if widespread; adhesive repair if minor and localised |
| Lost jointing sand | Gaps between slabs, lateral movement when pushed sideways, sand trails after rain | Re-point joints with polymeric jointing sand or mortar; adhesive if slab is also rocking |
| Sub-base settlement or subsidence | Slab sunk or tilted, soft or springy feel underfoot, surrounding slabs also affected | Lift, rebuild sub-base, re-bed (not a stick-down candidate) |
| Tree root uplift | One edge raised higher than the other, visible or palpable root below joint | Remove or reroute root, lift slab, re-bed; professional advice often needed |
| Frost heave | Slab displaced after a hard winter, may look OK in summer but rocks again the following spring | Lift, check drainage and sub-base depth, re-bed with improved drainage |
| Failed original adhesive or mortar | Clean underside with old adhesive residue or crumbling mortar, no sub-base damage | Clean, prepare surfaces, stick down with fresh adhesive if sub-base is sound |
Quick adhesive repair vs lift-and-re-bed: how to decide
This is the decision that matters most. I've seen people waste a Saturday and a tube of expensive adhesive on a repair that was never going to hold because the real problem was underground. Use this checklist honestly.
Go with a stick-down repair if all of these are true
- The slab rocks or tilts at one edge only, not across the whole surface.
- The hollow sound when tapped is localised to one section, not the whole slab.
- Probing the edge gap finds solid sub-base material within 15 mm of the surface.
- The underside contact area (visible when you tilt or lift the slab slightly) is at least 60 to 70% or more, with the gap concentrated at one edge or corner.
- The surrounding slabs are stable and level, suggesting the sub-base is intact broadly.
- The cause is clearly a failed mortar bond or minor jointing sand loss, not drainage or root problems.
- The gap you're trying to fill is no more than about 10 to 15 mm at its deepest point.
Lift and re-bed instead if any of these apply
- The slab rocks at multiple corners or across the full surface.
- The sub-base feels soft or you can see washed-out or eroded material under the slab.
- Multiple adjacent slabs are also loose, sunken, or tilting.
- The gap under the slab is more than 15 to 20 mm at any point.
- You can see or feel tree roots near the joint.
- The same slab has been loose before and been re-stuck without lasting success.
- There is persistent pooling of water over or around the slab after rain.
- The slab is sunken relative to its neighbours by more than about 10 mm.
If you land in the lift-and-re-bed column, that's a bigger job covered separately in the guides on how to raise a patio slab and how to fix a rocking patio slab. See the guide on how to raise a patio slab for step-by-step instructions on lifting, rebuilding the sub-base and re-laying the affected area. See the guide on how to fix a rocking patio slab for step-by-step instructions on lifting slabs, repairing the sub-base, and re-laying them correctly. See EP Henry Pavers & Slabs Technical Installation Guide (installation sequencing, bed types) for step‑by‑step tolerances and sequencing. Those articles walk through sub-base repair, compaction, and re-laying in detail. The rest of this guide focuses on the stick-down route.
Tools and materials you'll need
Tools
- Stiff-bristle brush and wire brush (for cleaning slab underside and bed surface)
- Pry bar or wide bolster chisel (for lifting slab edge if needed)
- Cold chisel and club hammer (for breaking out old mortar)
- Angle grinder with diamond disc (for cutting out stubborn jointing mortar)
- Rubber mallet (for tapping slab into position)
- Spirit level, minimum 1 m long
- Pointing trowel and gauging trowel
- Wooden or plastic wedges or packers (to hold slab in position during cure)
- Bucket and mixing paddle or drill attachment (for cement mortar)
- Caulking gun (for cartridge adhesives)
- Leaf blower or compressed air (optional, for clearing dust from voids)
- Knee pads, gloves, safety glasses
Materials: what to buy and what type to choose
| Material | When to use it | Notes |
|---|---|---|
| MS polymer or polyurethane paving adhesive (1-part, cartridge) | Small gaps, edge or corner lifts, bonding slab to existing mortar bed | Flexible after cure, handles minor movement. Look for products rated for outdoor masonry. Sikaflex-11 FC+ is a well-known example: tensile strength ~1.5 N/mm², movement capability ±35%, service range -40°C to +80°C. |
| Two-component epoxy adhesive | Very high bond strength needed, structural bonding to concrete base | Higher strength than MS polymer but less flexible. Shorter pot life, more expensive. Overkill for most domestic slabs but useful for heavy stone. |
| Polymeric paving mortar (2-part) | Filling gaps up to ~10-15 mm and re-bedding edges, jointing | Significantly higher compressive and flexural strength than cement mortar. ROMPOX ECOFINE, for example, achieves ~20.9 N/mm² compressive strength. Frost and de-icing salt resistant. Faster return to foot traffic. |
| Cement mortar (site-mixed) | Larger gap-filling and full edge re-bedding where polymeric mortar cost is prohibitive | 1 part Portland cement to 4 parts sharp sand by volume. Cheaper, slower to cure, more permeable, vulnerable to washout if drainage isn't sorted first. |
| Polymeric jointing sand or joint mortar | Re-pointing open joints around the repaired slab | Essential final step to prevent water ingress and future bed erosion. |
| Exterior paving sealant | Optional protective finish after repair | Slows future water penetration and jointing material erosion. Not a substitute for proper jointing. |
A note on quantities: for a single slab repair using cartridge adhesive you'll typically use one to two 300 ml cartridges. For a polymeric mortar repair, a 5 kg bag is usually enough for one or two slabs depending on gap size. For a cement mortar mix you'll need roughly 1 part cement to 4 parts sharp sand; a 25 kg bag of cement and a 25 kg bag of sharp sand is plenty for a few slabs.
Preparing the slab and the area before you repair
Preparation is where most DIY repairs go wrong. Adhesives and mortars need clean, dry, solid surfaces to bond to. Skipping this part is the fastest route to a repeat failure, and it's usually what's behind the issue of patio slabs not sticking in the first place.
- Clear the slab surface of all dirt, moss, algae, and loose material using a stiff brush. For heavy biological growth, use a diluted patio cleaner and rinse thoroughly, then allow at least 24 to 48 hours to dry fully before applying any adhesive or mortar.
- Remove the jointing material around the slab using a cold chisel, pointing tool, or angle grinder with diamond blade. You need to clear at least 20 to 30 mm of joint depth all the way around the slab to allow good adhesive application to the edges.
- Probe and inspect the bed. Use a piece of stiff wire or a thin screwdriver to check the depth and extent of any void under the slab. Note roughly where the solid contact still exists and where the gap is.
- If the slab edge needs to be lifted slightly to access the void, do so carefully with a pry bar, protecting the slab corner with a piece of scrap timber so you don't chip it. Support it on a wooden wedge while you work underneath.
- Clean out the void. Use a brush, a vacuum, or a burst of compressed air to remove loose sand, dust, and debris from inside the gap. Any loose material left behind will prevent the adhesive or mortar from bonding to the sub-base.
- Clean the underside of the slab wherever it's accessible. Wire-brush off loose mortar, sand and contamination from the contact surfaces. If there's old adhesive residue that's already failed, scrape and wire-brush it off as thoroughly as you can.
- Allow everything to dry. This is critical. Moisture trapped under the slab is one of the main reasons adhesive repairs fail. If the weather has been wet, give it a full day of dry conditions. In damp climates, even two days is not excessive.
- Check the surrounding slabs for level. Use your spirit level across the target slab and adjacent ones to understand exactly how much you need to raise or lower the slab during the repair. Mark a target level with a pencil on the adjacent slab edge if helpful.
Procedure A: Stick-down repair using paving adhesive or polymeric mortar
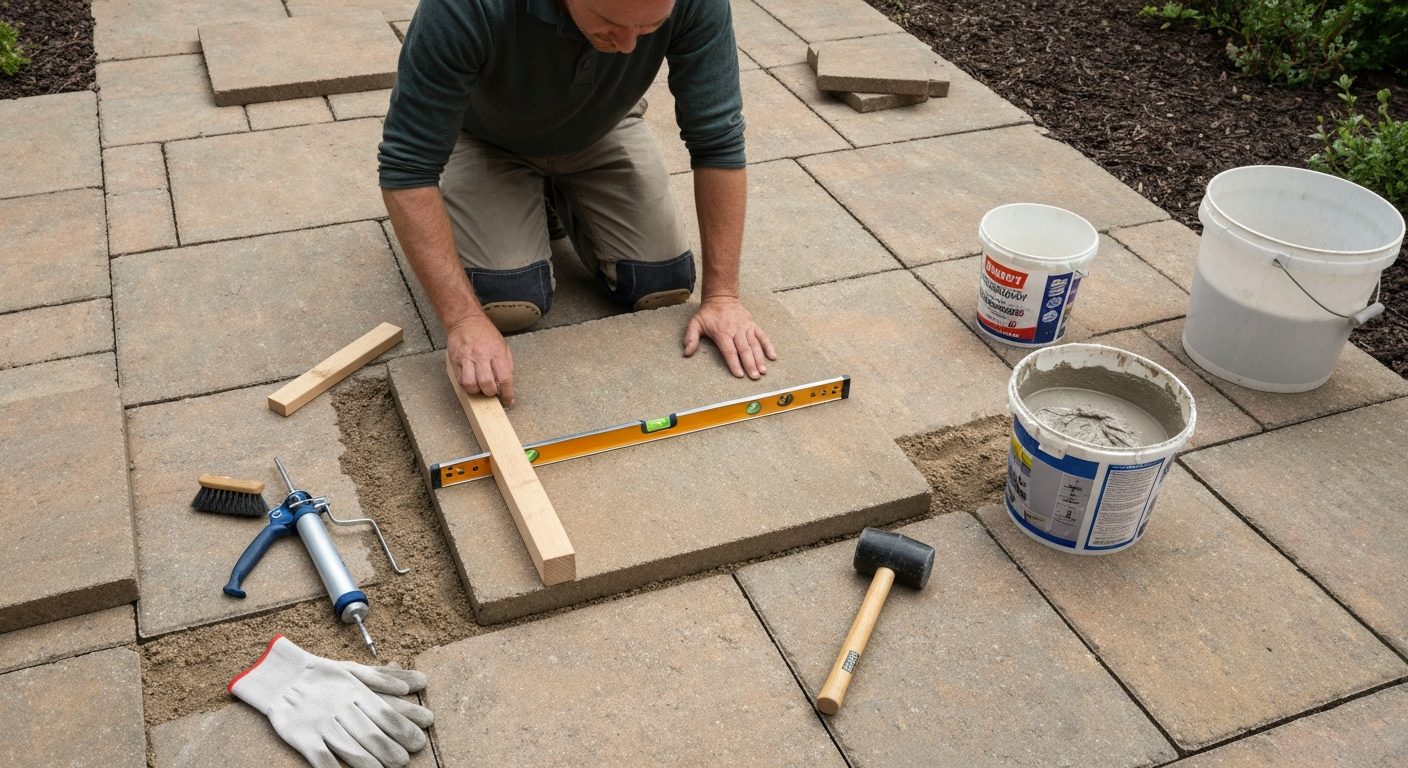
This method works well for slabs that rock at one edge or corner, where the gap is localised and the sub-base is confirmed solid. The aim is to inject or trowel sufficient adhesive or polymeric mortar into the void to fill it completely and bond the slab firmly back to the base. Done correctly, the result should be as durable as a new installation and passable within 24 to 48 hours for foot traffic, or faster with polymeric products.
- Complete all preparation steps described above. Do not start this step until the slab underside and sub-base contact surface are clean, sound and dry.
- Prop the slab open slightly if needed. If you need to trowel mortar or adhesive into a gap that isn't accessible with the slab flat, use a wooden wedge to hold the edge up by about 10 to 20 mm. Only do this if the slab can be safely supported and won't crack under its own weight across the raised edge.
- Mix or prepare your adhesive. For cartridge adhesive, load it into the caulking gun and purge the nozzle until fresh material comes through. For a two-part polymeric mortar, mix components according to the manufacturer's instructions, which will typically give you a pot life of 20 to 60 minutes depending on temperature. Work in batches if needed.
- Apply adhesive or mortar to the base surface inside the void. Use a pointing trowel to push the material as far into the gap as possible, working from the open joint around the perimeter. For larger voids, use a notched trowel to create ridges in the mortar bed that will allow air to escape as the slab is pressed down.
- If using a polymeric mortar to fill a gap of more than 5 mm, build up the material in the void until it's slightly proud of the surrounding bed surface, maybe 2 to 3 mm. This accounts for compression when the slab is pressed back down.
- Remove the wedge and lower the slab back into position. Do this slowly and steadily. If you have a helper, have them hold the far edge level while you press the near edge down.
- Check level immediately. Place your spirit level across the slab and compare it to adjacent slabs. If it's slightly high at one corner, tamp it down with the rubber mallet through a scrap piece of timber (never hit the slab directly with a metal hammer). If it's slightly low, lift carefully and add more material.
- Once level is correct, apply firm downward pressure across the full slab surface by standing or kneeling on it for 30 to 60 seconds. This forces the adhesive or mortar into full contact with both surfaces.
- Check level again with the spirit level. Industry installation guidance suggests a finished surface deviation of no more than about 6 mm in 3 metres as the benchmark for acceptable flatness. If you're within a couple of millimetres of the adjacent slabs, you're fine.
- Wipe away any adhesive or mortar that has squeezed out of the joint before it starts to cure. This is much easier to do now than after it hardens.
- Support the slab during cure. Place wooden wedges or packers at the joint edges to prevent the slab from shifting while the adhesive cures. Most polyurethane and MS polymer adhesives reach handling strength in 24 hours; polymeric mortars typically allow foot traffic in 4 to 24 hours depending on the product and temperature. Check the product datasheet.
- Do not walk on the slab until the adhesive or mortar has reached its specified foot-traffic strength. Rushing this step is a common reason for re-failure.
Re-pointing the joints
Once the slab is cured and stable, re-point all the cleared joints around it using a polymeric jointing mortar or brushed-in polymeric jointing sand. This is not optional. Open joints allow rainwater to wash directly under the slab, which will erode the new bed material and undo your repair. Pack the joint material tightly and finish flush with the slab surface. Brush off any excess from the slab face before it dries.
What to realistically expect
A well-executed stick-down repair on a sound sub-base should hold for years and feel solid underfoot immediately after cure. You might notice a very slight colour difference at the joint edges as the new mortar weathers in, but within a season it usually blends. If the slab starts rocking again within a few months, the sub-base has a deeper problem and the right answer is now the lift-and-re-bed route, not another round of adhesive.
Procedure A variant: using cement mortar for the stick-down
Cement mortar is the traditional choice for re-bedding paving slabs and it absolutely works for a stick-down repair, provided you use the right mix and the conditions are right. It's cheaper than polymeric mortar and widely available, but it's slower to cure, more permeable to water, and less resistant to freeze-thaw cycles. On a well-drained, sheltered patio in a mild climate it's a perfectly good material. On an exposed north-facing patio in a cold region, the polymeric option will last longer.
When to use cement mortar
- The gap under the slab is more than about 10 mm and you need a substantial filler rather than a thin adhesive bond.
- You're comfortable mixing mortar and have a little more time to work with a slower-curing material.
- Cost is a significant factor (cement mortar costs a fraction of polymeric products for the same volume).
- The patio is well-drained and you are confident drainage or frost is not the root cause of the original failure.
Mix and method
Mix at 1 part Portland cement to 4 parts sharp sand by volume. Keep the mix on the dry side, sometimes called a 'semi-dry' or 'slump' mix: it should clump together when squeezed in your hand but not be wet enough to slump or flow. This is important because a wet mortar shrinks more as it dries, increasing the chance of voids forming. For a full mortar bed under paving slabs, industry guidance commonly specifies a bed thickness of 30 to 40 mm, but for a stick-down top-up you're just filling the existing void, so apply it at the depth required and no deeper than needed.
Apply the mortar into the void using a pointing trowel, filling it thoroughly and working air pockets out by pressing and tamping. Lower the slab and follow the same levelling and tamping steps as in Procedure A above. The main difference is timing: a cement mortar bed should be kept dry and undisturbed for at least 24 hours before any light foot traffic and ideally 48 to 72 hours before normal use. Do not allow vehicles or heavy loads on a cement-mortared slab for at least 7 days.
Cement mortar limitations to be aware of
- Do not mix or apply in temperatures below 5°C or when frost is forecast within 48 hours.
- Cement mortar is more permeable than polymeric mortar, so the quality of jointing and the drainage of the sub-base matter even more.
- If the original failure was caused by water washing out the bed, you must also fix the drainage before using cement mortar, otherwise the same thing will happen again.
- Cement mortar takes longer to reach full strength (28 days for full cure), though it's walkable well before that.
- It can stain light-coloured or porous stone, so wipe any smears off quickly with a damp cloth before they dry.
Adhesive vs polymeric mortar vs cement mortar: a quick comparison
| Factor | Paving adhesive (MS polymer/PU) | Polymeric mortar (2-part) | Cement mortar (site-mixed) |
|---|---|---|---|
| Best gap size | Up to ~5-8 mm | Up to ~15 mm | 10-40 mm |
| Bond strength | Moderate (~1.5 N/mm² tensile) | High (~9-21 N/mm² compressive) | Moderate, variable by mix |
| Flexibility | High (±35% movement) | Low to moderate | Low |
| Frost/salt resistance | Good | Excellent | Moderate |
| Time to foot traffic | 24 hours | 4-24 hours (product dependent) | 24-72 hours |
| Cost (approximate) | £8-£15 per cartridge | £15-£30 per 5 kg bag | £3-£6 per repair |
| Difficulty | Easy (caulking gun) | Moderate (mixing required) | Moderate (mixing, consistency) |
| Best for | Small edge or corner lifts | Edge re-bedding, high-performance repairs | Larger voids, budget repairs, mild climates |
For most homeowners repairing a single loose slab with a small edge gap, a cartridge paving adhesive is the easiest and most forgiving option. If the gap is deeper or wider, move up to a polymeric mortar. Reserve cement mortar for situations where the void is substantial and you're confident the drainage and sub-base are sound.
Typical time and cost
A single-slab stick-down repair typically takes 30 to 60 minutes of actual work, plus preparation and cure waiting time. For a straightforward adhesive repair on one slab, budget around £10 to £25 for materials (adhesive, joint mortar, brushes). A polymeric mortar repair with re-jointing sits closer to £25 to £50 per slab. If you need to hire an angle grinder to cut out old mortar joints, add roughly £20 to £40 for a half-day hire. The whole job including cure time is usually a single weekend.
Troubleshooting common problems
- Slab is slightly too high after repair: press it down more firmly while the mortar is still workable; if it's set, you may need to lift and remove a small amount of material before re-setting.
- Adhesive squeezed out but slab still rocks: the void was larger than anticipated, the material didn't fill it fully, or you have a sub-base problem. Try probing again and consider whether this is now a re-bed job.
- Mortar cracked soon after setting: mix was too wet, or traffic was applied too early. Remove the cracked material, re-mix drier and re-apply.
- Slab slipped sideways during cure: wedges were removed or dislodged. Lower the slab, clean off the uncured material if possible, and restart with better temporary support.
- Joint filler keeps washing out: the drainage under the slab is channelling water through the joint. Fix the drainage gradient before re-pointing, or the cycle will repeat.
- Repair held for one winter then failed: frost heave is the likely cause. The sub-base depth or drainage was inadequate for your climate. This is now a full lift-and-re-bed with improved drainage.
When to call a professional
Be honest with yourself about the scope of the problem. Hiring a professional patio contractor makes more sense than a DIY repair in a few specific situations: the sub-base has failed across a large area (more than three or four slabs), there is significant subsidence suggesting a drainage or soil problem beneath the base, there are visible tree roots causing widespread upheaval, the slabs are very large or heavy stone that genuinely requires two people and specialist lifting tools, or the patio is attached to a house and changes in levels could affect drainage away from the building. A professional will typically lift and re-lay the affected area with a rebuilt sub-base, which is the only durable solution to those problems. The topic of why patio slabs lift in the first place covers some of the subsurface causes in more detail if you want to understand the full picture before getting quotes.
Preventing the problem from coming back
The single most effective thing you can do after a repair is maintain your joints. Jointing material, especially brushed-in polymeric sand, erodes over time. Check it annually and top up any joints that are visibly low or open. This stops water getting under the slabs and washing out the bedding, which is by far the most common cause of re-failure. Sweep debris and standing water off the patio promptly, especially in autumn when decomposing leaves trap moisture against joints. If your patio slopes toward the house rather than away from it, that's a longer-term project worth addressing properly. And if you're in a climate with hard frosts, consider sealing the patio surface with an appropriate exterior sealant after re-jointing to reduce water absorption into the bedding layer. It won't last forever and needs reapplying every few years, but it significantly slows the freeze-thaw erosion cycle that loosens slabs in winter.
FAQ
What are the most common causes of a loose, rocking or lifting patio slab and how do they differ technically?
Common causes: 1) Sub‑base/subgrade settlement or localised subsidence — granular base has compacted or washed away so slab loses support. 2) Washed‑out or eroded bedding/mortar — rainwater or poor drainage removes bedding material beneath the slab leaving voids. 3) Loss of jointing sand — lateral movement follows when joints no longer lock units together. 4) Tree root uplift — roots push slabs upward locally and can fracture edges. 5) Frost heave — freeze–thaw cycles in climates with poor drainage or high fines in the subgrade cause slabs to heave and then sit unevenly. 6) Failed or missing adhesive/mortar — old mortar debonds or was never applied. Each cause requires different repairs: structural sub‑base problems normally need lifting and re‑building the base; local voids or failed adhesive may be repairable by sticking with polymeric adhesive if diagnostics allow.
How should a homeowner diagnose whether a slab can be 'stuck down' or must be lifted and re‑bedded?
Do simple checks: tap the slab — a hollow ring and obvious rock indicate voids; try to lever one edge/corner to inspect underside contact; check for visible voids/exposed subsoil after rain or channels of washout; assess joint condition and surrounding slabs; look for root bulges and ponding that indicate drainage issues. Use decision thresholds: if underside contact is ≥~80% and the sub‑base appears sound and dry, an adhesive or polymeric mortar repair may be acceptable. If underside contact is <<80%, slab visibly rocks under load, there are multiple adjacent failing slabs, sub‑base washout, or failed edge restraints, then lift, repair the base and re‑bed (full rework) is recommended. If uncertain, consult a pro — incorrect choice risks repeat failure.
What materials and tools will I need for a stick‑down adhesive repair and for a full lift‑and‑re‑bed repair?
Stick‑down adhesive repair materials: 1‑part polyurethane/MS‑polymer adhesive or two‑part epoxy/polymeric paving mortar (manufacturer‑approved for stone/concrete), suitable primer if required, jointing sand or polymeric joint mortar, cleaning solvent, sealant for joints (optional). Tools: stiff brush, pressure washer (optional), trowel or cartridge gun, wedges/shims, rubber mallet, spirit level, gloves, eye protection. Full lift‑and‑re‑bed materials: MOT Type 1 / compactable granular aggregate, blinding sand (if required), cement and sharp/screeding sand for 1:4 full mortar bed (or specified bedding system), edge restraint material (concrete haunching or resin), jointing sand or polymeric grout. Tools: pry bars/suction lifter, wheelbarrow, shovel, plate compactor (hire), spirit level, screed rails/straight edge, mortar mixing tub or mixer, trowels, compactors, brick/stone wedges, PPE (gloves, boots, eye protection). Product selection should follow manufacturer PDS for adhesives/polymeric mortars and local standards (BS/ANSI) for bedding mixes.
What are the step‑by‑step instructions for sticking a loose slab down using an adhesive or polymeric mortar?
1) Inspect and prepare: confirm the slab is suitable for adhesive repair (see diagnostic criteria); clean slab top and underside — remove dirt, vegetation and old jointing; let surfaces dry if required by PDS. 2) Support and level: use wedges or shims to hold the slab at correct finished level and alignment. 3) Apply adhesive/bedding: follow product PDS — apply recommended bead pattern or trowelled bedding thickness and coverage to the slab underside or bed surface (ensure coverage per manufacturer; avoid voids). 4) Set slab: lower slab into position, press/bed to ensure contact and correct level, use a rubber mallet to final seat. 5) Maintain shims: keep temporary supports in place until adhesive reaches initial cure time. 6) Finish joints: once cured to specified handling time, fill joints with polymeric jointing mortar or sand per product instructions and clean residues immediately. 7) Cure and return to use: follow manufacturer cure times for foot traffic and full loading (could be hours for rapid polymeric mortars or up to 24–48 hours for some products). Document ambient temperature and humidity as they affect cure.
What are the step‑by‑step instructions for lifting and re‑bedding a slab properly?
1) Safety and staging: cordon area, wear PPE. 2) Remove slab: use pry bar or suction lifter to remove slab carefully to avoid damage. 3) Inspect and repair base: excavate failed bedding and any contaminated sub‑base; remove soft/topsoil; re‑build sub‑base in lifts using MOT Type 1 or engineered aggregate compacted with a plate compactor to specified thickness (typically ~100 mm for pedestrian patios; adjust for local soil/loads). 4) Prepare bed: lay blinding if required and set a full mortar bed (cement:sharp sand ~1:4) to 30–40 mm thickness for large slabs or follow manufacturer bedding spec; or use the appropriate sand bed for segmental pavers. 5) Bed the slab: butter or trowel mortar onto bed and underside to achieve full contact (aim ≥80% underside contact) and set slab level using screed rails and spirit level. 6) Edge restraints: repair or reinstall robust edge restraints to prevent lateral movement. 7) Jointing and cleaning: tool joints and fill with jointing sand or polymeric grout; clean off mortar squeeze‑out before it hardens. 8) Compaction/settling: in some slab systems, use a neoprene mat and plate compactor for even seating after initial set (follow product guidance). 9) Cure: allow mortar to reach recommended strength before traffic (typically 24–48 hours for cement mortar; polymeric mortars may allow quicker use).
When is sticking down with adhesive acceptable and what are its limitations and expected outcomes?
Acceptable when: (a) slab underside contact is largely intact (≥~80%) and voids are localised; (b) sub‑base is sound, dry and free of washout; (c) slab is undamaged and small/medium sized; (d) manufacturer PDS permits adhesive for that substrate and conditions. Limitations: adhesives and polymeric mortars do not fix structural sub‑base failures, root uplift or pervasive settlement; they may be less suitable when slabs must breathe or on very porous/contaminated surfaces without primer. Expected outcomes: durable, flexible bond resistant to water and salts if correct product and prep are used; faster cure and return to use than plain cement mortar. Longevity depends on correct diagnosis — if underlying issues persist, repair will be temporary.
Next Article
How to Fix a Rocking Patio Slab: DIY Steps, Costs & Tips
How to fix a rocking patio slab: step-by-step DIY fixes, costs, tools, safety tips and when to call a pro.