Most patio drainage problems come down to one of three things: water has nowhere to go, something is blocking the path it used to take, or the surface has shifted so it now directs water the wrong way. Once you know which one you're dealing with, the fix is usually straightforward. The tricky part is the diagnosis, and that's where most homeowners waste time and money by jumping to a solution before they've found the real cause.
Patio Drainage Problem: DIY Troubleshooting and Fixes

Talia Lang
29 Apr 2026
Signs that tell you what kind of drainage problem you actually have
Before you do anything, look at what the water is doing. Each symptom points in a different direction, and reading them correctly saves you from tearing up the wrong part of your patio.
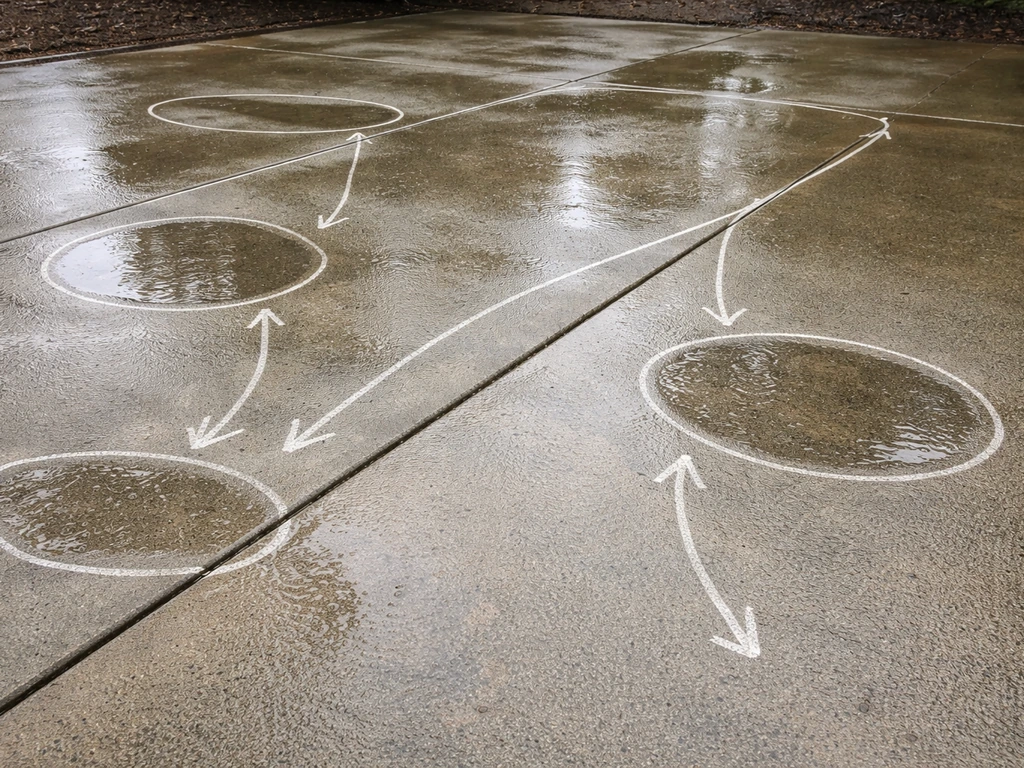
- Puddles that sit for hours after rain: the surface slope is wrong, a low spot has formed, or the water has nowhere to exit
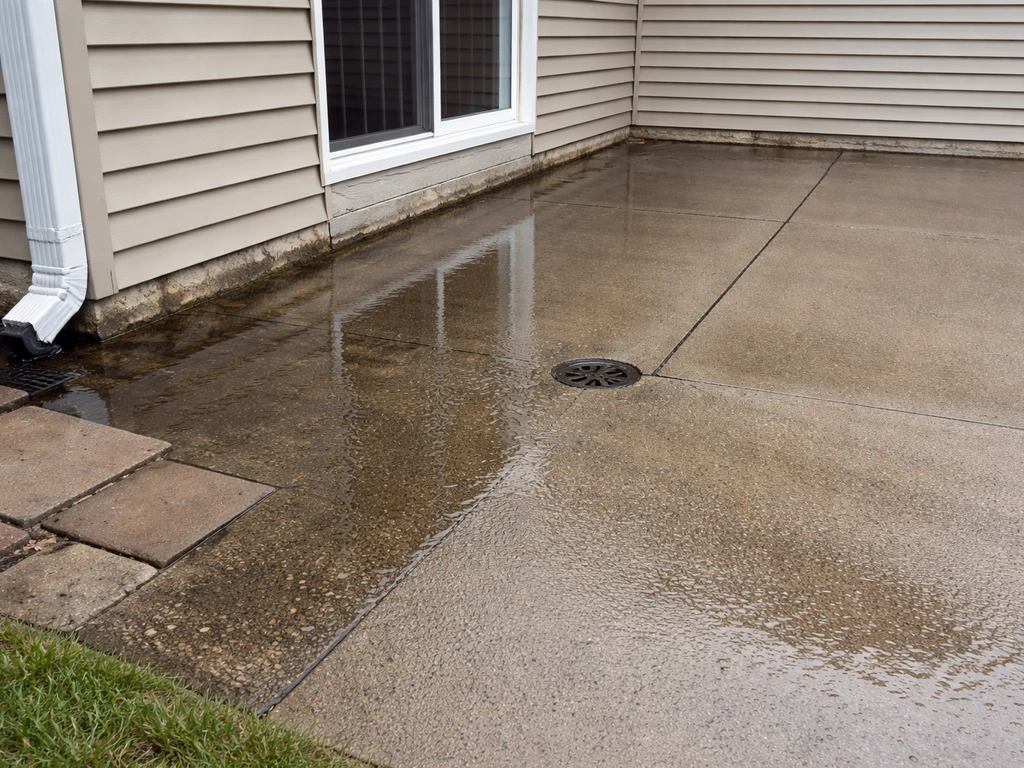
- Water pooling against the house wall: this is the most urgent scenario because it's actively threatening your foundation; the patio is likely sloping toward the house instead of away from it
- Soft or spongy ground under pavers: the base material is saturated or has washed out, creating voids beneath the surface
- Sand washing out of paver joints repeatedly: water is moving through or across the surface fast enough to carry sand with it, usually because runoff is concentrating in one spot
- White crusty deposits (efflorescence) on concrete or pavers: mineral salts are being carried to the surface by moisture, which signals ongoing water intrusion underneath the surface
- Pavers or sections of concrete that have sunk or tilted: settling caused by base erosion or saturated soil compressing under weight
- Damp or moldy smell near the patio edge closest to the house: water is finding its way under the slab or against the foundation wall
Efflorescence looks harmless but take it seriously. It means moisture is moving through the material regularly enough to carry dissolved salts to the surface. That level of moisture movement usually means a drainage problem that's been going on for a while, not just a surface issue.
Run these checks today before you pick up a shovel
You don't need special tools to figure out what's going on. A garden hose, a 4-foot level, and about 30 minutes will tell you most of what you need to know.
The hose test
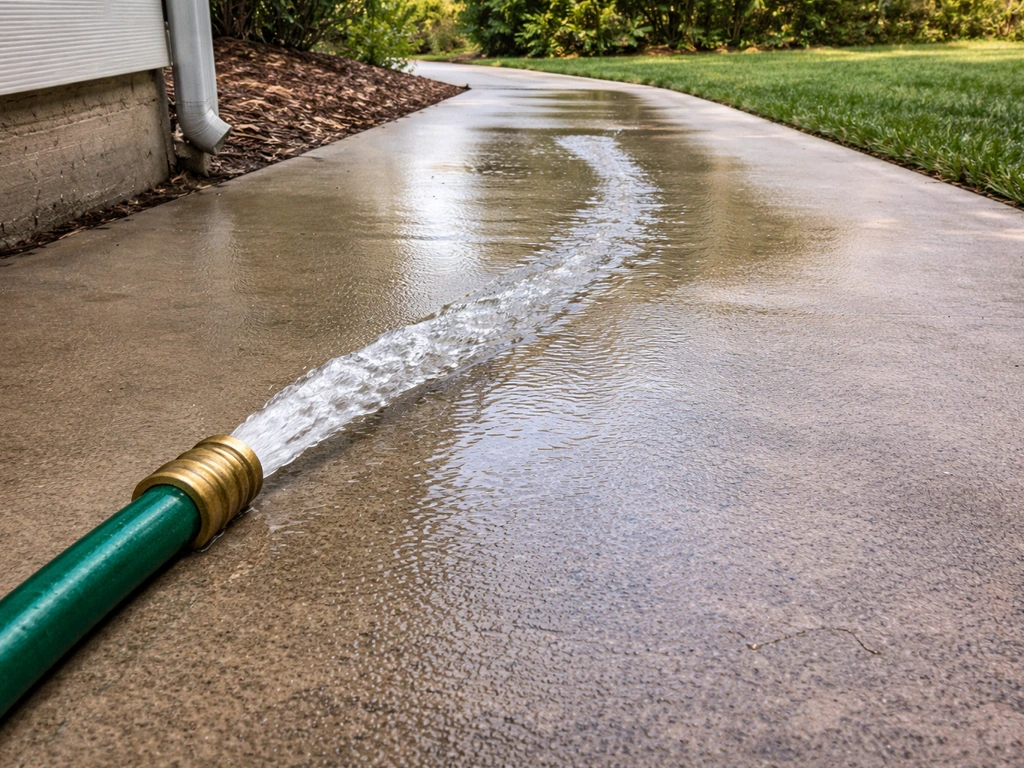
Run a hose on the patio surface for 2 to 3 minutes and watch where the water goes. It should move steadily away from the house. If it pools anywhere, mark those spots with chalk or a piece of tape. If it flows toward the house, that slope needs to be corrected before anything else. Note how long it takes standing water to drain after you shut the hose off. More than 10 to 15 minutes in a spot means you have either a slope problem, a clogged drain, or a surface that's no longer shedding water. If the patio slopes toward the house, you will need to correct the grade so water flows away instead of toward the foundation slope problem, a clogged drain, or a surface that's no longer shedding water.
The level check
Lay a 4-foot level on the patio surface in multiple directions, especially running away from the house. You want to see the bubble shift toward the house side, which means the surface is tilting away from it. A proper slope is at least 1/8 inch per foot away from the house, but 1/4 inch per foot (which equals 1 inch of drop over 4 feet) is a more reliable target for shedding water efficiently. If you're trying to figure out the layout, tiling a patio can also become a math problem, especially when you need consistent edges and slopes tiling a patio math problem. If your level shows the patio is flat or slopes toward the house, you've found your primary problem.
Finding the failure point
Walk the perimeter of the patio and look for where water is supposed to exit. On a concrete patio that's flush with or near a wall, check for weep holes at the base of any adjacent masonry. These small openings are designed to let trapped moisture escape, and they're notorious for getting clogged with debris, mortar drips, or years of dirt. On a paver patio, look at the edge restraints and the perimeter: is there a gap or a gravel border where water can drain off, or is the patio boxed in by landscaping that's higher than the patio surface? Also check your downspouts. A downspout dumping water right at the edge of the patio is often the actual culprit behind what looks like a slope problem.
The usual suspects: what actually causes patio drainage to fail
Most drainage problems aren't random. They have specific causes, and knowing yours changes what you do about it.
Wrong grade or slope
This is the most common cause. Building codes (IRC R401.3) require the ground around a foundation to drop at least 6 inches within the first 10 feet away from the building. For impervious surfaces like concrete patios, the minimum is typically a 2% slope away from the structure, which works out to about 1/4 inch per foot. Many patios were installed with enough slope at first, but settled over the years until they're now nearly flat, or worse, tilted the wrong direction. This is especially common when the patio was poured on fill soil that wasn't properly compacted.
Clogged drains or blocked weep paths
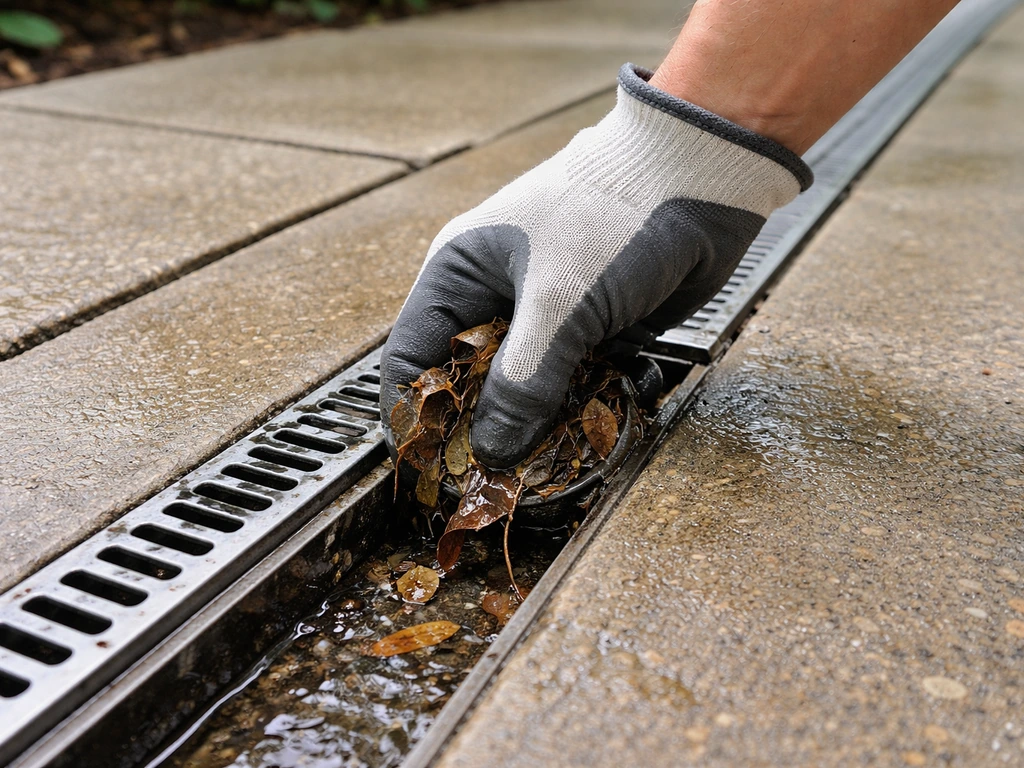
If your patio has a channel drain, area drain, or pop-up emitter, check when it last got cleaned out. Leaves, grit, and root intrusion can block these completely. Weep holes in masonry walls adjacent to the patio are particularly easy to ignore until they're completely packed with debris. A clogged drain can turn a properly sloped patio into a swimming pool during a heavy rain.
Settling and sunken sections
When a section of your patio sinks, it creates a low spot that catches water. On paver patios, this usually means the base material has shifted, compacted unevenly, or been washed out underneath. On concrete, it typically means the fill or subgrade beneath the slab has settled, leaving a void. Voids under concrete are serious because the slab is now unsupported, and foot traffic or vehicle weight can crack it. A hollow sound when you walk or tap on a concrete slab is a reliable sign of a void underneath.
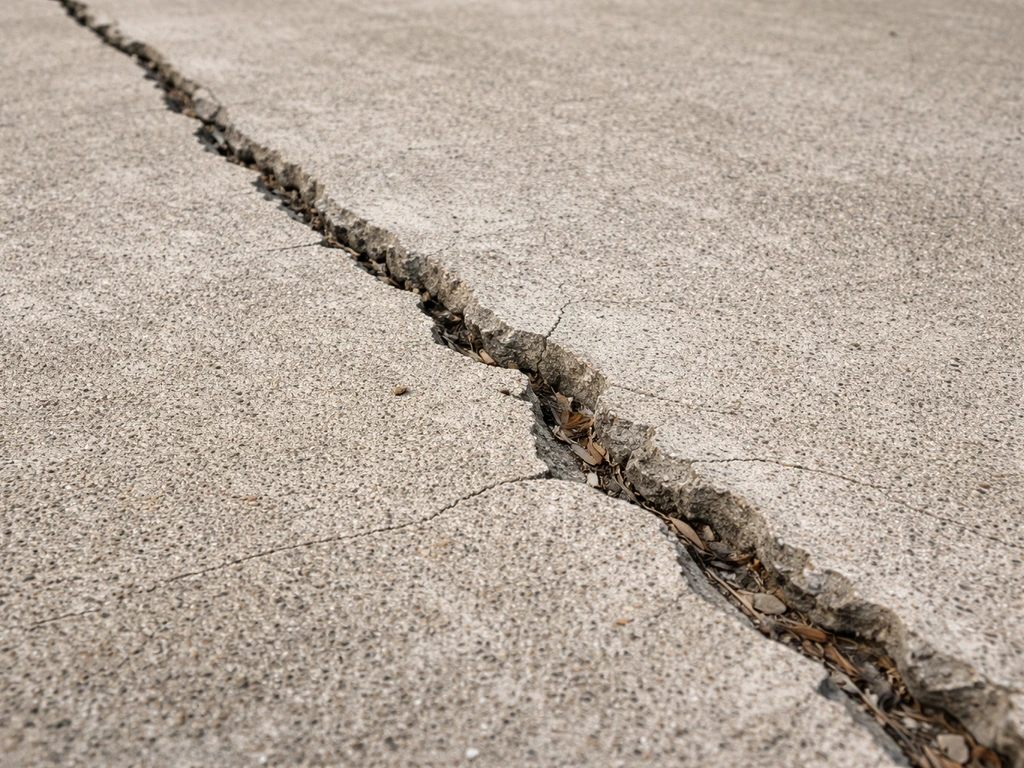
Cracked concrete or failed sealant
Cracks in concrete let water get under the slab. Once water is underneath, it softens the soil, promotes frost heave in cold climates, and can undermine the whole slab over time. Sealant that's worn out or was never applied has the same effect: the concrete itself becomes porous enough to absorb water rather than shedding it. Standing water on concrete accelerates deterioration, leading to spalling and further cracking, which makes drainage even worse.
Downspouts and adjacent runoff
This one catches a lot of people off guard. If a downspout terminates at or near the patio, every rainstorm sends a concentrated burst of roof runoff onto the surface. A patio that handles normal rainfall fine can pool badly when it's also receiving water from 1,000 square feet of roof. Landscaping that's been built up over the years can also start directing neighbors' or your own yard runoff onto the patio. Look at what's uphill from the patio, not just the patio itself.
Fixing a concrete patio with drainage problems
Concrete gives you fewer options than pavers because you can't easily lift and relay it, but there are still several practical fixes depending on what you find.
Seal the cracks first
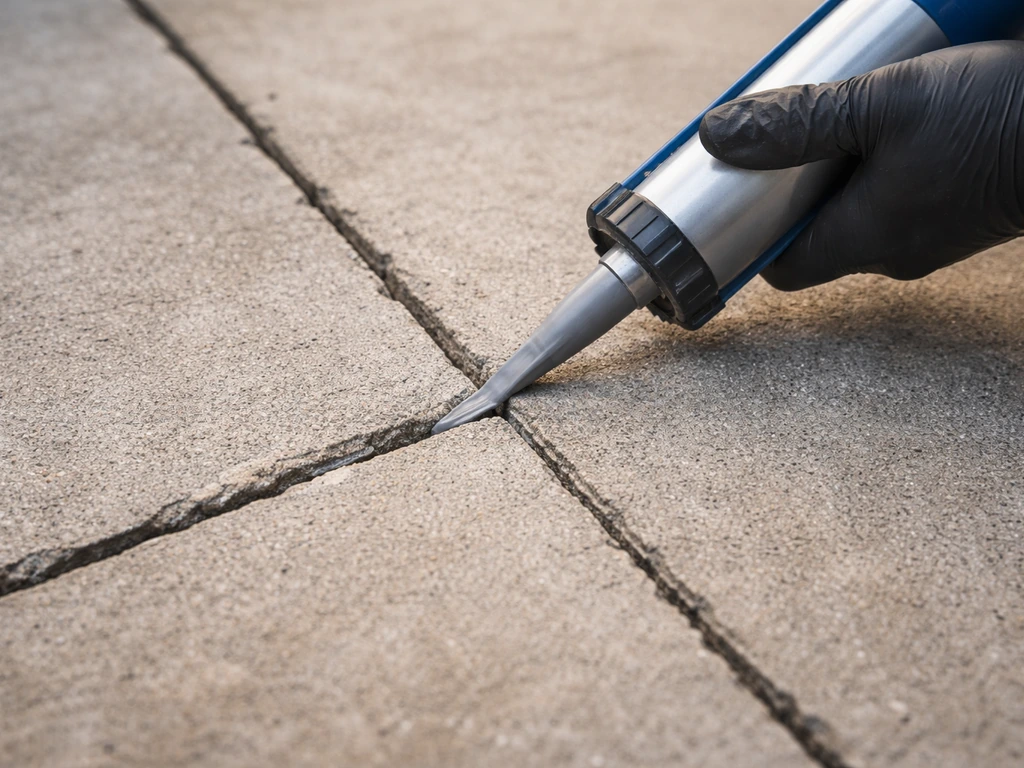
Any cracks wider than a hairline need to be sealed before you address slope or pooling. Use a polyurethane or epoxy crack filler (not regular caulk) for cracks up to about 1/2 inch wide. Clean the crack out with a wire brush and compressed air, let it dry completely, then fill it in two passes if needed. For wider cracks or cracks with vertical displacement (one side higher than the other), you have a structural issue, not just a sealing issue.
Address pooling areas with resurfacing or a topping layer
If the surface has low spots that collect water but the overall slope is acceptable, you can fill them with a concrete resurfacer or a polymer-modified topping mix. These products feather down to thin edges and bond well to existing concrete if the surface is clean and lightly roughened. The key is to create a smooth transition that directs water toward the edge of the patio rather than just raising the low spot enough to create two smaller low spots on either side of it. Take your time with a straightedge to check the new slope as you go.
Re-slope versus full slab replacement
If the entire slab slopes the wrong way, you have two realistic options: overlay the whole surface with a self-leveling or polymer topping that re-establishes the correct pitch, or break out and replace the slab. An overlay can work well if the existing slab is structurally sound (no voids, no widespread cracking, firmly bonded to the subgrade), but it adds thickness at the high end and can create a trip hazard at doorways or transitions. If the slab has significant voids, widespread cracking, or is moving, replacement is the smarter investment. Adding a resurfacing layer over a failing slab just delays the inevitable.
Apply fresh sealant after repairs
Once the surface is repaired and slope is correct, a penetrating concrete sealer (silane-siloxane type) helps prevent future water infiltration without changing the look of the surface. Apply it when the concrete has fully cured and the surface is dry. Reapply every 3 to 5 years, or when water stops beading on the surface.
Fixing a paver patio with drainage problems
Paver patios are actually easier to fix in most cases because you can pull up sections, correct what's underneath, and relay the pavers. The challenge is doing it right so you don't end up back in the same situation two years later.
Diagnose the base, not just the surface
Sunken or tilted pavers almost always point to a base or subbase problem, not the pavers themselves. When you lift a sunken section, you'll typically find either that the compacted gravel base has compressed unevenly, that the bedding sand has washed out from underneath, or that water has softened the subgrade soil to the point where it can't support the load. The ICPI (Interlocking Concrete Pavement Institute) is clear that base conditions must be verified and corrected before any resetting or relaying happens. Just adding sand and pushing the pavers back down is not a fix.
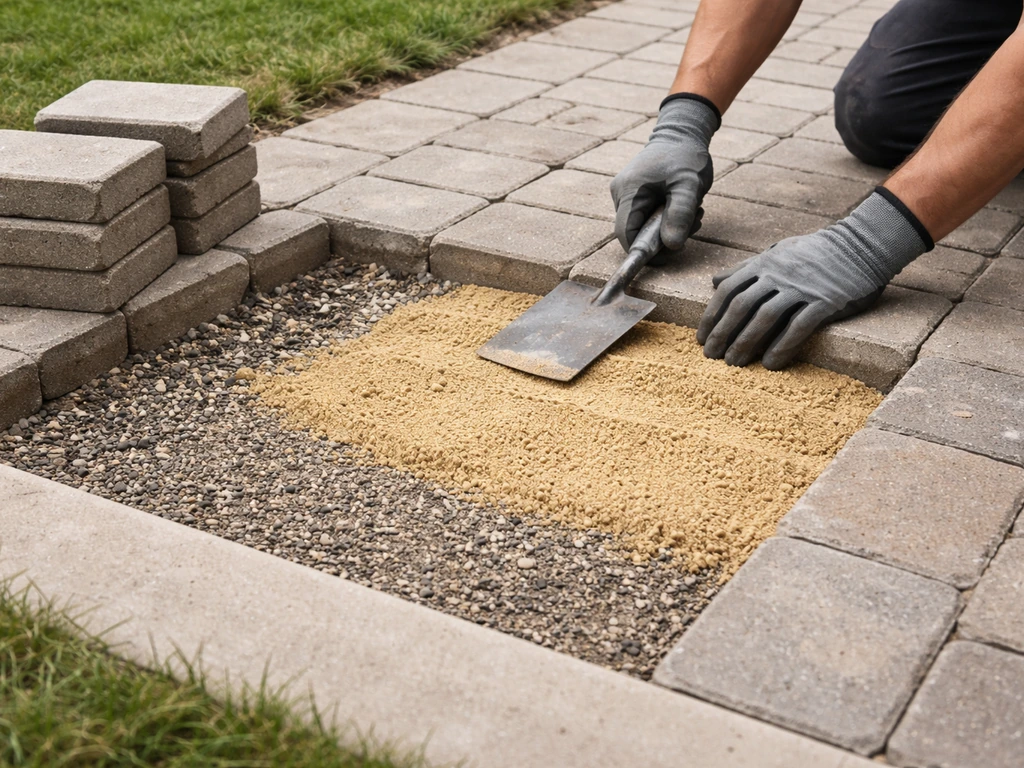
How to relay a sunken section properly
- Pull up all the pavers in the affected area plus one row beyond the visible damage to expose the full extent of the problem
- Remove the bedding sand layer and inspect the compacted gravel base: it should be firm, not soft or muddy
- If the base is soft or saturated, remove it down to stable soil, allow the area to dry, and add new compacted gravel base material in 3- to 4-inch lifts, compacting each lift with a plate compactor
- Check the slope of the base with a level before you add the bedding sand: aim for at least 1/8 to 1/4 inch of fall per foot away from the house
- Screed a fresh 1-inch layer of coarse bedding sand (not fine play sand) over the compacted base at the correct slope
- Reset the pavers, check each one with a level as you go, then compact the entire section with a plate compactor fitted with a rubber pad to protect the paver faces
- Sweep polymeric sand into the joints in two or three passes, compact again lightly, mist with water to activate the binder, and keep foot traffic off for 24 hours
Joint sand washout: fix the water first
If you're constantly topping up joint sand because it keeps washing away, adding more sand is just maintenance, not a repair. The water movement carrying the sand out needs to be redirected or slowed first. Check where the water is entering the patio from (downspout, runoff from lawn, etc.) and address that source. Then re-evaluate the slope to make sure water crosses the patio quickly rather than lingering. Once the water behavior is corrected, sweep polymeric sand into the joints rather than regular jointing sand. It locks together when activated with water and is significantly more resistant to washout.
Drainage layer under the pavers
A standard paver installation includes a compacted gravel base that allows water to percolate downward and move laterally through the aggregate. If yours was installed with a lean concrete base or a non-permeable layer underneath, it may be trapping water in the bedding sand with no exit route. If you open up a section and find saturated sand sitting on top of concrete or dense clay with no gravel layer, that's your drainage failure. The long-term fix is a proper aggregate base, but that means a more significant rebuild.
Bigger fixes: rerouting runoff, regrading, and when you need to excavate
Some drainage problems can't be solved at the patio surface alone. When the issue is the surrounding landscape directing water onto the patio, or the patio grade is so far off that resurfacing won't create a workable slope, you need to think bigger.
Cleaning and unclogging: the first stop
Before any excavation or regrading, clean every drain, weep hole, and channel on and around the patio. Use a plumber's snake or a pressure washer tip on any drain that looks slow or blocked. Scrape and clear any weep holes in adjacent masonry. Pop up emitters and channel drain grates are easy to remove and rinse out. Do all of this first and rerun your hose test. You might be surprised how often this alone solves what looked like a complicated drainage problem.
Rerouting downspouts and runoff
If a downspout is dumping onto or near the patio, extend it with a flexible downspout extension or connect it to a buried 4-inch PVC pipe that carries the water at least 6 to 10 feet away from the house before daylight. This is a cheap, high-impact fix that many homeowners overlook. If adjacent landscaping is higher than the patio and directing sheet flow across it, installing a small swale (a shallow V-shaped channel graded to carry water around the patio) in the lawn can intercept that runoff before it reaches the surface.
Regrading the area around the patio
If soil around the patio has settled or been raised over the years until it's now higher than the patio edge, water has no place to go. Regrading involves removing excess soil along the patio perimeter and reshaping the surrounding grade so it falls away from the patio and the house. The target is at least a 6-inch drop over the first 10 feet from the foundation. This is manageable as a DIY project with a shovel and a wheelbarrow if the area isn't too large, but it takes a few hours and careful attention to make sure you're not just moving the drainage problem to a new spot.
When excavation becomes necessary
If the base under a concrete slab has failed, the subgrade is chronically wet clay that drains poorly, or you need to install a French drain system under or beside the patio, you're looking at excavation. A French drain is a gravel-filled trench with a perforated pipe that intercepts groundwater and carries it away. It works well when water is saturating the soil beneath the patio rather than just ponding on the surface. The pipe needs a consistent slope of at least 1% (about 1/8 inch per foot) to keep water moving, and the trench needs to be wrapped in landscape fabric to prevent soil from clogging the gravel over time. This is doable as a DIY project around the patio perimeter, but it involves real digging and takes a full day or more depending on the size of the area.
How to keep water moving after you've fixed the problem
A repaired drainage system stays repaired if you do a little maintenance each year. Most drainage failures that come back do so because of neglect, not because the original fix was wrong.
- Clean patio drains and channel drains every spring and fall, especially after leaves are down in autumn
- Check and clear weep holes in adjacent masonry walls at the same time
- Walk the patio perimeter after the first few heavy rains of the season and look for new low spots or water backing up near the house
- Inspect paver joint sand each spring: top it up with polymeric sand if joints are more than half empty, and look for areas where sand loss is concentrated (which usually means a water concentration issue that needs addressing)
- Reapply concrete sealer every 3 to 5 years on concrete surfaces; look for areas where water soaks in rather than beading, which tells you the sealer has worn out in that spot
- Keep the grade around the patio edge clear: don't let mulch beds or soil build up against the patio edge over time, which gradually eliminates the drainage gap
- Check downspout extensions each spring to confirm they're still attached, aimed correctly, and the outlet isn't blocked by debris
When this isn't a DIY job
Most patio drainage problems are DIY-friendly if the damage is limited and the cause is clear. But some situations are genuinely beyond what makes sense to tackle yourself, and knowing the difference saves you from making a problem worse.
| Situation | Why It Needs a Pro | Risk of DIY |
|---|---|---|
| Water pooling against foundation wall repeatedly | Foundation drainage and waterproofing may be compromised; affects structural integrity | Can accelerate foundation damage or hide a larger waterproofing failure |
| Widespread voids under a concrete slab | Slab is unsupported; may require slab lifting (mudjacking/polyurethane foam injection) or full replacement | Slab can crack suddenly under load; incorrect filler can cause further settlement |
| Chronic saturation in the subgrade soil | May require engineered drainage, soil correction, or curtain drain design | Improper French drain installation can redirect water toward the foundation instead of away |
| Excavation near buried utilities | Any digging deeper than 12 inches near the house requires utility locates (call 811 in the US before you dig) | Striking a gas line, electrical conduit, or water supply is a serious safety hazard |
| Permit-required drainage changes | In many municipalities, adding area drains or connecting to storm sewer systems requires a permit | Unpermitted drainage work can affect home sale, insurance claims, or liability |
If water is pooling against your house wall after rain, that situation sits at the intersection of drainage repair and foundation protection. Don't just patch the patio surface and hope for the best. Get a drainage or foundation contractor to look at it, because the cost of a consultation is trivial compared to the cost of foundation repairs. Similarly, if your patio is sinking and you hear hollow sounds across a large portion of the slab, that's not a resurfacing job. If your patio is sinking, it can indicate an underlying void or base settlement that requires a more structural fix. If your patio is sinking, it can indicate an underlying void or base settlement that requires a more structural fix how to fix a slanted patio. That's a structural assessment job.
For most homeowners, though, a methodical approach works: run the diagnostics, identify which of the common causes fits your symptoms, and work through the appropriate fix path for your surface type. <a data-article-id="568B19DF-E28A-4BAC-9C74-D8867A59B5B2">Fix the water source and slope first</a>, then address the surface damage, then maintain it going forward. That sequence solves the problem for good instead of just treating the symptoms.
FAQ
Should I do patio drainage repairs right after heavy rain?
Yes. If the water pools during a hose test or it drains slowly after shutoff, wait to repair until the concrete surface is fully dry and the ground underneath is not saturated, otherwise resurfacer, patch, and sealers can fail or re-crack. A practical check is to tape a small 2 ft by 2 ft plastic sheet to the patio overnight, if you see condensation or darkening under the plastic in the morning, the area is still too wet to coat.
How can I tell if my patio drainage problem is a surface issue or a slope/base issue?
Use a simple evidence method: during the hose run, note whether water pools exactly in tile-to-tile or paver-to-paver seams (often a joint issue or local low spot) versus pooling as a broader patch (usually slope, clogged edge drainage, or base/subgrade failure). Also check timing, if the pool remains after the hose stops for more than 10 to 15 minutes, it usually indicates grade, blockage, or loss of surface shedding rather than just small surface wear.
What’s the best way to measure patio slope so I don’t misdiagnose the drainage problem?
Don’t rely on a single measurement. Recheck slope in several directions (at least along two lines that run away from the house and one line across the patio) because settled slabs and compressed base can create “micro-highs” and “micro-lows.” If you find flat spots only in one area, that points to a localized base or void, while consistently wrong slope across the whole patio points to regrading or a full resurfacing/overlay strategy.
Can I just seal concrete cracks to fix a patio drainage problem?
If you have concrete, hairline cracks can be sealed, but widened cracks or any crack with vertical displacement suggests a structural or base problem. A helpful decision aid is the “movement test”: press on both sides with a putty knife and look for crumbling edges, or place painter’s tape across the crack and see if the tape loosens after rain. If there is movement or unsupported sections (hollow sound), prioritize drainage and structural assessment over sealing.
Will switching joint sand to polymeric sand fix washout or recurring patio drainage problems?
Polymeric sand can clog joints if the underlying base is trapping water, but switching to polymeric sand will not fix a true drainage failure. If your topping-up keeps happening after every rain, first identify where incoming water is entering (downspout discharge, higher landscaping runoff, or blocked perimeter drainage) and verify that water can travel across the base toward an edge exit. Only then reset pavers and use polymeric sand so you are not locking in moisture.
What should I do first if I think the drainage problem is from a clog?
If you suspect a clogged drain or weep holes, clear them before you change slope or start any major surface work. After cleaning, rerun the hose test and measure how long standing water remains, a fast improvement is a strong sign the system was the bottleneck. If the problem persists with drains cleared, then you can trust the slope and surface diagnostics more.
Could my patio drainage problem be caused by water from the roof or landscaping uphill?
Yes, downspout discharge and yard runoff are common “hidden causes” that mimic slope problems. A fast check is to run the hose at the patio and separately watch during a real rain or a timed sprinkler test in the area uphill, if pooling worsens during roof runoff or sheet flow, you likely need to redirect the source (extend downspout or add a buried discharge line, or install a small swale) before correcting the patio pitch.
When should I stop DIY work and call a professional for a concrete patio drainage problem?
If the concrete slab is hollow sounding or a large section is sunken, resurfacing or topping is often a temporary cosmetic fix, and it can create more trip risk and ongoing cracking. A better next step is to identify voids, check whether water is getting underneath through cracks, and decide whether excavation or a slab-leveling or replacement approach is warranted. When in doubt, a drainage or foundation consult is usually cheaper than repeated surface patching.
How do I decide between resurfacing a patio and installing a French drain?
Not always. A French drain or other subsurface approach is typically the right direction when the ground beneath stays saturated, the hose test shows surface shedding issues but also you notice chronically wet soil, or your drainage problem persists even after confirming slope and clearing outlets. If the problem is mainly surface ponding with adequate subsurface behavior, resurfacing or regrading is usually less invasive than trenching.
What maintenance actually prevents patio drainage problems from coming back?
Annual maintenance should be small and seasonal, start with clearing leaves and grit from drains, weep holes, and channel grates before the rainy season, then inspect edges for landscaping that has grown or settled up against the patio. Also recheck downspout extensions for shifts, and if you see efflorescence returning or joints eroding, treat it as an early warning to repeat the hose test rather than waiting for a full failure.
Next Article
How to Fix Cement Patio Cracks: Diagnose and Repair
Diagnose concrete patio crack types and repair with the right sealant or patch, from prep to curing and prevention.