Yes, you can seal patio slabs yourself, and it's a genuinely useful project when the conditions are right. But the honest answer is that sealing works best as protection on a slab that's already in decent shape. If your concrete is cracked, actively weeping moisture, or still pushing out efflorescence, slapping sealer on top will either peel within a season or lock problems in place. The fix isn't complicated, but the prep work and product choice matter far more than most people expect.
Can You Seal Patio Slabs? When, Prep, and How to Seal

Talia Lang
26 Jun 2026
When sealing actually works vs when it doesn't
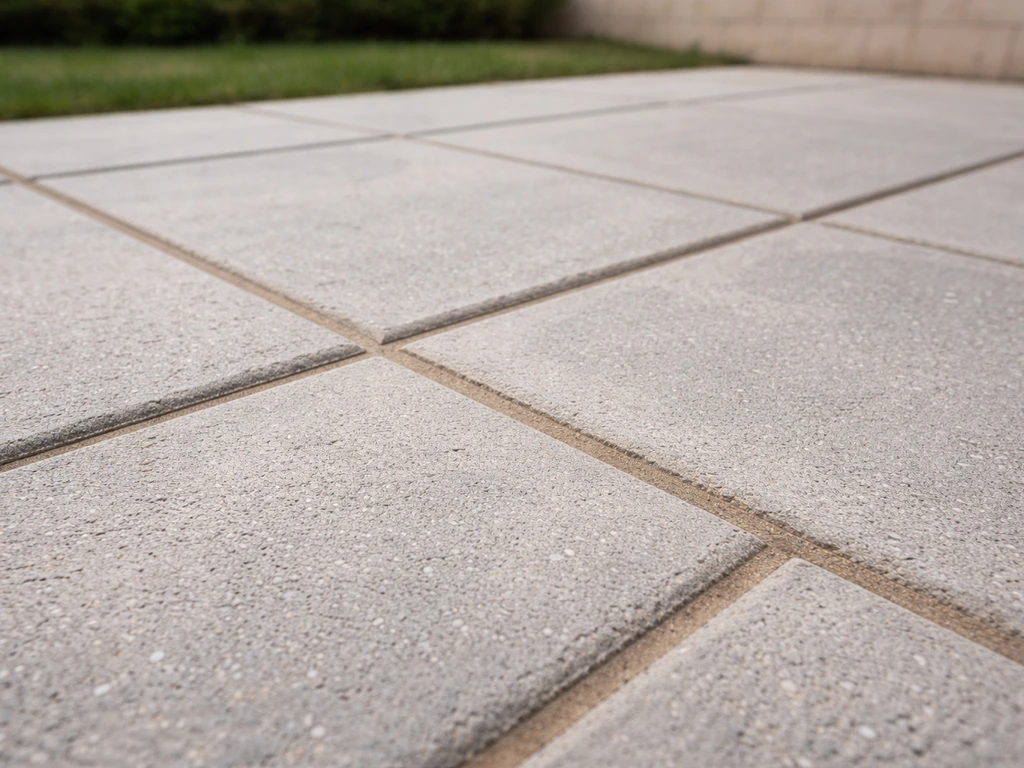
Sealing is worth doing when your slab is structurally sound but showing wear from weather, freeze-thaw cycles, UV, or light staining. A penetrating sealer on a clean, dry, porous slab genuinely reduces water absorption, resists oil and salt damage, and slows future deterioration. A topical (film-forming) sealer can refresh the look and add a sheen. Both do their jobs well when the surface underneath is ready for them.
Sealing won't work, and can make things worse, in a handful of situations. If water is pushing up through the slab from below (hydrostatic pressure), a surface sealer will bubble and peel because the moisture has nowhere to go. If efflorescence (that white powdery salt residue) keeps coming back, the moisture driving it hasn't been fixed, and painting or sealing over it will fail quickly. Sealers also can't bridge significant structural cracks, fill spalling pits, or fix settlement.
Those problems need repair first, not a coat of sealer. And if a prior sealer is still on the surface, many products including certain penetrating formulations simply cannot bond through it. And if a prior sealer is still on the surface, many products including certain penetrating formulations simply cannot bond through it <a data-article-id="47C5C3E4-25F3-4576-9B5F-6F0FA3B8D353">how do you seal a patio?
(patio sealer compatibility and bonding) cannot be ignored when an old sealer remains on the surface, so you may need to strip or test first like this guide explains as part of sealing failures and fixes. .
- Sealing works: Sound slab with surface wear, minor staining, open pores, no active moisture issues
- Sealing works: Post-repair consolidation to protect fresh patching compound
- Sealing won't fix: Active water infiltration from below (hydrostatic pressure)
- Sealing won't fix: Ongoing efflorescence without addressing the moisture source first
- Sealing won't fix: Structural cracks wider than hairline, deep spalling, or sunken sections
- Sealing won't fix: Incompatible existing coatings that haven't been removed
How to assess your slab before you buy anything
Before spending money on sealer, spend 20 minutes actually looking at your slab. You're checking four things: cracks, surface condition, moisture, and existing coatings.
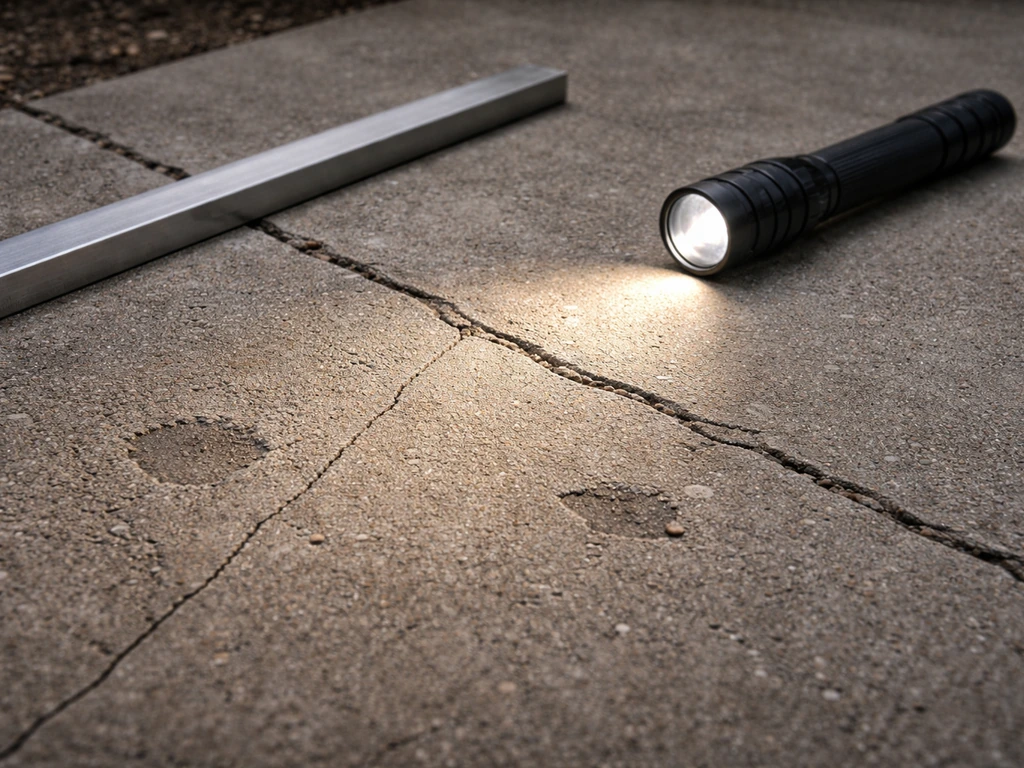
Cracks
Hairline cracks (under 1/8 inch wide) that aren't growing are cosmetic and can be sealed over once filled. Cracks wider than that, cracks that have edges at different heights, or cracks that are visibly growing are structural signals. Measure them, note whether the edges are level, and check back after a few weeks of rain and temperature change. A crack that's stable and less than 1/4 inch wide can usually be filled with a concrete crack filler before sealing. Anything wider or unstable needs proper repair first, and potentially a conversation with a structural engineer if your slab is connected to your foundation.
Spalling and pitting
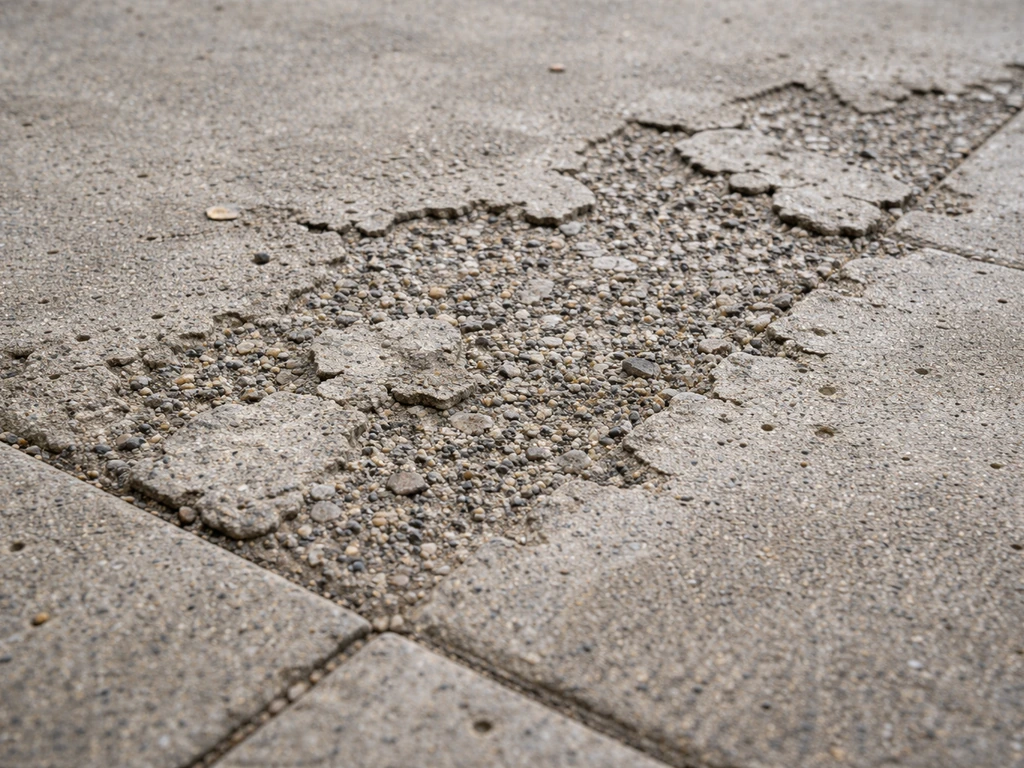
Spalling is where the top layer of concrete flakes off, leaving rough, pitted patches. It's usually caused by freeze-thaw damage or a weak surface mix. Light spalling can be patched with a resurfacing compound before sealing. Heavy spalling that goes deeper than about 1/4 inch across large areas is better handled with a full resurfacing product, not just sealer.
Efflorescence
Efflorescence is the white, chalky deposit you see on concrete or brick. It happens when water moves through the slab, picks up soluble salts, and deposits them on the surface as it evaporates. If you see it, you have a moisture pathway. Scrub it off with a stiff brush or wire brush, rinse thoroughly, and then watch. If it comes back within a few weeks, the moisture source hasn't been addressed. That might mean fixing gutters, improving drainage around the slab, or dealing with a rising water table. Seal only once the efflorescence has stopped recurring, and allow at least 48 hours of drying time after removal before applying any sealer.
Moisture and existing coatings
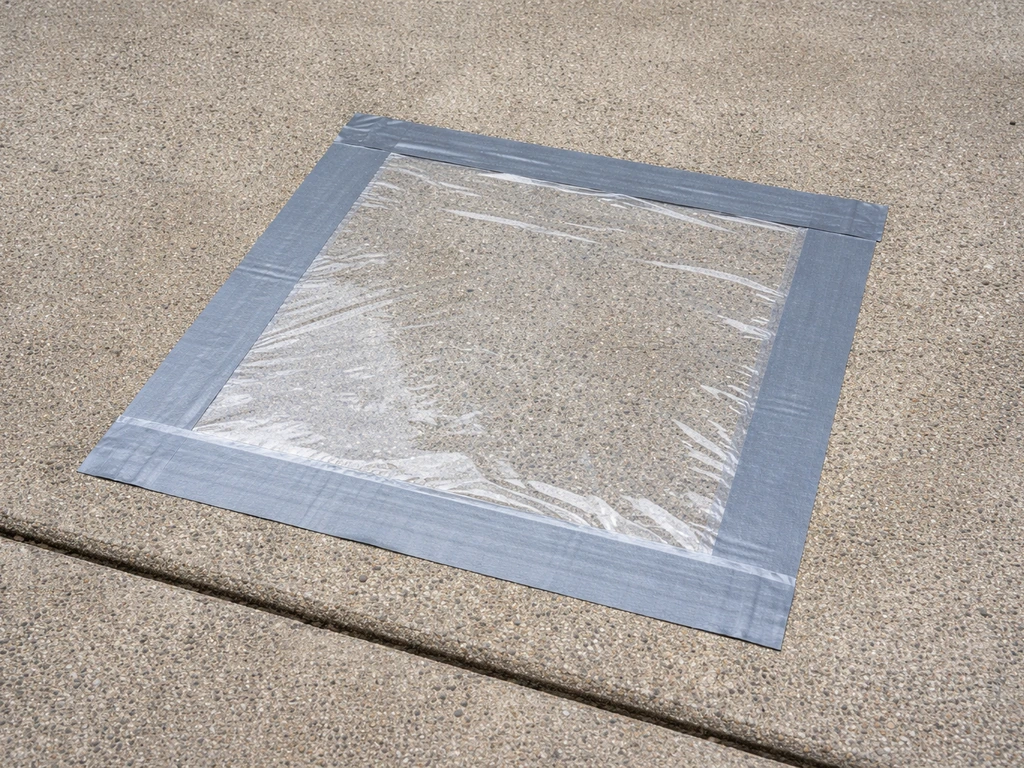
Tape a piece of plastic sheeting (about 18 inches square) flat to the concrete with duct tape on all four edges and leave it for 24 to 48 hours. If moisture beads up under the plastic when you pull it off, the slab is too wet or has active moisture drive from below. Don't seal it yet. For existing coatings, look for sheen, peeling, or flaking.
If your slab has been sealed before and the old sealer is still partially bonded, many products including certain penetrating sealers cannot be applied over it. Pressure-washing advice from a sealing community also warns that leaving residues or lines from prior sealers can prevent proper bonding, so you may need to strip and re-clean before resealing old sealer and surface residues must be stripped for products to bond.
how to seal patio tiles sealer. You'll need to strip it or test compatibility first.
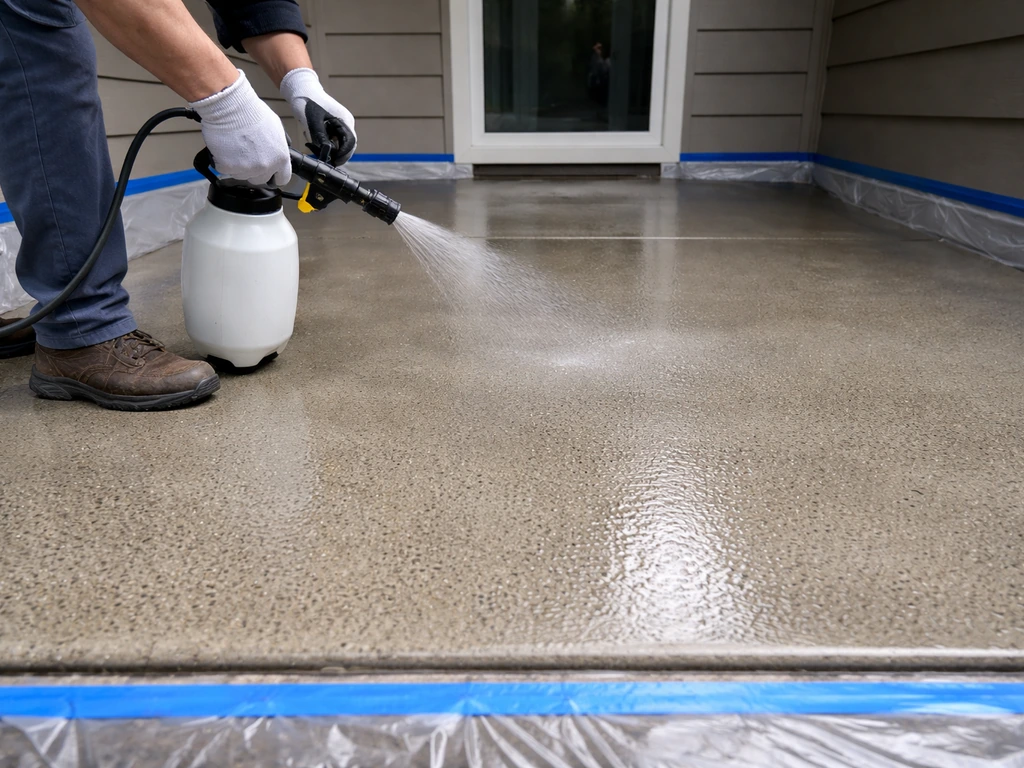
Surface prep: the step most people skip
Good prep is the difference between a sealer that lasts five to ten years and one that peels by spring. This is the part that takes real time and effort, and it can't be rushed.
- Clear the slab completely: remove all furniture, planters, and debris
- Sweep and blow off loose material, then inspect for cracks, spalling, and joint condition
- Degrease any oil or grease spots: scrub with a dedicated concrete degreaser or dish soap and a stiff brush, rinse thoroughly; don't let contamination get pushed into clean areas
- Pressure wash the slab: 2,000 to 3,000 psi is the practical sweet spot for most patio concrete; keep the nozzle moving and hold it at a consistent angle to avoid etching lines; don't go above 3,500 psi or you risk damaging the surface
- Repair cracks: fill hairline to 1/4-inch cracks with a flexible concrete crack filler; for wider cracks use a concrete repair mortar and follow the manufacturer's cure time before sealing
- Patch spalling and pitting: use a concrete patching compound, feather the edges, and let it cure fully (usually 24 to 72 hours minimum depending on product)
- Address expansion and control joints: these joints exist to allow the slab to move, so don't fill them with rigid filler or standard caulk; use a flexible polyurethane joint sealant rated for concrete movement; never cover or bridge expansion joints with a topical sealer coat
- Remove failed old sealer: if the existing coating is peeling, flaking, or incompatible with your new product, strip it using a chemical stripper designed for concrete, then clean again
- Final rinse and dry: rinse the slab thoroughly after any cleaning or etching, then allow it to dry completely; this typically means 24 to 72 hours of dry weather depending on conditions and slab porosity
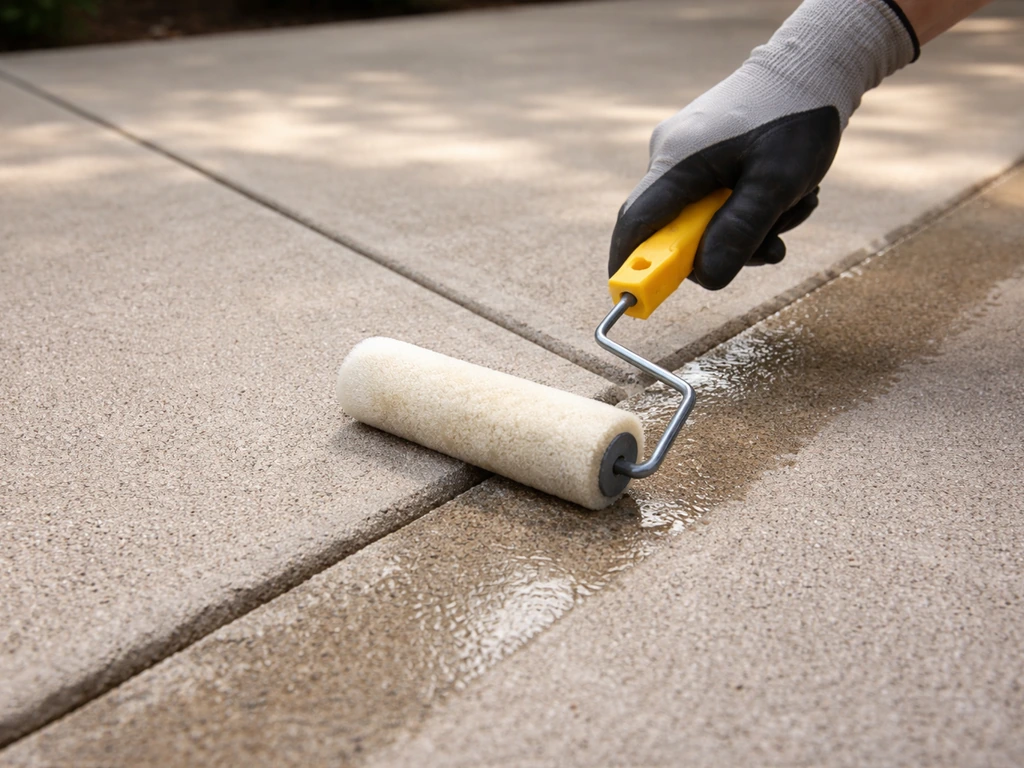
On the drying point: this isn't optional. Applying sealer over damp concrete is the single most common reason sealers fail. For best results when you apply patio sealer with a roller, make sure the surface is fully dry before you start Applying sealer over damp concrete. The moisture gets trapped, turns to vapor as the slab warms up, and pushes the sealer off from underneath. When in doubt, wait another day.
Choosing the right sealer: penetrating vs topical
There are two fundamentally different types of concrete sealer, and they do different jobs. Picking the wrong one for your situation is a common and frustrating mistake. If you are trying everbuild patio sealer instructions, double-check you picked the right sealer type for your situation so you avoid the common mistake of choosing incorrectly.
| Feature | Penetrating (Silane/Siloxane) | Topical (Film-Forming) |
|---|---|---|
| How it works | Soaks into the concrete and chemically bonds inside the pores | Sits on top of the surface as a protective film |
| Appearance | Invisible or very slight darkening; no sheen | Matte to high-gloss finish options |
| Breathability | Highly breathable; moisture vapor can still escape | Less breathable; can trap moisture if applied wrong |
| Best for | General weather protection, freeze-thaw resistance, salt damage prevention | Aesthetic enhancement, stain resistance, decorative concrete |
| Longevity | Silane: 7-10+ years; siloxane: 5-7 years | 2-5 years typical; needs more frequent recoating |
| Compatibility with prior sealer | Usually cannot be applied over existing coatings | Depends on product; many require same-brand or same-type base |
| DIY difficulty | Moderate: spray and back-roll; requires dry slab | Moderate: roller or sprayer; very sensitive to moisture and temperature |
For most outdoor concrete patios, a penetrating silane-siloxane sealer is the better choice. To get the best results, follow a clear, step-by-step approach to how to seal a slate patio, including the right sealer type and careful surface prep outdoor concrete patios. It doesn't change the look dramatically, which suits most people, and it's far more forgiving about moisture vapor moving through the slab over time.
Products like the QUIKRETE Concrete and Masonry Waterproofing Sealer (a water-based silane-siloxane blend) cover around 75 to 150 square feet per gallon, which is thirstier than topical products because the sealer is actually soaking in. Foundation Armor's SX5000 is a solvent-based option that penetrates aggressively and claims up to 7 to 10 years of service life on suitable slabs.
If you want a wet look or glossy finish, you're in topical territory. These work well on decorative concrete, stamped slabs, or where appearance matters most. Just understand you're committing to more frequent recoating and that the surface prep has to be perfect because the film will reveal every imperfection and trap any residual moisture underneath. Also worth noting: if your slab has been previously sealed with a topical product and you want to switch to a penetrating sealer, you'll need to fully strip the old coating first, since penetrating products cannot get through an existing film.
How to apply sealer to patio slabs: step by step
Before you start: conditions checklist
- Air temperature between 50 and 90°F (10 to 32°C): below 50°F the sealer won't cure properly; above 90°F it can dry too fast and streak
- Relative humidity below 85%
- No rain forecast for at least 24 hours after application
- Slab surface completely dry (the plastic sheet test from earlier should show no moisture)
- No direct hot sun on the slab during application if possible: work in shade or early morning to avoid flash-drying
What you'll need
- Sealer (calculate coverage: measure your slab in square feet, divide by the product's listed coverage rate, and add 10% for waste)
- Pump garden sprayer or airless sprayer with an adjustable tip, OR a paint roller with a 3/8-inch nap roller cover
- Paint tray if using a roller
- Brush or small roller for edges and tight spots
- Gloves and eye protection
- Drop cloths or plastic sheeting to protect anything adjacent to the slab
Application
- Start at the far end of the patio and work toward an exit so you don't seal yourself into a corner
- For penetrating sealers: apply with a pump sprayer in a consistent side-to-side pattern, then immediately back-roll with a roller to work the sealer in and eliminate any puddles or pooling; puddling is a problem because it creates a surface film that can peel
- For topical sealers: apply with a roller in thin, even coats; avoid over-applying; thinner coats bond better and last longer than thick single coats
- Cut in around edges and along walls with a brush first before rolling the main field
- Do not coat over expansion joints or control joints; sealer should stop at the joint edge; use your flexible polyurethane joint sealant in those gaps separately
- Allow the first coat to tack up per the manufacturer's time (typically 1 to 4 hours at normal temperatures)
- Apply a second coat if the product recommends it or if the slab is very porous and absorbed the first coat heavily; apply perpendicular to the first coat direction for even coverage
- Keep foot traffic off for at least 24 hours; protect from rain for at least 24 hours; give it 72 hours before returning heavy furniture or planters
How long it lasts and when to recoat
Penetrating silane-siloxane sealers are the longest-lasting option for outdoor concrete slabs. Silane-based products can last around 7 to 10 or more years before needing a recoat. Siloxane-based versions typically run 5 to 7 years. Topical film-forming sealers need more attention: most require recoating every 2 to 5 years depending on traffic, UV exposure, and how well the original application was done.
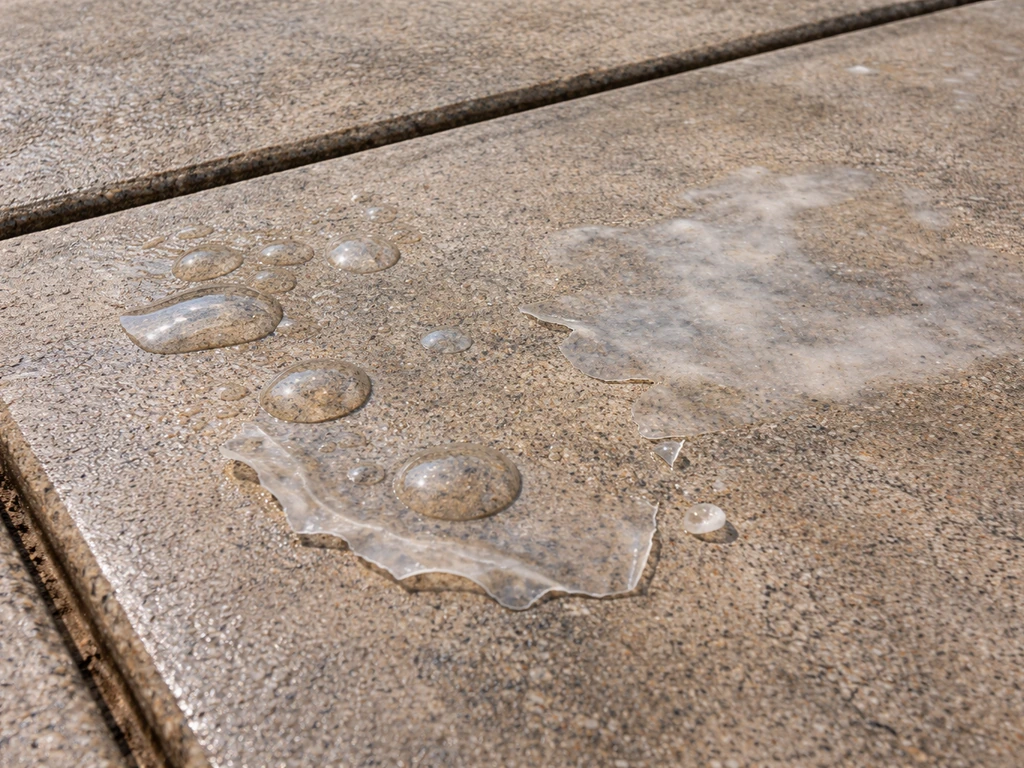
The practical test for recoating a penetrating sealer is simple: pour a small amount of water on the slab. If it beads up and rolls off, the sealer is still working. If the water soaks in and darkens the concrete, it's time to recoat. For topical sealers, look for dulling, flaking at edges, or areas where water is no longer beading.
Maintenance between coats is basic but worth doing. Sweep regularly to prevent grit from grinding into the surface. Clean oil or chemical spills promptly before they can penetrate. Avoid using harsh deicers like rock salt on sealed concrete, especially with topical coatings; use sand or a concrete-safe deicer instead. These habits alone can add years to a sealer's service life.
Common mistakes, failures, and what to do about them
Peeling and bubbling
The most common cause is moisture trapped under the sealer. This happens when the slab wasn't fully dry before application, when the sealer was applied over a damp day, or when a non-breathable topical sealer was put over a slab with active moisture drive from below. The fix is strip the failed sealer, identify and address the moisture source, let the slab dry completely, and reapply. There's no shortcut around this. If you apply a new coat over a bubbling one, you're just adding layers of failure.
White haze or cloudy patches
Cloudy or milky areas in a sealer coat usually mean the sealer was applied in humid conditions, cooled too fast, or was applied too thick. With topical sealers, this is particularly common. The practical fix is to strip the affected area, ensure conditions are right (temperature in range, humidity below 85%, no rain coming), and reapply a thinner coat. For example, Rust-Oleum RockSolid Natural Look Sealer specifies applying within a 50, 90°F temperature range and not applying if rain is expected within 24 hours, and it recommends degreasing and oil and grease spot cleaning as part of prep blank" rel="noopener noreferrer">temperature in range. Some clouding from residual moisture can also be worsened by sealing over incompletely dried efflorescence treatment.
Dark patches or uneven colour
Uneven darkening usually means the sealer was applied inconsistently, the slab had variable porosity (some patched areas absorb differently from the original concrete), or there was contamination in spots that blocked penetration. Thorough degreasing before application prevents most of this. If it's already done and the look is uneven, a light additional coat applied carefully can even things out if the product is still compatible, but test in a small area first.
Sealing over an incompatible existing product
This is a particularly frustrating situation because it often only becomes obvious after the new sealer is down. Signs include delamination, bubbling, or a tacky surface that never fully cures. If you switch from one sealer type to another (say, from a topical wet-look sealer to a penetrating product), you need to strip the old product first. Chemical strippers for concrete are available at most hardware stores, and the process typically involves applying the stripper, letting it dwell, scrubbing, and then thorough rinsing before starting fresh.
Expansion joint problems
Don't bridge expansion joints with a topical sealer coat and don't fill them with rigid filler. Caltrans' Concrete Pavement Guide also cautions that for certain joint systems, new JPCP/CRCP joints should not be sealed. These joints exist to allow the slab sections to move independently. Bridging them causes the coating to crack right at the joint every time. Use a proper flexible polyurethane concrete joint sealant in the joint itself, applied separately from the field sealer.
When to call a professional
DIY sealing is realistic for most homeowners with a sound slab. If you are sealing a stone patio table, the same approach applies: check for moisture problems, then choose the right sealer for the surface and finish you want. But there are situations where calling a professional is the smarter move. If you have active hydrostatic pressure (water pushing up from below), you need drainage or waterproofing work, not a surface sealer.
If your slab has structural cracks that have shifted, or if sections have sunk or heaved, that's a repair job first. If you've stripped old sealer and the slab looks like it's been through a war, a professional resurfacing contractor can assess whether the slab is worth sealing at all or whether a full resurfacing with a bonding overlay makes more sense.
Sealing is maintenance; it isn't a structural repair, and treating it as one is how you end up doing the job twice.
FAQ
Can you seal patio slabs if it rained the day before?
Only if the slab is truly dry throughout, not just surface-dry. After rain, re-check with the plastic-sheet test (24 to 48 hours) and wait for a dry forecast, since trapped moisture is the most common cause of peeling and bubbling.
How long should I wait after removing efflorescence before sealing?
At least 48 hours after cleaning, but also confirm it is no longer recurring. If the white residue shows up again within a few weeks, the moisture pathway is still active, and sealing will likely fail.
What temperature range is safe for sealing patio slabs?
Use the product’s temperature limits, but as a practical guide avoid very cold or very hot surfaces, and avoid sealing when the slab is warming up under strong sun. Temperature swings can cause uneven curing, which often shows up as cloudy patches or streaks.
Should I pressure wash before sealing?
Usually, yes for removing grime, but keep it conservative. Over-aggressive pressure or getting water into joints and cracks can leave the slab wet longer than expected, and sealer can fail if applied before the moisture clears.
Can you seal over paint or sealers that are peeling?
No, not reliably. Film-forming coatings or partially bonded old sealers can prevent proper adhesion, and peeling areas will telegraph through. Remove/strip down to clean, compatible concrete, or use only a product explicitly approved for that existing layer.
Do I need to etch or acid-wash concrete before sealing?
Not automatically. Many modern penetrating sealers are designed for clean, dry concrete without aggressive acid, and etching can create residues that affect bonding. Follow the sealer label, and if you are unsure, do a small test patch first.
Can you seal patio slabs with wet or damp patches?
Don’t. Even small damp areas can cause bubbling, milky haze, or tacky curing zones. If you see darkened concrete spots that do not return to normal dryness, identify the moisture source first.
Is it okay to apply two coats in the same day?
Often no, not with typical DIY timelines. Let the first coat cure to the point the label specifies, because recoating too soon can trap solvents or moisture and create soft, tacky, or cloudy finishes.
How do I tell whether a penetrating sealer has already been applied?
Do a water-bead test. If water consistently beads and rolls off, a penetrating sealer may already be present and working; if it darkens and soaks in, penetration is limited and recoating may be appropriate.
What should I do if my sealer turns cloudy or milky?
Treat it as a cure or application-condition problem. Strip the affected area if it is unacceptable, then reapply under drier conditions (and at the product’s recommended temperature), using a thinner coat to avoid trapping moisture.
Can you seal over expansion joints?
No, don’t coat or bridge them with field sealer. Joints need independent movement, and rigid coatings or films will crack at the seam, so seal them separately with a flexible joint sealant compatible with concrete.
Will sealing prevent weeds and algae from growing on a patio?
It can reduce staining and slow some surface-related growth, but it is not weed control. You still need to clean organic buildup (algae, moss) before sealing, and consider targeted treatments if growth is recurring.
Should I avoid salt or deicers after sealing?
Yes, especially for topical coatings. Even on sealed concrete, harsh deicers can degrade surfaces and accelerate failure. Use a concrete-safe deicer and apply sparingly to avoid damaging the film or the surrounding grout.
When is a professional worth it instead of DIY sealing?
Call a pro if there is evidence of active hydrostatic pressure, shifting structural cracks, significant settlement or heaving, or if you already stripped failed sealer but the moisture symptoms persist. Those issues require drainage or repairs, not just another coat.
Next Article
Should I Seal Patio Before Pointing? Correct Order
Learn when to seal patio before or after pointing, how to prep, repoint joints, and choose cure and sealer steps.