No, do not seal your patio before pointing. Sealing first is one of the most common mistakes people make, and it causes real problems: the sealer creates a barrier that stops mortar or jointing compound from bonding properly to the substrate, traps moisture underneath, and can interfere with the curing process. The correct order is always prep first, point second, let it cure fully, and then seal. After the joints are fully cured, you can learn how to seal patio tiles properly to help reduce staining and moisture issues. That sequence applies whether you are repointing brick or stone joints, filling paver gaps, or repairing cracked mortar on a concrete or masonry surface.
Should I Seal Patio Before Pointing? Correct Order

Talia Lang
22 Jun 2026
What you are actually pointing, and why it matters

Before you buy anything or start scraping joints, get clear on what surface you have and what type of pointing you are doing. The products and steps differ depending on this, and using the wrong approach is how you end up redoing the job six months later.
- Paver patios (concrete, clay, or natural stone pavers with sand or mortar joints): joints are typically filled with kiln-dried sand, polymeric sand, or a flexible pointing mortar. Polymeric sand and flexible mortars are the most common for DIY repair today.
- Mortar-jointed masonry or brick patios: joints are filled with a cementitious mortar mix. Repointing here means raking out the failed mortar and packing in fresh mix. This is the most demanding type and needs the longest cure time.
- Concrete slabs with control joints or cracks: joints or cracks may be filled with a flexible caulk or semi-rigid epoxy/polyurethane product rather than mortar. These are jointing or crack-filling products, not traditional pointing mortar.
- Previously sealed patios: if there is already a sealer on the surface, it changes everything. You need to deal with it before you point.
Knowing which category you are in also helps you choose the right product later. Pointing mortar on a paver patio is not the same as repointing a brick-edged masonry path. If you are unsure, the joints themselves tell you a lot: sand falls out easily when you sweep, mortar crumbles or pulls away in chunks, or flexible caulk has shrunk and cracked along its edges.
How to check for existing sealers before you do anything else
This step is not optional. Existing sealers are one of the main reasons pointing jobs fail, because fresh mortar and jointing compounds cannot bond to a sealed surface the way they bond to bare, porous stone or concrete. There are two types of sealers that behave differently when it comes to pointing work.
- Film-forming sealers (acrylics, epoxies, polyurethanes): these sit on the surface and create a visible coating. They will block mortar adhesion completely and must be removed before you can point effectively.
- Penetrating sealers (silane, siloxane, or impregnating types): these soak into the stone or concrete and are not visible on the surface. They are less likely to block mortar from bonding to the joint edges, but they can still affect how well certain products cure in the joint.
The easiest test is the water drop test. Drip a small amount of water onto the patio surface and onto the inside edge of a joint. If the water beads up and sits on the surface, a sealer is present. If the water soaks in within a few seconds, the surface is likely unsealed or has an older penetrating treatment that has mostly worn off. Do this test in multiple spots, including directly in a joint if it is wide enough, because coverage can be uneven.
If you find a film-forming sealer, you need to strip it before pointing. Use a chemical sealer stripper appropriate for the product type (most labels will tell you what they remove), scrub it in, let it dwell, then rinse thoroughly. Non-compatible existing sealers that are not removed will prevent proper adhesion from any new mortar or protective treatment you apply afterward. Trying to point over them and then reseal on top is a shortcut that fails quickly.
Also check for white powdery deposits on the surface or in the joints. That is efflorescence, which is mineral salt residue left by water moving through the masonry. It needs to be removed before pointing because if you seal over it, you trap it underneath. Diluted hydrochloric (muriatic) acid or a proprietary efflorescence cleaner will handle it, followed by a thorough rinse and full drying time before you do anything else.
Prep the surface properly before you point

Good prep is genuinely most of the job. The pointing material itself is almost the easy part. Spend real time on this stage and your repair will last. Rush it and you will be back out here in a year.
Remove failed joint material
Rake out any loose, crumbling, or hollow mortar to a minimum depth of about 15 to 20mm (roughly three quarters of an inch). You can use a plugging chisel and club hammer for traditional mortar joints, or an angle grinder with a raking disc for longer runs. For paver joints filled with polymeric sand, use a stiff brush, a joint scraper, or even a flat-blade screwdriver. Do not just top up over failed material. If the old joint is hollow or crumbling behind the surface layer, the new pointing will just crack out again following the same failure.
Clean the joints and surrounding surface

After raking out, use a stiff brush to clear out dust and debris. Then pressure wash the area if possible, or at minimum hose it down and scrub. The joint walls need to be clean and free from oil, moss, algae, loose particles, and any sealer residue. Let the surface dry until it is damp but not wet before pointing with cementitious mortar (a slightly damp joint helps mortar cure properly and prevents it from drying too fast and cracking). For flexible sealant or polymeric sand, follow the specific product instructions, as some require a bone-dry surface.
Check the condition of the pavers or slabs themselves
While you are prepping, look at the slabs around the joint failures. Are they cracked, rocking, or sunken? Joint failure is often a symptom of movement underneath, not just surface wear. If individual pavers are loose or the base has subsided, repointing over an unstable base will fail again. You may need to lift and re-bed those units before pointing. If you are seeing large-scale settlement across multiple areas, that points to a subgrade issue, which is beyond DIY repointing and warrants a professional look.
Choosing the right pointing product for your patio type
Not every patio takes the same pointing material. Using the wrong one is a common source of repeat failures. Here is a practical breakdown.
| Patio type | Recommended pointing material | Key consideration |
|---|---|---|
| Concrete or clay pavers with sand joints | Polymeric jointing sand | Do not use if you plan to seal with a sand-locking sealer afterward; match product systems |
| Natural stone or porcelain pavers | Flexible pointing mortar or specialist grout (e.g., a polymer-modified mix) | Avoid rigid OPC mortar which can crack and stain some stone types |
| Brick or masonry patio with mortar joints | Cementitious repointing mortar (matched to original joint strength) | Do not use mortar stronger than the masonry units; follow a 3-day wet cure |
| Concrete slab control joints or wide cracks | Flexible polyurethane or polyurea joint sealant | Joint must be clean and primed if required by the product spec |
| Block paving with flexible traffic loads | Polymer-modified flexible pointing mortar | Products like TuffGrout PM allow walk-on after around 3 hours in good conditions |
One important note on polymeric sand and sealing: if you are planning to use a paver sealer with sand-locking properties after pointing, do not use polymeric sand in the joints. The two systems can conflict. Use a standard kiln-dried jointing sand and let the sealer do the locking work. Check the sealer manufacturer's guidance before you commit to either product. For step-by-step everbuild patio sealer instructions, follow the product label for timing and application details sealer manufacturer's guidance.
Also avoid using a mortar that is stronger than the pavers or slabs it is sitting between. This is a mistake that causes the masonry units to crack rather than the joint flexing as it should. For soft natural stone patios, a lime-based or polymer-modified mortar is usually a better match than a stiff OPC (ordinary Portland cement) mix.
How to repoint the joints, step by step
- Check the weather forecast. Do not start if rain is expected within 24 hours, and do not point in freezing temperatures or during a frost. Fresh mortar is vulnerable to both. Aim for temperatures between 5°C and 30°C (40°F to 86°F) and dry conditions.
- Lightly dampen the joint walls with clean water (for cementitious mortars only). This prevents the dry masonry from pulling moisture out of the mortar too fast, which causes shrinkage cracks. Do not soak; just damp.
- Mix your mortar or prepare your jointing compound according to the product instructions. For traditional mortars, mix to a firm, slightly stiff consistency that holds its shape. Too wet and it will shrink and crack; too dry and it will not bond.
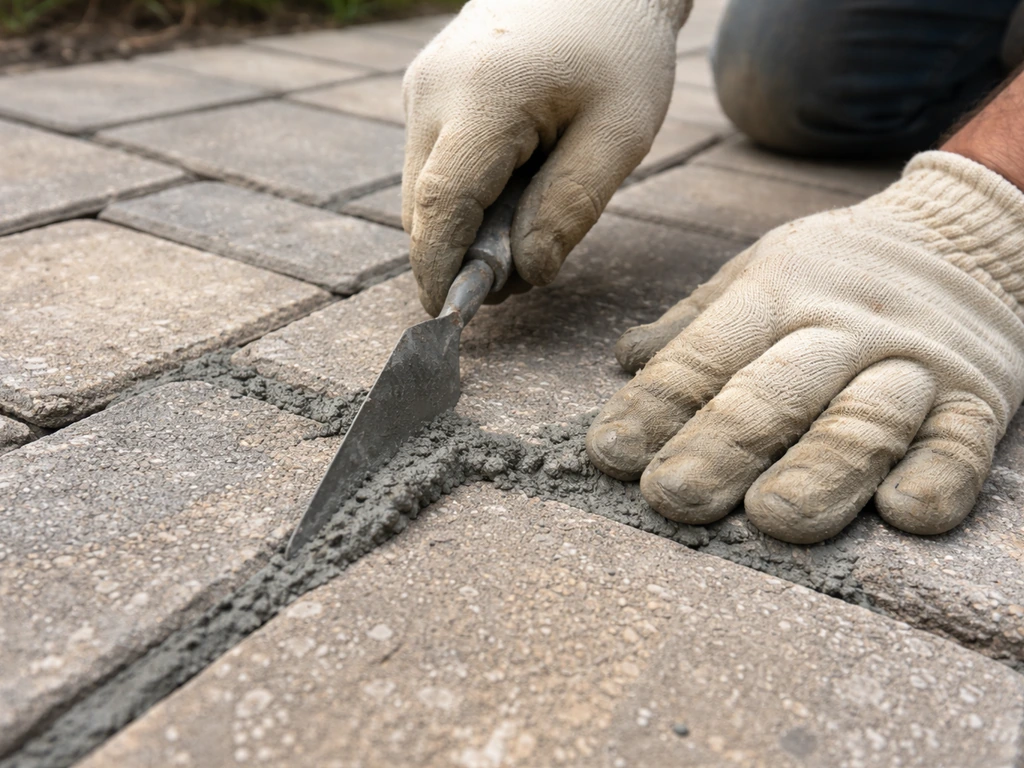
- Pack the mortar into the joint in layers if the joint is deep. For joints deeper than about 20mm, build up in two or more passes rather than trying to fill in one go. Each layer should be firm and well-pressed in.
- Strike off and finish the joint surface once the mortar has stiffened slightly but before it fully sets. A pointing iron or the edge of a trowel works well. Match the profile of the original joint if possible (slightly recessed is generally better than flush for drainage on a patio).
- For polymeric jointing sand: sweep it into the joints dry, compact it by plate vibrating or tamping, then sweep off any excess from the slab surface before activating. Haze left on the surface and then wetted will lock in place and is very difficult to remove later.
- Remove any mortar smears or overspill from the paver face while the mortar is still fresh. Dried mortar staining is much harder to remove and can require acid cleaning.
- Protect the fresh pointing from rain, direct sun, and frost while it cures.
Cure times to plan around
Cure time varies a lot depending on the product you use. Traditional cementitious repointing mortars should be wet-cured starting from initial set (usually within a few hours of application) and kept moist for at least 3 days. This means misting the joints with water or keeping them covered with damp burlap, especially in hot or dry conditions. Avoid letting them dry out too fast.
Fast-setting polymer-modified mortars can be walked on in around 3 hours under good conditions, but even these need several days before they are ready for a sealer to go on top. For example, Polytuff’s TuffGrout PM pointing mortar data sheet states it is “Walk On After 3 Hours,” showing how some polymer-modified mortars can support much quicker handling windows than traditional cementitious repointing [Fast-setting polymer-modified mortars can be walked on in around 3 hours under good conditions](https://www. polytuffus. com/pdf/HighwayDivision/datasheet/epoxy_mortars/PSIH-TDS-TuffGrout-PM-2019MAR.
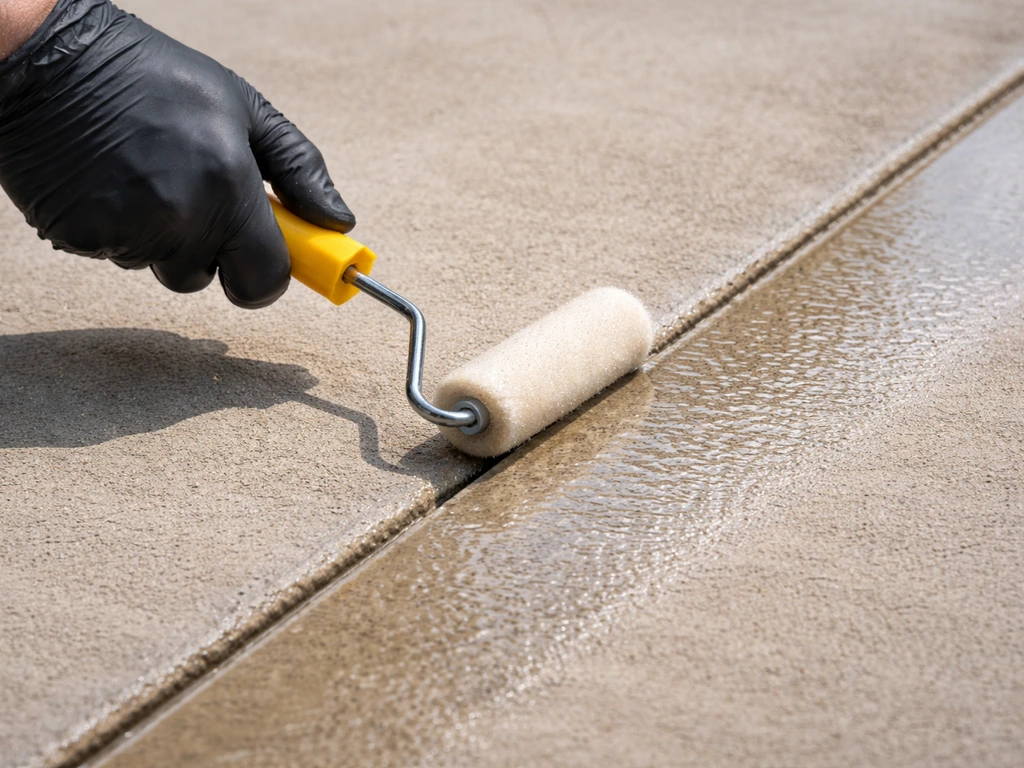
pdf). For roller-applied patio sealer, apply it in even coats, keep a wet edge, and work in small sections so the finish stays uniform several days before they are ready for a sealer to go on top. Flexible sealants and grouts like flexible grout systems typically dry within 8 to 24 hours depending on joint size, temperature, and humidity, with full cure taking longer. Lower temperatures and high humidity both extend all of these timelines.
Sika’s technical literature for sealant products provides curing time guidance that varies with temperature and humidity, including specified timeframes under 75°F and 50% RH conditions. Do not rush this stage.
Sealing over mortar that has not fully cured is one of the most common causes of bond failure and surface whitening.
Sealing after pointing: when to do it, what to use, and how to apply it
Sealing after pointing is beneficial in most cases. It protects the new joint material from weathering, reduces water ingress, helps prevent future freeze-thaw damage, and can bring out the colour of natural stone or pavers. But timing is everything.
When is the pointing ready to seal?
Wait until the new pointing is fully cured and the surface is completely dry. For traditional cementitious repointing, that typically means at least 7 days in warm, dry weather before applying a sealer, and longer in cool or damp conditions. Some professionals wait 28 days for full mortar strength before sealing, which is the conservative and most reliable approach if you can wait.
For fast-setting polymer-modified mortars, follow the specific product data sheet, but even where walk-on time is 3 hours, do not seal for at least 5 to 7 days. The surface should pass the water drop test in reverse: water should absorb into the material rather than bead, confirming there is no residual surface moisture trapping going on.
Choosing the right sealer
Match the sealer to the patio material. For natural stone (slate, sandstone, limestone), a penetrating impregnating sealer is almost always the right choice. It does not change the appearance significantly and does not form a film that can peel. For concrete pavers, you have more options: penetrating sealers for a natural look, or acrylic/polyurethane film-formers for a wet or enhanced finish. For porcelain or very dense tile-like pavers, a sealer may not even be necessary since they are already low-porosity. The site has detailed guidance on sealing specific patio types including slate patios, patio tiles, and patio slabs, which are worth checking for material-specific advice.
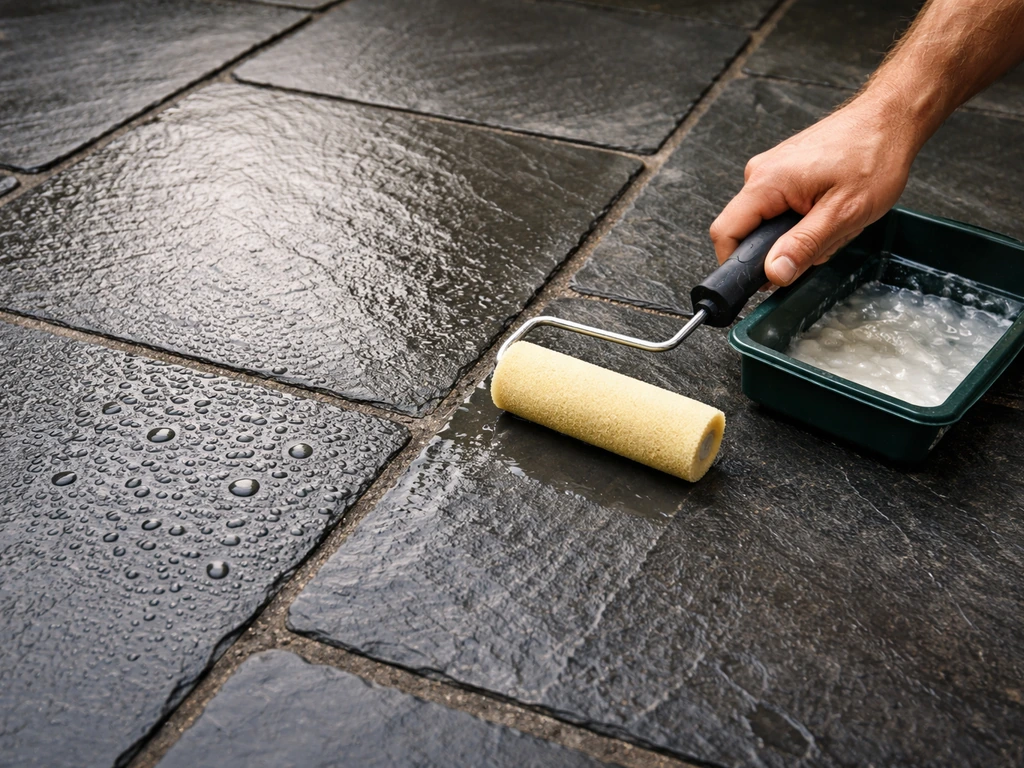
How to apply the sealer
Start with a clean, dry surface. Apply the sealer in thin, even coats using a roller, brush, or pump sprayer depending on the product and surface texture. Work in sections and avoid puddling. Two thin coats are always better than one thick one. Allow the first coat to penetrate or tack off before applying the second. Work in shade or during cooler parts of the day to avoid the sealer drying too fast on the surface before it can penetrate. Keep the area clear of foot traffic and furniture until the sealer has fully cured, which is typically 24 to 48 hours but check the product instructions.
When things go wrong: bond failures, trapped moisture, and drainage problems
Even when you follow the right sequence, you can run into problems. Here is what to look for and what it usually means.
Mortar not bonding or crumbling out quickly
If new pointing is pulling away from the joint edges within weeks or months, the joint surface was not clean enough, the mortar was too dry when applied, or there was a sealer residue left on the joint walls. Strip back to clean material, make sure you remove any contamination, and start again. Using a bonding primer on the joint walls before repointing can help in difficult cases, but it is not a substitute for proper cleaning.
White haze or cloudy patches after sealing
White or cloudy patches after sealing usually mean one of three things: the surface was not fully dry when sealed, a film-forming sealer trapped moisture underneath, or there was polymeric sand haze on the surface that was sealed over. This is why you should never seal over visible polymeric sand haze. In many cases, the sealer needs to be stripped and the surface properly prepared before resealing. Film-forming sealers are more prone to this than penetrating types. If you are seeing persistent whitening in the same area, it often points to a moisture source from below, which no amount of resealing will fix from the top.
Water pooling on or around the patio
Standing water after rain is a drainage problem, not a pointing problem. Failed pointing can allow water into the sub-base, but if water is sitting on the surface, the patio either does not have enough fall (slope) away from the house or the drainage channels are blocked. Repointing will not fix this. You need to address the falls, check that drainage channels or channels at the patio edge are clear, and consider whether the sub-base has been undermined by water over time. A saturated sub-base can cause patchy settlement and joint failure across a wide area.
Freeze-thaw joint damage
If pointing keeps failing every winter, freeze-thaw cycles are likely the culprit. Water gets into the joints, freezes, expands, and blows the mortar out. This is especially common with rigid OPC mortars on flexible or slightly moving bases. Switching to a polymer-modified flexible pointing mortar that is rated for freeze-thaw resistance will help, but you also need to address the water getting in in the first place. Sealing after pointing is one layer of protection, but good drainage and a solid base are more important long-term.
When to stop and call a professional
Some patio problems look like a pointing repair but are actually structural. If you are seeing large cracks running across slabs (not just joint lines), significant areas of settlement or heave, persistent wet patches that do not dry out even in good weather, or joint failure across the majority of the patio, those are signs of a sub-base or drainage problem that repointing alone will not solve. A professional can assess whether the patio needs to be lifted and re-laid, whether there is a drainage or subgrade issue, or whether there is a waterproofing problem from a different source. Spending time and money on surface-level pointing over a fundamentally failing base is a short-term fix at best.
FAQ
Can I seal first if my patio already has a “penetrating” sealer, not a glossy film?
Yes, but only after you have removed anything that would block bonding. If a water drop beads on the surface, you likely have an existing sealer, and new mortar should not be applied until that sealer (film-forming or incompatible penetrating type) is stripped and the area is fully rinsed and dry.
Is it ever okay to apply a sealer a day or two after pointing to keep it protected?
Only if the product label explicitly allows it and the joint material is already fully cured. In practice, you still need a clean, dry joint surface, and you should not seal while mortar is still whitening, sandy-polishing, or showing cracking from late cure.
What joint material should I use if I plan to use a paver sealer after pointing?
Be cautious with polymeric sand. If your plan is to use a paver sealer that locks sand in place, you should use standard kiln-dried jointing sand instead of polymeric sand in the joints, since the two systems can conflict and cause haze or poor performance.
I cleaned the patio, can I just top up the joints without raking them out?
No. Sweeping and hosing are not enough if there is sealer residue, moss/algae, oil stains, or white mineral deposits. Joints need to be raked to depth, brushed clean, and then thoroughly cleaned, because even thin residues can prevent adhesion and lead to early bond failure.
How do I know the joints are cured enough before sealing, beyond just waiting a certain number of days?
Because sealer products behave differently, you should treat “no longer wet” as not the same as “fully cured.” Use the manufacturer’s stated cure window for your specific pointing mortar, then confirm by the water drop test that the surface can absorb water rather than beading due to residual moisture.
How do I choose the right sealer for stone, concrete pavers, and dense tiles?
Yes, and it matters. If you use the wrong sealer type for the patio material, you can end up with peeling (on film-formers), persistent whitening (from trapped moisture), or little-to-no stain protection (on dense surfaces). Match penetrating impregnators to natural stone, and choose penetrating or film-forming options for concrete pavers based on the finish you want.
What should I do if it rains after I point the patio but before I can seal it?
If rain happens before your mortar has cured, do not seal over it right away. Wait until the joints are fully dry, then do another water drop test (to check for beading) and inspect for cracking or loss of mortar. If contamination or washout occurred, you may need to re-point before any sealing step.
Can I use a plastic sheet or tarp to protect joints temporarily before the sealer step?
Not in the “after pointing” stage. Bond failure issues come from sealing too soon or over a contaminated joint wall. If you need to protect the work temporarily, cover carefully to keep the joints from washing out, then remove coverings and follow the full cure and dry checks before sealing.
If my patio turns white after sealing, should I just reapply a new coat of sealer?
Often, but only if you fix the cause first. If whitening is localized and persistent, it can indicate moisture moving from below or a trapped moisture situation from a film-forming sealer. Stripping and redoing may be needed, and you might also need drainage or sub-base remediation to stop repeat failures.
How can I tell if I need drainage or re-bedding instead of just repointing and sealing?
Yes. Don’t force the job when movement is present. If pavers are rocking, slabs have sunk, or cracking runs across slabs, repointing alone usually won’t last. You may need to lift and re-bed units, repair the sub-base, or address drainage first before pointing and sealing.
Next Article
How to Seal a Slate Patio: DIY Steps, Products, Fixes
DIY steps to diagnose and seal slate patio: clean, fix issues, choose sealer, apply correctly, and troubleshoot blotches