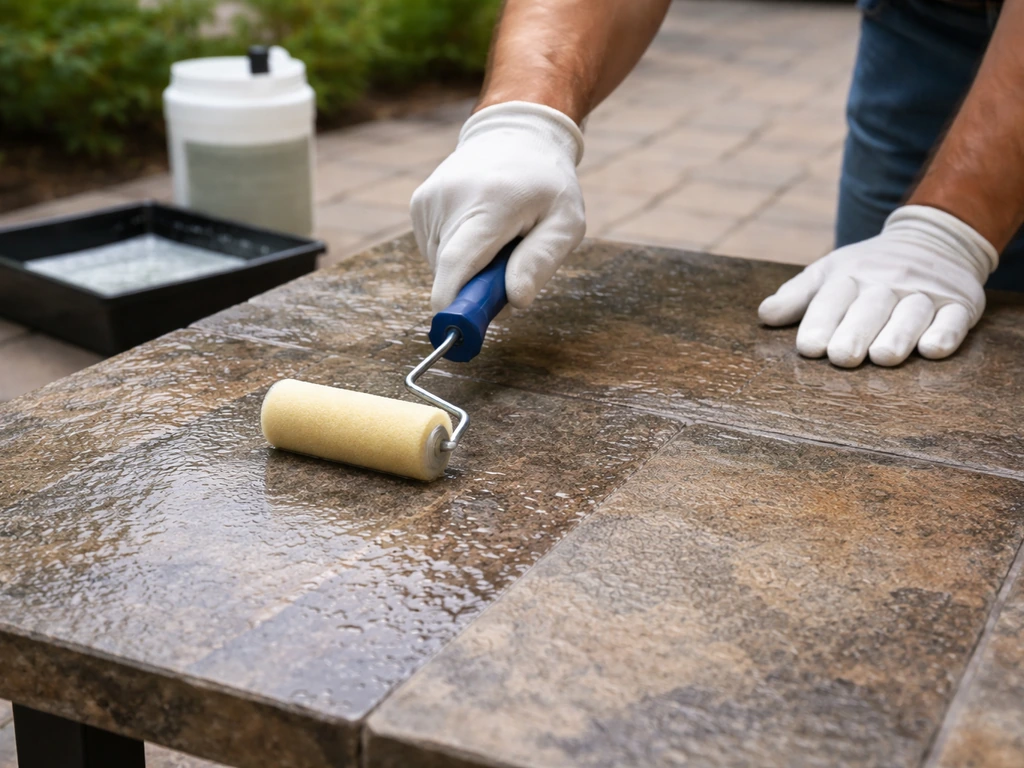
You can apply patio sealer with a roller on almost any outdoor surface, and for most concrete slabs, paving, slate, and natural stone, a medium-nap roller (around 3/4 inch or 18-20 mm) is the fastest and most consistent method. The core process is: clean and repair the surface thoroughly, let it dry completely, cut in the edges with a brush, then roll in manageable bays using a well-loaded roller with 50% overlap between passes. Most water-based sealers need around 4 hours between coats and at least 24 hours before foot traffic, though you should always treat the product label as the final word over any general guide, including this one.
How to Apply Patio Sealer with a Roller: Step-by-Step Guide

Talia Lang
22 Jul 2026
When and why sealing your patio actually makes sense
Sealing is worth doing when your patio absorbs water quickly (pour a small puddle and watch it disappear in under 30 seconds), when algae and moss keep coming back within a season of cleaning, or when you want to protect the colour and texture of natural stone, slate, or decorative concrete from UV fade and staining. It is not a fix for structural problems. If slabs are cracked, sunken, or your joints are failing, sealing over those issues just traps them underneath a layer that will eventually peel or bubble. Seal as a finishing step once the surface is genuinely sound, not as a cover-up.
Most patios benefit from resealing every 2 to 5 years depending on material, product type, and foot traffic. The first time you seal a new or freshly cleaned patio tends to use more product because the surface is most porous at that point. After that, maintenance coats are lighter and faster.
Sealer types: what the labels actually mean
There are two fundamental types: penetrating sealers and film-forming sealers. Penetrating sealers (silanes, siloxanes, and similar silicone-based chemistries) soak into the surface and repel water without changing the look. They are invisible, breathable, and the most forgiving to apply, but they do not protect against abrasion or staining as aggressively as film-formers. Film-forming sealers (acrylic, polyurethane) sit on top of the surface, offering a wet-look gloss, matt, or satin finish, better stain resistance, and stronger protection, but they require more careful prep and application because they can peel, bubble, or trap moisture if applied wrong.
| Type | How it works | Finish options | Coverage (typical) | Best for | Main risk |
|---|---|---|---|---|---|
| Penetrating silane/siloxane | Absorbs into pores, repels water | Natural/invisible | 8–30 m² per litre | Natural stone, slate, breathable substrates | Minimal; still needs dry surface |
| Water-based acrylic film-former | Forms surface film; dries to chosen sheen | Matt, satin, wet-look gloss | 3–8 m² per litre | Concrete, block paving, paving slabs | Peeling if moisture trapped; bubbling if over-applied |
| Solvent-based acrylic/polyurethane | Surface film; harder wearing, deeper gloss | High-gloss wet-look | 3–6 m² per litre | Dense concrete, block paving (trade use) | Strong fumes; flammable; stricter disposal |
| Water-based joint-stabilising sealer | Film-former that also locks joints | Matt to satin | 3–6 m² per litre (lower on first coat) | Block paving with sand joints | Must be applied before joints are disturbed |
For most DIYers, a water-based acrylic is the right call. Products like Everbuild 405 Path and Patio Seal are solvent-free, water-based, and can be applied by roller, brush, or low-pressure sprayer. They clean up with water, dry in around 4 hours, and are much more forgiving than solvent-based alternatives. If you want a high-gloss wet-look on dense block paving, solvent-based options exist but bring extra fumes, flammability risks, and stricter disposal requirements. The water-based versions have closed the gap enough for most residential patios that the solvent route is rarely worth it at DIY scale.
Matching sealer to your patio surface
Not every sealer works on every surface, and getting this wrong costs you both the product and the prep time. Concrete and cement-based paving slabs are the most forgiving and suit both film-forming and penetrating types. Natural stone (limestone, sandstone, granite) varies wildly in porosity and some types react badly to film-forming sealers that trap moisture inside. Slate is usually dense but can flake if moisture is sealed in. Patio tiles, especially glazed ceramic or porcelain, generally do not need sealing and may actually get slippery if coated with a gloss film-former. Stone patio tables have their own considerations around food safety, weather cycling, and finish.
| Surface | Recommended sealer type | Finish to choose | Key watch-out |
|---|---|---|---|
| Poured concrete | Water-based acrylic film-former | Matt, satin, or wet-look | Check for damp rising from below before sealing |
| Concrete paving slabs | Water-based acrylic or penetrating | Matt or satin | Very porous slabs drink sealer; budget for a generous first coat |
| Natural sandstone/limestone | Penetrating silane/siloxane or specialist stone sealer | Natural/invisible | Avoid film-formers that can trap moisture and spall |
| Slate | Penetrating or breathable acrylic designed for slate | Natural or enhancing | Some slate laminate/flake if coated with non-breathable products |
| Granite | Penetrating impregnator | Natural | Dense surface; do an absorbency test first — may not need sealing |
| Unglazed quarry/terracotta tiles | Penetrating or acrylic patio sealer | Matt or satin | High porosity; may need 2–3 coats |
| Glazed ceramic/porcelain tiles | Not usually required | N/A | Film-former can reduce slip resistance on already-slippery glaze |
| Stone patio table | Food-safe penetrating stone sealer | Natural | Outdoor cycling needs UV-stable product; avoid indoor-only stone sealers |
Tools, rollers, and materials to get before you start
Roller selection matters more than most people expect. The nap length (the pile depth on the roller sleeve) determines how well the sealer gets into a textured surface. For smooth concrete, a 1/4 to 3/8 inch (6-10 mm) nap is enough. For lightly textured paving slabs, use 1/2 inch (12 mm). For rough natural stone, riven slate, or textured concrete with significant surface relief, use a 3/4 inch (18-20 mm) nap or longer. Valspar’s Roller Guide recommends matching nap length to surface texture and suggests about 3/4 inch (18–20 mm) nap for rough masonry and natural stone Roller Guide — Valspar (roller nap selection by surface). The cover material matters too: microfibre or woven polyester sleeves work well with water-based sealers. Foam rollers are suitable for very thin, smooth-surface sealers but tend to create bubbles on thicker products or rough surfaces.
- Roller frame and extension pole (a telescopic pole saves your back and gives better control on horizontal surfaces)
- Roller sleeves: medium nap (1/2 inch) for slabs, long nap (3/4 inch) for rough stone or slate; buy spares for a second coat
- Roller tray or bucket grid (a bucket grid wastes less sealer than a shallow tray for most sealers)
- 2-3 inch brush for cutting in edges, joints, and any area the roller cannot reach
- Smaller 1-2 inch brush or mini roller for tight joints and borders
- Patio cleaner or dedicated algae/weed remover
- Pressure washer (1,500-2,300 PSI electric is adequate for most home patios)
- Stiff-bristle deck brush for scrubbing
- Crack filler or flexible outdoor mortar/pointing mix
- Masking tape and plastic sheeting to protect walls, steps, and planted borders
- Nitrile gloves (chemical-resistant for solvent-based products)
- Safety glasses or goggles
- Old clothes and knee pads
- Respirator with organic vapour cartridges if using any solvent-based product or spray-applying
- Clean cloths or rags for spills
- Bucket of clean water for water-based products; appropriate solvent per label for solvent-based
Surface prep part 1: cleaning the patio properly
This is the step people cut short and then wonder why the sealer peeled. Any dirt, algae, grease, efflorescence (white salt deposits), or loose material sitting on the surface will sit between the sealer and the patio, wrecking adhesion. A pressure washer makes this practical: for a typical domestic patio, an electric machine running 1,500-2,300 PSI is enough for most cleaning. If you have heavy oil stains, embedded moss, or years of biological growth, you might want something closer to 2,700 PSI, but go carefully on soft sandstone or older slabs. Use 15-40 degree fan nozzles and keep a standoff of at least 2 feet. Never use a zero-degree (red) nozzle on paving or stone as it will pit the surface and can blow out joint mortar.
For algae, moss, and lichen, apply a proprietary patio cleaner or a diluted sodium hypochlorite solution before pressure washing, let it dwell for the time specified on the label (usually 15-30 minutes), then rinse. On badly affected patios, a second treatment may be needed. If weeds are growing through joints, remove them manually, spray the roots with a path weedkiller, and let it work before washing. Do not seal over living roots. After washing, check for any white chalky residue (efflorescence on concrete and some stone) and treat with a diluted acid wash or specialist efflorescence remover if needed, then rinse thoroughly. The surface must be clean and chemically neutral before sealing.
Surface prep part 2: repairs, crack filling, and repointing
Sealer cannot bridge a crack. If you have cracks in concrete, fill them with a flexible exterior crack filler or a repair mortar appropriate to the surface before doing anything else. For hairline cracks in concrete, a polyurethane-based crack filler applied with a caulk gun and tooled flush works well. For larger voids or damage in paving slabs, use a sand/cement mix or a proprietary exterior repair compound. Let repairs cure to full hardness, which typically means at least 24-48 hours for most mortars and fillers, though some require 72 hours or more in cool weather. Check the repair product's own guidance.
Repointing is worth doing before sealing if your joints are crumbling or hollow-sounding when tapped, because the sealer will flow into and partially fill sound joints, which is useful for stabilising them, but it cannot replace missing pointing. If you're repointing with a traditional cement or kiln-dried sand and cement mix, let it fully cure (at least 7-28 days depending on the mix and weather) before applying a film-forming sealer over the top. The question of whether to seal before or after pointing is worth thinking through carefully, and the order matters for the result you get.
Do a test patch and read the product label
Before committing the whole patio, apply sealer to a 0.5-1 m² test patch in a discreet corner and let it fully cure. This tells you the actual colour change (some sealers darken stone significantly, others are truly invisible), how the surface absorbs the product, whether there are any adhesion issues, and what the finish looks like on your specific surface in your specific light. Natural stone especially can look completely different sealed than you expect from the tin. Once you are happy with the test patch result, you can proceed with confidence.
I will use Everbuild 405 Path and Patio Seal as an example throughout this article because it is a commonly available, practical product, but the principle applies to every sealer you buy: the product data sheet and label are your primary source of truth. Everbuild 405 is a water-based, solvent-free acrylic sealer. The manufacturer states approximately 8 m² per litre per coat (with the caveat that this varies by surface porosity), drying time of around 4 hours, and application by brush, roller, or low-pressure sprayer. See the EVERBUILD® 405 Path & Patio Seal, Product Data Sheet (Everbuild / Sika) for the manufacturer's stated coverage (approx. 8 m² per litre per coat), drying time (~4 hours), recommended application methods (brush, roller, or low‑pressure sprayer), and minimum film‑forming temperature (~0°C) EVERBUILD® 405 Path & Patio Seal — Product Data Sheet (Everbuild / Sika). It has a minimum film-forming temperature of around 0°C, though in practice applying in cold or damp weather is still risky for finish quality. The SDS for Everbuild 405 lists biocide components (CMIT/MIT mixture) that require basic skin and eye protection, so nitrile gloves and safety glasses are not optional even on a water-based product. Always download the product's SDS from the manufacturer's website and read the PPE and first-aid sections before you open the container.
How to apply patio sealer with a roller: step by step
Before you start rolling, make sure the surface is completely dry. Water-based sealers on a damp surface will go milky, struggle to adhere, and potentially peel. After pressure washing, budget at least 24-48 hours of dry weather before applying sealer, longer in cool or humid conditions. If the surface feels cold and slightly damp to the touch, it is not ready. For a full step-by-step walkthrough on how to apply patio sealer, see the dedicated guide covering preparation, rolling technique, and timing.
- Check conditions: temperature between roughly 5-25°C, no rain forecast for at least 4-6 hours after application (check your product label for its specific rain-free window), relative humidity below 85%, and the surface temperature at least 3°C above the dew point. On a cool, overcast September morning in the UK, those conditions are often marginal; a dry afternoon is typically safer.
- Stir or agitate the sealer: most water-based sealers should be stirred gently (not shaken, which introduces bubbles) to ensure even consistency. If the container has been sitting for weeks, do this before pouring into the tray.
- Mask off edges: tape plastic sheeting against the base of any walls, steps, or permanent borders. Sealer tracking onto brick or render looks bad and is difficult to remove once cured.
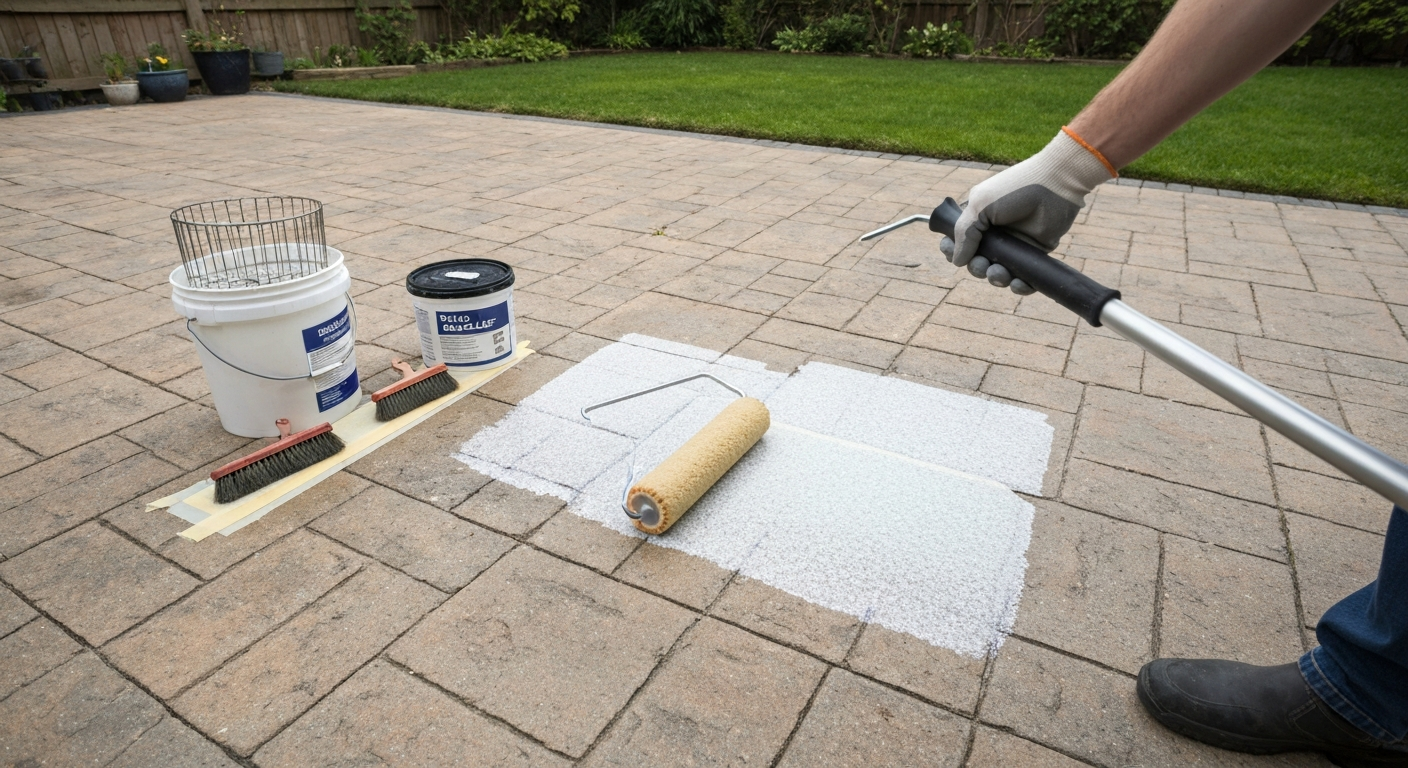
- Cut in the edges: using a 2-3 inch brush, apply sealer along all edges, corners, and any area where the roller cannot reach cleanly. Do about 15-20 cm in from the edge so the roller overlaps the brushed area. Do not let the brush-applied sealer skin over before rolling in; work in bays.
- Load the roller: pour sealer into the tray or use a bucket grid. Dip the roller and work it back and forth to load evenly, then roll off the excess so the roller is well-loaded but not dripping. A dripping roller leaves puddles that dry thick and look patchy.
- Apply in manageable bays: work in sections of roughly 2-3 m² at a time so you can maintain a wet edge. Start at the far end of the patio and work towards your exit point so you do not roll over wet sealer.
- Use a consistent rolling pattern: apply in long, even strokes with approximately 50% overlap between each pass. This prevents streaks and thin spots. On the first coat, use light-to-moderate pressure to push sealer into the surface texture. Do not overwork a section once the sealer starts to tack — this pulls the film and causes streaks.
- Check coverage as you go: the surface should look uniformly wet with no dry patches or obvious puddles. If a section is drinking the sealer very quickly, apply a little more while still wet rather than going back over dry film.
- Finish the bay and move on: maintain a wet edge with the adjacent section so joins do not leave lap lines. On second coats, roll perpendicular to your first-coat direction for more even coverage.
- Remove excess where the product requires it: some gloss and wet-look sealers (particularly Resiblock-style joint-stabilising products) require excess pooled sealer to be worked in or removed before it dries. Follow the product label on this — some need a squeegee, some do not.
- Let the first coat cure before applying the second: most products specify a minimum recoat window (around 3-4 hours at 20°C for water-based acrylics) and a maximum window (often 24 hours). Applying the second coat too early traps solvent and causes bubbling; applying too late on some products means the coats do not bond well. Check the label.
Edges, joints, and awkward details
A roller cannot reach into tight mortar joints, along the base of a wall, around drainage channels, or into the gaps around steps and raised beds. These areas matter because they are typically where moisture infiltration starts. Use a 1-2 inch brush or a small (2-3 inch) mini roller to work sealer into joints after the main roller pass, before the product skins over. On block paving with open sand joints, a stiffer brush can help push sealer into the joint gaps. On riven or textured stone with deep surface relief, go over the area with the brush after rolling to ensure sealer has reached into the low points.
Coverage rates and how much sealer to buy
Coverage figures on packaging are almost always quoted for the best-case scenario: smooth, low-porosity surface, second coat. In the real world, a first coat on an unsealed, moderately porous concrete patio might give you 3-5 m² per litre rather than the headline 8 m² per litre. Riven sandstone or unsealed terracotta can drop to 2-3 m² per litre on a first coat. The table below gives realistic working ranges.
| Surface type | First coat (realistic) | Second coat (realistic) | Headline/optimistic figure |
|---|---|---|---|
| Smooth/dense concrete | 5–7 m²/L | 7–10 m²/L | Up to 8–20 m²/L |
| Standard concrete paving slabs | 4–6 m²/L | 6–8 m²/L | Up to 8 m²/L |
| Natural sandstone (porous) | 2–4 m²/L | 4–6 m²/L | Up to 6 m²/L |
| Block paving (first joint-stabilising coat) | 2–4 m²/L | 5–7 m²/L | Up to 6 m²/L |
| Riven slate or textured stone | 3–5 m²/L | 5–7 m²/L | Up to 8 m²/L |
| Unglazed quarry/terracotta tiles | 2–4 m²/L | 4–6 m²/L | Up to 8 m²/L |
To calculate how much you need: measure the patio area in m², divide by your realistic first-coat coverage, and do the same for the second coat. Add 10-15% for waste, edge losses, and the fact that a very old or extra-porous surface will drink more than average. For a 30 m² patio of average concrete paving slabs, budget roughly 6-8 litres across two coats at realistic rates rather than relying on the label's best-case figures.
Drying, recoating, and weather limits
Most water-based patio sealers are touch-dry within 1-2 hours and ready for a second coat in around 3-4 hours at 20°C with good airflow. Full cure, meaning the point at which the film has reached most of its hardness and resistance, typically takes 24-72 hours. Do not put furniture back, allow foot traffic, or drive on the surface until the product's stated cure time has passed. For Everbuild 405-style products, budget at least 24 hours before foot traffic and longer in cold or damp conditions.
Temperature is the single biggest variable. Most water-based sealers specify not applying below around 5°C, and while some list a minimum film-forming temperature as low as 0°C (as Everbuild 405 does), applying near the cold edge of that range in damp or shaded conditions still risks poor film formation, cloudiness, or slow cure. Resiblock-style block paving sealers specify a working range of +3°C to +30°C. Above 25-28°C in direct sun, water-based sealers can skin over on the surface before they have properly bonded, causing a dry, uneven finish. Ideal conditions are an overcast or lightly sunny day between about 10-20°C with no rain for at least 4-6 hours and ideally 24 hours. Do not apply if the surface feels cold and the dew point is close to the surface temperature: moisture condenses on the curing film and ruins it. The practical rule is that the surface should be at least 3°C warmer than the dew point.
Material-specific notes: concrete and paving slabs
Concrete and cement-based paving slabs are the most forgiving surfaces to seal. The main trap is applying over damp concrete, especially if the slab is on a ground-bearing base with no damp-proof membrane. If you seal over concrete that has rising moisture, the sealer will eventually lift and peel from below no matter how well it was applied. Check by taping a square of plastic sheeting (about 1 m² ) to the surface and leaving it for 24 hours; if condensation forms underneath, you have a damp problem that needs addressing before sealing. Paving slabs, particularly older concrete ones, tend to be highly porous on first application and can drink through a lot of sealer. Budget for a liberal first coat and do not panic if coverage is lower than expected.
One common mistake on block paving is applying a film-forming sealer before the jointing sand has fully settled or before repointing crumbling joints. Stabilising sealers work by locking the surface and joint sand in place, so they work best on joints that are already at the right level and in reasonable condition.
Material-specific notes: slate and natural stone
Slate and natural stone (sandstone, limestone, granite) are where sealer choice really matters. A film-forming acrylic sealer applied to breathable natural stone can trap moisture inside, which then pushes the film off from below or, in freezing conditions, causes the stone surface to spall (small flakes breaking off the surface). For most natural stone, including slate, a penetrating silane/siloxane sealer or a specialist breathable stone sealer is the safer choice. These soak in, do not form a surface film, and let the stone breathe. The trade-off is that penetrating sealers do not change the look much and are not as stain-resistant as a film-former, but they are reversible and much less likely to cause long-term damage.
Some slate sealers are designed to give an 'enhancing' or slight darkening effect without forming a true film. If you want colour enhancement on slate or sandstone, look for products specifically designed for that surface and do the test patch first because the degree of colour change varies significantly. On dense granite, which has very low porosity, it is worth doing the water absorbency test (pour a small amount of water on the surface) before buying sealer at all. If water beads up immediately and does not absorb within several minutes, the stone may not need sealing and product money is wasted.
Material-specific notes: patio tiles and stone tabletops
Glazed ceramic and porcelain tiles generally do not need sealing, and applying a gloss film-former to an already non-absorbent glazed surface can reduce slip resistance, which matters on an outdoor patio where rain and algae growth are constant factors. Unglazed quarry tiles, terracotta, and some natural stone tiles are a different matter: they are highly porous and genuinely benefit from sealing to reduce staining and water ingress. For these, use a penetrating or specialist tile sealer and apply a test patch to check the finish before committing.
Stone patio tables need a sealer designed for the specific stone type and the outdoor environment. Most indoor stone sealers are not UV-stable and will degrade quickly in outdoor conditions. Use an exterior-rated penetrating sealer and check whether the product is suitable for surfaces that come into contact with food if you use the table for dining. Avoid film-forming acrylics on outdoor tabletops as the constant exposure to weather cycling, heat from cups and plates, and cleaning products will cause them to peel or dull relatively quickly.
Troubleshooting: what went wrong and how to fix it
Bubbling is the most common problem and almost always has one of three causes: the surface was damp when you applied, the sealer was applied too thickly in one pass, or the second coat went on before the first had cured. Small bubbles that appear while rolling usually work themselves out if you keep rolling; bubbles that appear as the sealer dries and cures indicate trapped moisture or over-application. On a water-based product, minor bubbling sometimes resolves as the full cure completes, but a visibly bubbly or blistered finish usually means the area needs to be stripped back and re-done.
| Problem | Most likely cause | Fix |
|---|---|---|
| Bubbling during application | Roller over-loaded, too thick a coat, or surface slightly damp | Roll more lightly, reload less, ensure surface is fully dry next time |
| Cloudy or milky finish (water-based) | Applied in cold/damp conditions or over a wet surface | Allow full cure; may fade; if persistent, strip and re-apply in better conditions |
| Streaks and lap lines | Roller allowed to dry between sections, poor wet-edge maintenance | Work faster in smaller bays; keep a wet edge |
| Sticky or tacky surface after stated cure time | Insufficient ventilation, very high humidity, or second coat applied too early | Increase ventilation; allow longer cure; in persistent cases, assess whether sealer needs to be stripped |
| Peeling or flaking after a few months | Moisture in substrate, failed adhesion due to dirty surface, or incompatible products | Strip back affected areas, investigate moisture source, clean thoroughly and re-seal with compatible product |
| Uneven sheen (patchy gloss) | Variable surface porosity or inconsistent roller loading | Second coat applied evenly usually corrects this; ensure consistent roller load |
| Sealer not absorbing (sitting on surface) | Surface still has old sealer, wax, or paint residue, or is very dense stone | Strip/clean properly; consider whether a penetrating sealer suits the surface better |
Maintenance schedule and realistic longevity
Sealers do not last forever. A water-based acrylic on an averagely trafficked domestic patio typically gives 2-4 years of effective protection before it starts to thin, chalk, or lose water-repellency. Penetrating sealers last longer in some respects (3-5 years or more), partly because there is no surface film to wear off. Solvent-based and harder commercial products can last 4-7 years but are less often used in DIY contexts. Traffic, UV exposure, harsh cleaners, and freeze-thaw cycles all reduce longevity.
- Every spring: inspect the patio surface, check water repellency by pouring a small amount of water — if it soaks in immediately rather than beading, the sealer is spent
- Annually: clean the patio with a mild patio cleaner or low-pressure wash; avoid strong bleach-based cleaners on sealed surfaces as they can degrade some acrylics
- Every 2-3 years: consider a maintenance recoat on high-traffic areas even if the main surface looks fine
- Every 3-5 years: full clean, inspection for cracking or failed jointing, repair as needed, then re-seal
- After any major repair: clean the repair area and spot-seal before the repaired section starts absorbing staining
Safety, PPE, and disposal
Even water-based sealers carry biocide components and acrylic chemistry that warrant basic precautions. Wear nitrile gloves and safety glasses whenever mixing, pouring, or applying. For solvent-based products, upgrade to chemical-resistant gloves, add eye protection with a proper seal, and use a NIOSH-approved respirator with organic vapour cartridges. Never apply solvent-based products in an enclosed space. Even outdoor application in a sheltered courtyard can concentrate fumes to unsafe levels in still conditions.
Disposal of leftover product needs attention. Water-based (latex) sealers often have different disposal rules to solvent-based ones. Many local authorities allow small amounts of fully dried, water-based product to go in general waste; liquid product should not be poured down drains. Solvent-based products, and rags soaked in solvent-based sealer, are typically classified as hazardous waste and must be taken to a household hazardous waste facility. Check your product SDS and local authority guidance before disposal. Empty containers that held solvent-based products should be treated as hazardous waste, not put in recycling.
When to call a professional
Most domestic patio sealing is genuinely DIY-friendly if you do the prep properly. There are situations, though, where getting a professional involved is the right call and will save you money in the long run. If your patio is showing signs of damp rising from below (efflorescence, persistent dark patches, hollow-sounding slabs), sealing is not the solution and a professional damp assessment is needed first. If the area is large (over 50-60 m²) and the surface is uneven or has multiple materials, a professional with a spray rig and experience with larger areas will get more consistent results. Historic or unusual natural stone (old limestone, hand-cut slate, listed-building contexts) is worth getting specialist advice on before sealing because the wrong product can cause permanent damage that is expensive or impossible to reverse. And if you have had multiple sealer failures on the same area, repeated peeling, bubbling, or loss of adhesion, there is usually an underlying problem (moisture, substrate incompatibility, old product residue) that needs diagnosing before another coat goes down.
Quick checklist and timeline from prep to finished patio
- Day 1: Remove all furniture, sweep debris, apply weed and algae treatment if needed and leave to dwell
- Day 1-2: Pressure wash the entire patio (15-40 degree nozzle, 2-foot standoff minimum), scrub joints, rinse thoroughly
- Day 2-3: Fill cracks, repair damaged slabs, repoint crumbling joints with appropriate mortar or filler
- Day 3 onward: Allow all repairs to cure (24-48 hours minimum for most fillers; 7-28 days for full mortar cure if repointing)
- Pre-sealing: Confirm surface is fully dry (24-48 hours of dry weather post-washing), do the plastic-sheet damp test if in any doubt
- Morning of sealing day: Check weather forecast (dry, 10-20°C, low humidity), gather all tools and PPE, do test patch in a hidden corner
- Sealing day: Mask edges, cut in with brush, roll in bays with 50% overlap, complete first coat
- 3-4 hours after first coat (check label): Apply second coat rolling perpendicular to first-coat direction
- 24-48 hours after final coat: Light foot traffic acceptable; full cure for furniture and normal use per label guidance
- After full cure: Remove masking, inspect finish, note any areas for maintenance recoating
Related Fix Broken Patio topics worth reading
Sealing is the last step in a sequence, and the result depends heavily on everything that came before it. If your patio needed a thorough clean before this job, the broader guide on how to seal a patio covers the full picture of method choices, including brush and spray alternatives to rolling. If you're deciding whether your slabs need sealing at all, the guide on whether you can seal patio slabs answers the material-specific questions in more detail. See the guide 'Can you seal patio slabs' for detailed, material-specific advice. For slate specifically, there's more depth in the guide to sealing a slate patio, including breathability and colour-enhancement options. For step-by-step instructions specific to slate, see our guide on how to seal a slate patio how to seal slate patio. If you're working through a brand-specific product for the first time, the Everbuild patio sealer instructions walkthrough covers that product's quirks in full. Patio tiles have their own sealing considerations covered separately, and if you're asking about a stone patio table rather than the floor, that topic has its own guide too. See the guide on how to seal a stone patio table for specific advice on sealing outdoor tabletops. If your patio needs repointing before sealing, the question of whether to seal before or after pointing is worth reading before you start.
FAQ
When and why should a homeowner seal a patio?
Seal a patio to protect against water ingress, staining, freeze–thaw damage, algae/weed growth and to restore appearance (wet‑look or matt). Seal when surfaces are clean, dry and structurally sound — typically every 2–7 years depending on product, substrate porosity and exposure. Seal if jointing is intact and there are no active drainage problems; defer sealing until repairs are completed and fully cured.
What types of patio sealers are available and how do I choose one?
Main types: penetrating silanes/siloxanes (deep, invisible water repellency, high m²/L), water‑based acrylic film‑forming sealers (matt or wet‑look, build a protective film, lower m²/L), solvent‑based acrylics/PU (strong gloss, generally more VOCs). Choose based on substrate and desired finish: penetrating for natural stone and high porosity where you want no film; acrylic for colour enhancement and surface protection on concrete, slabs and paving. Always match the sealer chemistry to the manufacturer substrate list and follow SDS/TDS for compatibility.
What roller and tool checklist do I need?
Tools: paint tray or bucket, long‑nap roller sleeve sized to surface texture (short nap 1/4–3/8" for smooth tiles, 1/2" for light texture, 3/4" or more for rough stone/pavers), extension pole, synthetic/woven sleeve for water‑based products (foam or low‑lint for thin solvent finishes), cut‑in brush for edges, garden sprayer or watering can for some penetrating products (if allowed), squeegee or broom for leveling (product dependent), clean rags, masking tape and protective sheeting. PPE: chemical‑resistant gloves, eye protection, suitable respirator if product SDS recommends (organic‑vapour cartridges for solvent products), waterproof boots, and ensure good ventilation.
What surface‑preparation steps are required before sealing?
1) Remove furniture and protect plants. 2) Clear loose debris, sweep joints. 3) Apply biological/algae remover and allow dwell time per label; scrub stubborn growth. 4) Pressure‑wash surfaces (start with wide‑angle nozzle, keep 2–4 ft distance; ~1,500–3,000 PSI typical for patios) to remove dirt and previous residues; avoid zero‑degree tip and test an inconspicuous area. 5) Repair cracked slabs, replace broken units, re‑point joints and allow repair materials to cure fully (follow repair product cure times, typically 24–72 hours). 6) Allow surface to fully dry (often 24–48 hours depending on weather) — do not seal if surface is within ~3°C of dew point or if condensation/rain expected in the rain‑free window required by the sealer.
How do I decide whether to wait after repairs/pointing before sealing?
Always wait until repair/pointing mortars are cured to the manufacturer’s minimum (commonly 24–72 hours) and the substrate is dry. Sealing too early traps moisture or prevents mortar cure, causing adhesion and appearance failures. If in doubt, allow an extra day or follow the repair product TDS.
Step‑by‑step: how to apply patio sealer with a roller (detailed technique)?
1) Read product TDS/SDS and confirm weather window and PPE. 2) Work in small, manageable bays. ‘Cut in’ edges with a brush first. 3) Pour sealer into a tray or use a roller bucket grid. Load roller evenly — avoid overloading. 4) Apply sealer with even passes and ~50% overlap; for textured surfaces use long‑nap rollers to push product into crevices. 5) Maintain a wet edge and work back towards a clean exit point. 6) For two‑coat systems apply the second coat perpendicular to the first after the specified recoat time and within any maximum window. 7) For penetrating products follow manufacturer method—often applied with sprayer or watering can and then brushed/rolled to distribute; do not over‑apply film‑forming product beyond recommended WFT. 8) Remove masking and clean tools per product instructions.
Next Article
How to Seal a Stone Patio Table: Step-by-Step DIY Guide
Step-by-step DIY guide on sealing granite, marble, slate, travertine, limestone, or patio stone tables, with sealer choi