To seal a slate patio correctly, you clean the surface thoroughly, let it dry completely, apply a penetrating impregnating sealer rated for exterior slate (not just any silane/siloxane product), and give it the full cure time before using the patio again. If you want the full process, including prep, product choice, and cure timing, start with how do you seal a patio for your exact slate finish. That's the short version. The longer version matters a lot more, because slate is one of those materials where cutting corners on prep or picking the wrong product leads to haze, blotchy patches, slippery surfaces, or trapped moisture that's harder to fix than the original problem.
How to Seal a Slate Patio: DIY Steps, Products, Fixes

Talia Lang
20 Jun 2026
Step 1: Assess the Slate and Check for Existing Sealant
Before you buy anything, spend 10 minutes actually looking at your patio and figuring out what you're working with. Slate comes in different surface finishes, and that affects everything from how a sealer penetrates to how slippery it gets. The most common outdoor finishes are cleft (the raw, split surface with its natural texture), honed (mechanically ground down to a matte, smoother feel), and tumbled (rounded edges and a weathered, worn look). Cleft is the grippiest and most porous of the bunch. Honed is smoother and denser. Knowing which you have helps you predict absorption rate and choose a finish level (matte vs wet-look) that looks right after sealing.
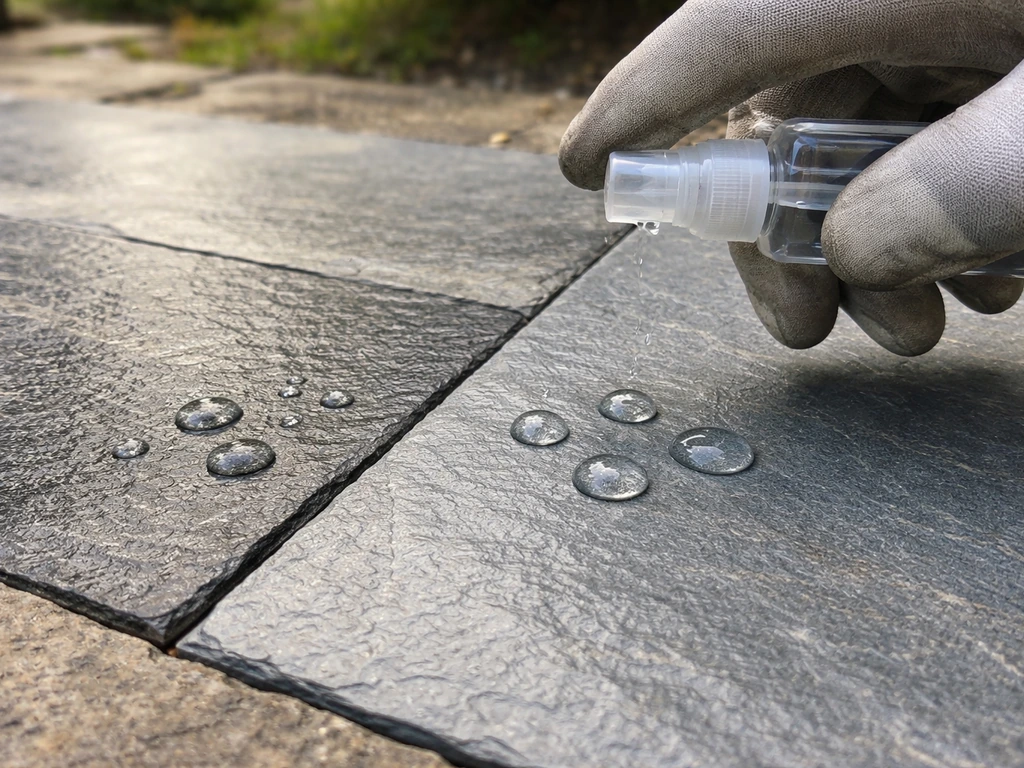
Next, check whether your slate is already sealed. Drip a small amount of water, about a 1-inch diameter drop, onto the surface and watch what happens. If the water beads up and sits there without soaking in, there's likely an existing sealer doing its job. If the water gets absorbed and the wet spot grows and darkens the stone, the slate is unsealed or the existing sealer has failed.
This simple test, often called a water drop or absorption test, tells you your starting point. [If your slate is already sealed, you need to remove the old sealer before applying a new one. ](https://cdn-global. laticrete.
com/-/media/project/laticrete-international/australia/product-documents/tds/tds-1261-1117. pdf? hash=E1D8DBD1EF26D8231AE5ED9942D33369&rev=24af12a7f01e47f78a84ccefeeb7b7a5&rev=24af12a7f01e47f78a84ccefeeb7b7a5) Layering a new sealer over an incompatible old one is a reliable way to get a cloudy, peeling mess.
While you're at it, look at the overall condition: note any tiles that rock or shift when you step on them, any cracked or chipped faces, gaps in the pointing, white chalky deposits (efflorescence), green biological growth, or low spots where water sits. Whether you should seal a patio before pointing depends on whether the mortar gaps are fully repaired and ready to accept coatings without trapping moisture gaps in the pointing. All of these need to be dealt with before a drop of sealer goes on.
Step 2: Clean and Prep the Surface Correctly
Sealer locks in whatever is on the surface, so if you apply it over dirt, algae, or mineral deposits, those things stay there permanently. If you need a quick walkthrough for the whole process, follow these steps on how to seal patio tiles. Proper cleaning isn't optional prep, it's the most important part of the whole job.
General Cleaning
Start with a stiff brush and a bucket of water to remove loose debris, then work with a pH-neutral stone cleaner or a purpose-made exterior surface cleaner designed for natural stone. Products like Franmar's EBC Exterior Surface Cleaner handle general soil, algae, moss, and light cement residue in one step. Avoid household bleach as a primary cleaner on slate, it can discolor certain slates and doesn't address mineral deposits. A pressure washer on a moderate setting (around 800–1200 PSI) is useful for rinsing, but don't press the nozzle close to the joints or you'll blast out the pointing.
Tackling Algae and Moss
If you have visible green or black biological growth, use a biocidal cleaner rated for stone surfaces. Work it in with a stiff brush, let it dwell per the product instructions, and rinse thoroughly. The National Park Service's stone care guidelines recommend biocidal cleaners specifically for algae, moss, and lichen on stone, and explicitly caution against strong acids like muriatic acid, which can dissolve and damage the stone surface. Stick to that advice on slate.
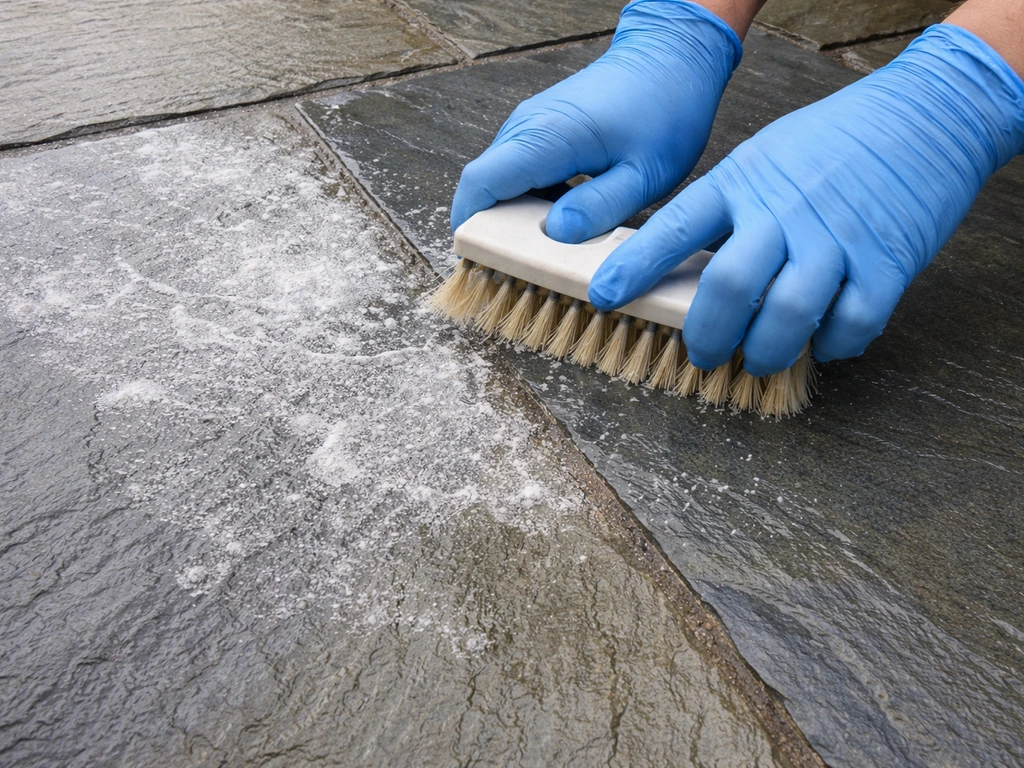
Removing Efflorescence
Efflorescence shows up as white, chalky deposits on the surface, it's dissolved salts migrating up from the substrate or mortar bed as moisture moves through. A dedicated efflorescence remover (SEK Surebond's Efflo Off is one example) is formulated to break down salt crystals without just smearing them around. Follow the dilution directions carefully. Note that slate is generally less acid-sensitive than materials like limestone or marble, but you still want to use a buffered, diluted product rather than anything aggressive. Rinse well after.
Once the patio is clean, let it dry fully. In summer conditions, 48–72 hours of dry weather is a reasonable minimum. If there's been rain recently or your patio sits in a shaded area, give it longer. Sealing damp slate traps moisture underneath the sealer, which causes haziness, white blotching, and sealer failure. This is one of the most common mistakes and one of the hardest to fix.
Step 3: Repair Damage and Address Drainage Before You Seal
Sealer protects sound slate. It doesn't fix structural problems, and sealing over them just delays (and worsens) the outcome. Here's what to look for and deal with first.
- Rocking or loose slabs: A slab that rocks when you step on it usually has a void under one corner where the bedding has failed. Water gets in, freezes, expands, and the problem gets worse each winter. Lift the slab, add fresh mortar or bedding sand as appropriate to your original installation type, and re-seat it level before sealing.
- Cracked tiles: Surface hairline cracks can stay as-is if they're stable. Cracks that go all the way through or that are growing should be addressed — either by replacing the slate tile or, for minor structural cracks, filling with a flexible stone-compatible filler and letting it cure before sealing.
- Failed or missing pointing/joints: Repoint any gaps in the mortar joints before sealing. Sealer won't bridge gaps or substitute for pointing. Let fresh pointing cure for at least a week before applying sealer.
- Drainage problems: If water pools on the patio surface rather than running off, note where. A properly built patio slopes away from the house at roughly 1/8 to 1/4 inch per foot. If you have a serious drainage issue — standing water, water tracking toward the foundation, or major sections of sunken slabs — sealing is not the fix. You're looking at a substrate or grading issue that needs to be corrected first.
If a significant portion of the patio is shifting, sinking, or has widespread substrate failure, that's the point where calling a professional makes sense. A sealer won't save a patio that's moving underneath. Knowing when to stop DIY is part of the diagnosis.
Step 4: Choose the Right Slate Sealer
This is where most people make a costly mistake: they grab whatever stone sealer is on the shelf without checking whether it's actually rated for exterior slate. Some popular silane/siloxane sealers explicitly exclude slate on their label. SEK Surebond's SB-4000, for example, is a well-regarded water-repellent silane/siloxane product, but its own product data sheet lists slate as a substrate it's not recommended for. Always read the compatibility section before you buy. If you’re using Everbuild patio sealer, follow the instructions for substrate compatibility and application method so you get the best penetration and finish compatibility section.
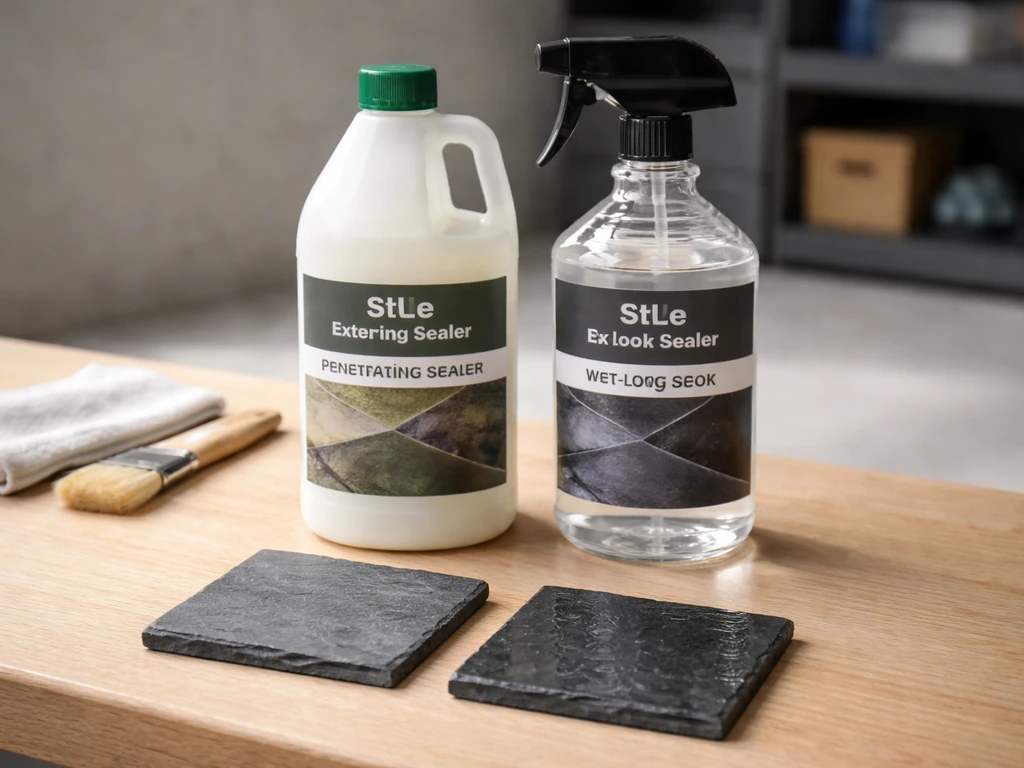
Penetrating (Impregnating) Sealers vs Topical (Film-Forming) Sealers
These are the two main categories, and they behave very differently on slate.
| Feature | Penetrating / Impregnating | Topical / Film-Forming |
|---|---|---|
| How it works | Soaks into the stone pores and repels water from within; no surface film | Sits on top of the stone as a clear or tinted coating |
| Appearance | Invisible or very subtle enhancement; preserves natural look | Can add sheen, wet look, or high gloss depending on product |
| Breathability | Breathable — lets vapor escape, reduces moisture trap risk | Less breathable — moisture trapped below can cause issues |
| Slip risk | Low — no slick surface layer added | Higher — smooth film can be slippery when wet |
| Durability | 3–7 years typical for exterior use | 1–3 years typical; wears faster underfoot |
| Best for | Most outdoor slate patios; especially cleft and natural finishes | Decorative purposes; areas wanting a wet-look finish with caution |
| Example products | LATICRETE STONETECH Impregnator Pro, Rust-Oleum 511 Seal & Enhance | Glaze 'N Seal Slate Sealer, Ghostshield 5505 |
For most exterior slate patios, a penetrating impregnating sealer is the right call. It keeps the patio looking natural, doesn't create a slippery film, and lets the stone breathe so moisture doesn't get trapped. LATICRETE STONETECH Impregnator Pro is a solvent-based impregnating sealer explicitly listed for exterior natural stone including slate, and it's a reliable choice.
“LATICRETE® 190 Sealer” is described in its TDS as a UV-resistant water and moisture repellent for exterior areas that cures into an invisible water-repellent coating LATICRETE 190 sealer cures into an invisible water-repellent coating.
Rust-Oleum 511 Seal & Enhance is a solvent-based penetrating color enhancer that also works on slate and adds a slight deepening of the stone's natural color without a film. Both are widely available.
If you want a wet-look or more decorative finish, a topical product like Glaze 'N Seal's slate sealer (a clear acrylic with a low-gloss finish) or Ghostshield's 5505 can work, but go in with realistic expectations. Topical sealers on an outdoor patio wear faster, can get slippery, and if they start to peel or haze, removal is significantly more work than re-applying a penetrating sealer. If you go topical and your patio gets slippery, Ghostshield and similar manufacturers offer anti-slip additives (like Grip-Tek) that you mix into the sealer before application. Use them.
Do a Spot Test First
Before you commit to the whole patio, apply your chosen sealer to a spare piece of slate or a small inconspicuous area and let it fully cure. Check the color, sheen level, and that there's no haze or blotching. Slate can vary significantly even within the same patio, and a spot test saves you from a finish you hate across 200 square feet.
Step 5: Application, Tools, Timing, and Technique
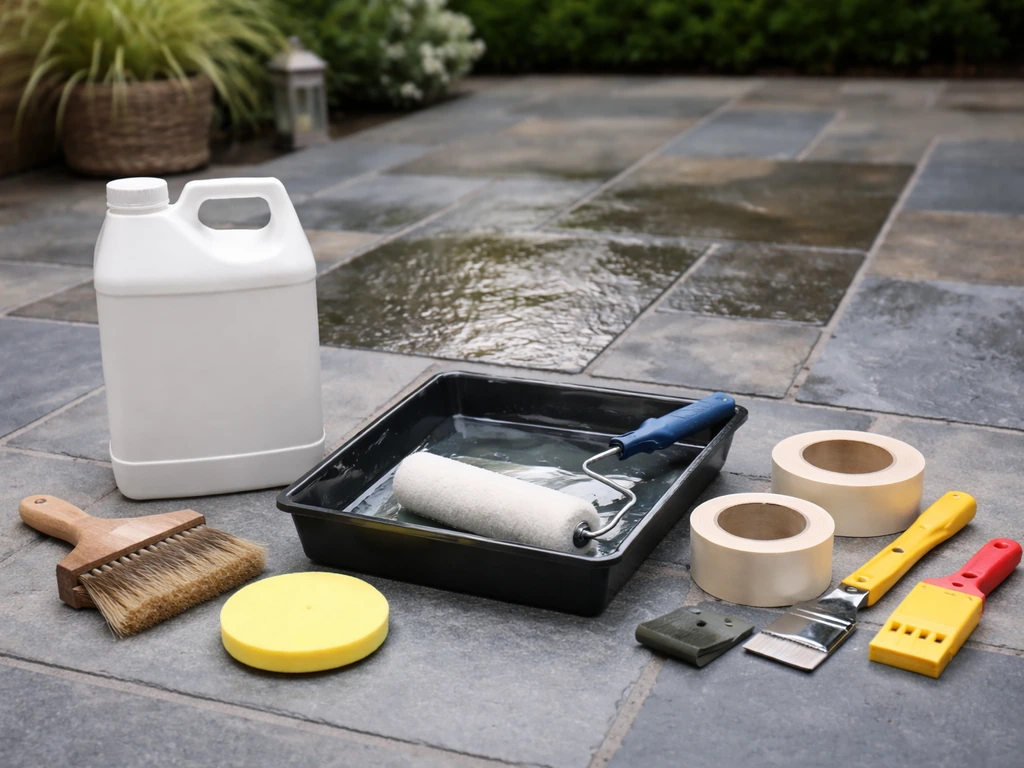
What You'll Need
- Your chosen slate-rated exterior sealer
- Natural bristle brush or foam applicator pad (for penetrating sealers on textured cleft slate)
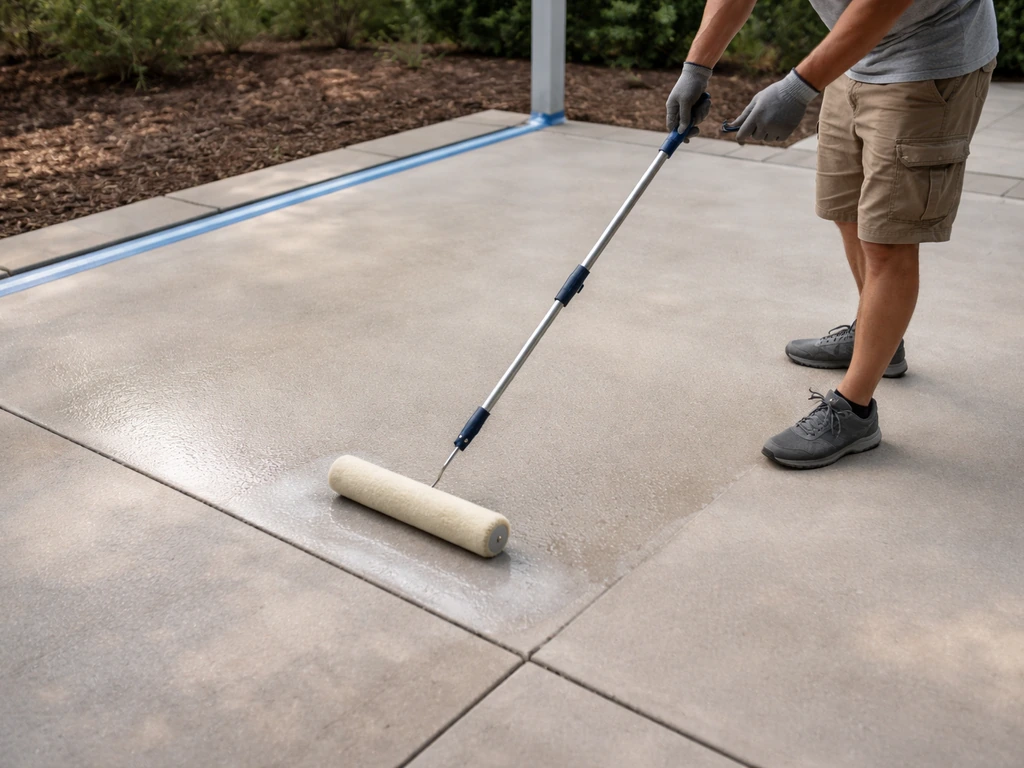
- Low-nap roller and roller tray (for honed/smoother slate or larger areas)
- Clean lint-free rags or a wet-dry vac for removing excess sealer
- Painter's tape to protect adjacent surfaces
- Nitrile gloves and eye protection
- Good ventilation — especially for solvent-based products
Weather and Temperature
Temperature matters more than most people realize. Once the weather is right, you can apply patio sealer with a roller for even coverage and a consistent finish. Most exterior stone sealers should be applied when air and surface temperatures are between 50°F and 90°F (10°C to 32°C). Applying in direct hot sun causes solvent-based products to flash off too quickly, leaving streaks and uneven penetration. Applying when it's too cold slows cure and can leave the sealer milky. Pick a dry day with no rain forecast for at least 24–48 hours. Early morning is often ideal in summer: cooler, lower UV, and the surface has had time to lose overnight condensation.
How to Apply
- Make sure the surface is completely dry and dust-free. Sweep or blow off any debris right before starting.
- Work in manageable sections — roughly 50–100 square feet at a time — so you don't lose track of edges or allow product to dry before you've spread it evenly.
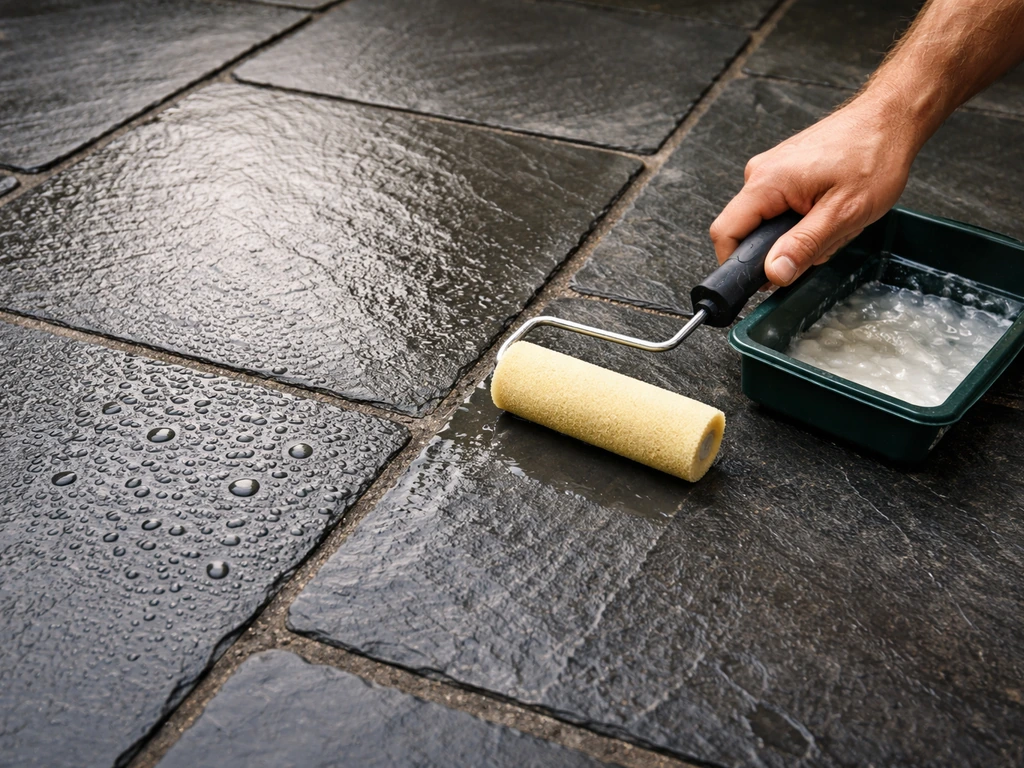
- Apply the sealer liberally and evenly using your brush, pad, or roller. On textured cleft slate, a brush helps work the product into the crevices and natural splits. On honed slate, a roller is faster and more consistent.
- For penetrating sealers: let the first coat soak in for 5–10 minutes (follow your product's specific dwell time), then wipe off any excess that hasn't absorbed before it dries on the surface. Pooled sealer left to dry on the surface causes haze and a sticky film. This step is critical.
- Apply a second coat if the product directions call for it or if the first coat absorbed very quickly across the whole surface. Some porous slate will drink up the first coat entirely and benefit from a second pass.
- Keep the area closed off until the sealer has cured. Don't let people, pets, or furniture back on until you've hit the minimum cure time.
The number one application mistake with penetrating sealers is leaving excess product on the surface. If you want step-by-step guidance on how to apply patio sealer, follow the application timing and technique sections so you get even penetration without hazing penetrating sealer. It dries into a hazy film that's annoying to remove. When in doubt, apply conservatively and wipe up any standing product promptly with a clean rag.
Step 6: Drying, Cure Time, and Maintenance Going Forward
Drying time (surface dry, usually 1–4 hours) is not the same as cure time (full chemical bonding, typically 24–72 hours). Most exterior slate sealers will be surface-dry within a couple of hours but won't be fully cured and protective for 24–72 hours depending on temperature, humidity, and the specific product. Don't put furniture back on it or let heavy foot traffic through until the full cure time has passed. Rushing this step is how you get scuff marks and surface impressions in a sealer that hasn't properly hardened.
Once cured, run the water drop test again. Water should now bead cleanly on the surface. If it still absorbs in some spots, those areas may need an additional coat, or the sealer didn't bond properly due to residual contamination or moisture, which means stripping and starting the surface prep over in that area.
Maintenance Schedule
- Re-run the water drop test every 12–18 months. When water starts absorbing rather than beading, it's time to reseal.
- Clean the patio with a pH-neutral cleaner at least once a year — avoid anything acidic or abrasive that can degrade the sealer.
- Remove leaves and organic debris promptly, especially in autumn. Decomposing organic matter accelerates biological growth and can stain slate.
- For penetrating sealers, reapplication is typically needed every 3–5 years for exterior use, though high-traffic areas or harsh climates may need more frequent attention.
- Topical/film-forming sealers typically need reapplication every 1–2 years and will show wear more visibly.
Troubleshooting Common Problems and Safety Notes
Haze or White Blotchy Patches After Sealing

This is almost always one of two things: excess sealer left on the surface that dried into a film, or moisture trapped under the sealer at application time. For surface haze from dried excess, try scrubbing with a clean cloth dampened with the appropriate solvent (mineral spirits for solvent-based products, water for water-based) while the sealer is still relatively fresh, within the first hour or two. If it's already fully cured, you'll likely need a sealer stripper. For moisture-trap haze, the sealer has to come off and the process starts over from the drying step.
Streaks
Streaks happen when the sealer is applied unevenly or when sections are allowed to dry before blending into the next section. Work in consistent back-and-forth passes and keep a wet edge. On a hot day, work faster or break the patio into smaller sections.
Sealer Doesn't Seem to Be Working
If you applied a penetrating sealer and the water drop test shows absorption almost identical to before, the sealer may not have bonded, possibly because of surface contamination, a product incompatible with slate, or application over an existing sealer that blocked penetration. A Reddit thread discussing the 511 Seal & Enhance raised this exact issue: the sealer appeared not to work because sealed and unsealed areas absorbed water the same way. If this happens to you, strip the surface, confirm the old sealer is fully removed, and reseal with a confirmed slate-rated product.
Slippery Surface After Sealing
If you used a topical/film-forming sealer, slipperiness is a real risk, especially when wet. An anti-slip additive mixed into the sealer before application (like Grip-Tek) addresses this. If it's already applied and already slippery, you can sometimes apply a very thin coat of the same sealer with an additive mixed in, but test in a small area first. For penetrating sealers, slipperiness after application is usually minimal because there's no film on the surface.
When to Call a Professional
Sealing is a DIY-friendly job when the patio is in decent structural shape. But stop and get professional input if you're dealing with: widespread slab movement or sinking across multiple areas, water actively draining toward the house foundation, major efflorescence that keeps returning despite cleaning (which signals an ongoing moisture intrusion problem in the substrate), or if significant slate replacement is needed. A sealer is a protective layer on a sound surface, it's not a fix for a failing substrate or a drainage problem. If you are wondering “can you seal patio slabs,” the right answer depends on whether the slabs and drainage are sound and stable before you apply any sealer.
Safety
Solvent-based sealers are flammable and should be used with good ventilation, keep open flames away, wear nitrile gloves, and use eye protection. Water-based sealers are safer to handle but still warrant gloves and eye protection. Dispose of solvent-soaked rags carefully: lay them flat outdoors to dry before disposal rather than bunching them up, which creates a fire risk. Keep pets and children off the patio for the full cure period, not just until it's surface-dry.
Quick Materials List
- pH-neutral stone cleaner or exterior surface cleaner (e.g., Franmar EBC)
- Dedicated efflorescence remover if white deposits are present (e.g., SEK Surebond Efflo Off)
- Biocidal stone cleaner for algae/moss if biological growth is present
- Stiff scrubbing brush and pressure washer (800–1200 PSI) for rinsing
- Penetrating/impregnating sealer rated specifically for exterior slate (e.g., LATICRETE STONETECH Impregnator Pro or Rust-Oleum 511 Seal & Enhance)
- Natural bristle brush, foam applicator, or low-nap roller
- Clean lint-free rags or wet-dry vac for excess sealer removal
- Nitrile gloves and safety glasses
- Painter's tape for edges
- Anti-slip additive if using a topical sealer on the patio (e.g., Grip-Tek)
FAQ
How soon after sealing can I walk on or move furniture on a slate patio?
Don’t go by “surface dry” alone. Even if it feels dry in 1 to 4 hours, most exterior slate sealers need a full cure window (commonly 24 to 72 hours) before normal foot traffic and furniture placement. If you trap furniture on uncured sealer, you can get permanent scuff marks or impressions.
Should I seal right after I repair pointing or grout between slate tiles?
Only if the mortar is fully set and dry enough that it will not release moisture into the sealer. In practice, grout repairs should cure thoroughly and dry, then be cleaned so no fresh mortar film or salts remain. Sealing too soon can cause hazing and white blotching because moisture gets trapped beneath the sealer.
Can I seal slate if it has efflorescence showing even after cleaning?
If it keeps returning, treat it as a moisture intrusion problem in the substrate or mortar bed, not a simple surface issue. Cleaning once may look good temporarily, but ongoing salts migration can lift or blur sealer. Address drainage and the source of moisture first, then reseal once the problem is resolved.
What’s the best way to tell if I need to remove an old sealer before applying a new one?
Do an absorption check (water droplet test). If water still beads and sits, you likely still have active old sealer, and a new product may not penetrate evenly. Also look for visible peeling, cloudy patches, or areas that look different from the rest of the patio, those are signs you should strip rather than “layer.”
Why do I get blotchy dark spots after sealing, even when the patio looked clean?
Blotching often comes from trapped moisture or uneven contamination (dust, algae remnants, or mineral film) that prevents consistent bonding. Another common cause is sealing when parts of the surface stayed damp, such as shaded areas or low spots. If blotches appear, retest with the water droplet test after cure to identify which areas failed before deciding whether to spot-reseal or strip.
Do I need to seal slate right after installation, or can I wait?
Waiting can be beneficial if there’s new mortar or any wet construction residue that needs time to dry out and stop off-gassing salts. If the patio was recently pointed, give it enough time for curing and drying, then do the water droplet test. If the slate absorbs water, you’re closer to being ready; if it beads, you may already have a surface protection layer or contamination to remove.
Can I use the same sealer on cleft, honed, and tumbled slate?
Often you should choose based on the product’s compatibility with slate, but finish matters for results. Cleft slate tends to absorb more, so it may take more product or show darker penetration. Honed slate is smoother and can show sheen differences more easily. Always do a spot test on your exact slate finish before sealing the full patio.
What happens if I apply sealer in hot sun or if the surface is too warm?
Solvent-based products can flash off too quickly, leading to streaks, uneven penetration, or a weak bond. If the patio surface is getting too hot to comfortably touch, wait for cooler hours or use conditions closer to moderate temperatures. Streaking may improve with a careful second coat only if the first coat didn’t haze into a cured film.
What if my water droplet test shows some areas still absorb the same as before, after cure?
That usually means the sealer didn’t bond in those spots, often due to residual contamination, blocked penetration from old sealer, or moisture that was present at the time of application. Test those areas again to confirm pattern, then either spot-strip the affected zones and reseal with a slate-rated product, or strip the whole patio if the failure is widespread.
If a penetrating sealer leaves haze, can I just wipe it off later?
If the product is still in its early stage, you may be able to remove excess haze with the correct compatible cleaner or solvent recommended for that sealer type. If it fully cured into a film, wiping often won’t fix it, and you typically need a sealer stripper. The safest approach is to prevent excess in the first place, apply conservatively, and promptly wipe standing product.
Will sealing make slate slippery?
Penetrating impregnators generally keep a natural, non-film surface so slipperiness risk is lower. Topical or film-forming sealers can increase traction issues, especially when wet. If you choose a topical product, consider an anti-slip additive and do a wet spot test on a small area before treating the entire patio.
Can I reseal only part of the patio if some tiles failed?
Sometimes, but patchwork can lead to uneven color depth or sheen, especially with decorative enhancers or topical sealers. The most reliable method is to re-prep and reseal consistently, which may mean stripping to remove any failed product boundaries. If failures are localized, spot-test first and match the sealer type and application method exactly.
How should I dispose of solvent-based sealer rags and leftover product?
Solvent-soaked rags can be a fire risk, don’t bunch or store them in a closed pile. Spread them flat outdoors to dry before disposal, and keep them away from ignition sources until they’re fully dry. Follow the product label for disposal and any special handling requirements.
When should I stop DIY and get help instead of sealing?
If the patio is moving, sinking, or has active drainage toward the foundation, sealing won’t correct the underlying failure and can worsen trapping moisture. Also get professional input if efflorescence keeps returning despite cleaning and the area shows signs of ongoing water intrusion, because the source of moisture needs investigation before any protective coating.
Next Article
How to Apply Patio Sealer: Step-by-Step DIY Guide
Step-by-step DIY on how to apply patio sealer: prep, repairs, product choice, application, drying, and troubleshooting f