To fix a sinking paver patio the right way, you need to lift the affected pavers, remove whatever base or bedding material has failed underneath, rebuild those layers correctly with compacted gravel and fresh bedding sand, then reset the pavers with proper slope and joint sand. Just dropping pavers back into place without touching the layers below is the reason most DIY repairs sink again within a season or two.
Fix Sinking Paver Patio: DIY Diagnose and Repair Steps

Talia Lang
30 Jun 2026

Why patio pavers sink in the first place
Pavers don't sink randomly. There's almost always a specific layer that failed, and knowing which one tells you exactly how big a job you're in for. The three main culprits are base failure, drainage problems, and joint/edging breakdown, and they often show up together.
- Poor or under-compacted base: The crushed gravel sub-base beneath your pavers was either too thin, used the wrong material (plain dirt or unwashed sand), or was never properly compacted. Over time, the soil beneath it shifts, and the whole system drops.
- Washed-out bedding sand: The 1-inch layer of coarse sand that pavers sit on directly can get undermined when water pools underneath it. Installers sometimes call this the 'bathtub effect' — water gets trapped, saturates the bedding sand, and it either compresses or literally washes out through weak joints.
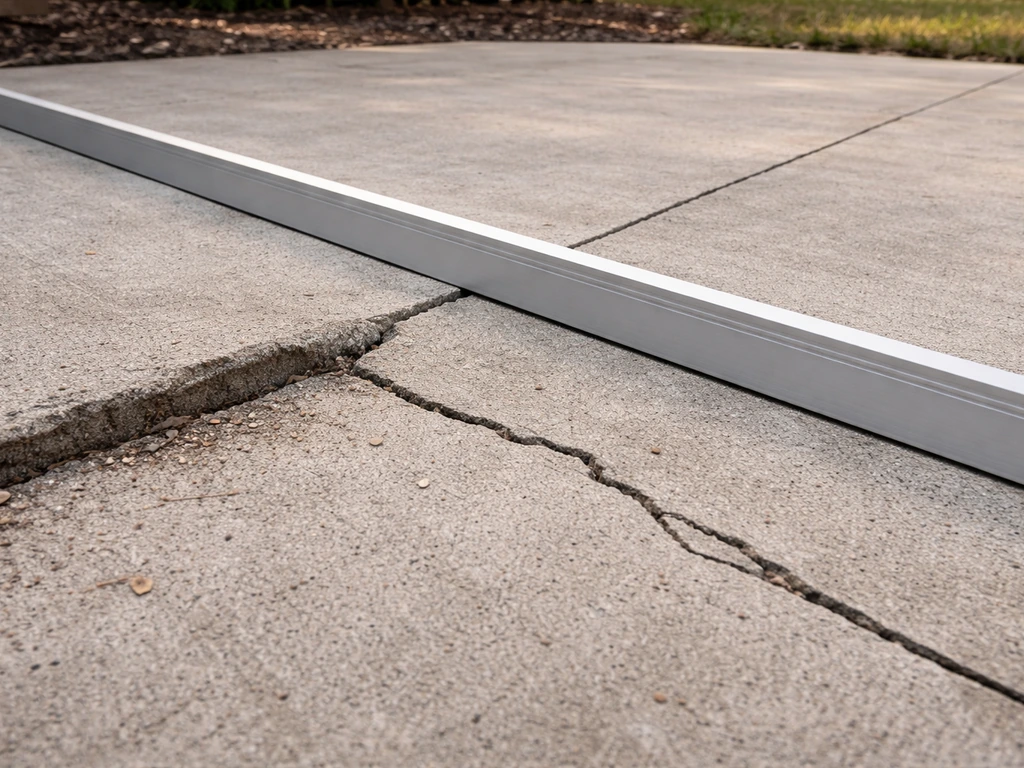
- Drainage failure and slope: A properly built paver patio slopes away from your house at a minimum of 1/4 inch per foot. If that slope is wrong or nonexistent, water sits on the surface, finds its way down through the joints, and erodes the layers below.
- Joint sand washout: Jointing sand holds pavers in place laterally. Once it washes out, pavers shift, gaps open up, more water gets in, and the whole system destabilizes faster.
- Failed or missing edge restraints: Without solid edging locked into the ground, pavers along the perimeter migrate outward, creating gaps that accelerate every other failure on this list.
- Freeze-thaw cycles: In colder climates, water that infiltrates the base freezes and expands, heaving pavers up. When it melts, they don't always come back down level.
If you have standing water after a storm, pavers that rock when you step on them, or visible gaps where joint sand has disappeared, you're looking at a combination of these issues rather than just one.
Assess the damage before you touch anything
Before you pull a single paver, spend 15 minutes walking the patio and mapping out what's happening. This saves you from doing a partial repair in the wrong spot.
What to look for on the surface
- Use a long straightedge or a 4-foot level laid across the patio surface to find all the low spots, not just the obvious ones.
- Mark sunken areas with chalk or painter's tape so you know the full scope.
- Check whether the sinking is localized (a few pavers in one spot) or widespread across a large section. Localized sinking usually means a bedding sand issue. Widespread sinking usually points to base failure.
- Look at your border pavers specifically. If the perimeter has spread outward or the edge restraints have lifted, that's a separate problem to fix alongside the resetting.
- Check for standing water or visible water stains — these tell you where drainage is failing.
Dig down and check each layer
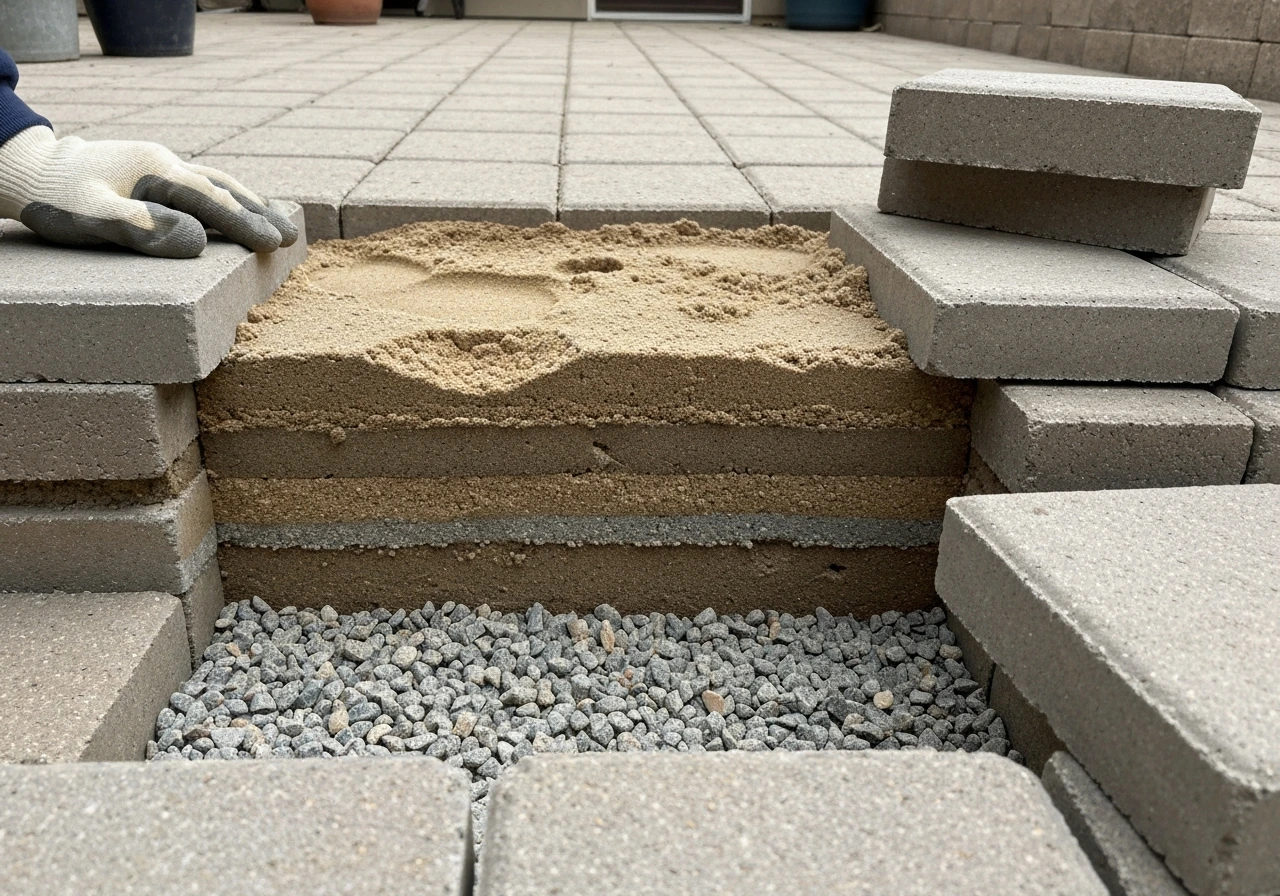
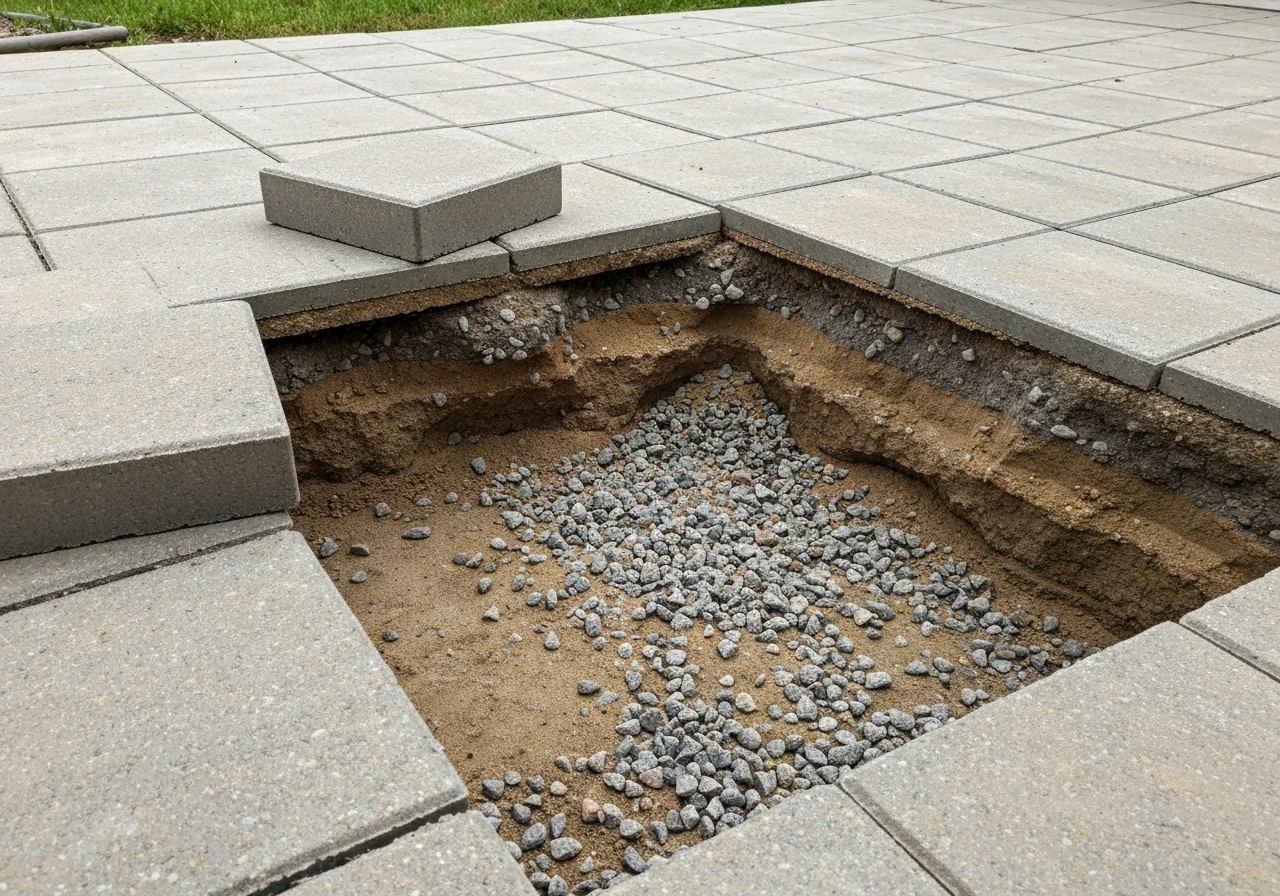
Pull up two or three of the worst pavers and look at what's underneath. If you end up finding issues closer to the surface, use these sunken patio slabs repair steps as a related option for fixing settlement the same way at the slab level how to fix sunken patio slabs. You're checking three layers: the bedding sand directly under the pavers, the compacted gravel base below that, and the subgrade (native soil) at the bottom.
- Bedding sand: Should be coarse, gritty, and about 1 inch thick. If it's muddy, missing in spots, or packed down to almost nothing, it's been compromised.
- Gravel base: Should be 4 to 6 inches of compacted crushed stone (crushed limestone or Class II base rock works well). Dig in with a screwdriver — if it goes in easily, the base isn't compacted properly. If the gravel is fine-grained sand rather than angular crushed stone, that's the original installation mistake.
- Subgrade: The native soil at the bottom should feel firm. If it's soft, wet, or shows signs of erosion channels, you have a subgrade problem that needs more than just re-leveling pavers.
This inspection tells you whether you're doing a simple bedding reset (a few hours of work) or a full base rebuild (a weekend project). Be honest about what you find. Resetting pavers on a bad base is just delaying the same sinking.
Tools and materials you'll need
Most of what you need for this repair isn't specialized. You can rent a plate compactor from any equipment rental place for around $60 to $80 per day, which is worth every penny compared to hand-tamping. Here's a full list:
| Item | What It's For | Notes |
|---|---|---|
| Flat pry bar or paver puller | Lifting pavers without chipping them | A dedicated paver extraction tool is faster; a flat bar works fine |
| Plate compactor (rental) | Compacting base layers and final surface | Essential — do not skip this |
| Hand tamper | Compacting in tight spots the plate compactor can't reach | Cheap, worth owning |
| Long level (4-foot) | Checking slope and flatness | A 6-foot level is even better for large areas |
| Screed rails and screed board | Setting bedding sand at consistent depth | 2x4 lumber works as a screed board |
| Crushed stone / Class II base rock | Rebuilding the base layer | Angular crushed stone, not pea gravel or sand |
| Coarse bedding sand | 1-inch setting bed for pavers | Sharp, coarse sand — not play sand or fine sand |
| Polymeric joint sand | Filling joints to resist washout | Choose a product rated for your joint width |
| Rubber mallet | Tapping pavers into place | Avoids surface damage |
| Broom (stiff bristle) | Sweeping joint sand into gaps | |
| Garden hose or sprayer | Activating polymeric sand | Low-pressure spray, not high-pressure |
| Edging spikes and replacement edge restraints (if needed) | Securing perimeter | Plastic or aluminum paver edging |
Step-by-step: lifting, rebuilding, and resetting sunken pavers
Work through this process systematically. Don't try to reset pavers in one section while you're still pulling up another, you'll lose track of your levels.
- Mark and photograph the area. Before you pull anything up, photograph the pattern from above. Pavers often have a specific layout direction, and it's easy to put them back wrong. Mark the border of your repair zone.
- Remove the pavers carefully. Slide a flat pry bar into a joint at the edge of your repair zone and gently pry the first paver up. Once you have the first one out, the rest lift out by hand. Stack them neatly nearby — you'll be reusing them. Inspect each one for cracks while you have them out.
- Remove the old bedding sand completely. Rake and shovel out the bedding sand layer down to the gravel base. Don't try to reuse this sand — it's been saturated and contaminated. Dispose of it or use it elsewhere in the yard.
- Assess the gravel base. If the base is solid, well-compacted, and the right depth (4 to 6 inches minimum), you can work from here. If it's thin, soft, or using the wrong material, remove it down to subgrade and start fresh.
- Rebuild the base if needed. Add crushed stone in 2- to 3-inch lifts, compacting each lift with the plate compactor before adding more. A single 4-inch compacted base layer typically requires starting with about 5 to 6 inches of loose material. Don't dump it all in and compact once — you'll get voids deeper in the layer.
- Check your slope. Before you lay any bedding sand, verify the gravel base surface pitches away from your house at 1/4 inch per foot. Use your level and a tape measure. This is the step most people skip, and it's why patios flood.
- Set your bedding sand. Lay screed rails (you can use 1-inch diameter metal conduit or pipe) on top of the compacted base, then drag a 2x4 across them to create a perfectly flat 1-inch sand bed. Pull the rails out after screeding and fill those channels with sand by hand. Do not compact the bedding sand before laying pavers.
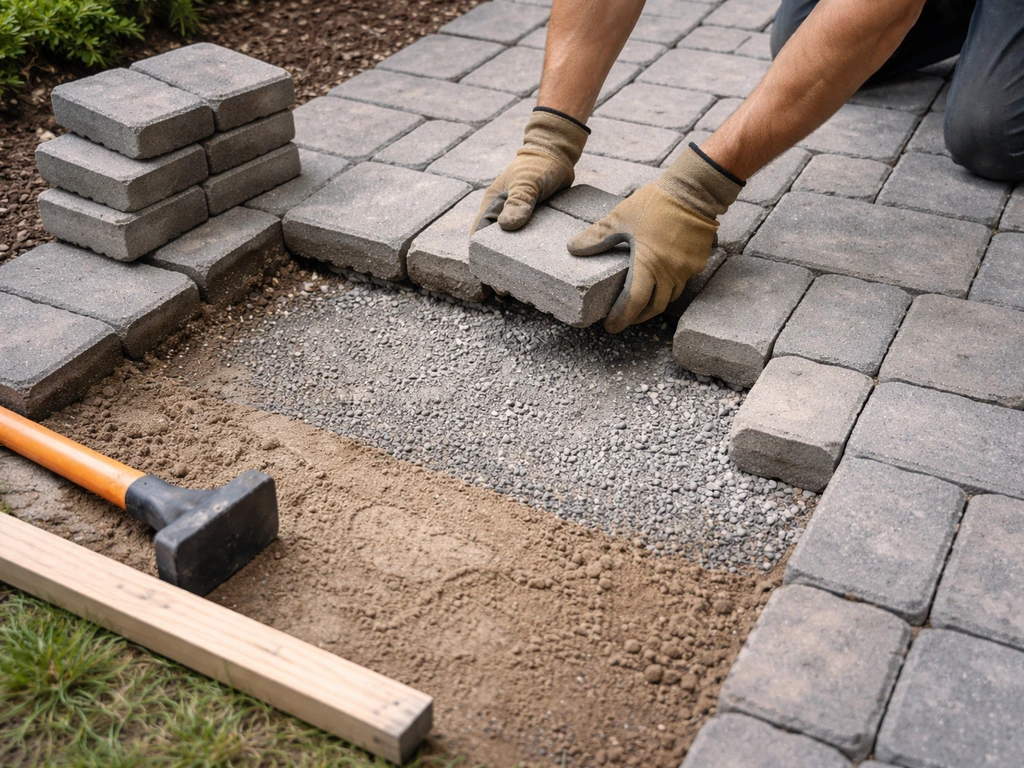
- Reset the pavers. Place pavers back in their original pattern, pressing each one down firmly by hand, then tapping with a rubber mallet. Keep joints consistent — most pavers are designed for a 1/8- to 3/16-inch joint. Check your level every few pavers to make sure you're staying flat and maintaining slope.
- Do a final compaction pass. Once all the pavers are back in place, run the plate compactor over the entire repaired area. Use a rubber pad or piece of carpet under the compactor plate to avoid scratching the paver surface. This final pass seats the pavers firmly into the bedding sand.
Fix the root cause: compaction, base depth, and drainage slope
Resetting pavers without addressing what caused the sinking means you'll be back here in a year. If you're stuck with a sunken patio, follow a complete how to fix sunken patio pavers approach so the base and drainage are corrected, not just the surface Resetting pavers without addressing what caused the sinking. Here's how to actually solve each of the underlying problems.
Compaction and base thickness
The gravel base needs to be compacted to at least 95% Standard Proctor density (this is the industry spec derived from ASTM D698 compaction testing). You can't measure that at home, but the practical test is firm: the base surface should feel like pavement when you walk on it, and a screwdriver shouldn't penetrate more than a quarter inch with hand pressure. If you're rebuilding from scratch, 4 inches of compacted crushed stone is the minimum for a residential patio on stable soil. If your soil is soft or expansive clay, go to 6 inches.
Drainage and slope correction
If your patio was originally built flat or sloping toward the house, that's a structural problem you need to fix now, not later. The 1/4-inch-per-foot rule isn't optional, water sitting on the surface or draining toward your foundation will undermine your base no matter how well you compact it. If the existing grade makes it impossible to slope away without raising the patio significantly, consider installing a channel drain at the low end of the patio to intercept water before it pools.
Edge restraints
Check every linear foot of edging while the pavers are up. Plastic or aluminum paver edging should be staked into the ground every 12 inches with 10- or 12-inch spikes, driven at an angle outward. If the stakes have pulled out or the edging has lifted, replace the whole run. Edging that isn't locked down is what allows border pavers to migrate and opens the gap that lets the whole system unravel.
Finishing touches: joint sand, edging, and sealing
Getting polymeric sand right
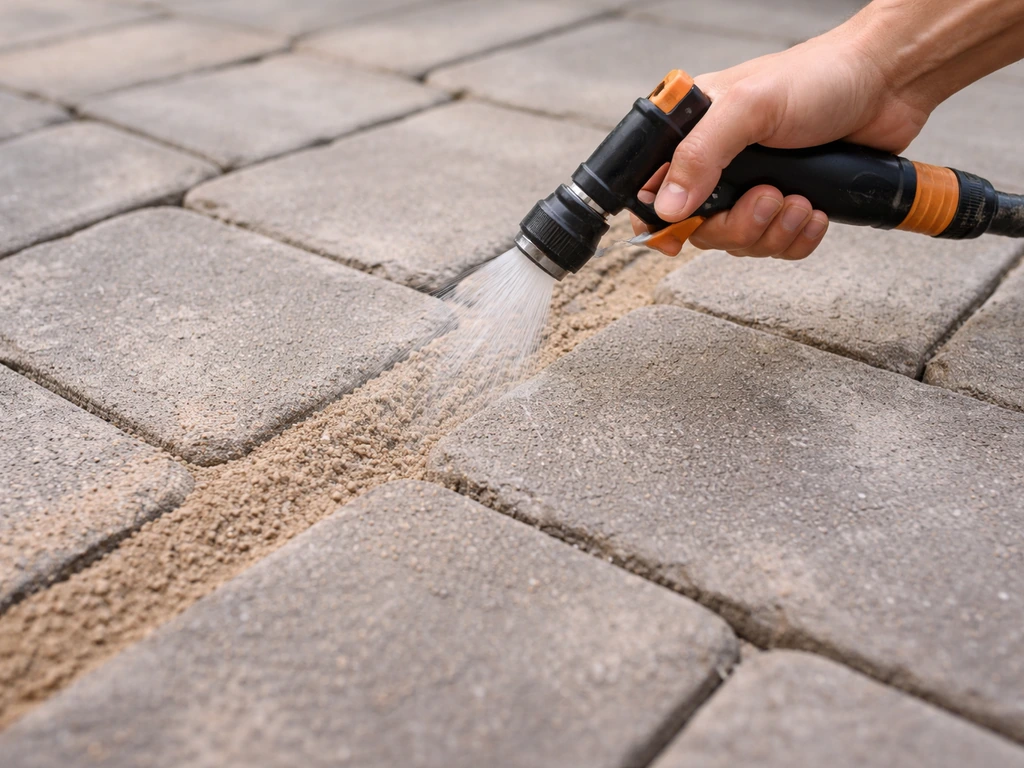
Polymeric joint sand is the best choice for filling joints after a repair, it hardens when activated with water and resists washout far better than plain sand. But it fails badly if you apply it wrong, and that failure is a common reason joints wash out again. The rules are strict: the paver surface and joints must be completely dry before you sweep the sand in. Techniseal’s EZSAND TDS specifies that surface and joints must be completely dry and should not be applied to submerged or constantly wet surfaces blank" rel="noopener noreferrer">paver surface and joints must be completely dry. Never apply polymeric sand over damp pavers. Check the weather and make sure you have at least 24 hours of dry conditions after application. Techniseal notes that its polymeric sand is blank" rel="noopener noreferrer">activated with a water showering step and provides a readiness rule of thumb: a properly compacted surface should not allow a finger to sink into the joints.
- Sweep dry polymeric sand across the paver surface and into the joints using a stiff broom.
- Run the plate compactor (with a rubber pad) over the area one more time to vibrate the sand deep into the joints.
- Sweep again to top off any joints that settled during compaction.
- Blow off any excess sand from the paver surface with a leaf blower — do not leave sand sitting on top of the pavers before activation.
- Activate with a gentle, low-pressure water spray. Work in sections no larger than 200 square feet at a time so the sand doesn't start setting before you finish activating the whole area.
- Check joint depth after activation. Techniseal's rule of thumb is useful here: properly filled joints shouldn't allow your finger to sink in. If they do, the sand level is too low and needs topping off after the first application dries.
- Allow the polymeric sand to cure fully before foot traffic — typically 24 hours, though read your specific product's instructions.
Sealing: useful maintenance, not a structural fix
Sealing your pavers after a repair is optional but worth considering if you want to protect the surface and help lock in the joint sand. What sealing won't do is fix or prevent sinking, it's surface-level maintenance, not a structural solution. Once you fix sunken paver areas, sealing is optional and works as maintenance, not a structural remedy fix sunken brick patio. If you decide to seal, wait at least 30 days after installing polymeric sand before applying a sealer (some products specify longer). On brand-new pavers that were just reset, wait 60 to 90 days to allow any efflorescence (the white mineral haze that appears early on) to work its way out before sealing it in. Use a penetrating or film-forming paver sealer based on your preference for finish (matte vs. wet look), and follow the manufacturer's application instructions for your specific paver type.
When to call a pro instead of DIYing it
Most localized sinking repairs, even ones that require base rebuilding in a small area, are genuinely within DIY reach if you're comfortable with a plate compactor and have a weekend available. But some situations warrant calling a hardscaping contractor, and it's better to know that now than after you've pulled everything up.
- The entire patio is sinking, not just a section. If the whole surface has dropped uniformly or you find the subgrade is soft and unstable across the whole area, you're looking at a subgrade failure that requires regrading, possibly geotextile fabric installation, and a full base rebuild — not a partial repair.
- You have a drainage problem that originates off the patio. If water is flowing onto your patio from a yard slope, downspout, or neighbor's property, fixing the patio base alone won't solve the recurring settlement. You need a drainage solution (French drain, grading work) that a landscaper or civil contractor handles.
- The patio has sunk repeatedly after previous repairs. Repeated settlement in the same spot means there's an ongoing soil issue — possibly a buried organic layer decomposing, a tree root system, or soil that expands and contracts seasonally. A pro can evaluate whether the site is even appropriate for a paver patio without a more engineered base.
- The sunken area is directly adjacent to your house foundation. Getting base repair and drainage slope wrong near a foundation has real consequences. If the low spot is right against the house, have a contractor assess it.
It's also worth noting that if you're dealing with sunken concrete slab sections rather than individual pavers, the repair process is different, slab lifting and paver resetting are separate disciplines with different tools and techniques.
How to keep your paver patio from sinking again
Once you've done this repair properly, a little ongoing maintenance goes a long way toward not repeating it.
- Inspect joints every spring. Joint sand settles and washes out gradually over time. Top off any low joints with polymeric sand before water has a clear pathway into your base. Catching this early costs almost nothing.
- Clean your drainage paths. Keep the perimeter of your patio clear so water can flow away from it freely. Debris, mulch, or soil buildup along the edges acts like a dam.
- Check your edge restraints annually. Walk the perimeter and press down on border pavers. If they rock or have visible gaps at the edge, resecure the edging immediately before it gets worse.
- Reapply sealer every 3 to 5 years if you're sealing. A fresh sealer coat helps resist water infiltration into joints and protects against freeze-thaw damage in cold climates.
- Don't let tree roots grow under the patio. If you have trees nearby, check for root-related heaving or cracking. Tree roots are one of the more persistent causes of repeated localized sinking.
- After any significant storm, do a quick visual check. Early detection of a newly sunken paver or washed-out joint is a five-minute fix. Letting it go for a season turns it into a weekend project.
The honest truth about paver patios is that they're designed to be maintained and repaired in sections, that's actually one of their biggest advantages over poured concrete. When you do this repair right and fix the actual cause rather than just the symptom, a paver patio can stay level and stable for decades.
FAQ
Can I fix sinking paver patio areas one small section at a time, or do I need to redo the whole patio?
Yes, but only if the failed zone is clearly localized and you can re-establish the same slope, edge restraint, and compaction across the repair boundary. A practical rule is to lift a rectangle slightly beyond the worst rocking area (at least 6 to 12 inches past the visibly unstable pavers) so the new base ties into solid, undisturbed material rather than another failing seam.
How do I tell whether the problem is bedding sand, the gravel base, or subgrade without guesswork?
Start by checking joint sand loss and edging movement first, then look for water clues. If you see standing water, darker damp base, or repeated undermining after rain, drainage or grading is the likely driver, not just bedding. If there is no water and the base feels loose or spongy under a paver, base compaction or separation is more likely.
My pavers rock when I step on them, can I just add more sand and tamp?
If pavers rock, you should assume the bedding layer has become uneven or the base has settled, so a “sand-only” top-up usually fails. Instead of adding sand over existing layers, pull up at least the rocking units and inspect down to the base, because trapped voids and soft spots will keep the same heights from re-leveling.
What’s the most common mistake when using polymeric joint sand on a repaired patio?
Do not use polymeric sand as a patch if joints are re-sanded prematurely or if the patio is damp. Polymerics need dry joints and a dry surface to activate correctly, and applying it with humidity or after misty weather can lead to weak crust, incomplete bonding, and later washout. If the weather window is not right, use plain sand for now and plan polymeric for the next dry period (or fully correct the drainage and edges first).
Will sealing my paver patio prevent it from sinking again?
Yes, but treat it as optional protection, not stabilization. A sealer can slow staining and make cleanup easier, but it will not stop base settlement, washout, or improper slope. If you choose to seal, verify it matches your paver type (clay vs concrete) and that it is compatible with polymeric sand so you do not trap moisture or prevent proper joint performance.
How can I avoid creating a new slope problem while resetting pavers in the repair area?
If you remove and rebuild only the top layers, the slopes can drift because the base thickness changes or because the new bedding is not screeded to a consistent height. To avoid this, establish new reference points (string line or level marks) before resetting pavers, and use a screed board or straightedge so every reset section matches the intended 1/4-inch-per-foot fall.
What should I do if the repaired spot starts sinking again after the first heavy rain?
You should inspect and redo bedding and base when the repair area shows voids, pumping, or continued rocking after compaction. A sign you have not fixed the cause is repeated settlement right after the first few rainstorms. In that case, re-lift and check for drainage failure, undercutting, and whether the base thickness and compaction were adequate at the edges of the repair.
Why does my patio edge keep separating even when I rebuild the middle?
Edge restraints matter because they keep border pavers from creeping and opening joints, even when the field pavers are stable. If you have lifted edging, missing stakes, or a wavy border line, replace the edging run and stake pattern before resetting the pavers, then rebuild the base right to the edge so there is no unsupported strip.
What changes when the patio sits over expansive clay or persistently wet soil?
If your soil is expansive clay or stays wet seasonally, the deeper base thickness recommendation and better drainage become more important. In these conditions, consider installing a proper base drainage layer or improving surface runoff control (for example, a channel drain at the low end) because compacting alone can be undermined by seasonal volume changes.
When should I stop DIY troubleshooting and hire a contractor for a sinking paver patio?
If the sinking is widespread or affects large slab-like areas, the work may be too extensive to treat as “localized paver repair.” Call a hardscaping contractor if the base has failed over a broad footprint, if you find major subgrade instability, or if grading corrections require significant removal and drainage system work. It is usually cheaper to get it right once than to repeatedly lift the same pavers after each rainy season.
Next Article
How to Fix a Sinking Patio: DIY Diagnosis and Repair
Step-by-step DIY guide to diagnose and fix a sinking concrete patio slab, including drainage, voids, leveling, and when