A sinking concrete patio is almost always caused by one of four things: soil settling under the slab, water washing out the fine particles that support it, voids forming from poor compaction or erosion, or drainage problems that have been quietly doing damage for years. The good news is that if the slab itself is still mostly intact, you can often fix it yourself using a process called slabjacking or mudjacking. If the slab is cracked into several pieces and the subbase is badly compromised, you're looking at a professional job or a full replacement. This guide will help you figure out which situation you're in and exactly what to do about it.
How to Fix a Sinking Patio: DIY Diagnosis and Repair

Talia Lang
29 May 2026
Quick diagnosis: is your patio actually sinking or just cracked?
Before you buy materials or call anyone, spend 20 minutes doing a proper inspection. You want to know two things: how much has it sunk, and is there void space underneath it? Both questions are easier to answer than you might think.
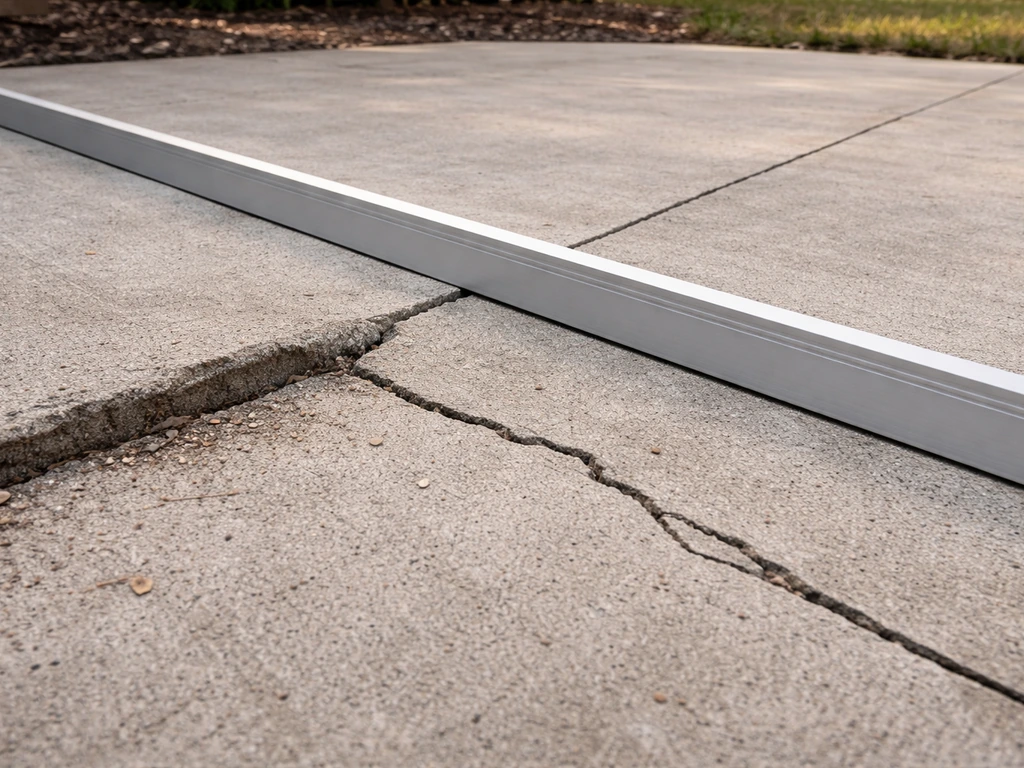
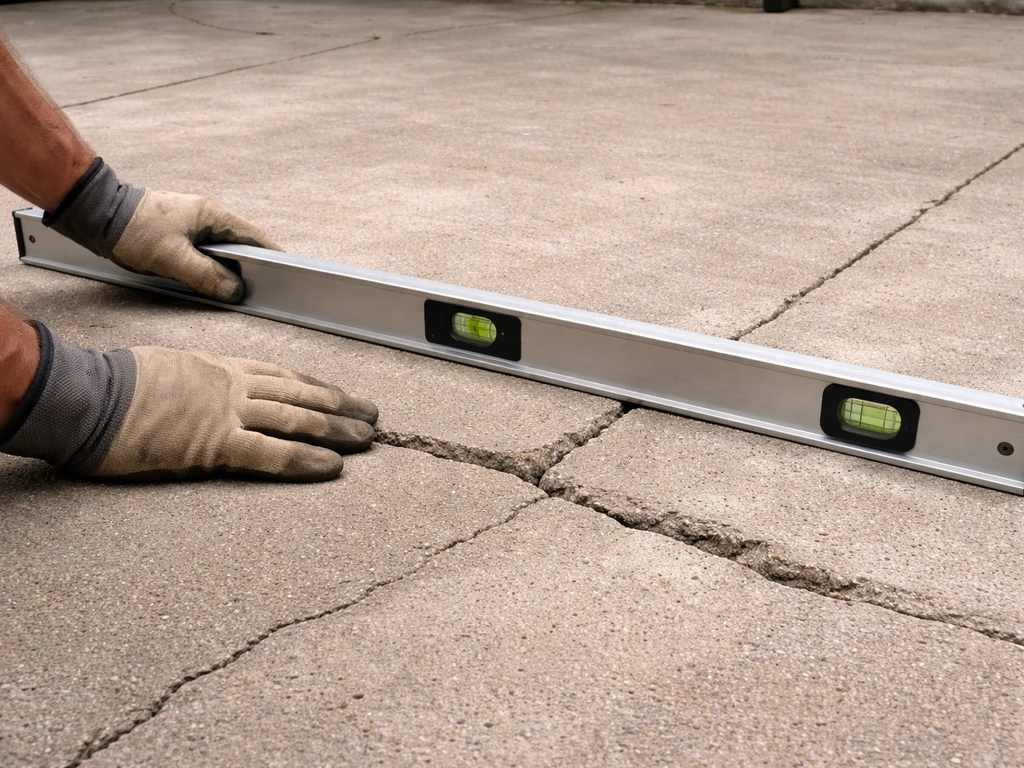
Start with a long straightedge or a 6-foot level laid across the surface. Look for low spots and measure the gap. A drop of a half inch over a few feet is a tripping hazard but usually repairable. More than 2 inches of sinking, or sinking that's uneven panel to panel, suggests a more serious subbase problem. Also check whether water pools on the patio surface after rain. Ponding, slow drying in one area, or mud seeping up at the slab edges are all signs that water is the culprit and is still actively moving soil around under there.
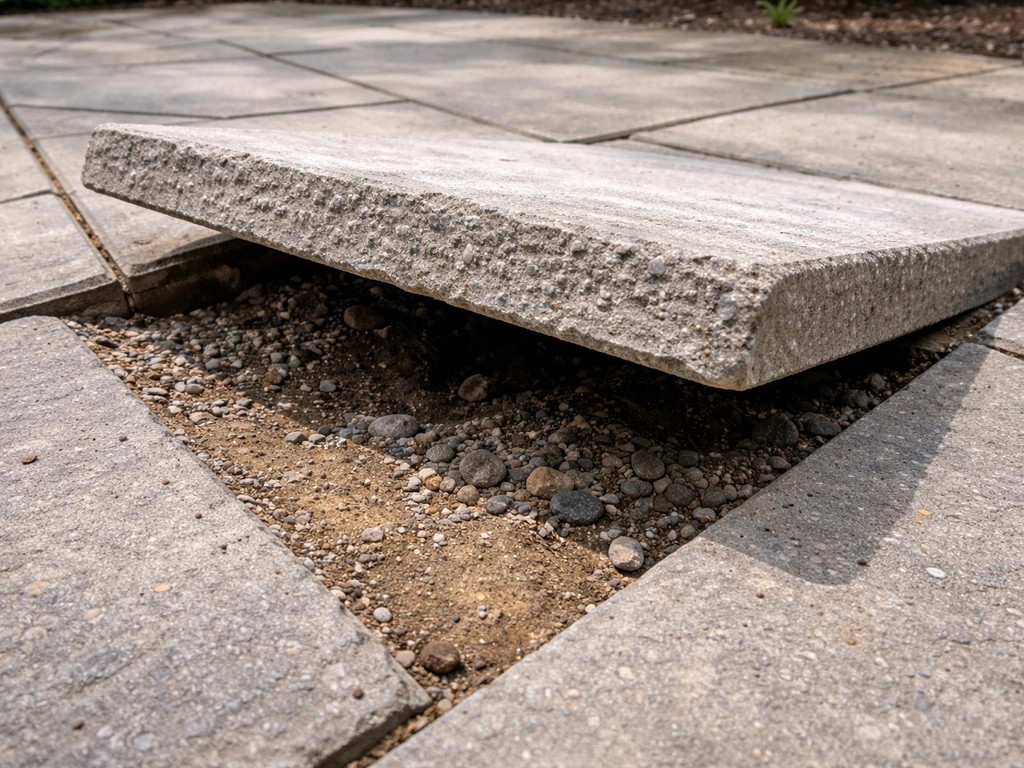
Next, check for voids by sounding the slab. Walk across it slowly and listen for a hollow, drum-like sound underfoot, especially near the low spots. You can also use a steel rod or a regular hammer and tap across the surface in a grid pattern. Solid slab sounds like a dull thud. A hollow area sounds noticeably different, almost like tapping on a cardboard box. This technique, sometimes called chain dragging in professional inspection, works surprisingly well for locating hidden voids without any equipment.
Finally, look at the cracks. Hairline cracks in a single plane often mean normal shrinkage. But diagonal cracks running from corners, or cracks that are wider at one end than the other, usually point to differential settling where one part of the slab dropped more than another. If the slab is broken into several large sections that have moved independently, that's a more serious structural problem and the DIY options get limited fast.
Why concrete patios sink in the first place
Understanding the cause matters because fixing the symptom without fixing the cause just means you'll be back here again in a few years. Here are the most common culprits.
Soil settlement and poor compaction

If the ground under the slab wasn't properly compacted before the concrete was poured, it will continue to compress under the weight of the slab over time. This is especially common in newer homes where the lot was graded with fill dirt that was never compacted properly. Clay-heavy soils are also a problem because they shrink when dry and swell when wet, creating a constant cycle of movement that gradually shifts the slab.
Washout and soil erosion
This is the most common cause for established patios. Water gets under the slab through joints, edges, or cracks and slowly carries fine soil particles away with it every time it drains. Over months and years, those particles washing out creates expanding voids under the slab. A single downspout discharging near the patio edge during a heavy storm can dump an enormous volume of water directly against the slab, and that adds up fast. The slab then spans the void like a bridge until it finally drops.
Drainage problems
If the patio doesn't slope slightly away from the house (the standard is about 1/8 inch per foot), water sits on or alongside the slab and seeps under it. Gutters that drain too close to the patio, irrigation heads pointed at the edge of the patio, and low spots in the yard that send runoff toward the patio all make this worse. Drainage problems don't just cause sinking; they also cause the slab to move subtly as the moisture content of the soil keeps changing.
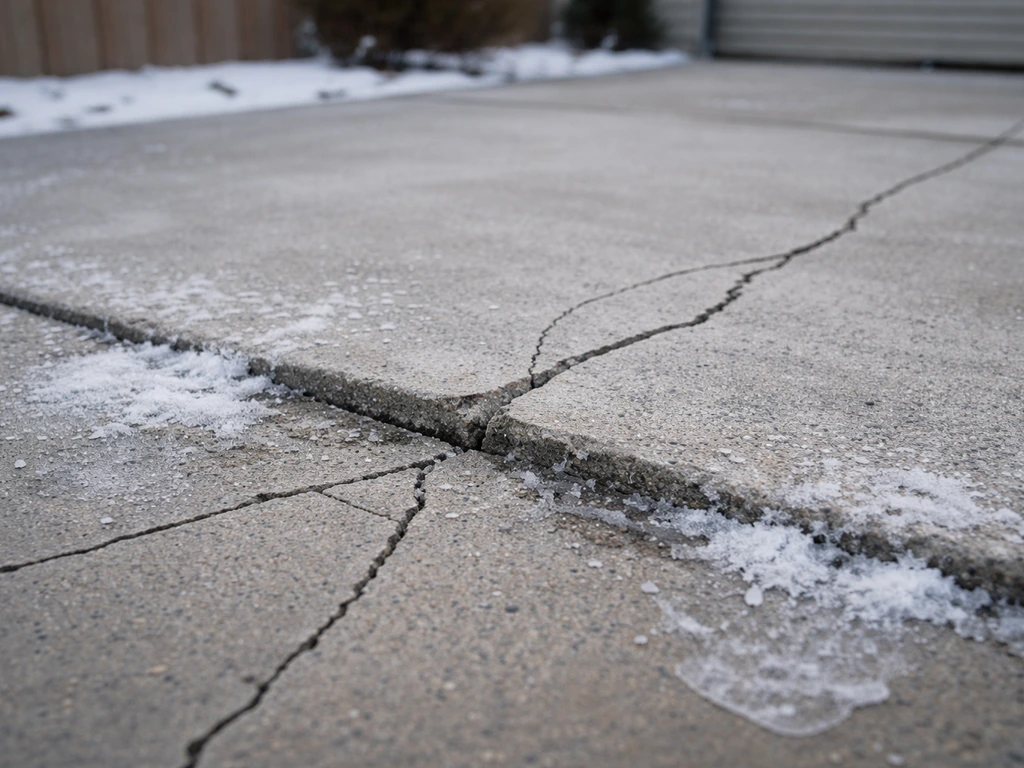
Freeze-thaw cycles
In colder climates, water that gets under the slab freezes and expands, which can push the slab upward (frost heave) or, when it thaws, leave gaps that collapse unevenly. If your patio looks worse every spring, frost heave combined with poor drainage is almost certainly involved.
What you'll need for a DIY fix
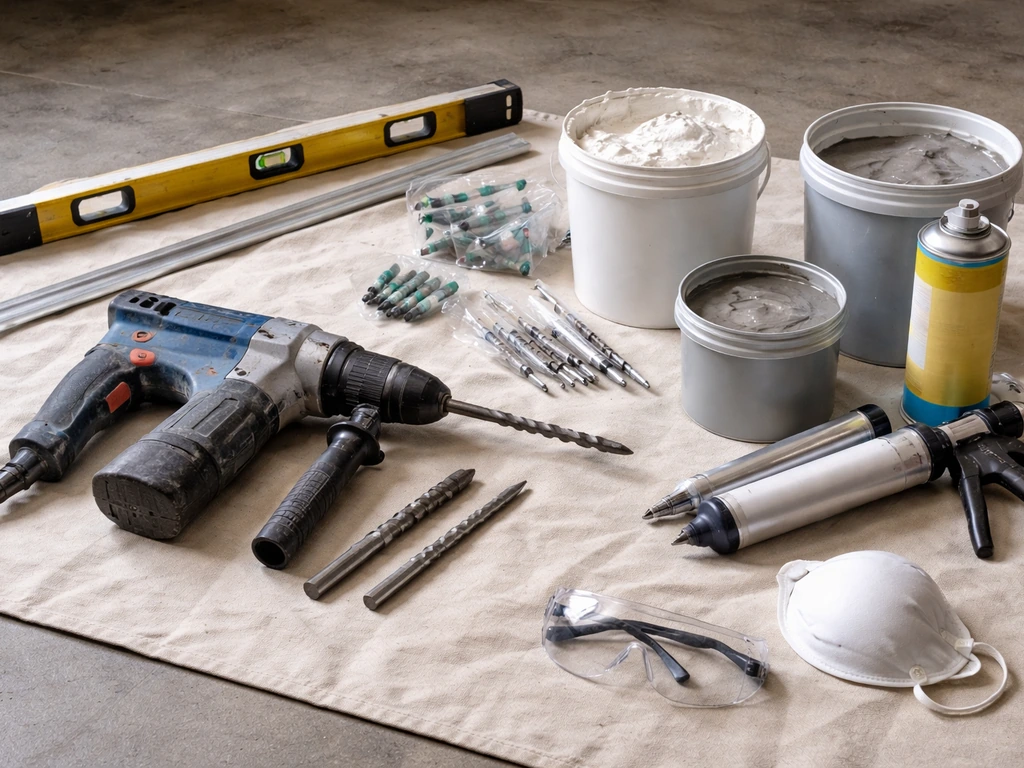
The right repair approach depends on how much the slab has sunk and whether there are voids underneath. For minor settling with small voids, you can fill the gaps yourself. For significant sinking, you'll need to rent equipment or hire out the lifting portion. Here's what the DIY toolkit looks like:
- Rotary hammer drill with a 1.5-inch or 2-inch masonry bit (for drilling injection holes if doing mudjacking yourself)
- Hydraulic grout pump or polyurethane foam injection kit (for modest void-filling; heavy lifting requires professional equipment)
- Cementitious grout mix or polyurethane two-part foam kit (more on which to choose below)
- Long level or straightedge (6 feet minimum) for monitoring lift
- Concrete patching mix (QUIKRETE Concrete Resurfacer or Sakrete Fast-Setting Resurfacer work well for surface repairs)
- Margin trowel and float for finishing
- Caulk gun and polyurethane joint sealant for cracks and expansion joints
- Safety glasses, gloves, and dust mask for drilling
- Garden hose for cleanup
A quick note on materials: traditional mudjacking uses a cementitious grout slurry pumped in at low pressure (around 10 PSI). It's cheaper but heavier, and if your drainage problems aren't solved, it can erode just like the original soil did. Polyurethane foam injection uses a two-part foam (an isocyanate and a polyol resin mixed at the nozzle) that cures into a rigid, closed-cell foam. It's lighter, won't erode, and cures in minutes rather than days. For most residential patios, polyurethane foam is the better long-term choice even though it costs more per project.
Step-by-step: how to fix a sinking concrete patio slab
This process assumes your slab is still mostly intact, just sunken. If you have large chunks that have separated and rotated, stop here and read the section on when to call a pro first.
- Mark your low spots and void areas. Walk the slab with a level and chalk, marking every spot that sounds hollow and every area that's dropped more than a quarter inch. This map tells you where your injection holes need to go.
- Identify and fix your drainage issues first. Redirect any downspouts at least 6 feet away from the patio edge. If irrigation heads are near the slab, reposition them. Fixing the root cause before you repair the slab is non-negotiable, or the repair fails again.
- Drill injection holes. Using your rotary hammer and a 1.5 to 2-inch masonry bit, drill holes through the slab over your marked void areas. A grid spacing of around 4 feet works well for most patios; you want enough coverage to fill the void completely without over-drilling. Stay at least 6 inches back from slab edges and joints.
- Inject the fill material. For polyurethane foam, insert the injection port, connect the two-component gun, and inject in short bursts, working from one end of the void toward the other. For cementitious grout, connect the pump and inject at low pressure, watching for grout to appear at adjacent holes, which tells you the void is filling. Do not over-inject. Monitor the slab elevation with your long level continuously as you work.
- Monitor lift carefully. Lift the slab in small, controlled increments. Check your level after every few seconds of injection. You're aiming to get the slab back to its original plane, not to push it higher than it was. Overcorrection is easy to do and hard to undo.
- Stop injection and cap holes. Once the slab is level or the void is filled, stop pumping and plug or patch the injection holes. Polyurethane foam cures in minutes. Cementitious grout needs 24 to 48 hours before you load the slab.
- Patch the injection holes and surface cracks. Mix a small batch of concrete resurfacer to a thick paste and fill the drilled holes flush with the surface. For surface cracks, use a polyurethane caulk for any crack wider than a hairline, and a concrete resurfacer skim coat for the surface texture. QUIKRETE Concrete Resurfacer has a working time of about 20 minutes at 70°F, so mix small batches.
- Seal the joints. Once patches have cured, seal all expansion joints and the perimeter edge of the slab where it meets the house with a good polyurethane sealant. This is the most important thing you can do to prevent water from getting under the slab again.
How to stop it from sinking again
The repair itself won't last if the conditions that caused the sinking are still in place. Here's what actually works for long-term prevention.
Get the water away from the slab
This is the single most effective thing you can do. Extend downspout extensions so they discharge at least 6 feet from any concrete surface. Check that the yard grades away from the patio; if it doesn't, you may need to add topsoil along the edges to redirect surface runoff. Add a channel drain at the low edge of the patio if water consistently wants to pool there.
Seal the perimeter and joints every few years
The joint between the patio and the house foundation is the most common entry point for water. A backer rod and polyurethane caulk there, refreshed every two to three years, does a lot of work. Also seal the control joints in the slab surface. Once caulk gets brittle and starts pulling away, water starts getting underneath.
Don't let vegetation grow at the edges
Roots from nearby trees or large shrubs can work under slab edges over time and cause uneven lifting and settlement. Keep a clean edge between the slab and any planting beds, and use a root barrier if you have large trees nearby.
Cure times, surface finishing, and realistic expectations
Polyurethane foam cures in minutes and the slab is typically walkable the same day, often within an hour of injection. Cementitious grout mudjacking is slower. Plan to stay off the slab for at least 24 hours and avoid driving heavy loads over it for 48 to 72 hours.
For the patched surface, Sakrete's Fast-Setting Self-Leveling Resurfacer sets in about 90 minutes and is ready for foot traffic in around 4 hours, which makes it a practical choice. QUIKRETE Concrete Resurfacer is more widely available and works well for cosmetic skim coats over the drilled holes and any spalled areas, though it needs closer to 24 hours before you put furniture back.
On realistic expectations: slabjacking and void-filling can restore a slab to level and give it solid bearing support again, but they don't make it look new. Drilled holes get patched, but there will be visible marks. Existing cracks in the slab will still be there. If the aesthetic result matters a lot to you, a concrete resurfacer skim coat over the whole slab after the lifting and patching can help unify the appearance. Also understand that if the underlying drainage or soil problem isn't corrected, even a perfect repair has a limited lifespan.
| Method | Best for | Cure time | DIY-friendly? | Cost relative |
|---|---|---|---|---|
| Mudjacking (cementitious grout) | Large voids, significant lift needed, budget repairs | 24-48 hours | Partially (pump rental or pro recommended) | Lower |
| Polyurethane foam injection | Smaller voids, faster turnaround, wet/drainage-prone areas | Minutes to 1 hour | Partially (two-component equipment needed) | Higher |
| Surface resurfacer only | Minor low spots under 1/4 inch, cosmetic leveling | 90 min to 24 hours | Yes | Lowest |
| Full slab replacement | Severely broken or badly settled slab beyond lifting | Several days | No | Highest |
When to stop DIYing and call a professional
There are situations where the honest answer is that this job is beyond what a homeowner can safely or effectively do. Knowing when to stop is part of doing this right.
- The slab has dropped more than 3 inches or has shifted laterally, not just vertically
- The slab is broken into multiple sections that have moved in different directions, not just dropped uniformly
- You can see or feel significant movement in the slab when you walk near its edges, suggesting a large active void
- Water is actively coming up through cracks or joints after rain (hydrostatic pressure problem, not just surface drainage)
- The area near the patio shows signs of sinkholes, unusual ground depression, or soil collapse
- The patio is attached to structural elements of the house, like a stoop or foundation step, where movement could affect structural integrity
- You've done a DIY repair in the past and the slab sank again within a year (the subbase problem is more serious than it looks)
In these cases, a professional concrete repair contractor can use ground-penetrating radar (GPR) or core sampling to assess what's actually happening under the slab before committing to a fix. That diagnostic step is worth every penny when the situation is unclear, because injecting grout into a badly compromised subbase can make things worse instead of better.
It's also worth knowing that different patio materials have different repair paths. The process described here is specific to poured concrete slab patios. If you're dealing with individual pavers or brick units that have sunk, the repair process is different since you can often lift and reset the units directly.
If you have a fix sunken brick patio instead of a poured concrete slab, you'll usually need to lift and reset the affected units and address the drainage that caused the movement brick patio repairs. If you have sinking pavers, the goal is to lift, reset, and rebuild the base so the same settlement does not return fix sinking paver patio.
If you have sunken patio pavers, the fix usually involves lifting and resetting the units after correcting the base and drainage individual pavers or brick units that have sunk. The same applies to slab-on-grade installations made of individual concrete slabs rather than one poured section.
If you take one thing away from this: diagnose the cause before you spend anything on materials. The drainage problem that caused the sinking costs almost nothing to fix. The materials to fill the void cost something. But fixing the void without fixing the drainage means you'll be back here in two or three years doing the same thing again.
FAQ
How can I tell whether the patio is still actively sinking versus it already stabilized?
Use a tape measure or the level to track the depth difference from one fixed reference point (like the house threshold) across several days after a dry spell and again after a heavy rain. If the low spots rise slightly after rain then drop again, that pattern usually points to active water movement or saturated subbase, meaning you should fix drainage before slabjacking.
When should I stop DIY inspection and call a pro before attempting slabjacking?
It is usually not worth lifting an intact slab if the slab is cracked into multiple large sections that have shifted independently, or if you find widespread hollow areas that connect across the patio. In those cases, injecting material can leave you with a “bridge” over unstable soil, so it is better to get core samples or use a contractor for an assessment before proceeding.
What signs mean I should fix drainage first, not after lifting the slab?
If you see water pooling, slow drying, efflorescence (white chalky deposits) at edges, or mud pumping through joints after rain, you have an active drainage path. Prioritize correcting grading, downspout discharge distance, and joint/edge sealing first. Otherwise the injection can erode or the void can re-form even if the slab lifts initially.
If my patio mostly lies flat but still sinks in one area, should I still worry about yard grading?
If the patio slopes toward the house or appears level only when dry, do not assume mudjacking alone will “solve” the issue. The surface can still trap water, and repeated wetting and drying can shrink and swell the supporting soil, leading to new low spots. Confirm the yard grades away from the patio and correct it before long-term repairs.
My patio has cracks, how do I know which ones will keep causing sinking?
Small hairline shrinkage cracks in a single plane are often not a deal breaker, but cracks that open and close with seasons, diagonal cracks from corners, or cracks with soil movement at the edges are red flags. If a crack widens after freeze-thaw or after heavy storms, it suggests differential settling or water-driven movement that needs cause correction along with repair.
Why is “resurfacing” usually not enough for a sinking patio?
Do not rely on the slab’s appearance alone. A slab can look intact while voids exist underneath. If you hear obvious hollow sounds in a grid pattern, or you notice one area is permanently lower and sounds hollow while adjacent areas sound solid, you likely need void injection rather than just resurfacing.
What’s the best way to locate the water source if only one corner is sinking?
If you have a “local depression” that is only at one edge, look for downspouts, irrigation heads, or runoff coming from a specific direction. Once you find the source, reroute discharge and adjust the irrigation to stop watering the patio edge. Targeted correction often prevents the void from expanding in just one growing zone.
How should I verify the slab lifting results after foam or grout injection?
Polyurethane foam cures quickly, but it still depends on the pressure and the operator’s technique. After injection, recheck level at the treated points and inspect again after the first rain to confirm the slab does not re-settle. If you can, take baseline measurements before work so you can confirm lift and identify any remaining low areas.
How often do I need to re-seal joints after repairing a sinking patio?
Yes. For bonded sealant, plan to refresh joint sealing every two to three years as noted in the article, and more often if you get lots of sun exposure or freeze-thaw. Also, after major drainage changes, re-inspect control joints and edges because new runoff patterns can stress sealant and allow water entry again.
I think it’s a paver or brick patio, not a poured slab. Does the same sinking-patio repair plan apply?
If the patio is made of pavers or brick units, you generally cannot use slabjacking methods as a direct fix. The correct approach is to lift and reset units, rebuild or improve the base, and correct drainage so the bedding does not keep washing out. Treating pavers like a poured concrete slab can cause repeat settlement.
What should I do in what order, to avoid wasting money on a temporary fix?
Before injecting, make sure you have a way for water to leave the area, not just where it goes while it is raining. Fix downspouts, irrigation, grading, and pooled-water spots so the subbase stays relatively stable. Then choose the repair type, void filling method, and patch timing, because repeated wetting will shorten the lifespan of any lifting repair.
Next Article
How to Fix Sunken Patio Slabs: Step-by-Step DIY Repair
Diagnose why patio slabs sink, then lift, re-level, underfill voids, fix drainage, and cure for a lasting DIY repair.