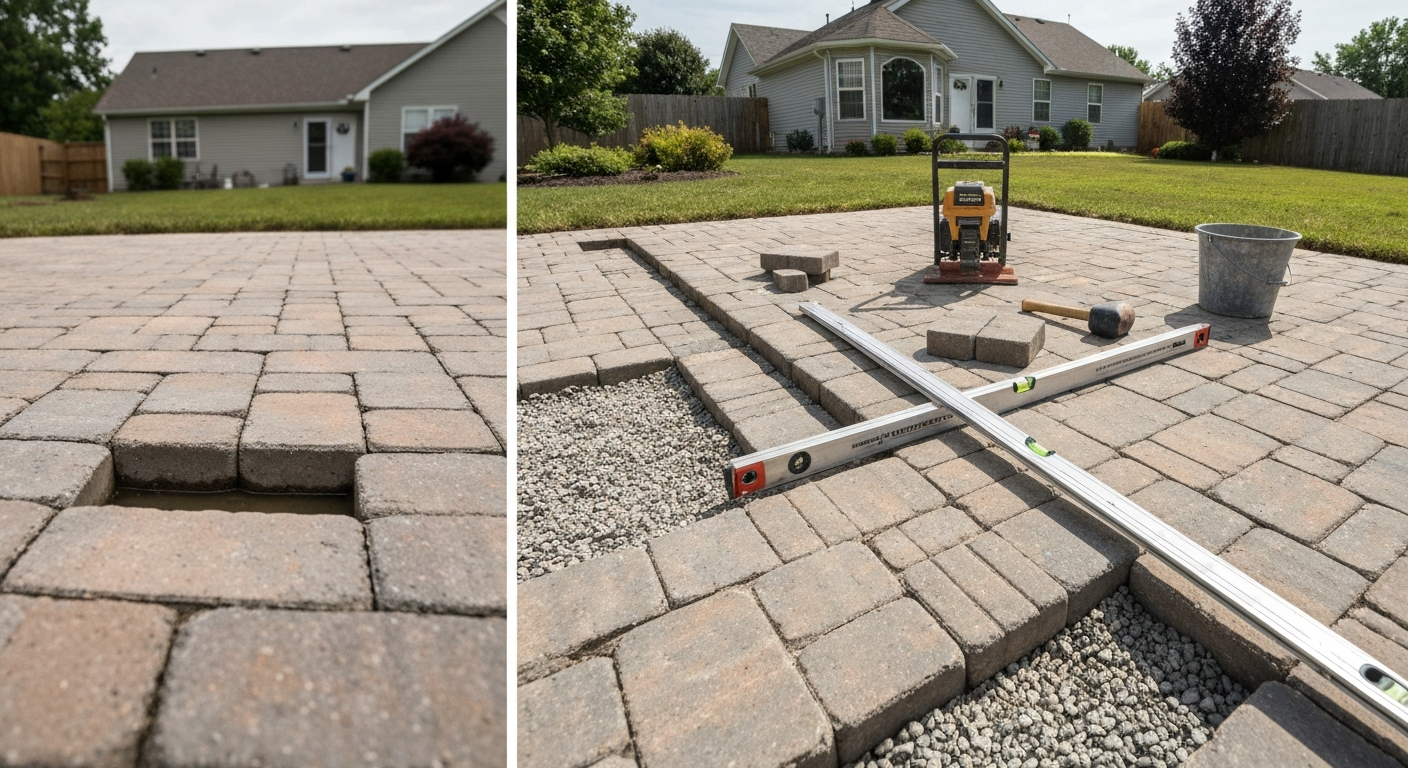
A sunken patio is almost always a base problem, not a surface problem. Whether you have concrete slabs, brick, or pavers, the fix comes down to finding out what failed underneath, correcting it, and putting things back properly. Most homeowners can handle paver and brick repairs themselves in a weekend. Concrete slab lifting is trickier and often worth calling a specialist for, but you can still understand the process well enough to vet contractors and avoid getting oversold. This guide covers diagnosis, every common repair method, tools and materials, realistic costs, and honest guidance on when to stop and call someone.
Fix Sunken Patio: DIY Steps for Pavers, Concrete & Drainage

Talia Lang
10 Aug 2026
What causes a sunken patio (and what materials this covers)
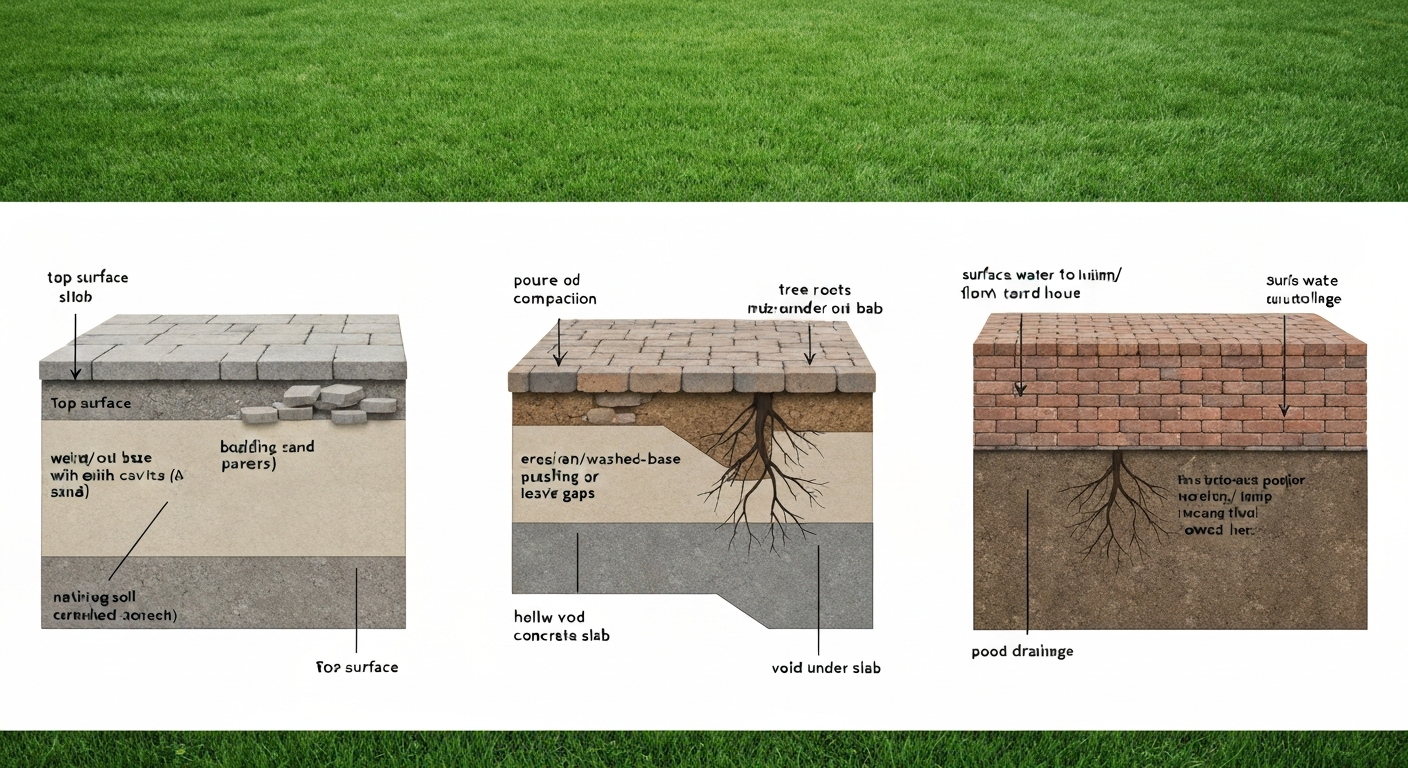
Patios sink for a handful of reasons that repeat themselves constantly: the base wasn't compacted properly during installation, water has slowly eroded or washed out the material underneath, tree roots have either pushed things up or left voids as they decayed, the soil has naturally settled over time, or drainage is so poor that water is perpetually undermining the structure. This guide covers all three common patio materials: poured concrete slabs, interlocking pavers (concrete or natural stone), and brick. The diagnosis process is similar across all three, but the repair methods diverge significantly once you know what you're dealing with.
Pavers and brick are the most forgiving to repair because individual units can be lifted and reset without specialized equipment. Concrete slabs are a different story. You can't just pick them up. Your options are mudjacking (pumping a cement slurry underneath to fill voids and raise the slab), polyurethane foam injection (a faster, lighter alternative), or full removal and replacement. Each of those slab approaches has a real cost and difficulty range, so choosing the right one matters.
Quick diagnostic checklist: what's causing your patio to sink
Before you buy a single bag of sand or rent any equipment, spend 20 minutes walking your patio and running through this checklist. The cause you identify will completely change your repair approach.
- Poor or uncompacted base: Low spots appear evenly distributed or in a broad area, not just near edges or roots. Lifting a paver or tapping a concrete slab reveals soft or hollow zones. This is the most common cause by far.
- Erosion or washed-out base: Low spots get visibly worse after heavy rain. If you lift a few pavers in a sunken zone, the bedding sand is gone or the base material has shifted. Water is carrying it away somewhere.
- Tree roots: Slabs or pavers that are heaving up on one side and sinking on the other, or actual roots visible in the base when units are lifted. Mature trees within 10 feet of the patio are a red flag. Decayed roots can also leave voids that cause sinking.
- Soil settling: Gradual, slow descent over several years, often concentrated near the house where fill was placed during construction. The sinking is usually uniform and not tied to rain events.
- Drainage problems: Water pools on the surface or runs toward the house. The ground around the patio stays wet for days after rain. This doesn't cause sinking directly but accelerates erosion and soil movement underneath.
A few quick field tests help confirm what you're seeing. Grab a stiff rod or piece of rebar and probe the soil around sunken spots, pushing down to feel for soft zones or voids. Tap concrete slabs with a hammer or your knuckles: a dull, hollow sound means a void underneath, while a solid thud means good contact with the base. Use a 4 to 6 foot straightedge or a long board to span sunken areas and measure the gap at the lowest point. And if you suspect erosion, pull up one or two pavers in the worst spot and look at what's under them.
How to assess your patio before choosing a repair
Grading the severity
Not every sunken patio needs the same level of intervention. A small area with a quarter-inch drop is a cosmetic nuisance. A two-inch drop across several square feet near your foundation is a structural and water management problem. Measure the vertical displacement with your straightedge and a tape measure or a small level. As a rough guide: under half an inch is low severity and often a simple sand re-bed for pavers; half an inch to one and a half inches is moderate and usually requires base work; over one and a half inches or widespread sinking across most of the patio is severe and may mean full base reconstruction or professional slab lifting.
Slope and drainage check
Measure the existing slope of your patio away from the house. The target for patios is roughly 1/8 to 1/4 inch of drop per foot of run away from the structure. That's enough to move water without making the surface feel noticeably tilted. If your patio now slopes toward the house or has flat or reverse spots, drainage repair has to be part of the fix, not an afterthought. A line level or a long builder's level on your straightedge makes this measurement fast.
Load and structural considerations
A residential pedestrian patio is a relatively light-load structure, which is part of why homeowners can often handle repairs without engineering input. That said, if the patio is adjacent to your foundation, attached to the house structure, or if sinking is occurring near a retaining wall, the stakes are higher. Sinking near the foundation can direct water toward your basement or crawl space. Sinking adjacent to a retaining wall can signal wall movement. In either case, be conservative: fix drainage as part of any repair and consider a professional assessment before doing heavy excavation.
Should you DIY this or call someone
Paver and brick repairs are genuinely DIY-friendly for most homeowners. The skills involved are basic, the tools are rentable, and the risk of making things significantly worse is low if you follow the process correctly. Concrete slab lifting is a different calculation. Mudjacking and polyurethane foam injection require specialized equipment and experience to get right, and a botched foam injection in particular can cause more damage than the original sunken slab. Most homeowners should treat slab lifting as a job to understand and price out, not necessarily to execute themselves.
Here are the situations where I'd strongly recommend hiring a professional rather than attempting a DIY fix:
- The sunken area is directly adjacent to your home's foundation and water is or could be redirecting toward it.
- Sinking is caused by tree roots and you haven't determined the extent of root intrusion. An arborist assessment before major excavation is worth the cost.
- You have a concrete slab with voids underneath and want a mudjacking or foam injection repair. Unless you already own or can practically rent the pumping equipment, this is contractor territory.
- The base failure is deep (more than 8 inches down) or involves unstable fill soil that won't hold compaction.
- Your patio is adjacent to or part of a retaining wall showing any movement.
- Local permits are required for patio work in your municipality. Check before you start: some jurisdictions require permits for patio work above a certain square footage or when drainage modifications are involved.
If none of those apply and you're dealing with sunken pavers or brick, you're very likely in DIY territory. Budget a full weekend for a moderate repair and be prepared to spend a second day if the base work is more involved than expected.
Tools and materials you'll need
General tools for any patio repair
- 4 to 6 foot straightedge or long board
- 4-foot level or line level
- Stiff probe rod or length of rebar
- Tape measure
- Rubber mallet
- Hand tamper or plate compactor (rent a plate compactor for anything over a few square feet)
- Flat spade and pointed shovel
- Wheelbarrow
- Broom and shop vacuum
- Knee pads (you'll be on the ground a lot)
- Work gloves and safety glasses
Paver and brick repair supplies
- Paver puller or two flathead screwdrivers for lifting units
- Compactable gravel or crushed stone base material (typically 3/4-inch clean crushed aggregate or road base)
- ASTM C33-grade bedding sand (not mason sand, not stone screenings, not polymeric sand for the bedding layer)
- Polymeric sand for joints (optional but highly recommended to resist erosion and weed growth)
- Garden hose or watering can for activating polymeric sand
- Plate compactor with rubber pad attachment to protect paver surfaces
- Replacement pavers or bricks if any are cracked or broken
- Edge restraint spikes if existing restraints are loose or damaged
Mudjacking supplies (contractor-level job)
- Mudjacking pump and hoses (contractor equipment)
- Slurry mix: typically a blend of Portland cement, sandy soil, and water
- Drill with masonry bit (1.5 to 2-inch holes for injection ports)
- Hydraulic cement or patching compound to close injection holes after work
Polyurethane foam injection supplies
- Two-component expanding polyurethane foam system and injection equipment (contractor-grade rigs for large areas; DIY foam kits exist for small, shallow repairs)
- Rotary hammer drill with small-diameter masonry bit (typically 5/8-inch holes)
- Hydraulic cement or fast-setting concrete patching compound for hole closure
- Grinder or angle grinder for smoothing patched holes flush with slab surface
Drainage repair materials
- Topsoil or compactable fill for regrading around the patio perimeter
- Perforated drain pipe (4-inch diameter is standard for French drains)
- Drain fabric (filter cloth/geotextile) to wrap French drain pipe
- Washed gravel for French drain bedding
- Channel drain or slot drain with appropriate grate (for surface drainage between slabs or pavers)
- Downspout extension pipe or flexible corrugated tubing if gutters empty near the patio
Step-by-step: fixing sunken pavers and brick
This is the repair most homeowners can confidently tackle. The process for interlocking pavers and brick is essentially the same: lift the affected units, fix whatever failed underneath, and reset everything properly. If you're dealing specifically with brick, see the guide my brick patio is sinking for step‑by‑step instructions tailored to brick patios. For step-by-step instructions on how to level a sunken patio, consult our detailed guide. The key rule is never use the bedding sand layer to compensate for an uneven base. If your base is low, you fix the base. Piling extra sand underneath to make up the difference will just compress and shift again, and you'll be back out there next year doing the same thing. For a detailed, step-by-step walkthrough on how to fix sinking patio stones, see the guide on how to fix sinking patio stones.
- Mark the repair zone. Use chalk or tape to mark an area slightly larger than the visibly sunken section. You want to pull units from stable ground into the sunken zone so you're not working at an edge.
- Extract the pavers or bricks. Use a paver puller tool if you have one, or carefully work two flathead screwdrivers into opposite joints and pry upward. Stack units face-down in the order you remove them so you can relay them in the same pattern. Number them with chalk if the pattern is complex.
- Remove old joint and bedding sand. Scrape out the existing sand using a flat spade, trowel, or even a stiff broom. Vacuum out fine material with a shop vac. You want to expose the aggregate base clearly.
- Inspect and fix the base. This is the most important step. If the base is eroded, washed out, or simply low, add compactable crushed stone or road base and compact it in 2 to 4-inch lifts. Don't dump in a 6-inch pile and compact it once. Work in layers. A plate compactor (rent one, it's worth it) will do a far better job than a hand tamper for anything more than a couple of square feet. Your target compacted base thickness is 4 inches minimum for a residential pedestrian patio, and 4 to 6 inches or more if your soil is soft or clay-heavy. Also check your edge restraints: if they're loose, missing, or broken, pavers will migrate laterally and sink again no matter how good your base is. Spike them back down or replace damaged sections.
- Screed the bedding sand. Pour ASTM C33 bedding sand over the repaired base and screed it to a consistent, nominal 1-inch uncompacted thickness. Use two screed rails (lengths of conduit or pipe work fine) set to the correct height and drag a straight board across them. The goal is perfectly even depth across the whole repair area, not a sloped or humped surface. This 1-inch layer is not adjustable: don't add extra sand to bring low spots up. If the base is low, go back to step 4.
- Re-lay the pavers or bricks. Set them back in the original pattern, starting from stable ground and working into the repair zone. Don't slide them into place as that disturbs the sand; set each one straight down. Use a rubber mallet to tap units level with their neighbors and with each other. Check frequently with your straightedge.
- Compact the surface. Run a plate compactor with a rubber pad (or foam pad) over the entire repair area, including a foot or two into the undisturbed surrounding surface. This seats the units into the bedding sand and locks them together.
- Fill the joints. For standard joint sand, sweep dry sand across the surface and work it into the joints, then compact again and repeat until joints are full. For polymeric sand, sweep it in dry, compact, sweep again to top off joints, then mist the entire surface with water per the manufacturer's instructions to activate the binding agent. Polymeric sand sets firm and resists erosion and weeds much better than plain sand, and I'd recommend it for most repairs.
- Final check. Lay your straightedge across the repaired area and check for any high or low spots. Tap each unit to confirm it's seated solidly. Check the slope away from the house one more time.
If your repair involves a larger section of the patio, or if you found that the base is failing across most of the surface, you're essentially doing a full reinstall. That's a bigger project but still DIY-capable if you're comfortable with the tools. Related to this, if individual sinking patio stones are your main issue rather than the whole field, the same basic process applies but on a smaller scale.
Fixing sunken concrete slabs: mudjacking
What mudjacking is
Mudjacking, sometimes called slabjacking, is the process of pumping a cement-and-soil slurry underneath a sunken concrete slab to fill the void and hydraulically push the slab back up. Contractors drill holes through the slab (typically 1.5 to 2 inches in diameter), inject slurry under pressure until the slab reaches the right height, then patch the holes. It's been around for decades, it's well understood, and it's significantly cheaper than tearing out and replacing concrete.
The mudjacking process
- A contractor assesses the slab: measures the displacement, probes for voids, checks the surrounding grade and drainage situation.
- Injection holes are drilled through the slab at strategic locations, typically at the lowest points and at corners or edges where voids are detected.
- The slurry (a mix of Portland cement, sandy soil, and water) is pumped under pressure through the holes. The contractor monitors slab movement closely, stopping when the target elevation is reached.
- Holes are filled with hydraulic cement or patching compound and finished to blend with the surrounding surface as well as possible.
- The slab needs 24 to 48 hours to cure before normal foot traffic and longer before vehicle traffic.
Mudjacking: pros and cons
| Factor | Mudjacking |
|---|---|
| Cost | Typically $500–$1,500 for a residential patio, depending on slab size and void volume |
| Material weight | Heavy slurry adds significant weight to the subgrade, which can accelerate re-settlement in weak or saturated soils |
| Hole size | Larger holes (1.5–2 in.) are more visible after patching |
| Cure time | 24–48 hours before foot traffic |
| Void fill | Good for large voids with accessible access points |
| DIY feasibility | Not practical for most homeowners; requires a pump rig and experience reading slab movement |
| Longevity | 5–10 years is typical; results vary based on soil conditions and drainage |
Mudjacking is a solid choice when soil conditions are stable and the slab just needs voids filled and position corrected. It's less ideal if your soil is clay-heavy or chronically wet, because the added weight of the slurry can create new settlement problems. Always ask a contractor to give you their honest assessment of the underlying soil before committing to mudjacking over foam injection or replacement.
Fixing sunken concrete slabs: polyurethane foam injection
What polyurethane foam injection is
Polyurethane foam injection (often called polyjacking or foam lifting) pumps a two-component expanding polyurethane foam under the slab through much smaller holes than mudjacking. The two chemicals mix at the injection tip, expand rapidly to fill voids, and begin to cure within minutes. The foam is lightweight compared with cement slurry, which is a meaningful advantage in weak or settled soils where adding heavy material could cause further problems. The process also densifies the surrounding soil as the foam expands outward from injection points.
The foam injection process
- The contractor assesses the slab: same first step as mudjacking, checking displacement, voids, drainage, and soil conditions.
- Small holes (typically around 5/8 inch) are drilled through the slab at planned injection points. Fewer and smaller holes than mudjacking.
- The two-component foam is injected under the slab. The contractor works in short bursts, watching the slab surface for movement and stopping precisely when the target height is reached. Because the foam expands rapidly and cures quickly, this requires experience to control.
- Injection ports are removed, holes are filled with fast-setting patching compound, and the surface is ground smooth if needed.
- The cured foam is solid and water-resistant. The slab can typically handle foot traffic within 15 to 30 minutes of the final injection.
Polyurethane foam injection: pros and cons
| Factor | Foam Injection |
|---|---|
| Cost | Typically $800–$2,500+ for a residential patio; generally higher than mudjacking per square foot |
| Material weight | Very lightweight; does not add meaningful load to subgrade |
| Hole size | Small holes (5/8 in.) are much less visible after patching |
| Cure time | 15–30 minutes for foot traffic; same day return to use |
| Void fill | Excellent for small to medium voids; expands to fill irregular spaces |
| DIY feasibility | Small DIY foam kits exist for minor, shallow repairs; full slab lifting requires contractor equipment and experience |
| Longevity | Generally comparable to or better than mudjacking; foam does not wash out |
For most homeowners, foam injection is the more appealing option: smaller holes, faster cure, and lighter material. The catch is cost and the fact that full slab lifting really does require professional equipment and experience. The foam expansion happens fast, and miscalculating the lift even slightly can crack a slab or create a new high spot. Small DIY foam kits can fill minor voids under a settled step or small slab section, but they're not designed for lifting and leveling a full patio slab. If your slab needs significant lifting, get three quotes from contractors who offer both mudjacking and foam injection and ask each one which they'd recommend for your specific soil conditions and why. That answer will tell you a lot about how honest they're being.
Neither mudjacking nor foam injection is a magic fix for a slab sitting on fundamentally poor soil or chronic drainage problems. If water is constantly eroding the base or the subgrade soil is inherently weak, you'll likely need to repeat the process in a few years. Fixing the drainage situation alongside the slab lifting is the only way to get durable results.
Drainage fixes that keep the patio from sinking again
Every repair in this guide can fail prematurely if water is the underlying cause and you don't address it. Even a perfectly rebuilt paver base will start sinking again if runoff from a downspout is dumping onto it or if the surrounding grade funnels water under the patio edge. Here are the main drainage fixes and when to use each one. For step-by-step guidance on draining a sunken patio and rerouting runoff, see how to drain a sunken patio.
- Regrading the perimeter: If the ground around your patio has settled and now slopes toward it, adding topsoil to restore a positive grade sloping away from both the house and the patio edge is often the simplest and cheapest fix. Aim for that 1/8 to 1/4 inch per foot drop away from structures.
- Downspout extensions: If a gutter downspout terminates at or near the patio, extend it at least 6 feet away using rigid or flexible corrugated pipe. This single fix eliminates a huge volume of erosive water in one step.
- French drain: If water is pooling along the patio edge or soaking in from upslope, a French drain (a perforated pipe wrapped in filter fabric, bedded in gravel, and buried at a depth that captures subsurface flow) can intercept and redirect that water before it reaches the base. Run the outlet to daylight or a dry well.
- Channel or slot drain: If water ponds on the patio surface itself, a channel drain set flush with the patio surface and running across the low end can capture surface runoff and pipe it away. These work especially well between a patio and a house wall or at the base of a slope.
- Improving joint drainage for pavers: Polymeric sand in paver joints slows water infiltration, which helps protect the bedding sand layer from erosion. It won't fix a drainage problem on its own, but it's a useful part of the overall system.
Comparing repair methods side by side
| Method | Best for | Typical DIY? | Estimated cost | Time to complete | Difficulty |
|---|---|---|---|---|---|
| Re-bed pavers/brick | Sunken pavers or brick with base failure | Yes | $50–$300 in materials | 1–2 days | Moderate |
| Mudjacking | Sunken concrete slabs with voids underneath | No (contractor) | $500–$1,500 | Half to full day | Pro only |
| Foam injection | Sunken concrete slabs, especially in weak soils | Partially (small repairs only) | $800–$2,500+ | Hours (fast cure) | Pro for full lifts |
| Concrete slab replacement | Severely cracked, broken, or repeatedly failing slabs | No (contractor for large areas) | $1,500–$5,000+ | 2–5 days | Pro recommended |
| Drainage improvement | Any repair where water is the root cause | Yes | $50–$600+ depending on scope | 1 day | Low to moderate |
Common mistakes that make the problem worse
- Using extra bedding sand to fill a low base: The sand compresses over time and you're back to square one. Fix the base, not the sand depth.
- Using the wrong sand: Mason sand, stone screenings, and any sand that retains moisture will destabilize the bedding layer. ASTM C33 concrete sand is the specified material for a reason.
- Compacting one thick lift instead of layers: Compacting a 6-inch pile of base material doesn't compact the bottom half effectively. Always work in 2 to 4-inch lifts.
- Ignoring edge restraints: Pavers migrate laterally without solid edge containment. Even a perfect base repair will fail if the restraints aren't locked down.
- Skipping drainage: Repairing the surface without addressing why water is getting under there is a temporary fix at best.
- Over-lifting with foam or mudjacking: Pushing a slab too high is hard to reverse and can crack the concrete. Experienced contractors use small, controlled injections and stop frequently to check.
How to prevent a sunken patio from happening again
Most patio sinking is preventable if the installation is done correctly the first time. If you're rebuilding a base, follow the specifications: compact aggregate in lifts, use the right sand, install edge restraints properly, and build in the correct slope from the start. After the repair, keep an eye on the perimeter grade every spring and add topsoil as needed to maintain positive drainage away from the patio. Clean paver joints every few years and refill with polymeric sand when they start to erode. Make sure gutters and downspouts are directing water well away from the patio surface. And if you have mature trees nearby, watch for early signs of root movement every season rather than waiting until a slab is lifted two inches in the air.
A well-built and well-drained patio should stay level for 15 to 20 years or more. The ones that sink after three years almost always have an installation problem or a drainage problem, or both. Fix the cause and the surface fix will actually last.
FAQ
Quick diagnostic checklist: How do I identify the cause of a sunken patio (pavers, brick or concrete slab)?
Do these quick checks: 1) Visual/surface checks: look for low spots that enlarge after rain, gaps at edges, cracks, bulges or heaving. 2) Straightedge/level: place a 4–6 ft straightedge and use a level to measure vertical displacement and slope; note fall away from the house (target ~1/8–1/4 in./ft). 3) Tap test: tap pavers/slab—hollow/dull sounds indicate voids. 4) Probe: use hardened rod/rebar to probe for soft spots or voids. 5) Lift sample units: remove a few pavers/brick to inspect bedding/base (soft bedding sand, missing base, roots, or washed-out zones). 6) Inspect after rain: worsening spots after heavy rain suggests erosion/drainage issues. 7) Tree proximity: mature trees near the patio with root exposure or heaving suggests root uplift or voiding. Record findings to guide repair selection.
What tools and materials do I need to diagnose and perform basic repairs?
Diagnostic tools: 4–6 ft straightedge/board, 2–4 ft spirit level, rubber mallet, tapping tool, probe/rebar, tape measure, camera. Paver/brick repair tools: paver puller (or pry bar), flat shovel, broom, wheelbarrow, plate compactor (w/ rubber mat for delicate surfaces), hand tamper, screed board, rake, contractor-grade sand (ASTM C33 bedding sand), crushed stone for base (typically 3/4" minus), joint sand (concrete sand) or polymeric sand, edge restraint materials (plastic/metal/DIY concrete curb), safety gear (gloves, eye protection, knee pads). Concrete slab repair (professional tools often required): mudjacking pump & slurry hose, polyurethane injection kit (usually pro-supplied), drill with diamond bit, plugs for injection holes, jackhammer (for replacement), excavation/backfill tools. Drainage tools/materials: shovel, compactible fill (crushed stone), perforated drainpipe (4"), landscape fabric, gravel, channel drains, downspout extenders.
Step-by-step DIY repair for sunken pavers or brick (concise practical method)
1) Remove affected units: use a paver puller or pry bar; keep pattern pieces together. 2) Remove old joint and bedding sand to expose base. 3) Inspect base: look for voids, eroded spots, tree roots. 4) Fix the cause: correct drainage, remove/trim roots (consult arborist if major), or block water intrusion. 5) Rebuild base: add crushed-stone base in 2–4 in. lifts and compact each lift; aim for the correct final compacted thickness (commonly 4–6 in. for pedestrian patios; more on poor soils). 6) Screed bedding sand to a uniform nominal 1 in. uncompacted thickness (do not use bedding sand to correct base irregularities). 7) Re-lay pavers to original pattern. 8) Compact pavers with a plate compactor using a rubber mat, then sweep joint sand (polymeric sand optional) and compact again; mist per polymeric-sand directions. 9) Install/repair edge restraints to prevent lateral migration. 10) Final check for slope/drainage and adjust if needed.
What are the correct base and bedding specifications I should follow?
Use a well-graded crushed-stone subbase compacted in lifts to specified depth—commonly a minimum of 4 in. compacted for pedestrian patios, typically 4–6 in. or more on marginal soils. Place base in 2–4 in. lifts and mechanically compact each lift to high relative density (contract specs often call for ~95% Standard/Modified Proctor). Bedding sand should be concrete (ASTM C33) sand, screeded to a uniform nominal 1 in. uncompacted thickness; do not use bedding sand to correct an uneven base. Provide consistent edge restraint per manufacturer/ICPI guidance.
How do I fix drainage problems that caused or worsen sinking patios?
Identify where water flows and ponding occurs. Fixes (choose based on cause): 1) Regrade surface to establish positive slope away from structures (target ~1/8–1/4 in./ft). 2) Extend downspouts at least 5–10 ft or into splash blocks/underground pipe. 3) Install French drains: trench, lay perforated pipe on gravel bed wrapped in fabric, backfill with gravel. 4) Install channel/linear drains at patio edges or thresholds to collect sheet flow. 5) Add dry wells or rain gardens to accept runoff. 6) Correct irrigation leaks. 7) For pavers, ensure jointing materials (polymeric sand) are properly installed to limit infiltration along joints. Test after repairs by running water to confirm flow away from patio.
Concrete slab solutions: what are mudjacking, polyurethane injection and full replacement—pros, cons and basic steps?
Mudjacking (slabjacking): pumps a cement/sand slurry under slab through holes to fill voids and lift slab. Pros: lower material cost, proven technique. Cons: large holes, slower cure, adds weight to subgrade (can worsen settlement on weak soils). Typical steps: drill holes, pump slurry to lift slab, patch holes, finish. Polyurethane foam injection (polyjacking/PolyLEVEL): injects expanding two-component polyurethane into voids via small ports. Pros: small holes, fast cure, lightweight, densifies surrounding soils, precise lift. Cons: higher material cost; does not replace deep foundation issues. Steps: drill small holes, inject foam until lift achieved, trim ports and seal. Full or partial replacement: remove slab, excavate/repair subgrade, reinstall base, pour new concrete. Pros: permanent fix, addresses poor base/foundation. Cons: most costly and time-consuming; requires demolition and finishing work.
Next Article
How to Level a Sunken Patio: Fix Pavers, Slab & Drainage
Learn practical steps to diagnose and repair a sunken patio, pavers or concrete, with DIY and pro options.