A sunken patio is fixable in most cases, and whether you need to pull up pavers or call someone with a foam injection rig depends almost entirely on what caused the sinking and how far things have dropped. For paver and brick patios, DIY re-leveling is genuinely within reach for most homeowners. For concrete slabs, the right move is usually mudjacking or polyurethane lifting by a pro, unless the slab is already crumbling, in which case replacement is the honest answer. This guide walks you through diagnosing the problem accurately, matching your situation to the right repair method, and then doing the work step by step.
How to Level a Sunken Patio: Fix Pavers, Slab & Drainage

Talia Lang
7 Aug 2026
What a sunken patio actually is (and what this guide covers)
A sunken patio is any outdoor paved surface, concrete slab, brick, or interlocking pavers, where part of the surface has dropped below its original elevation. That might look like a single paver sitting 3/4 inch lower than its neighbors, a whole section of brickwork that now pools water after rain, or a concrete slab panel that has tilted away from the house. The problem is almost always below the surface: the soil or base material that supports the paving has shifted, eroded, or compressed. The paving itself is just telling you something has gone wrong underneath.
This guide covers both paver/brick patios and concrete slab patios. For pavers and brick, I'll take you through a full DIY re-leveling process. For concrete slabs, I'll explain mudjacking and polyurethane foam lifting so you know what to expect and what to ask a contractor, plus I'll cover when neither option makes sense and replacement is the right call. I'll also address drainage, because poor drainage is often what caused the problem in the first place and ignoring it guarantees you'll be back here in a few years.
DIY or hire a pro? Run through this before you start
Not every sunken patio is a weekend DIY project, and I'd rather tell you that upfront than have you halfway through a job that's gotten out of hand. Work through the checklist below honestly before you commit to a direction.
- Surface type: Pavers and brick are DIY-friendly because the units lift out individually. Concrete slabs require specialized equipment (pump rigs or foam injection guns) that aren't rented at home improvement stores — those jobs belong to contractors.
- Area and depth: Resetting a 20-square-foot corner of patio is very manageable solo. If more than a third of your patio has sunk, or settlement depth exceeds about 3 inches, the underlying problem is likely widespread and worth a professional assessment first.
- Cause clarity: If you know why the patio sank (a clogged downspout washed out the base sand, for example), you can fix it confidently. If you don't understand the cause, you risk repeating the failure — a pro can often spot it in 15 minutes.
- Proximity to the house foundation: If sinking is happening right along a house wall or foundation, do not DIY. Drainage or soil problems there can affect structural elements. Get a contractor's eyes on it.
- Tree roots: If roots have buckled pavers or created voids under a concrete slab, root management is part of the fix and changes the project scope considerably.
- Standing water or drainage failure: If water is actively collecting on the patio or running toward the house, the drainage issue needs to be corrected as part of any repair — otherwise every fix is temporary.
- Structural cracking in a concrete slab: Multiple broken pieces, exposed rebar, or cracks wider than 1/4 inch running through the full depth mean the slab is likely beyond lifting and needs replacement.
- Permits: In most jurisdictions, re-setting pavers in place doesn't require a permit. Replacing a full concrete slab often does, especially near the house. Check with your local building department before starting any slab replacement.
Why patios sink: the actual causes
Patios don't sink randomly. There are a handful of well-understood reasons, and knowing which one you're dealing with changes how you fix it. Here are the most common.
Poor compaction at the start
This is the most common cause I see, especially on newer patios or DIY-built ones. If the gravel or aggregate base wasn't compacted in proper lifts before the pavers or slab went down, it will compact itself over time under the weight of foot traffic, furniture, and freeze-thaw cycles. The result is gradual, widespread sinking that often looks like the whole patio has slowly lowered itself by an inch or two. Industry guidance calls for compacting aggregate base in 2 to 4 inch lifts to a minimum 4 inch total depth on stable soils, and 6 inches or more on soft or poorly draining ground. Skipping that step is the root of a lot of callbacks.
Erosion and washout
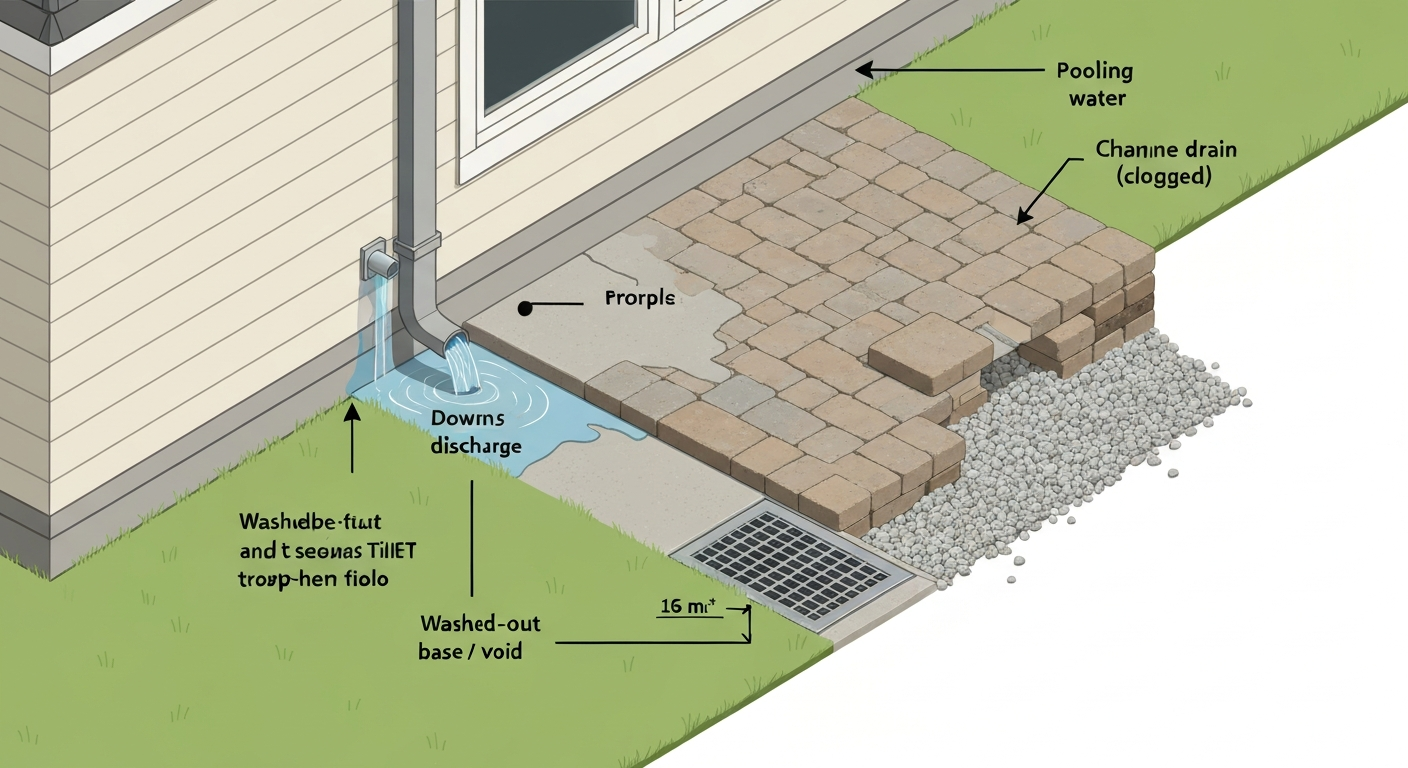
Water moving under a patio carries base material with it. A downspout that discharges onto or near the patio, a low spot that collects runoff, or a buried pipe leak can all gradually wash sand and fine aggregate out from under the surface. The EPA's moisture control guidance recommends maintaining at least a 5% slope (roughly 6 inches of drop per 10 feet of run) away from buildings. When that slope doesn't exist or has been lost, water runs toward the house instead of away from it, saturates the subgrade, and the patio follows.
Organic material decomposing underground
Old tree stumps, large root masses, and construction debris buried during backfill all decay over years and leave voids. When that organic material was providing support and then breaks down, the soil above it collapses. This tends to cause localized, often circular depressions rather than uniform sinking.
Tree roots
Active tree roots grow under patios, push pavers upward (heave), and can also create channels that erode and then collapse once the root dies back. If you've got a mature tree within 20 feet of your patio, roots are worth investigating when you lift pavers and inspect the base.
Freeze-thaw cycles
In cold climates, water in the soil expands when it freezes and can lift a patio several inches over a winter. When it thaws, the soil doesn't always settle back evenly, especially if it's been disturbed by drainage issues or poor compaction. Over several seasons this creates progressively worse unevenness. If you're in a freeze-thaw climate and your patio sinks every spring, the base depth is probably inadequate.
How to inspect and measure the problem
Before you touch anything, spend 30 minutes documenting what you've got. You'll thank yourself when you're mid-repair and need to verify you've corrected the settlement depth, or when you're explaining the situation to a contractor.
Visual inspection
- Walk the entire patio and mark sunken areas with chalk or painter's tape.
- Look for water staining patterns — they tell you where water has been pooling and flowing.
- Check grout or joint sand loss: missing joint material accelerates erosion under pavers.
- Look at the patio edge: are edge restraints still intact and vertical, or have they heaved, cracked, or pulled away?
- For concrete slabs, look for cracks — note their width, length, and whether adjacent panels are at different heights (differential settlement).
- Check roof downspout discharge points. Are any of them close to the patio? Where does the water go?
Measuring settlement depth and flatness
Use a 10-foot straightedge (a long level works) laid across the patio surface. Industry flatness tolerances for pedestrian paver surfaces are no more than 3/8 inch variation under a 10-foot straightedge. Anything more than that is a documented defect worth repairing. Measure and record the maximum gap under the straightedge in each sunken zone. Also measure the total area affected, count paver units or tape out square footage on a concrete slab. This determines how much material you'll need and whether the project scope is realistic for a solo DIYer.
Checking slope
Set a long level on the patio surface and check the slope direction. The surface should drain away from the house, not toward it. A minimum 1/4 inch per foot of fall away from the structure is generally recommended. If your patio is now sloping toward the house after settling, drainage correction is part of your repair, not optional.
Checking for voids under concrete
For concrete slabs, knock firmly across the surface with a hammer or the handle of a screwdriver. A solid slab sounds dense and dull. A hollow sound indicates a void beneath, the slab is unsupported in that area and is essentially spanning across empty space. Concrete Settlement Cracks: Causes, Repair & Prevention, SlabCalc explains settlement‑cracking typically results from supporting soil losing strength or volume (for example unconsolidated fill, organic decomposition, or washout) and can be distinguished from heave by inspecting for voids under the slab, evidence of washouts, or root channels Concrete Settlement Cracks: Causes, Repair & Prevention — SlabCalc. Map where you hear hollow spots, because those are exactly where a mudjacking or foam lift needs to introduce material.
Documenting before you start work
Take photos from multiple angles, including close-ups of the worst sunken areas and any cracking. Write down your measurements: maximum settlement depth, affected area in square feet, and which direction the slope has shifted. If you're hiring a contractor, this documentation helps them give you an accurate quote. If you're DIYing, it's your before-and-after baseline.
Scenario-specific answers for common situations
People describe sunken patio problems in different ways, and the right approach depends on exactly what's going on. Here's how I'd handle the most common situations.
"Fix sunken patio", the general case
If your patio has sunk and you're not sure where to start, the surface material is your first decision point. For detailed, step-by-step instructions and repair options to fix sunken patio issues, refer to this guide. Pavers and brick can almost always be re-leveled by lifting and resetting on a repaired base, a real DIY option covered step by step below. Concrete slabs that are still intact but have sunk 1 to 4 inches over a void or eroded subgrade are good candidates for mudjacking or polyurethane foam lifting by a contractor. Slabs that are cracked into multiple pieces or have exposed rebar need replacement. The cause of sinking also determines what permanent fix is needed: if erosion caused it, you must address drainage or it will sink again.
"How to drain a sunken patio", when water is the main problem
A patio that holds water after rain is both a slip hazard and an ongoing threat to the base below. If the surface slope has reversed so it drains toward the house, re-leveling the surface to restore the proper slope is the fix for pavers. For concrete slabs, adding a surface channel drain (a linear slot drain set flush with the surface) can intercept water without lifting the slab, but that only works if you have somewhere useful to route the drain outlet. French drains around the patio perimeter can intercept subsurface water before it saturates the base. For step-by-step guidance on how to drain a sunken patio, see how to drain a sunken patio. For severe cases where the patio is a low bowl that collects water from surrounding grades, regrading the surrounding soil to redirect surface runoff is often the most important step. Redirecting downspout discharge at least 6 feet away from the patio perimeter is a cheap, immediate improvement that prevents future erosion.
"How to fix sinking patio stones", individual units dropping or shifting
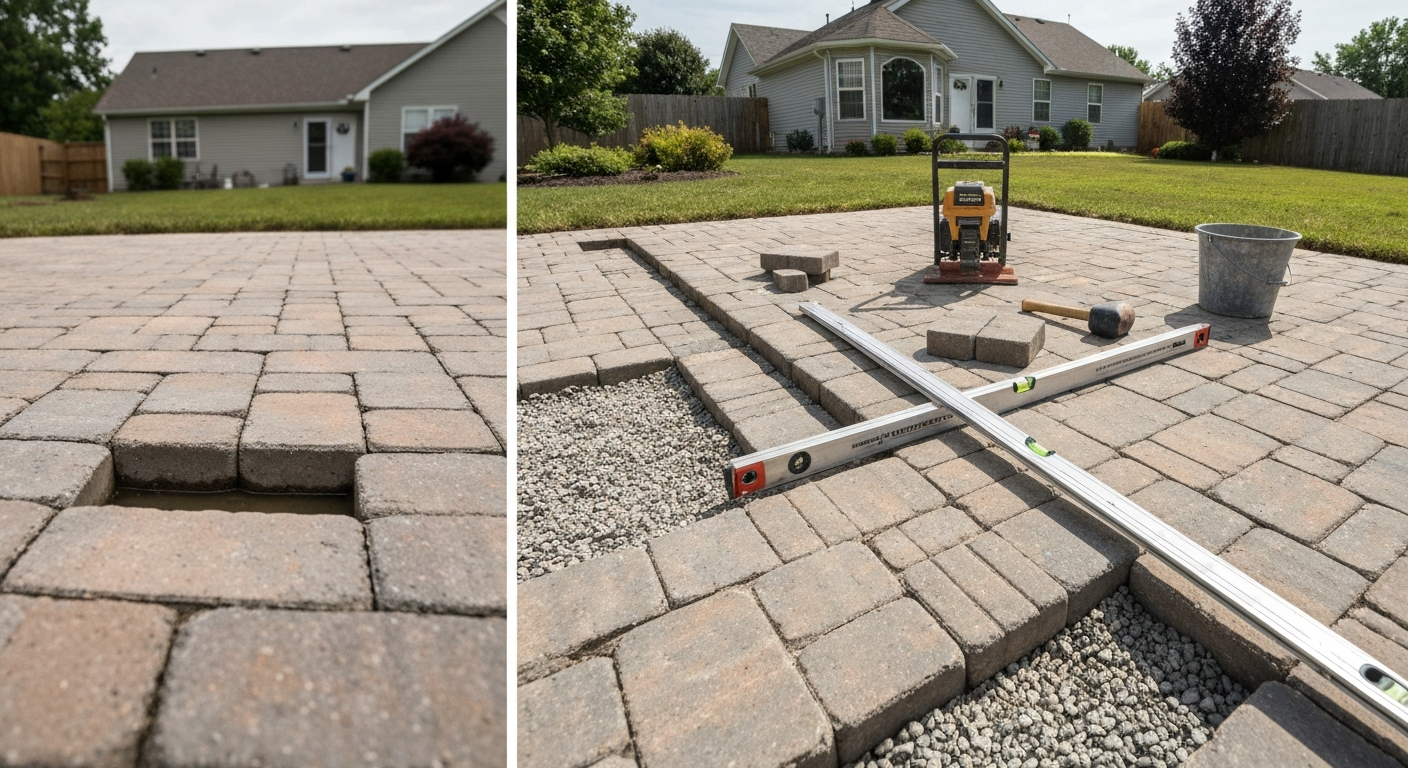
When individual paving stones, flagstones, or pavers sink while surrounding ones stay level, the cause is almost always localized: a void from a decayed root, a concentrated washout under that specific spot, or a single area where base depth was thin. For a focused DIY approach to lifting and resetting individual units, see our guide on how to fix sinking patio stones. The good news is this is the most DIY-friendly scenario. Lift the affected units (and a few surrounding ones for context), excavate to check the base, add and compact new gravel if the base is thin or has washed out, re-level the bedding layer, and reset the stones. The step-by-step section below covers this in detail.
"My brick patio is sinking", what's different about brick
Brick patios behave almost identically to concrete paver patios from a repair standpoint: the bricks are reset on a compacted aggregate base with a sand or stone dust bedding layer. If your brick patio is sinking, see this guide on my brick patio is sinking for targeted diagnosis and repair steps. The one extra complication with older brick patios is that the bricks themselves may be spalled, cracked, or undersized if they've been in place for decades. Set aside broken units as you lift them and source replacement bricks before re-laying, trying to find matching old brick afterward is harder than you'd expect. Also check the edge restraints on older brick patios: many were installed with a simple concrete header or no restraint at all, and lateral spread may be part of why the surface has shifted. A proper mechanical edge restraint (plastic or aluminum, spiked into the compacted base) makes a real difference in keeping the repaired area stable.
Matching your situation to the right repair method
The table below maps the most common patio scenarios to the appropriate repair approach. Use your inspection measurements and the cause you've identified to find your row.
| Situation | Material | Best repair approach | DIY realistic? |
|---|---|---|---|
| 1–3 pavers/bricks sunk, rest stable | Pavers or brick | Lift, repair base, reset units | Yes |
| Large section (10–50+ sq ft) uniformly sunk | Pavers or brick | Lift section, re-compact base, re-lay | Yes, but labor-intensive |
| Patio slopes toward house, water pooling | Pavers or brick | Re-level to restore slope, add drainage if needed | Yes |
| Intact concrete slab, sunk 1–4 inches, hollow sound underneath | Concrete slab | Mudjacking or polyurethane foam injection | No — contractor required |
| Concrete slab tilted, minor surface cracking, no broken pieces | Concrete slab | Polyurethane foam lift for precision | No — contractor required |
| Concrete slab broken into multiple pieces, exposed rebar | Concrete slab | Full slab replacement | DIY possible but challenging |
| Sinking linked to foundation movement or active soil failure | Any | Geotechnical/structural assessment first | No — professional required |
| Edge restraints failed, pavers spreading laterally | Pavers or brick | Reset edge restraints, re-compact border | Yes |
Repair options for concrete slabs: what mudjacking and foam lifting actually involve
Since concrete slab lifting requires contractor equipment, I want to give you enough detail to evaluate quotes intelligently and know what you're getting.
Mudjacking (slabjacking)
Mudjacking drills holes roughly 1 to 1.5 inches in diameter through the slab at strategic points, then pumps a slurry of sand, cement, and soil under pressure to fill voids and hydraulically lift the slab back to grade. The holes are patched afterward with cement. It's a proven method for intact slabs with subsidence caused by voids or eroded subgrade. Typical costs run roughly $3 to $8 per square foot depending on region and job complexity. The cementitious grout adds weight to the subgrade (worth noting on already soft soils) and needs 24 to 48 hours before full load return. The grout is also susceptible to washout over time if the drainage issue that caused the void isn't corrected, so drainage must be addressed alongside any slab lift.
Polyurethane foam injection (polyjacking)
Polyurethane foam injection uses a two-component expanding resin injected through small holes, roughly 0.5 inches in diameter, about the size of a dime. The foam expands rapidly to fill voids and lift the slab, cures in minutes, and offers precise incremental control (contractors typically raise slabs in 1/16-inch increments). FHWA/NJDOT report, considerations for polymer slab lift and pavement stabilization notes polyurethane injection is used for pavement panel lifting and soil stabilization where precision and reduced downtime are required, and recommends verifying foam surround under panels and sampling/testing requirements FHWA/NJDOT report — considerations for polymer slab lift and pavement stabilization. Because the material is lightweight and essentially waterproof once cured, it doesn't add load to soft subgrade and is more resistant to washout than mudjacking slurry. The tradeoff is cost: expect roughly $8 to $25 per square foot, considerably more than mudjacking. For precision-critical lifts or situations where minimizing downtime matters, it's often worth the premium.
| Factor | Mudjacking | Polyurethane foam injection |
|---|---|---|
| Hole size | ~1–1.5 inches | ~0.5 inches |
| Material weight | Heavy (cementitious slurry) | Very light (foam) |
| Cure/return to service | 24–48 hours | Minutes to a few hours |
| Lifting precision | Good | Excellent (1/16-inch increments) |
| Washout resistance | Moderate | High |
| Typical cost range | $3–$8 per sq ft | $8–$25 per sq ft |
| DIY possible? | No | No |
When neither lifting method is the answer
Neither mudjacking nor polyurethane foam injection is appropriate when the slab concrete itself is structurally compromised: heavily cracked into multiple pieces, crumbling, or with exposed and corroding reinforcing steel. Lifting a broken slab just repositions broken pieces. Similarly, if sinking is linked to foundation settlement or active geotechnical instability (sinkholes, failing retaining walls, karst), you need a geotechnical engineer's assessment before any repair work. In those cases, full slab replacement, often with corrected subgrade preparation and improved drainage, is the right path.
Repair options for paver and brick patios: your full toolkit
Before jumping into the step-by-step, here's a quick overview of all the repair options available for paver and brick patios, so you can choose the right scope for your situation.
- Re-leveling on existing base: Lift pavers/bricks, scrape or add bedding sand to re-establish the correct grade, and reset. Works when the aggregate base itself is intact and adequately compacted — the problem was only in the 1-inch bedding layer.
- Resetting on a new compacted base: Lift pavers/bricks, excavate and remove the existing base material, install fresh compacted aggregate base in 2–4 inch lifts, then re-lay the bedding layer and pavers. Required when the base was inadequately compacted, contaminated, or washed out.
- Edge restraint repair: Reinstall or add edge restraints along the perimeter where lateral spread is occurring. Concrete spike-down plastic or aluminum edge restraints pinned into the compacted base are the standard fix.
- Refreshing bedding sand or stone dust: If the bedding layer has been degraded (blown or washed away, mixed with fines) but the base is solid, remove pavers, scrape out old bedding material, and install fresh coarse sand or stone dust at a nominal 1-inch depth.
- Partial replacement: When individual pavers or bricks are cracked, chipped, or badly spalled, replace those units during re-laying. Match the unit as closely as possible before starting — some manufactured pavers have been discontinued and can be hard to source.
Step-by-step: re-leveling sinking patio pavers or bricks
This process works for brick patios and all types of interlocking concrete pavers. It's a satisfying repair that most able-bodied homeowners can complete over a weekend for a typical 50-to-100 square foot affected area. I'll be realistic about the physical demands: lifting pavers is repetitive and back-intensive work. Plan accordingly.
Tools and materials you'll need
- Flat pry bar or paver puller (a dedicated paver lifting tool saves your back significantly)
- Square-nosed spade and hand tamper or rented plate compactor (a plate compactor delivering at least 5,000 lbf centrifugal force is the industry-standard recommendation for seating pavers after re-laying)
- 10-foot straightedge or a long level
- String line and line level or a laser level
- Rubber mallet
- Stiff brush and leaf blower for joint sand
- Wheelbarrow
- Compactable aggregate base (dense-graded crushed stone, typically 3/4 inch minus with fines)
- Coarse bedding sand or stone dust (NOT fine playground sand — it compresses unevenly)
- Polymeric jointing sand for final joint filling
- Replacement pavers/bricks as needed
- New edge restraints and spikes if existing ones are damaged
- Safety glasses, work gloves, knee pads
Step 1: Mark your work area and set reference lines
Using your pre-inspection measurements and photos, mark the full area you'll lift. Include at least one course of pavers beyond the visibly sunken zone, you'll often find that the adjacent area is marginally low too. Set a string line along the length of the patio at the correct finished height and slope (1/4 inch per foot minimum falling away from the house). This line is your reference for re-laying. Photograph the area before touching anything.
Step 2: Remove joint sand and lift pavers
Use a stiff brush or a small chisel to loosen joint sand along the edges of the area you're lifting. Slide a flat pry bar into the joint at a paver corner and lever up to pop the first unit free. Once the first paver is out, the rest lift easily by hand. Stack them nearby in the same orientation they came out, this helps if you're re-laying the same pattern. Number rows with chalk if the pattern is complex. Inspect each unit as you stack: set aside cracked or badly spalled units for replacement.
Step 3: Inspect and repair the base
With the pavers lifted, scrape away the bedding sand layer and look at the aggregate base beneath. Dig down to see how deep the base is. If it's less than 4 inches on stable soils, or less than 6 inches on soft or damp ground, that's a root cause of your problem. If you see root channels, void pockets, or evidence of washout (base material missing entirely in spots), excavate those areas and bring them back up to proper depth with fresh compactable aggregate. Add material in 2-to-4 inch lifts and compact each lift firmly, this step is what determines whether the repair lasts. If you have a rented plate compactor, use it. A hand tamper works for small areas but takes more effort to get adequate compaction.
Step 4: Address drainage if needed
If your inspection showed that drainage caused the washout, this is the moment to fix it before the pavers go back down. Options include: regrading the surrounding soil to direct runoff away from the patio (cheapest option), extending downspouts away from the area, or installing a perimeter French drain (perforated pipe in a gravel trench, sloped to daylight or a catch basin) to intercept subsurface water before it reaches the base. If the slope of the patio itself was reversed, correct it during re-laying by adjusting your bedding layer to restore proper fall.
Step 5: Screed the bedding layer
Spread fresh coarse bedding sand or stone dust over the compacted base and screed it to a consistent 1-inch depth. A standard screeding setup uses two parallel 1-inch diameter pipes laid on the base as guides, drag a straight board across them to create a perfectly uniform 1-inch bedding surface. Remove the pipe guides after screeding and fill the voids with a handful of sand. Do not walk on the screeded surface before placing pavers. The bedding layer is not a structural element, it's just a setting bed that allows fine adjustment. All structural support comes from the compacted base below it.
Step 6: Re-lay pavers and check with straightedge
Lay pavers back into position starting from the lowest point and working up. Keep consistent joint widths (typically 1/8 to 3/16 inch for concrete pavers; slightly wider for brick depending on the pattern). After every few rows, check with your straightedge and string line to confirm you're maintaining the correct slope and that surface variation stays within 3/8 inch under the 10-foot straightedge. Tap units lightly with a rubber mallet to seat them into the bedding layer, do not hammer them down aggressively, which can fracture corners.
Step 7: Reset or install edge restraints
Before filling joints, check the perimeter edge restraints. Industry guidance requires a restraining surface of at least 1 inch in contact with the paver edge, anchored into the compacted base with spikes at 12-inch intervals. If existing restraints are cracked, heaved, or pulled away from the pavers, replace them now. Skipping this step will cause the repair to spread laterally over time, especially along unsupported sides.
Step 8: Compact pavers and fill joints
Run a plate compactor over the entire re-laid area (place a piece of carpet scrap or rubber mat between the compactor plate and pavers to avoid surface scratching). This seats the units fully into the bedding sand and locks the pattern. Then spread dry polymeric jointing sand across the surface and sweep it into the joints, working it in with a stiff brush. Run the compactor over the area again to vibrate sand into the joints. Repeat the sweep and compact cycle until joints are filled to within about 1/8 inch of the surface. After jointing, mist the surface with water per the polymeric sand manufacturer's instructions to activate the binding agents. Avoid pedestrian traffic for at least a few hours.
Realistic scope and limitations
A focused DIYer can re-level roughly 50 to 100 square feet of paver patio in a single weekend, including base repair. Larger areas (200+ square feet) or deep base work requiring significant excavation will take longer and may warrant renting a plate compactor rather than borrowing a neighbor's hand tamper. If during excavation you discover severely contaminated base material, very deep voids, or subgrade soil that is soft and saturated, stop and reassess, that's when professional input on soil stabilization or drainage becomes genuinely necessary before proceeding.
Cost and time estimates at a glance
| Repair type | Typical cost range | Estimated time | DIY or pro? |
|---|---|---|---|
| Re-level 1–10 pavers (bedding repair) | $20–$80 in materials | 2–4 hours | DIY |
| Re-level 50–100 sq ft paver/brick section | $100–$400 in materials + tool rental | 1–2 days | DIY |
| Full paver patio base replacement (200+ sq ft) | $400–$1,200+ materials + rental | 2–4 days | DIY or pro |
| Mudjacking (concrete slab) | $3–$8 per sq ft (contractor) | Half day to full day | Pro |
| Polyurethane foam injection | $8–$25 per sq ft (contractor) | A few hours, walkable same day | Pro |
| Concrete slab full replacement | $8–$20+ per sq ft (contractor) | 1–3 days + cure time | Pro (or advanced DIY) |
| Channel or French drain installation | $200–$800+ depending on length and complexity | 1–2 days | DIY or pro |
When to stop and call a professional
There are specific situations where DIY work will either fail or create a bigger problem. Be honest with yourself about these.
- Sinking is occurring right against the house foundation or along a foundation wall — water/soil issues here can have structural implications.
- The concrete slab is broken into multiple pieces with exposed reinforcing steel, or you can see that adjacent slab panels have settled at significantly different heights.
- After lifting pavers, you find the subgrade soil is soft, wet, and yielding — it compresses when you press on it. That soil needs stabilization, not just a new layer of gravel on top.
- You can identify active water intrusion from underground (a buried pipe may be leaking) or the soil never seems to dry out in the area.
- Sinking has affected the patio in a pattern that correlates with foundation walls, basement walls, or a neighboring retaining wall — that's a structural issue, not a paving issue.
- You've re-leveled the same area twice and it keeps sinking. The root cause hasn't been identified and fixed.
Prevention: how to avoid going through this again
Most patio sinking is preventable or at least significantly delayed with a few ongoing habits. The biggest one is managing water. Keep downspouts discharging well away from the patio perimeter, at least 6 feet, and further is better. Check twice a year that the patio slope hasn't been altered by soil movement, and that water is still draining away from the house. Refill polymeric jointing sand every 2 to 3 years (or whenever joints look depleted) because joint sand loss is what allows water to infiltrate and erode the base. If you're in a freeze-thaw climate, re-check paver levels every spring before the season starts, minor adjustments made early are far easier than major repairs after several seasons of cumulative shifting. For any new patio work, insist on proper base depth and compacted lifts, cutting corners on base prep is the primary reason patios fail.
FAQ
What commonly causes a patio to sink (concrete slab or pavers)?
Typical causes: poor initial subgrade compaction or inadequate base depth; erosion or washout of base material from surface runoff, broken downspouts or underground leaks; decomposition of buried organic material (old stump/roots) leaving voids; tree root activity that creates local voids or later collapse; and frost‑heave cycles in cold climates that lead to differential settlement when soil thaws.
How do I inspect and measure a sunken patio to diagnose the problem?
Steps: visually map depressions and cracks, note where water collects or flows; run a 10 ft straightedge across suspect areas to find gaps (industry tolerance ≈ ±3/8 in over 10 ft); use a string line, laser level, or rotating laser for elevation differences; sound concrete with a hammer/chisel to detect hollow spots/voids beneath; lift a few pavers (if applicable) to inspect bedding and base material depth/condition; look for sources of water (downspouts, roof runoff, leaking irrigation) and signs of organic fill or root channels beneath the surface.
How do I decide whether to repair (level) or replace a sunken concrete slab?
Repair (lift) if the slab is largely intact without severe cracking, reinforcement exposure, or ongoing structural movement, and if the cause is voids/poor base or isolated settlement. Replace when the slab is crumbling, has many interconnected cracks, exposed corroded rebar, is heavily undermined by active soil collapse, or if there’s underlying foundation/structural movement. Consider site drainage — fixing drainage may be needed with either option.
What are the main methods to lift a sunken concrete slab and when is each appropriate?
Mudjacking (slabjacking): pumps cementitious grout through ~1 in. holes to fill voids and hydraulically lift slab. Good for medium‑sized projects with stable soils; lower per‑sq‑ft cost but heavier grout and slower cure. Polyurethane injection (polyjacking/PolyLevel): injects expanding resin through small ports to lift and fill voids. Faster cure, precise incremental lift, less added weight, better resistance to washout; cost is higher. Replace slab: necessary when concrete is beyond repair or soils are actively failing. Choose based on slab condition, soil stability, drainage, and budget.
How do I decide whether to DIY or hire a pro for lifting concrete?
DIY might be reasonable for very small, simple paver or stepping stone lifts and for releveling areas where materials/tools and skills exist. Lifting concrete slabs (mudjacking or polyjacking) typically requires specialized pumps, materials, and experience to control lift and avoid damage — hiring a contractor is recommended for moderate to large slabs, areas near structures, or when diagnostic uncertainty exists. Also hire a pro if you need permits, geotechnical input, or drainage system installation.
How do I fix sinking patio pavers or brick (DIY step‑by‑step)?
1) Remove edge restraints and pavers over the depressed area (mark layout to replace accurately). 2) Remove bedding sand and inspect base aggregate depth/condition. 3) If base is shallow/poorly compacted, add and compact 3–4 in. of dense‑graded aggregate in 2 in. lifts with a plate compactor (6 in. for unstable soils). 4) Reinstall nominal 1 in. bedding sand (screed rails), level with a screed board. 5) Re-lay pavers, maintain joint spacing; reinstall edge restraint (concrete curb or mechanical restraint). 6) Compact pavers with vibrating plate compactor using a protective pad, sweep polymeric or joint sand into joints, and finish. 7) Re‑grade surface so it drains away from house (minimum 5% slope where possible). Note: for small localized depressions, simply adding/compacting base and re-bedding is common DIY work; for larger areas consider pro help.
Next Article
How to Drain a Sunken Patio: DIY Drainage & Leveling Guide
How to drain a sunken patio: DIY steps for regrading, French or channel drains, and paver/concrete leveling.