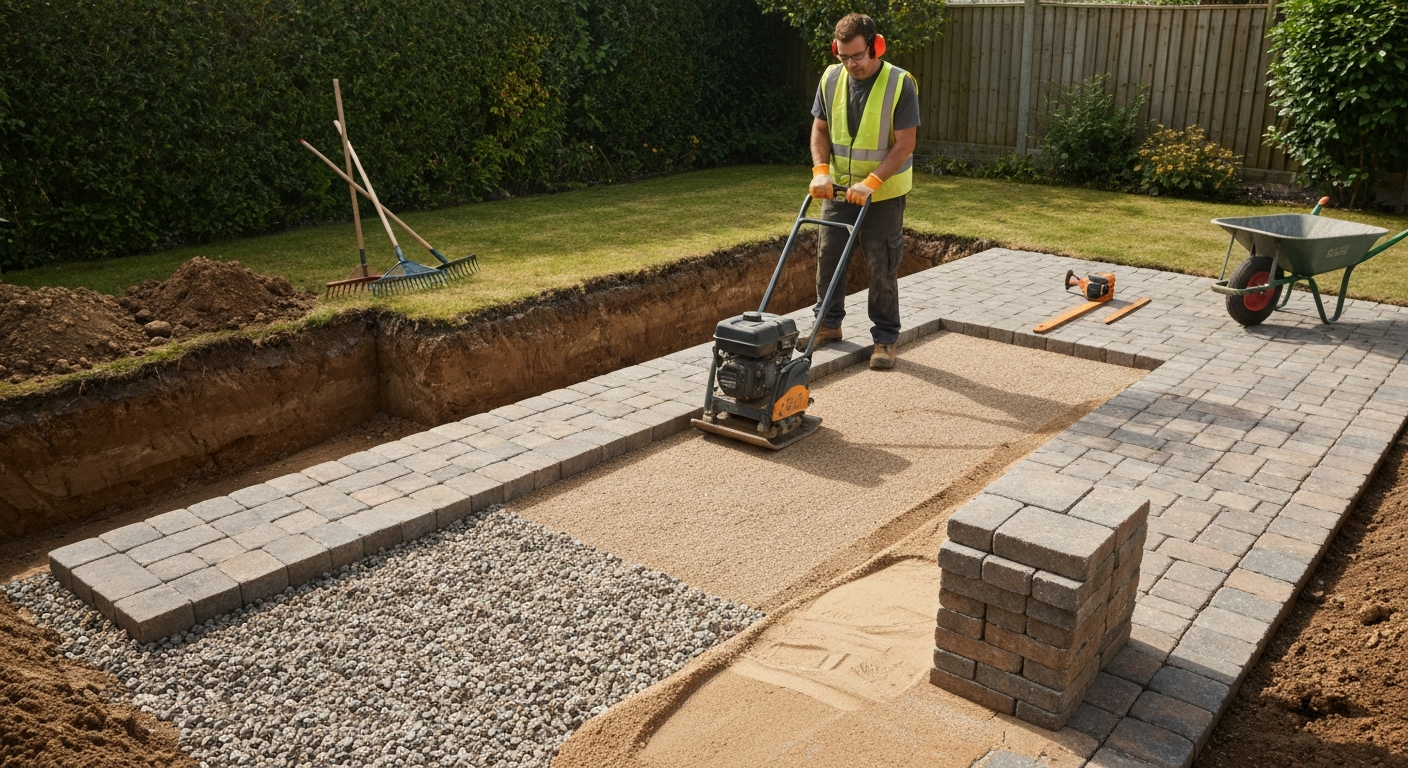
To properly compact a patio base, you lay compactable crushed stone (MOT Type 1 or dense-graded crushed aggregate) in layers no deeper than 4 inches (100 mm), bring each layer to the right moisture, and run a plate compactor over it in overlapping passes until the surface stops moving and the material feels locked solid. Then you top it with about 1 inch (25 mm) of bedding sand, screed it level, and give the finished paver or slab surface one or two final compactor passes to seat everything. That is the whole process in a sentence, but every step has details that actually matter, and skipping any of them is how you end up with sunken slabs six months later.
How to Compact Patio Base: Step-by-Step Guide for DIY

Talia Lang
18 Jul 2026
What this guide covers and who it's for
This article is written for homeowners doing a DIY patio project, either building a new paved area from scratch or repairing an existing one that has sunk, shifted, or cracked. It walks you through the full base compaction process: why it matters, which materials to use, what tools you need, how to rent versus buy equipment, and how to work safely. It also covers the differences between new-build and spot-repair compaction, how to test that your base is actually solid, and how to troubleshoot compaction failures after the fact. If you are about to start pointing or grouting once the base is sorted, the post-compaction jointing section at the end will connect the dots on that side of the job. If you need guidance on doing the pointing step without specialist kit, see how to point a patio without a pointing tool.
Why compaction actually matters
Compaction does one fundamental thing: it squeezes air voids out of the material below your pavers and locks the particles together so they cannot move. When a patio base is properly compacted, it transfers the weight of foot traffic, furniture, and vehicles down through those interlocked layers into stable ground. When it is not, the voids gradually collapse under load, and you get settlement, rutting, and the classic sunken or rocking paver. Research from the Federal Highway Administration is clear that inadequate compaction is one of the primary causes of early pavement failure. For a home patio this means cracked slabs, lifted edges, and water pooling where it should not.
Drainage is the other big reason. A well-compacted, dense-graded aggregate base allows water to flow through and out without washing fine particles upward (a process called piping). A loose, under-compacted base can actually hold water and slowly erode from below, undermining the surface layer from underneath. If your patio drains poorly and you notice soft or spongy areas after rain, the base is almost certainly the root cause.
Longevity ties both of these together. ICPI (the Interlocking Concrete Pavement Institute) specifies a minimum compacted base depth of 4 inches for pedestrian patios and walkways, and 6 inches for residential driveways in non-freeze climates. In frost-prone areas those numbers go up, because freeze-thaw cycling amplifies every weakness in an under-built base. Get the base right once and the surface can last decades. Skimp on it and you are back to square one in a few winters.
Signs your patio base needs recompacting
Not every patio problem is a base compaction problem, but these are the signs that point directly to it.
- Sunken or dipped areas: pavers or slabs that have settled below the surrounding surface, often creating a low spot that collects water.
- Rocking or clicking pavers: individual pavers that tip when you step on them, meaning the base material underneath has shifted or washed away.
- Visible settlement lines: sections of the patio that have dropped relative to a step, wall, or house foundation.
- Poor drainage or persistent puddles: water sitting on the surface after rain rather than draining away, pointing to either a compaction problem or a base that has been washed out.
- Cracks along grout or pointing lines: hairline or widening cracks in the joints that follow a settlement pattern rather than a random surface crack.
- Edge creep: pavers along the border of the patio that have pushed outward, indicating the base is no longer holding them in place.
- Soft or spongy feel underfoot: particularly noticeable after wet weather, suggesting the sub-base has lost its density.
One thing worth saying directly: if you have widespread settlement across most of the patio, or if the ground beneath is genuinely soft (clay-heavy soil, filled ground, or areas near tree roots), recompacting the existing material may not be enough. Those situations often require excavating to a greater depth, improving subgrade drainage, or bringing in a geotextile fabric before you re-lay any base material. I will come back to that in the troubleshooting section.
New build vs spot repair: different jobs, different priorities
These two scenarios look similar on the surface but they pull in different directions when it comes to planning and effort.
New build
With a new build you have full control over every layer. You can excavate to the right depth, set your gradients for drainage from the start, choose the correct materials, and compact in planned lifts (layers). The process is more work upfront but far simpler in terms of troubleshooting, because you are not working around existing problems. The risk here is cutting corners when you are tired and most of the work feels done. The compaction step feels like the boring bit after all the excavating, but it is the one you cannot fake.
Spot repair
Spot repairs mean you are lifting a section of an existing patio, diagnosing what went wrong underneath, fixing it, and reinstating. The compaction challenge here is that you are working in a confined area that is already tied into surrounding material. You often cannot get a full-size plate compactor into a small lifted section, so a hand tamper becomes your main tool. You also have to match the level of the repaired section to the surrounding undisturbed surface, which means being very precise about how much material you put back and how much it will compact. It is slower and more fiddly than a new build, but perfectly doable for repairs up to a few square metres.
| Factor | New Build | Spot Repair |
|---|---|---|
| Excavation depth | Full spec depth (min. 4–6 in compacted base) | Match existing surrounding depth |
| Material layers | Sub-base + bedding sand in planned lifts | Replace only what was disturbed or failed |
| Compaction tool | Plate compactor, full site access | Hand tamper or small plate compactor |
| Level matching | Set from scratch to designed gradient | Match precisely to surrounding surface |
| Drainage planning | Design in from the start | Identify why existing drainage failed first |
| Typical time | Half to full day per 10–20 sq m | 1–3 hours per small repair section |
| Risk of failure | Low if process followed | Higher if underlying cause not addressed |
Materials: what to use and why
Choosing the right material for each layer is not complicated once you understand what each one is doing.
MOT Type 1 (crushed stone sub-base)
MOT Type 1 is a well-graded crushed aggregate that runs from about 40 mm down to fine particles. In the UK it is specified under Clause 803 of the Specification for Highway Works. In the US the equivalent is a dense-graded crushed stone base (sometimes called Class 2 aggregate base or AASHTO M147 material). Both work on the same principle: the mix of particle sizes means the material interlocks tightly when compacted, creating a stiff, load-bearing layer that also sheds water. The angular, crushed particles are key here. Rounded gravel or natural river stone does not interlock the same way and is not suitable as a compactable sub-base. MOT Type 1 is what you want for the bulk of your base depth.
Sharp sand (coarse grit sand)
Sharp sand, also called coarse grit sand or concreting sand, is a washed, angular-particle sand used in concrete mixes and as a scratch layer in some base builds. It is not the same as the fine bedding sand that goes directly under pavers, and it is important not to confuse them. Some builders use a thin layer of sharp sand between the sub-base and bedding sand as a levelling course, but this is optional and not always recommended because it can create a slippage plane if it gets wet.
Bedding sand
Bedding sand is the 1-inch (25 mm) layer that goes directly under your pavers. ICPI Tech Spec 2 is specific: it must be ASTM C33 concrete sand (or the equivalent CSA A23.1 FA1 in Canada). Masonry sand and stone dust (crusher fines) are explicitly not acceptable for bedding. The reason is gradation: ASTM C33 sand has a controlled particle size distribution that gives you a stable, permeable layer that compacts to a consistent thickness. Stone dust, despite being popular at garden centres, holds too much moisture, can become plastic under load, and has been linked to long-term paver settlement. ICPI also notes that bedding sand should be moist at installation, around 6 to 8 percent moisture content, not soaking wet and not bone dry. Saturated sand compacts poorly and can pump out from under pavers; dry sand lacks cohesion for screeding.
Jointing sand and polymeric sand
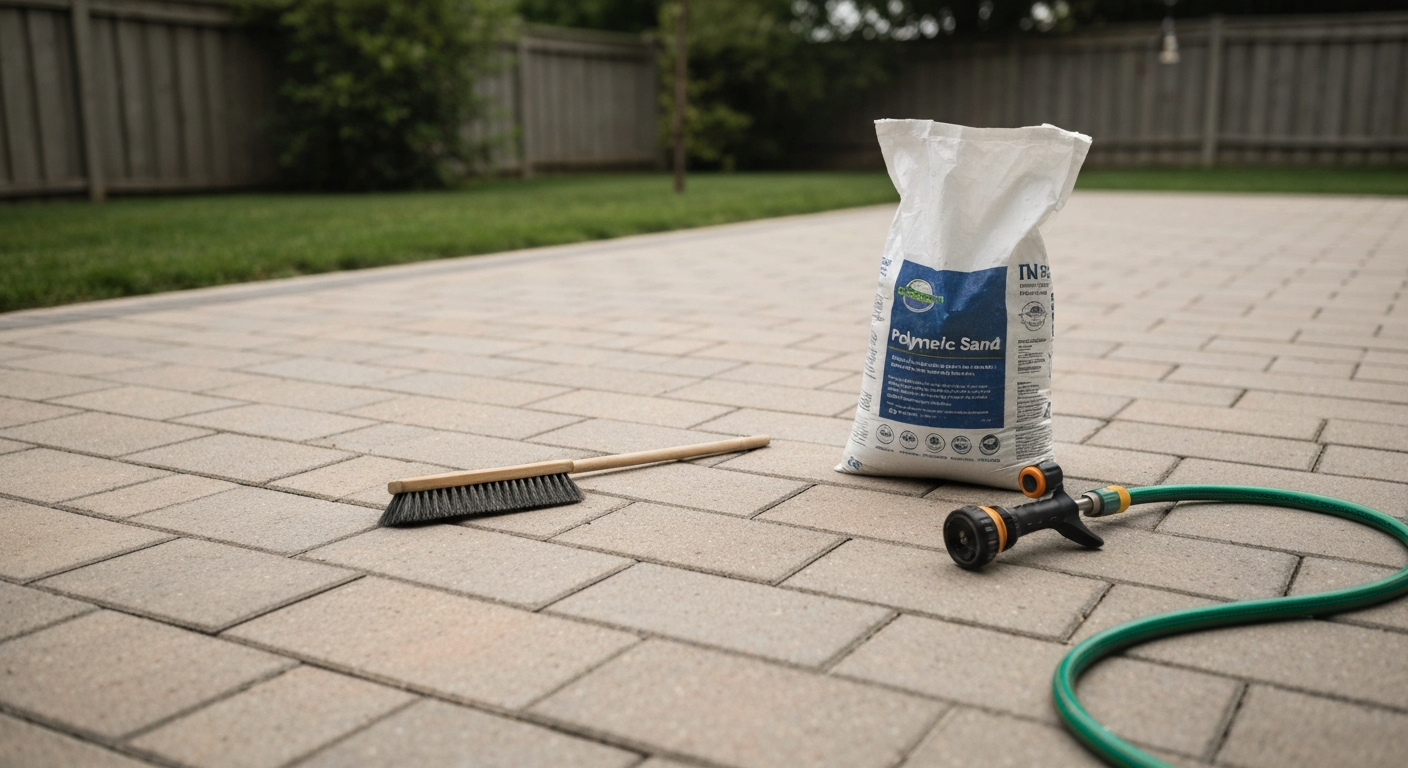
Once pavers are laid and compacted, the joints need filling. Standard jointing sand is swept into the joints and then locked in by the final compactor passes. Polymeric sand is a jointing sand mixed with a binding agent that activates with water, creating a semi-rigid joint that resists ants, weeds, and washout. Polymeric sand requires dry joints at installation, a controlled misting to activate it, and protection from rain and traffic for 24 to 48 hours. Most products also have a minimum temperature requirement during curing, typically above 35 to 50 degrees Fahrenheit (around 2 to 10 degrees Celsius). Follow the manufacturer's installation sheet exactly. Over-watering is a common mistake that causes staining and joint washout. If you want to go deeper on the jointing and pointing options after your base is sorted, the sand-and-cement pointing and dry mix repointing approaches are covered in the related guides on this site.
Tools and equipment you will need
Having the right tools before you start saves a lot of back-and-forth. Here is a full checklist, separated by category.
Compaction equipment
- Plate compactor: the main workhorse for sub-base compaction and for seating pavers. ICPI recommends at least 4,000 lbf (approximately 18 kN) of centrifugal force for paver installation. Most rental-grade plate compactors fall in the 3,000 to 5,000 lbf range. A Wacker Neuson VP series compactor, for example, runs from about 10 to 20 kN depending on model (VP1030 to VP2050), weighing 52 to 100 kg. Match the machine to the area: a lighter 3,000 lbf unit works fine for small patios; heavier work benefits from the larger models.
- Hand tamper: a weighted steel plate on a pole, used for compacting edges, corners, and confined repair areas where a plate compactor cannot reach. Also useful for tamping down small volumes of material that do not justify firing up the plate compactor.
- Vibrating roller: occasionally used on larger residential projects where the area is big enough to justify one. Overkill for most patios under 50 square metres.
Levelling and spreading tools
- Aluminium straight-edge or screed board: for levelling the bedding sand layer. A 6 to 8 foot (1.8 to 2.4 m) board is enough for most domestic patios.
- Spirit level: a 4 to 6 foot (1.2 to 1.8 m) level for checking gradients and flat surfaces. You want a fall of around 1:60 (about 1 in per 5 ft) away from the house for drainage.
- String lines and pins: for establishing level reference lines across the work area.
- Tape measure: for checking depths at multiple points during excavation and base building.
Digging and spreading hand tools
- Flat-tined rake: for spreading aggregate base material evenly before compaction.
- Square-mouth shovel: for loading material and back-filling spot repairs.
- Club hammer and bolster chisel: for splitting pavers to fit edges in repairs.
- Rubber mallet: for tapping pavers into final position without cracking them.
- Wheelbarrow: for moving aggregate and bedding sand around the site.
Rent or buy: making the call
A decent plate compactor costs between $300 and $800 to buy new, or roughly $50 to $100 per day to rent depending on your location and the machine size. For a single patio project, renting almost always makes more sense. You are unlikely to use the machine more than one or two days per project, and storage is a real issue with anything that weighs 50 to 100 kg. Rent it, use it, return it.
The exception is if you are working on multiple projects over a season, have an ongoing landscape business, or you regularly deal with areas like block paving driveways or garden paths that need occasional re-compaction. In that case a mid-range plate compactor pays for itself after two or three jobs. Budget-end plate compactors from tool retailers (like the Northern Tool ProSeries 3,000 lbf model) give you a serviceable machine for around $300, though the rental-grade Wacker or Honda units are more reliable for sustained use.
Hand tampers are worth owning outright. They cost $30 to $60 new, last indefinitely, and are useful for every kind of soil or base work. Do not try to do an entire patio with one, though. It is exhausting and the result will not be consistent enough for a large area.
| Tool | Buy (approx.) | Rent per day (approx.) | Recommendation |
|---|---|---|---|
| Plate compactor (standard, ~3,000 lbf) | $300–$500 | $50–$80 | Rent for single projects |
| Plate compactor (heavy, ~4,000+ lbf) | $500–$800 | $70–$100 | Rent; buy only for regular use |
| Hand tamper | $30–$60 | Usually not available | Buy outright |
| Vibrating roller (walk-behind) | $1,500+ | $120–$180 | Rent only; overkill for most patios |
| Aluminium straight-edge/screed board | $30–$60 | N/A | Buy; used every project |
| 4–6 ft spirit level | $25–$60 | N/A | Buy |
Safety before you start
Compaction work involves three real hazards: noise, dust, and hand-arm vibration. None of them will hurt you on a one-day job if you take basic precautions, but it is worth being deliberate about it rather than assuming it is fine because it is your own back garden.
- Eye protection: safety glasses or goggles are non-negotiable. Plate compactors throw up stone chips and grit.
- Hearing protection: earmuffs or foam earplugs rated at least 25 dB. A plate compactor runs at around 95 to 105 dB at the operator position. For a full day's work that level of exposure will cause hearing damage without protection.
- Dust mask or half-face respirator: crushed stone and aggregate base material generates silica-containing dust. An FFP2 or N95 mask is the minimum. If you are dry-sweeping polymeric sand into joints, the same applies — most manufacturers include respiratory precautions in their SDS.
- Gloves: heavy-duty work gloves for handling aggregate and operating the compactor. Anti-vibration gloves help reduce hand-arm vibration if you are using the plate compactor for extended periods.
- Steel-toe boots: heavy plate compactors are ungainly and will damage unprotected feet if they roll or tip.
- Site setup: keep children and pets off the work area before and during compaction. Mark any underground service locations (gas, electric, water) before you excavate. Call your utility locating service if in any doubt.
- Gasoline-powered plate compactors: run these in well-ventilated conditions only. Do not use them in enclosed areas or near open doors and windows.
- Vibration breaks: if you are operating a plate compactor for more than an hour, take 10-minute breaks to reduce hand-arm vibration exposure. This is especially important with older or heavier machines.
Step-by-step: how to compact a patio base
This sequence applies to a new build. For spot repairs, the same steps apply but you will be working in the confined footprint of the lifted area, and you will use a hand tamper for most of the work. I will note spot-repair differences where they are significant.
Step 1: excavate and prepare the subgrade
Excavate to a depth that gives you room for your compacted sub-base plus your bedding sand plus the thickness of your paver or slab. For a pedestrian patio with standard 50 mm (2 in) concrete pavers, that means roughly 100 mm (4 in) of compacted sub-base plus 25 mm (1 in) of bedding sand plus 50 mm of paver, totalling about 175 mm (7 in) below finished level. Add depth for heavier use or frost-prone areas. Once excavated, remove any soft spots, organic material, or topsoil from the base of the excavation. Compact the exposed subgrade itself with the plate compactor before adding any aggregate. This is a step many people skip, and it matters: if the subgrade is soft it will compress under load no matter how well-compacted your aggregate base is.
Step 2: check and adjust moisture in your base material
Aggregate compacts best when it has a little moisture in it. Bone-dry aggregate does not bind well; waterlogged aggregate cannot be compacted because the water fills the voids and the material pumps rather than densifies. A simple field test: take a handful of aggregate and squeeze it. If it holds its shape loosely when you open your hand and crumbles easily when you tap it, moisture is about right. If water drips out, it is too wet and needs to dry before you compact. If it falls apart immediately without any cohesion, it is too dry and needs a light spray with a garden hose before compaction. This applies to the sub-base aggregate and to the bedding sand.
Step 3: lay and compact the sub-base in lifts
Do not dump all your aggregate in at once and try to compact the full depth in a single pass. This is the single most common mistake in DIY base work. Plate compactors and hand tampers can only compact material effectively to a limited depth per pass. For most rental-grade plate compactors, the effective compaction depth is about 4 inches (100 mm) per lift. Spread aggregate to a loose depth of around 5 inches (125 mm) to account for compression, then compact. If your total base needs to be 6 inches compacted, you are doing two lifts: one to get you to about 3 to 4 inches, then a second layer on top.
For each lift, make overlapping passes with the plate compactor in straight lines across the area, then repeat at 90 degrees to the first direction. Typically three to five passes in each direction is sufficient for a domestic patio. The practical sign that you have done enough: the surface stops sinking visibly with each compactor pass. If you can still see the plate leaving an impression and the material feeling springy after five passes, something is wrong, either the material is too wet, the lift is too deep, or the subgrade below is compromised.
For spot repairs in a confined area, use the hand tamper in the same logical pattern: grid passes, working from edges toward the center, checking depth frequently against the surrounding surface.
Step 4: install edging restraints
Before you lay bedding sand, install any edge restraints or kerb edging. This is especially important for block paving, where the edges of the paved area need to be physically held in place. Without edge restraint, the compaction from foot traffic gradually pushes the outside rows outward. Plastic or aluminium paving edging spiked into the compacted sub-base is the standard approach for block paving. For mortared slab patios, a concrete haunching on the perimeter achieves the same thing.
Step 5: screed the bedding sand
Spread your ASTM C33 bedding sand across the compacted sub-base to a loose depth of about 1.25 inches (30 mm), which will compact to approximately 1 inch (25 mm). Set screed rails or use the paver thickness itself as a guide to pull the sand to a consistent level with your straight-edge. The key here is to screed it and leave it: do not walk on the screeded sand or let it get rained on before laying pavers. Any footprints or wet patches will create uneven spots in the finished surface. Work in sections, screeding and laying pavers in the same pass.
Step 6: lay the pavers
Lay pavers from one corner, working outward so you are always kneeling on uncompacted sand or a kneeling board, not on already-laid pavers. Place each paver straight down rather than sliding it, to avoid disturbing the sand. Use a rubber mallet to tap pavers into position and check levels frequently with your spirit level. Leave consistent joint gaps for jointing sand.
Step 7: compact the finished paver surface
Once pavers are laid, run the plate compactor over the surface to seat them into the bedding sand. ICPI recommends using a compactor with at least 4,000 lbf (18 kN) of centrifugal force for this step. Fit the plate compactor with a rubber or polyurethane pad to protect the paver surface from scratching. Make two to three passes across the whole area in different directions. After the first compaction pass, sweep jointing sand across the surface and brush it into the joints, then make one or two more passes to vibrate the sand fully into the gaps. Top up joints with additional sand as needed and make a final compaction pass.
How to check your compaction is actually good
For professional work, compaction is verified with nuclear density gauges or sand cone tests referenced against Proctor test results (ASTM D698 for standard compaction, ASTM D1557 for modified compaction). ASTM D1557 - Standard Test Methods for Laboratory Compaction Characteristics of Soil Using Modified Effort specifies a higher compactive effort than ASTM D698 and is commonly used when project specifications call for 'modified' compaction (heavier construction). Typical residential and municipal specifications require 90 to 95 percent of the maximum dry density from those Proctor tests. You are not going to do a Proctor test in your back garden, and that is fine. But you can do a meaningful field check.
- No-movement test: after your final compactor passes, the surface should not visibly deflect or move when the plate compactor runs over it. If you can still see the plate sinking in, you need more passes or the material is too wet.
- Foot test: walk across the compacted sub-base before laying bedding sand. Your boot should leave at most a very faint impression. Any significant sinkage means it needs more compaction.
- Rod probe: push a steel rod or screwdriver into the compacted surface. You should need real force to penetrate more than about 10 mm. Easy penetration means it is under-compacted.
- Straightedge check: lay your aluminium straight-edge across the compacted surface in multiple directions. Any gaps larger than about 10 mm indicate a low spot that needs topping up and re-compacting before bedding sand goes down.
Post-compaction pointing and jointing
Once compaction is done and pavers are seated, finishing the joints is what actually locks the surface together and keeps weeds and insects out. There are a few routes depending on your patio type and how permanent you want the result.
Kiln-dried jointing sand is the simplest option: sweep it in, compact, and top up. It is cheap and easy to do but not the most durable. Polymeric sand is a better long-term choice for block paving, as the binder hardens the joint and resists erosion. If you are working with natural stone or concrete slabs with wider joints, a sand-and-cement pointing mix gives a more solid, traditional finish. Dry mix repointing is an option for refreshing old joints without fully lifting the patio. For step-by-step instructions on how to repoint a patio using a dry mix, see the guide titled "how to repoint a patio dry mix" (resource ID 777140f6-2ae5-4cdd-8d9a-1c53c44648b1). Each of these has its own technique, and if jointing is your next step, the related guides on grouting patio slabs with sand and cement, using dry mix for pointing, and pointing without specialist tools cover those processes in detail.
Troubleshooting common compaction failures
Pavers sinking after a few months
This almost always means the sub-base was not compacted in proper lifts, the subgrade was not compacted before laying aggregate, or the aggregate layer was not thick enough. Lift the affected pavers, check the base depth, and if you find loose material, remove it and start the lift-and-compact sequence again. If the sub-base looks solid but you find a soft spot directly below it in the native soil, you have a subgrade problem, which means excavating deeper and possibly installing a geotextile fabric before re-building the base.
Uneven surface after compaction
High spots or low spots in the finished bedding sand surface usually come from uneven screeding or from walking on the sand before laying pavers. Low spots can be re-screeded locally if you have not yet laid that section. Once pavers are down and you find an uneven area, you need to lift those pavers, adjust the sand level beneath, and re-lay. Trying to correct unevenness by just tapping pavers down harder with a mallet will crack them.
Water pooling in one area
Check whether the gradient of the whole patio runs toward that area. If the patio is dipping rather than draining, it is a settlement issue (see above). If the gradient looks correct but water still pools, check whether the joint sand has been washed out in that area and the joints are open, allowing surface water to saturate the bedding sand underneath. Replace washed-out jointing sand and consider polymeric sand to prevent it happening again.
When compaction will not fix the problem
There are situations where the issue goes beyond what better compaction can solve. If the native subgrade is consistently soft (high clay content, filled or made ground, areas with a high water table), you may need land drainage installed before any base work makes sense. If the patio is on a slope and you are seeing erosion-driven settlement, surface drainage channels or a French drain may be the real fix. And if the area is being undermined by tree roots, no base will stay compacted while those roots are still active. In these cases, it is worth getting a professional opinion before you spend a weekend re-laying something that will fail again for the same reason.
Realistic time and effort expectations
For a new-build patio of around 15 to 20 square metres, expect to spend the better part of a full day on excavation and base compaction alone, before a single paver goes down. If you are doing it solo, two days is a comfortable pace. A small spot repair of two to five pavers takes one to three hours including lifting, raking, tamping, and re-laying. Larger repairs or full patio rebuilds over bad subgrades can stretch into a weekend project easily. Do not try to rush the compaction step to save time. It is the one place in this job where taking shortcuts has very predictable and very frustrating consequences.
FAQ
What core technical concepts must the article explain about compaction for a patio base?
Explain soil/aggregate dry density, void reduction, stone-on-stone interlock, load transfer through layered pavement, and how inadequate compaction causes settlement, rutting and water infiltration. Define Proctor tests (ASTM D698/D1557), optimum moisture content, and field compaction expressed as percent of Proctor maximum dry density (e.g., 90–95%). Cite FHWA and geotech guidance for the mechanics and failure modes.
Which standards and authoritative references should be cited or consulted?
At minimum cite ASTM D698 and ASTM D1557 for lab compaction methods and how field targets are derived; FHWA geotechnical guidance for pavement layering and compaction theory; ICPI technical specifications (Tech Spec 2 and 17) for paver bedding sand, base depths and installation practices; local DOT or municipal specs for acceptance criteria (many require 95%); and manufacturer datasheets for polymeric sand and compactor equipment.
What are realistic percent-compaction targets for residential patio bases?
Common acceptance targets are 90–95% of the specified Proctor maximum dry density. For light pedestrian patios 90% may be acceptable; for critical fills, frost-prone sites, or drive-on areas follow 95% as often required by DOTs or local specs. Always state which Proctor test (Standard vs Modified) the spec references before quoting a percent target.
How thick should each layer be, and what materials are recommended?
Typical guidance: subbase (if needed) = well-graded crushed stone (MOT/Type 1 or equivalent) compacted in 3–4 in (75–100 mm) lifts; aggregate base under pavers = 4 in (100 mm) compacted for pedestrian patios, 6 in (150 mm) for residential driveways (increase for weak subgrades/frost). Bedding sand = approx. 1 in (25 mm) loose of ASTM C33 concrete sand (not stone dust). Use angular/crushed aggregates for the compacted base and clean, well-graded concrete sand for bedding.
How should moisture be managed during compaction?
Aim for near-optimum moisture content as defined by the Proctor test: moist enough to compact and reduce dust but not saturated. For many bedding sands ~6–8% moisture is ideal. For aggregate base, lightly dampen very dry material to reach compaction moisture; avoid compaction on saturated subgrade or during heavy rain. Surface should not puddle; if saturated, allow drying or improve drainage before reattempting compaction.
What equipment should DIYers consider, and how many passes are typical?
Tools: plate compactor (preferred), hand tamper (spot repairs/small areas), or small vibratory roller for larger jobs. Choose a plate compactor with adequate centrifugal force (ICPI suggests ~4,000 lbf / ~18 kN for seating pavers; smaller rental units may be 2,000–3,000 lbf). Make multiple overlapping passes until rebound/stiffness ceases—commonly 4–8 passes per lift for aggregate bases with a plate compactor; use more passes on looser or deeper lifts. For bedding sand, one or two light passes after pavers are laid to seat them and push jointing sand into joints is typical.
Next Article
How to Repoint a Patio Dry Mix: Step-by-Step DIY Guide
DIY: Repoint a patio with dry mix, prep, ratios, finishing, troubleshooting, and when to call a pro.