A slanted patio can usually be fixed by either resetting the pavers on a properly graded base or, for concrete slabs, using slabjacking to lift settled sections or breaking out and repaving the worst areas. The right fix depends on what caused the slope in the first place, so before you rent any equipment or buy materials, spend 20 minutes diagnosing the problem. Jumping straight to repairs without understanding the cause is how people end up with a slanted patio again two years later.
How to Fix a Slanted Patio: Diagnose and Relevel Steps

Talia Lang
30 Jun 2026
Confirming how and where it's slanted
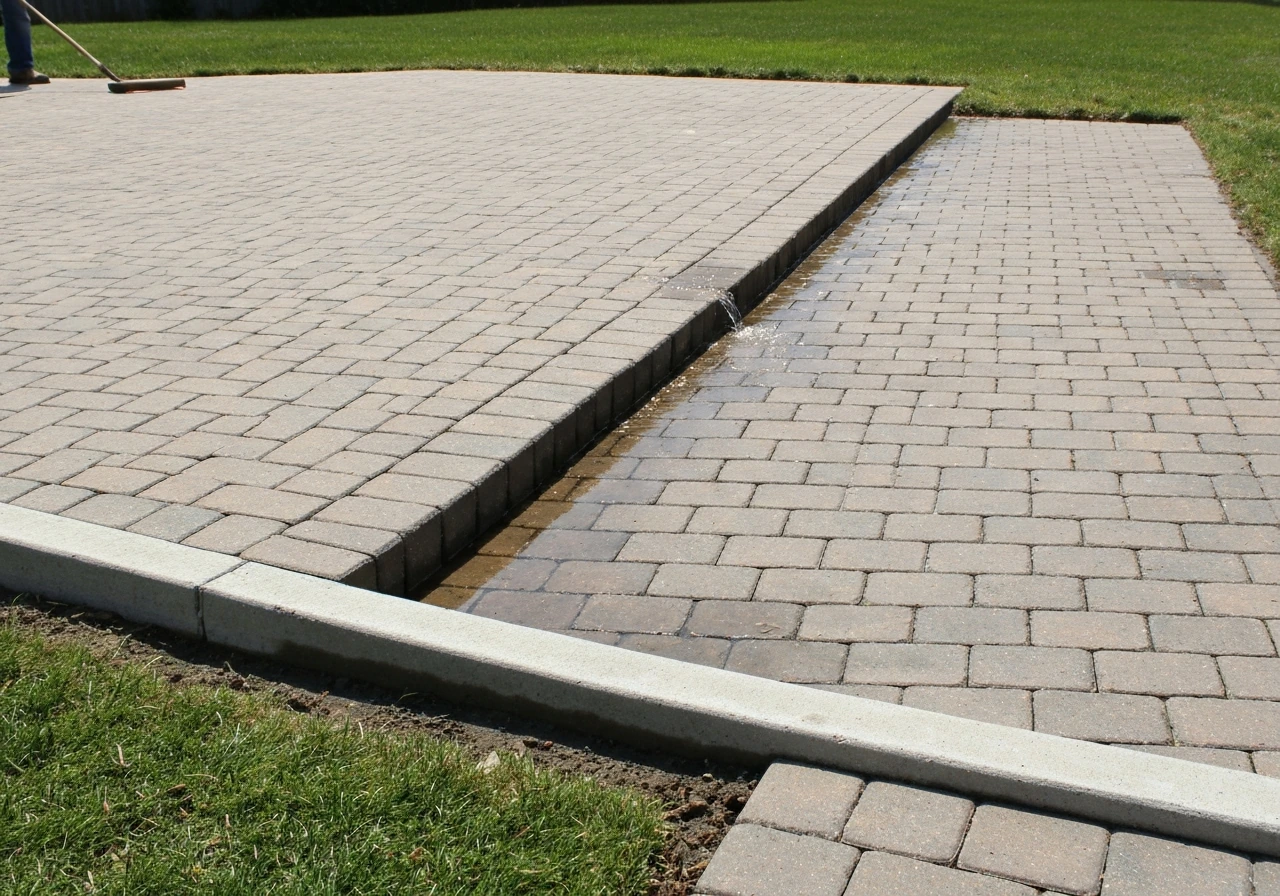
First, get a clear picture of what you're dealing with. The goal here is to find your high point, your low point, and which direction water is actually moving. This matters because some slope is intentional and correct: patios should slope away from the house at a minimum of 1/4 inch per foot (a 2% grade). If your patio is 12 feet wide, the far edge should be 3 inches lower than the house-side edge. So before assuming something is broken, confirm the slope is actually wrong.
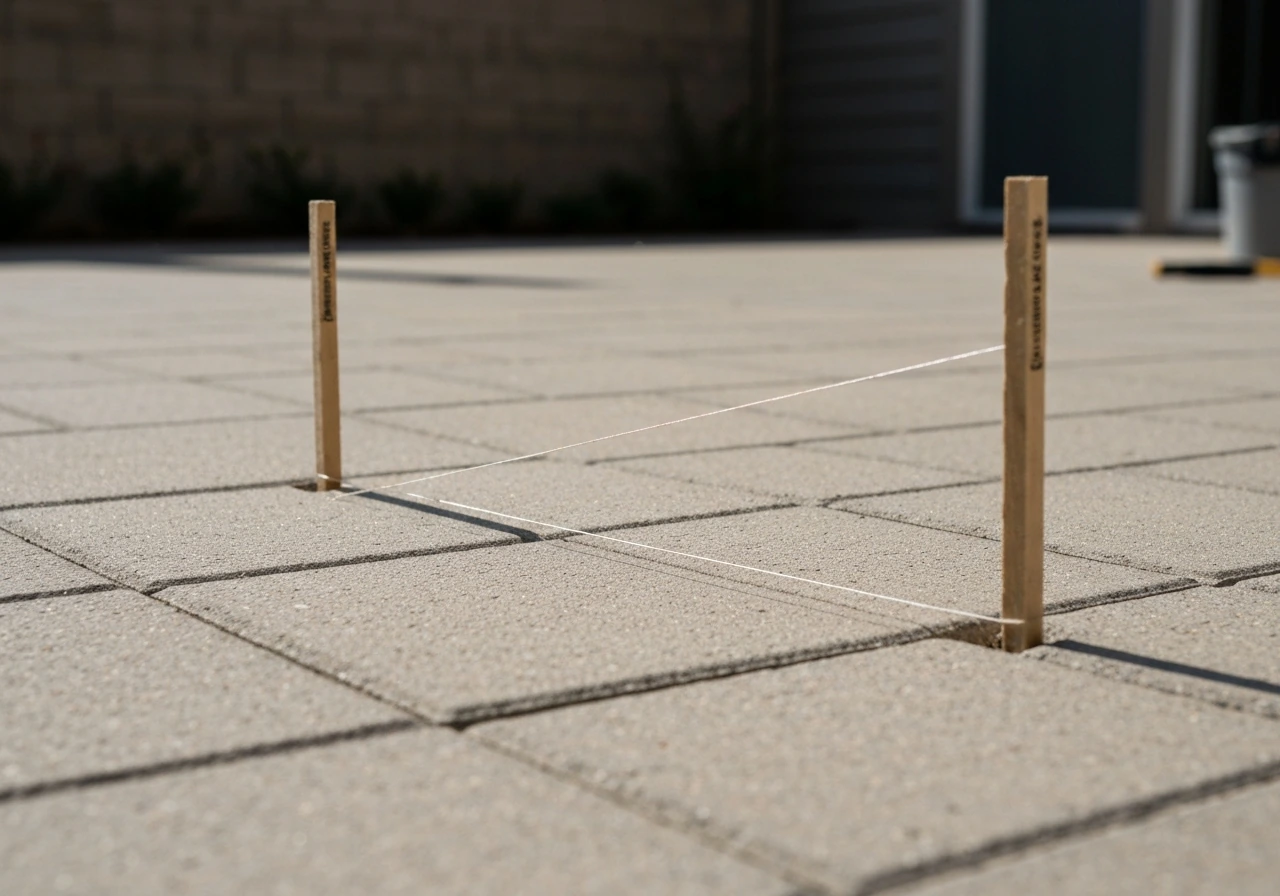
To measure slope, drive two stakes at opposite ends of the patio and run a string line between them. Use a line level or a cheap digital level placed on a straight board to find the true horizontal. Measure the drop from the string line down to the patio surface at each stake. A drop of about 1/4 inch per linear foot sloping away from the house is what you're aiming for. More than that feels obviously tilted underfoot. Less than that, or a slope toward the house, is a drainage problem waiting to get worse. If you’re dealing with a slope toward the house, you can also use the same slope-checking steps to confirm drainage and then move into the detailed repair approach.
While you're out there, look for these additional signs that tell you more about the nature of the problem:
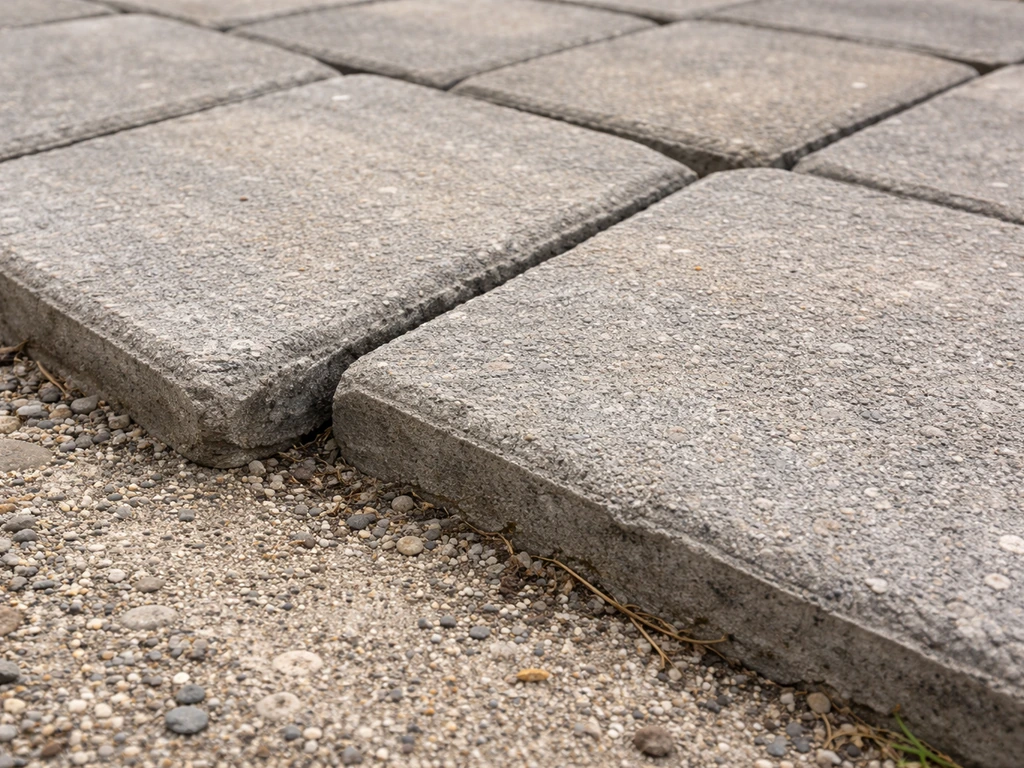
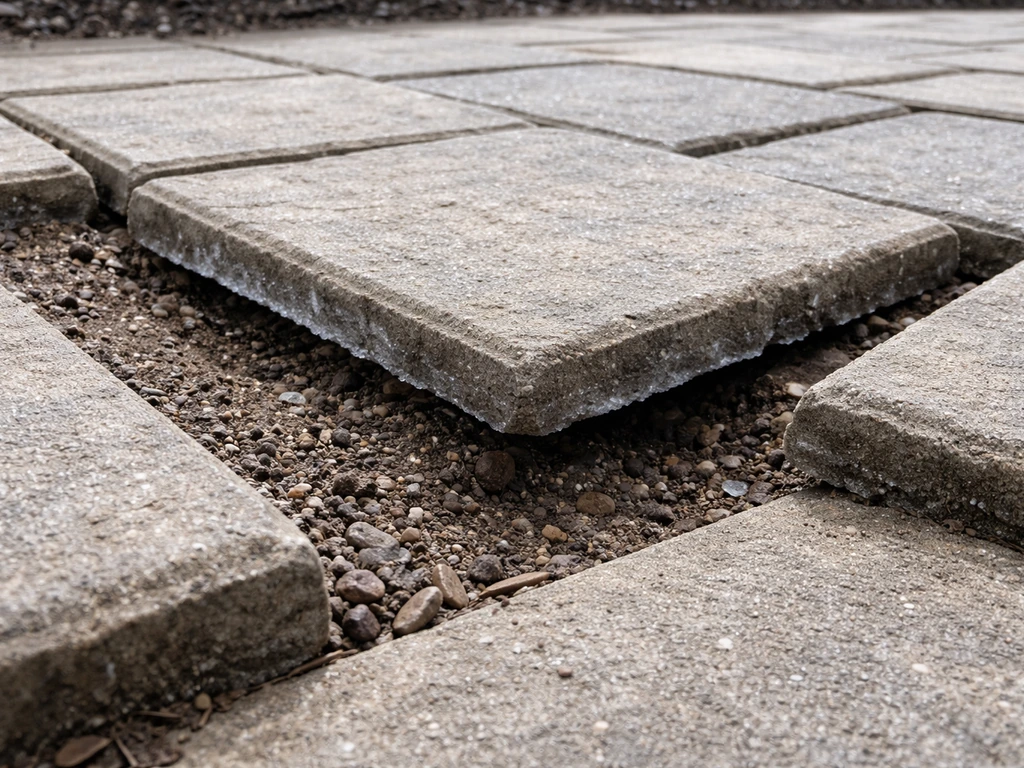
- Pavers that rock or wobble when you step on them (bedding sand loss or base voids)
- Sections that have dropped noticeably lower than surrounding areas (settlement or subgrade failure)
- Cracks in concrete that run parallel to the house or in a diagonal pattern (differential settlement)
- Puddles that form in the same spots after every rain (low points where slope direction has reversed)
- A gap or lip between the patio and the house foundation or door threshold (significant heave or drop)
- Visible soil erosion at the patio edges or under lifted pavers (water is moving through the base)
Mark your low spots with chalk or flagging tape so you have a map of the problem areas before you start digging anything up.
Diagnosing the root cause
There are four main reasons a patio develops a bad slope. Knowing which one you have shapes every decision that follows.
Settlement from poor compaction
This is the most common cause, especially in newer patios. If the base material (usually compacted gravel) wasn't compacted in layers or was installed too thick without intermediate compaction passes, it will compress over time under foot traffic and weather. Settlement tends to be gradual and often affects the whole patio or a large section rather than one isolated spot. If your patio was installed without a mechanical plate compactor, or over freshly disturbed soil, this is almost certainly what happened.
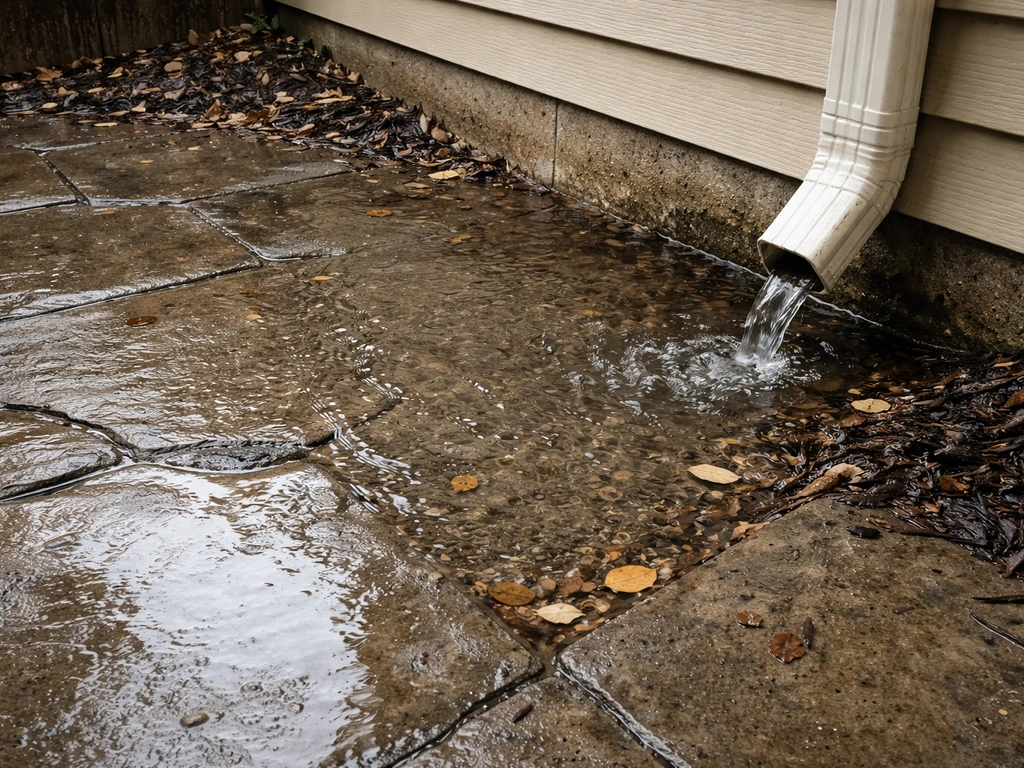
Drainage and runoff erosion
Water is the number one enemy of any patio base. If drainage was poor from the start, or if a gutter downspout dumps water near the patio edge, water infiltrates the base and carries fine particles away over time. You'll often see this as erosion at the patio edges, sand washing out from between pavers, or low spots that develop near a concentrated water source. If the slope is toward the house, water is also pooling against the foundation, which is a serious problem worth addressing promptly. That kind of settling is often described as a patio is sinking, so treat the root cause, not just the slope.
Freeze-thaw movement
In climates with freezing winters, water that saturates the base or the soil underneath expands when it freezes and contracts when it thaws. Over multiple cycles, this heaves sections upward and drops them again, often unevenly. Freeze-thaw damage usually shows up as sections that are higher than neighboring areas (heave) or as a patchwork of tilted pavers rather than one consistent slope. If your patio looked fine in the fall and developed a noticeable tilt by spring, freeze-thaw is the likely culprit.
Base failure from tree roots or subgrade problems
Tree roots growing under a patio can lift sections dramatically. Organic matter in the subgrade (buried wood debris, roots left from land clearing) decomposes over time and creates voids. You can also have a soft or unstable subgrade from expansive clay soil that swells when wet and shrinks when dry. These causes tend to produce more dramatic, localized tilting and often come with cracking in concrete. If you see raised humps under pavers or diagonal cracks in a concrete slab, check for roots or unstable subgrade.
Material-specific fix approach: concrete slab vs. pavers
The material your patio is made of determines whether you're lifting and resetting individual pieces or dealing with a monolithic slab. These are fundamentally different repair jobs.
| Factor | Concrete Slab | Interlocking Pavers |
|---|---|---|
| Mild settlement (under 1 in) | Slabjacking / foam lifting | Reset individual pavers on regraded sand bed |
| Moderate settlement (1–3 in) | Slabjacking if slab is intact; consider partial replacement | Lift and relay section with base regrading |
| Severe settlement or cracking | Break out and repour; may need professional | Full section removal with base rebuild |
| Slope toward house | Mudjacking to tilt slab outward, or cut and repour | Full relay with correctly graded base |
| Freeze-thaw heave | Grind high spots; address drainage in base | Reset lifted pavers; improve base drainage |
| Root damage | Remove roots, fill void, patch or repour section | Remove roots, compact fill, relay pavers |
| DIY-friendly? | Partial (slabjacking usually needs a pro) | Yes, with proper tools and time |
Concrete slabs: your main options

Slabjacking (also called mudjacking) pumps a cement slurry through holes drilled in the slab to fill voids underneath and lift the slab back to grade. Polyurethane foam lifting works on the same principle but uses expanding foam instead of slurry. Both methods address the symptom (the drop) but not the underlying cause, which is why the ACI makes clear that slabjacking is not a substitute for fixing whatever caused the settlement in the first place. If drainage was the problem, you need to fix drainage too. If you are trying to keep a patio from flooding, correcting the drainage path is often the key step that prevents water from pooling again fix drainage too. Slabjacking is generally a contractor job because of the equipment required, but it's usually much cheaper than full replacement. Expect to pay in the range of $500 to $1,500 for a typical residential patio slab section.
If the slab is badly cracked, actively heaving, or sitting on soil that's still actively moving, slabjacking won't hold. In those cases, the right answer is to break out the problem section and repour it with proper base preparation. That's more work but it's the only permanent fix when the subgrade is compromised.
Pavers: the more DIY-friendly option
The big advantage of interlocking pavers is that you can pull them up, fix what's underneath, and relay them. No cutting, no pouring, no curing time. The repair process involves removing the affected section, regrading and recompacting the base, screeding a fresh bedding sand layer to the correct slope, and relaying the pavers. Done right, a reset paver patio can last another 20 to 30 years.
Preparing the site: measuring, removing, and base excavation
This is the step most DIYers rush, and it's exactly where the slope problem starts for the next owner. If you run into a tiling a patio math problem, use your string lines and grade targets so the paver layout matches the slope. Take your time here.
Setting your target grade
Before you remove anything, set up your reference string lines showing the target finished grade. You need at least a 1/4 inch per foot slope away from the house across the full patio width. For a 10-foot-wide patio, that's a 2.5-inch drop from the house edge to the outer edge. Use batter boards (simple stakes with a crossbar) at each corner and run tight string lines showing your target finish elevation. These stay up through the entire project as your guide.
Removing pavers
For pavers, start at the lowest or most affected edge. Use a flat pry bar or a dedicated paver extractor to pop up the first paver, then lift the rest by hand. Stack them in a dry, organized spot nearby. Clean old sand off the bottom as you go so you can inspect each paver for cracks or spalling. Set aside any damaged ones. Remove enough pavers to give yourself 18 to 24 inches of clearance beyond the edge of the problem area, because the base issue almost always extends past the visible surface damage.
Excavating the base
Scrape off the bedding sand layer completely. Don't try to reuse it in place. Examine the base aggregate underneath. Probe it with a screwdriver: it should feel firm and resist penetration. If it's soft or muddy, you need to dig down further. A properly built paver base typically requires 4 to 6 inches of compacted aggregate base for foot traffic applications. Dig out unstable material until you hit firm, undisturbed soil, then plan to build back up with fresh gravel.
If you find tree roots, cut them cleanly with a saw or root cutter rather than just chopping through them with a shovel. Leaving torn root ends under your base creates voids as they dry out and decompose. After root removal, the void has to be filled and compacted before you rebuild.
Rebuilding and re-leveling: base, bedding, and compaction
Rebuilding the base layer
Use clean, angular crushed stone (3/4 inch minus or road base gravel) for your base. The angular edges interlock and compact tightly, unlike rounded pea gravel which shifts under load. Install it in layers no more than 4 inches thick, and compact each layer with a plate compactor before adding more. This is the non-negotiable step. One thick dump of gravel compacted once is not the same thing, even if it looks similar. Running the compactor in overlapping passes in two directions takes time, but it's the only way to get a base that won't settle again.
As you build up each layer, check it against your string lines. You're grading the top of the base layer to roughly the target slope, accounting for the bedding sand and paver thickness that go on top. Typically, your base top should be about 1.75 to 2.5 inches below your target finished paver surface (1 inch for bedding sand plus paver thickness, which is usually 2.375 inches for a standard 60mm paver, adjusted to your specific paver).
Screeding the bedding sand
Use coarse concrete sand that meets ASTM C33 grading standards for your bedding layer. Fine or dirty sand compacts poorly and allows settlement. Spread the sand to a nominal 1-inch depth and screed it flat and to grade using screed pipes (lengths of conduit) set at your target elevation as guides. Pull a straight 2x4 across the pipes to level the sand. Once screeded, don't walk on the sand bed. Every footstep creates a divot that throws off your paver level.
The whole assembly, base plus bedding sand, needs to be built to the drainage slope. You can't pour a flat base and then try to tilt the sand layer to compensate. The slope has to be consistent all the way down.
Laying and compacting the pavers
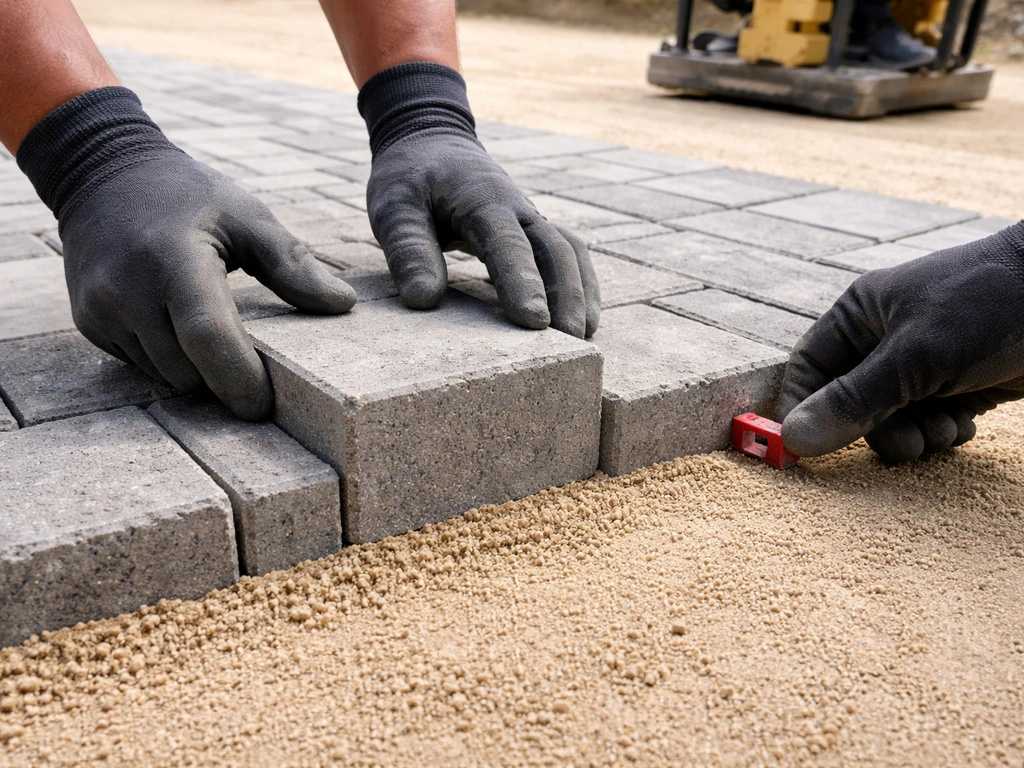
Lay pavers starting from a fixed, straight edge (usually the house side) and work outward. Use spacers or rely on the paver's built-in lugs to maintain consistent joint width, minimum about 1/8 inch (3mm) for polymeric sand to work properly. Once an area is laid, run a plate compactor (ideally with a rubber pad on the plate) over the pavers to seat them firmly into the bedding sand. This compaction step is what locks the pavers into place and brings the surface to its true, final grade. Check your work against the string lines as you go.
Finishing: sealing joints and setting edge restraints
Edge restraints
Edge restraints are the unsung hero of a patio that stays level. Without them, pavers at the perimeter slowly creep outward, joint sand migrates out, and the whole field loosens over time. Install plastic or aluminum paver edging along every exposed patio edge that isn't bound by a wall or concrete border. Spike it into the base at 12-inch intervals using 10- or 12-inch landscape spikes. The restraints carry the outward force of the paver field and prevent bedding sand from escaping at the edges.
Jointing sand
Spread dry jointing sand over the paved surface and sweep it into the joints with a push broom. Run the plate compactor over the surface again, then sweep and compact one more time until the joints are fully consolidated and flush with the paver surface. For most DIY repairs, polymeric jointing sand is worth the extra cost. It binds when activated with water, resists erosion from rain, and makes it harder for weeds and ants to destabilize the joints. Follow the manufacturer's instructions for the specific product: joint depth, moisture activation method, and dry time all matter. If joints are too shallow or the sand is activated incorrectly, it can haze or crack.
Sealing the surface
Sealing is optional but beneficial, particularly for concrete pavers or stamped concrete. A penetrating sealer helps repel water, slow UV fading, and reduce the growth of moss and mildew. Don't seal until the polymeric sand has fully cured (usually 24 to 48 hours after activation, depending on the product). Clean the surface thoroughly before sealing. A wet-look or enhancing sealer can also revive the color of older pavers after a reset.
Keeping it level: prevention and when to call a pro
What keeps a patio level long-term
Most patio failures come back to water. Managing where water goes is the best thing you can do to protect your work. Make sure gutters and downspouts are directing water well away from the patio area. If you have a downspout that drains near the patio, extend it with a flexible corrugated pipe to discharge at least 6 feet away, or ideally into a drain system. If the slope is toward the house, it is often a patio drainage problem that needs proper runoff control before any reset will last drains near the patio. If the patio is still sloping toward the house after your fix, that's a drainage problem worth addressing separately.
- Maintain a minimum 1/4-inch-per-foot slope away from the house across the full patio surface
- Keep joint sand topped up annually and resweep after any significant erosion event
- Clear moss, weeds, and debris from joints before they destabilize the bedding layer
- Inspect edge restraints each spring and re-spike any sections that have shifted or heaved
- Redirect downspouts and surface runoff away from the patio perimeter
- Keep trees pruned back and watch for root encroachment at patio edges every few years
When to call a professional
Not every slanted patio is a DIY job. Be honest with yourself about a few situations where calling a contractor is the smarter move. If your concrete slab has wide structural cracks (wider than about 1/4 inch), is actively heaving in multiple spots, or has large voids underneath confirmed by a hollow sound when knocked on, slabjacking may not hold and a structural assessment makes sense. If the slope is toward the house and your basement or crawl space has moisture issues, that's a foundation drainage problem that goes beyond a patio reset. If the slope is toward the house, knowing how to fix patio drainage problems can help you redirect water before it affects your foundation. If you've already reset the same patio twice and it keeps moving, the subgrade itself is unstable, possibly due to expansive clay, a high water table, or buried organic material, and a professional with the right equipment to assess and stabilize the soil is the right call.
A good hardscape contractor or civil engineer can diagnose subgrade problems that aren't visible from the surface. The cost of that diagnosis upfront is almost always less than the cost of doing a DIY repair that fails again in 18 months. There's no shame in recognizing when the scope of a problem is beyond what a plate compactor and a pry bar can solve.
FAQ
What if my patio already has a slight slope away from the house, but one corner is still lower or higher?
Confirm you have two separate issues: overall pitch may be correct, but localized settlement can create an out-of-level “spot.” Use your string line method at that corner specifically (measure drop at both ends of the affected area) to decide whether you should reset only the limited section instead of rebuilding the whole patio.
How do I tell whether water is causing the slope versus the base simply compressing?
Look for patterns tied to water sources. If you see sand washing out, erosion at edges, or low spots forming consistently near downspouts or the lowest perimeter, drainage is likely driving movement. If the tilt is uniform across a large section with no edge erosion, base compaction or thickness issues are more likely.
If I have a paver patio, should I regrade the bedding sand or completely remove it?
Do not attempt to “top up” bedding sand without removing the existing layer. The article approach works because it removes the contaminated or deformed sand, rebuilds with properly compacted base, then screeds bedding to grade. Reusing old sand often recreates unevenness quickly because the sand layer continues to deform under load.
Can I reuse the jointing sand after lifting and relaying pavers?
Usually no. Old jointing sand tends to be contaminated, compacted, or partially washed out, which reduces binding performance, especially for polymeric products. For best results, sweep out the old material and use fresh polymeric jointing sand, then activate it only when the surface and joints are clean and dry per the product instructions.
How do I prevent my plate compactor from damaging new pavers?
Use a compactor with a rubber pad on the plate (or a proper paver-safe attachment). Also avoid “extra passes” early on, because aggressive compaction before the sand base is correctly graded can push bedding sand out of plane and distort your final slope.
What mistake causes patios to look level during installation but tilt again later?
The common failure is building a base that is not compacted in layers or that does not match the target drainage slope. Even if pavers look good right after resetting, an uncompacted base can settle beneath them over time, recreating the original tilt.
My concrete slab is cracked, but I do not know if it is structural. Can I still slabjack?
Do a quick check for active movement and structural severity. If cracks are wide (around a quarter inch or more), multiple areas are heaving, or you detect voids by knocking and hearing hollow areas that suggest unstable support, slabjacking often will not hold. In those cases, break-out and rebuild with correct base preparation is typically the more durable solution.
How can I confirm the slope direction is correct before I start removing pavers?
Run measurements using a string line and level across the full patio width, then map the high and low points. Verify that water is intended to flow away from the house at about a 1/4 inch per foot minimum. If you find slope toward the house, treat drainage routing first or you can end up pushing the problem back into the foundation.
Do I need to worry about the patio being level relative to the deck or door thresholds?
Yes, because “level” can conflict with “drain away.” The typical target is drainage grade away from the house, even if that means a slight difference across a doorway or threshold. Plan the finished height using your batter boards and string lines so paver elevations hit the drainage target while still clearing door hardware and maintaining functional transitions.
When should I seal a reset patio, and will sealing affect polymeric sand performance?
Wait until the polymeric jointing sand has fully cured after activation (often 24 to 48 hours, depending on the product). Seal too early and you can interfere with the sand’s intended binding and moisture response. Also clean thoroughly so sealer bonds properly to the pavers.
If my patio keeps shifting after a reset, what information should I gather before calling a pro?
Document where movement returns (which edges or spots), how quickly it happened, and whether you see water-related signs (sand loss, edge erosion, pooled runoff). Also note soil conditions such as clay, nearby trees, downspout locations, and any previous freeze-thaw behavior, because those clues help a contractor diagnose whether the issue is drainage, expansive soil, roots, or a persistent high water table.
Next Article
How to Keep Patio From Flooding: Fix and Prevent It
Diagnose why your patio floods and fix it fast with grading, downspout drainage, low spot repair, and prevention tips.