Most patio flooding comes down to one of three things: the surface slopes the wrong way, water has nowhere to go once it lands, or the patio itself has sunk and cracked in ways that trap water. Figure out which one you're dealing with first, then fix that specific problem. Slapping sealant on a patio that drains toward your house won't help. Neither will adding a channel drain if a clogged downspout is dumping all the water in one spot. Diagnosis comes before any repair.
How to Keep Patio From Flooding: Fix and Prevent It

Talia Lang
4 Jun 2026
Quick triage: why is your patio flooding?
Before you buy anything or dig anything up, spend 20 minutes outside during or right after a heavy rain. Watch where the water actually comes from and where it ends up. You're looking for a handful of root causes, and each one points to a different fix.
- Water pools against the house wall: the patio is sloping toward the foundation instead of away from it. This is a grading problem.
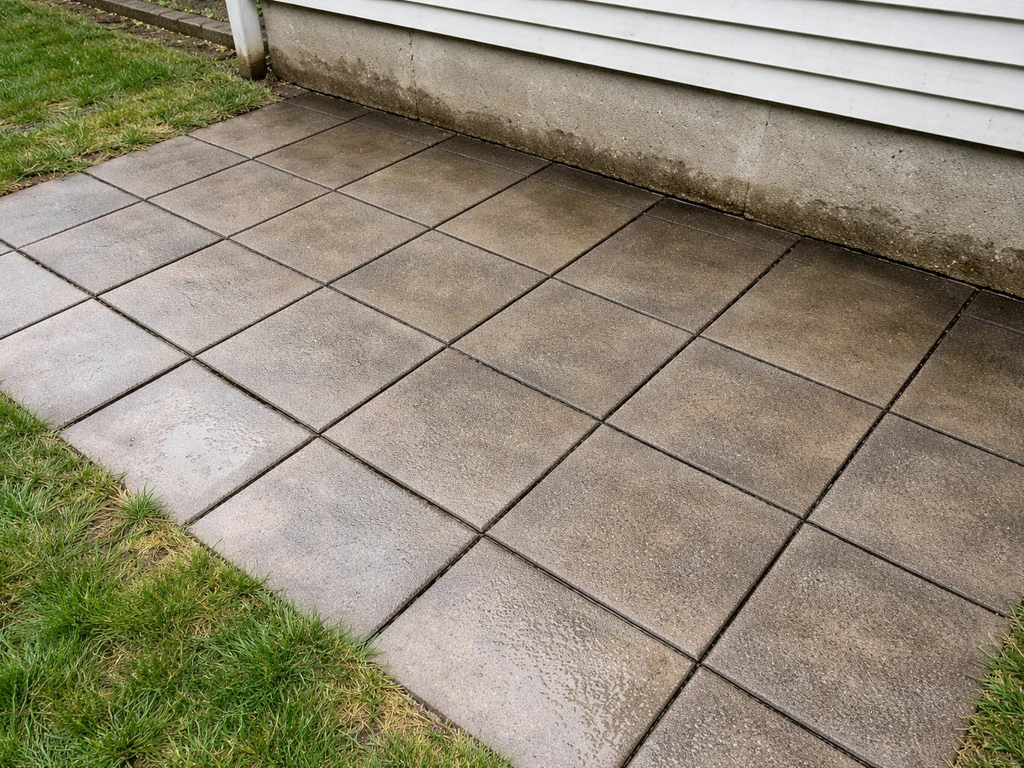
- Water pools in the middle or along one edge of the patio: there's a low spot, usually from a sunken paver, a settled concrete slab, or an eroded base underneath.
- Water rushes onto the patio from one direction during rain: runoff from the yard, a garden bed, or a neighboring property is being directed your way.
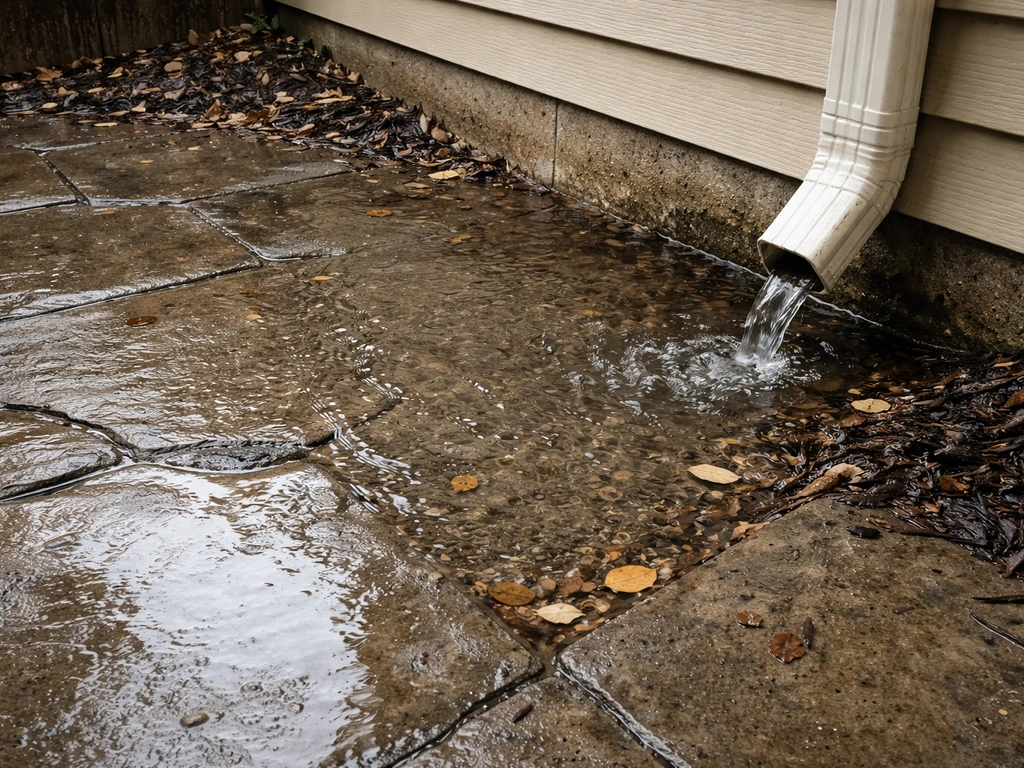
- One specific area floods even in light rain: check the nearest downspout. It may be discharging right onto the patio or right next to it.
- The patio drains fine but still feels wet or damp long after rain: this points to a base drainage failure or groundwater pressure from below, not a surface issue.
A useful trick here is the hose test. Run a hose where rain actually lands on the patio, not where the puddle forms. Watch the water move. If it flows toward the house, you have a slope problem. If it disappears into a crack or joint and you lose track of it, that water is going under the surface and eroding the base. The end puddle is a symptom. The hose test helps you find the source.
Check your drainage and grading first
Is your patio sloped the right direction?
Any patio surface within about 10 feet of your house should slope away from the foundation at a minimum of 1/4 inch per foot. That works out to 1 inch of drop for every 4 feet of patio, or roughly a 2% grade. Some sources allow as little as 1/8 inch per foot, but 1/4 inch per foot is the safer target, especially in areas with heavy rainfall.
To check this yourself, lay a 4-foot level on the patio surface pointing away from the house and measure the gap underneath the low end. You want to see at least 1 inch of gap on a 4-foot level. If it's level or tipping back toward the house, that's your primary problem.
A common sign of an uneven patio is water pooling instead of draining away, which you can confirm with a quick level check If it's level or tipping back toward the house, that's your primary problem. .
Where are your downspouts discharging?
Downspouts should discharge at least 6 feet from your foundation wall, onto ground that slopes away from the house. A surprising number of flooding complaints trace straight back to a downspout that ends 12 inches from the house, right at the edge of the patio. During rain, check whether gutters are overflowing at any point, whether the downspout outlet is blocked, and whether water is sheeting off the roof edge in a spot where there's no gutter at all. A sagging or misaligned gutter section can redirect a huge amount of roof runoff straight down onto the patio. If you see any of this, fix the gutter problem first, before addressing anything else.
Is outside runoff draining onto your patio?
Look at what surrounds the patio: lawn, garden beds, a slope, a neighbor's yard. If any of that ground slopes toward the patio, water will follow. Garden beds built up against the patio edge are a common culprit because the soil holds water and gradually releases it onto the hardscape. This kind of runoff is often overlooked because people focus on the patio itself, but fixing the patio won't help if the yard is funneling water onto it from three sides.
DIY fixes for patio drainage problems
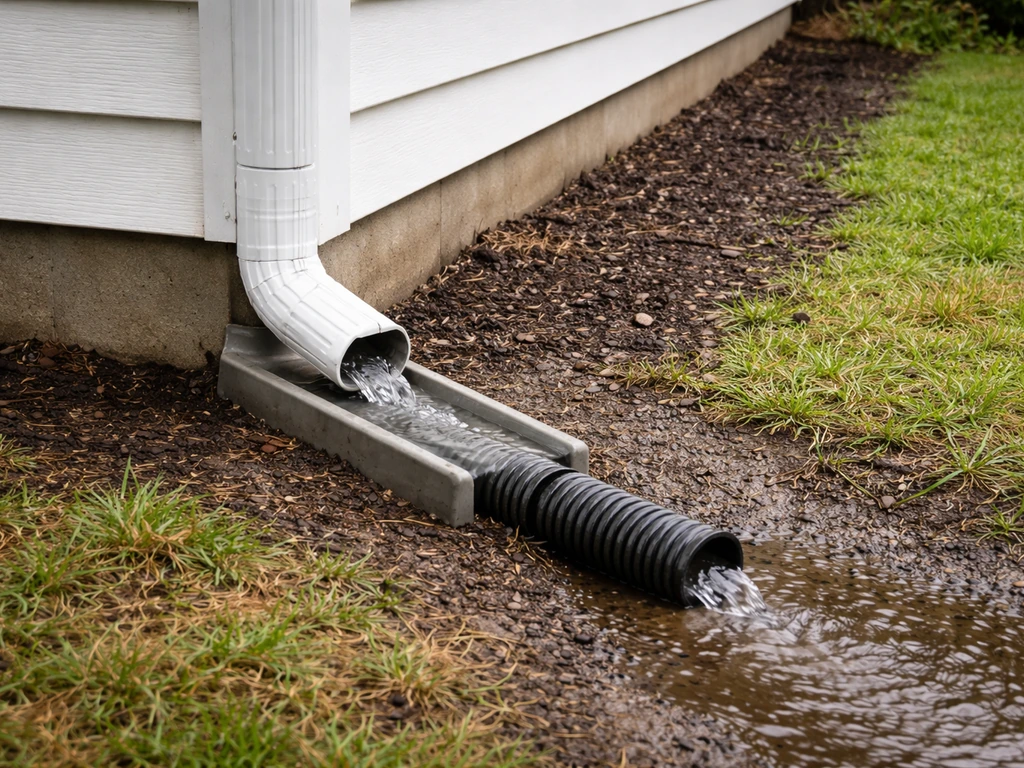
Extend or redirect your downspouts
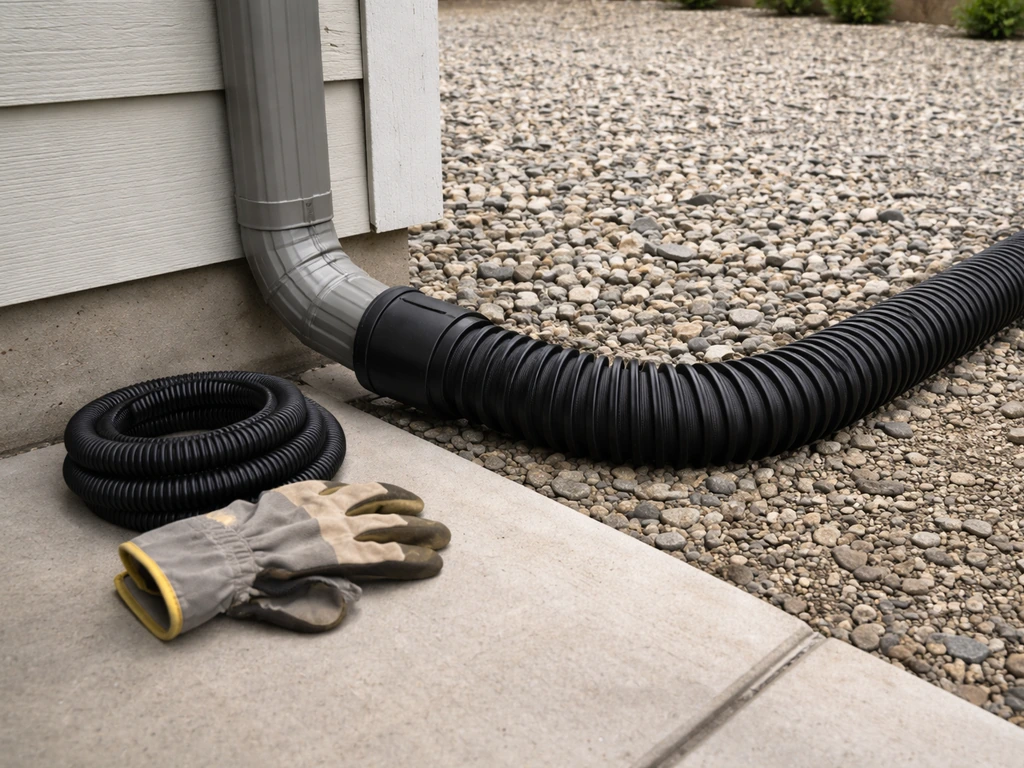
If a downspout is dumping water near the patio, this is the cheapest and fastest fix available. A rigid or flexible downspout extension costs $10 to $30 and can push the discharge point 4 to 6 feet further away. Pair it with a splash block, which is a sloped concrete or plastic pad that sits under the outlet and directs water away from the foundation. Standard splash blocks run about 2 feet wide by 3 feet long. One important note: extensions and splash blocks only work if the ground they discharge onto actually slopes away from the house. If the grade is flat or backward, the water just sits there. Check before you rely on this fix alone.
Add a channel drain across the patio
A channel drain (also called a trench drain) is a linear slot drain that runs across the patio surface and collects water before it can pool. You install it at the low point of the patio, typically near the house edge, and connect it to a pipe that carries water to daylight or a dry well.
This is a solid DIY project on a paver patio because you can lift pavers, dig the trench, set the drain, and re-lay the pavers around it. On a concrete patio, you'll need a concrete saw to cut the slot. Channel drains need at least a 1% slope along their length (about 1/8 inch per foot) to carry water to the outlet.
If you are trying to install or adjust a drain line, tiling a patio math problem can help you sanity-check the needed slope and layout before you start cutting or digging. A dead-flat channel drain will just hold water and eventually clog. Systems like the NDS Dura Slope have a built-in slope cast into the drain body, which removes the guesswork.
Install a French drain along the patio edge
A French drain is a gravel-filled trench with a perforated pipe that intercepts water moving through the soil before it reaches the patio. It's most useful when the flooding is caused by yard runoff or groundwater creeping in from the sides.
For a residential patio, you're typically digging 18 to 24 inches deep, lining the trench with landscape fabric to keep soil out of the gravel, laying perforated pipe with holes facing down, backfilling with clean crushed stone, and wrapping the fabric over the top before covering. The pipe needs a minimum 1% slope (1/8 inch per foot) toward the outlet, whether that's daylight, a dry well, or a storm drain connection. A flat French drain does nothing.
This is where most DIY installs fail, so take the time to set your slope carefully with a line level or laser level before you dig.
Regrade the area around the patio
If the ground alongside the patio is flat or slopes toward the house, adding soil and regrading is often the most effective long-term fix. The goal is to build up the grade so that the first 6 to 10 feet from the house drops at least 6 inches in elevation. This is manageable as a DIY project when we're talking about a strip of lawn or a garden bed next to the patio.
You add topsoil, slope it away, and reseed or replant. It becomes a much bigger job when the entire yard needs to be regraded or when there are buried utility lines, retaining walls, or large root systems involved. For anything beyond a few cubic yards of soil, it's worth getting a professional assessment.
Surface repairs that stop water from pooling
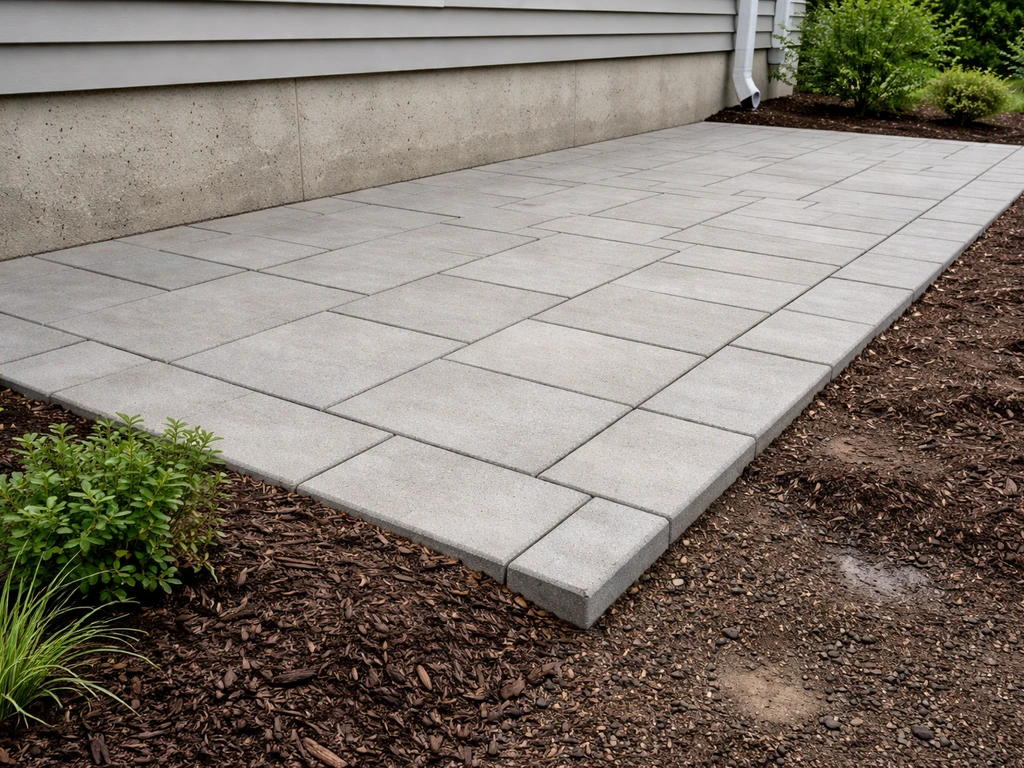
Lifting and resetting sunken pavers
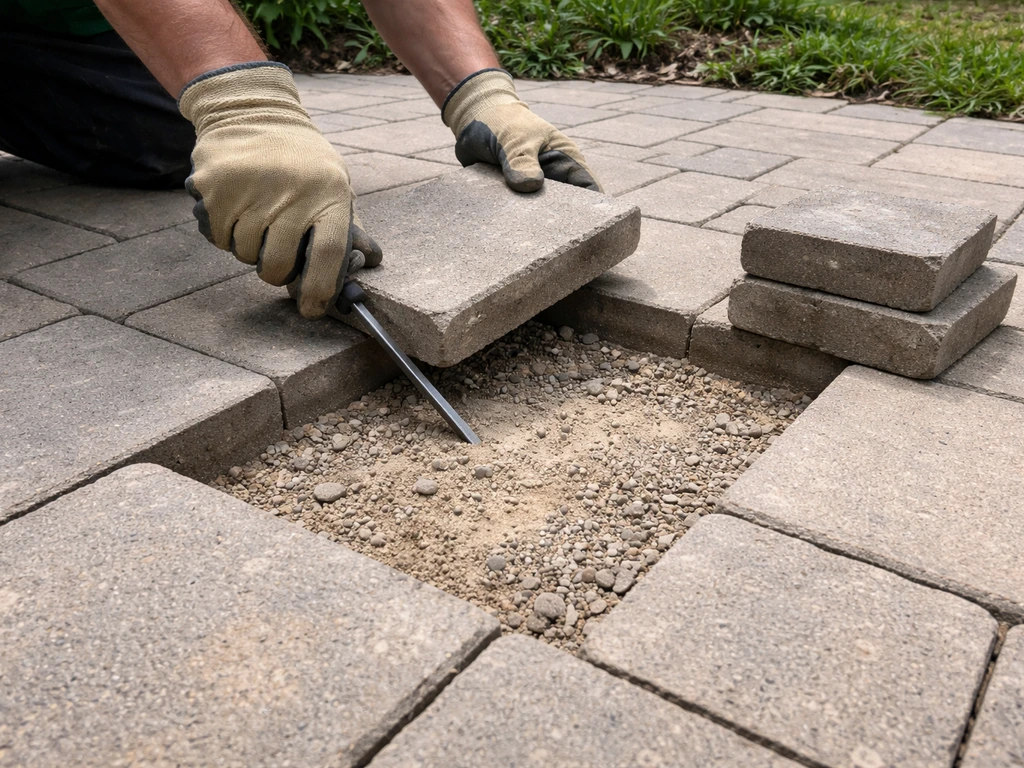
Sunken pavers are one of the most common reasons water pools on a patio. The paver itself is usually fine. The problem is the base underneath: the compacted gravel or sand has washed out, compressed unevenly, or been pushed around by freeze-thaw cycles. Water gets into the joint, erodes the base, the base collapses, the paver sinks, and now you have a low spot that holds more water, which erodes more base. You break the cycle by lifting the sunken paver, adding and re-compacting the base material, and re-setting the paver flush with the surrounding surface.
- Use a flathead screwdriver or paver puller to pop up the sunken paver without disturbing neighbors.
- Scrape out the sand or stone dust setting bed underneath and examine the gravel base. If the gravel has washed away or is soaked, you may need to dig deeper and repack with crushed stone.
- Add dry sand or polymeric sand to build the setting bed back up to the right height. Add a little at a time and test the paver height as you go.
- Re-set the paver, check it with a level against the surrounding surface, and tamp it firmly.
- Sweep polymeric sand into the joints, mist with water to activate it, and let it cure before use.
If multiple pavers in the same area are sinking or rocking, the base failure is widespread and you may need to pull a larger section, fix the drainage underneath, and relay the whole area. A patio that keeps sinking in the same spot is telling you there's a water problem under the surface that a surface fix won't solve.
Patching and leveling concrete
Cracked or sunken concrete creates the same problem as sunken pavers: water finds the low spot and stays there. Cracks also let water infiltrate the base, which then erodes and causes more sinking. For surface cracks that aren't structural, clean the crack out thoroughly (no dust, oil, or loose material), press a foam backer rod into any crack wider than 1/2 inch to give the sealant something to bond against, then fill with a flexible polyurethane or elastomeric concrete crack sealant. Don't use rigid mortar or hydraulic cement in a crack that will see freeze-thaw movement. A rigid fill will pop out the first winter.
For a sunken concrete section that creates a genuine pool, you have two practical options. The first is slabjacking (also called mudjacking or foam lifting), where material is pumped under the slab to raise it. This is a professional job. The second is adding a self-leveling concrete overlay to built up the low area. This is DIY-friendly for low spots up to about 1 inch deep. Clean the surface, apply a bonding primer, and pour the self-leveling compound according to the product directions. It flows into the low area and cures flat. For deeper depressions, use a vinyl concrete patch mix, feathering the edges carefully so the patch doesn't create its own lip that catches water.
Sealing expansion joints and control joints
Expansion joints in concrete are the intentional gaps that allow the slab to move with temperature changes. When the sealant in these joints fails or was never installed properly, water seeps through, gets under the slab, and erodes the base. Over time, this causes the slab edges to sink and crack further. Use a flexible elastomeric joint sealant (not caulk, not mortar) rated for concrete expansion joints.
Clean the joint, insert a backer rod if the gap is wider than 1/2 inch, and leave about 1/8 inch of clearance between the top of the backer rod and the slab surface for the sealant to fill. This is a straightforward maintenance task that makes a meaningful difference in how long a concrete patio stays flat and dry.
Preventing the next flood: sealing, maintenance, and smarter landscaping
Should you seal your patio?
Sealing a patio does not fix drainage or slope problems, and it won't stop a flood. What it does do is reduce how much water penetrates the surface and the joints, which slows base erosion and extends the life of the surface. On a concrete patio that drains properly, a penetrating concrete sealer applied every 2 to 3 years is good maintenance.
On a paver patio, polymeric sand in the joints plus a paver sealer on top is the standard approach. Neither of these is a flood prevention strategy on its own. If you notice signs of pooling, clogs, or standing water after rain, this guide on how to fix patio drainage problems can help you pick the right DIY solution. Think of sealing as protecting a fix you've already made, not as the fix itself.
Keep gutters and drains clear
Clean your gutters at least twice a year: once in late spring after trees have finished dropping seeds and pollen, and once in late fall after leaves are down. A clogged gutter overflows and dumps water exactly where you don't want it. While you're up there, check that all downspouts are clear and flowing freely. At ground level, clear any trench drain or channel drain grates of debris after heavy storms.
Debris and sediment can clog catch basins and similar stormwater components, reducing drainage efficiency and increasing flood risk. Debris accumulation in a channel drain can clog the outlet pipe and cause the drain to back up, which defeats the whole system. A quick check after every major storm takes five minutes and prevents a lot of frustration.
Manage landscaping and runoff
Garden beds built up against the patio edge act like a dam. Lower them or install a gravel buffer strip between the bed and the patio edge so water has somewhere to go rather than spilling over onto the surface. If you have lawn that slopes toward the patio, a shallow swale (a gentle V-shaped depression in the turf) can redirect that runoff around the patio and toward a lower point in the yard. This doesn't require heavy equipment, just a flat shovel and a few hours of work. For chronic runoff from a neighboring property or a hill, a French drain along the uphill edge of the patio is the right long-term solution.
Annual maintenance checklist
- Inspect patio slope with a level each spring, especially after a hard winter with significant freeze-thaw.
- Check and clear all downspout extensions and splash blocks; make sure they haven't been knocked out of position.
- Clear channel drain and trench drain grates of debris; flush with a hose to confirm the outlet pipe is flowing.
- Inspect paver joints for erosion or missing polymeric sand and refill as needed.
- Check concrete expansion joints and reseal any that are cracked, missing, or pulling away from the edges.
- Walk the perimeter of the patio and look for any new low spots or areas where soil has settled away from the edge.
When to stop DIYing and call a professional
Most patio drainage problems are genuinely fixable without a contractor. If you're seeing a patio drainage problem after a heavy rain, start by confirming the grade and where the water is going. But there are situations where DIY work will waste your time and money, and a professional is the right call from the start.
| Situation | Why it needs a pro | What they'll likely do |
|---|---|---|
| Patio floods even when it hasn't rained, or water appears from below | Groundwater or high water table creating hydrostatic pressure | Assess need for sump pump, drainage tile, or waterproofing system |
| Multiple large sections of concrete have sunk several inches | Widespread soil instability or significant base failure under the slab | Slabjacking, foam lifting, or full slab replacement |
| The entire yard around the patio slopes toward the house | Major regrading required; involves significant earthwork and possibly retaining walls | Site grading plan, heavy equipment, proper drainage design |
| You've fixed the surface repeatedly and it keeps sinking in the same spot | Hidden drainage failure or void forming underground (could be a broken pipe) | Camera inspection of underground drain lines, void detection |
| Flooding affects the basement or crawl space, not just the patio surface | Water intrusion is reaching the structure; foundation risk | Waterproofing contractor or structural engineer assessment |
A good rule of thumb: if you've corrected the slope, extended the downspouts, cleared all the drains, and repaired the surface, and the patio is still flooding after a normal rain event, there is something going on below the surface that a visual inspection won't reveal. That's when spending a few hundred dollars on a professional diagnosis is smarter than spending the same money on another DIY fix that won't hold.
The patio flooding problem is almost always solvable. It just requires working through the actual cause rather than guessing at symptoms. Start with slope and downspouts, then look at the surface, then look at what's surrounding the patio. Fix in that order and you'll solve it for good rather than managing it season to season.
FAQ
How can I tell if the patio is flooding from roof runoff or from groundwater?
Do the hose test on a dry day by running water onto the same spots rain hits, if puddling appears immediately and follows the hose path, it is surface drainage or slope. For groundwater, heavy rain may cause pooling even when the roof looks controlled, and you may see dampness at the patio edges or in nearby lawn beds hours later. In that case, focus on side interception, like a French drain along the uphill edge.
Should I fix the patio slope using leveling sand or patch material?
Avoid trying to “build up” low spots with leveling sand or thin patch layers as a drainage fix, it usually washes or settles again. Low areas generally need base re-compaction (for pavers) or an overlay/raise method matched to depth (for concrete). If the low spot keeps returning, the base or under-slab drainage is failing.
What if my downspouts drain downhill but the patio still floods?
Check for overflow from gutters even if downspouts discharge away. A sagging gutter section can dump water onto the patio at a specific point. Also confirm the downspout outlet is not causing sheet flow along the foundation line, that can happen if the discharge is aimed back toward the wall or if the ground near the outlet is flat.
Can I rely on a channel drain if I cannot regrade the patio surface?
Only if the channel drain can be installed at a real low point with adequate outlet slope. A trench drain that is dead-flat will trap water and clog. If you cannot create pitch to the outlet, consider an alternative like a localized base rebuild at the low area or a different interception strategy.
How do I confirm a channel drain has the needed slope before digging?
Use a line level or laser to measure elevation changes along the planned run, not just the drain body. Even if the drain product claims slope, you still need correct placement so the outlet connection carries water away. Plan for the outlet to reach daylight, a dry well, or a storm connection at the required downhill direction.
Is it better to add soil and regrade right next to the house or farther out?
The priority is the strip closest to the foundation. Aim to restore a drop within the first 6 to 10 feet from the house, so runoff leaves the foundation zone rather than merely shifting the puddle farther out. If buried utilities or retaining walls are nearby, get a professional assessment before bringing soil up against structures.
What should I do if only one corner of the patio floods?
Single-corner flooding often points to either an under-base failure concentrated at that area or an external runoff source aimed at the corner. Re-check gutter overflow points, confirm the downspout outlet location and splash behavior, and run a targeted hose test at the roof edge line that discharges above that corner.
Does sealing a patio stop flooding?
No, sealing mainly reduces water penetration into joints and minor surface infiltration. It can slow base erosion, but it will not correct wrong-way slope, blocked drainage paths, or water that is trapped because the underbase is failing. Treat sealing as maintenance after you fix the drainage path.
Can I use rigid mortar or hydraulic cement to fill patio cracks?
For cracks that experience temperature movement or freeze-thaw, rigid fills often pop out and can worsen water intrusion. The safer approach for non-structural movement cracks is a flexible backer rod plus an elastomeric or polyurethane concrete crack sealant designed for moving joints.
How do I choose between re-laying pavers versus installing a new drain system?
If pavers are sinking in a localized area, re-laying with a properly rebuilt base usually resolves the trapped-water cycle. If water comes from a consistent direction, like roof runoff onto a broad low area, a drain system at the low point can be more effective. If multiple adjacent areas sink or rocking spreads, inspect under the surface and consider a larger drainage repair before relaying.
When is it worth hiring a professional even if the visible patio looks fixable?
If you have corrected slope near the house, extended and cleared downspouts, cleared channel or trench drain grates and outlets, repaired cracked or sunken sections, and the patio still floods after a typical rain, the issue is likely underground (blocked pipe, failed subbase drainage, or groundwater). At that point, paid diagnosis can prevent repeated DIY repairs that do not address the hidden cause.
Next Article
How to Fix a Patio That Slopes Toward the House
Diagnose why a patio slopes toward the house, then DIY regrade, reset pavers or rebuild base and fix drainage.